
 100% Security Verified | No Subscription Required | No Malware


Closed captions are very important in videos. For those who have difficulties hearing, captions and subtitles are mandatory, and for the rest, they are an excellent little helper. If you are not sure if you've heard something correctly in the video, the subtitles or closed captions will be there to give you the required information.
Struggling to enable YouTube's auto captions? Don’t worry—we’ve got you covered with simple step-by-step guides for both desktop and mobile users. Plus, we’ll show you how to generate automatic subtitles. Keep reading to learn more!
In this article
Get YouTube Automatic Captions on Your Desktop
The YouTube creator who uploaded the video controls whether or not this feature will be available in the video. There are three possible scenarios:
- The creator uploaded a proper subtitle:
- The creator allowed YouTube auto-generated captions
- The creator disallowed closed captions
In this case, the creator uploaded a properly coded subtitle file, which will look the same as when you watch something on TV. These are, shall we say, professional-grade subtitles.
In this case, the creator allowed YouTube's AI algorithms to check the video and generate automatic captions. These are good, but they are not always correct, and they are certainly not properly formatted.
In this case, the button for closed captions will simply not be available on the video.
Whether you're using a browser or the dedicated PC app, enabling auto-generated captions works the same way. Here's how to set them up-for all videos or just one.
How to Enable Auto-CC for All Videos on YouTube
Tired of manually turning on subtitles every time? Set YouTube to display them automatically:
- Sign in to YouTube Studio and upload your video
- In the left menu, click on "Subtitles" and select your uploaded video
- Click "Add Language," choose the video's language, and then click "Add" under "Subtitles"
- YouTube will automatically generate subtitles. Review and edit them for accuracy, then click "Publish" to finalize
📺Watch the step-by-step video tutorial:
How to Turn On Subtitles (CC) for a Single Video
If you only need captions for one video, follow these quick steps:
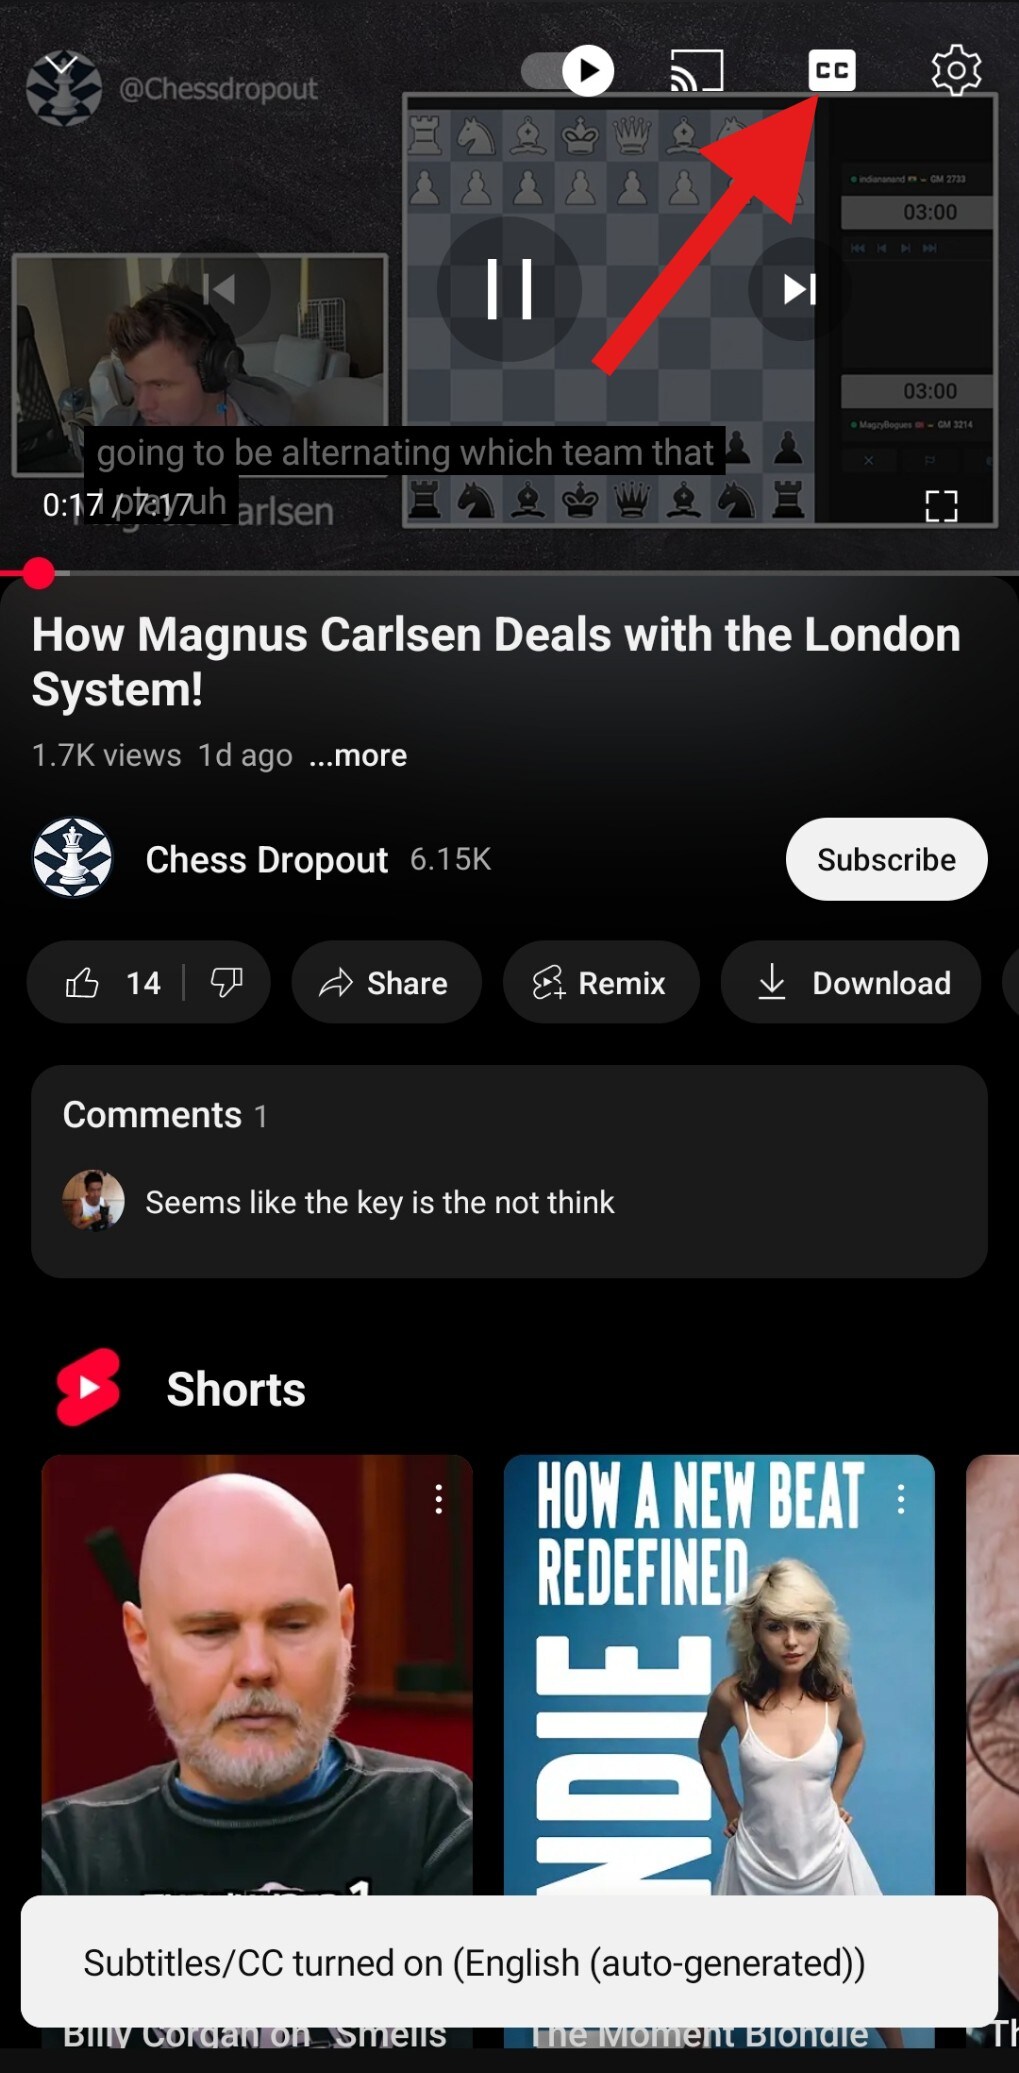
- Open YouTube and play your chosen video
- Look at the lower-right corner of the video player - find the "CC" (Closed Captions) button
- Click the button once to turn on automatic captions

And now, let's take a look at the mobile version of YouTube and see how you can activate closed captions there.
Get Automatic YouTube Subtitles on Your Mobile
The process for activating the YouTube auto-caption feature on mobile devices is more or less the same as with the PC version, but the button for activating closed captions is located in a different spot.
- Open the YouTube app on your phone
- Play a video and pause it
- Tap the "CC" button in the top-right corner to activate subtitles
Of course, these auto-generated subtitles are not perfect, and there are some disadvantages connected to them. The following section will shine a light on those shortcomings.
Limitations Auto-Generated Captions on YouTube
Automatic YouTube subtitles are not perfect in any sense of the word. They actually have several issues, which can be grouped into three distinct categories.
- Bad transcriptions: The auto-caption feature often misinterprets the spoken words, especially if the speaker has an accent. Also, AI cannot understand slang, and if someone is speaking very fast and if there is some background noise, this will also damage the captions generated.
- No punctuation and capitalization: YouTube's AI does not feature proper punctuation and capitalization, which makes the text harder to read, especially if the person in the video is talking fast.
- No contextual understanding: AI doesn't understand the context behind what is being spoken, so if certain homophones (like "there" and "their") are used, the AI might mix those up, making it very hard to read.
Of course, this is not ideal. If you are a YouTube creator and you want to generate and upload the perfect subtitles for your videos, or simply want to get the best possible auto-generated subtitles for the video you are watching, there is an app that offers an excellent AI Caption feature. We'll teach you how to use it in the following section.
How to Improve Auto-Generated Captions (With Best Tool)
The app in question is called Wondershare Filmora. Filmora stands out as one of the most comprehensive video editing tools on the market, offering both essential and advanced editing capabilities for video, image, and audio content.
Beyond basic functions like cutting, trimming, adding filters, effects, stickers, and animated text, Filmora empowers creators with its game-changing AI Caption system that helps you automatically add subtitles to YouTube videos.
The AI Caption suite includes three powerful modules:
- Speech-to-Text that automatically transcribes your dialogue with impressive accuracy
- AI Translation for instant multilingual subtitle generation
- Dynamic Caption templates that bring your text to life with professional animations
 secure download

The above three methods provide you a smarter solutions:
- Its enhanced speech recognition better handles accents, fast speech, and background noise.
- Auto punctuation & capitalization ensures proper formatting for readability.
- Context-aware processing helps distinguish between similar-sounding words.
Feel free to pick the option that works best for you, given the situation.
Follow the steps below to learn to generate automatic subtitles for your videos with Speech-to-Text in Filmora.
Step 1: Download the desktop version of Filmora on your Windows or Mac device.
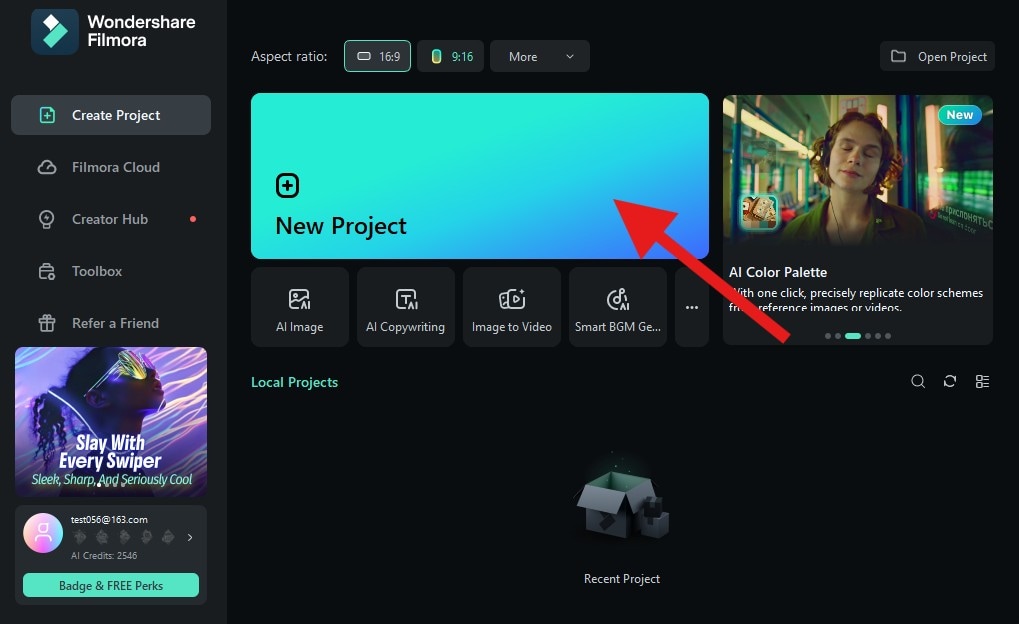
Step 2: Open the app and click on New Project.
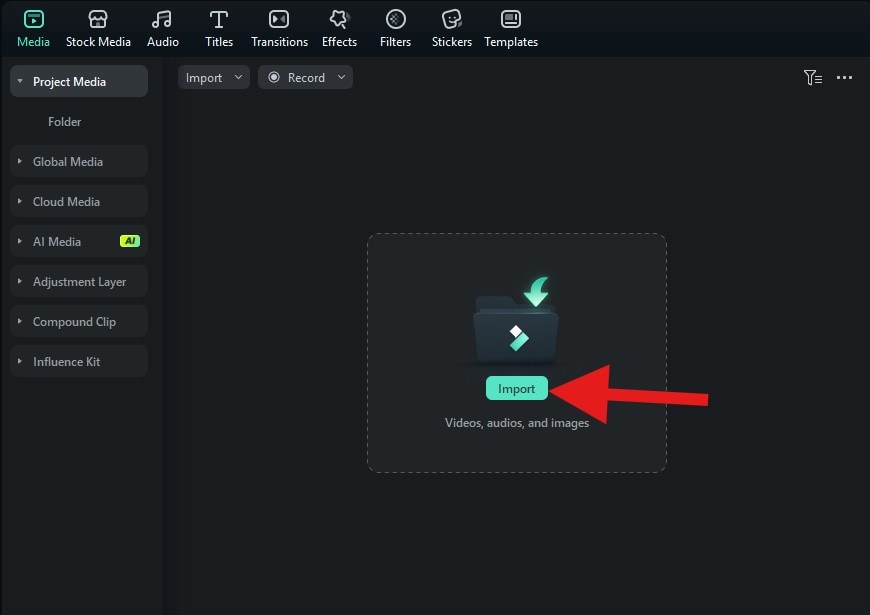
Step 3: Click on Import and proceed to add a video that has some spoken words.
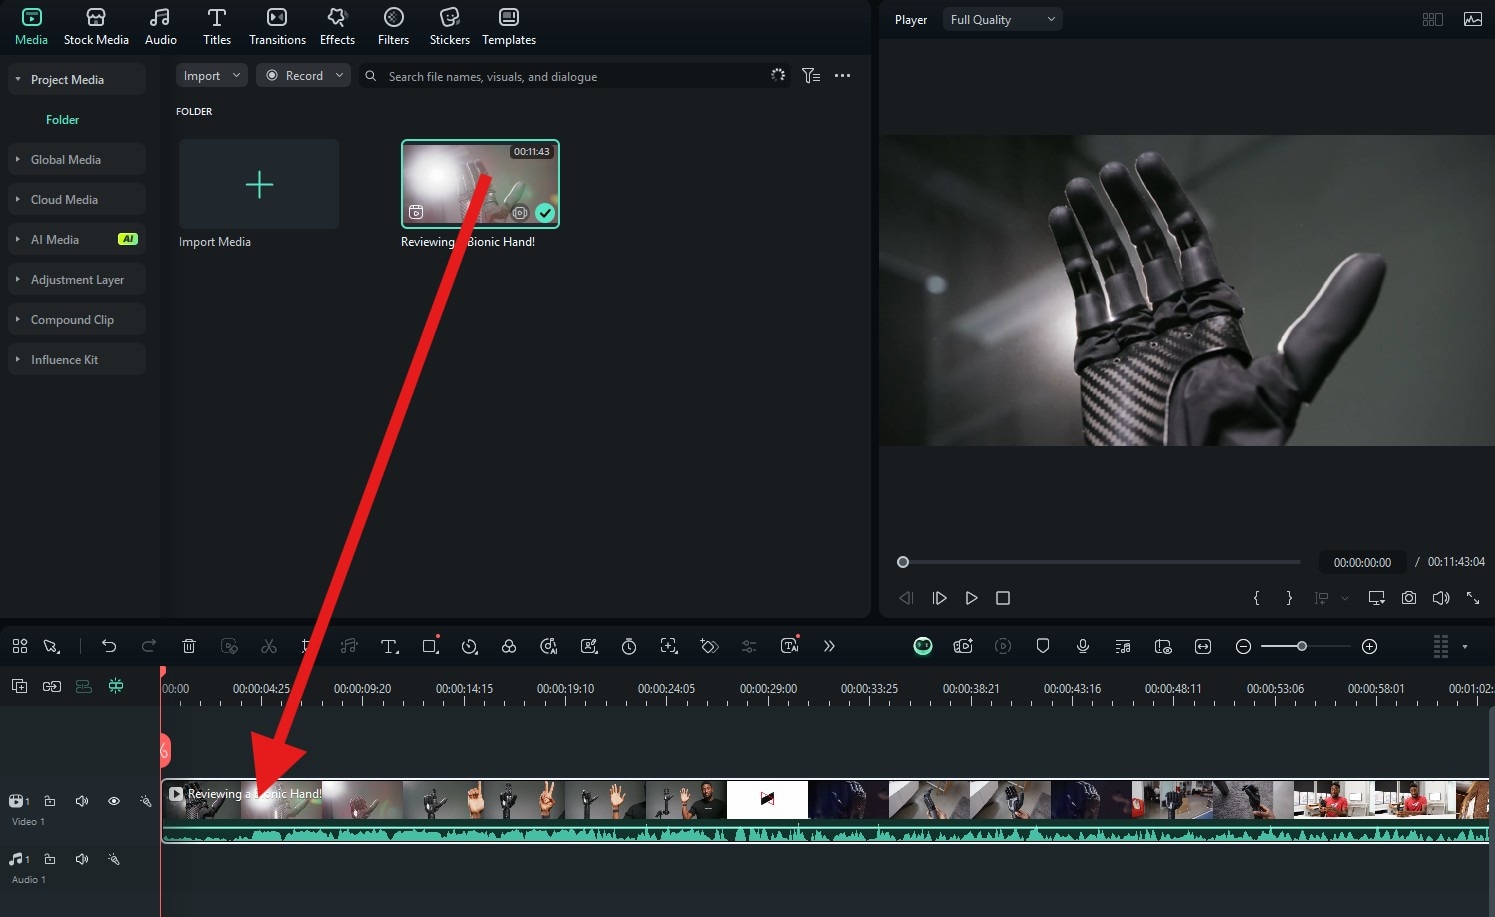
Step 4: Drag the video to the timeline.
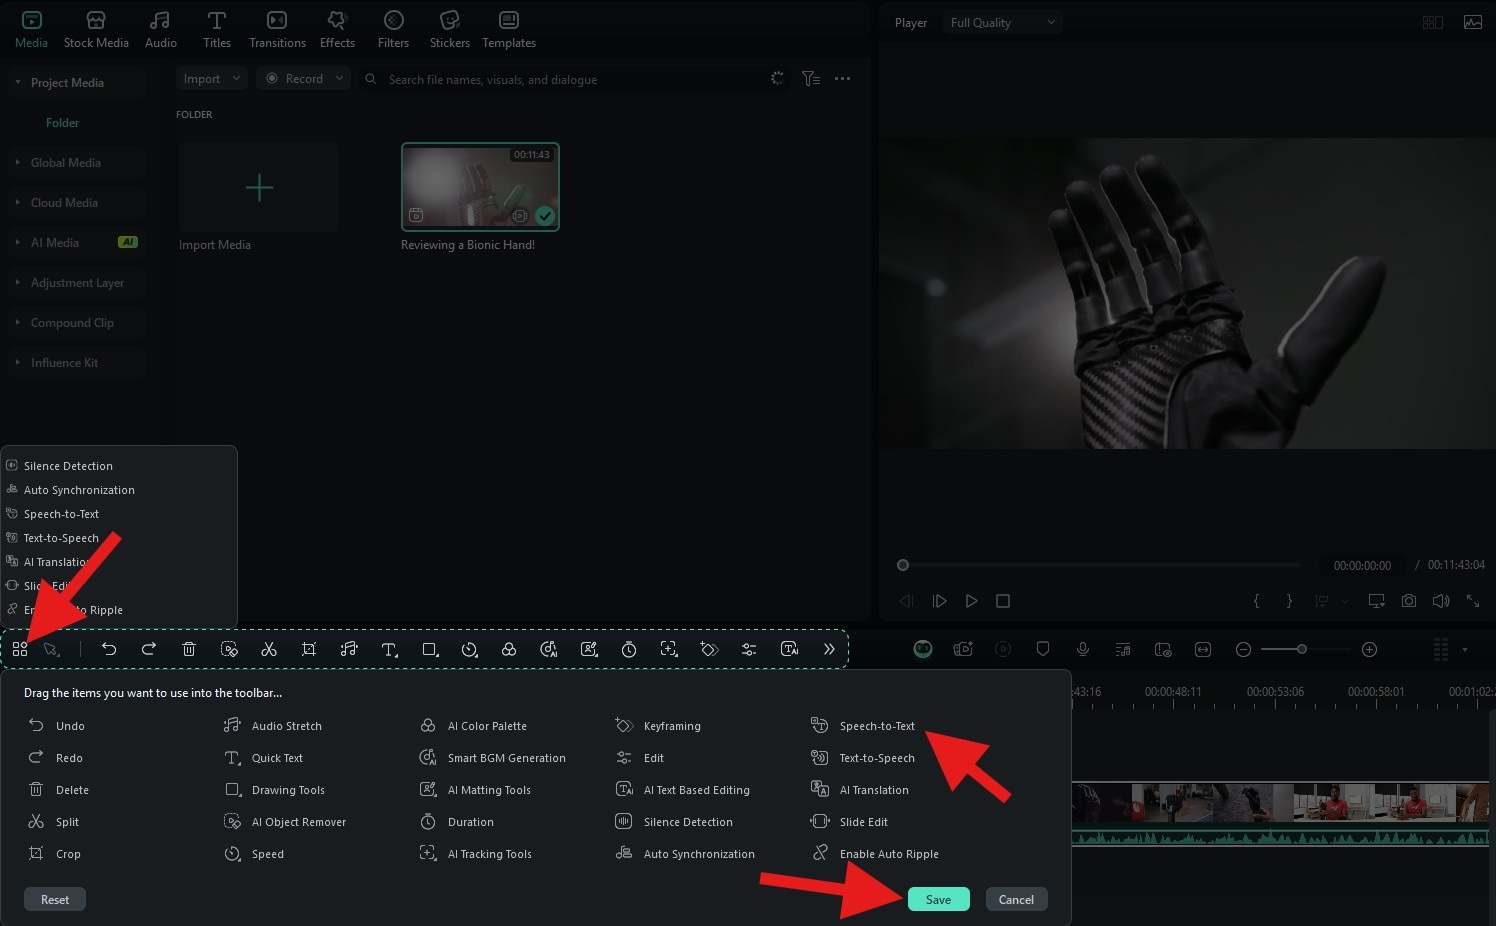
Step 5: Click on the Custom Toolbar icon at the far left of the screen and make sure that the Speech to Text feature is added to the toolbar. Then, click Save.
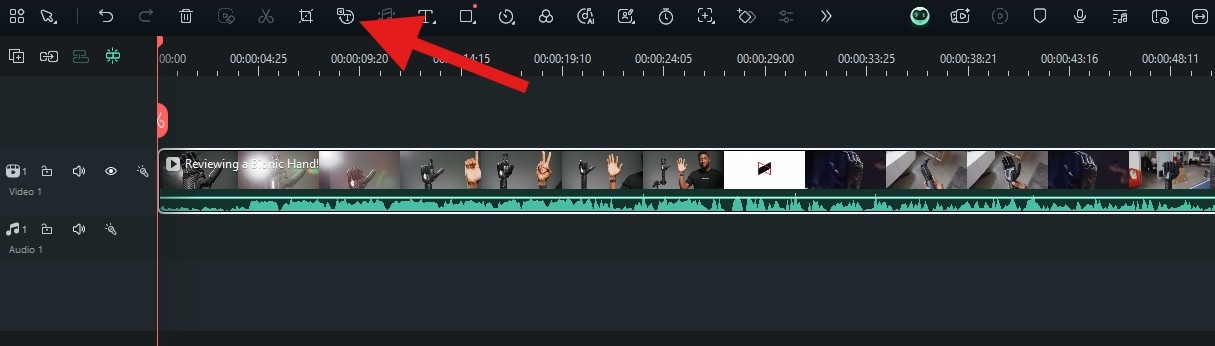
Step 6: Now, click on the Speech to Text icon in the toolbar.
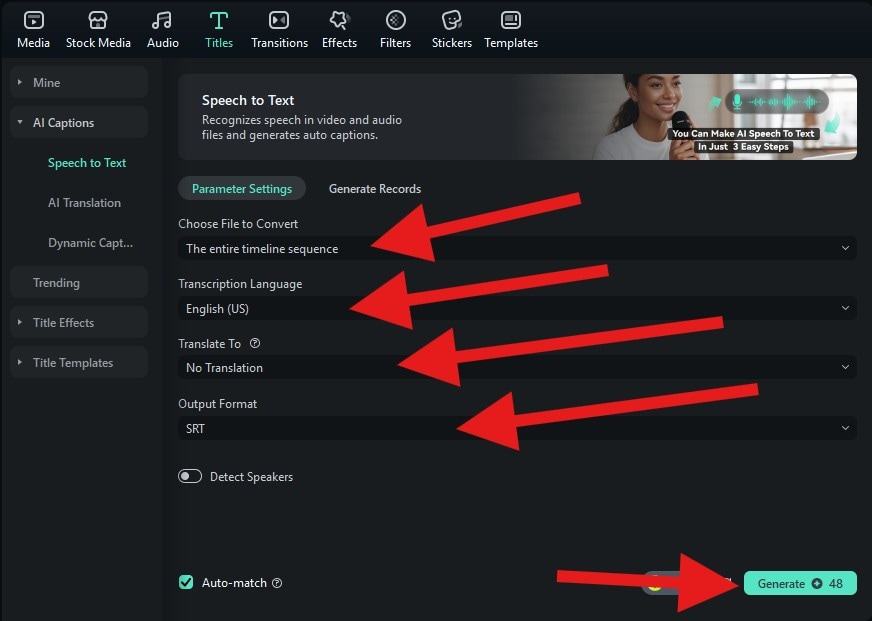
Step 7: Under the Choose File to Convert drop-down menu, select The entire timeline sequence option. Then, under Transcription Langage pick the language that is spoken in your video. You also have the option to automatically translate it into certain languages. Pick the Output Format and click Generate. Depending on the length of the video, this can take up to a couple of minutes.
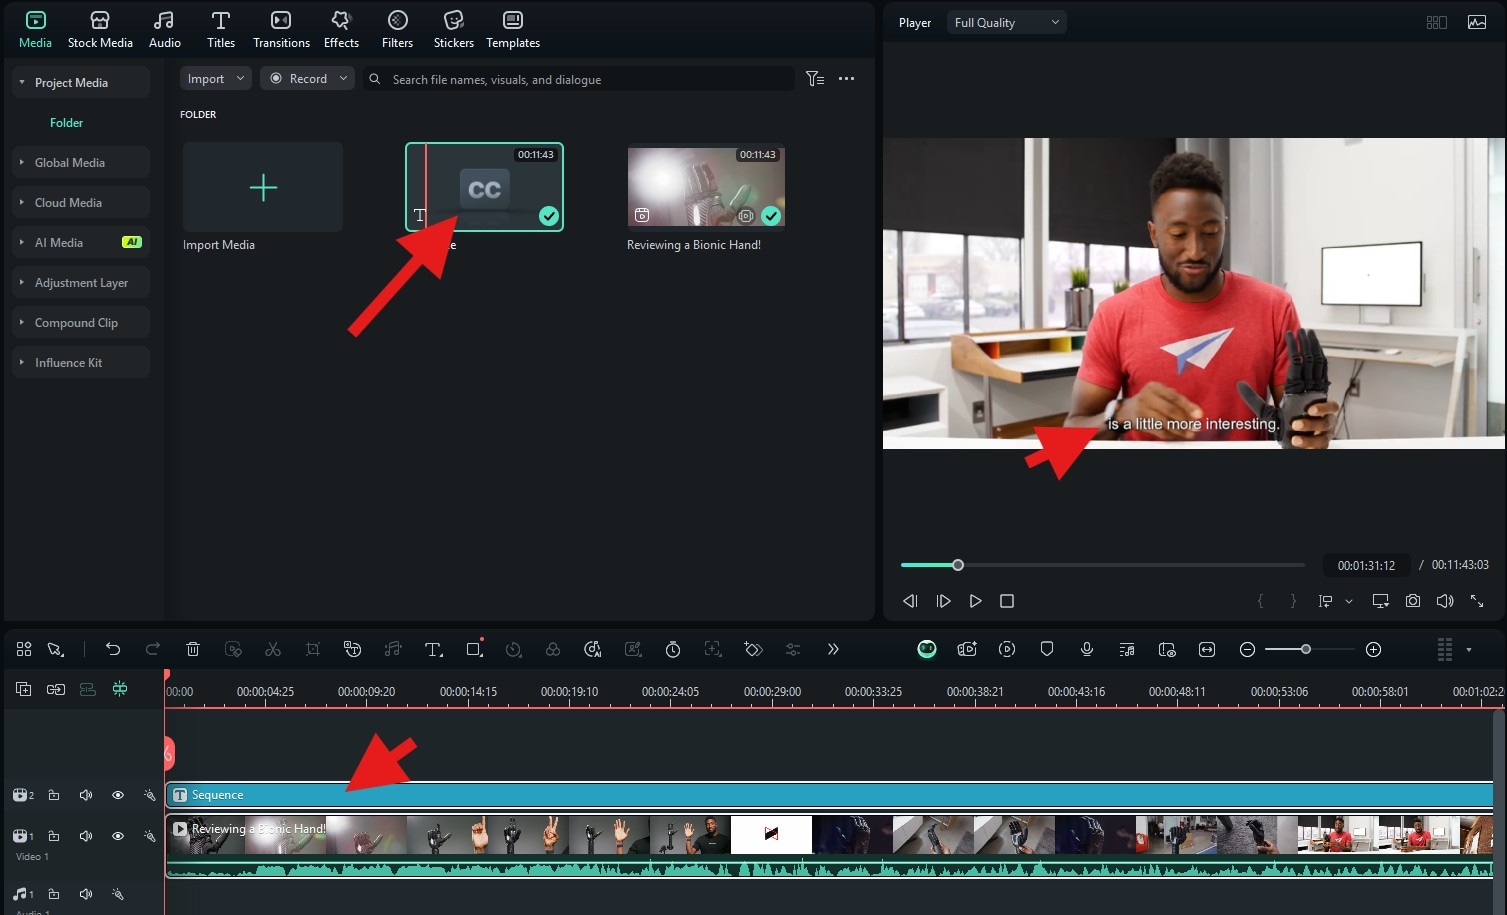
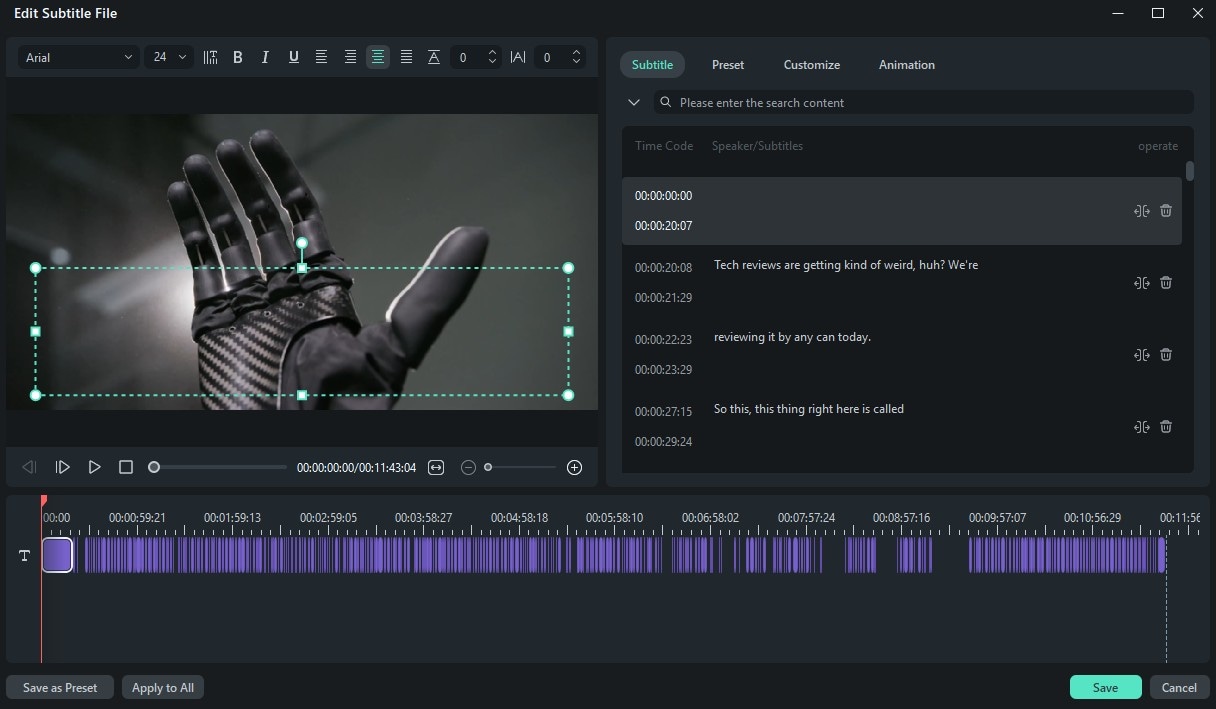
Step 8: The subtitle will be generated and added to the media tab and to the timeline. You can immediately review it in the video player.
As you will see, Filmora's automatic subtitles follow grammar and syntax rules as well. Sentences are properly divided with full stops, you can see commas where a subordinate sentence needs to be acknowledged, and the use of capital letters is correct across the board.
If you double-click on the title sequence in the timeline, this window will appear. You can edit any mistakes, but you will seldom have a lot of work to do.
Who would have thought that another tool is better at generating YouTube auto captions? What's most exciting here is that Filmora is connected to YouTube. After you complete a certain project and proceed to export the file, you can consider posting it directly on YouTube from Filmora, which is a very handy feature.
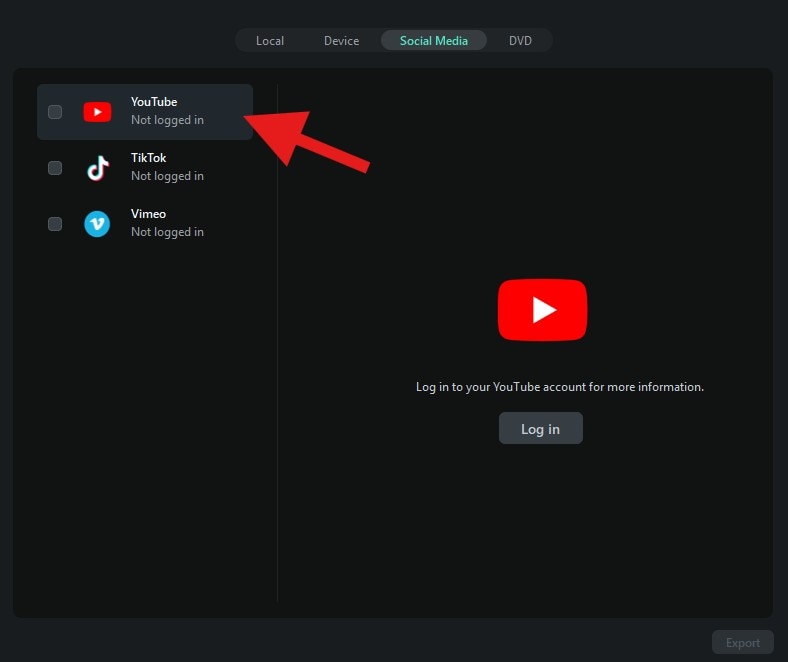
If you are a creator, this bridges the gap between YouTube and Filmora, and instead of uploading your video through YouTube, you can use this powerful video editing tool, make the perfect video with grammatically correct auto-generated subtitles, and post it to your channel effortlessly.
Before we conclude, it's also worth noting that Filmora is available on mobile devices as well (Android and iOS). Here, you will also find the AI Captions feature that works more or less the same as the Speech to Text on PCs, but here, you are also given the option to customize these captions and make them attractive for YouTube shorts.
secure download - Bilingual Captions: intelligently generate dual-language subtitles in perfect sync.
- AI Highlight: automatically add emphasis to your captions
- AI Emojis/Sticker: suggests context-aware emojis & stickers with your captions
- AI Camera: automatically zoom and track speakers, ensuring your captions always match the on-screen action
Beyond Captions: How to Make Your YouTube Videos Go Viral
It is also worth mentioning that both the desktop and mobile versions of the app have stellar video editing features. We already mentioned some of them at the beginning of the previous section, but let's expand on them a bit.
AI Text-Based Editing-the captions generated allow you to edit the video based on the text, which is especially useful for longer videos.
Smart Short Clips-it helps you quickly repurpose long YouTube videos into engaging short clips, optimizing them for platforms like TikTok and Reels to boost reach and virality.
AI Remover-if you have a pesky object in your photo and want to remove it, you can do that with a few taps or clicks to make the captions easier to read.
Easy editing features-whether it is cutting or trimming, or adding complex video effects, everything is easy in Filmora because the interface is very user-friendly.
All this is just scratching the surface. Filmora has thousands of other features that we didn't have time to mention in this text, but you can explore them as you continue using the app.
secure download Conclusion
In this article, you have learned how to activate the YouTube auto caption feature on all devices, but we also introduced some drawbacks. If you are a creator and you want to get the perfect subtitle for your YouTube video, or you are a video enthusiast who just wants the best possible subtitles to improve the viewing experience, as we have proven in this text, you cannot go wrong with Filmora. Download both versions of the app and see how it works.
