Mask tracking Premiere Pro is a technique that lets you apply effects to a precise frame area. In video editing, mask tracking is crucial because it lets you apply effects to areas of your footage rather than the full frame. This can assist you in producing videos that look more professional by emphasizing crucial details, obscuring delicate content, and using imaginative effects.
This article guides Premiere Pro mask tracking using the right tools and effects. Give it a read if you are interested in tracking mask Premiere.
In this article
Spice up your video content with the endless possibilities of AI masking functions!

Part 1. What Do You Know About Mask Tracking in Videos?
Automatic tracking and following a certain object or area during a video clip is known as mask tracking. Usually, the "mask" depicts a designated zone of interest, such as a person's face, an item, or any other area. Mask tracking is achieved using various methods and algorithms, including computer vision techniques such as optical flow, feature tracking, or machine learning.
The objective of the effect is to track the targeted item consistently over all video frames. Mask tracking Premiere Pro is a common special effect in video editing. It can add visual components, apply filters, or change the color and lighting inside the tracked region.
Part 2. How To Perform Mask Tracking with Adobe Premiere Pro
One of the most widely used industry standard programs for video editing is Adobe Premiere Pro. With the help of this tool, users can alter various aspects of photographs and films. It can tweak effects in nearly every frame according to user preferences using Premiere mask tracking. You will undoubtedly get remarkable outcomes from it in a short amount of time.
The tool is a video editing expert, so many professional video editors rely on it. It offers a huge range of editing features that get together to create an impactful and eye-catching video.
Marked Key Features of Adobe Premiere Pro
- Video Editing: You can combine audio and apply effects and transitions to your video content. The platform also helps you work with color or add animated titles to your videos.
- Text-Based Editing: Text-based editing creates a transcript and automatically highlights text to add clips to your timeline. It can edit and rearrange clips like a text document.
- Color Correction: With the help of AI, you can automatically balance your colors or modify the frame using expert color wheels and curve controls. It also assists in viewing your work using integrated video scopes.
- Audio Editing: With Adobe Premiere Pro, you can explore audio tracks, license them, and utilize AI to adapt them to your clips automatically.
Step-by-Step Guide to Perform Mask Tracking with Premiere Pro
Adobe Premiere mask tracking is one of the many remarkable features of the app. If you want to employ mask tracking in your videos using Adobe Premiere, look at the steps below:
Step 1: To start off with the process, import the video onto the timeline that needs to be edited. Navigate to the top of the screen and select "Effect Controls" to proceed further. Select any specific shape present below the "Opacity" option on the left to add a mask to your clip.
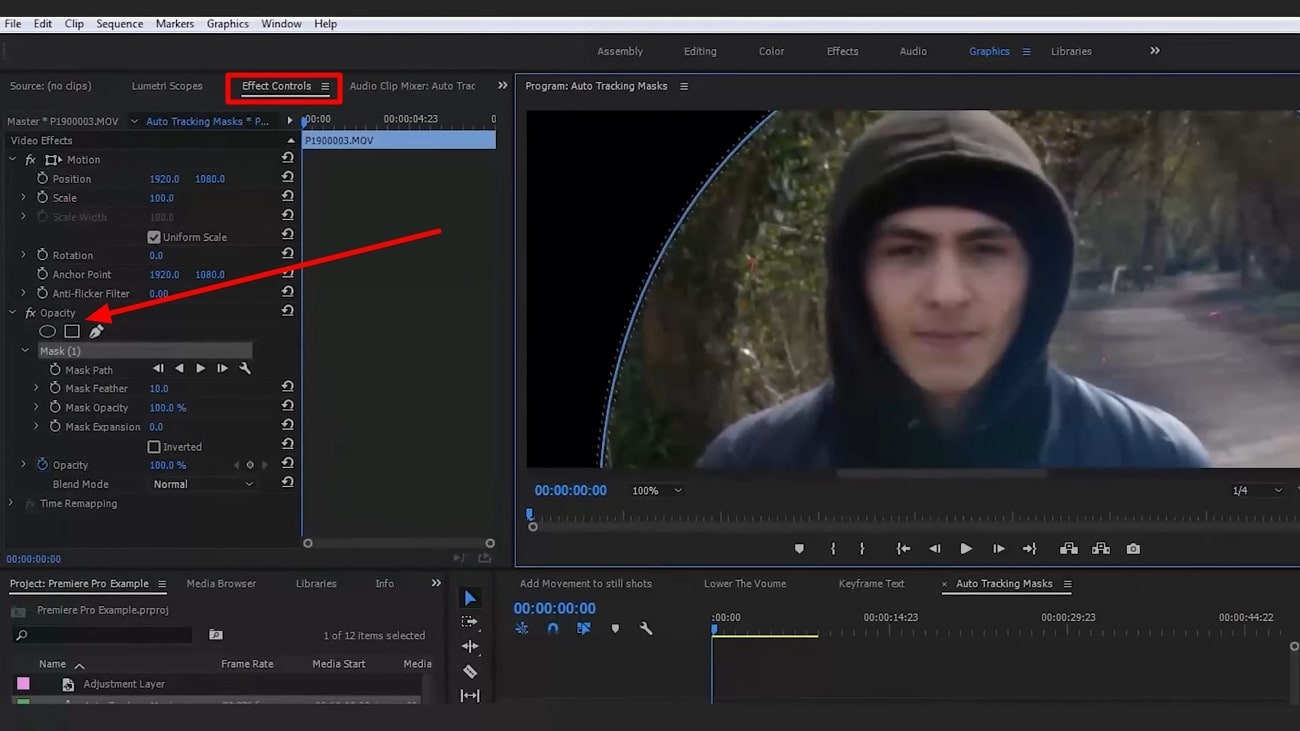
Step 2: Set the shape according to the person or object you will track by masking. Now, under the “Mask” option, you will see the “Mask Feather” option. Click on “Mask Feather” and adjust it so it won’t look too harsh on the edges.
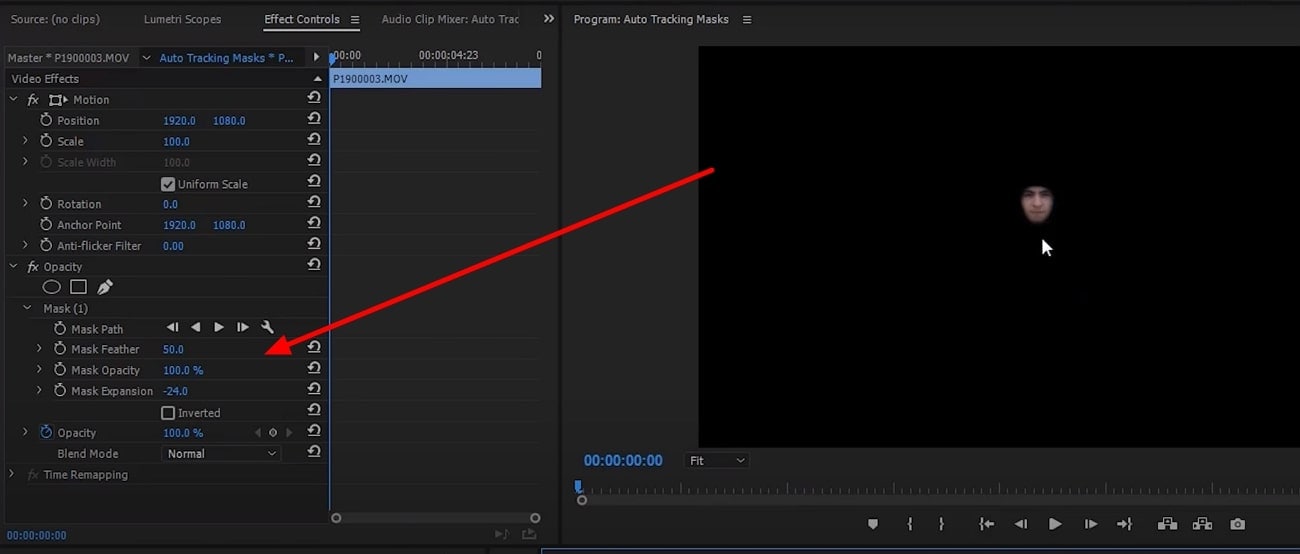
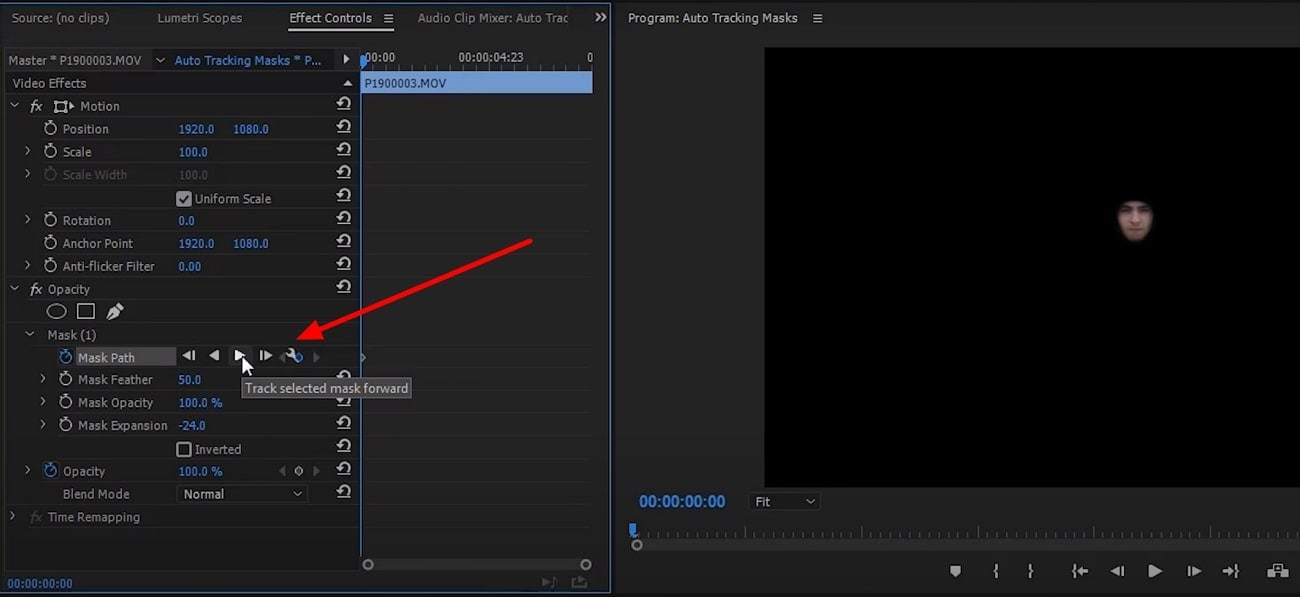
Step 4: Go to the beginning of the video you are editing, return to the editing section, and look for the “Mask Path” option. Now hit the “Track Selected Masked Forward” button and wait for the system to complete the Premiere Pro tracking mask process and save the video.
Part 3. Making Masking Easy with Wondershare Filmora: Reviewing the Details
Adobe Premiere Pro is an incredible tool, without a doubt. However, many users say that it needs to be simpler to use. You cannot generate a good video even after watching tutorials because it’s hard for an amateur to use Adobe Premiere Pro. Because of this, many users look for alternative options to add a premiere tracking mask and make other changes to their videos.
This part is all about the amazing alternative that you’re looking for. Wondershare Filmora is a video editing tool that provides professional quality content editing. The tool is so easy to use that you can start immediately with basic instructions. Its smart editing features, combined with a fast and intelligent system, make it a great choice for everyone.
Key Features of Wondershare Filmora
- Compound Clip: This feature will arrange all your clips, combine them, and edit them as a single clip. This strong and intuitive feature improves and edits your video.

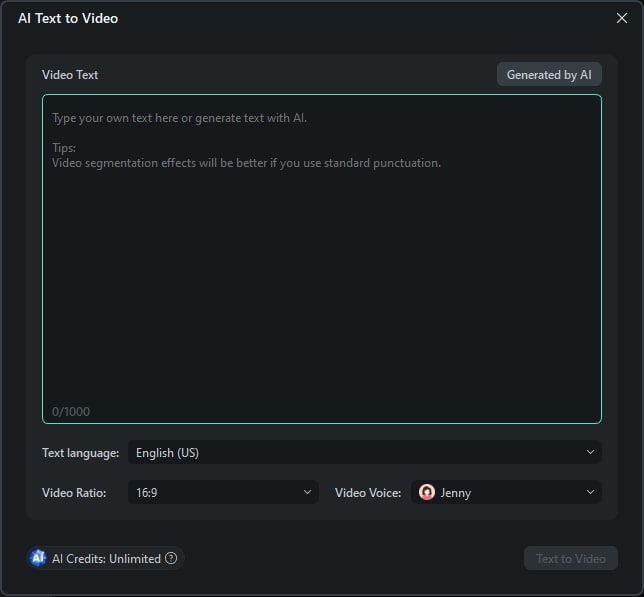
- AI Text-to-Video: You can convert text into engaging visual narratives and instantly turn text inputs into interesting videos. The feature makes ideas into stunning videos with ease.
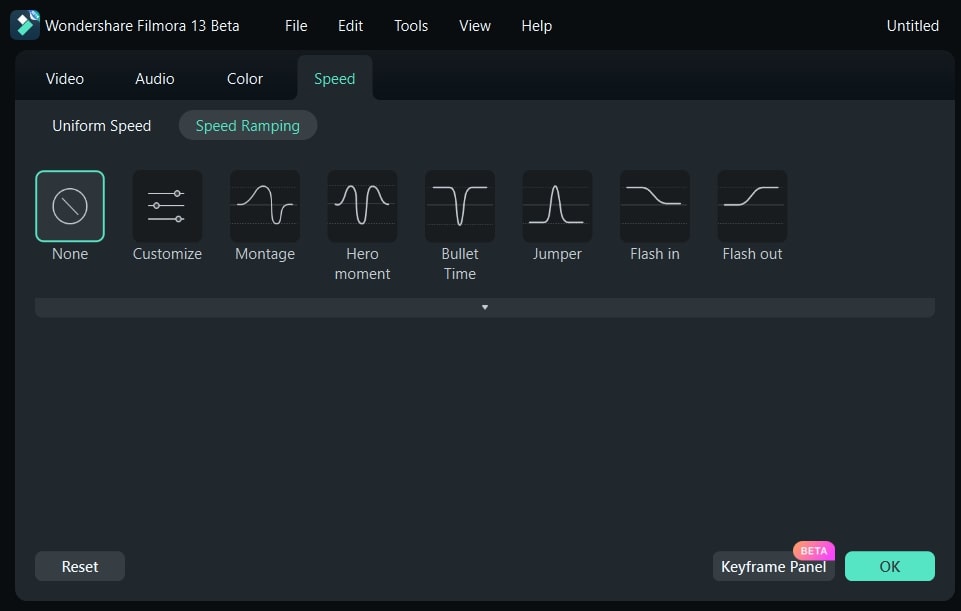
- Speed Ramping: This feature produces distinctive cinematic effects by managing your keyframes and altering the speed of your film.
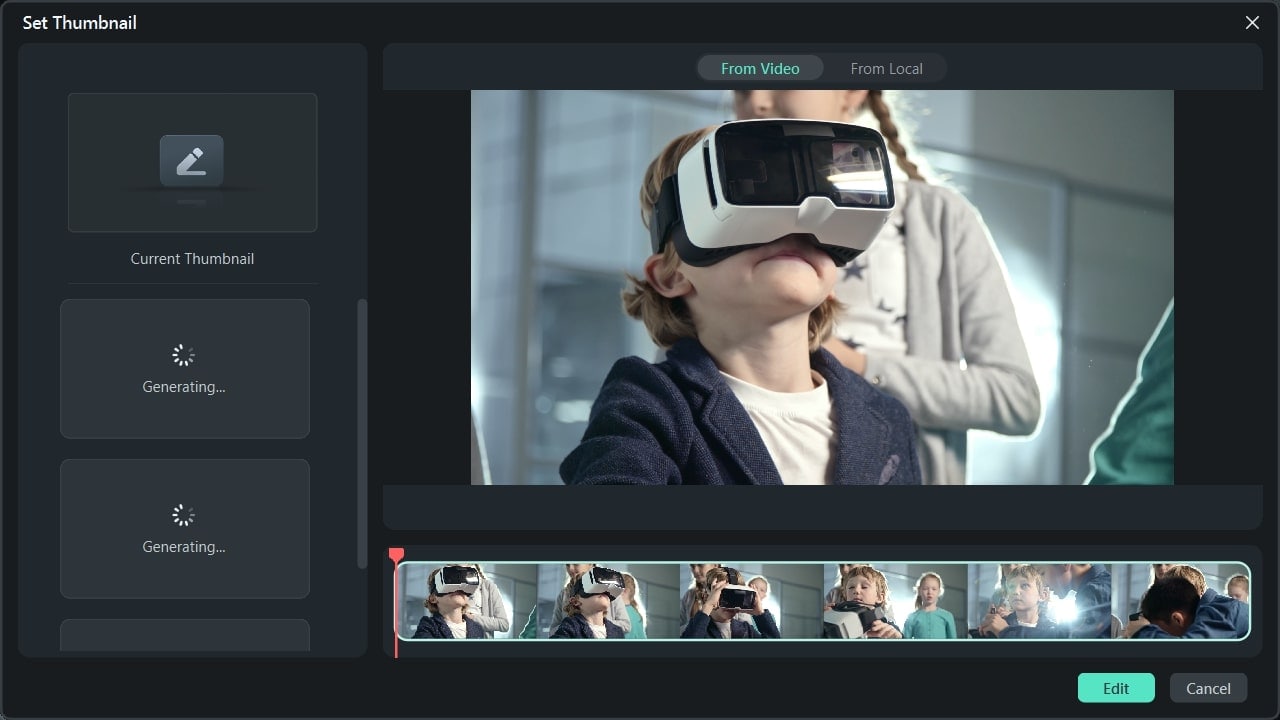
- AI Thumbnail Creator: The tool uses AI to create attractive, engaging thumbnails that get the viewers’ attention. You can use different presets to beautify your thumbnail.
Step-by-Step Guide on How to Perform AI Masking on Filmora
Wondershare Filmora Premiere Pro mask tracking is way easier and provides the same high-end results. Follow the steps below to do mask tracking using Filmora’s unique functions and procedures:
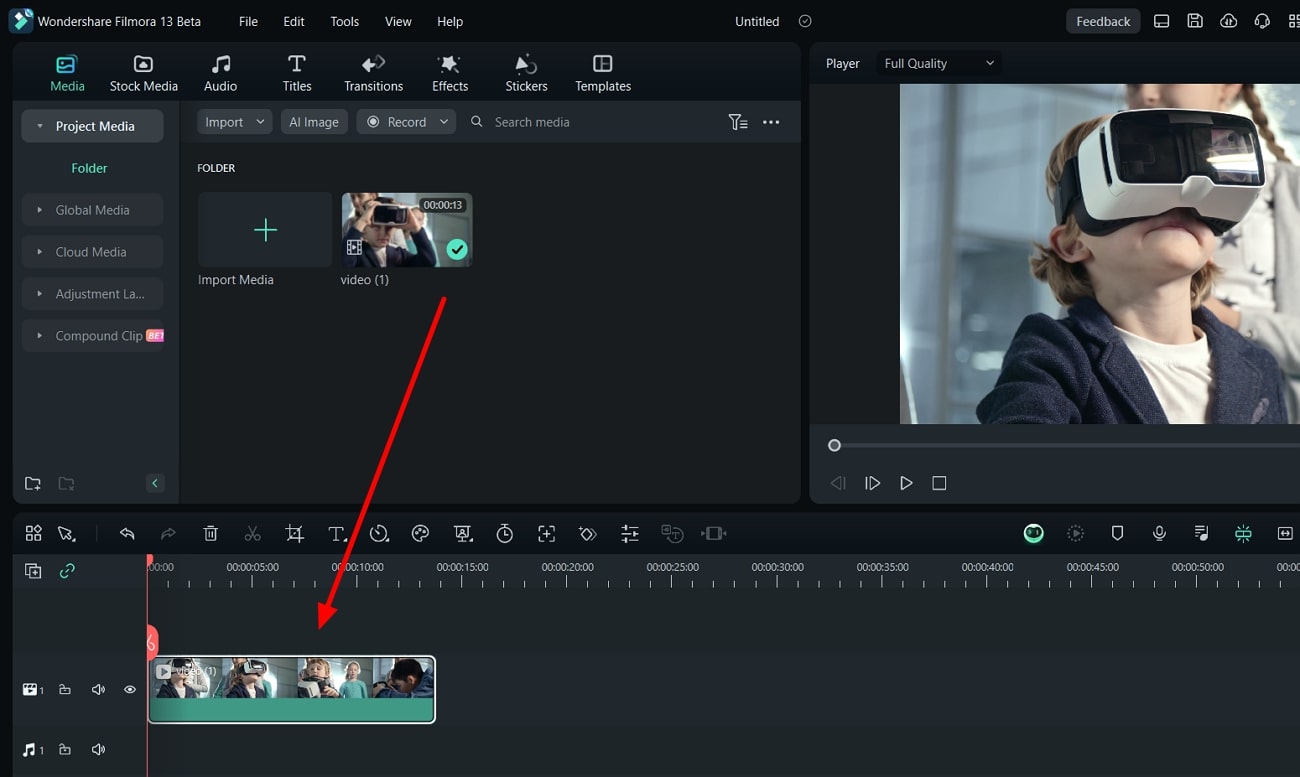
Step 1Add Video Content to Timeline in Filmora
Launch Wondershare Filmora on your computer and proceed by creating a “New Project.” As a new window opens, import your required video clips to the timeline. Double-click and proceed to their respective video settings.
Step 2Use AI Masking Feature on Video
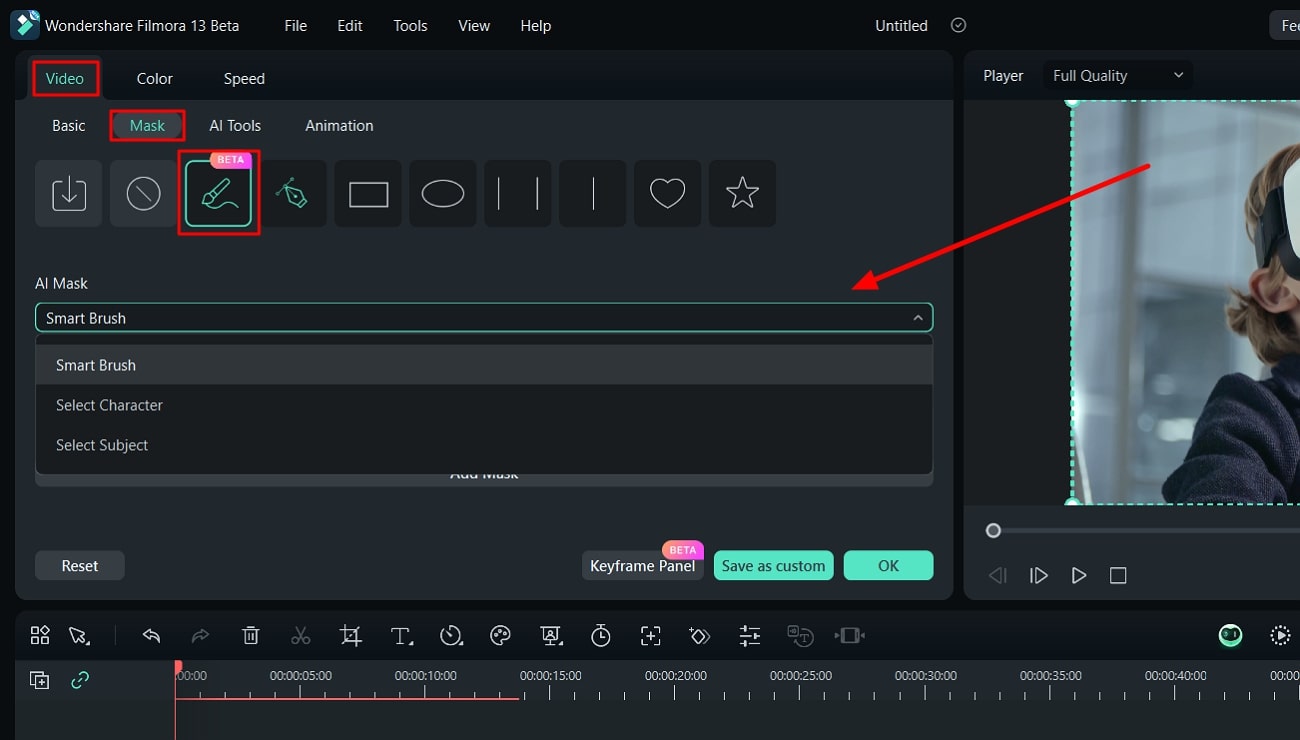
On double-clicking the video, proceed to the “Video” tab from the top and continue into the “Mask” section. Select the “AI Mask” option in the provided list to open further settings. Select any appropriate mode of AI Mask from the bottom options and set the respective parameters accordingly. You can either select “Smart Brush” or go for “Smart Character” or “Smart Subject.”
Step 3Save Final Video
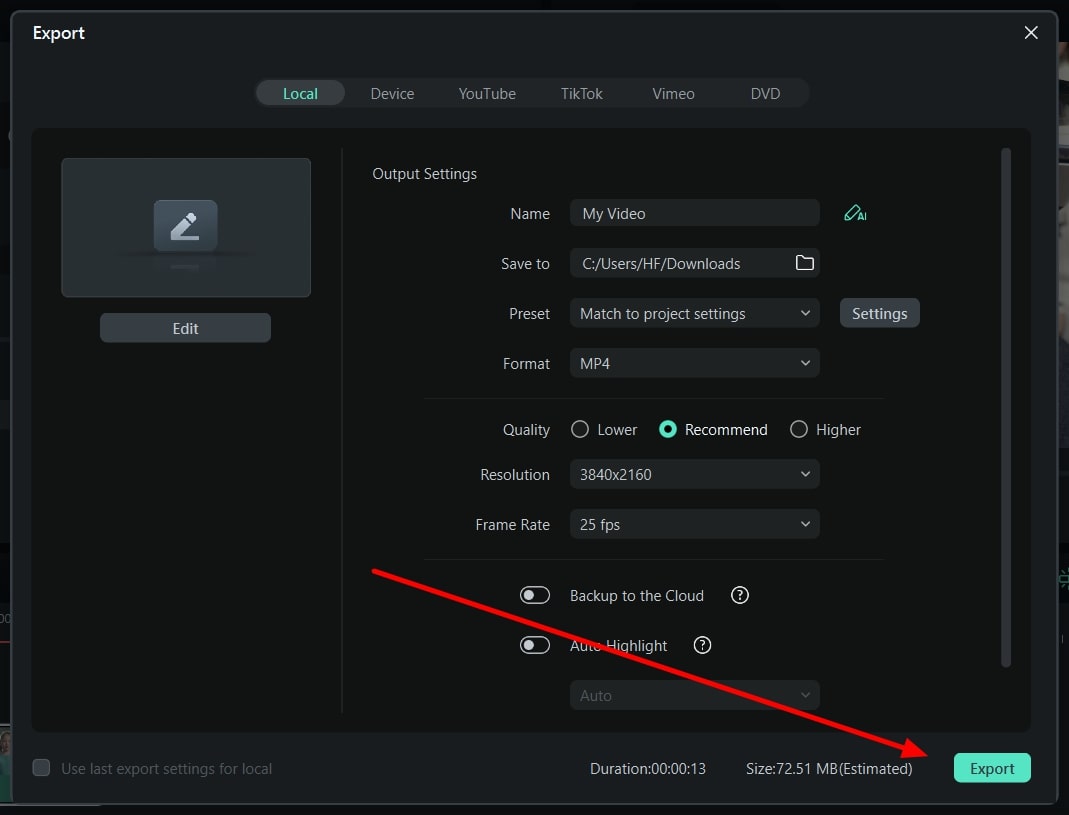
On clicking "OK," all changes are applied to the video. Continue to the "Export" button to save your edited video clip on your computer.
🤩 Post You Might Be Interested In:
Conclusion
Mask tracking is handy for adding effects to a moving object in your video. By tracking the movement, you can ensure the effect persists even as the object moves around the frame. Many professionals use it in their videos to edit and enhance a specific area in their clip. Check out this article if you also seek an app for Premiere mask tracking.

