
 100% Security Verified | No Subscription Required | No Malware


 ChatGPT
 Perplexity
 Gemini
 Claude
 Grok
Grok
Removing the background from an image is a key photo editing skill. It comes in handy when making product listings, creating a thumbnail, or cleaning up your social media photos for public sharing. If you can remove your photo's background, you can repurpose your visuals in countless ways.
One tool you can use for this is Photopea—a free, web photo editor that looks and feels a lot like Adobe Photoshop. It's a powerful alternative, especially for those who want Photoshop-level features without the cost.
Now, unlike some modern apps that offer one-click background removal, background removal in Photopea isn't exactly automatic. Unlike apps like Filmora's Background Remover (which usually just take one click), Photopea requires a bit of hands-on work. That means using selection tools, layers, and sometimes a steady hand.
In this article, you'll learn how to remove backgrounds in Photopea and we’ll also provide an alternative AI-powered software.

In this article
Part 1: Manually Remove Background from Photos in Photopea

Photopea is a solid photo editing tool that comes in two versions for both desktop and mobile.
Photopea Online Editor is accessible through any browser at photopea.com. This online photo editor feels like using Adobe Photoshop but without the price tag. The Photopea mobile app, on the other hand, is available for download on Android and iOS.
At its core, it offers layers, masks, selection tools, adjustment layers, text, filters, and more—basically everything you’d expect from any photo editor. It's compatible with popular file types like PSD, JPG, PNG, and even Sketch and XD files. That flexibility makes it a solid choice for both beginners and experienced designers.
Photopea: How To Remove Background on Desktop & Mobile App

Removing background with Photopea requires completely different processes for both desktop and mobile. The online editor automatically cuts out your subject and smooths out the edges using layer tools.
On the other hand, no magic button instantly removes the background in the Photopea mobile editor. Instead, you manually select the parts of your image background you want to erase using a brush. It takes more time, precision, and control to achieve good results.
How To Remove Background in the Photopea Mobile App
Here's how to erase image backgrounds using Photopea on your phone.
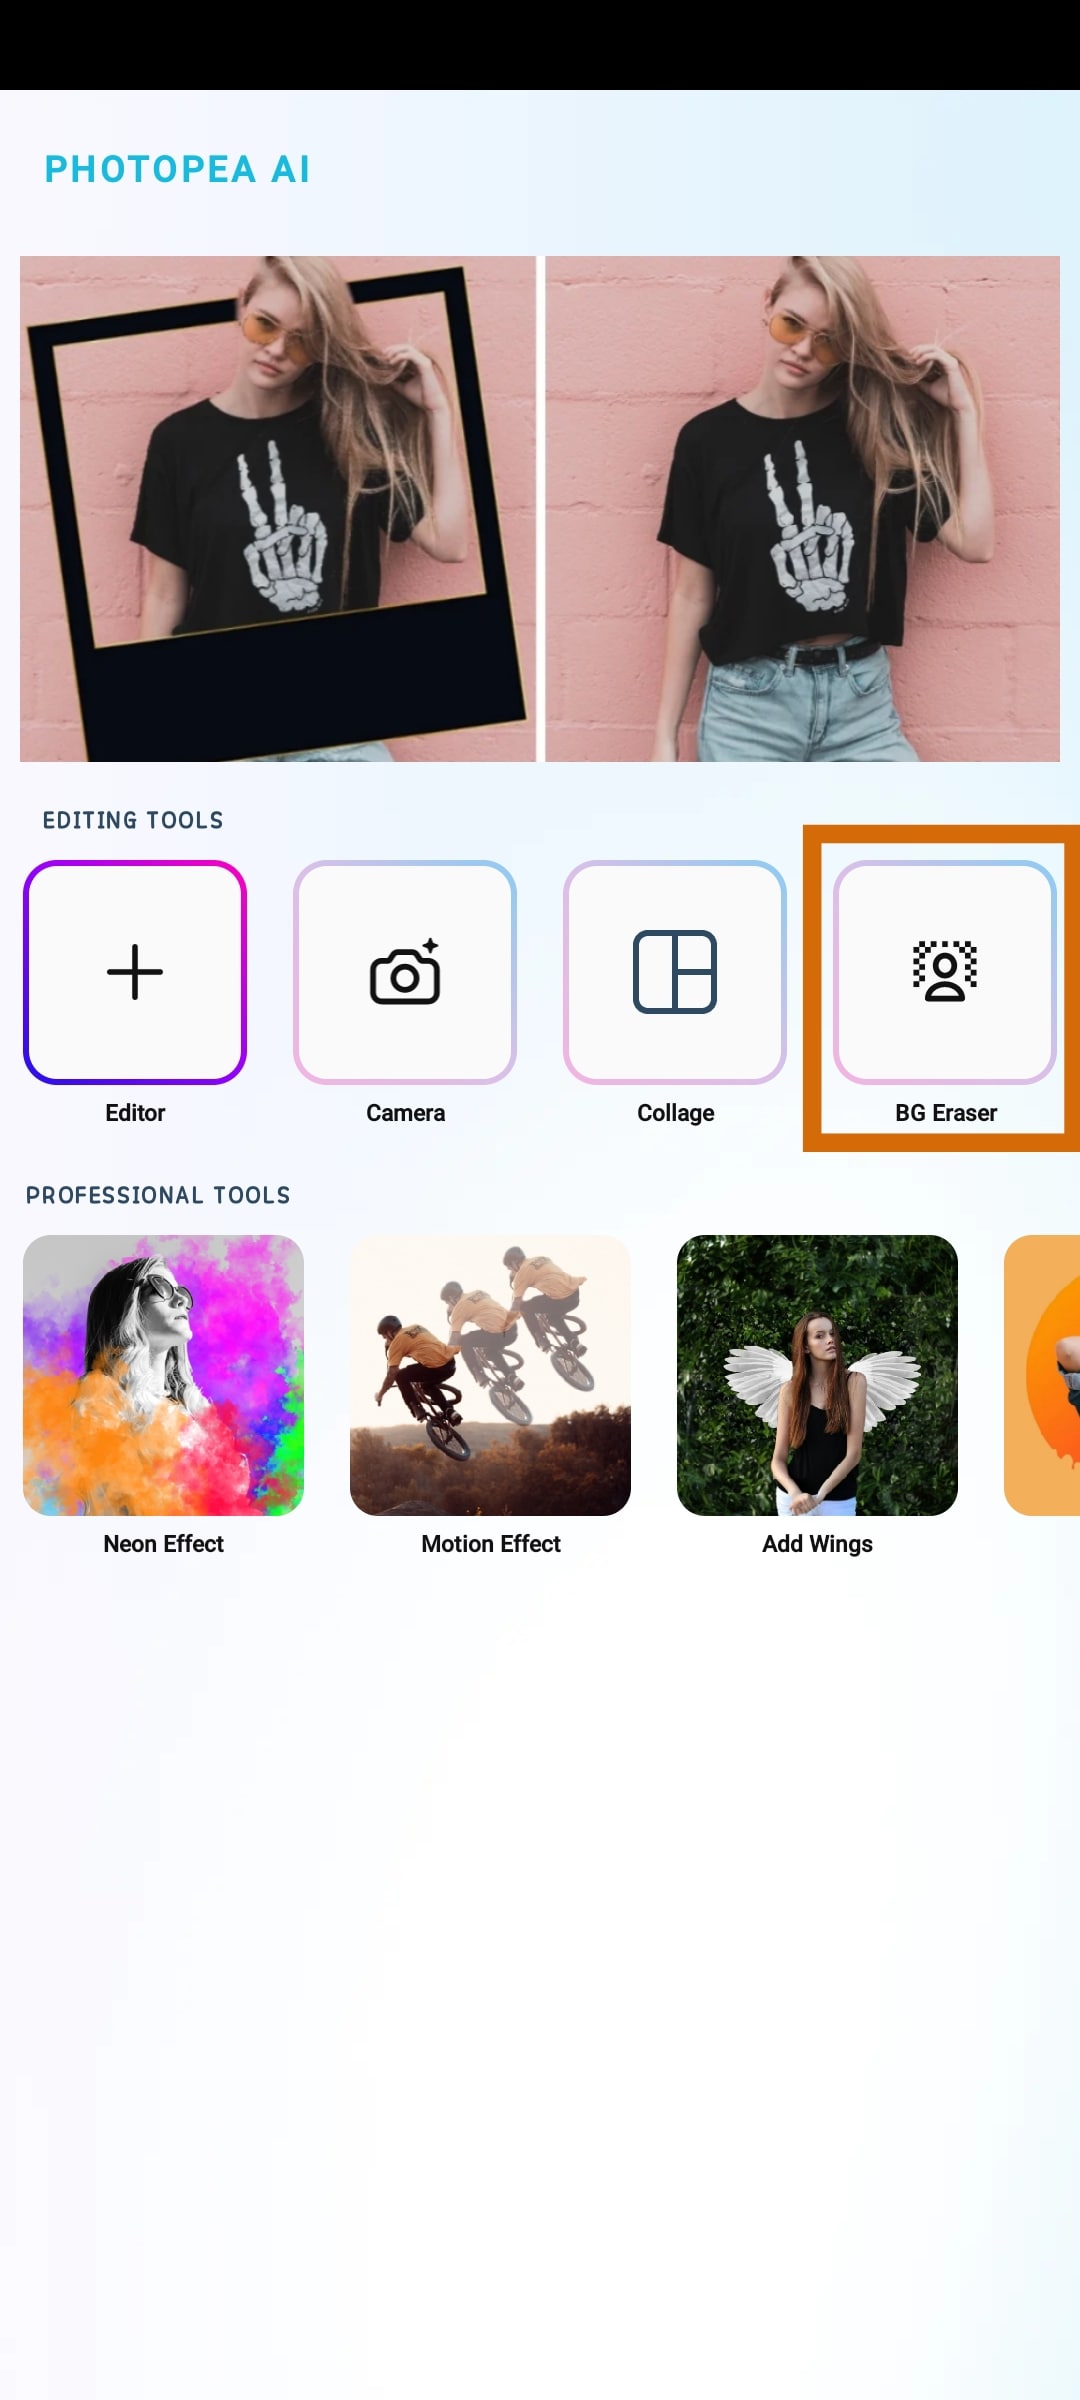
- Step 1: Open the Photopea app on your phone.
- On the home screen, select BG Eraser.
- Upload your photo.
- Step 2: Select Eraser on the toolbar.
- Manually brush over the image background to remove it.
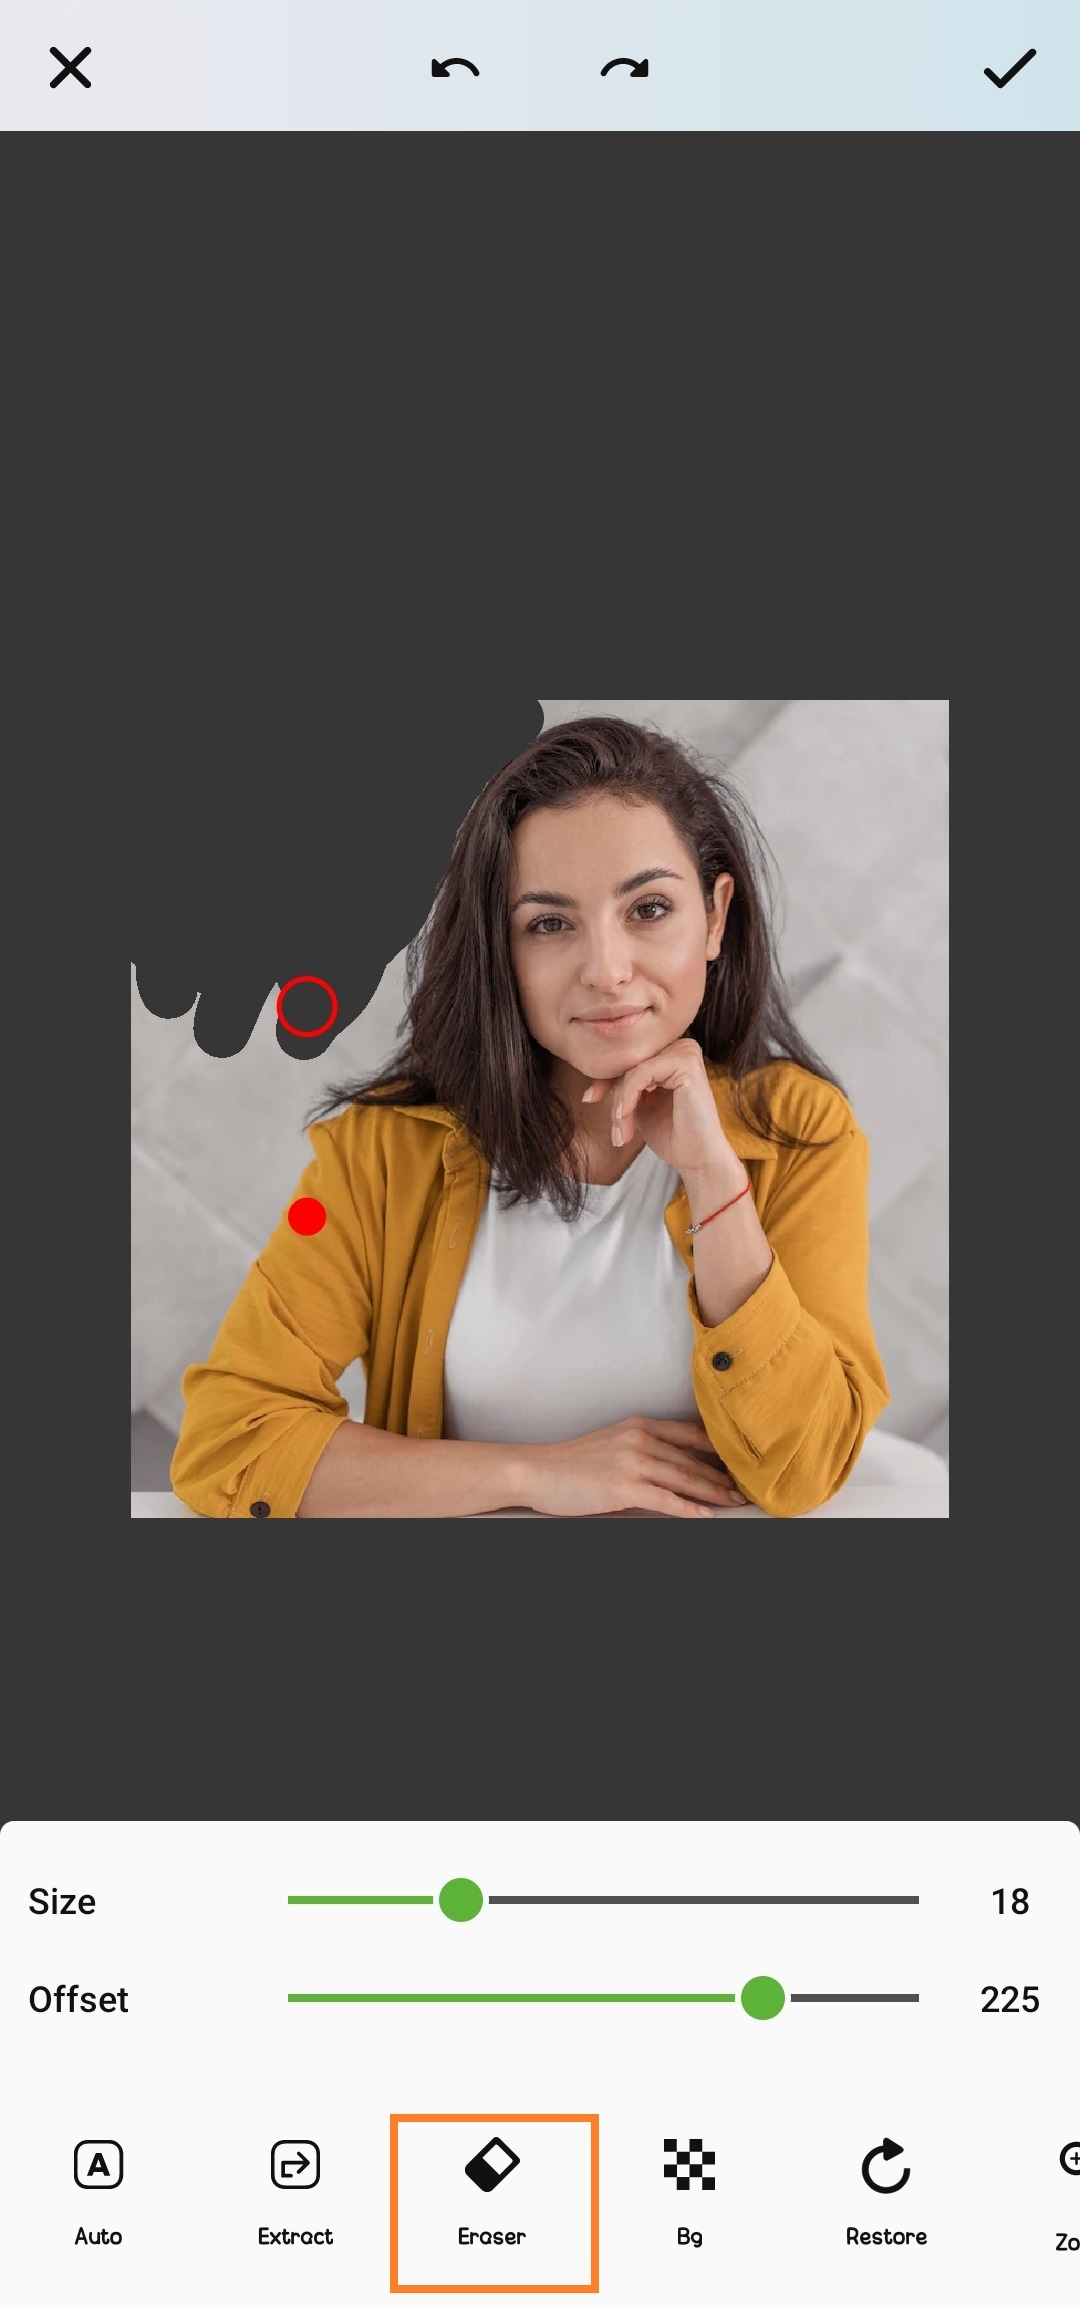
Alternatively, click on Auto.
- Move the pointer to the part of the background you want to remove, and Photopea will remove it.
- Repeat the process until every part of the background is removed.
- You may still need to use the Eraser to clean up image edges for a neater finish.

How to Delete Background In Photopea Online Editor
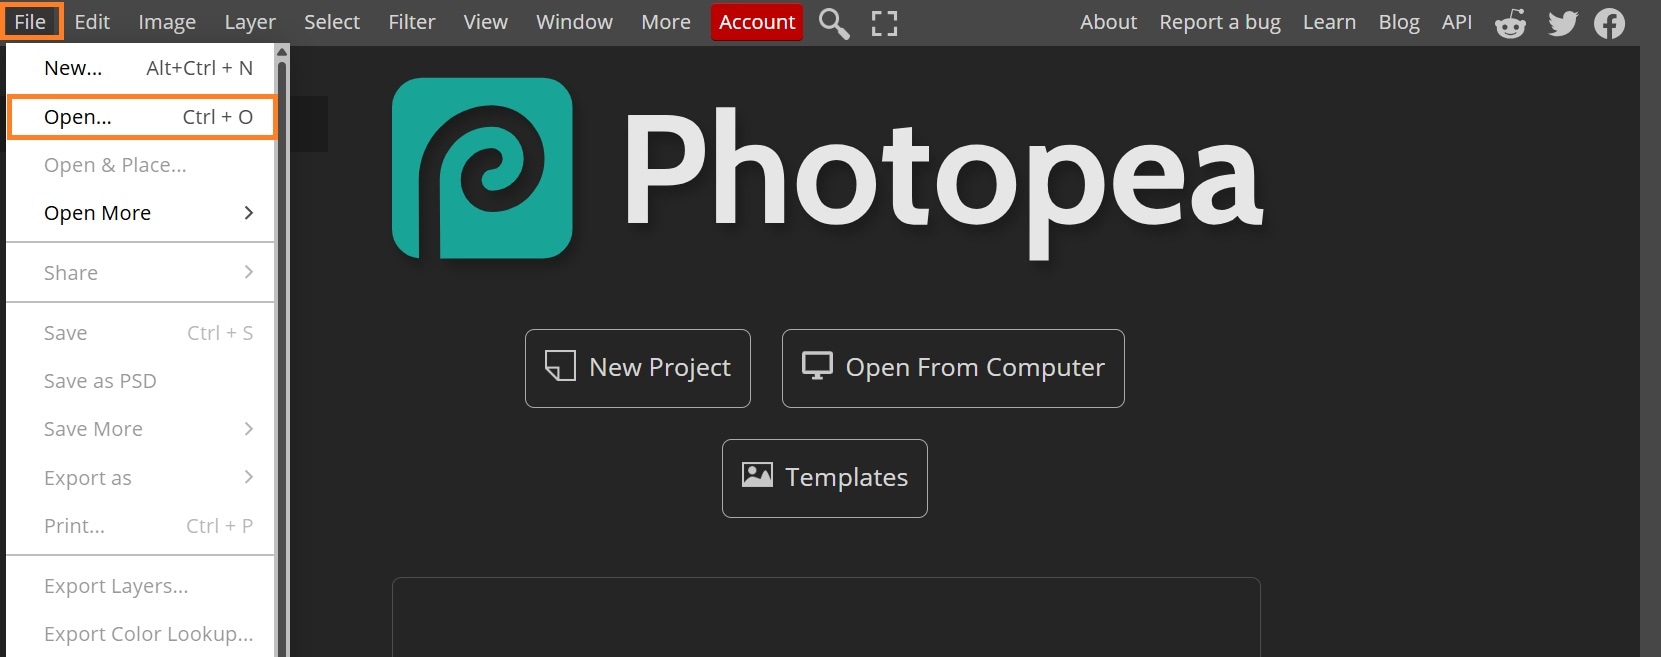
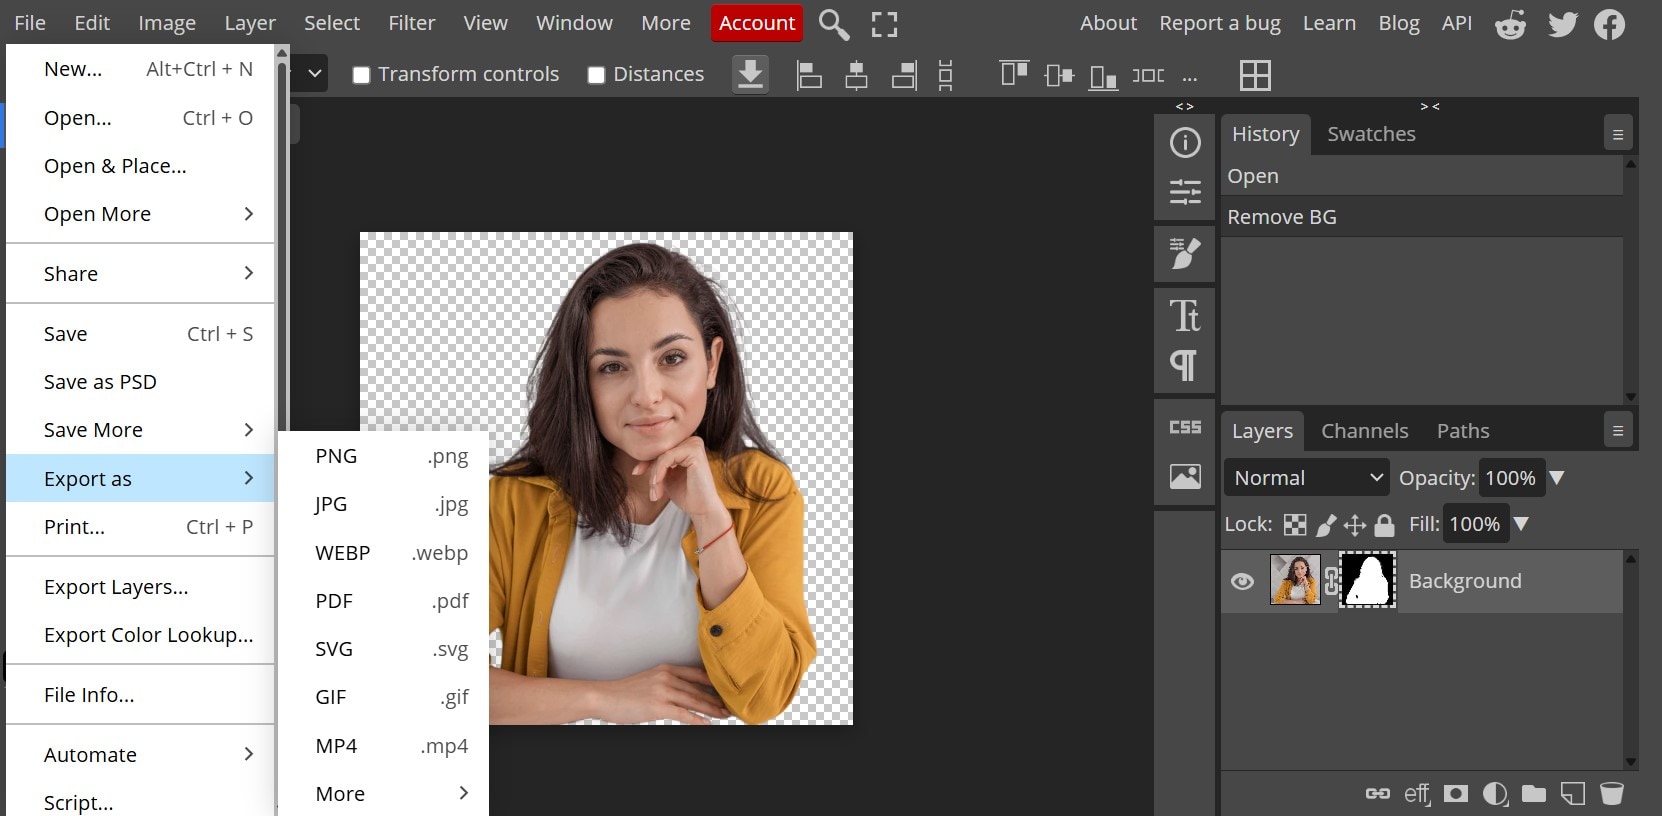
- Step 1: Open Photopea in your browser. Go to photopea.com.
- Go to File > Opento upload your image to Photopea.
- Step 2: Go to Select > Remove BG.
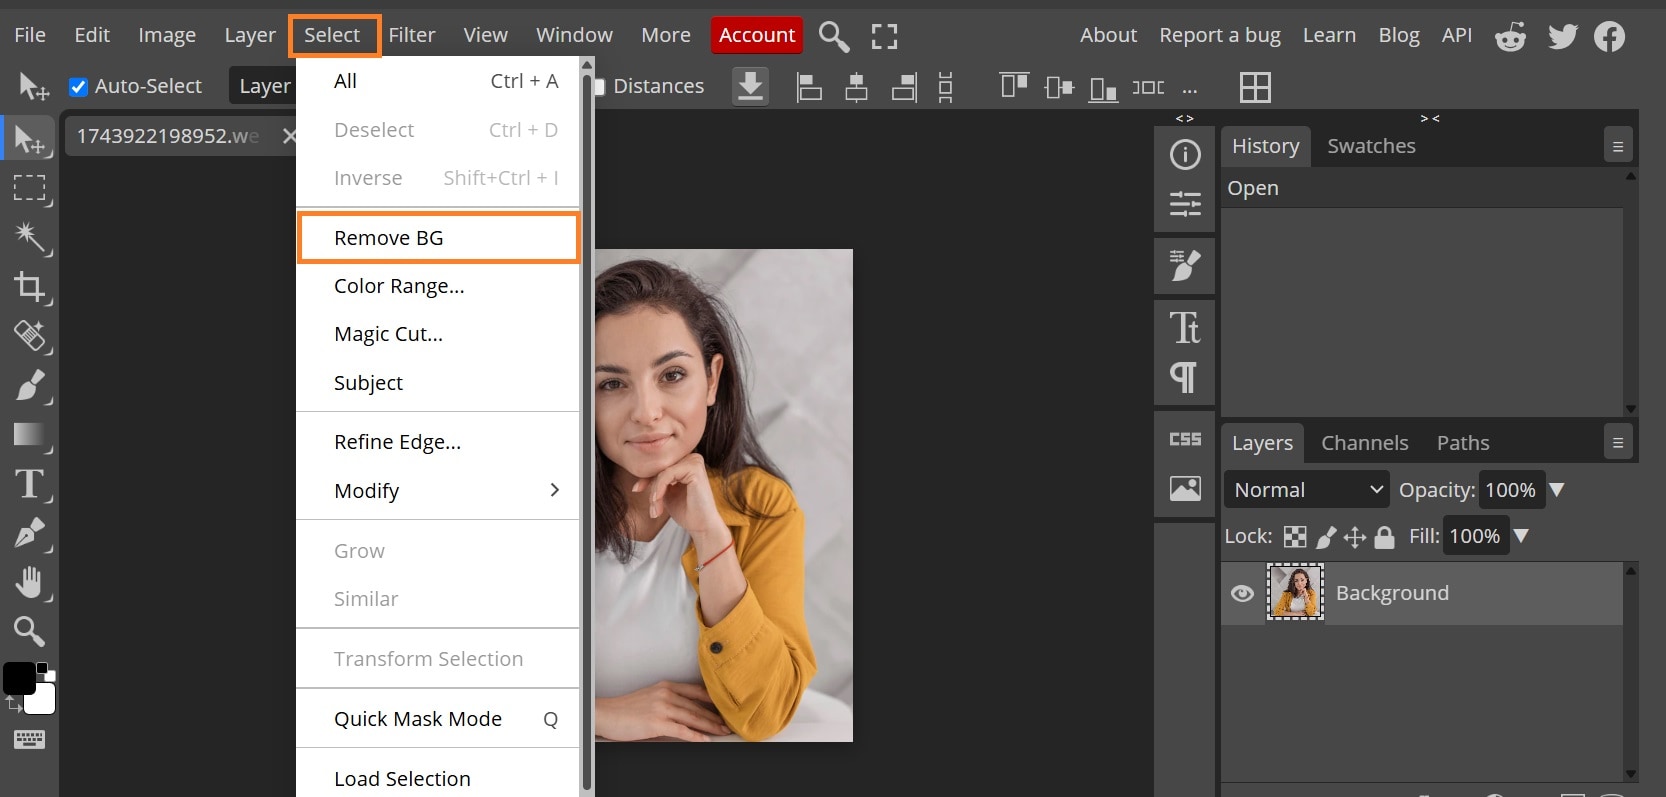
- Step 3: Go to File and export your image in your preferred format.
Part 2: Automatically Remove Background in Photos in Seconds
Let’s be honest; using Photopea to remove backgrounds manually can be time-consuming. It takes a steady hand, some editing know-how, and patience. That’s why automatic background removal tools have become so popular. Thanks to AI, they're fast, user-friendly, and often impressively accurate.
AI-powered editors like Wondershare Filmora can save time and skip the hassle of selections and masks.
Wondershare Filmora is a video and photo editing tool that lets you cut out backgrounds from both photos and videos using smart AI technology. You get clean cutouts in seconds, which is especially helpful if you’re working on multiple images or just don’t want to get lost in technical details.
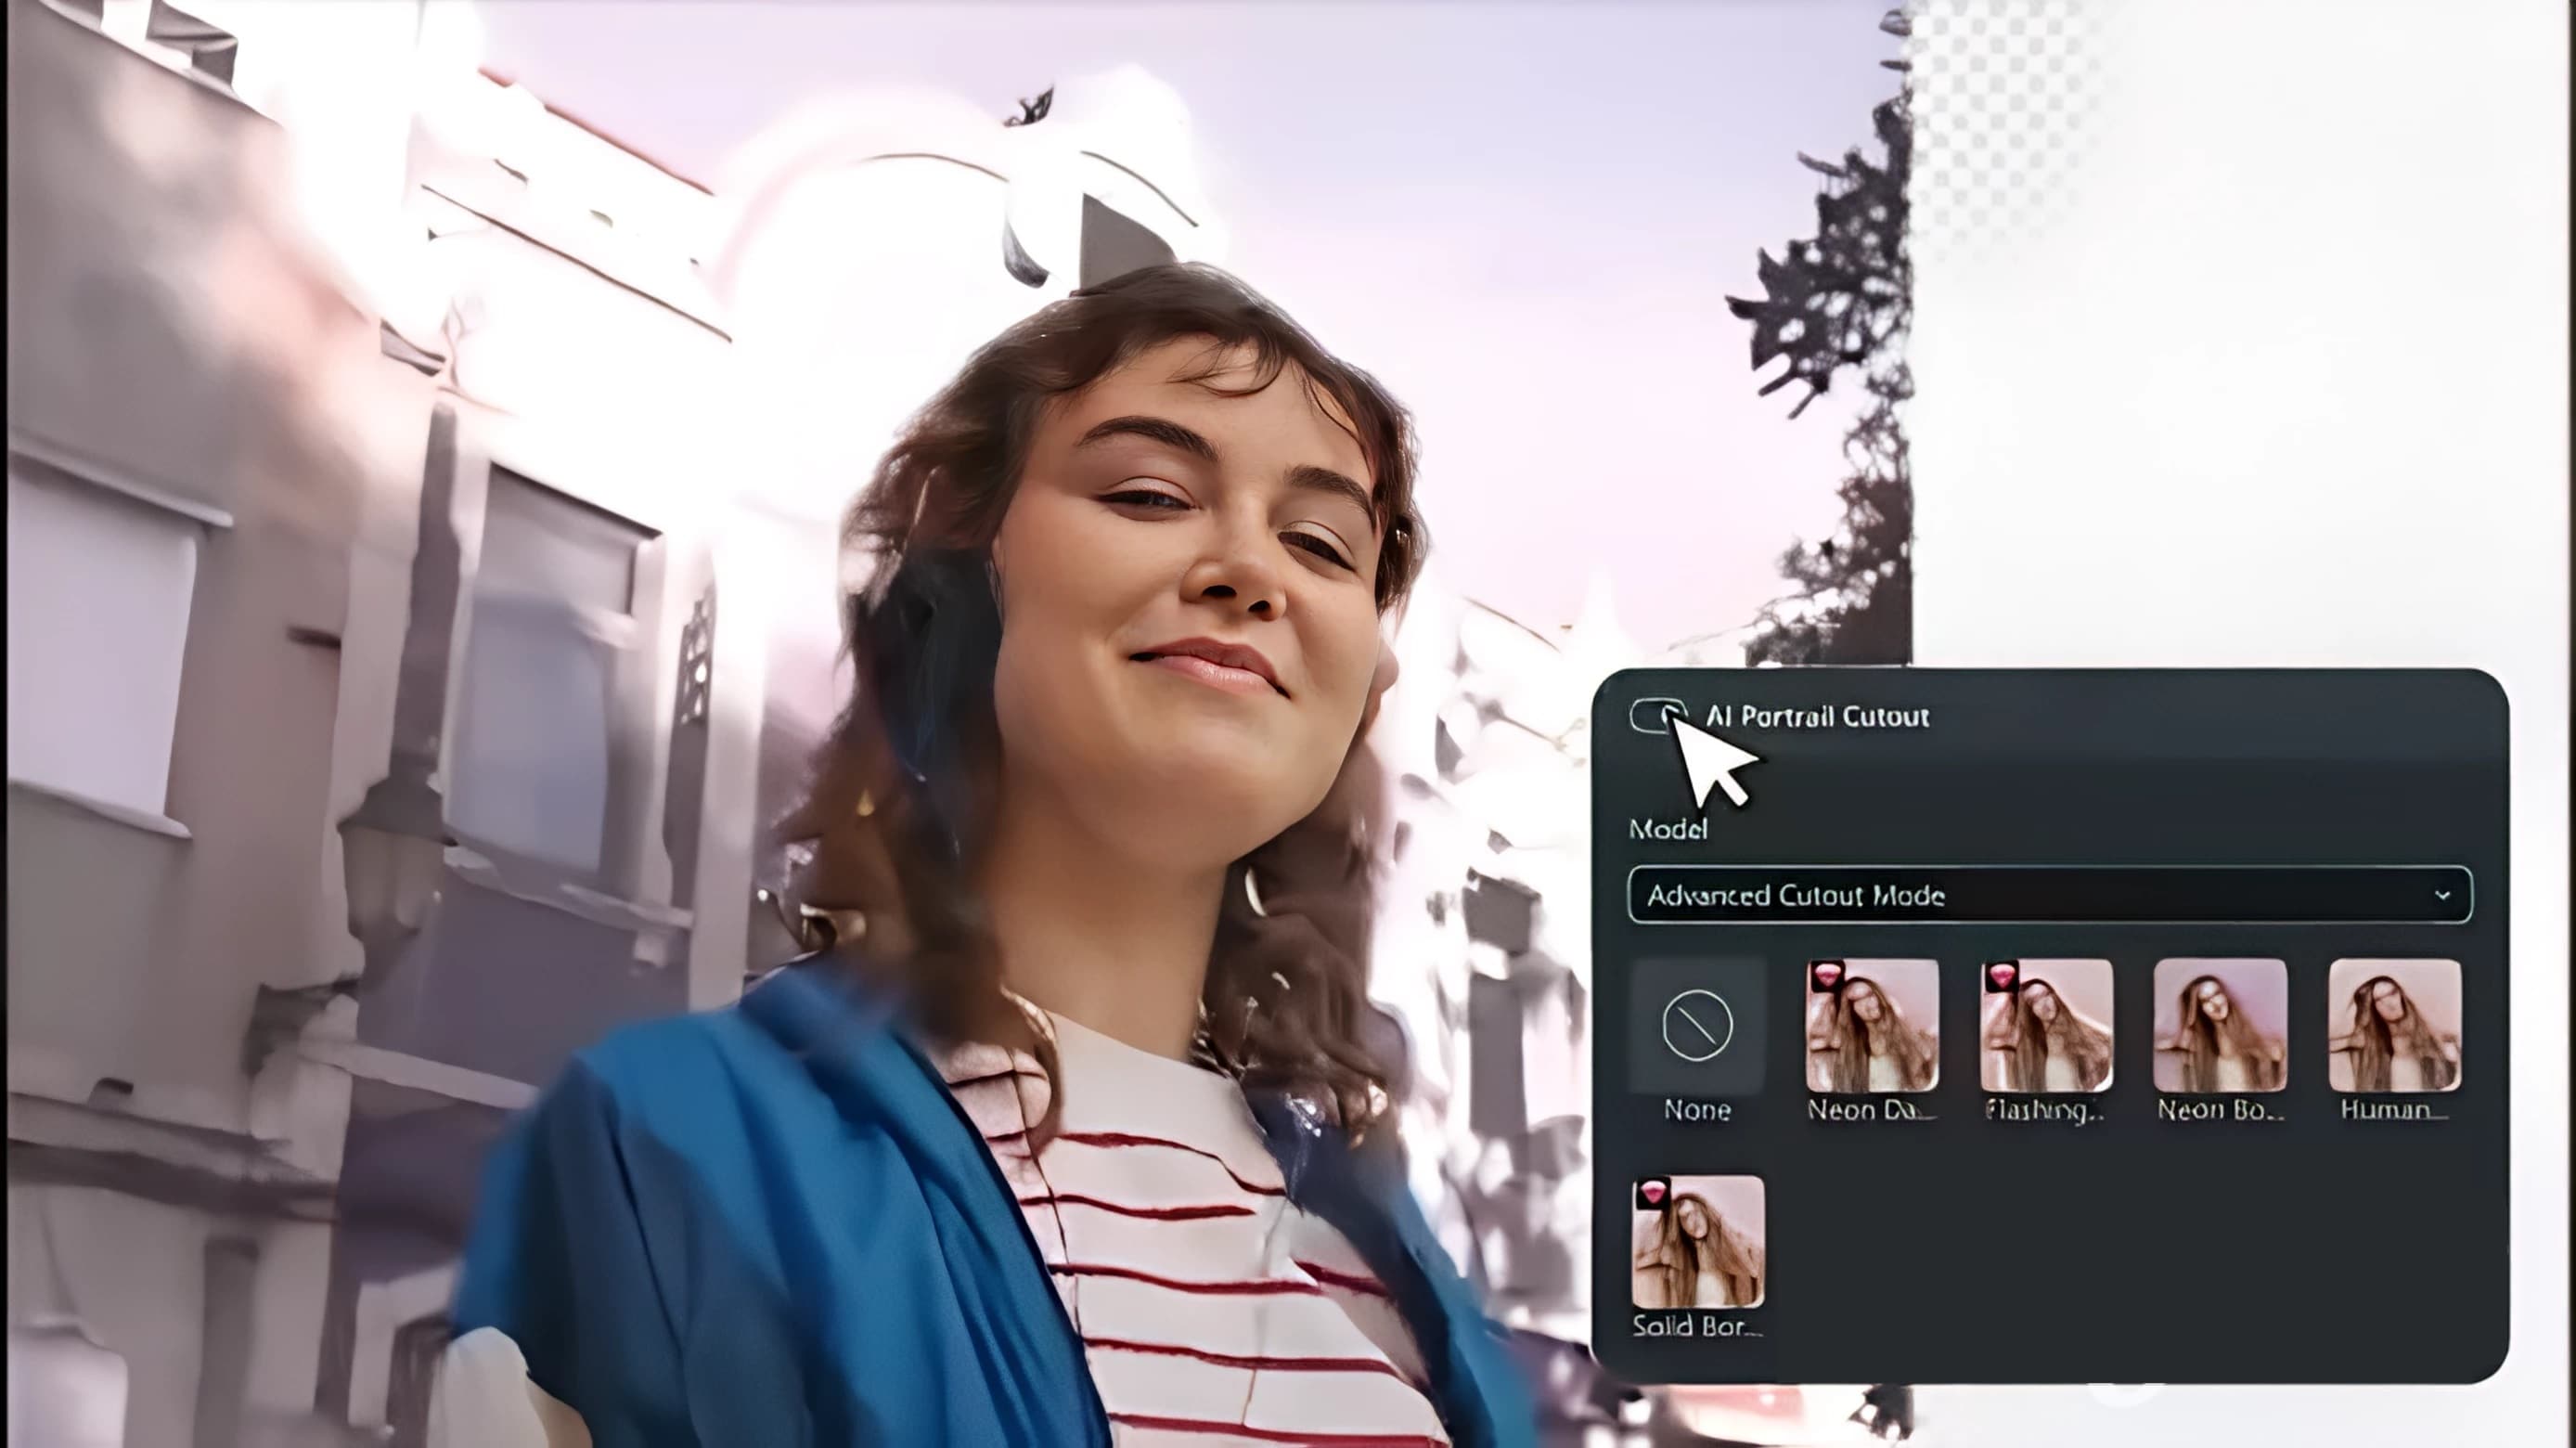
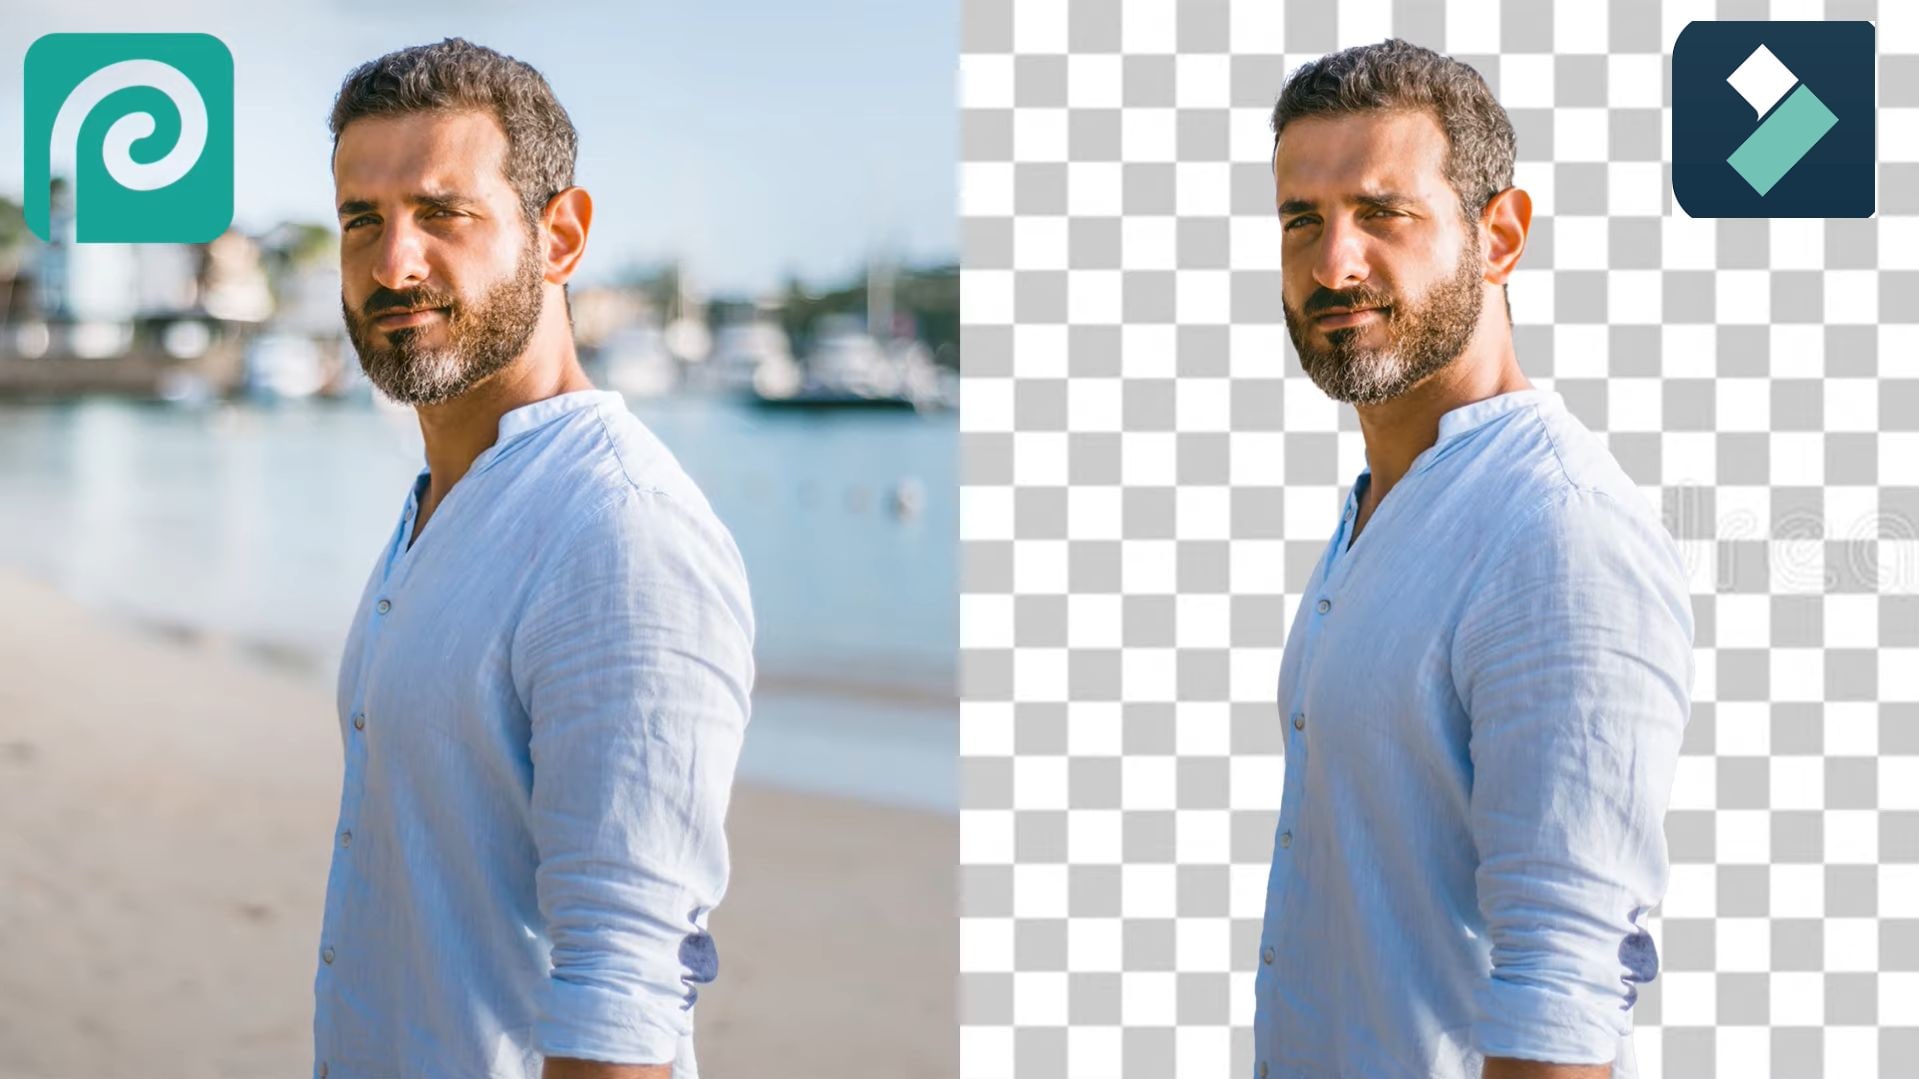
Filmora’sAI Portrait Cutoutinstantly detects people in photos and removes the background. Powered by advanced AI, so you get precise results with minimal effort while editing your video or photo.
How to Remove Background Automatically Using Filmora
Here’s how to remove a background from a photo in just a few clicks.
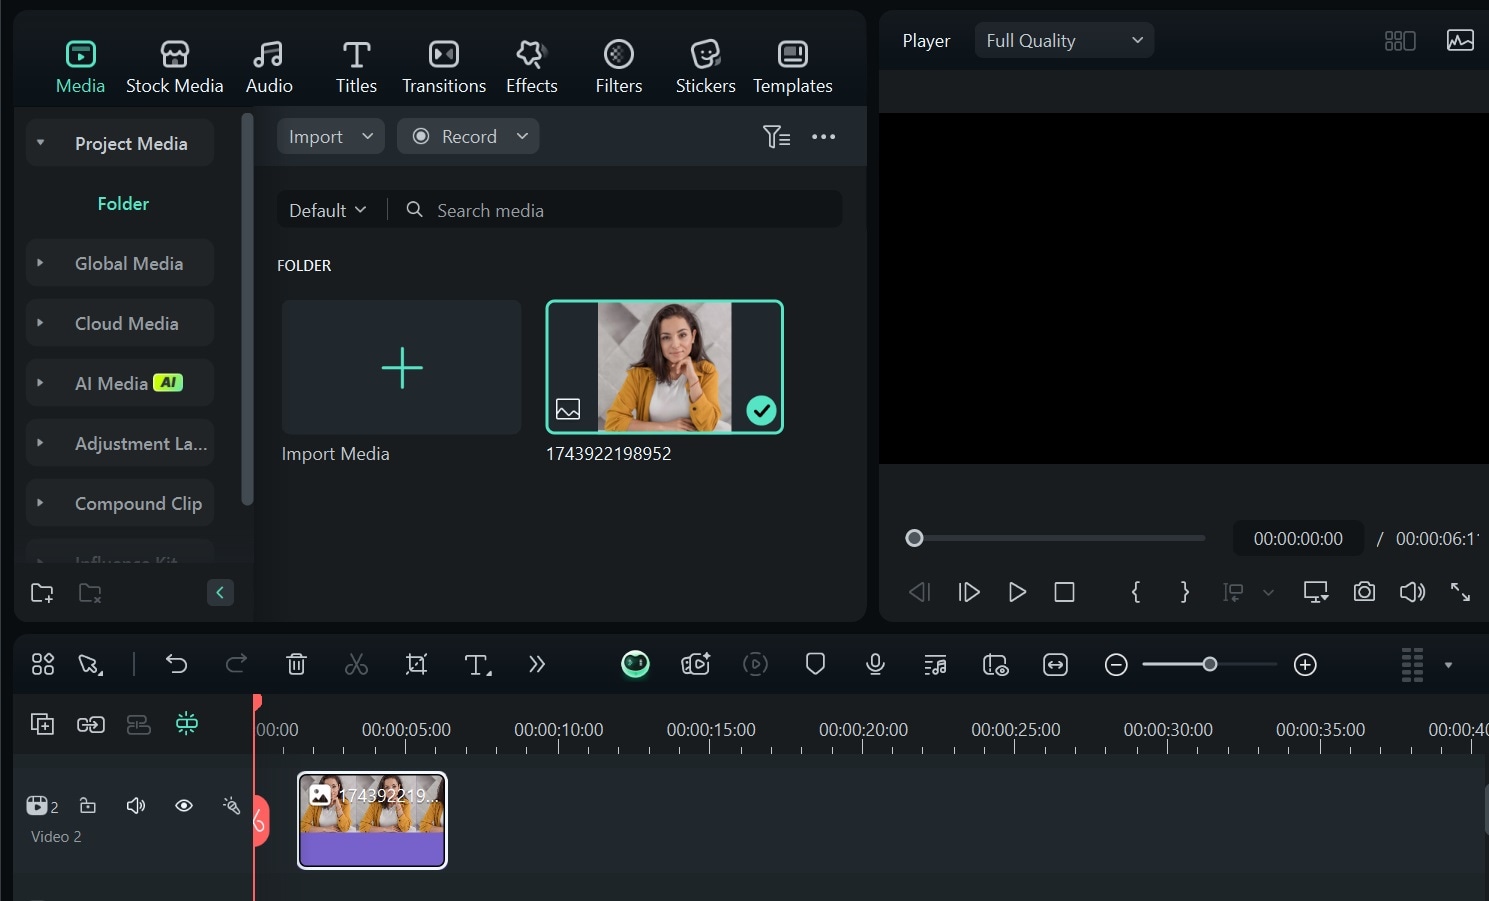
- Step 1: Open Filmora and import your photo.
- Drag and drop your image on the timeline.
 secure download

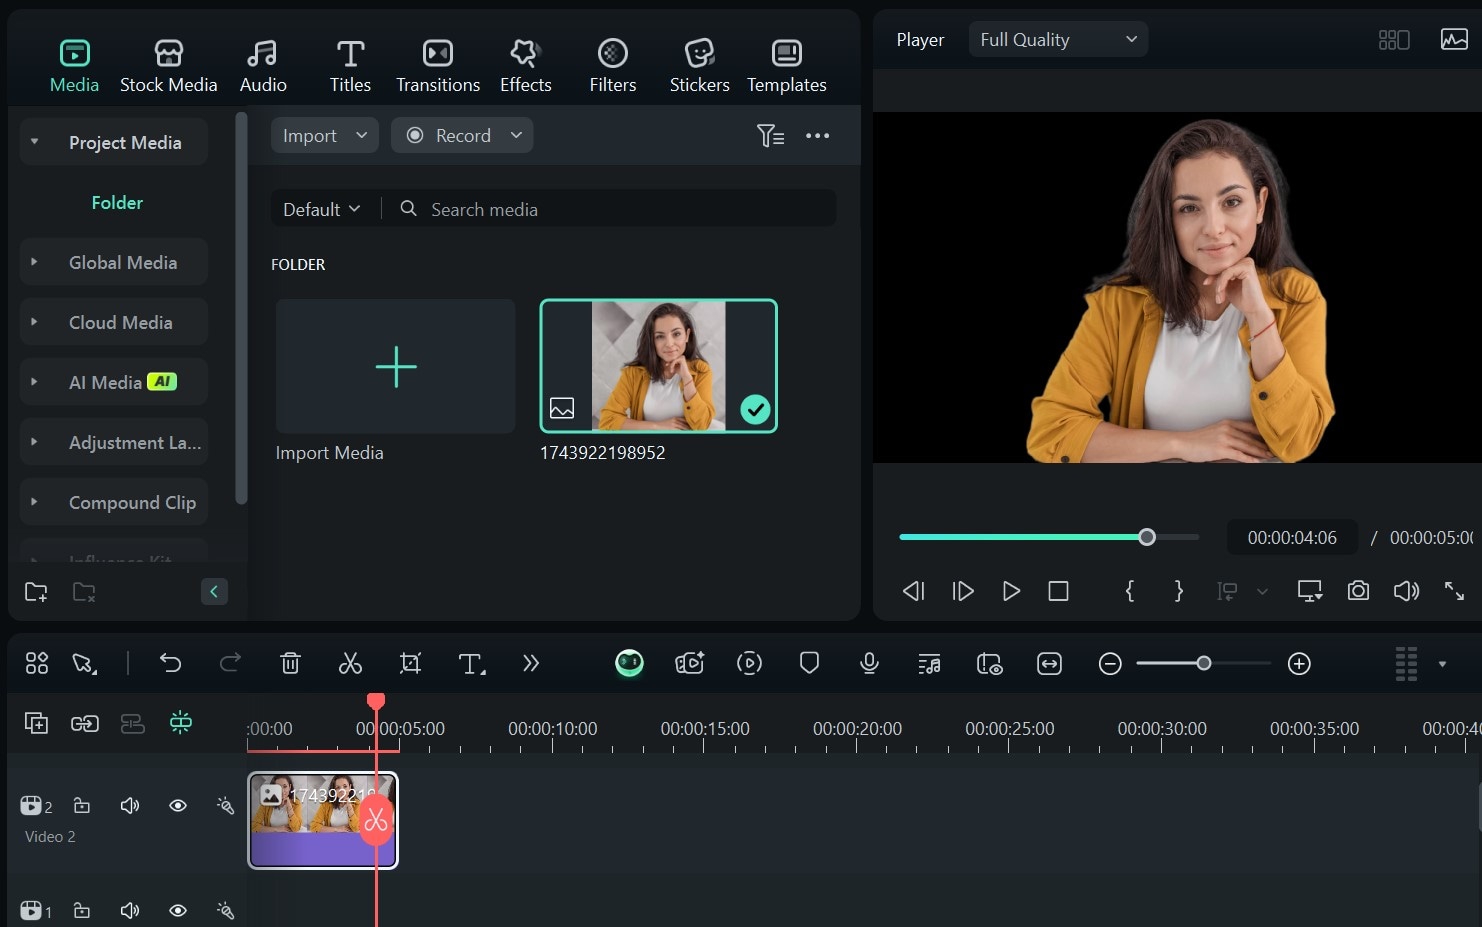
- Step 2: Apply AI Portrait Cutout.
- Go to Tools > Videos and select AI Portrait Cutout.
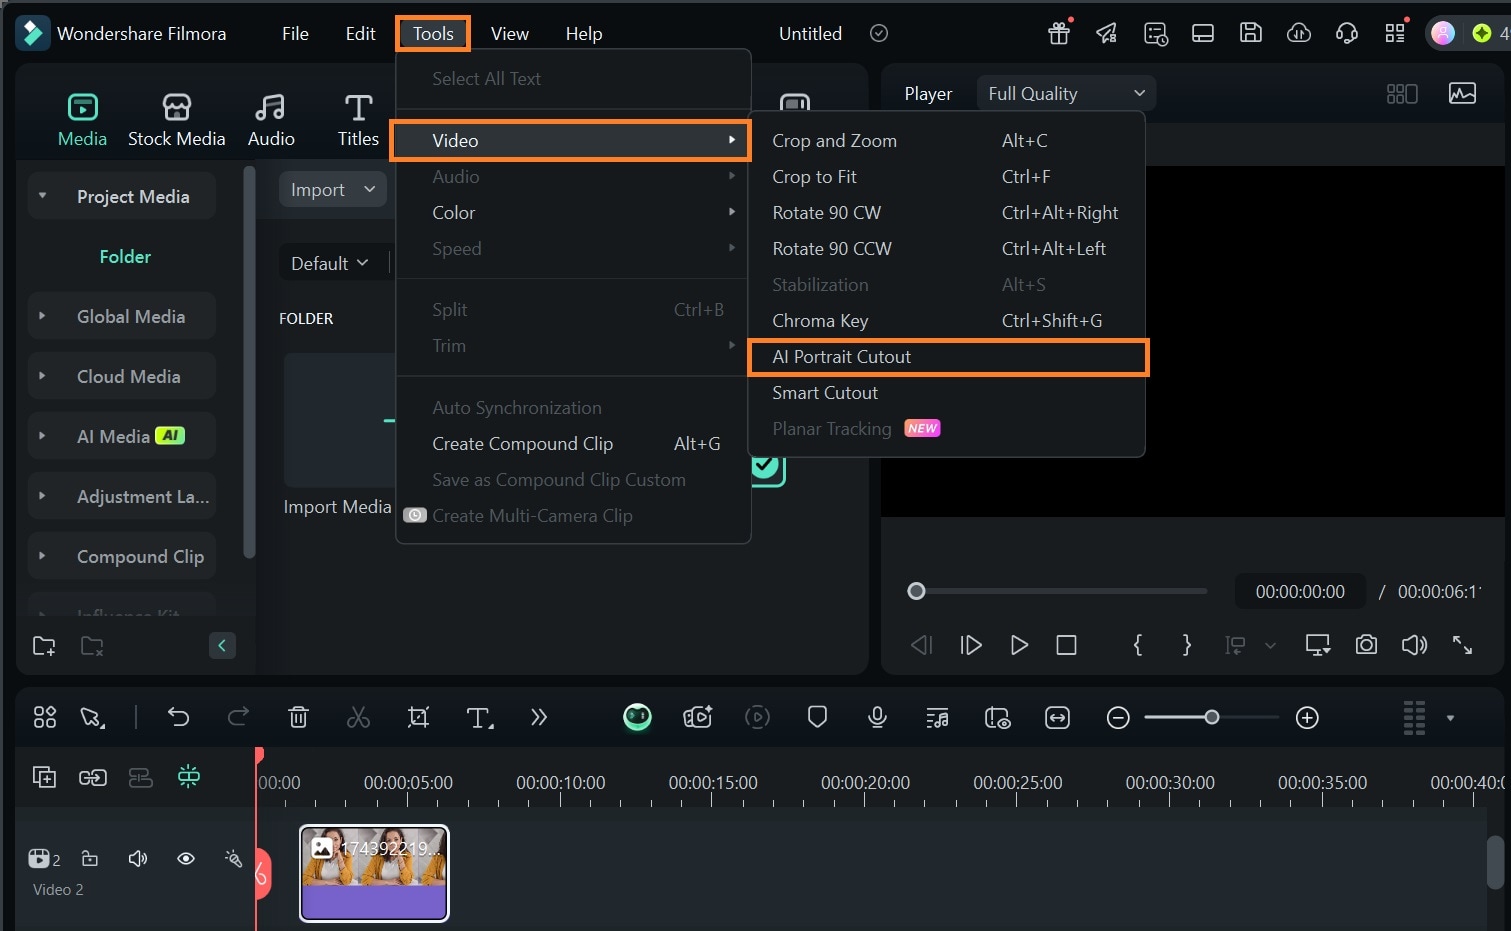
- Step 3: Filmora automatically removes the background of your photo to give a clean image. Export your photo in HD.
Part 3: Should I Use Filmora or Photopea to Remove Backgrounds in Photos?
So, is Photopea or Filmora better at removing backgrounds?
Well, it really depends on what you're trying to do and how much control (or convenience) you need. Here’s a quick comparison to help you decide
| Feature / Use Case | Photopea | Filmora |
| Type of Tool | Image editor | Video target="_blank" rel="noopener" photo editor with AI tools |
| Background Removal Style | Manual target="_blank" rel="noopener" Auto BG Erasers | Automatic (AI Portrait Cutout, Smart Cutout) |
| Ease of Use | Moderate | Very easy |
| Precision | Low for mobile app. Slightly High for online editor | High (with Smart Cutout refinement) |
| Mobile Support | Mobile app and online editor | Available on desktop and mobile (best experience on desktop) |
| Supports Video Background Removal | ❌ | ✅ Yes, with AI Portrait for videos |
| File Format Support | PSD, PNG, JPG, SVG, etc. | JPG, PNG, and common video formats |
| Price | Free and paid for some features include background removal on the online editor. | Free (with credits) and paid plans for full features. Free trial for new users. |
Bonus: Remove Other Unwanted Distractions in Photos with Filmora
Sometimes, removing an image's background with Photopea or Filmora is not enough, as backgrounds aren't the only thing that can ruin a good photo. Sometimes, it's a stray object, a random person in the background, or even a power line cutting through the sky.
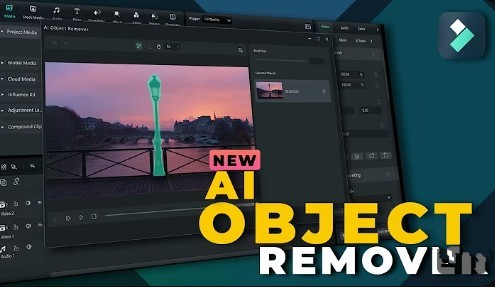
That’s where Filmora’s AI Object Remover comes in handy. Whether you’re using the mobile app or desktop version, Filmora makes it super easy to erase distractions with just a few taps or clicks.
How to Remove Objects Using Filmora’s AI Object Remover on a Phone
Here’s how to remove unwanted objects with Filmora on your phone.
- Step 1: Download and Open Filmora on your phone.
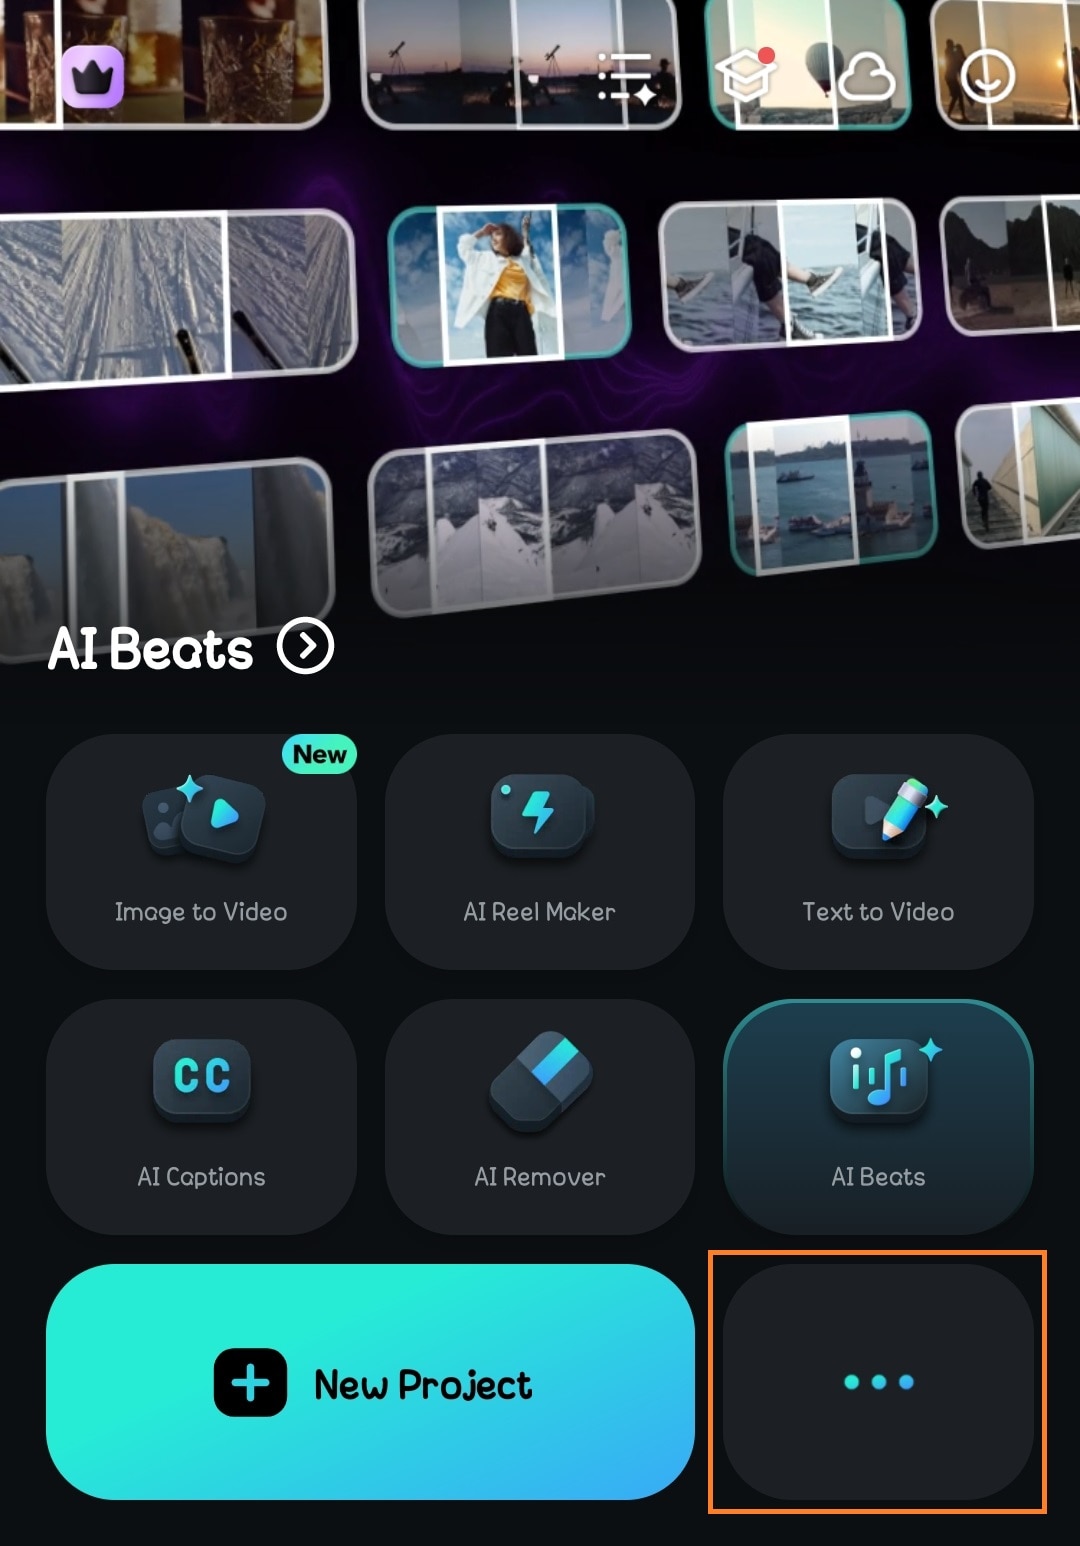
- On the home screen, click on New Project and upload your photo.
 secure download
 - Step 2 (optional): Select the AI Object Remover Tool.
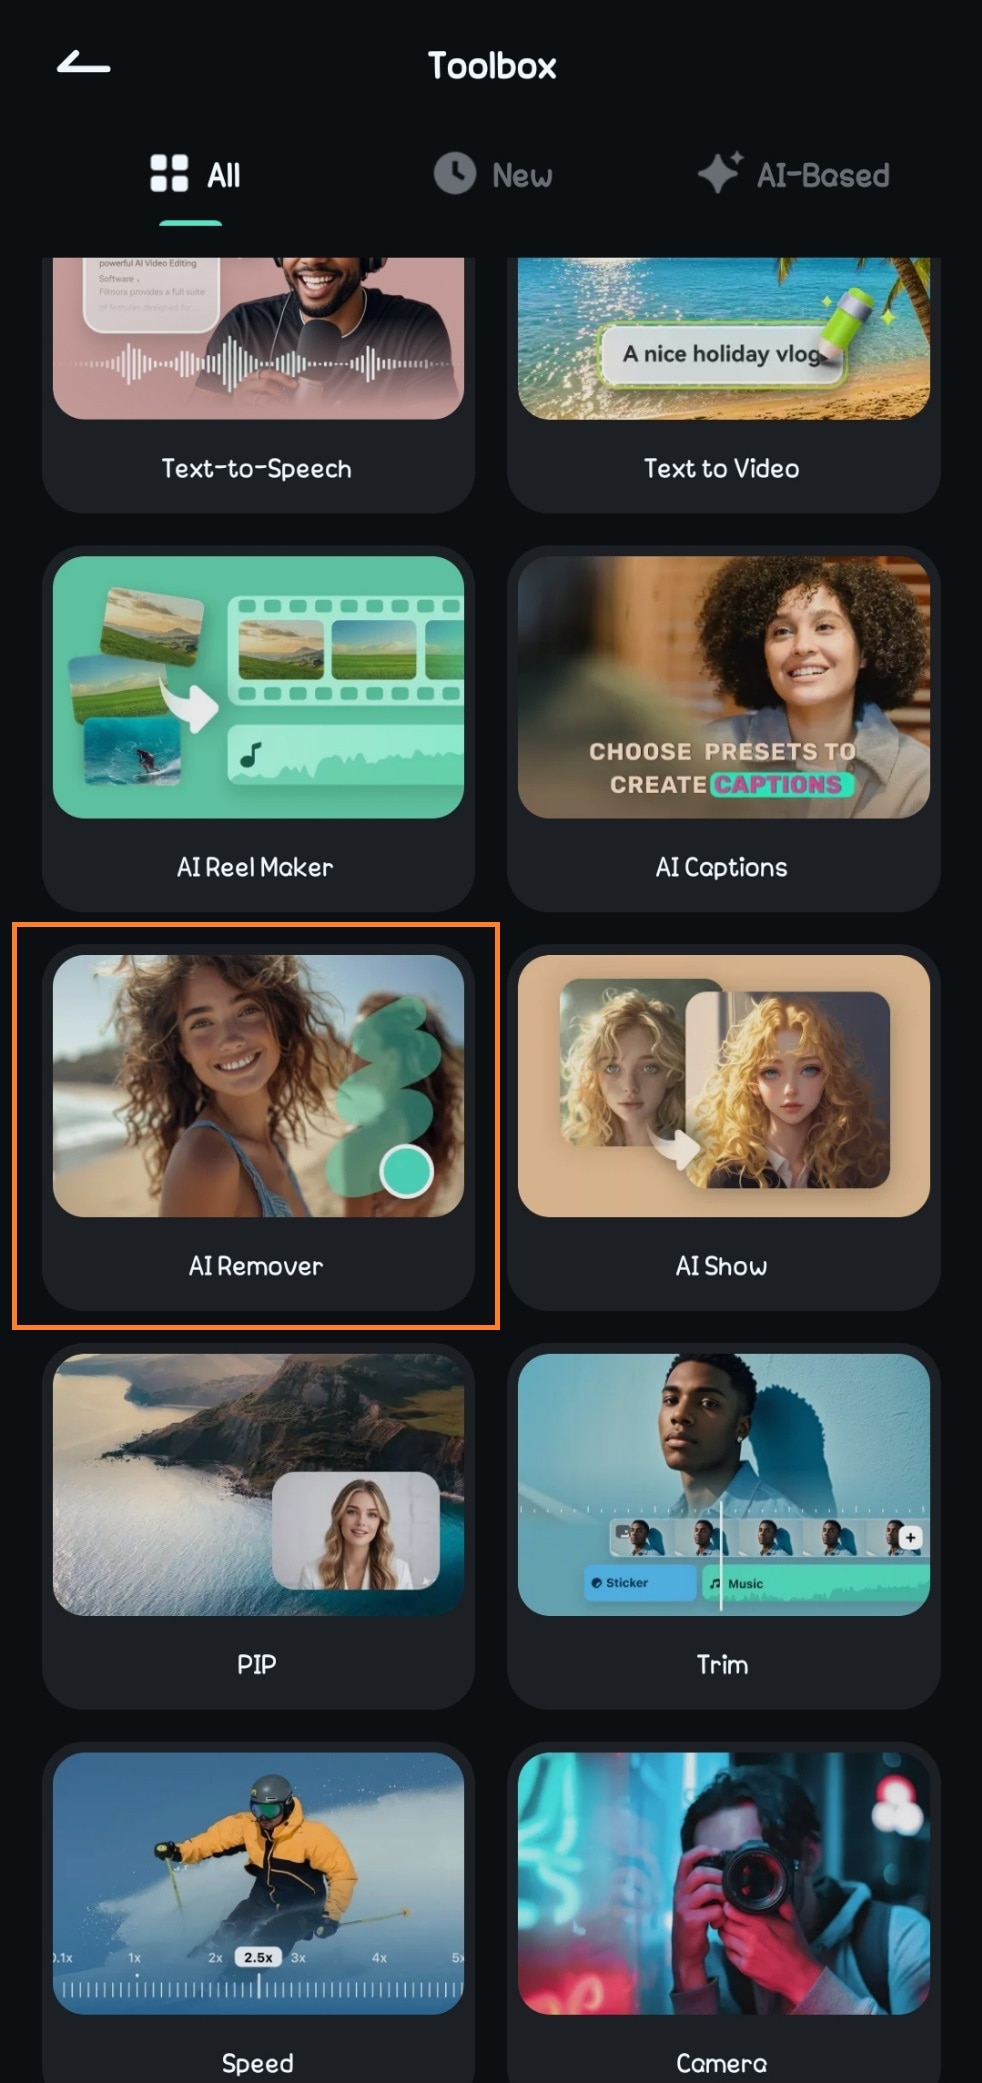
- Go to the AI Tools section and choose AI Remover.
- Then, select the photo you want to remove the object from and upload it.
- Step 3: Use AI Remover.
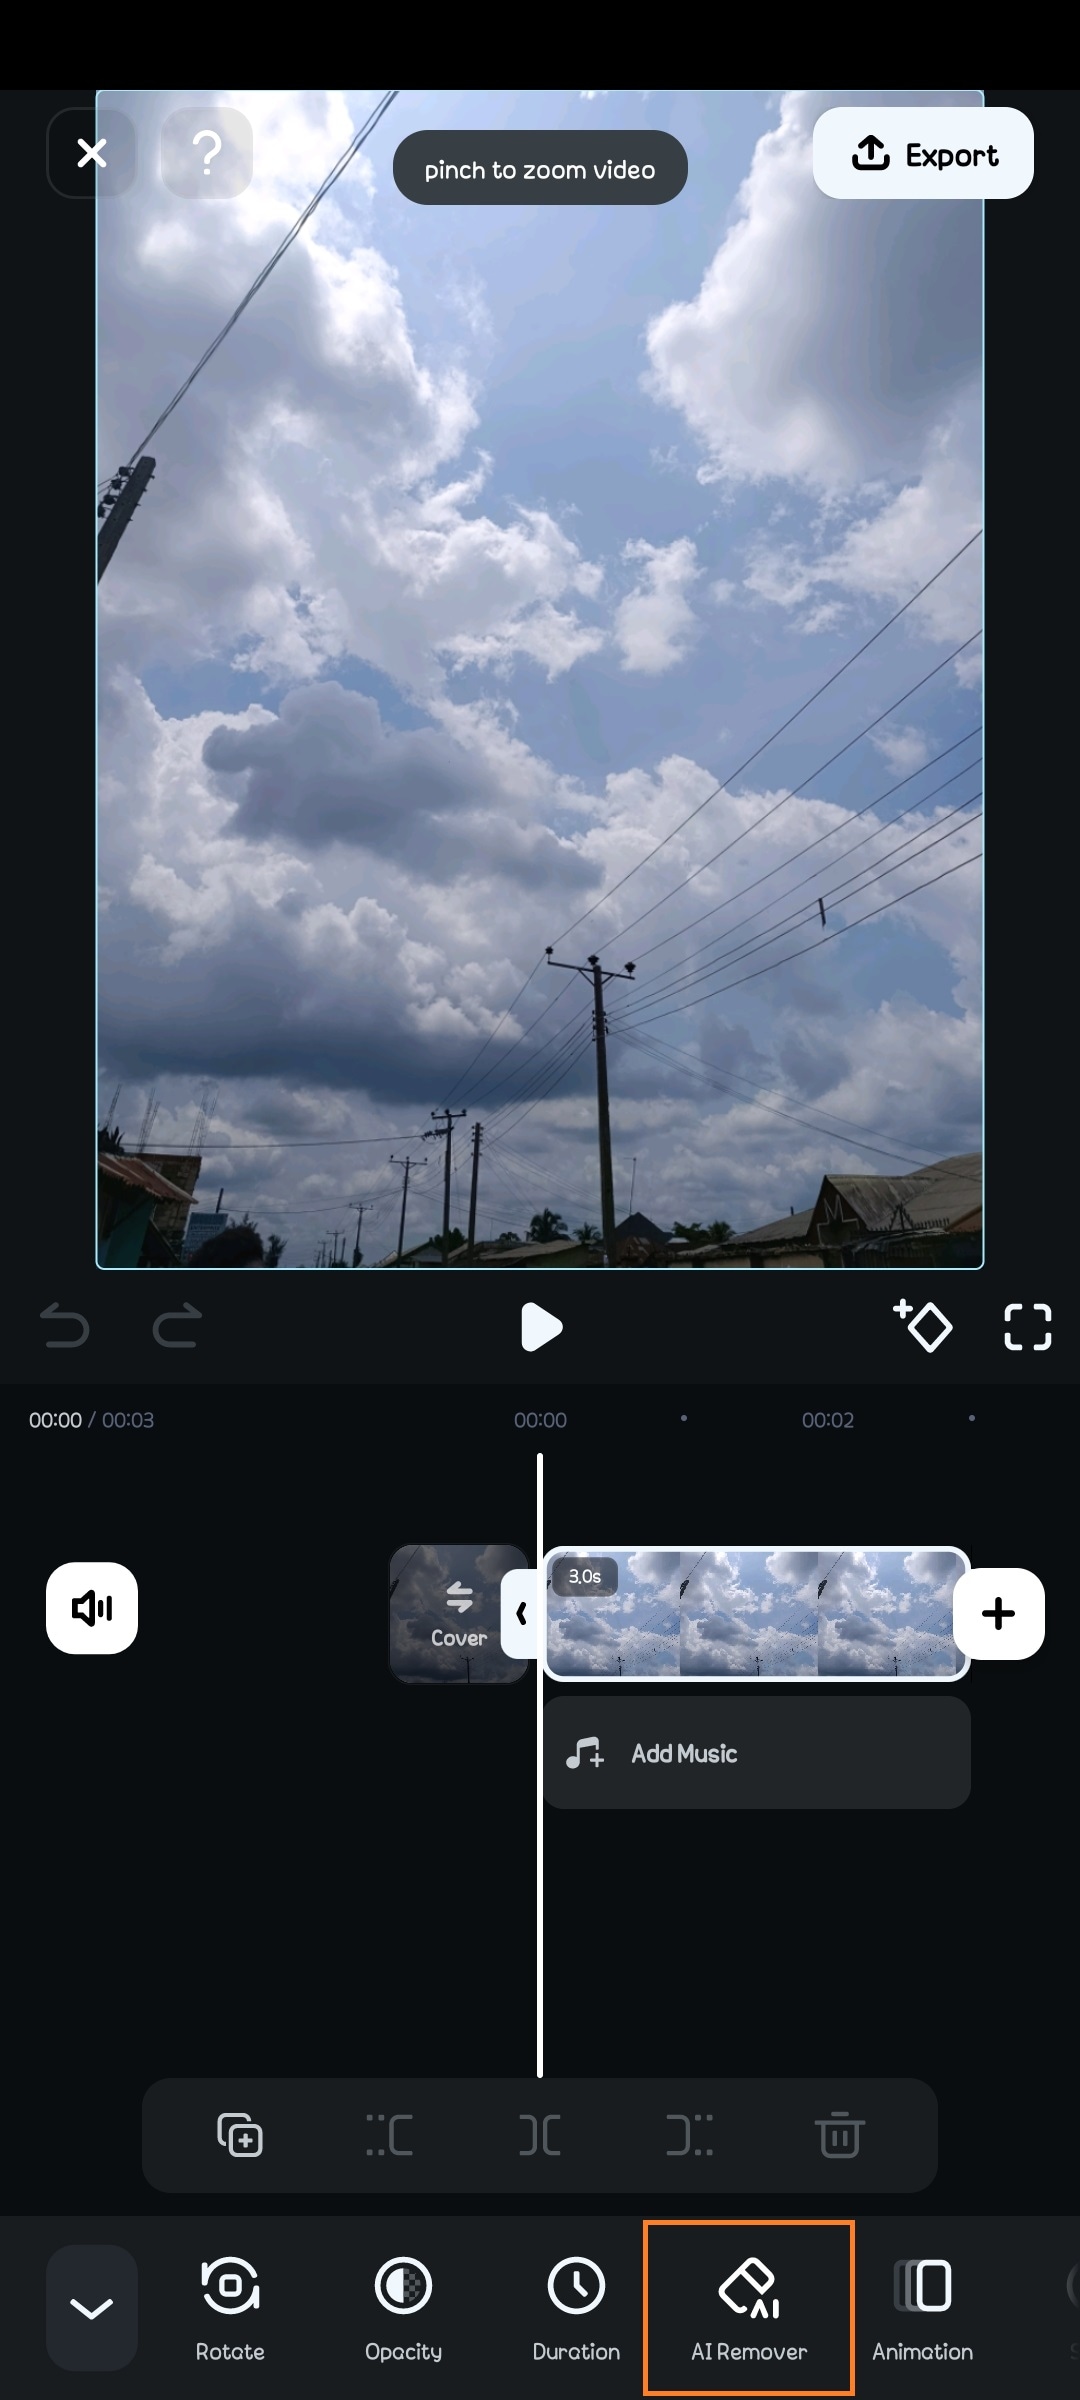
- Select the photo or video on the timeline.
- Amongst the editing options, click on AI Remover.
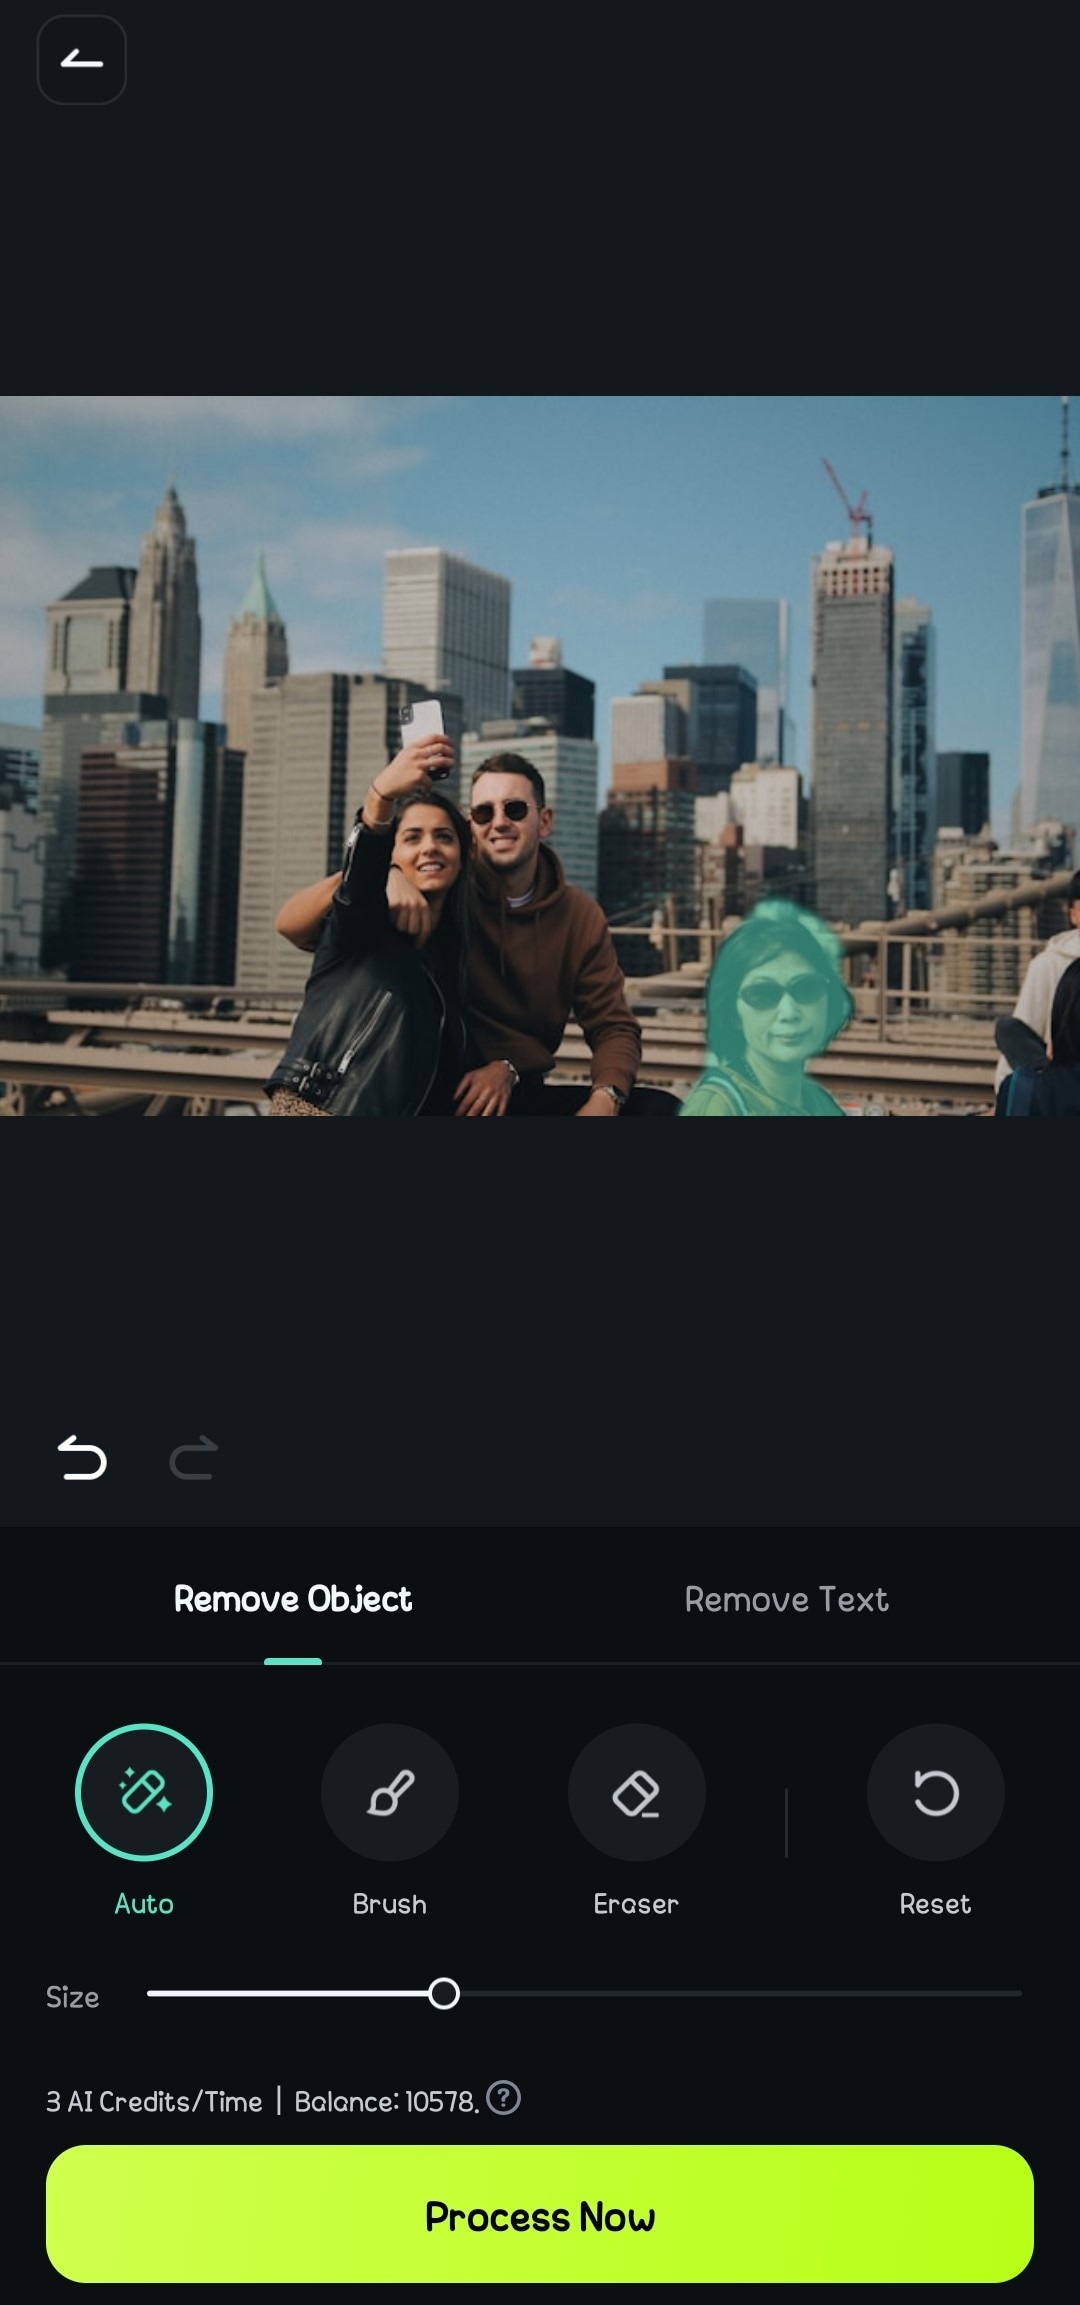
- Step 4: You can choose to remove text or objects. Choose an option that suits your needs.
- To remove objects, select a brush mode—manual or auto.
- For precision during manual removal, adjust the brush size to match the object to be removed.
- Brush over the unwanted object—Use your finger to highlight the object or person you want to erase.
- Once you’re done, click on Process Now.
Filmora’s AI will remove all the highlighted objects and fill in the erased area to blend naturally with the surroundings.
How to Remove Objects Using Filmora’s AI Object Remover on Desktop
Here’s how to use the tool on a PC.
- Step 1: Open Filmora on your computer.
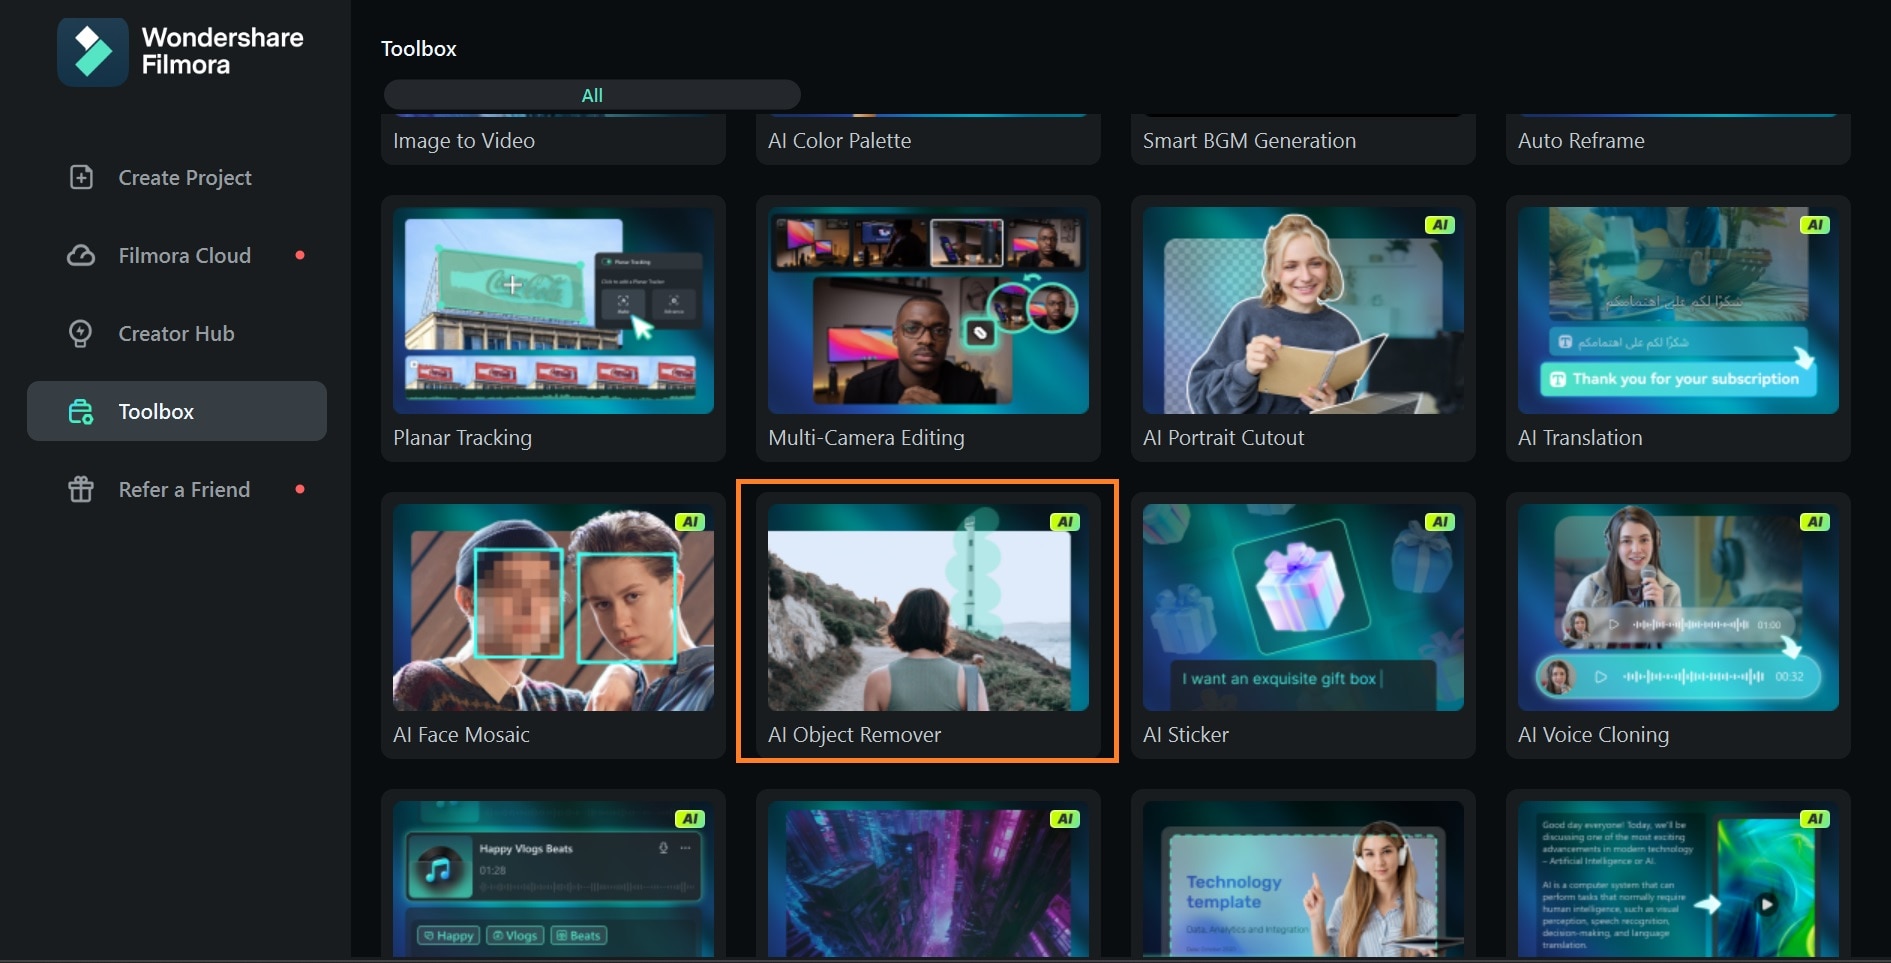
- Go to Toolboxon the Filmora home screen.
- Select AI Object Removerand open your image.
 secure download
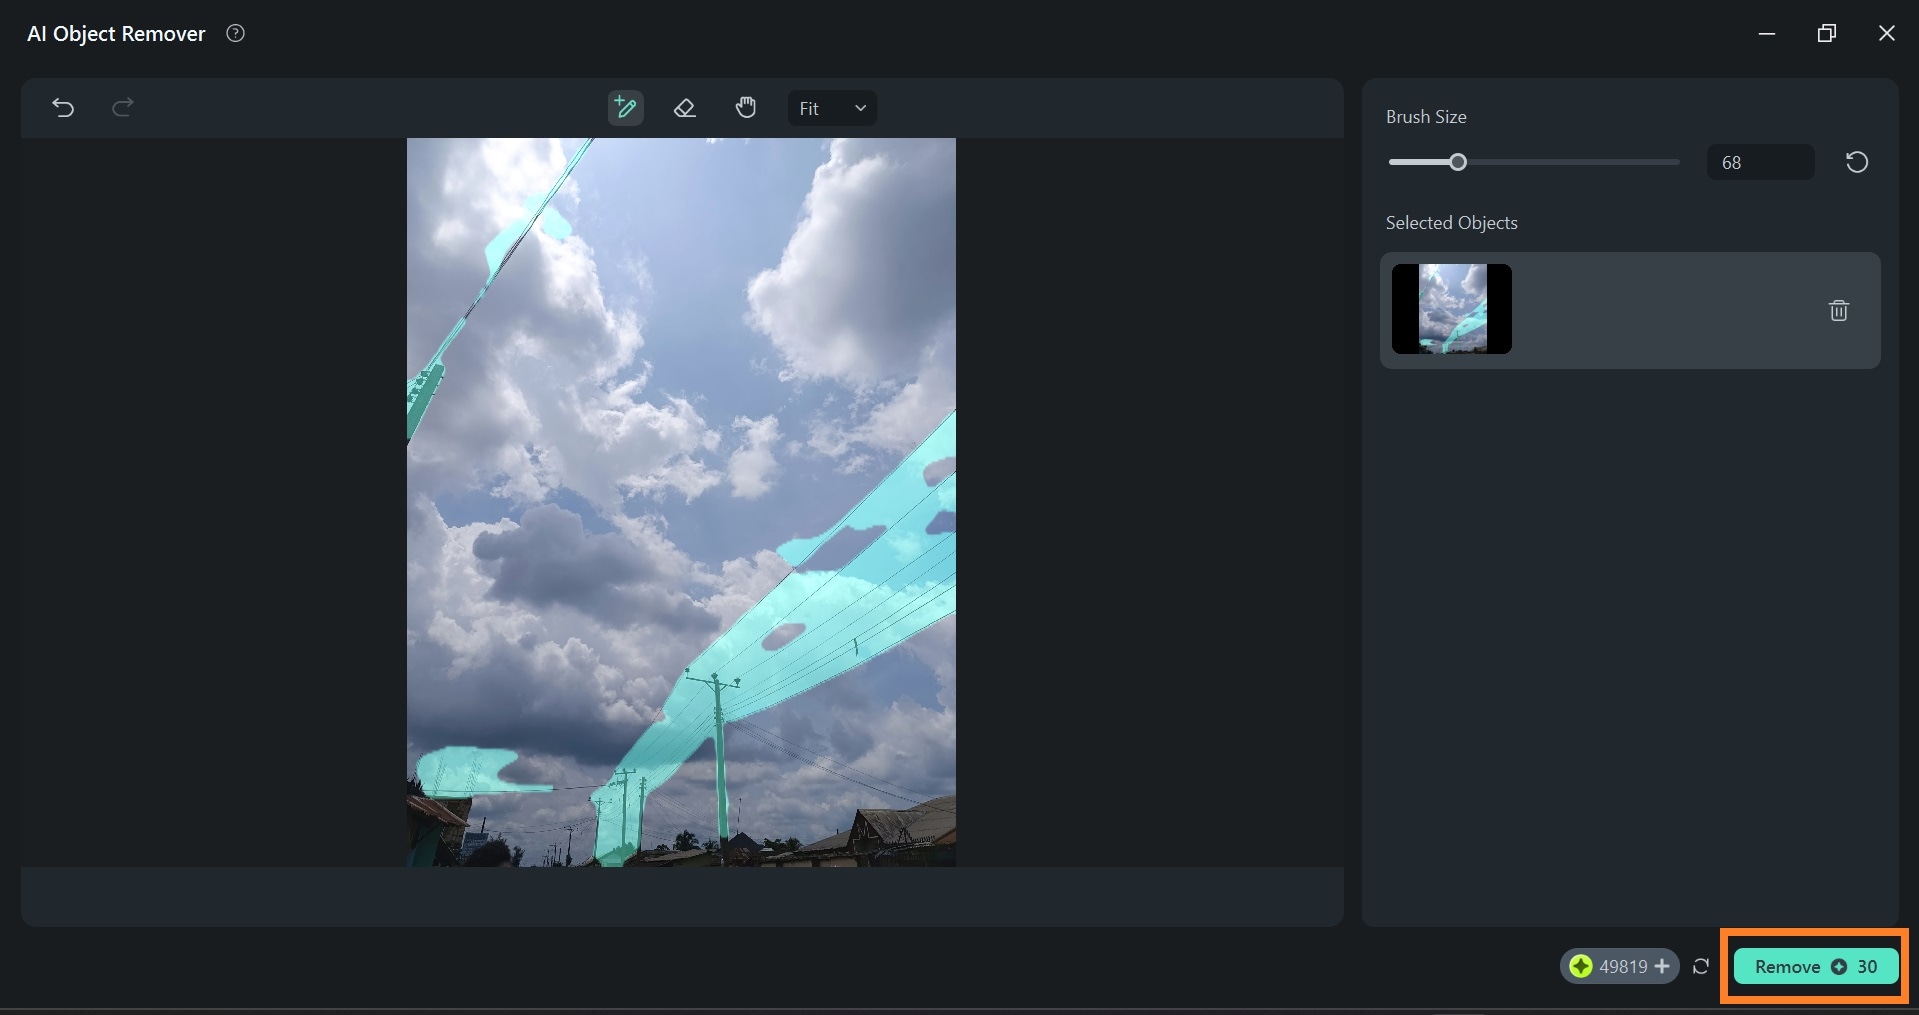
 - Step 2: Highlight the object and apply Object Remover.
- Use the selection tool to mark the unwanted object. You can fine-tune the edges for better accuracy and adjust the brush size for more precision.
- ClickRemove.
If you already have your photo or video on the dashboard and want to remove an object while editing, simply right-click on the image on the timeline and select AI Object Remover.
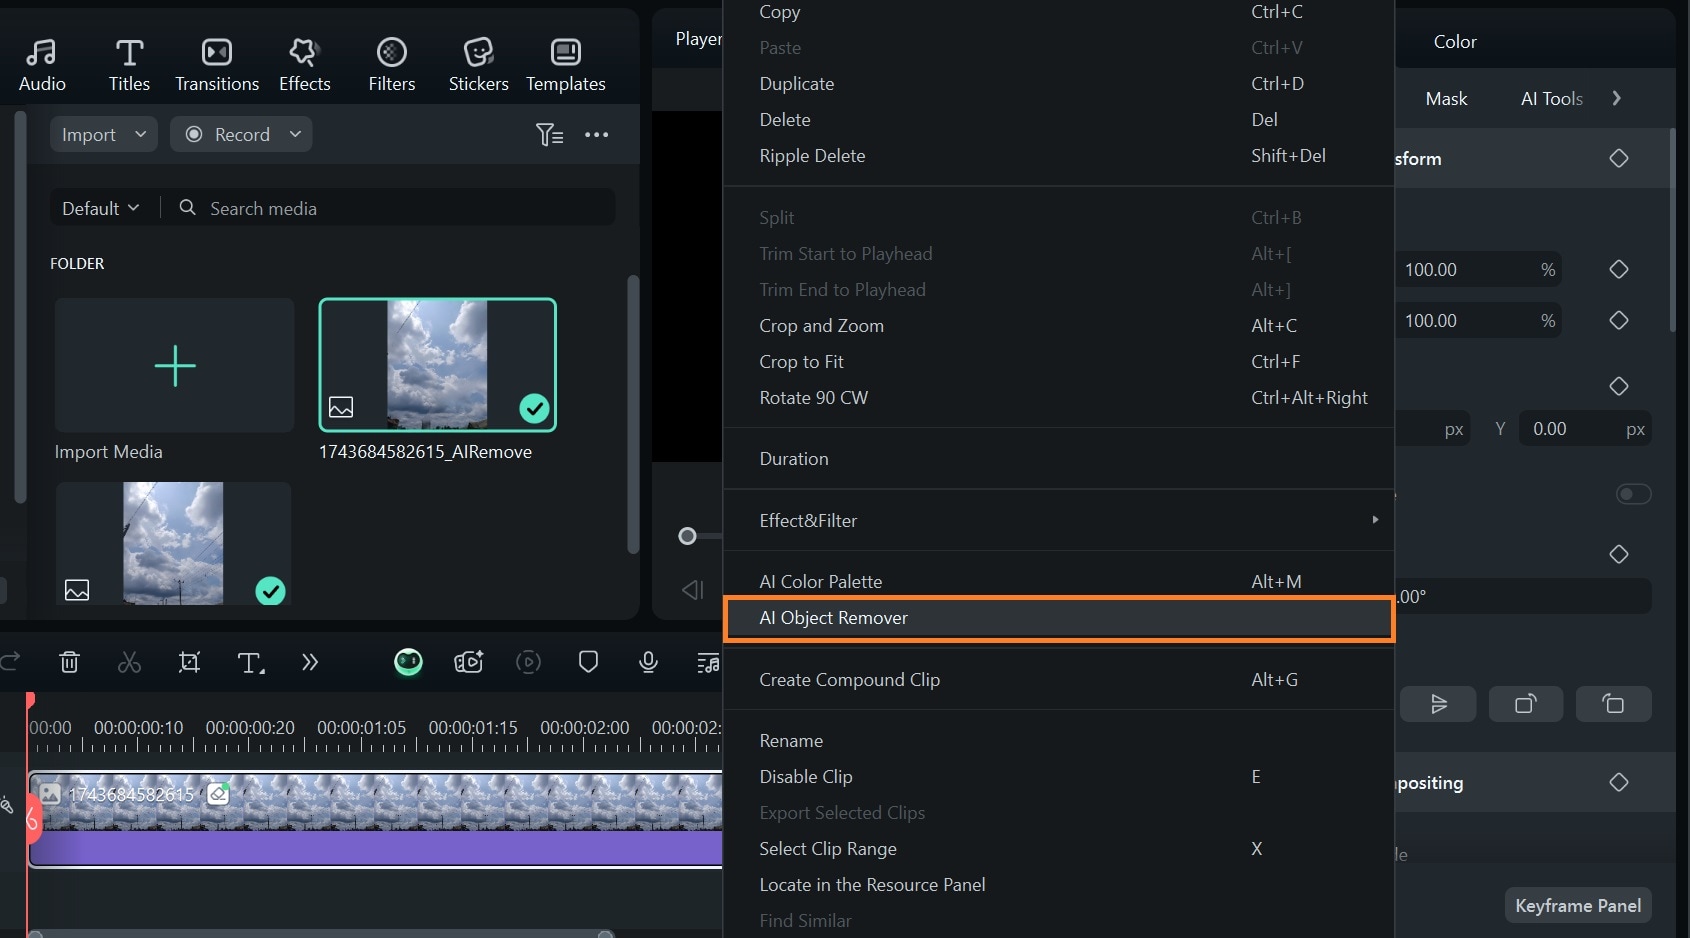
Your edited photo will automatically be updated on the editing dashboard.
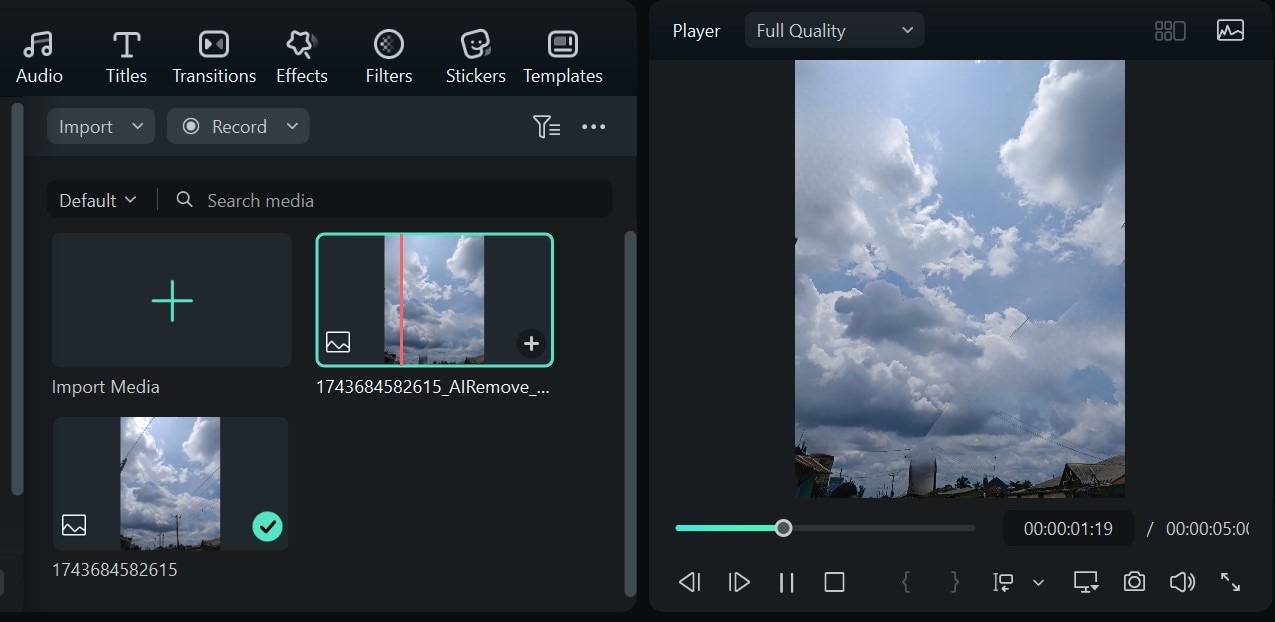
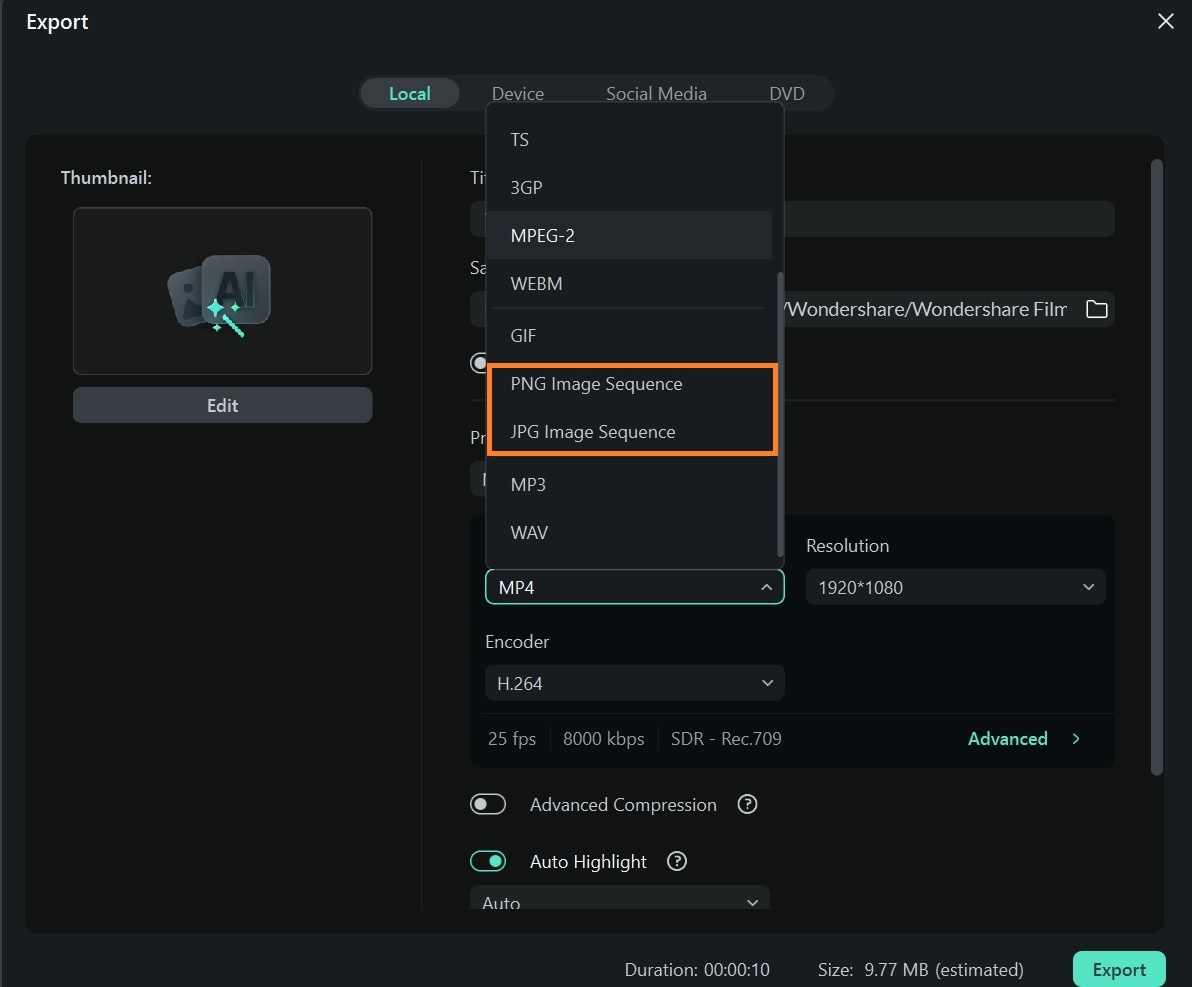
- Step 3: Export the final image.
- Once you’re satisfied with the result, export the image in your desired resolution.
- Ensure you set the media format to JPG or PNG to avoid exporting your image as a video.
- Remove unwanted objects from videos & images in seconds.
- No manual masking—AI does the hard work for you.
- Preserve background quality with smart auto-fill.
- Works seamlessly on Windows, Mac, iOS & Android.

Conclusion
Learning how to remove backgrounds in Photopea helps you to make detailed, custom edits without relying on expensive software. It’s a great option if you prefer hands-on control.
But if speed, simplicity, and precision are your top priorities, Filmora’s AI-powered background and object removal tools can save you a ton of time while delivering clean, professional results.
Ultimately, the best choice depends on your workflow and goals, but now that you know the strengths of each, you’re ready to tackle any background with confidence!
