
 100% Security Verified | No Subscription Required | No Malware


 ChatGPT
 Perplexity
 Gemini
 Claude
 Grok
Grok
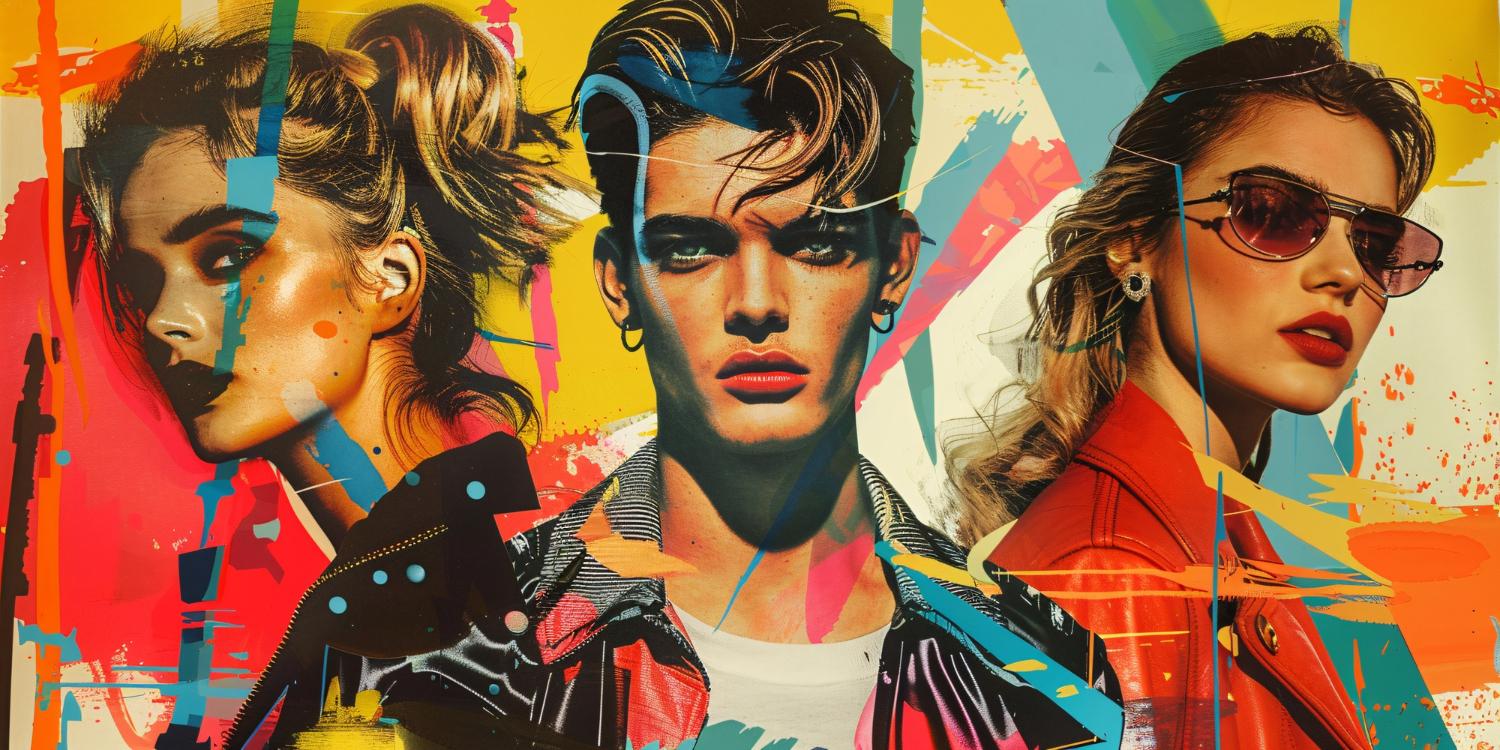
Are you a fan of Andy Warhol's Marilyn Diptych or Roy Lichtenstein's comic-style illustrations? That vibrant and playful aesthetic is trending again, but this time, it's gone digital. Creators on Instagram, TikTok, and Pinterest are embracing pop art filters to transform photos into retro-style masterpieces full of color, contrast, and some of them are inspired by old comic books.
Whether you want to recreate Warhol's repeated panels, Lichtenstein's halftone dots, or add a modern twist, this guide will walk you through everything you need to know. Let's learn how to use the pop art filter to turn photos into pop art styles.
In this article
What is a Pop Art Filter?
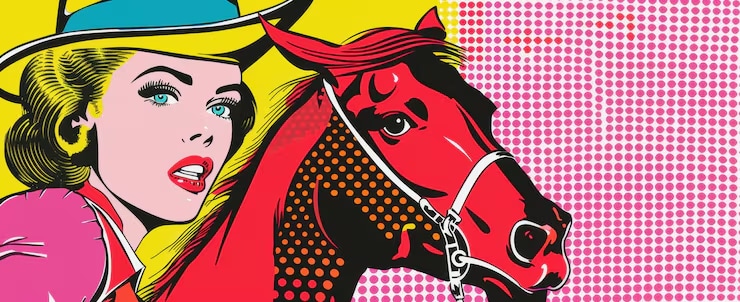
A pop art filter is an AI tool that applies visual effects inspired by the 1950s and 1960s pop art movement. People use it to give their photos a high-energy look that resembles classic old-school comic books. These filters mimic signature characteristics of the style, such as saturated colors, usually primary palettes that pop, thick edges and outlines that exaggerate features, or halftone dot patterns, which can be excellent if you are planning on printing.
There are also repeated elements in tiles with different colorways. It's all about playful exaggeration, over-the-top proportions, retro vibes, and surreal contrasts.
3 Mainstream Styles of Pop Art Filters
In theory, there are three types of pop art filters. You can check out some examples below.
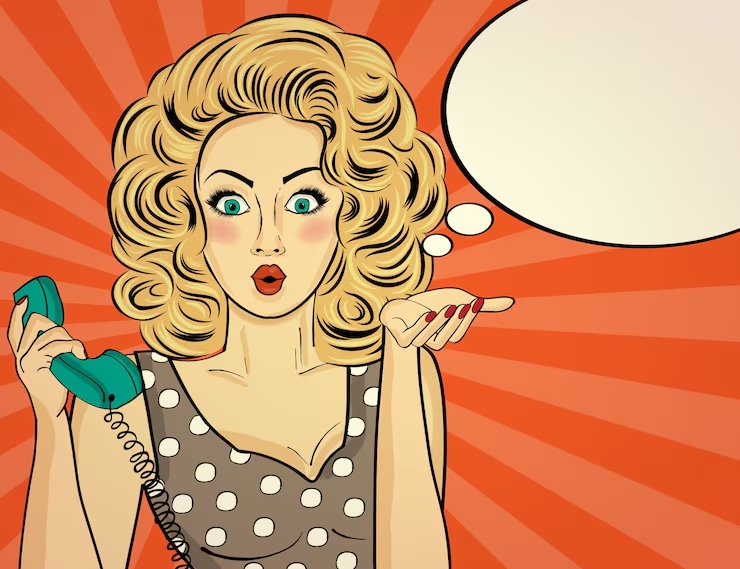
Classic Pop Art
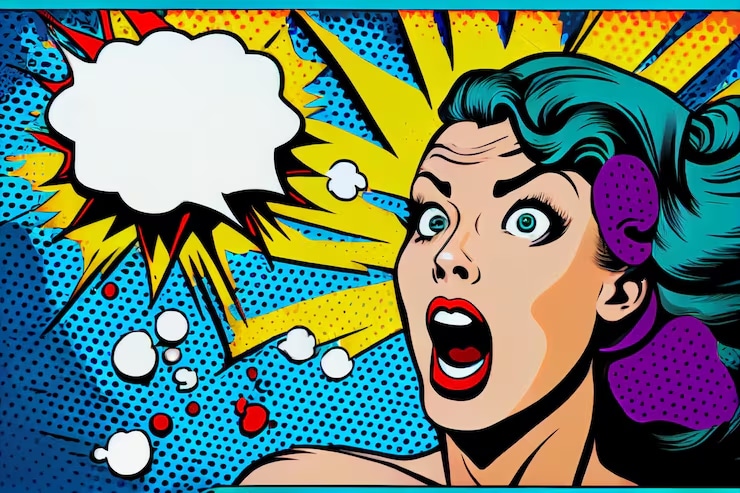
Comic Pop Art
Retro Pop Art
All of them are similar, but they differ in their primary characteristics. To help you understand the difference, we have prepared this easy table. Check it out!
| Style | Characteristics | Best For |
| Classic Pop Style | Warhol-inspired grids, flat vibrant colors, and repetition | Posters, brand visuals, bold campaigns |
| Comic Pop Style | Speech bubbles, halftone dots, comic-strip outlines | Social media edits, memes, playful portraits |
| Retro Pop Style | Vintage tones, textured overlays, muted contrasts | Nostalgic content, album covers, lifestyle blogs |
Best Tools for Pop Art Filters
There are tools that allow you to turn photos into pop art styles. Let's have a quick overview of the top tools we have picked.
| Tools | Advantages | Disadvantages | Best for |
| PicsArt | Fast, beginner-friendly presets, built-in stickers, speech bubbles, halftone overlays, and a mobile workflow for quick social posts. | The free tier has ads. | Casual creators, quick Instagram/TikTok edits, on-the-go designs. |
| Photoshop | Full control over outlines, halftones, posterization, and color panels; layer masks and smart objects; print-ready exports. | Steeper learning curve; subscription cost; | Designers/photographers, brand campaigns, high-res multi-panel Warhol grids. |
| MidJourney | Generates original pop-art imagery from prompts; infinite variations; striking comic/Warhol hybrids. | It requires a Discord workflow, a subscription for full use, prompt crafting needed, and less control over exact likeness from photos. | AI-first creatives and marketers need unique art, concept, and moodboards. |
Beginner-Friendly · Free Mobile Tool: PicsArt
PicsArt is a versatile mobile app that offers free pop art presets and creative overlays. Perfect for beginners, it gives you an instant way to turn photos into eye-catching pop art edits. Here are the easy steps to apply the pop filter using the PicsArt app.
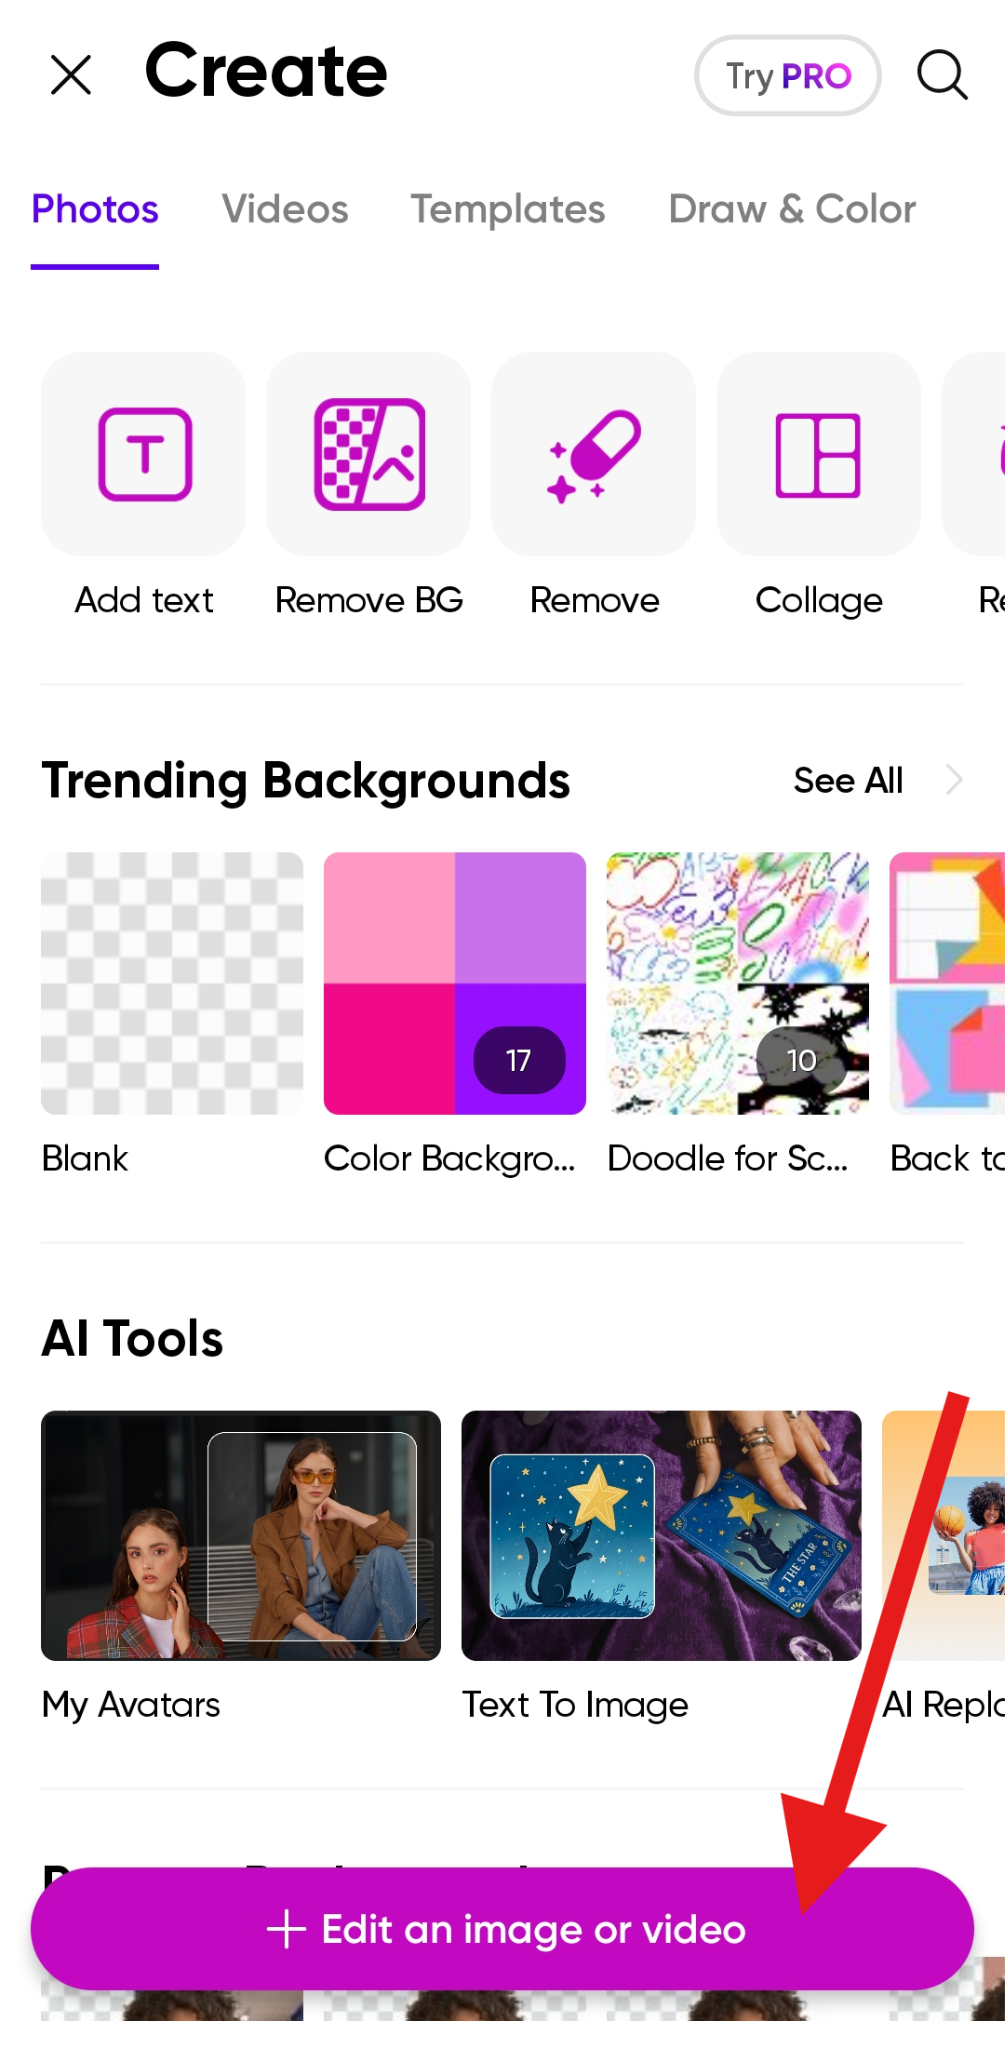
- Open the app and tap on + Edit an image or video. Then, upload a photo from your device.
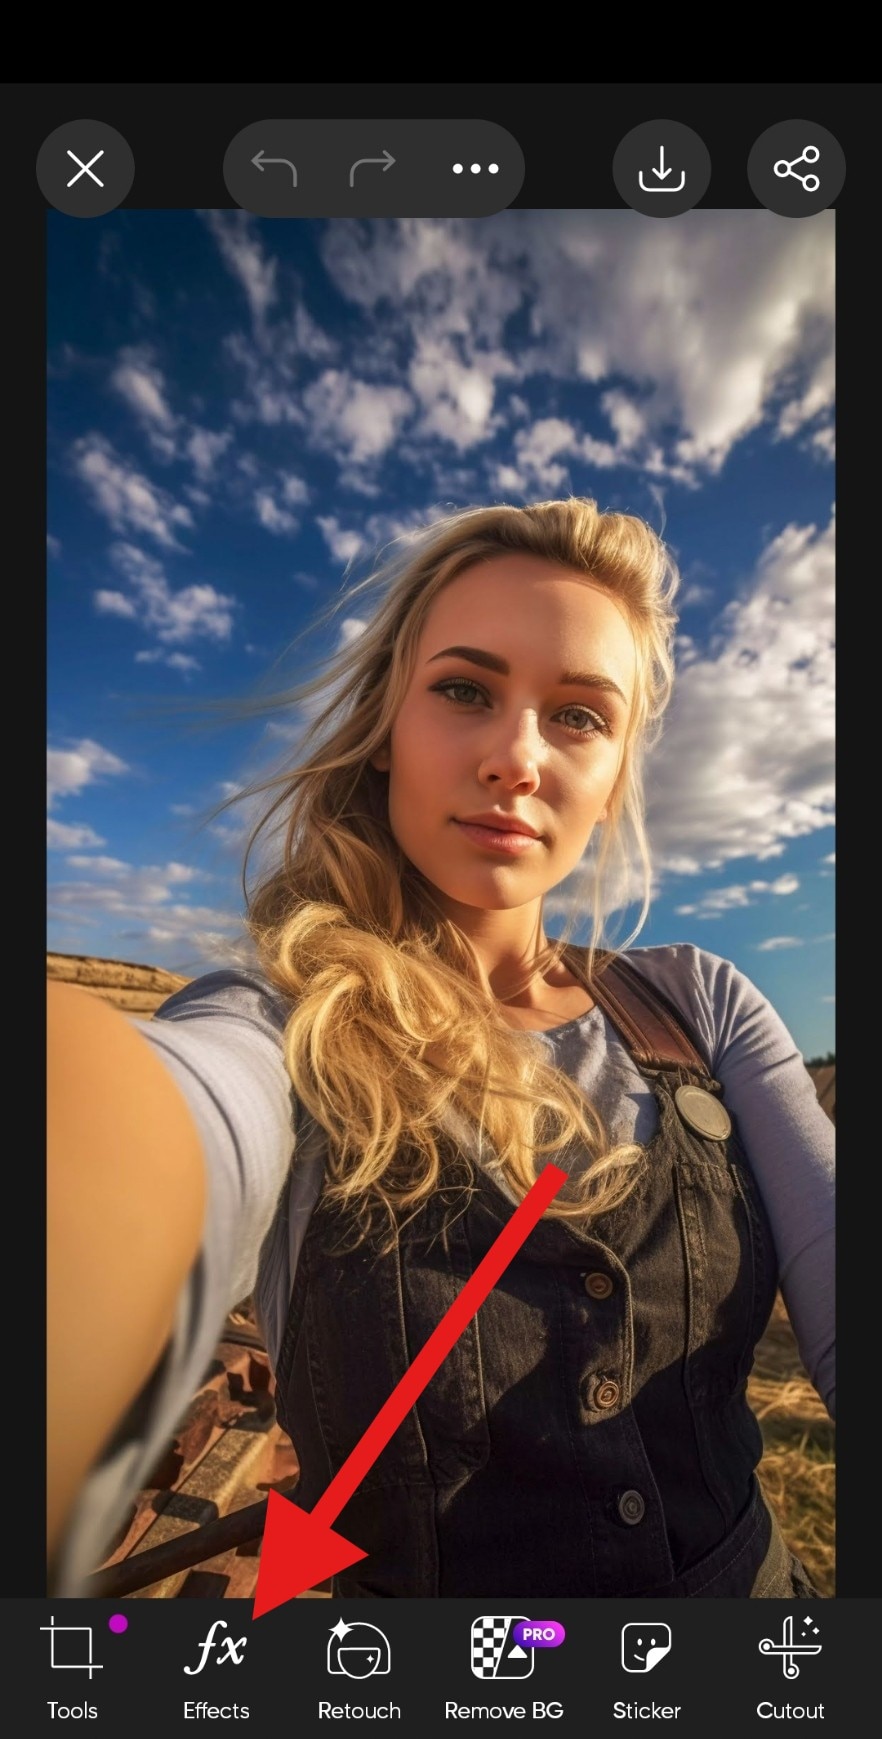
- Now, tap on the Effects tab.
- Now, go to the MAGIC category and select the Neo Pop effect. After that, you can accept the changes.
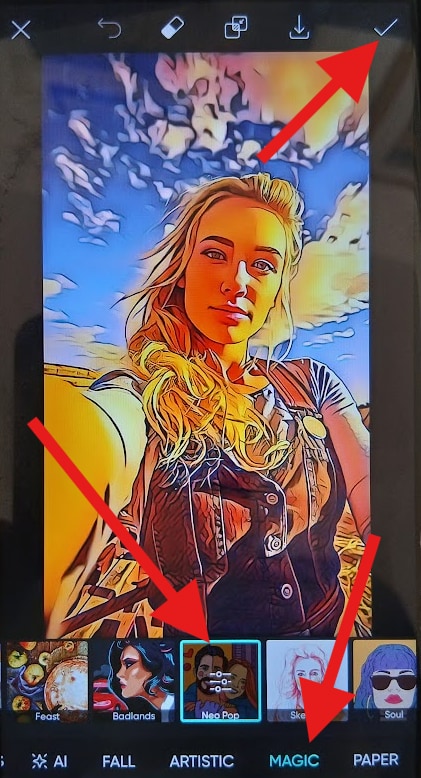
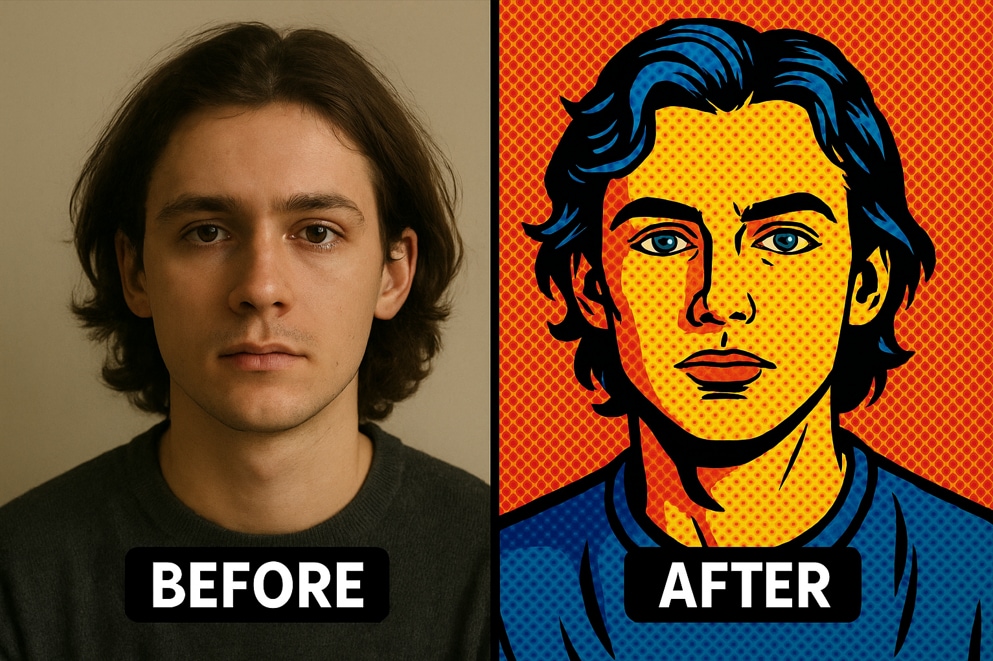
- Check out the comparison photo. The original is on the left, and the PicsArt pop art filter is on the right.

Professional-Grade · Computer Tool: Photoshop
Adobe Photoshop is a professional tool that gives you full control over your pop art transformations. Unlike apps with static presets, Photoshop lets you recreate Warhol's techniques manually for quality edits, but it's not that easy, so strap in for the tutorial below.
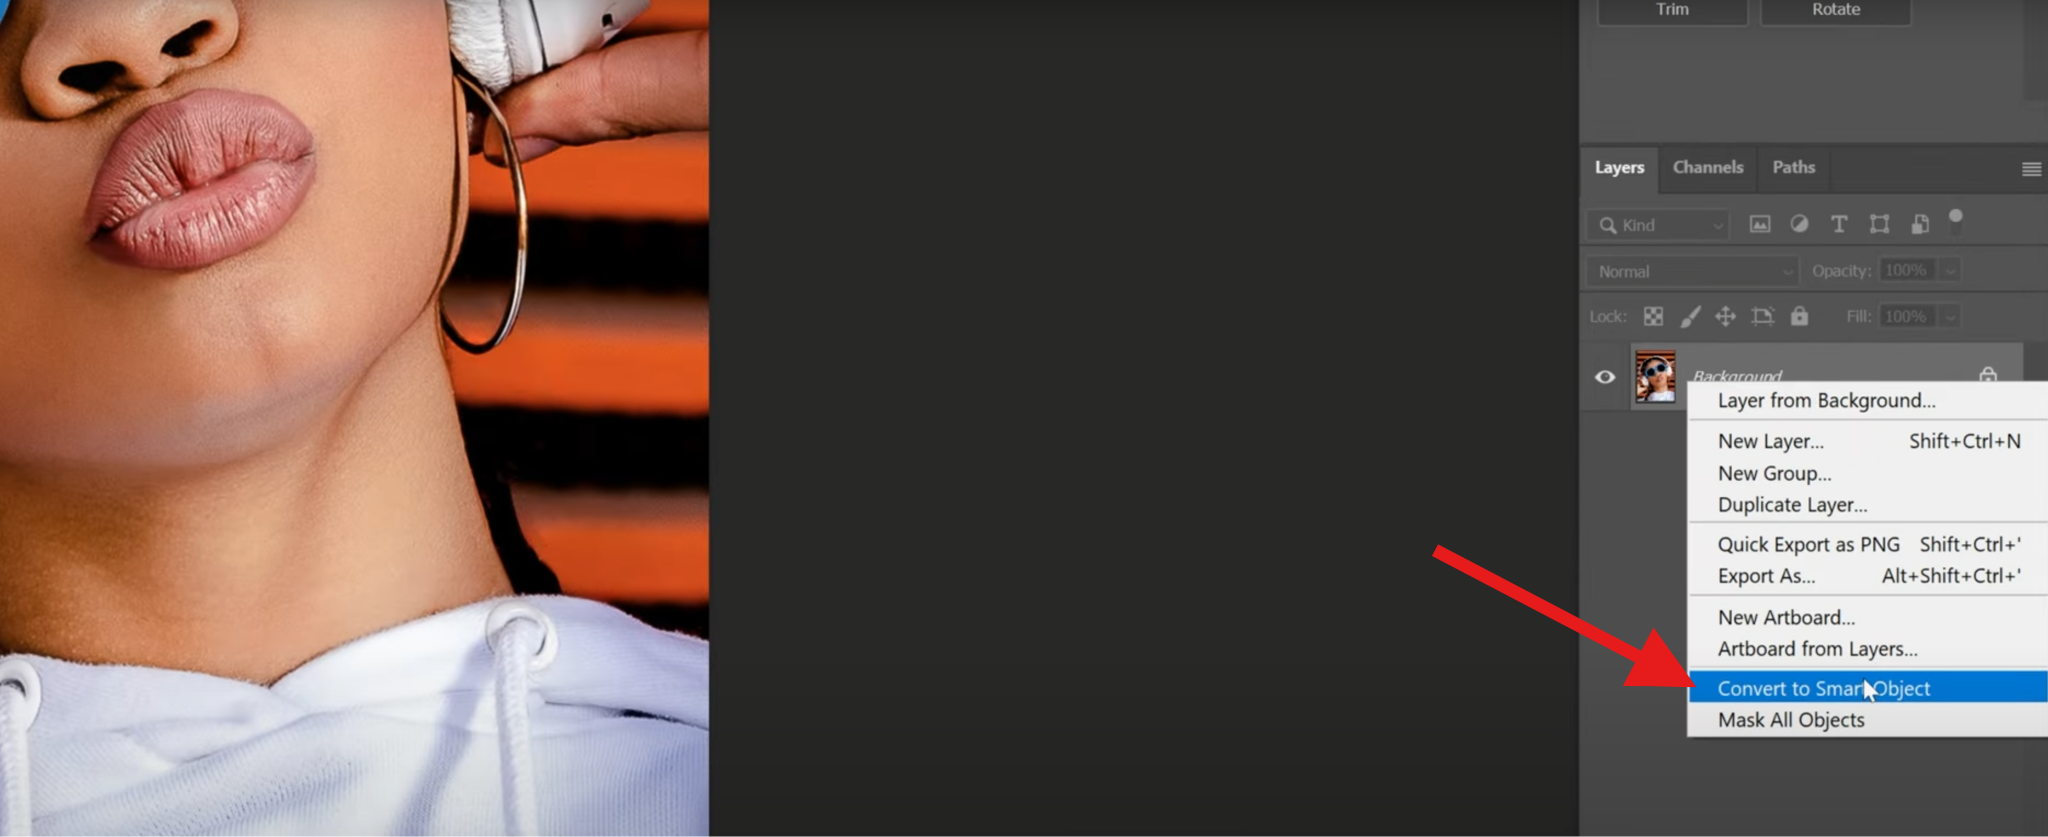
- Open Photoshop, upload your photo, and in the Layers section, right-click on your photo and select the Convert to Smart Object option.
- Now, on the left side of the screen, make sure that the colors are assigned like this: black for the foreground and white for the background.

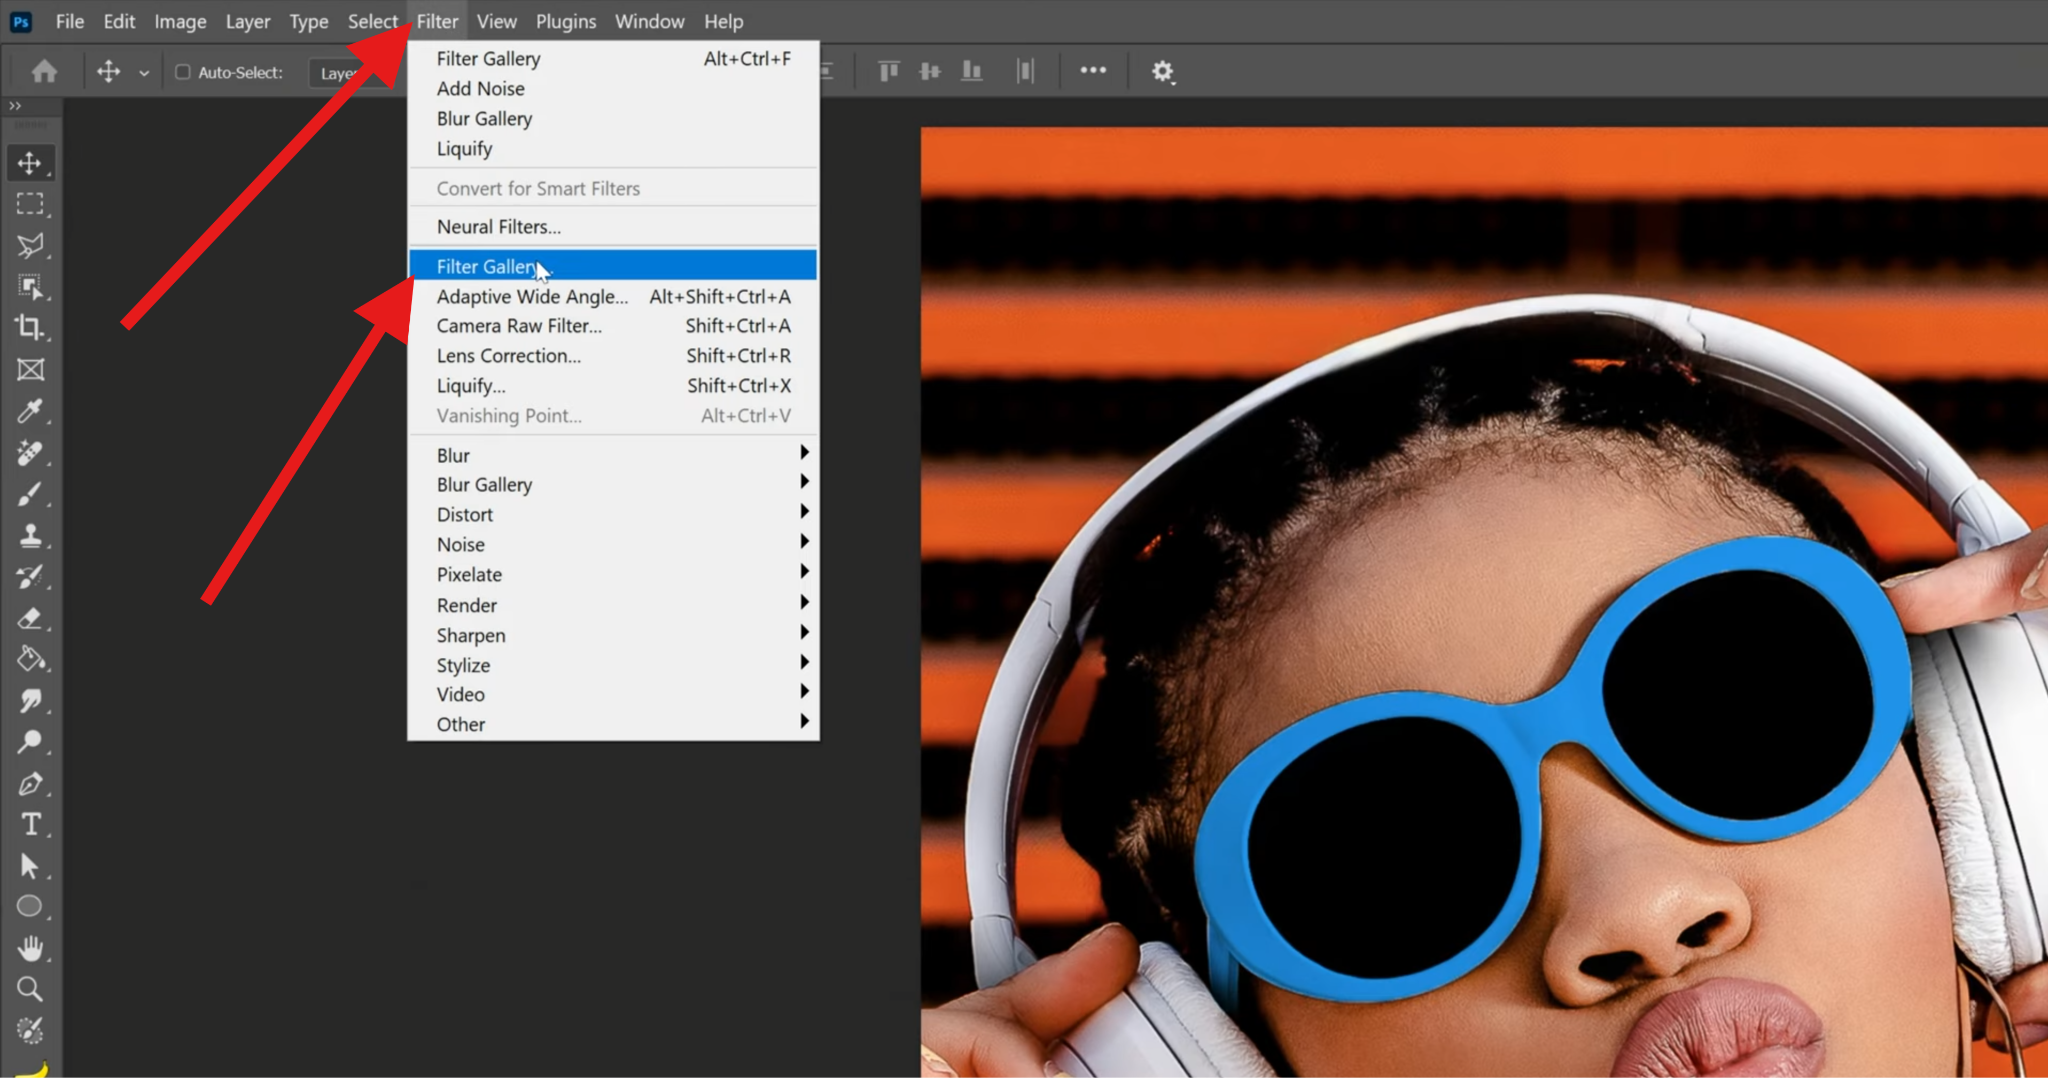
- Then, go to Filter > Filter Gallery.
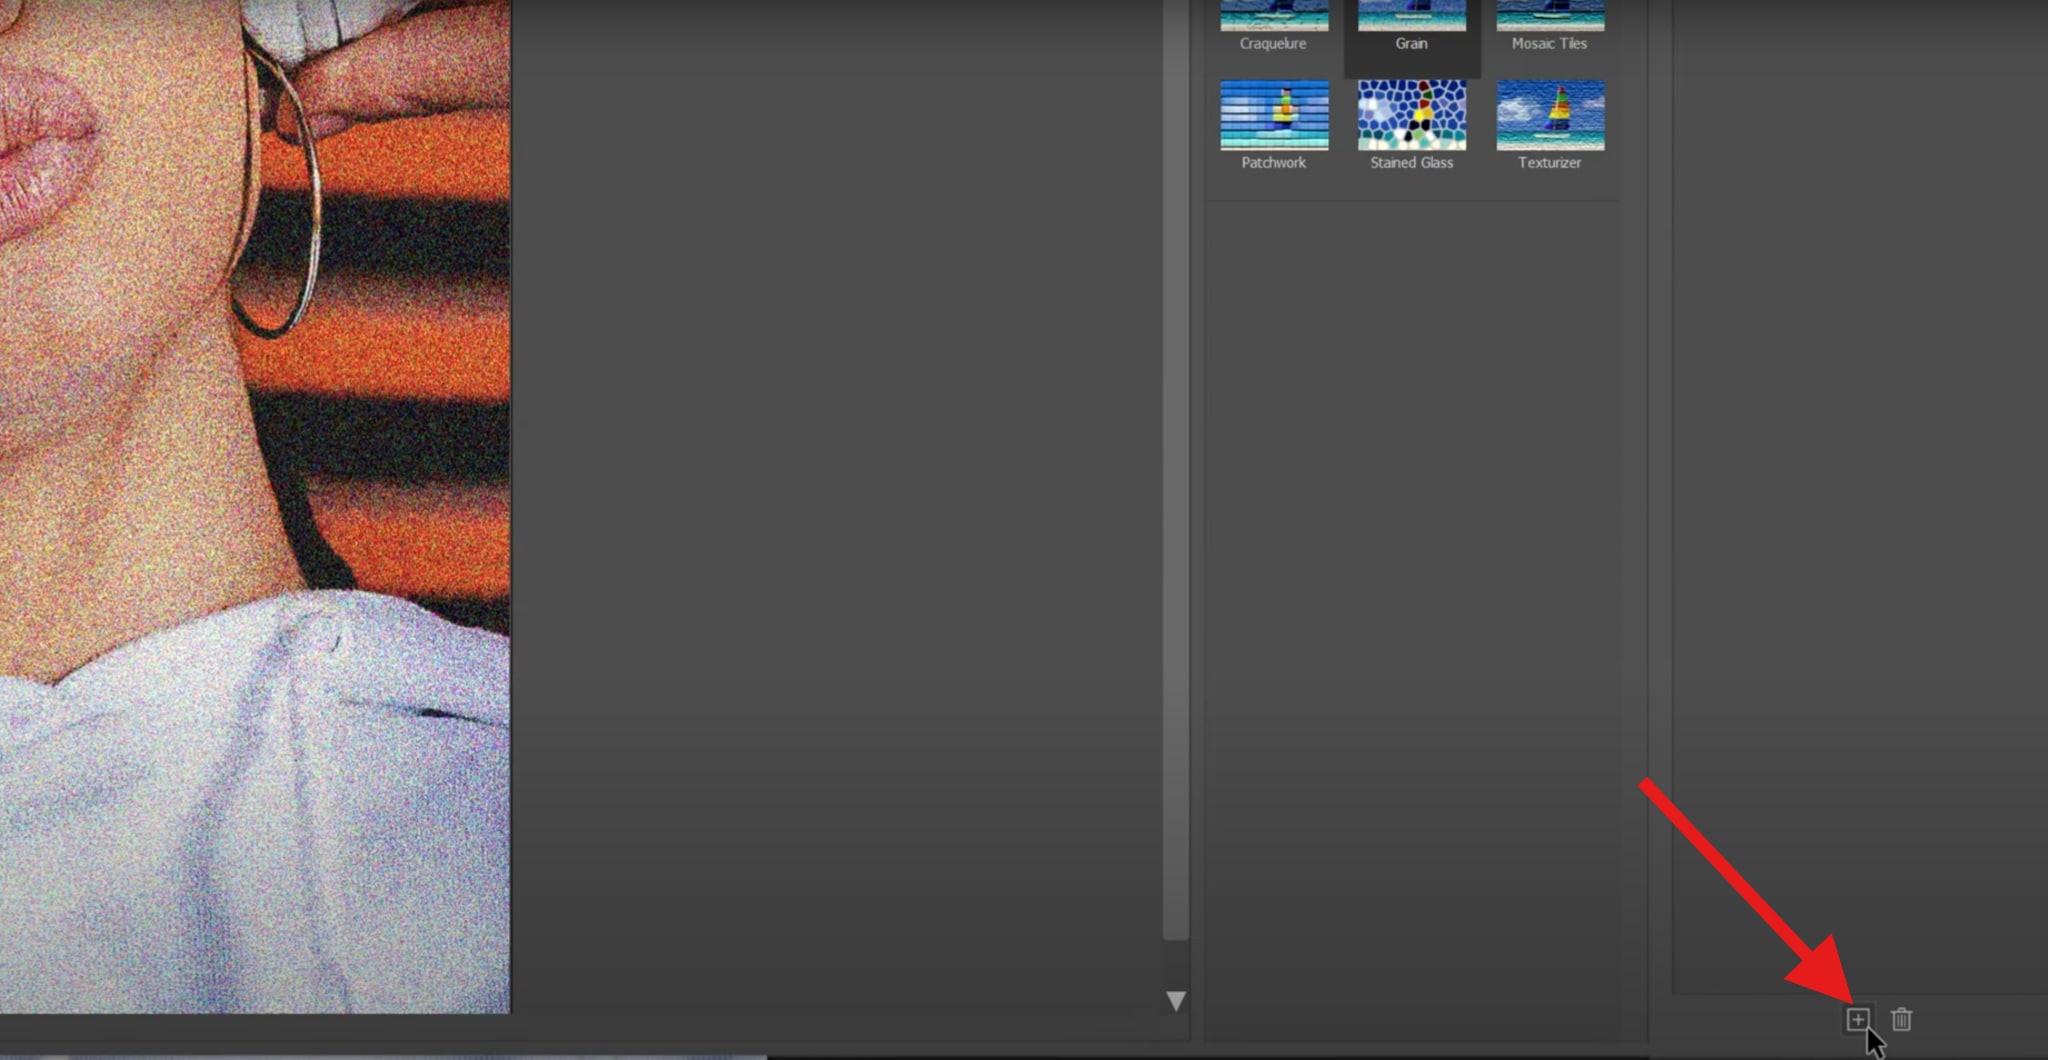
- Select the Textures folder and then the Grain filter. After that, adjust the Intensity of the filter and maximize its value.

- When this is done, take a look at the bottom-right corner of the screen and hit the + sign to add another filter.
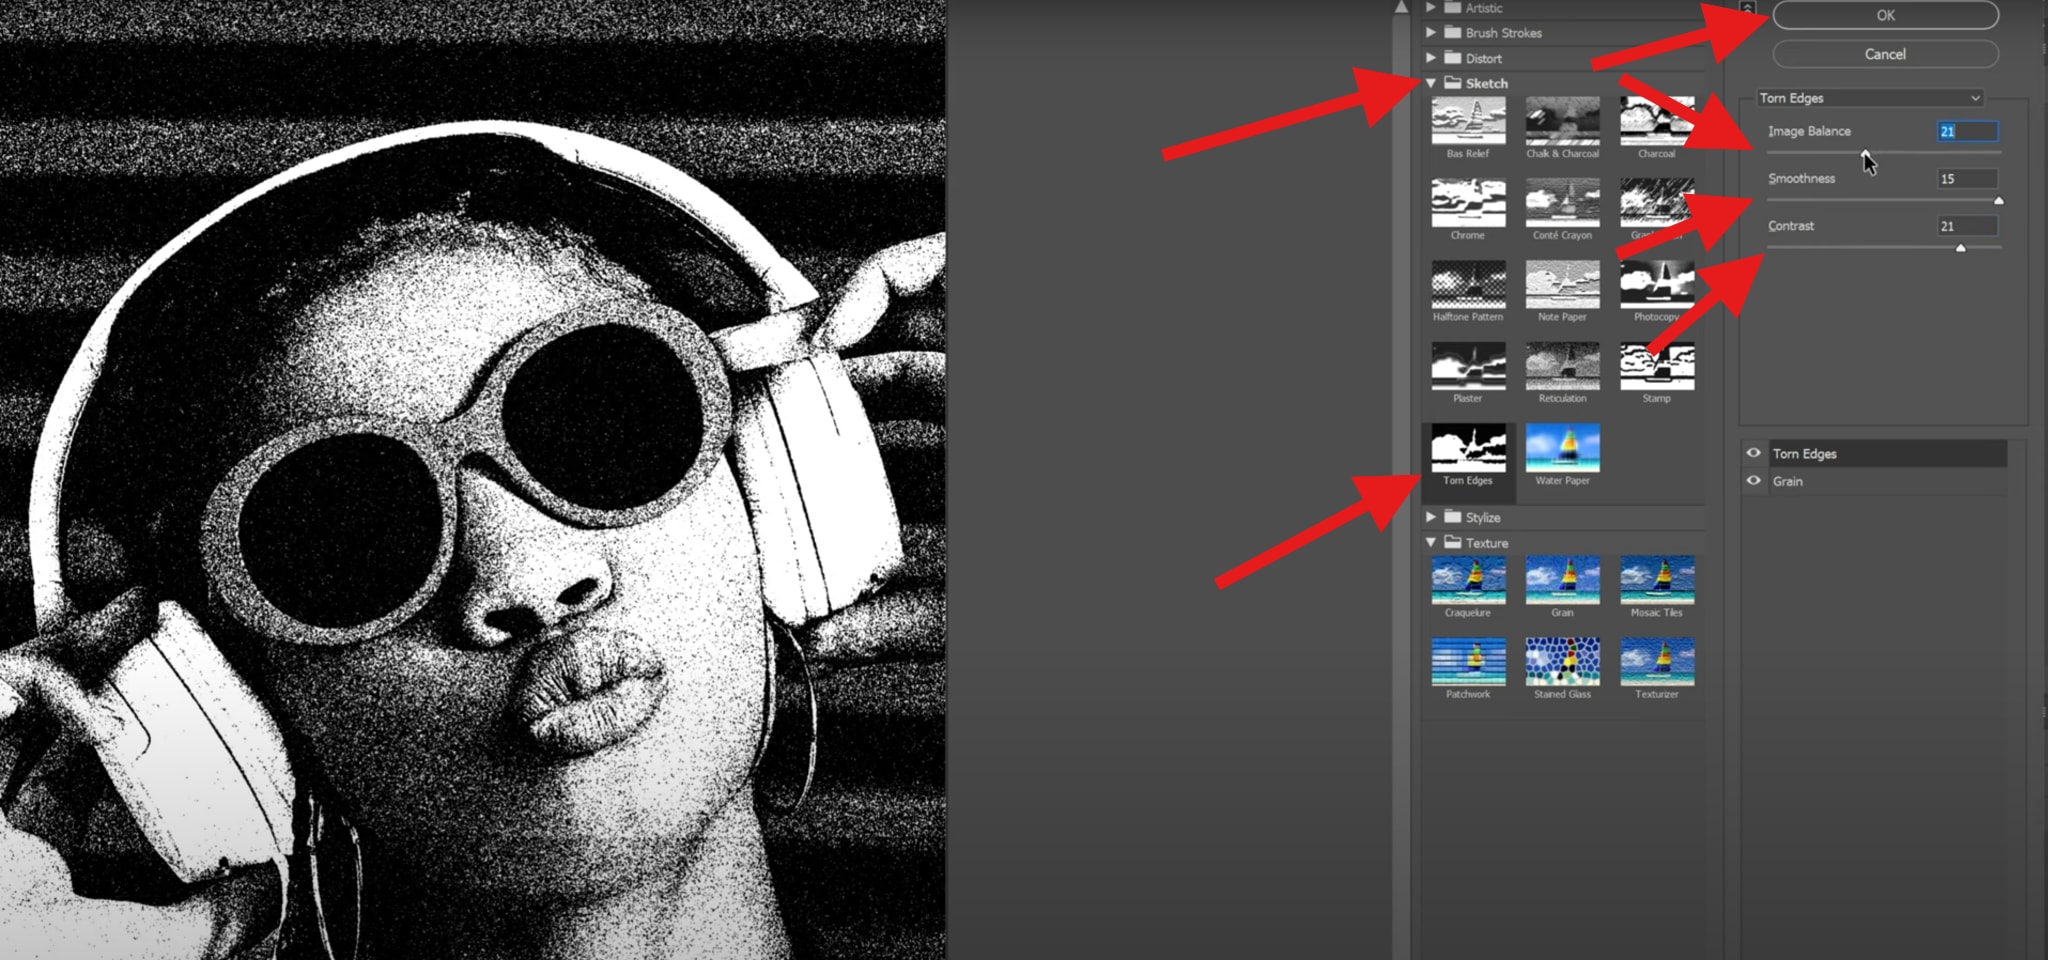
- Select the Sketch folder and choose the Torn Edges preset. Then, adjust the Image Balance, Smoothness, and Contrast until you get the right result. When you are done, click OK.
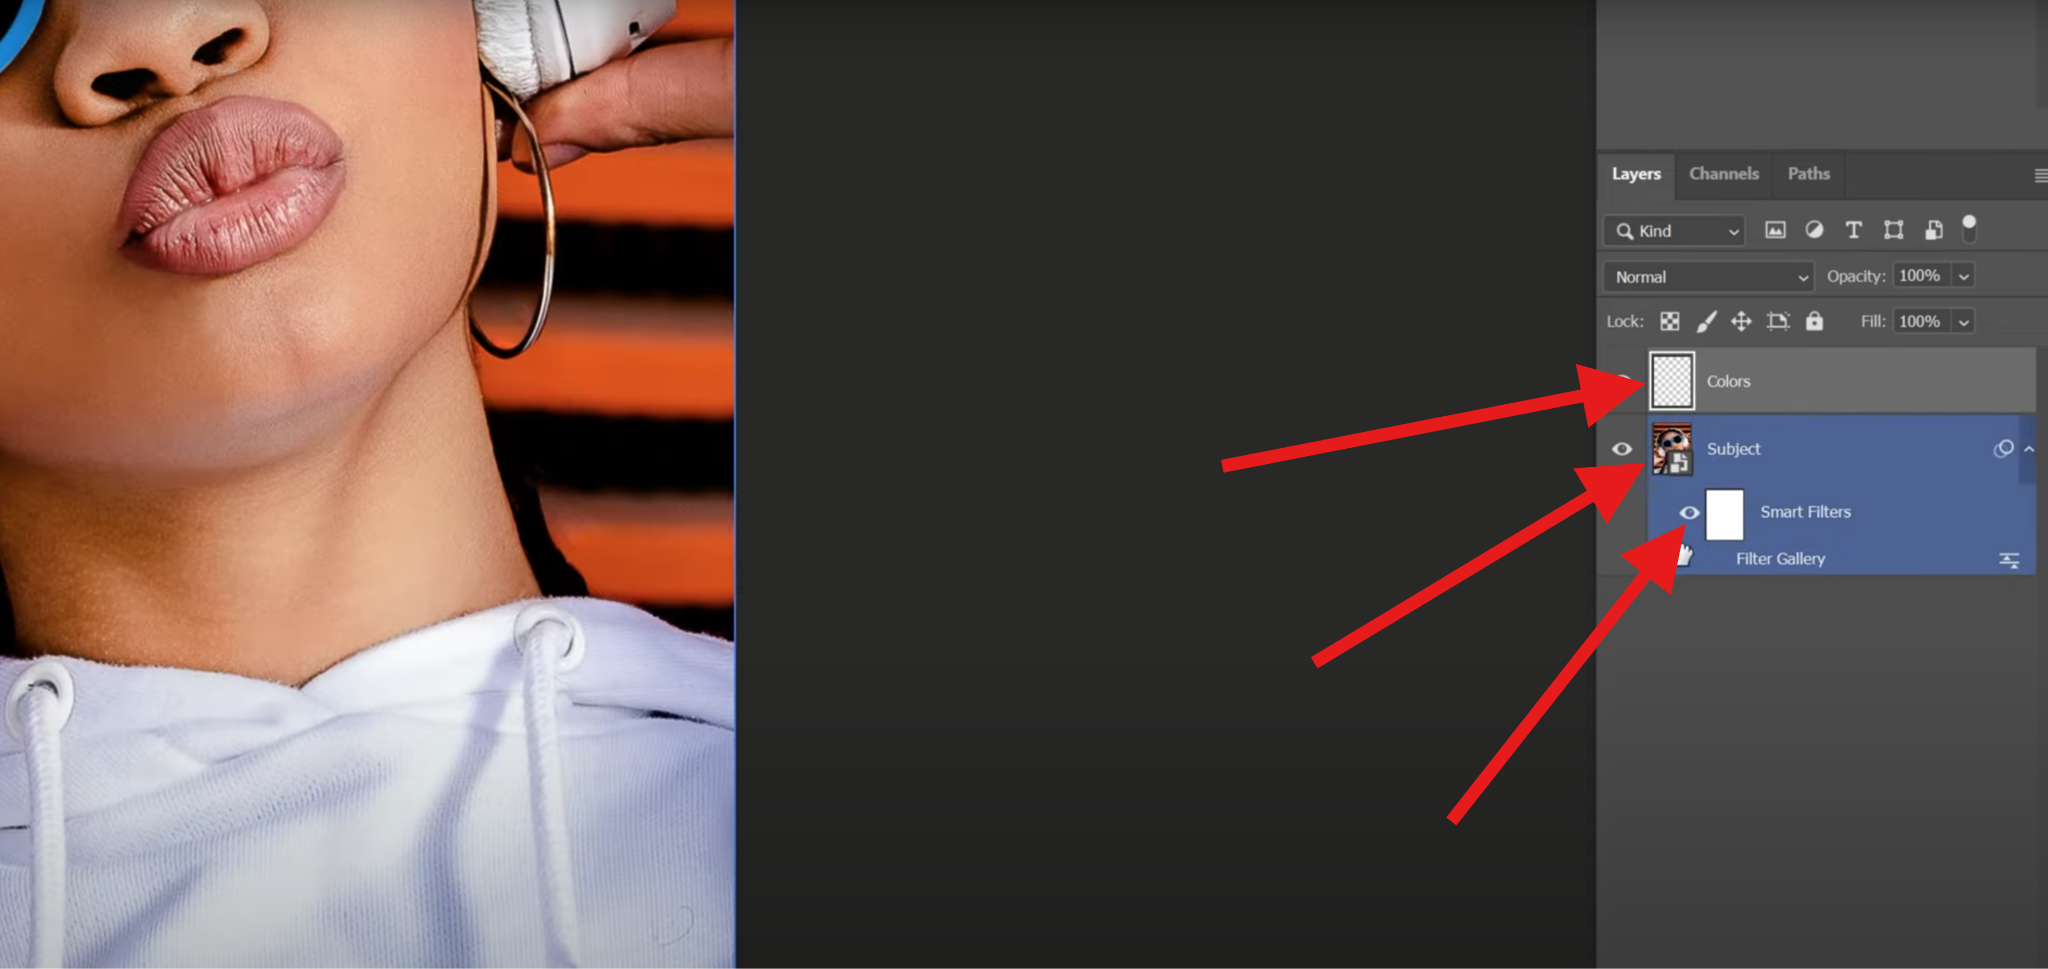
- Create a new layer and name it Colors. Then, select your subject layer again and deactivate the Smart Filters for now.
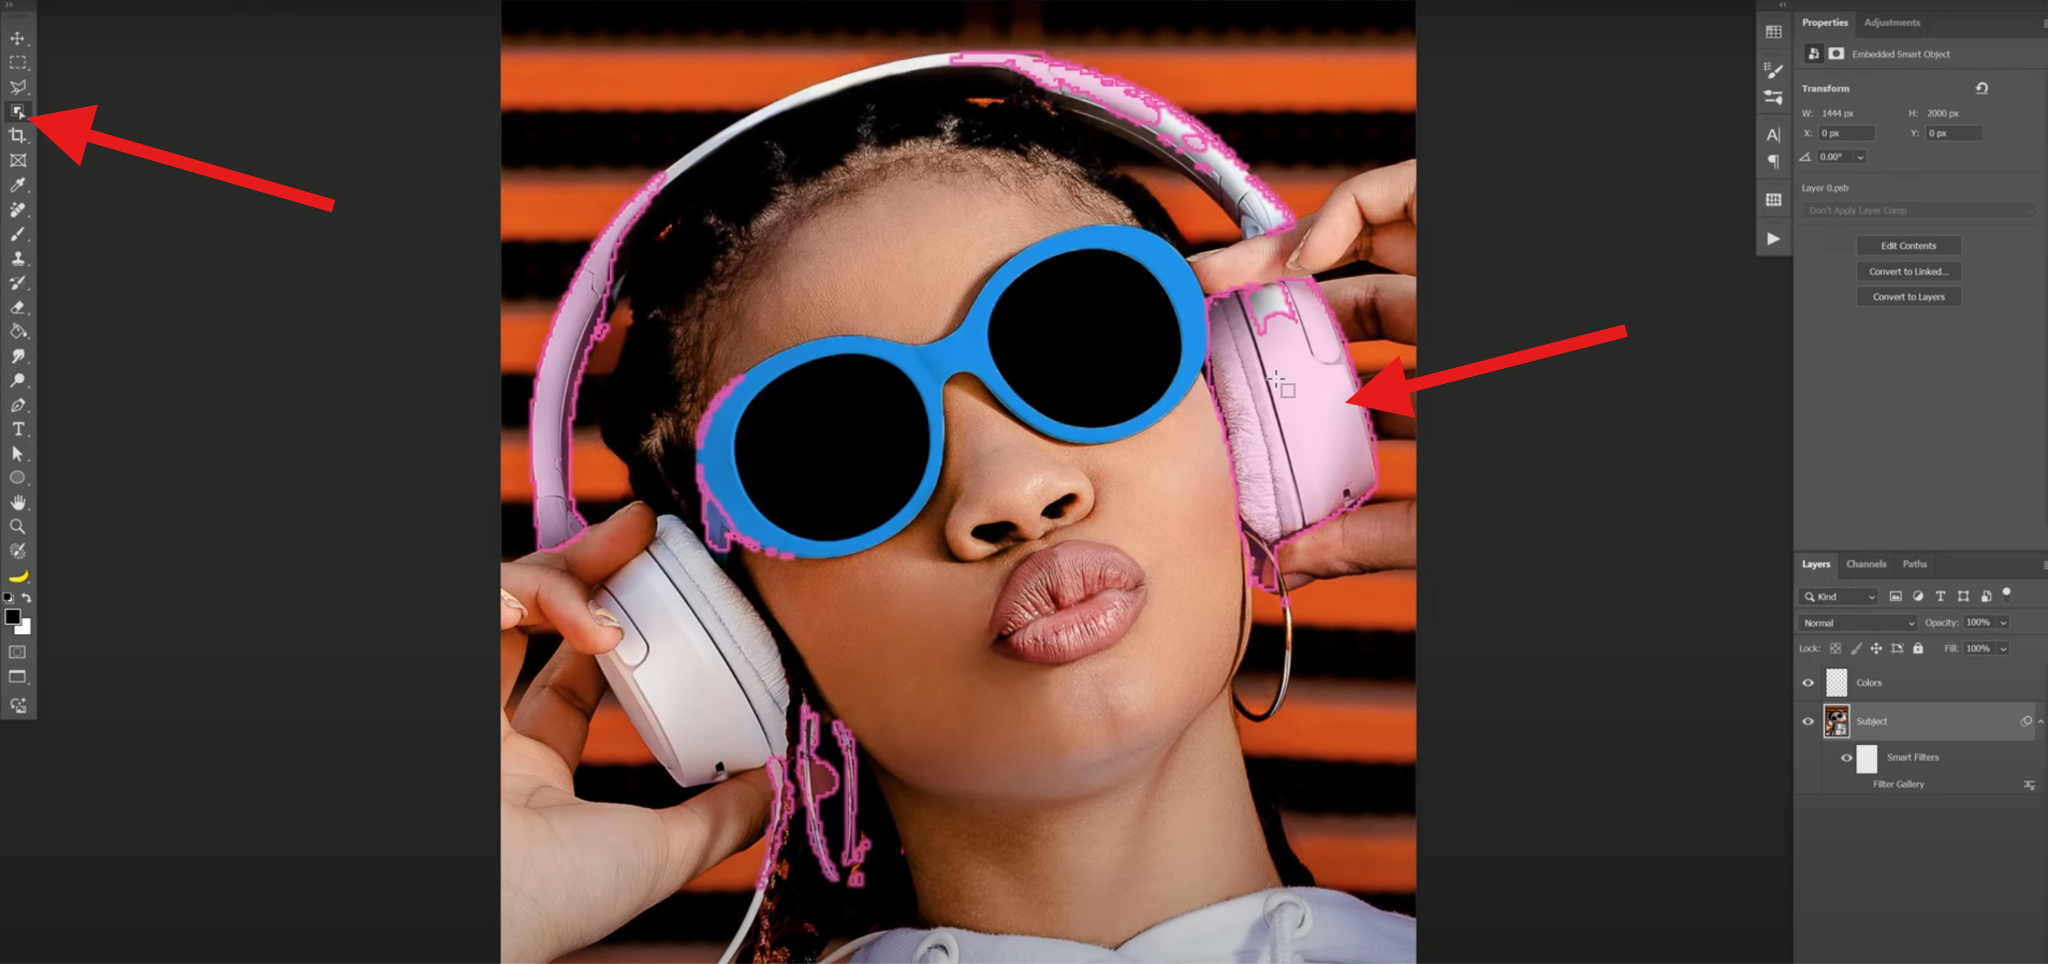
- Select the Object Selection Tool and then make sure to select different objects or groups of objects in the photo.
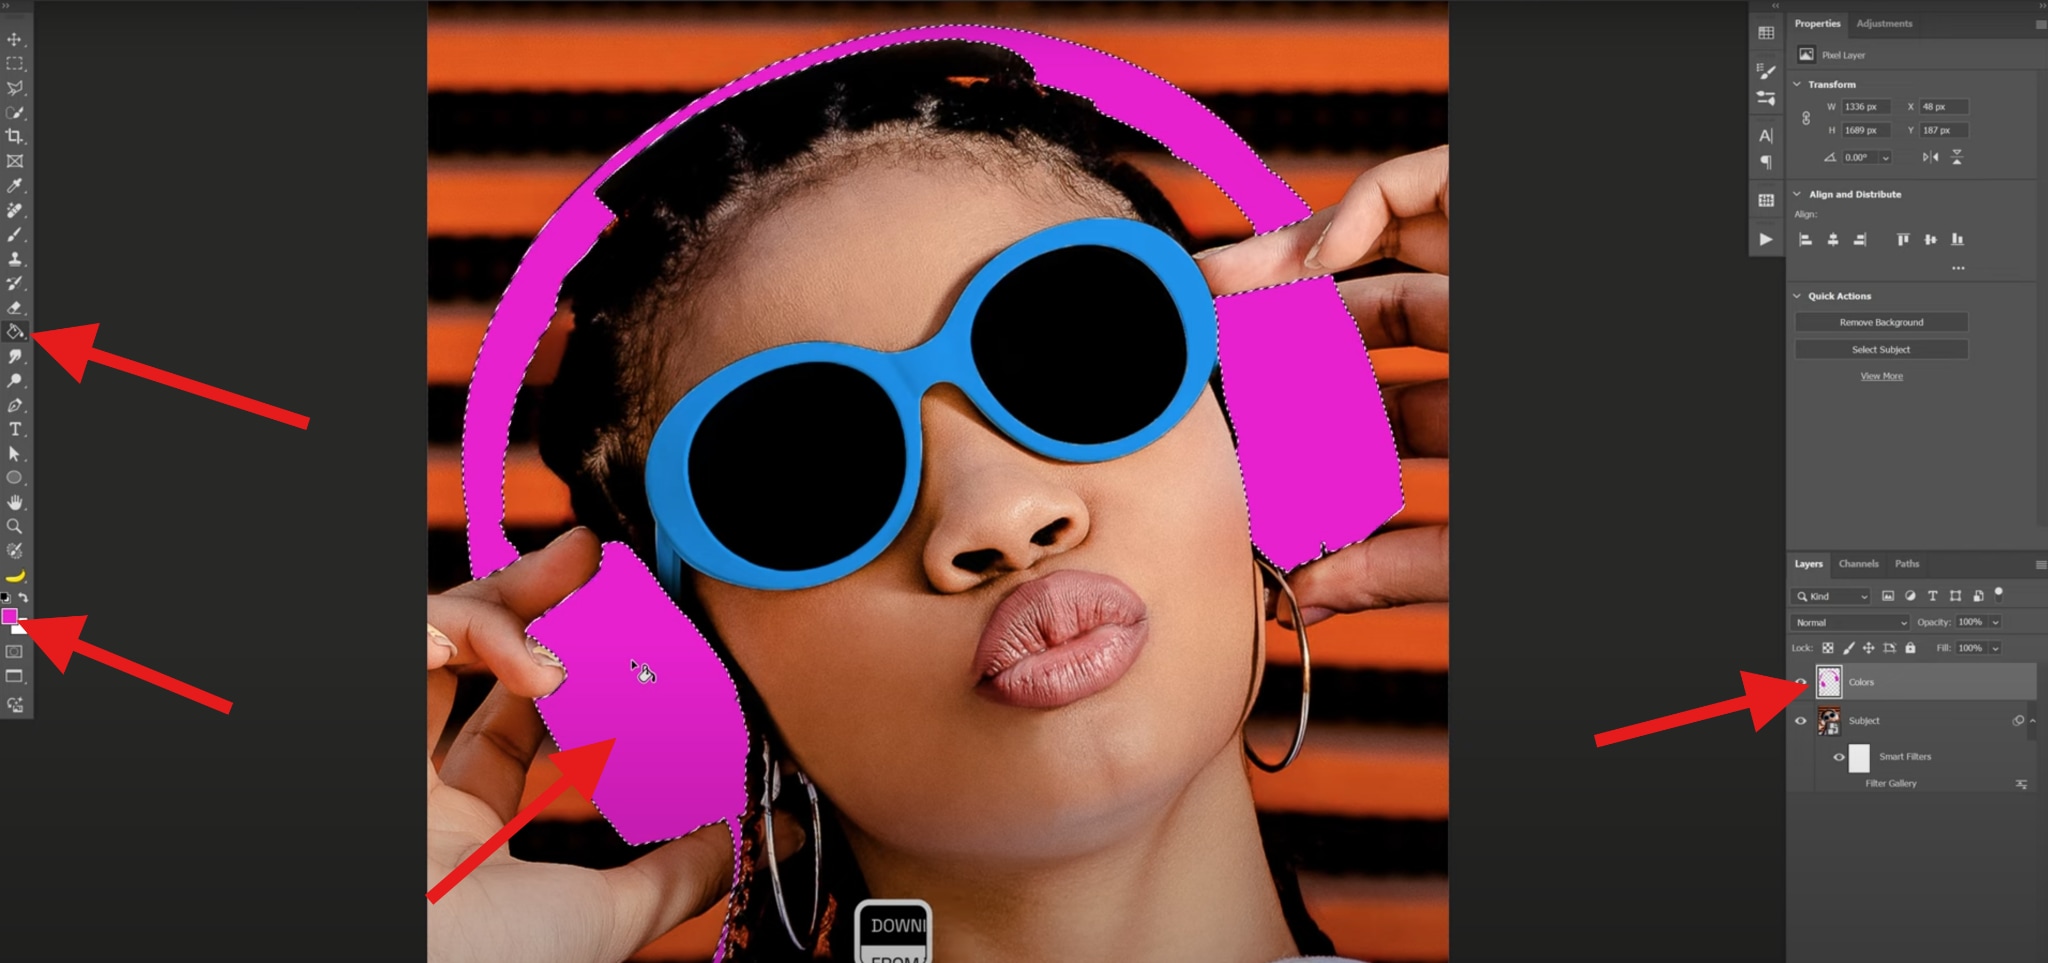
- Now, you need to select the Colors layer and then change the foreground color. We'll go with pink. Then, select the Color Fill tool and paint your selected objects.
- Repeat the step above for different objects in your photo and make sure to use vivid colors. Then, reactivate the Filter Library, select the Colors layer, and then pick Multiply as the blend mode.
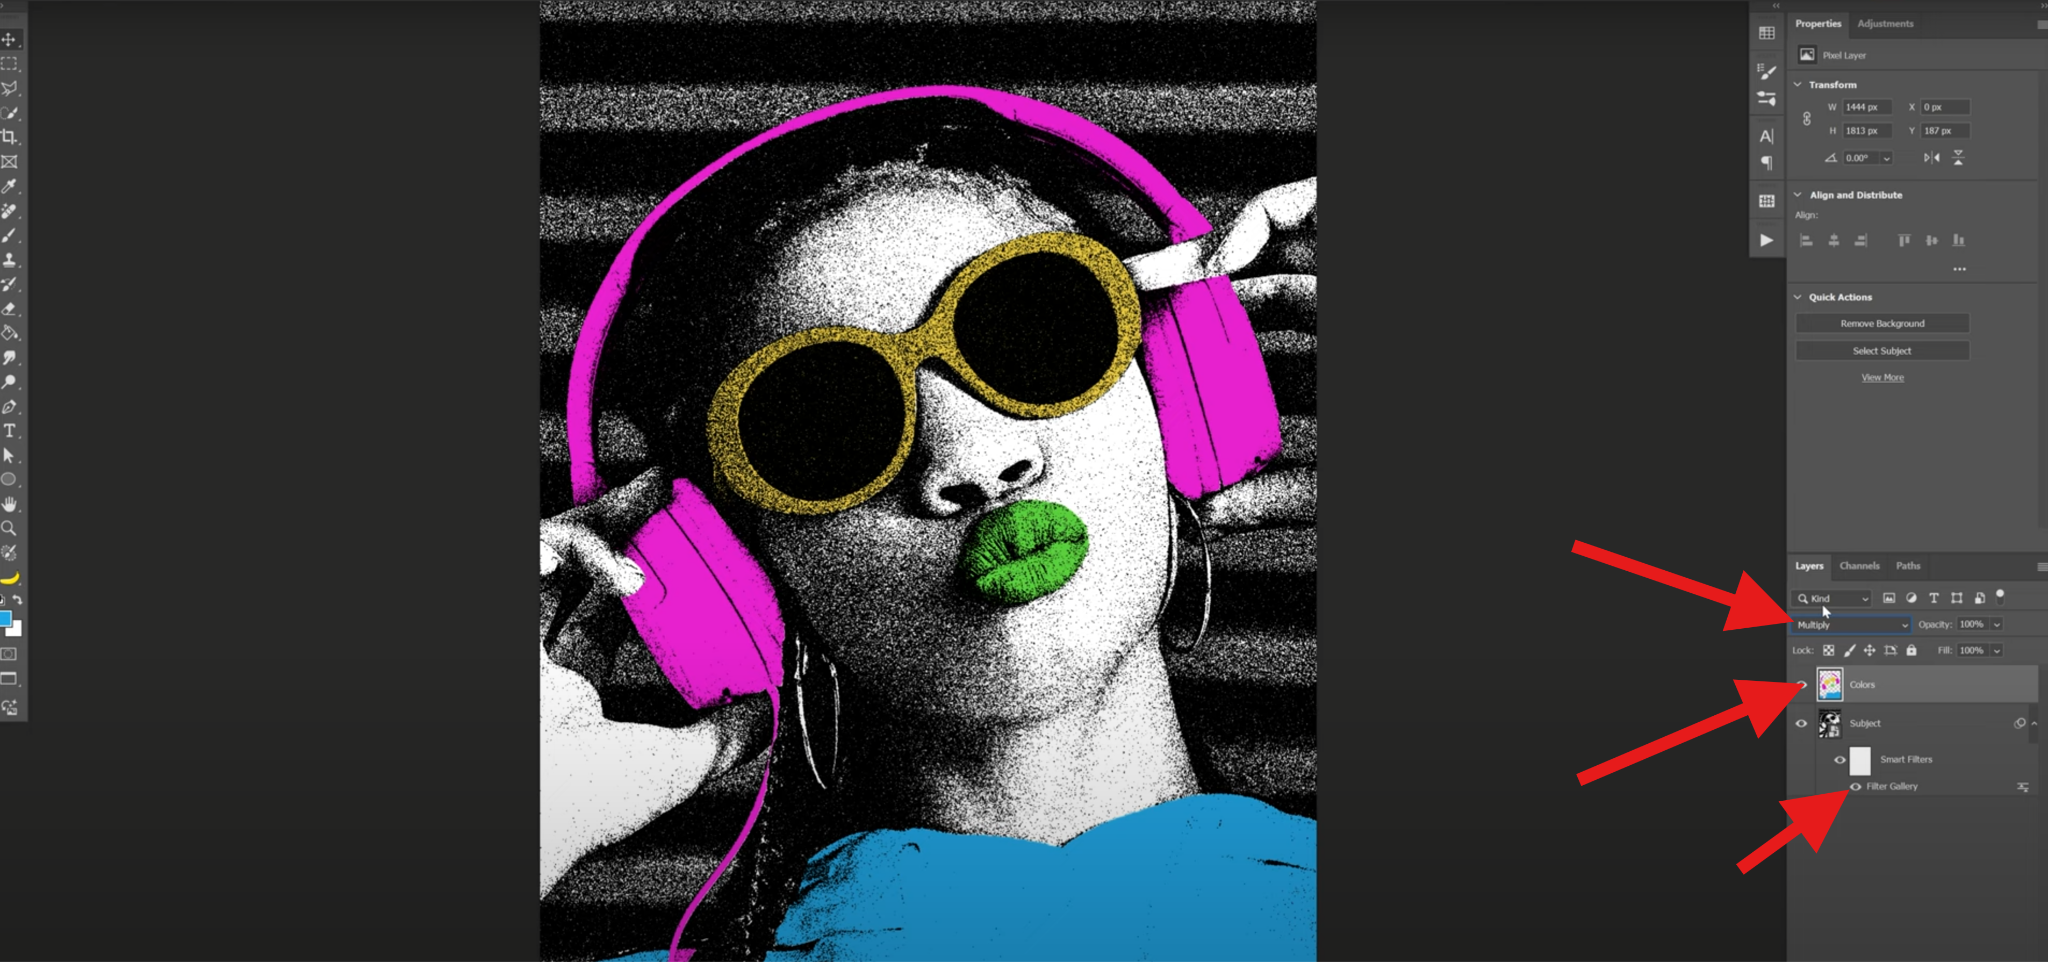
- Take a look at the comparison.
Niche and Advanced · AI-Generated Tools: Midjourney
MidJourney is a different type of tool. You can use it to generate AI-driven pop art illustrations directly from text prompts and edit photos like Nano Banana AI. It's ideal for advanced users and creators seeking unique, futuristic takes on classic pop art styles. We'll show you how this tool works as well. Just follow the steps below.
- Join the MidJourney Discord or go to their web app.
- Upload your photo and type in your prompts.
- Preview and download your photo.
Advanced Tips for Pop Art Filters — From "Application" to "Creation"
If you want to make your new pop art creation "pop" in other people's feeds, you need to pay attention to a few pro tips that will help you take the perfect photo, which you can later convert into a pop art masterpiece. Take a look.
- Use Strong Contrast Photos – Flat lighting doesn't pop, so you should choose portraits with defined shadows.
- Experiment with Panel Grids – Create Warhol-inspired multi-color tiles for more exciting compositions.
- Add Comic Elements – Speech bubbles, exclamatory captions, and halftone overlays make pop art edits instantly recognizable.
- Combine Pop with Other Styles – Blend pop art with charcoal, watercolor, or oil painting styles for mixed media effects.
- Animate Your Pop Art – With tools like Filmora or After Effects, you can make halftone dots pulsate or colorways shift dynamically for Reels and TikToks.
How to Apply AI Pop Art Filters?
As you have noticed, the above methods require some manual adjustments, while Midjourney relies on prompts. If you are looking for a one-click transfer, you may need an AI photo to pop art converter. For instant results without manual tweaks, try LightX's AI Pop Art Filter. Take a look at how it works.
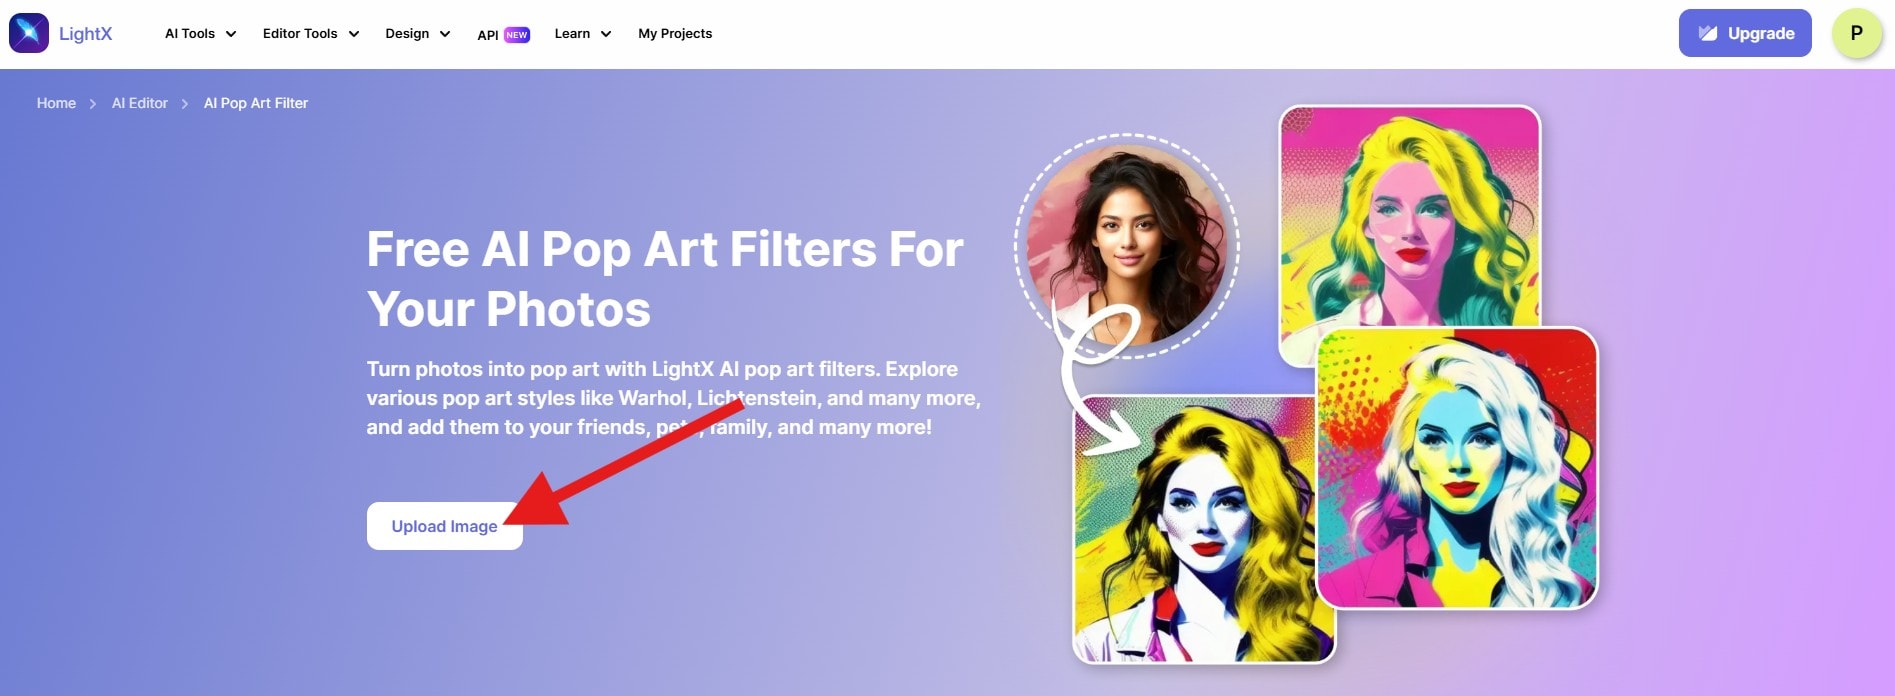
- Go to the LightX Free AI Pop Art Filters For Your Photos landing page and click on Upload Image. Then, simply select and upload a photo from your device.
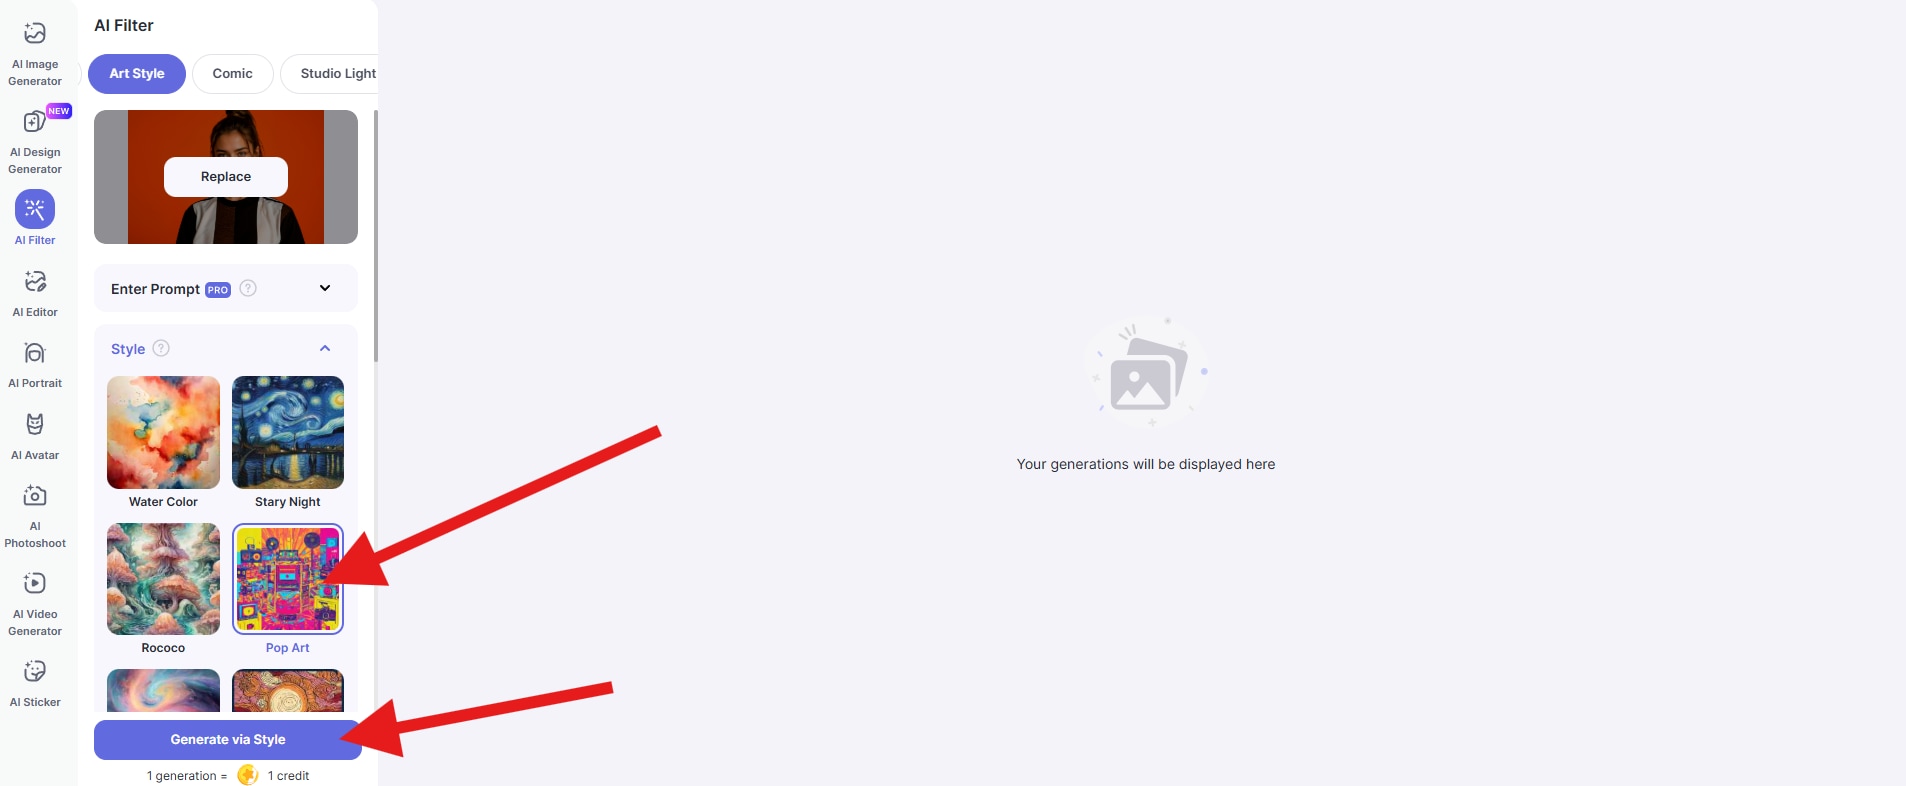
- Select the Pop Art style and click on Generate via Style.
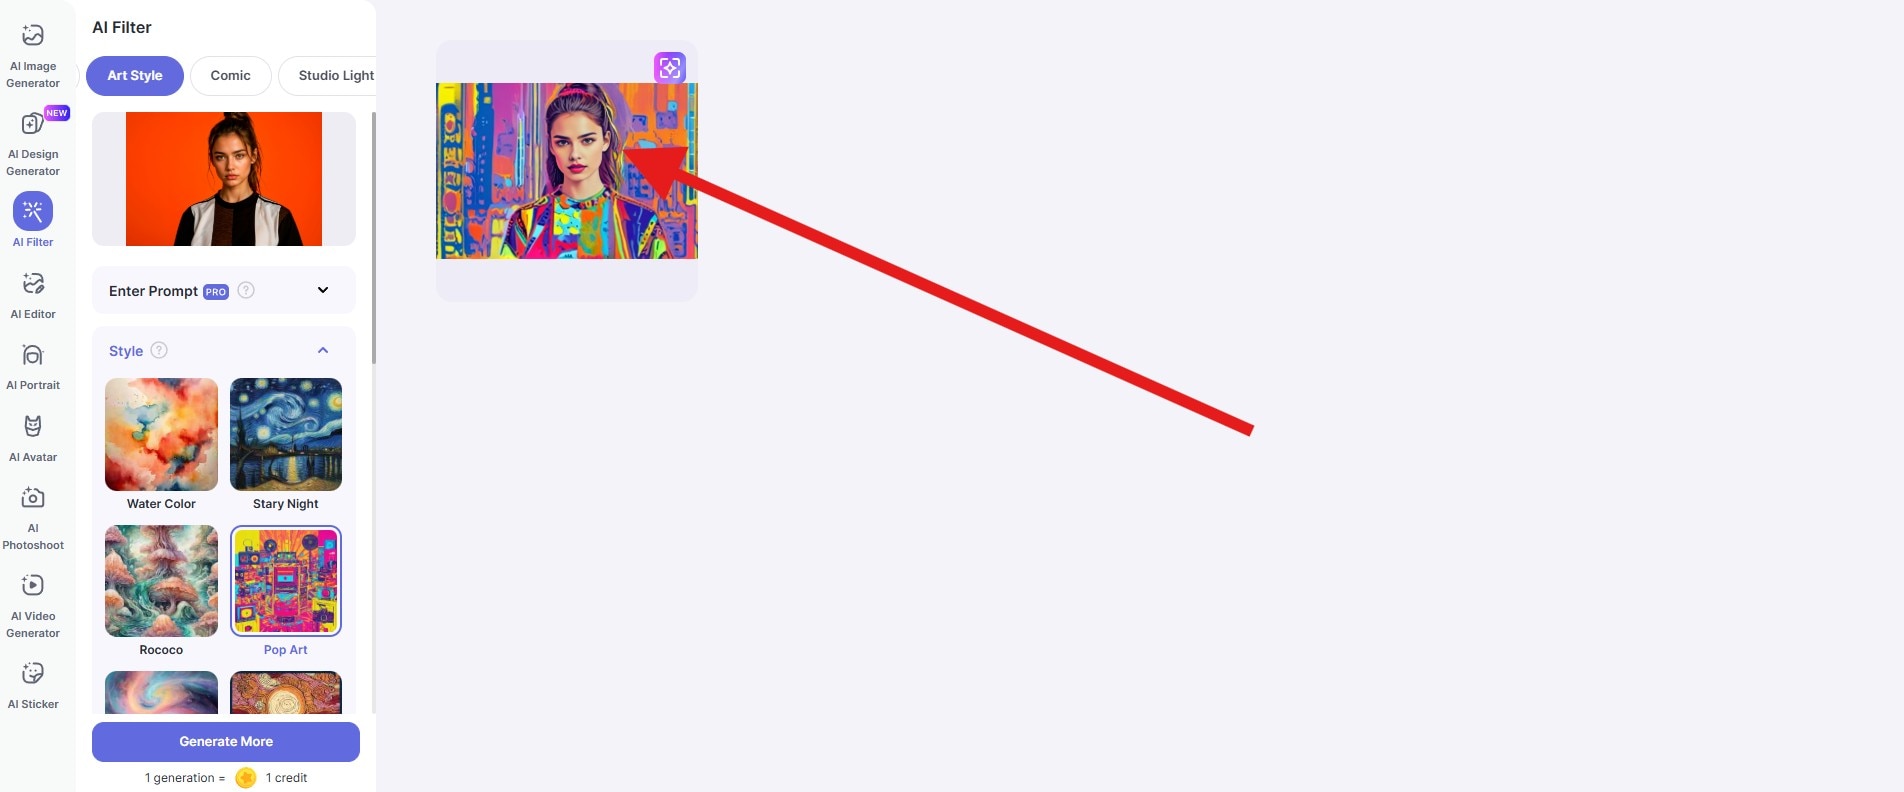
- Click to review and download your pop art photo.
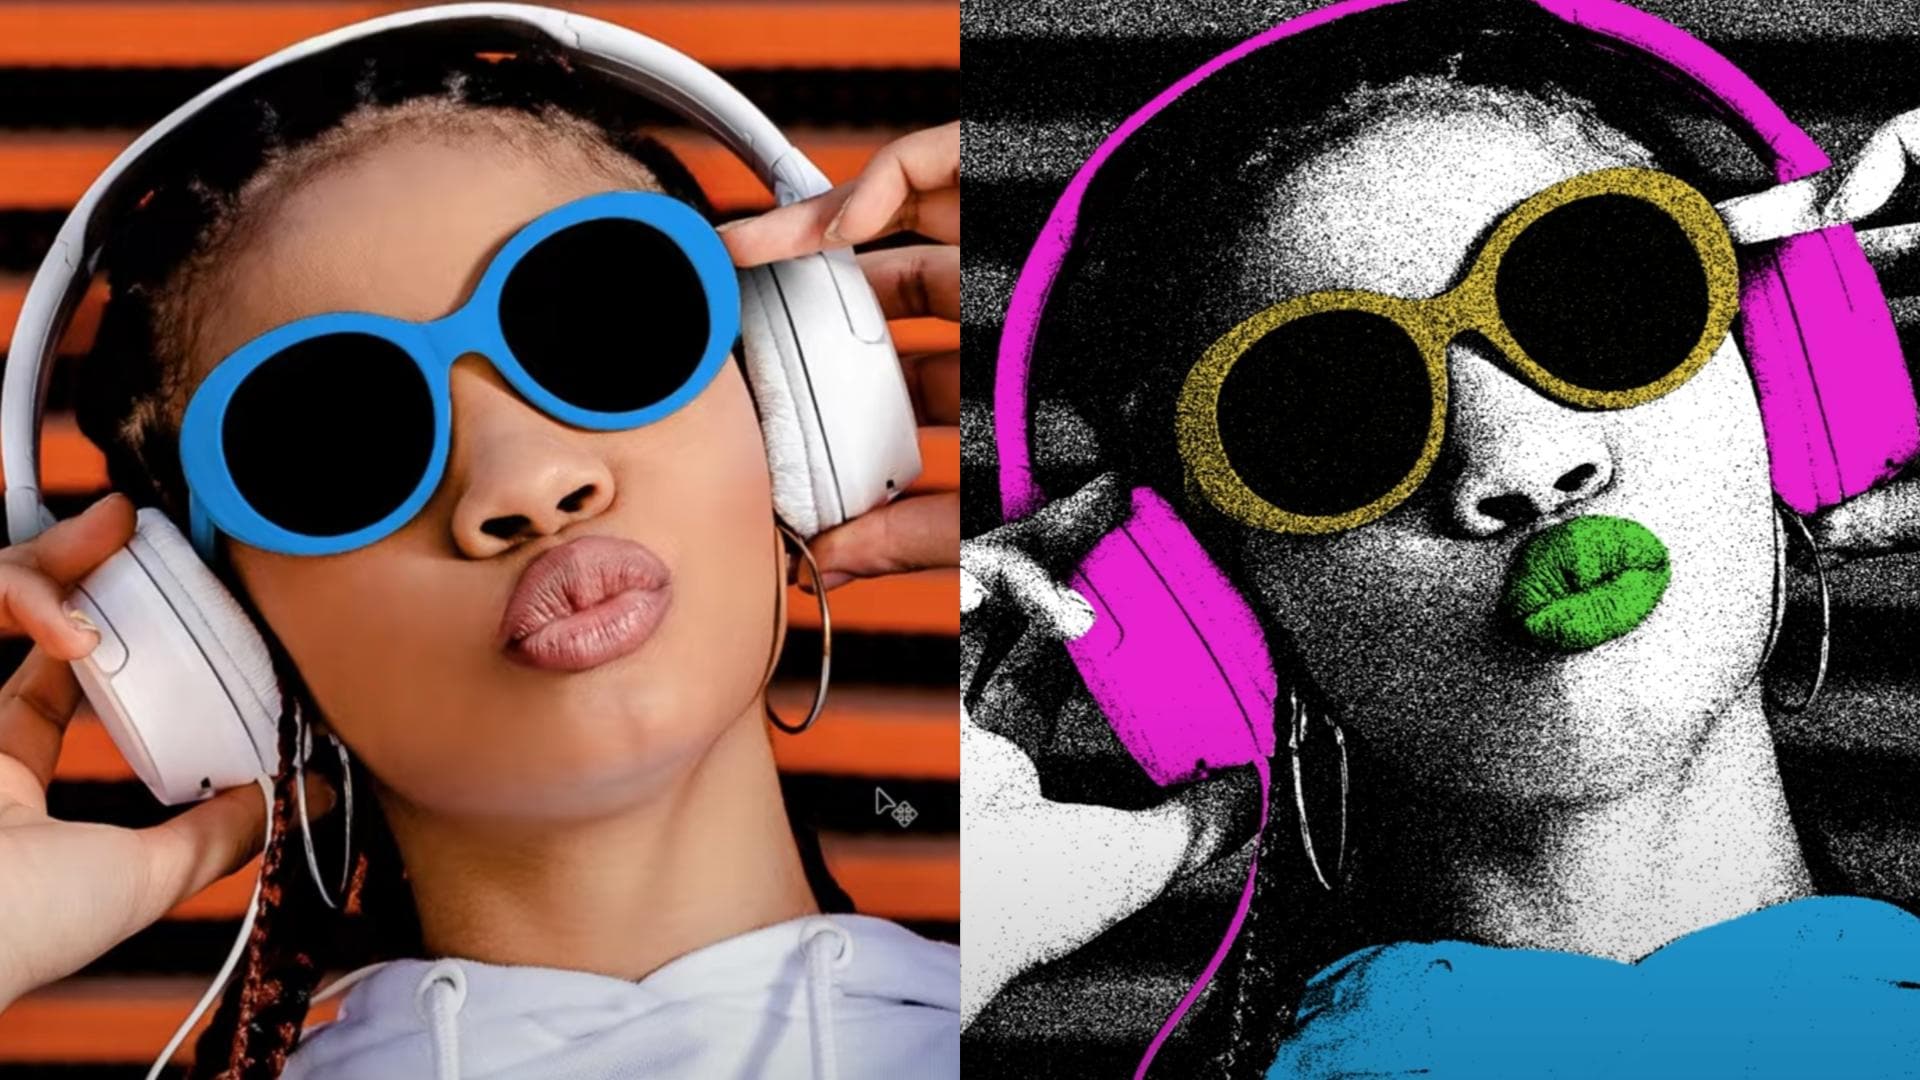
- Here's a quick comparison photo. It shows the original photo and the pop art filter in action.
Explore More AI Art Filters
Now, if you are a creative spirit and want to push your edits even further, we have a perfect tool for you. Wondershare Filmora offers a complete creative suite that offers AI-Powered Style Transfers, where you can instantly transform images into pop art, charcoal, watercolor, or anime. On top of that, you get access to Image-to-Video animations, where you can animate halftone effects for cinematic Instagram Stories.
And let's not forget to mention millions of creative assets and preset libraries, where you can access ready-made visual editing options like filters and effects.
In today's guide, we will show you how to use the AI Image Stylizer using Filmora's PC version (Windows and Mac). Just follow the steps below.
- Download and install Filmora on your computer.
 secure download

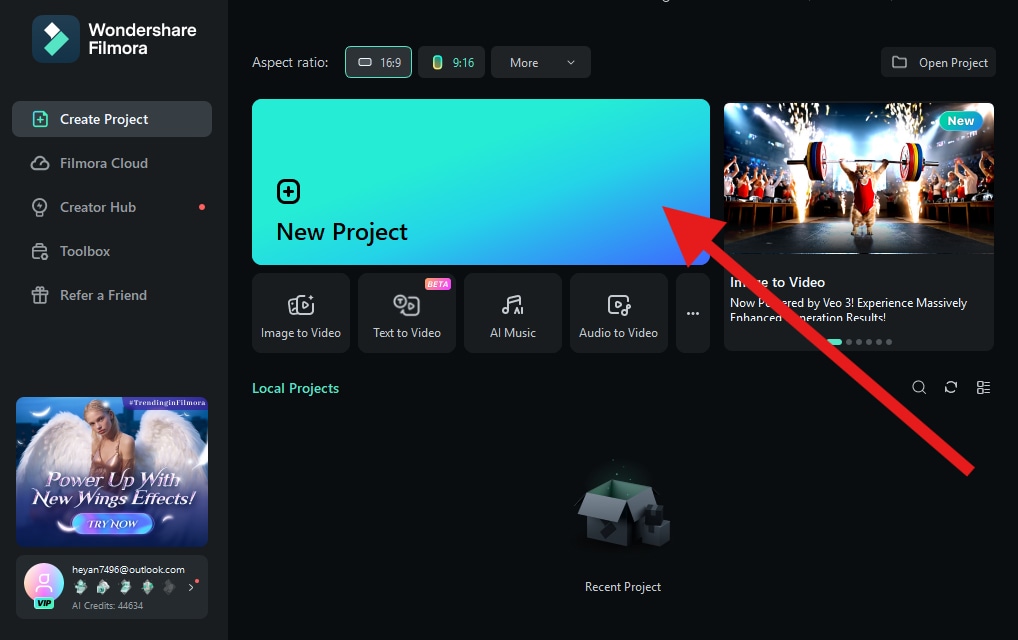
- Open Filmora and create a New Project.
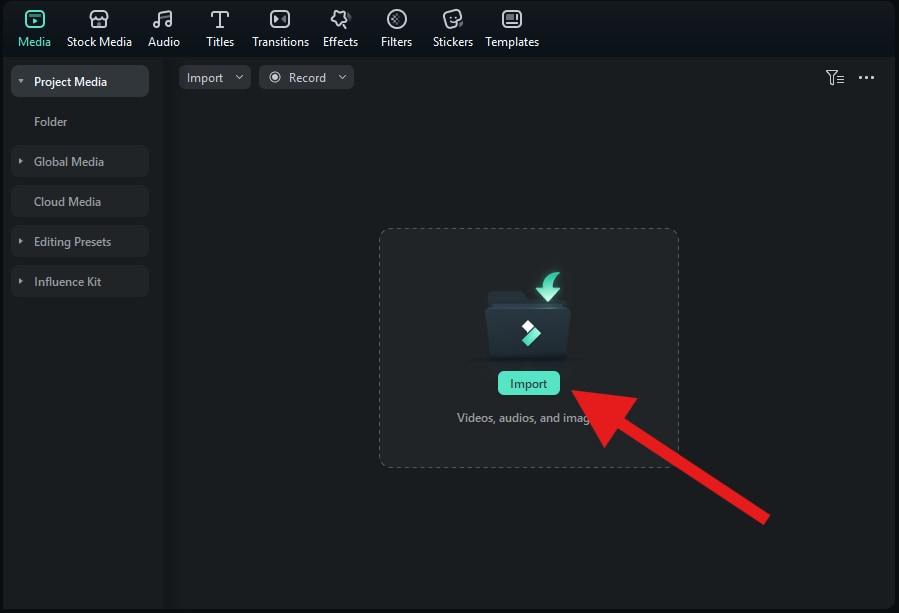
- Click on Import and add a photo from your device.
- Now, drag the photo to the editing timeline.

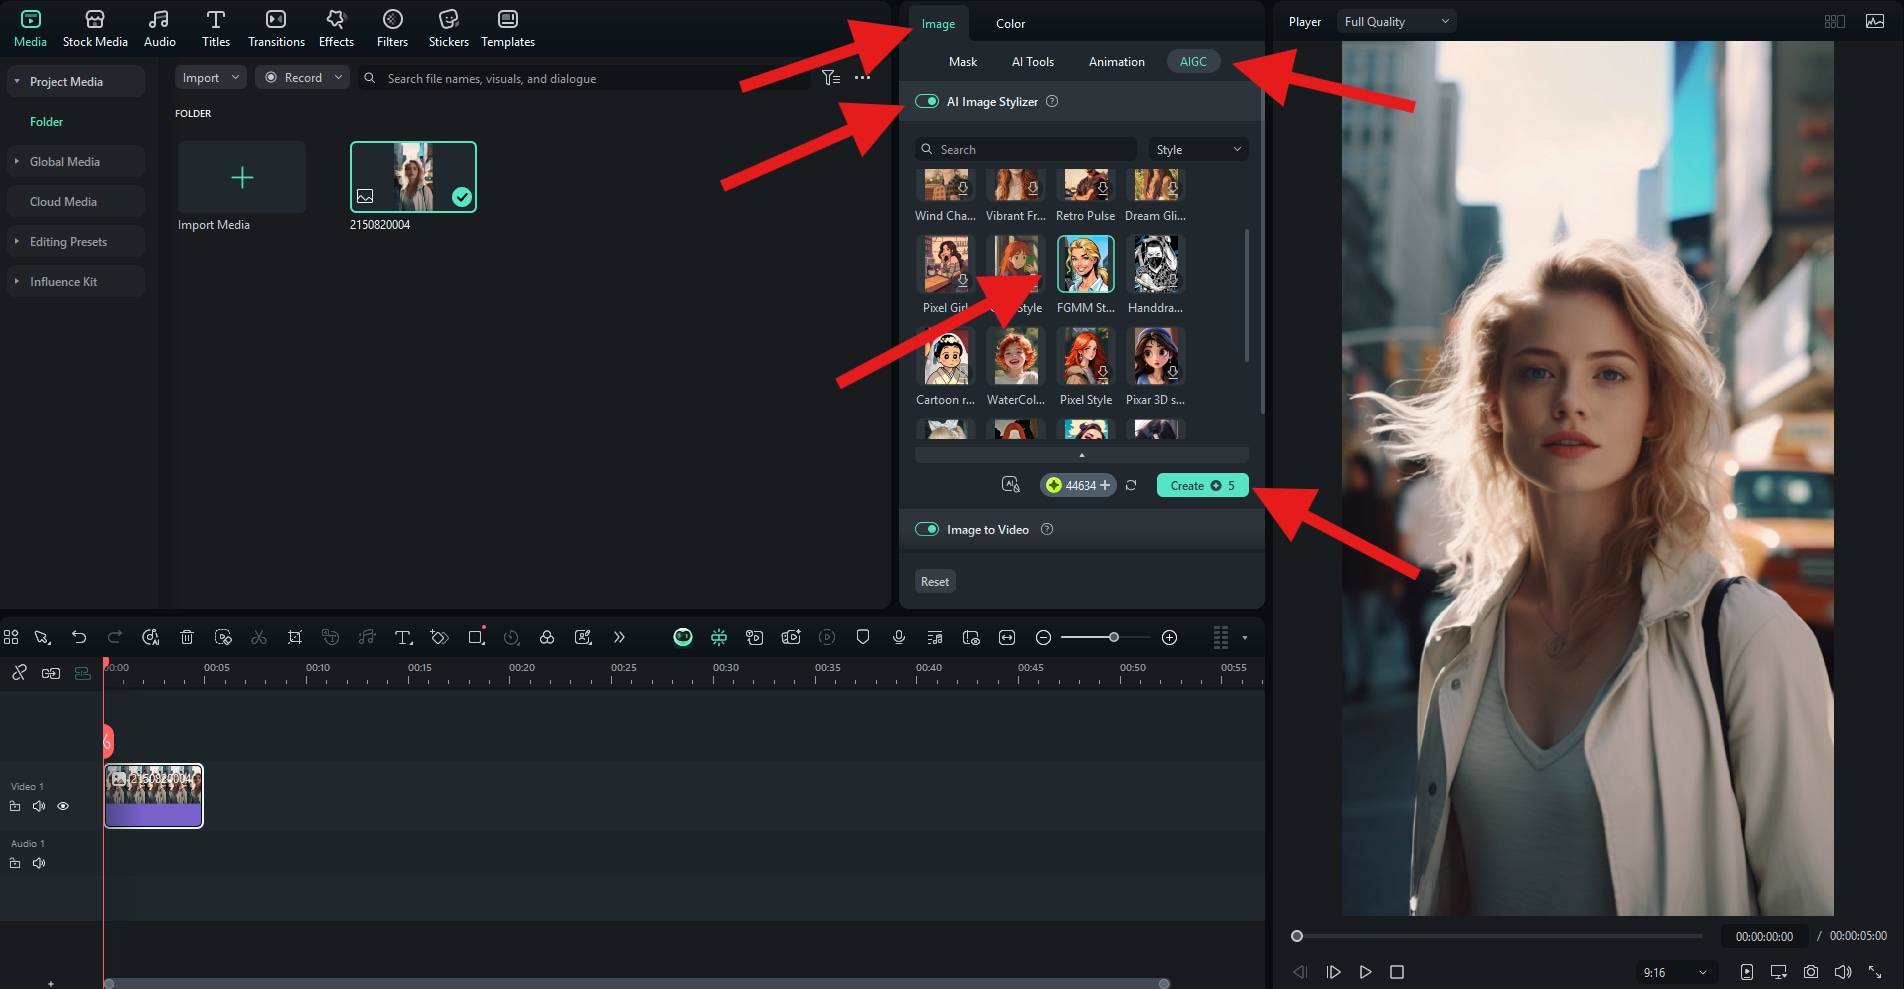
- Select the image in the timeline, go to Image > AIGC, and activate the AI Image Stylizer feature. Then, pick the FGMM Style and click on Create.
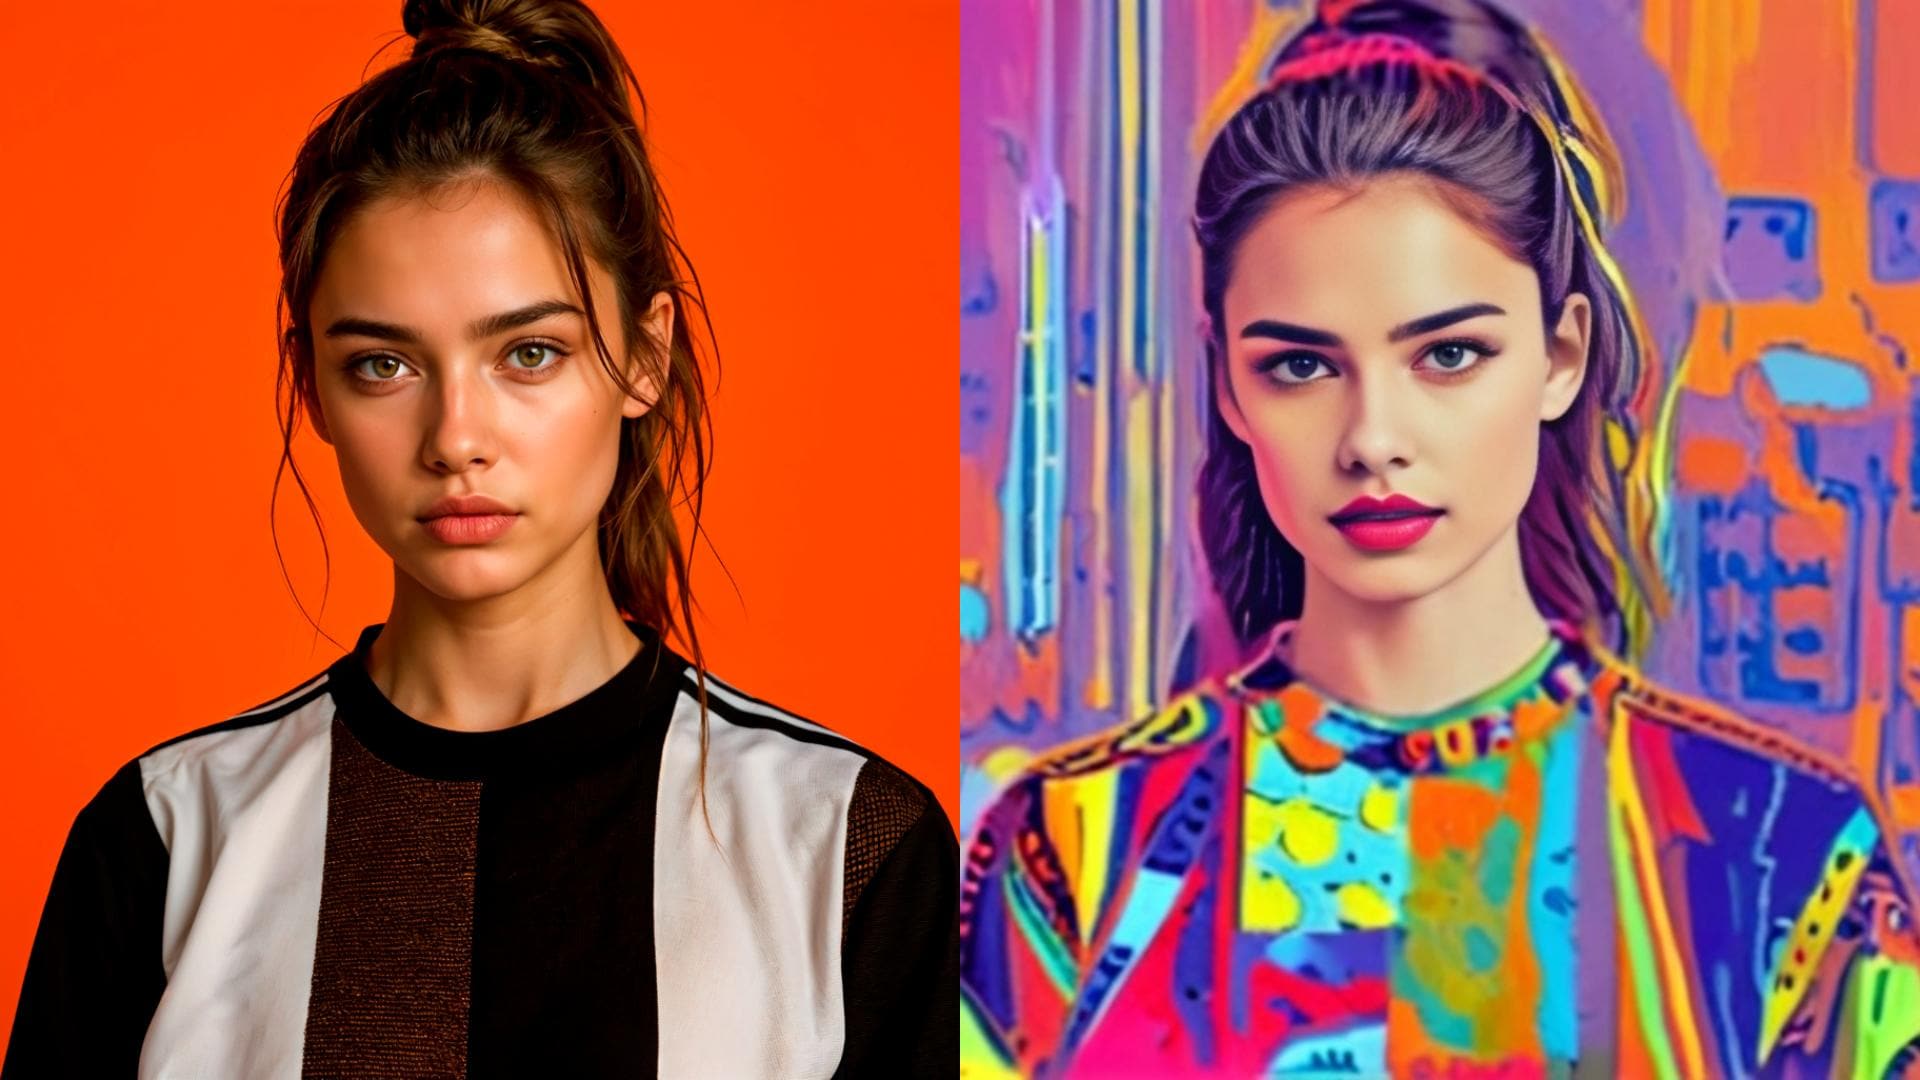
- After a short while, you will get the result. Here's a quick comparison so that you can check it out.
Conclusion
Pop art isn't just a passing trend. It's a visual statement, and it's here to stay. Whether you want a quick filter with PicsArt on your mobile, advanced customizations in Photoshop, or AI-generated masterpieces via MidJourney, there's a tool for every skill level. And if you want a one-stop solution for transforming and animating your photos, Filmora's AI-powered filters make it effortless.
Download Filmora today and unleash your inner Warhol on desktop or mobile.
secure download 