
Photo editors and editing brands now look for cutting-edge Photoshop retouching solutions to improve their image quality and appearance.
With AI Photoshop retouching, anyone can turn ordinary pictures into visually pleasing works of art. Thanks to AI retouching in Photoshop, one can enhance images to make them appear more professional and appealing.
This article explores the significance and power of AI skin retouching in image enhancement. Also, learn how Photoshop and Wondershare's Filmora's AI retouching features revolutionize the next-gen image editing landscape.
In this article
The best editor helps you edit photo and video without hassle.

Part 1: AI Photoshop Retouching Tools & How To Use Them
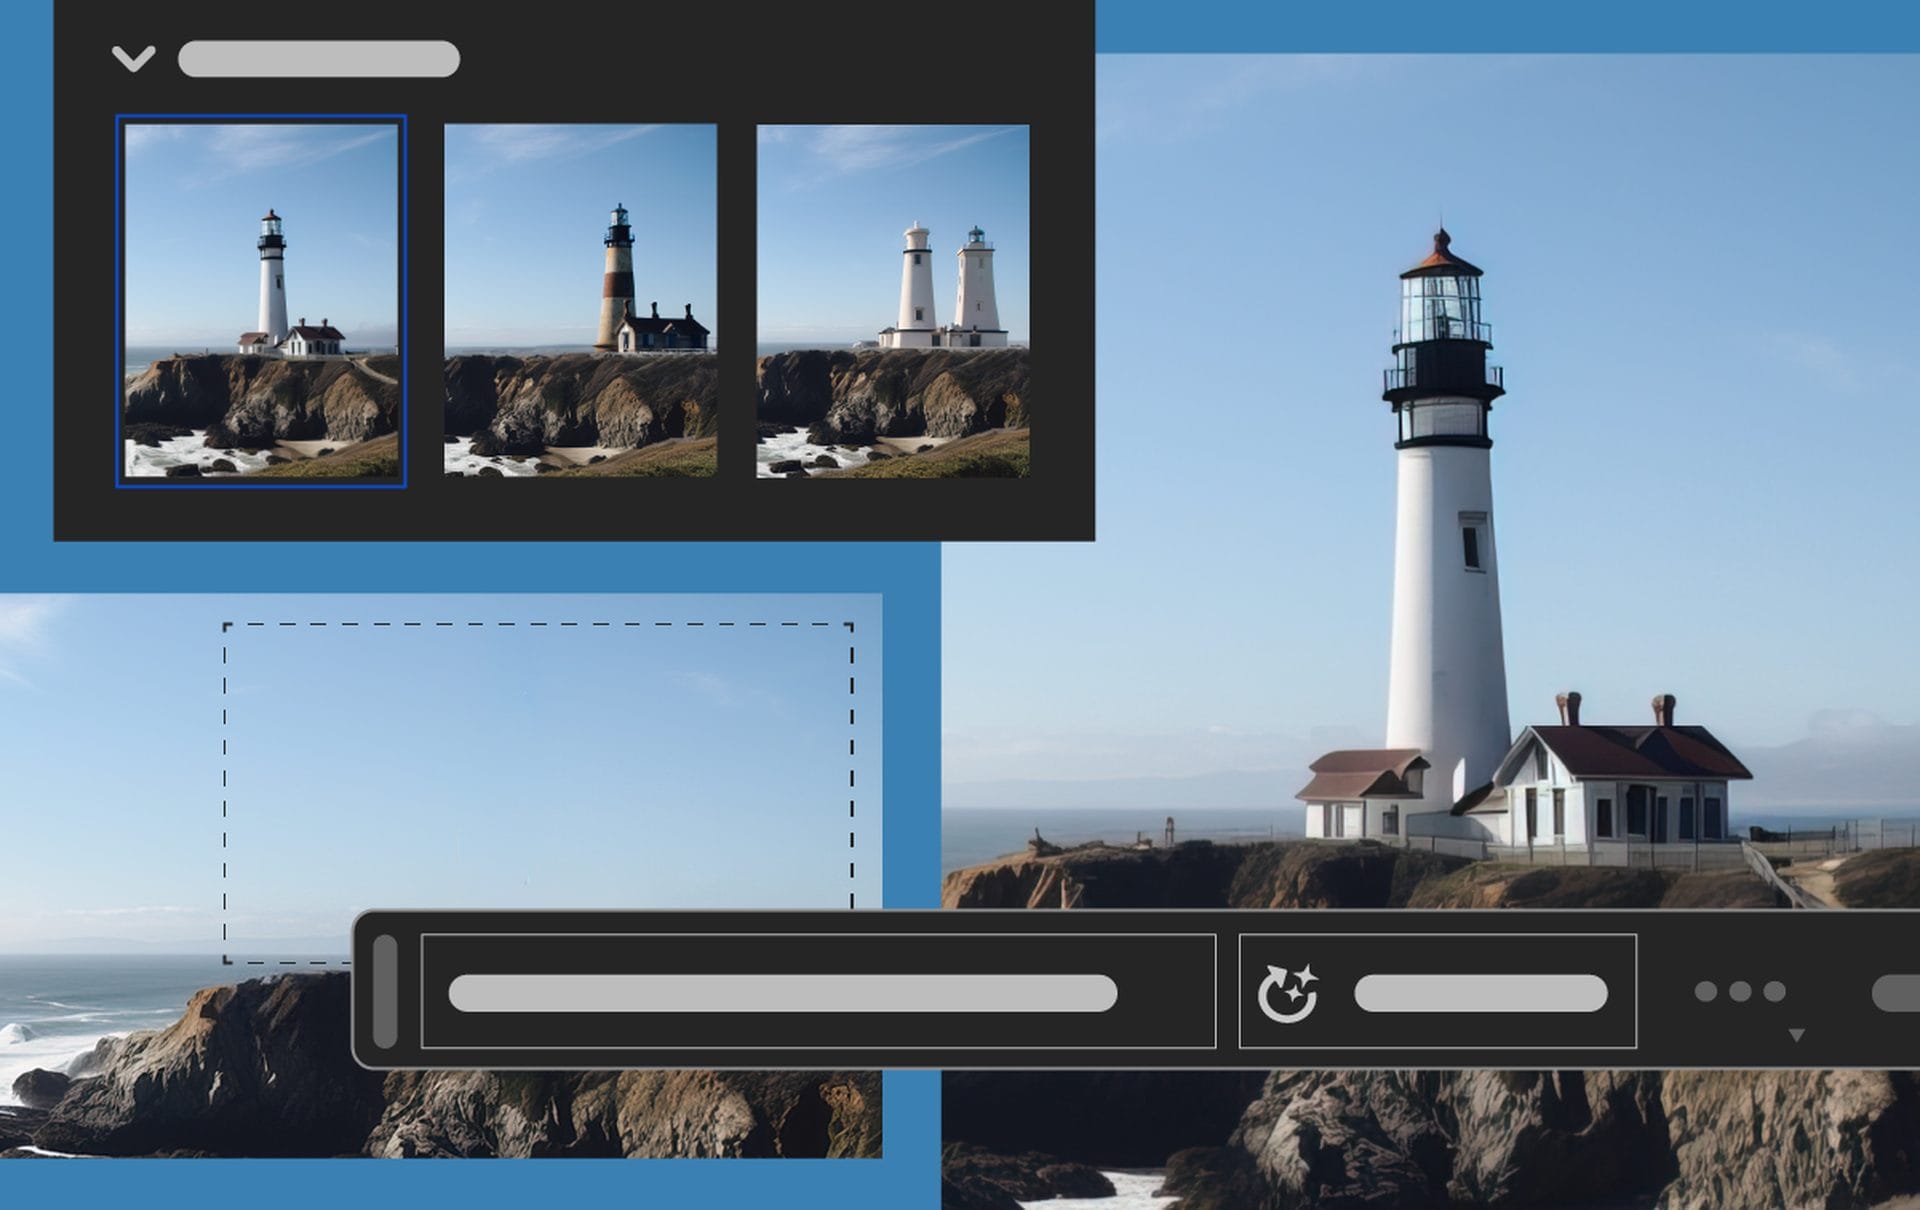
Today, Adobe Photoshop features a range of tools that use the power of AI to accelerate and enhance the photo retouching process. From whitening the teeth to smoothing the skin, these tools can enhance your image in numerous unimaginable ways.
Thanks to these AI-powered Photoshop retouching tools, individuals can now save time and generate high-quality images in no time. But how do these tools work? They use ML algorithms to analyze images and highlight the improvement areas. Once done, these tools put this data to work by editing the images within seconds.
AI skin retouching Lightroom and Adobe Photoshop Generative Fill are the two most popular and widely preferred AI Photoshop retouching tools in the market. Before we learn more about them and how they work, explore the steps to use an AI Photoshop retouching tool in general:
Step 1
Open Photoshop and select the image you want to fine-tune and edit.
Step 2
Navigate to the Filter menu and tap the Neural Filters option.
Step 3
Once done, click on the Retouch category. You'll find it in the Neural Filters panel.
Step 4
Now, choose the AI Retouching tool/feature you intend to use.

Step 5
You can also change the degree of the retouching effect by using Sliders. Finally, click the Apply button to add the retouching effect to the image.
Now let's learn what the two most popular AI Photoshop retouching tools are and how to use them:
Part 2: AI Photoshop Retouching Tool 1: Adobe AI Skin Retouching Lightroom
Adobe Lightroom's cutting-edge AI retouching features pave a quick way to enhance your images. A few simple clicks and you're done smoothening skin or brightening teeth on the image. Even someone new to this AI-powered editing technology can produce results of the highest standards.
Nevertheless, here is a step-by-step guide on using the AI skin-retouching Lightroom tool:
Step 1Get Rid of Blemishes
Always remove stray hairs and any blemishes or markings on the skin. To activate the Spot Removal tool, click on its icon. Click on the area you wish to remove now. To remove the blemish, Lightroom automatically chooses another part of the photo to sample from. Lightroom allows you to transfer the selected area to another area of the image if you disagree.
Step 2Accentuate the Hair's Peculiarities
Now you can choose a different Adjustment Brush and repeat the previous steps. Choose Clarity this time, then paint over the subject's hair. The midtones will stand out, and the hair will pop slightly.

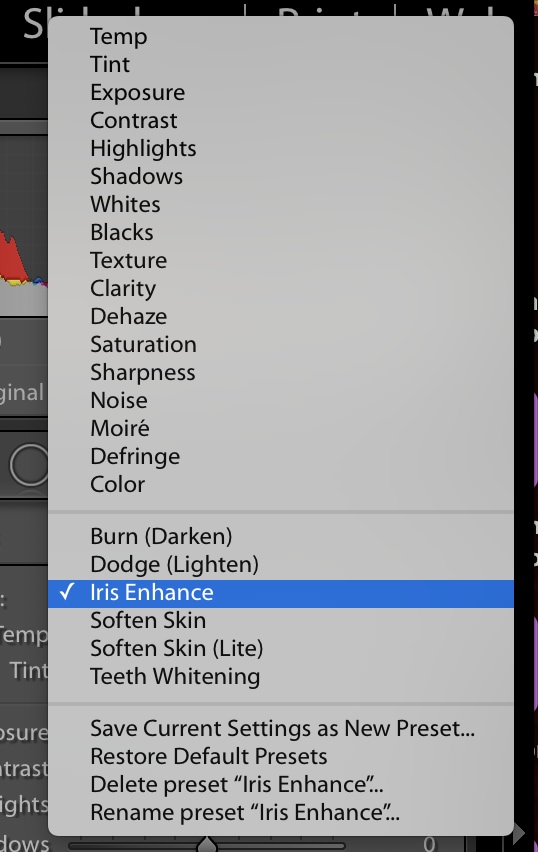
Step 3Improve the Eyes
To create a new Adjustment Brush, click the Adjustment Brush panel and choose Iris Enhance from the dropdown menu. The model's eyes' irises should now be painted in. You may ensure that you haven't included any undesirable portions of the image by pressing the letter O on the keyboard, which makes it easier to view the painted region (which shows as a red overlay).
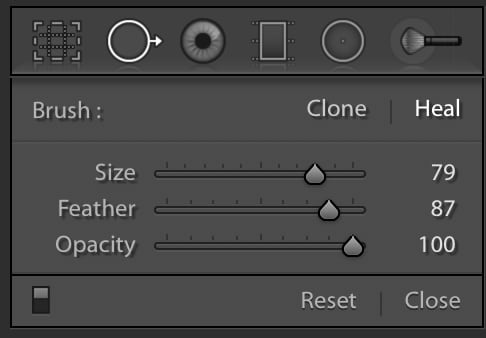
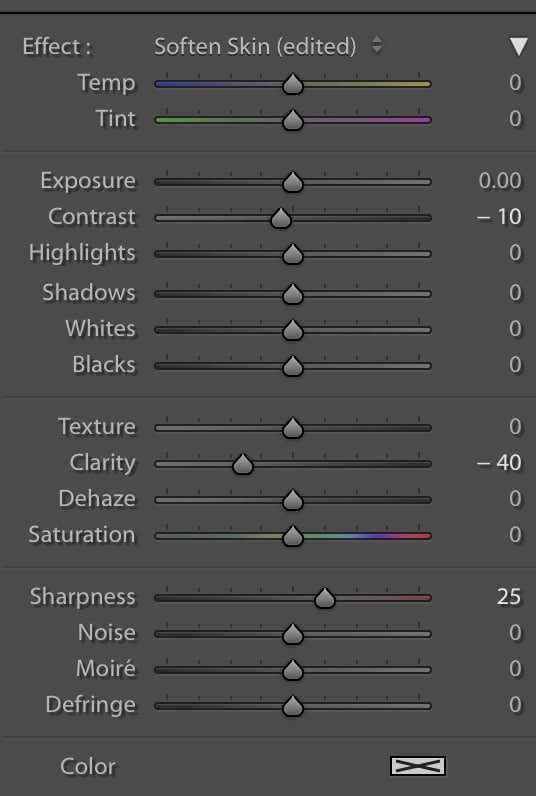
Step 4Skin Softening
To add the finishing touches, choose the Soften Skin brush. Some people may not even require it as they already have beautiful skin. Here, use your discretion to create a natural appearance without losing detail. Clarity is reduced by this brush's default setting at -100; you might wish to increase it to -50 or less.
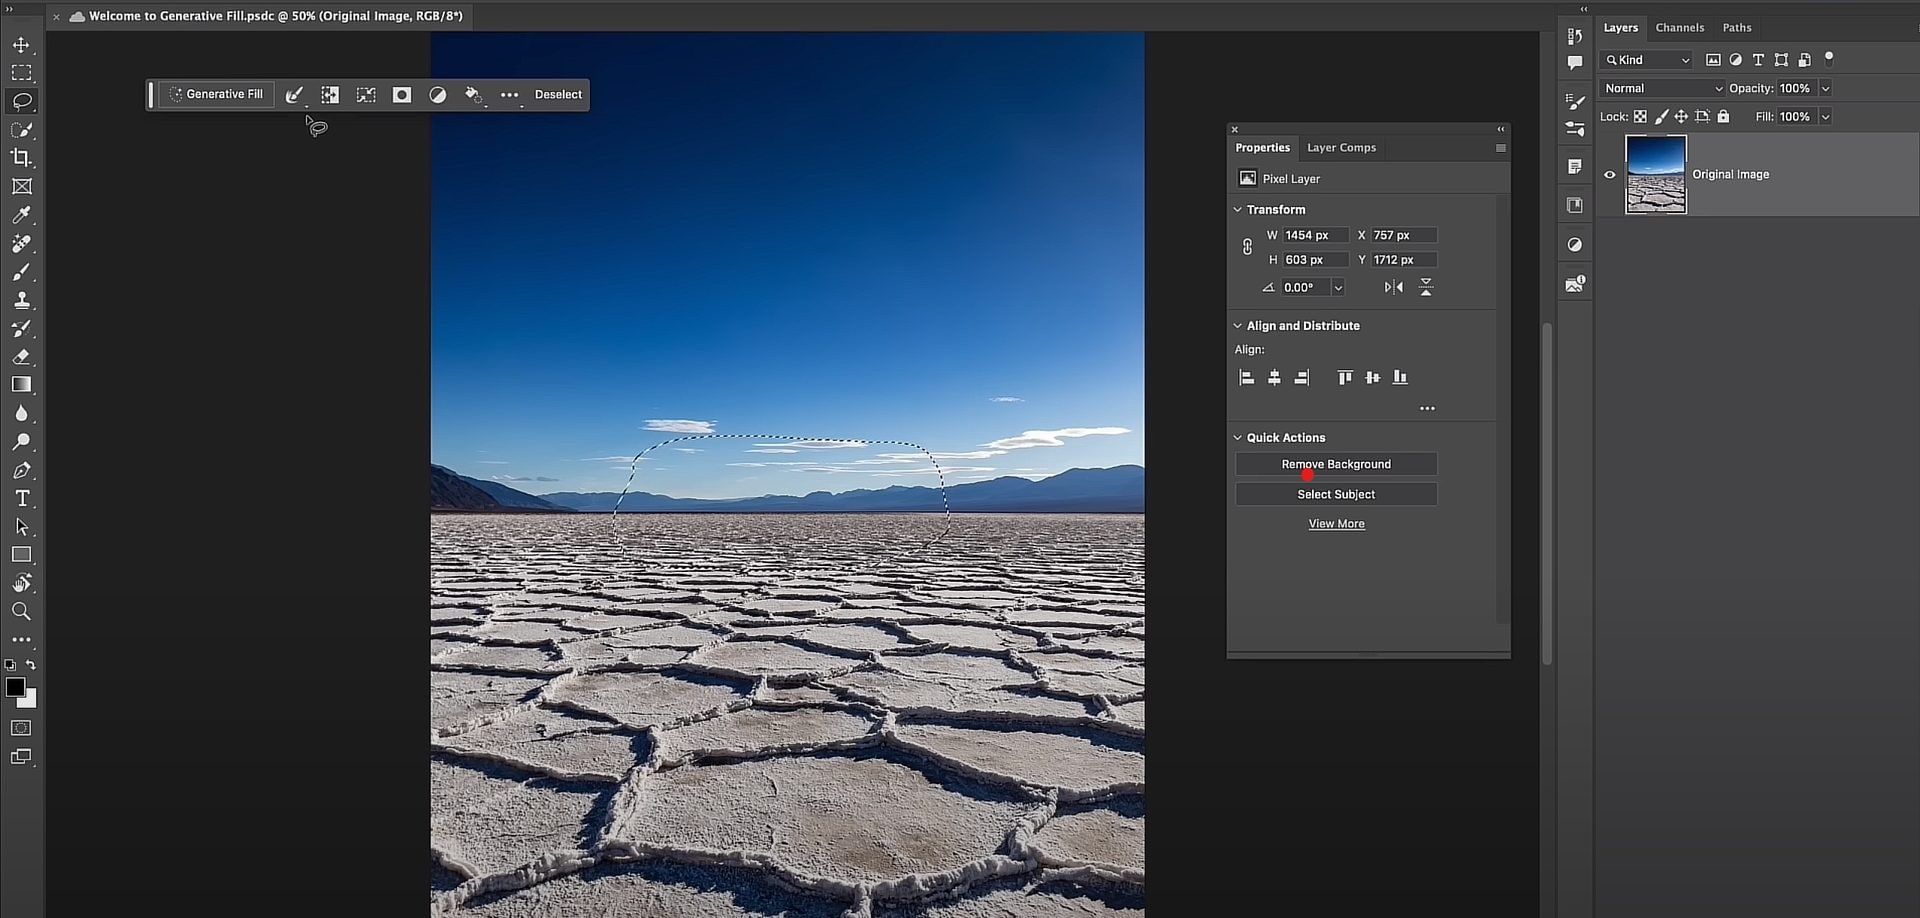
Part 3: AI Photoshop Retouching Tool 2: Photoshop Generative Fill
Creators and editors seeking ways for quick and effective retouching can leverage the power of this AI-backed program. To leverage the Photoshop Generative Fill AI retouching tool, follow these detailed steps:
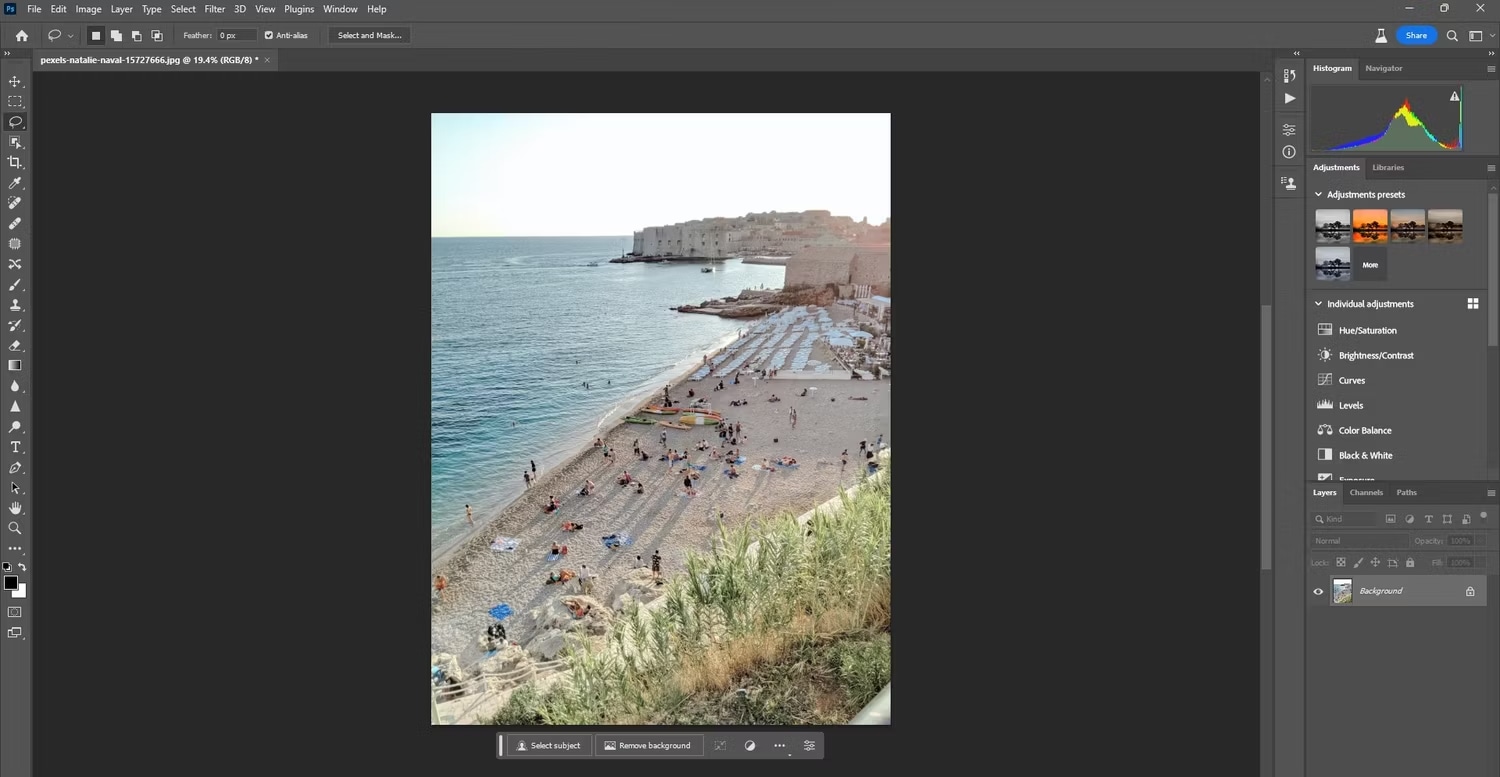
Step 1Remove Unwanted Elements Within Seconds
- Removing undesired features from a shot, such as stray items or imperfections, takes a lot of effort during image editing.
- Simply tap on the image you want to retouch on Photoshop, direct to, and tap on the Content-Aware Fill option.
- Subsequently, choose the Generative Fill option, tap on the brush, and use it to remove any unwanted items from the image.
Step 2Improve Image Quality
Beyond just removing objects, AI Photoshop retouching can also improve the overall quality of the image.
Select the area of images and click on the ‘Retouch Skin,' ‘Improve Background,' or ‘Enhance Color' options to make the changes.
Step 3Maintain The Authenticity of The Actual Image

Now, look after maintaining the authenticity of the actual image as a creator.
When entering the prompt on the Generative Fill option, ensure that you use the right words. For instance, don't just say, ‘Fill in the background,' but rather, ‘Fill in the background with pine forest trees.'
Part 4: Wondershare Filmora: A Wildcard Entry Into The World of AI Photo Retouching!
Although Photoshop is a great tool for retouching, you cannot rely too much on its other AI features. On the other hand, Wondershare Filmora leads the industry with its state-of-the-art AI features. Filmora, a revolutionary video editing software in today's era, is the perfect tool to leverage for creating AI-backed well-edited videos.
From transitioning your images into videos to enhancing their overall quality with the power of AI, Filmora has taken the simplicity and rapidity of editing images to the next level by letting anyone customize images with the power of AI.
With the AI-powered video editing software — Filmora, anyone can now edit an image or video per their needs and desires. Despite helping you create images using text prompt via its AI Image feature, Filmora brings you various other range of AI-powered features, including:
AI Image
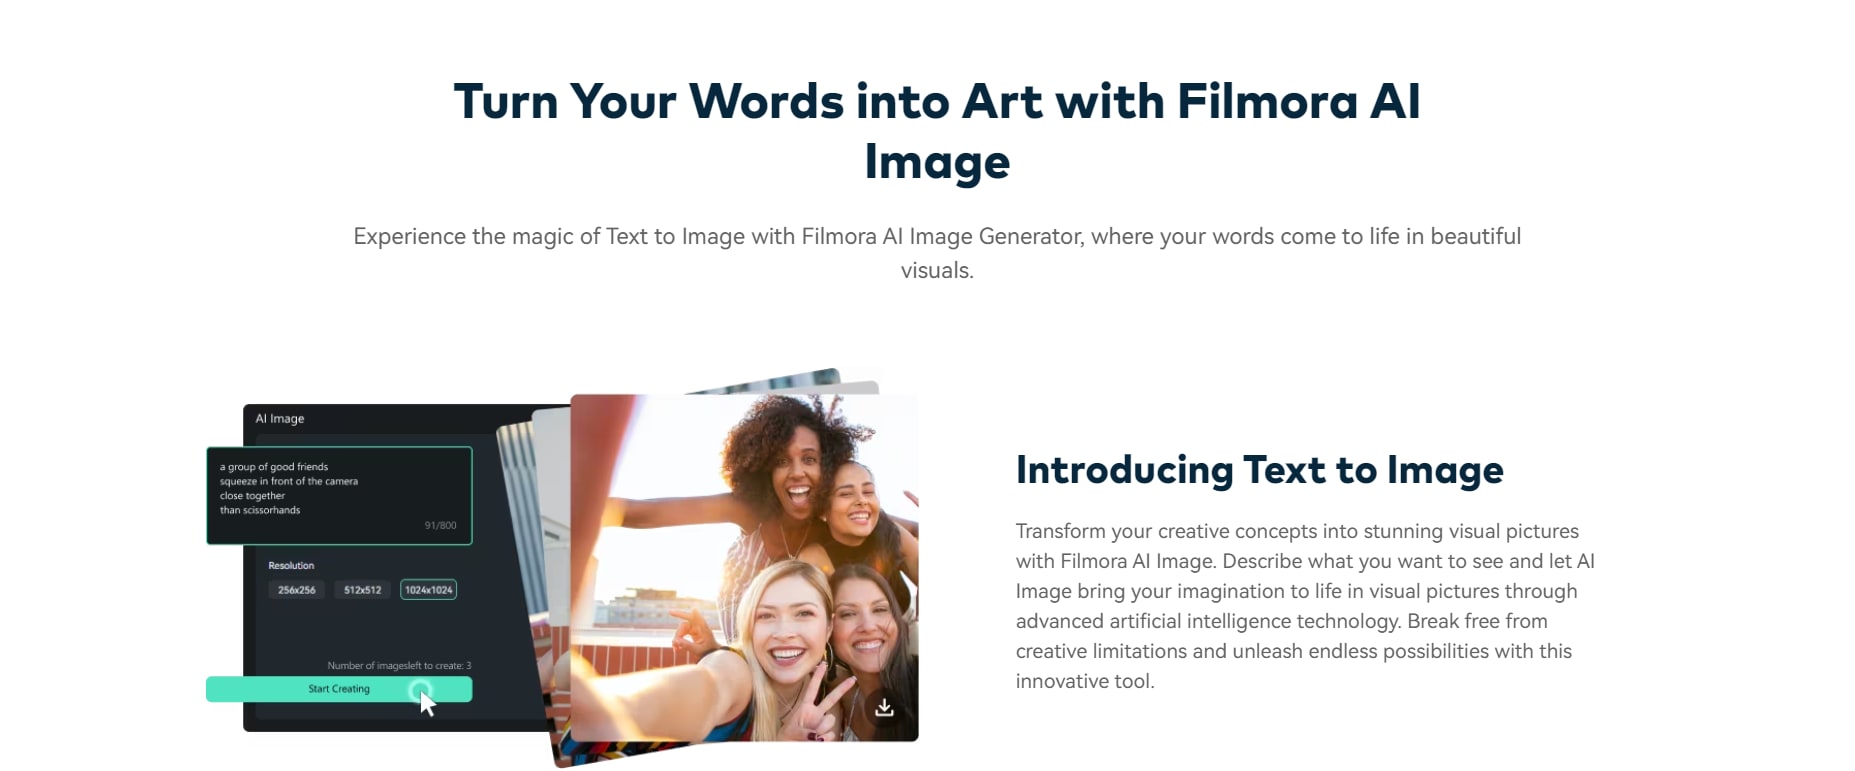
Filmora has introduced an AI-powered internal image generator for its editing community. Leverage Filmora AI Image to convert your imaginative ideas into beautiful visual representations. Give AI Image a description of what you'd prefer to see, and it will use cutting-edge artificial intelligence algorithms to create visual representations of what you've envisioned.
AI Portrait
Use the AI Portrait tool in Filmora to unleash your creativity. With the help of this adaptable tool, you can remove background objects with high accuracy using a simple drag and click to give your videos a creative flair.
AI Smart Cutout
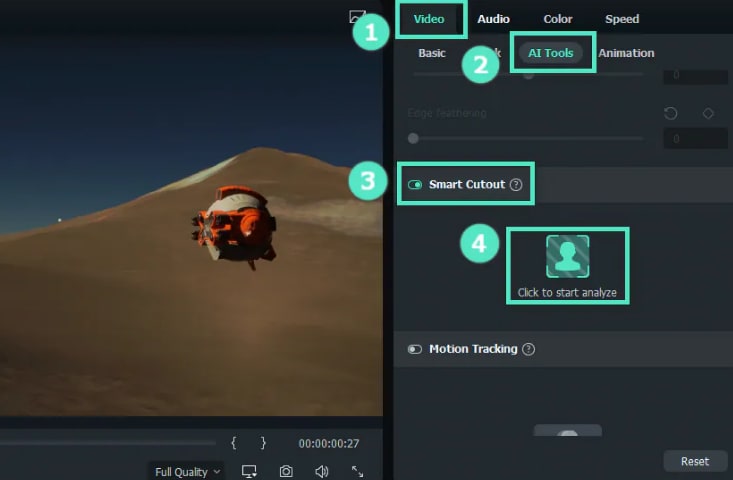
Delete the unpleasant manual object removal. You may choose and remove any undesirable things from your videos using Filmora's AI Smart Cut tool.
Conclusion
When it comes to AI retouching, Photoshop is undoubtedly the best! However, content creators cannot always rely on your AI-powered images to generate results. Eventually, you'll have to transition into more powerful functions like video and audio editing. This is where the power of Filmora and its AI features comes in.
These AI features can still make your images look majestic once you turn them into videos. Filmora is an excellent choice for creators requiring a strong, AI-powered video editing platform. To retouch images, however, you might want to consider using Photoshop or another specific photo editing program.
All things considered, if you're seeking a robust image-retouching tool, Photoshop is for you. However, when it comes to the best editing software, Filmora is the greatest of all time!.
