
 100% Security Verified | No Subscription Required | No Malware

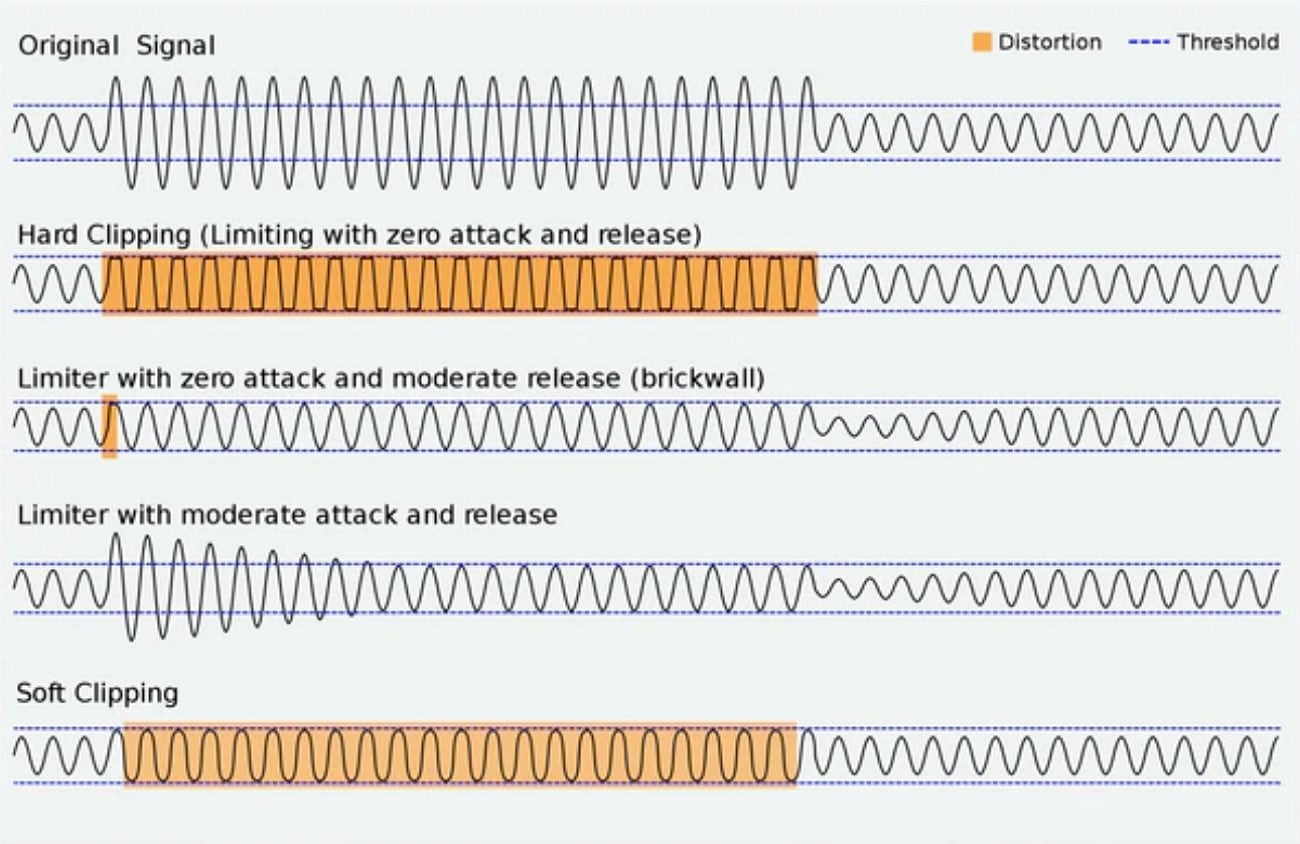
Most people experience an unpleasant noise while listening to an audio file. This usually happens when there is a certain change in the audio waveform, and the peaks are flattened. The result of this change is a harsh sound in which the amplitudes cross the maximum value. One of the reasons for this distortion is poor sound gain or accidental overloads.
This flaw can be managed using the right precautions during recording or utilizing dedicated tools post-recording. In this article, we will discuss methods to remove audio clipping for a smoother and more pleasant sound quality.
In this article
Part 1. Prevent Audio Clipping During Recording
Use Professional-Grade Recording Equipment
High-quality recorders like Zoom F3 or Sound Devices MixPre II handle wide dynamic ranges and help capture clear sound without distortion.
Recommended Recording Settings
- Use a sample rate of 48kHz or higher (up to 96kHz) to capture detailed audio.
- Record with 24-bit depth for sufficient headroom; 32-bit offers even more dynamic range.
- Avoid recording at too high gain to prevent clipping—keep input peaks ideally between -12dB and -6dB.
Tools to Use
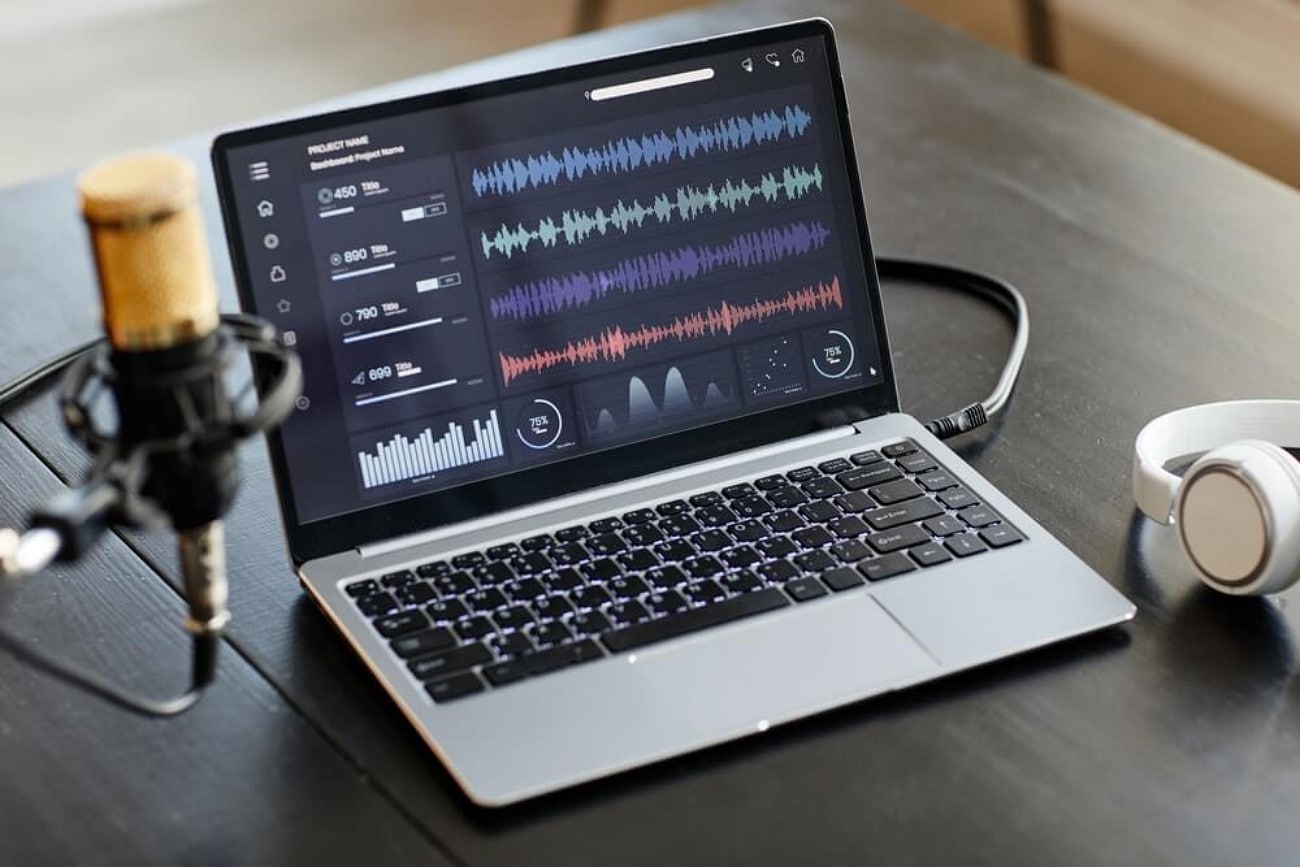
Use DAWs with Live Monitoring:
Software like Audacity, Reaper, and Adobe Audition offers real-time waveform and level monitoring, allowing you to:
- Hear exactly what's being recorded with minimal latency
- Visually spot clipping or input spikes as they occur
- Make instant adjustments before the problem becomes irreversible
Pair with Audio Interface Software:
Tools like PreSonus UC Surface and Universal Audio Console let you:
- Adjust preamp gain digitally (without touching hardware knobs)
- Fine-tune levels before the signal reaches your DAW
- Achieve more precise and consistent gain staging
Part 2. Repair Audio Clipping in Post-Production
The editing phase is the next stage to counter sound clipping, especially if it is not handled effectively in the previous phase. Below are the essential steps that you can utilize in post-production for crisp and clear audio:
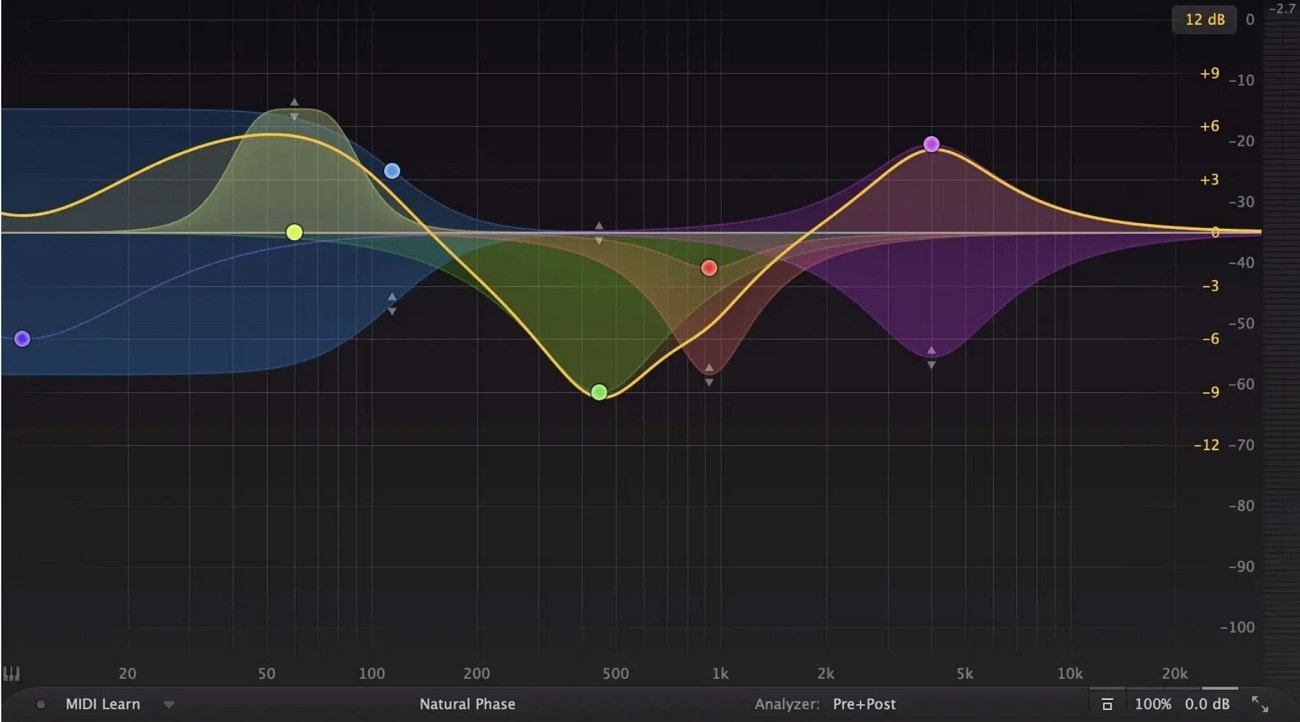
EQ Cleanup
It is usually the first move to address the sound issues of audio clipping. By subtly reducing the frequency range with a parametric EQ, smooth out the harsh texture, especially in the 2kHz to 5kHz frequencies.
Compression
The next thing to manage is the dynamic inconsistencies that clipping may have left. Create a uniform balance between the louder and quieter parts by gently compressing the signals. Control the peaks and maintain a natural dynamic range throughout the audio.
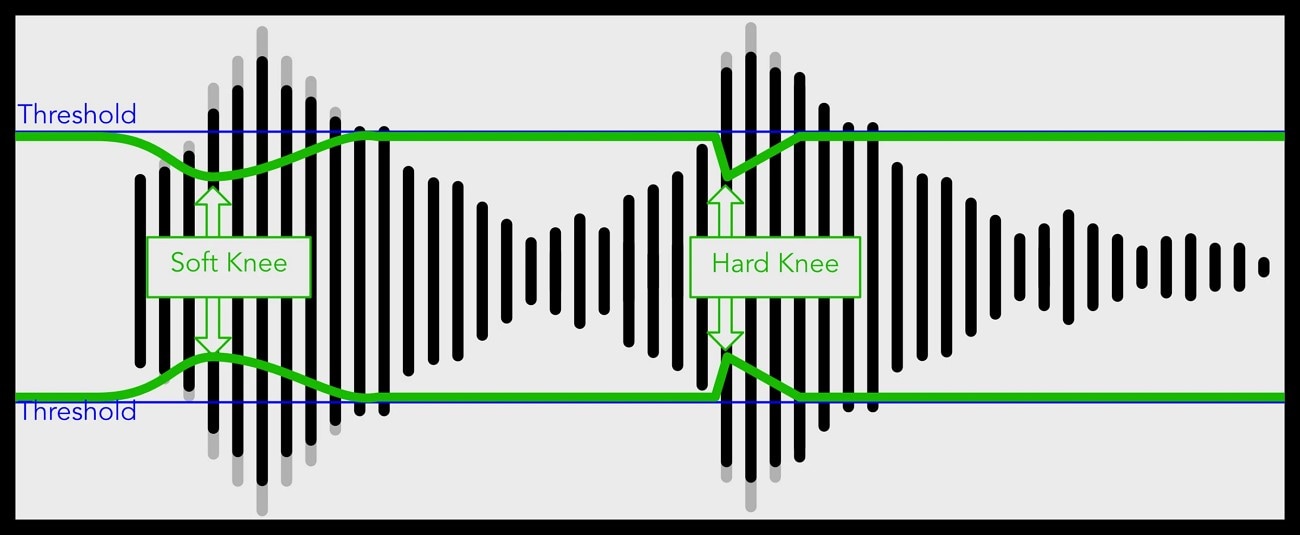
Limiter
In this step, make sure your audio does not exceed its maximum output level after editing. A limiter catches and manages any final peaks that might cause clipping sound during playback or export. The integer-sample distortion can be prevented to make the audio sound crisp and clear when played on consumer-grade equipment.
Using Video Editor
One of the most reliable solutions to remove the sound clipping from your video and audio files is to use Wondershare Filmora. This all-in-one multimedia tool provides the utility of fine-tuning the audio to the highest quality by offering basic and AI-powered functions. It automatically detects the flaws in your audio and provides a solution to remove them seamlessly using advanced technology.
The tool effectively eliminates background noise to ensure clean and professional audio while enhancing the clarity of the voice. You can check the instant results before and after the audio enhancement process. It offers various features that help users eliminate audio clipping instantly.
Original:
Enhanced:


How to Remove Audio Clipping Using Filmora
Mentioned below are different techniques that you can utilize to fix the audio clipping issue in your media effortlessly:
This utility automatically stretches and adjusts the audio according to the length of the video. It helps users rearrange songs and other music pieces without losing the quality. The feature eliminates the need for manual cutting and ripping of the audio to match the video length. Provided below are the steps to learn how to fix audio clipping within the Filmora interface:
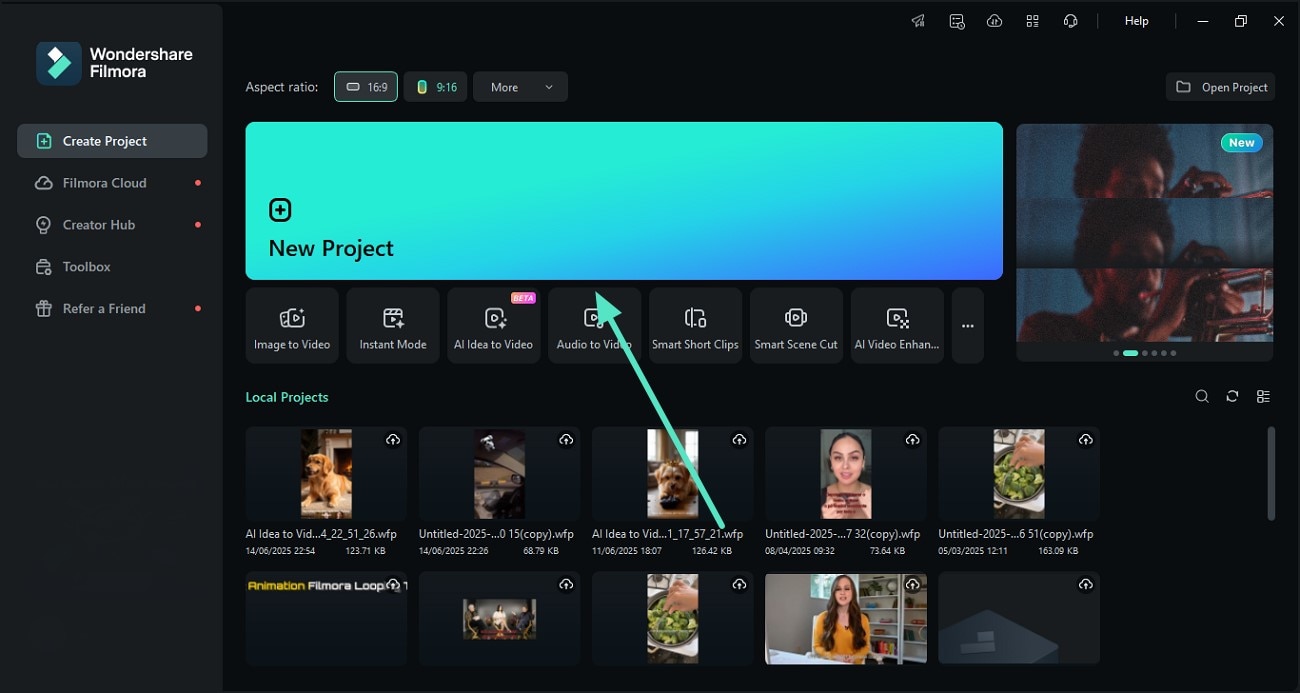
Step 1Start By Creating a New Project
- Press the "New Project" option after launching Filmora on your device.
- Import the audio and video files into the interface and drag to the editing timeline.
Step 2Enable the Audio Stretch Feature
- Locate the "Audio Stretch" icon at the top of the editing timeline.
- Drag the audio track accordingly to match the audio with the video length.
 secure download
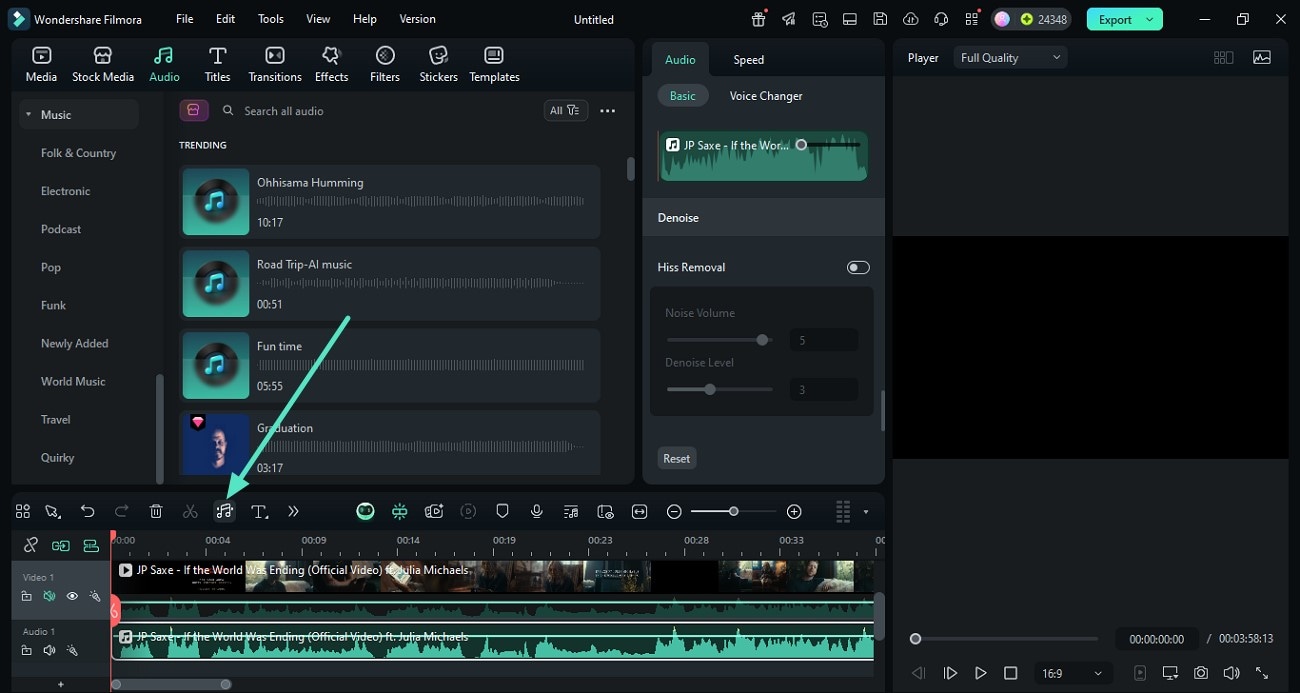
 It enables users to automatically remove unwanted noise from their videos by detecting the hum and hiss efficiently. Moreover, it lets you adjust the intensity of the noise remover according to your preferences.
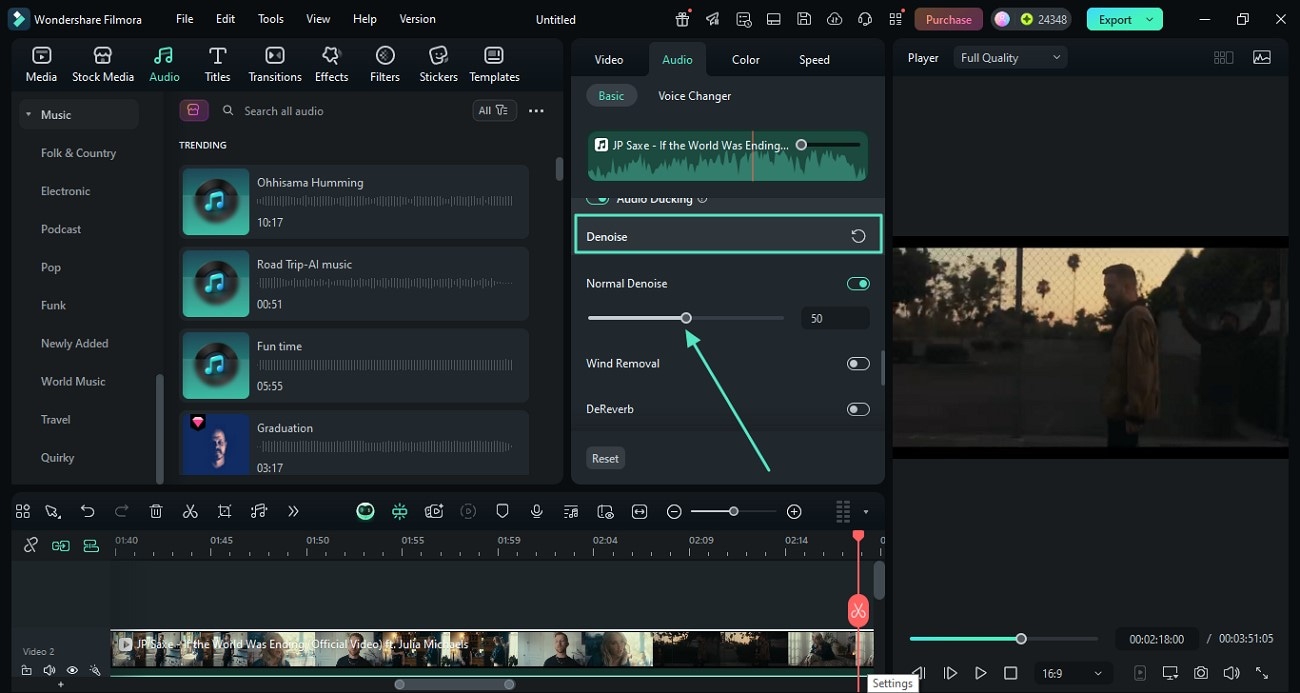
Instructions: How to Perform Audio Denoise With Filmora
- After importing the video to the editing timeline, access the audio panel located within the interface.
- Scroll through all the way to locate the "Denoise" option.
- Adjust the "Normal Denoise" by dragging the respective sliders.
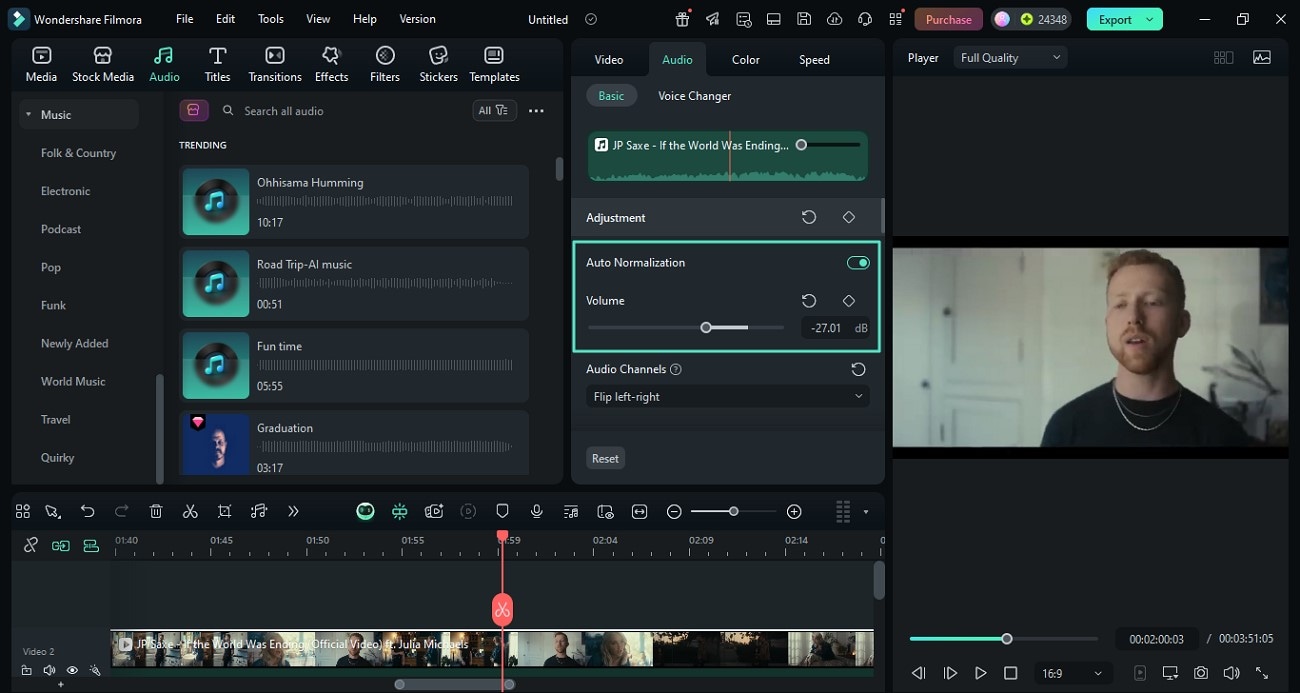
Users can automatically balance audio levels across their video clips while preventing audio clipping. It offers a consistent listening experience by allowing users to adjust the volume of their audio and video clips from left to right.
Guide to Normalizing Audio With Filmora
- Locate the "Auto Normalization" feature by accessing the audio panel.
- Enable the toggle and adjust the volume by dragging the slider.
- Drag the drop-down menu to select the audio channel.
- Adjust the sound balance and fade in and fade out according to your preferences by dragging sliders.
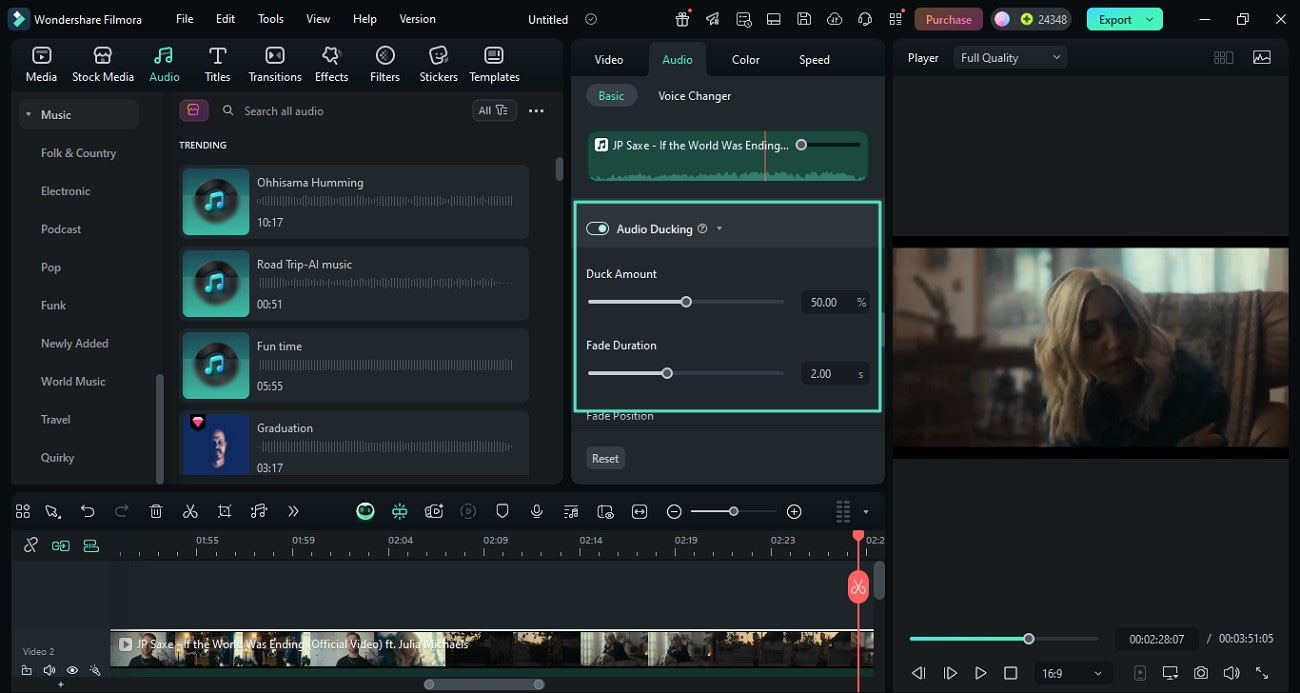
Filmora's Audio Ducking feature automatically lowers the background music volume when there is dialogue or voiceover. This feature is especially useful for tutorials and vlogs where background music might overpower the speech. To use this feature for removing audio clipping, follow the instructions provided below:
Ducking Audio With Filmora: A Simple Guide
- Scroll through the audio panel to locate the "Audio Ducking" feature.
- Turn the toggle on and adjust the "Duck Amount" by dragging the slider.
- Adjust the "Fade Duration" and position according to your preferences.
Tips For Effective Visual Editing
Video editing can make a significant difference when addressing audio issues such as clipping or distortion. Here are some essential tips that you can use to enhance your editing workflow:
- Zooming the visual display of audio lets you pinpoint the exact spot of distortion to make it easier to address the problem areas.
- There is no need to record the entire track if the clipping or unwanted noise is present only in a certain segment of the recording. Instead, you can recapture the flawed segments and splice them into the original audio.
- You can apply short fades between clips to minimize audio transitions when the recording is complete. This creates a natural flow and prevents clipping that can distract listeners.
- Try to match the volume and shape of the surrounding waveform when recording the audio. It will make the transition less noticeable and help avoid unnatural volume jumps.
Part 3. Export Audio with Optimal Quality Settings
The final step is to export the audio with optimal settings once it is edited and cleaned using Filmora. Selecting the correct export configuration is crucial if your content will be published on multiple streaming platforms.
Recommended Export Settings in Filmora
- Exporting in WAV format is ideal for preserving audio quality because it is a lossless format that retains all audio details without compression.
- MP3 at 320 KBPS is a good balance between quality and size if you are targeting online platforms.
- It is essential to match the project sample rate during export, which is typically 48 kHz for video projects offered by Filmora.
secure download Steps for Exporting Audio Files With Different Settings on Filmora
As discussed, Filmora offers different export settings to save the output in high quality. To export your results after learning what is audio clipping, read the steps mentioned below:
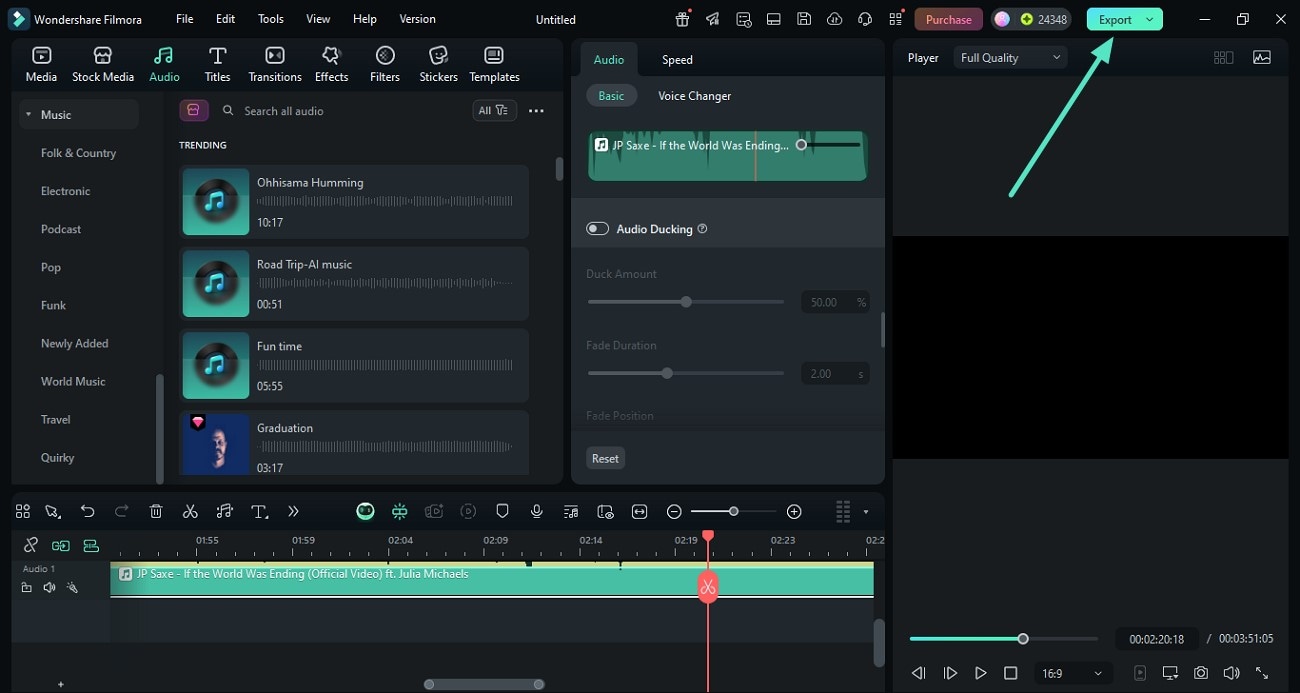
Step 1Click the Export Button After Editing
- Head to the top-right corner once your audio file is ready to be saved.
- Press the "Export" button to proceed to the next interface to adjust the audio settings.
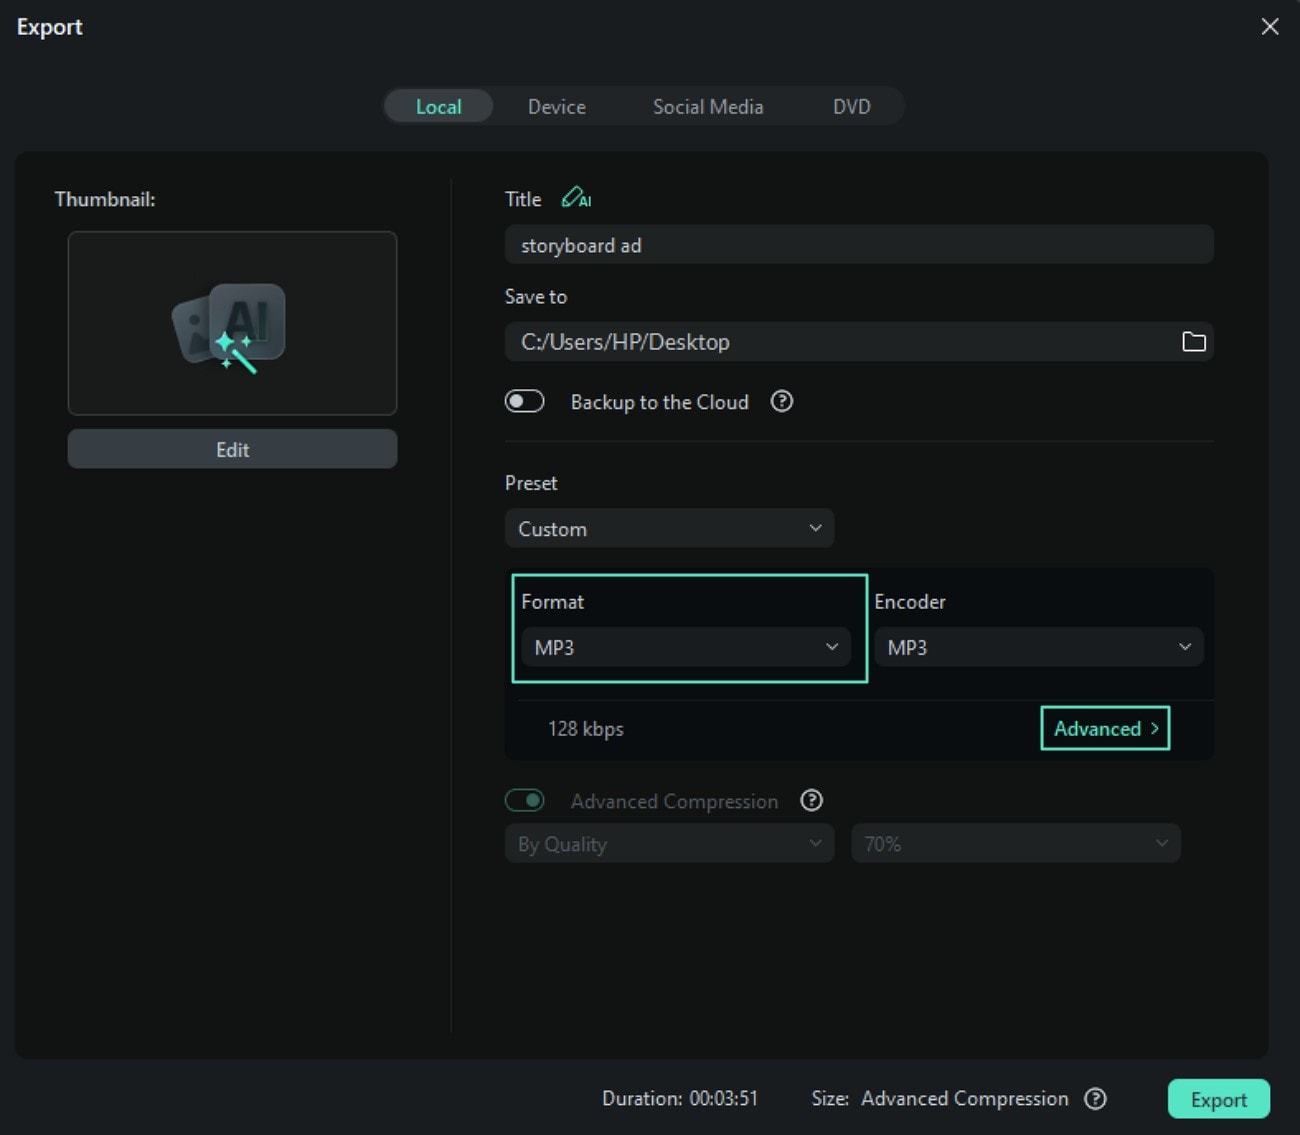
Step 2Select Format and Other Settings
- Expand the "Format" section to select the output format as MP3 or WAV.
- Click on the "Advanced" option to enable advanced settings.
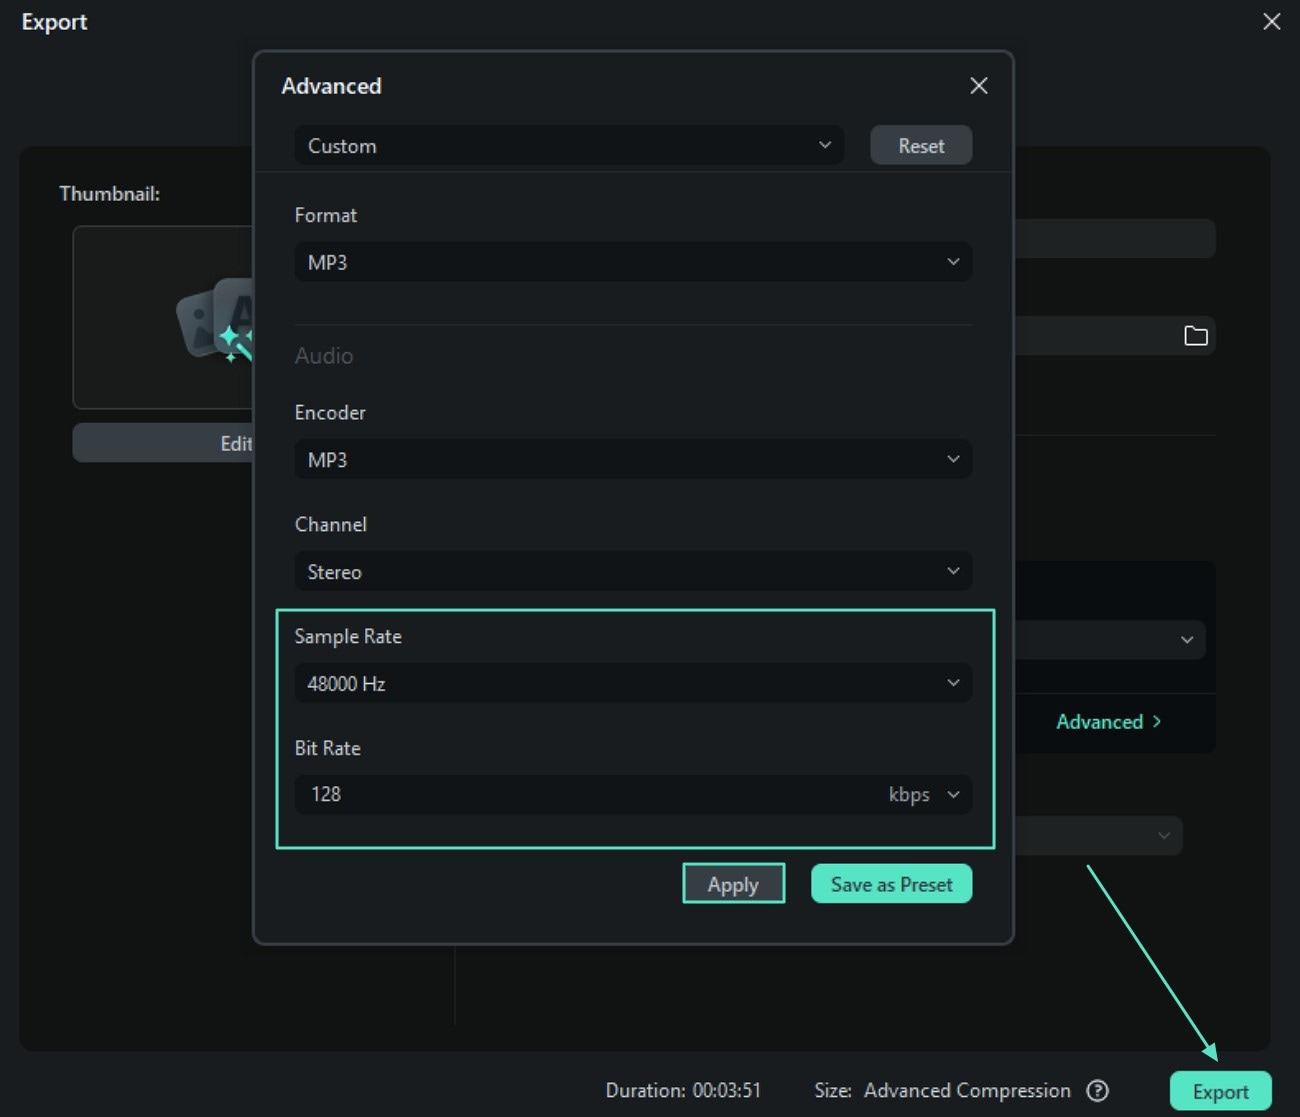
Step 3Configure Advanced Settings and Export
- In the following window, select settings like "Sample Rate" or "Bit Rate" by expanding the drop-down menu.
- Press "Apply" to save the changes made to the output.
- Finally, hit the "Export" button to save the audio without sound clipping to your device.
Conclusion
To conclude, this article has discussed what audio clipping is and its negative impact on the overall listening experience. The article also suggested various ways to fix this flaw in the recording and post-production phases. However, one of the best tools that removes these audio artifacts is Wondershare Filmora, which offers various audio enhancement features that help you produce clear audio.
secure download 