
 100% Security Verified | No Subscription Required | No Malware


 ChatGPT
 Perplexity
 Gemini
 Claude
 Grok
Grok
Converting speech into text has never been easier, thanks to Hugging Face’s speech-to-text models. Whether you’re transcribing interviews, generating subtitles, or developing AI-powered applications, Hugging Face provides state-of-the-art speech recognition powered by advanced machine learning models. The best part? It’s highly customizable, allowing you to fine-tune models for better accuracy and performance based on your specific needs.
In this guide, we’ll walk you through how to set up and use speech-to-text Hugging Face API, explore its customization options, and discuss practical use cases. But what if you need a simpler alternative? Don’t worry—we’ll also introduce an easy-to-use speech-to-text tool that gets the job done effortlessly. Whether you’re a developer, content creator, or business professional, this guide will help you find the best speech-to-text solution for your workflow, keep reading.

In this article
Part 1: How Hugging Face Speech to Text Works
Hugging Face Speech-to-Text is a great feature inside the Hugging Face Transformers library that allows you to turn spoken words into written text using pre-trained models. It uses advanced automatic speech recognition (ASR) technology to transcribe speech. With transformer based architectures like Wav2Vec2, the system processes audio data and converts it into text. And it does it with great accuracy.
One of the things that makes Speech-to-Text in Hugging Face stand out is its pipeline integration which makes it super easy for developers. With just a few lines of code you can process audio files and get text transcripts. Also, it has pre-trained models for multiple languages and speech scenarios so it’s adaptable for many use cases.
The speech-to-text process follows a step by step sequence to ensure accurate transcription:
- Audio Input: You provide an audio file to process.
- Feature Extraction: The system extracts speech features, log-mel filter banks. This helps to analyze sound patterns.
- Model Inference: A pre-trained transformer model processes the features and generates text tokens that represent spoken words.
- Text Output: The model converts these tokens into a text transcript.
Hugging Face speech-to-text models, particularly SeamlessM4T-v2, improve efficiency by implementing a dual sequence-to-sequence (seq2seq) framework. It features separate speech and text encoders, as well as a HiFi-GAN vocoder, which improves the quality of generated voice. This is a useful tool for speech recognition and automation, with applications including virtual assistants, live captioning, transcription services, and voice search.
Part 2: Setting Up Hugging Face Speech to Text
Below is a step-by-step guide on how to setup in order to use hugging face speech to text:
Step 1: Create a Hugging Face Account
The first you need is an account on Hugging Face. Creating an account gives you access to pre-trained models and APIs. If you don’t have an account already;
- Go to hugging face website
- Click on Sign Up
- Enter your details and create an account
- Once logged in, go to your Profile Settings
- Find Access Tokens, and create a new token (choose "Write" as the permission level)
This token will help you connect to Hugging Face from your code.
Step 2: Install Required Libraries
The next thing you need to do is to install all the libraries that you’ll need. To do this, open your terminal or command prompt and type:
| pip install transformers datasets torchaudio librosa soundfile |
Transformers is for loading Hugging Face models, torchaudio helps process audio data, while librosa and soundfile help load and modify audio files.
Step 3: Load the Model
After installing all the required libraries, the next thing you need to do is to load the speech-to-text model. You can use Wav2Vec2 as it’s one of the best pre-trained models for speech recognition.
|
from transformers import Wav2Vec2ForCTC, Wav2Vec2Processor import torch
# Load the model and processor model_name = "facebook/wav2vec2-large-960h" processor = Wav2Vec2Processor.from_pretrained(model_name) model = Wav2Vec2ForCTC.from_pretrained(model_name) |
Step 4: Convert Audio to Text
You need to get your audio file ready so the model can understand it. To achieve this, you need to load the audio into your software. Then, make sure it's in the correct format so the model can process it appropriately. You'll run it through the model to transform the speech to text.
|
import librosa
#Load an audio file and convert to 16kHz def load_audio(file_path): audio, sr = librosa.load(file_path, sr=16000) return audio
audio_file = "example.wav" audio_input = load_audio(audio_file) |
Process the audio input so the model can read it
| input_values = processor(audio_input, return_tensors="pt", sampling_rate=16000).input_values |
How to Customize Speech-to-Text Models
If you want your speech-to-text Hugging face model to work better, you need to fine-tune it. The basic model is good, but it might not understand certain accents, background noise, or special words. Training it with your own data helps it learn and improve, making it much more accurate for your needs. Here’s how you can fine-tune the model:
- Fine-Tune with Custom Data: Train the model with your own audio and transcription datasets to improve recognition of specific accents or industry terms.
- Adjust Inference Settings: Modify parameters like temperature and beam search to refine accuracy.
- Add Custom Vocabulary: Teach the model new words and phrases relevant to your domain.
Customization makes the model more precise and reliable for your specific needs. But if you prefer a simpler solution, check out the next section for an easy alternative to speech-to-text!
Part 3: An Easier Alternative: Automatic Speech-to-Text with Filmora
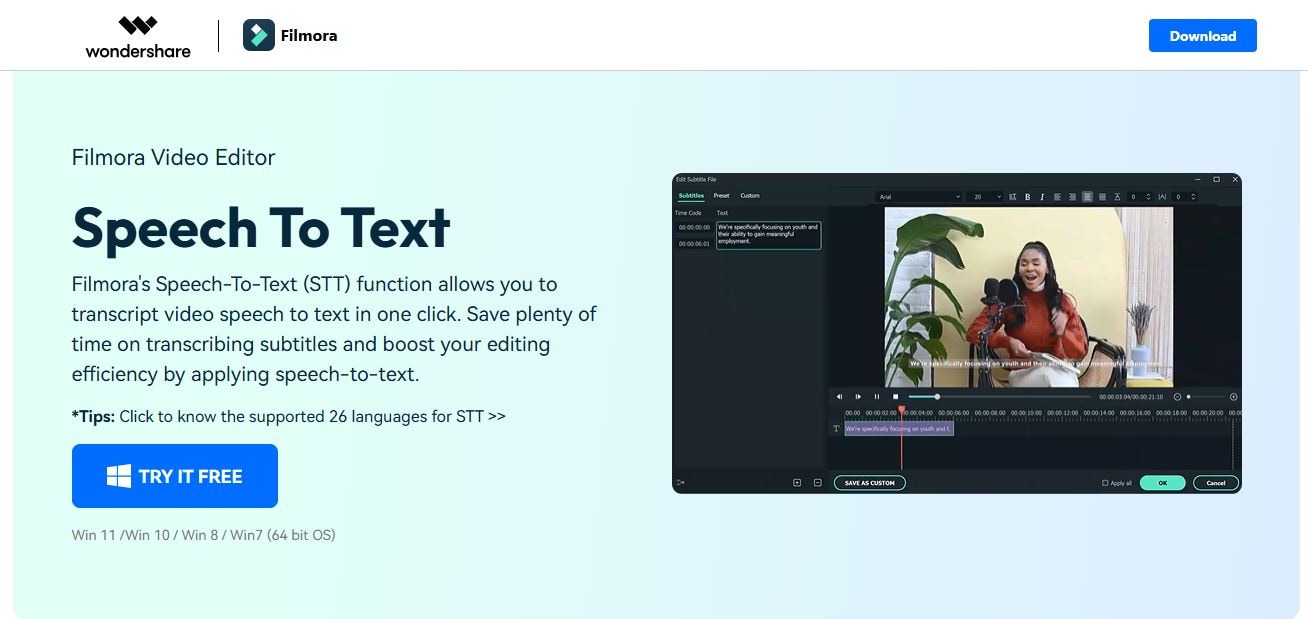
Hugging Face Speech-to-Text seems too complicated, and requires technical skills like coding. But there is an easier alternative_ Wondershare Filmora is a much simpler approach to convert speech to text. Filmora is a popular video editing software that has a speech-to-text tool that automatically transcribes audio with a few clicks.
- Filmora simplifies everything for you. So, you don’t need programming skills or complex configurations.
- It can transcribe video speech to text with up to 99% accuracy. So, content creators, students, and even business professionals can use it to generate text from audio quickly and accurately.
- Supports 45+ languages and works well for video subtitles, voice notes, and interviews.
- It’s equipped with the auto subtitle translation for multilingual content
- You can generate customizable animated captions to enhance engagement
- Also, Filmora’s inbuilt speech-to-text feature processes audio data very fast, and saves time for the user. It’s speed and time-saving ability is what make it the best alternative.
Part 4: How to Use Filmora Speech-to-Text
Filmora makes it very simple to convert speech to text. There is no need to create code or set up anything hard.
Just follow these simple instructions to get your transcript in no time using the desktop speech to text feature:
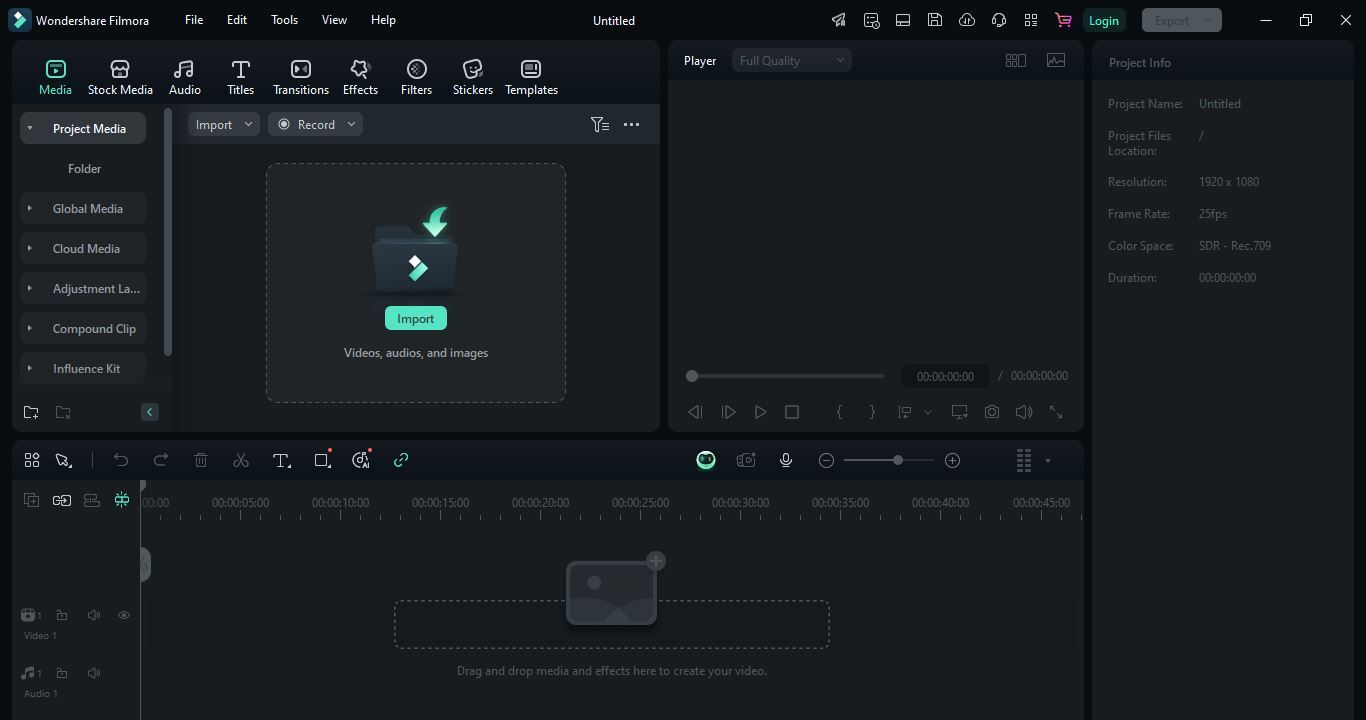
Step 1: Import Your Audio or Video
Open Filmora and add your audio or video file. You can do this by simply dragging and dropping it onto the timeline. This makes it easier for you. Once your file is in place, you’re ready to move on.
 secure download

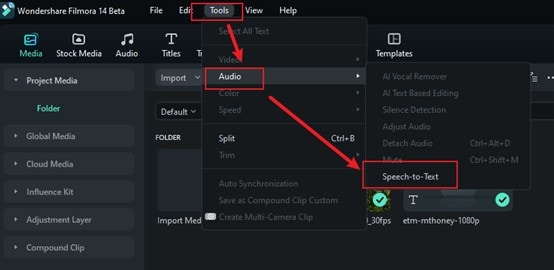
Step 2: Select the Speech-to-Text Option
Go to the Tools in the top menu bar and click on it. Choose Audio and then Text to Speech option to automatically analyze your audio. No need to adjust settings or do anything extra as it handles everything for you.
Step 3: Choose Your Language
Filmora supports many languages, so pick the one that matches your audio. This step is important because choosing the right language helps Filmora transcribe your speech accurately. If you skip this, you might get some incorrect results.
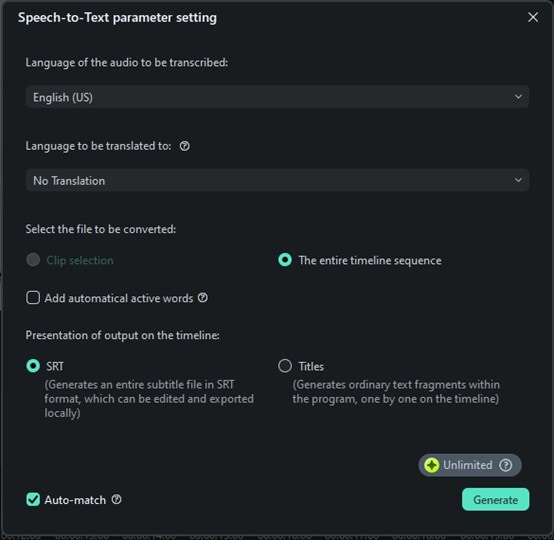
Step 4: Start the Transcription and Save
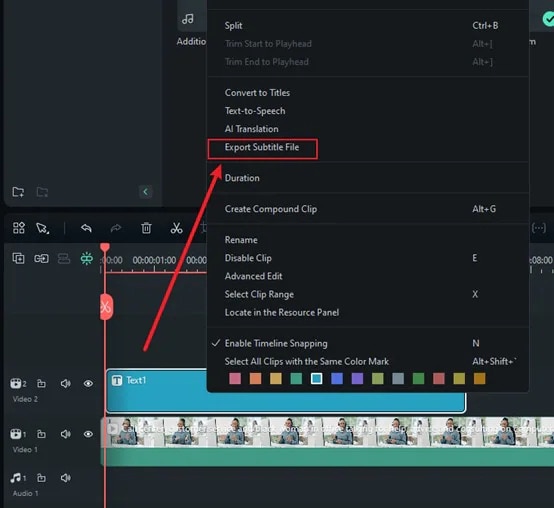
Now, just click Generate, and Filmora will start transcribing your speech. This part is really fast. Within seconds, you’ll see the spoken words appear as text. No waiting for hours, no complex setup, just instant results. Click on the text file, select Export Subtitle File transcript to save it to add as subtitles to your video.
If you want to convert video speech into text captions, Filmora also offers an AI Captioning feature on its mobile app. It allows you to generate text captions on your mobile device in less than a minute
Step 1: Download the Filmora app from the Google Play Store (Android) or App Store (iPhone). You can also get it from the official website. Once installed, open the app and tap New Project.
 secure download
 Step 2. Choose a video from your media library and tap Import to add it to your workspace.

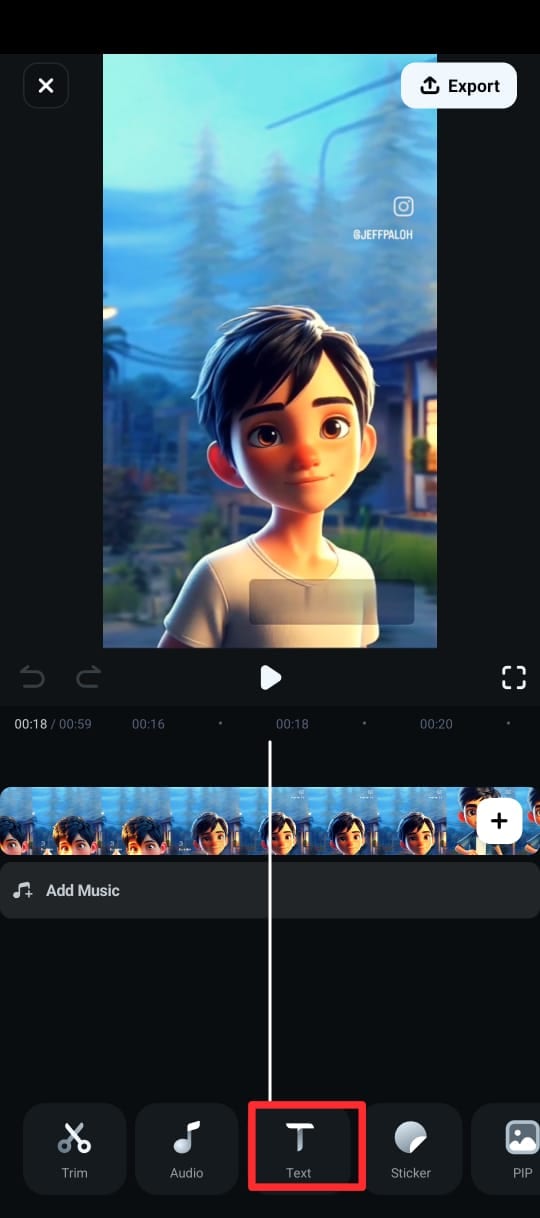
Step 3: At the bottom menu, tap Text (marked by a T icon) and choose AI Captions.
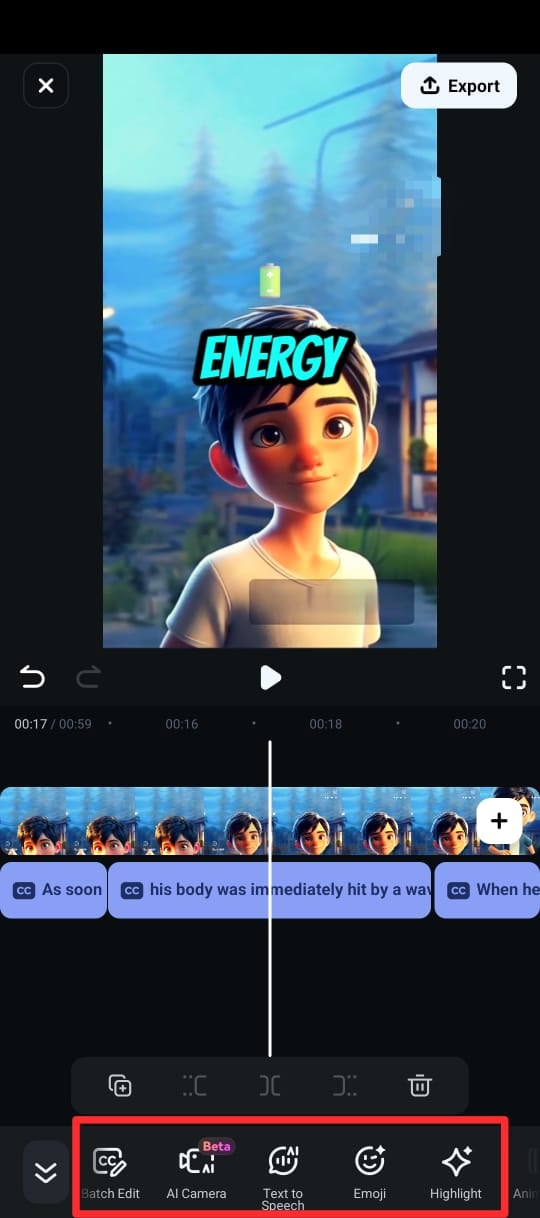
Step 4: On the next screen, select the language, toggle on Speaker Detection and tap Add Captions to generate text from the video’s speech.

Step 5: Once the captions are generated, you can customize the text using different text templates, emojis and fonts. You can also edit the text in clip in the timeline by selecting Edit Speech from the editing suite.
Step 6: Export your video with captions in the desired format.
Part 5. Which Tool is the Best?
Choosing between Hugging Face and Filmora depends on your specific needs and level of technical expertise. Each tool serves a different purpose, so let’s explore which one is right for you based on different scenarios.
- If you need advanced customization and AI-powered control, Hugging Face speech to text is the better choice. It is ideal for developers, researchers, and professionals who want to train models, fine-tune parameters, and work with large datasets. However, it requires coding knowledge and time to set up, making it less suitable for beginners or those looking for a quick solution.
- On the other hand, if you want a fast, accurate transcription tool without any technical setup, Filmora is the way to go. It’s designed for content creators, students, and professionals who need a simple, one-click solution.
- Use Filmora if you’re adding subtitles/captions to videos, transcribing lectures, or converting speech into text for reports.
- For those working in niche fields that require domain-specific speech recognition, Hugging Face allows you to train the model on industry-specific terminology. This ensures better accuracy for complex jargon, but again, it requires effort and technical know-how.
- Meanwhile, if your main goal is transcribing video content, Filmora is a more convenient option, as it quickly converts speech into text, making it ideal for YouTubers, podcasters, and social media creators.
In summary, if you love coding and want full control and customization, go for text to speech in huggingface. But if you want an easy and instant transcription tool, Filmora is the perfect choice. Choose the one that best fits your workflow and skill level.
Conclusion
Converting speech to text doesn’t have to be complicated. Hugging Face text to speech is powerful tool but requires coding and setup which is cool for developers. However, if you want something quick and easy, Filmora is the best alternative. With just a few clicks, you can transcribe audio effortlessly; no coding, no stress. Why spend hours on complex setups? Try Filmora’s speech-to-text feature today and convert your audio into text in seconds
