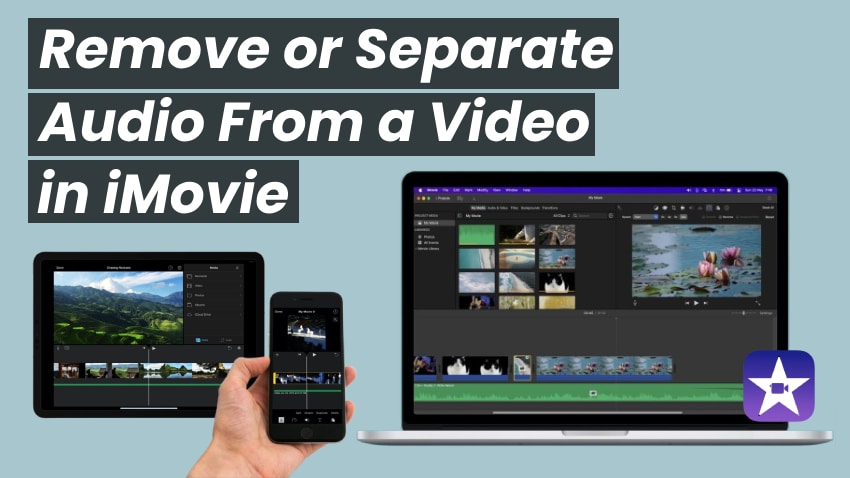
Do you wish to extract audio from a video to create an audio-only file or save your clip without sound? iMovie is an excellent choice. Besides the audio detachment feature that unlocks non-destructive editing, it lets you separate the tracks while exporting.
Before showing you how to separate audio from a video in iMovie across all devices, let's see why you would want to extract it in the first place.
In this article
The Importance of Extracting Audio in Video Editing

Extracting audio from a video can be beneficial in many situations, including:
- Non-destructive audio editing– Detaching audio from a video lets you edit the audio separately. For instance, you can cut out specific sections, like a conversation of passersby in a nature video.
- Avoiding copyright infringement– Audio extraction is perfect when removing copyrighted music from videos. You can delete the audio track and add a copyright-free song.
- Changing the soundtrack and SFX – Do you wish to replace copyright-free background music with a soundtrack that matches your video's vibe better? Do you want to remove the sound effects? Audio detachment is your way to go.
- Adding a voiceover– Extracting audio from a video is ideal when replacing it with narration, adding commentary to specific sections without distracting background music or SFX, and dubbing your video to break language barriers.
- Repurposing audio content– Separating audio from videos is excellent for creating an audio-only podcast. You can convert webinars and video interviews into audio files and edit them to make podcast highlights. You can also turn video ads into audio ads for the radio or streaming platforms like Spotify.
Now that you know how audio extraction can benefit you, it's time to see how to remove or separate audio from a video in iMovie on your iPhone, iPad, or Mac.
How to Separate Audio From a Video in iMovie on an iPad or iPhone
iMovie for iPad and iPhone devices doesn't differ in the user interface and features. Here's how to separate audio in iMovie for iOS and iPadOS:
- Step 1: Launch iMovie, go to Projects, and tap Start New Project > Movie.

- Step 2: The app will open your Moments folder, but you can pick another by tapping Media > Videos. Either way, tap and hold the desired file and select Create Movie.

- Step 3: Tap your video on the timeline to select it and reveal editing tools. Then, hit the Actions (scissors) button and tap Detach.
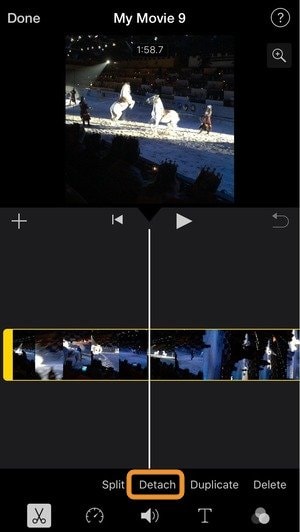
- Step 4: You'll see the audio track in blue, but deleting it would also remove the video from your device. Therefore, tap Background to separate the audio from the video.

- Step 5: Once your audio is in green, edit or remove one track without affecting the other.

- Step 6: Tap the audio or video track on the timeline and hit Actions > Delete. You can then keep only the audio or save the video without sound.

- Step 7: If you delete the video, the Preview panel will show a blank screen. Either way, tap Done.

- Step 8: Tap the Export button.

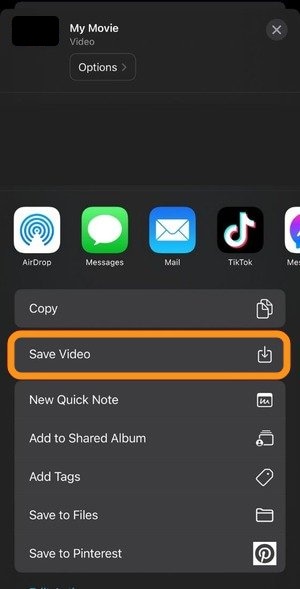
- Step 9: Tap Export Project to save your file.

- Step 10: Tap Save Video to download the file to the Photos app. If it's an audio-only file, iMovie will save it in the default MOV format because it doesn't have the option to export audio only. That's available on macOS. However, you can convert it into AAC, MP3, or another format using an online converter or GarageBand.
How to Extract Audio From a Video in iMovie on a Mac
iMovie for macOS lets you detach audio from a video to edit the tracks separately and remove either from the file. You can also directly export audio without previously detaching it from the video. Here are the steps for both methods.
Method 1: Export Audio Only
Here's the fastest way to extract audio from iMovie:
- Step 1: Launch iMovie and click Create New under Projects.
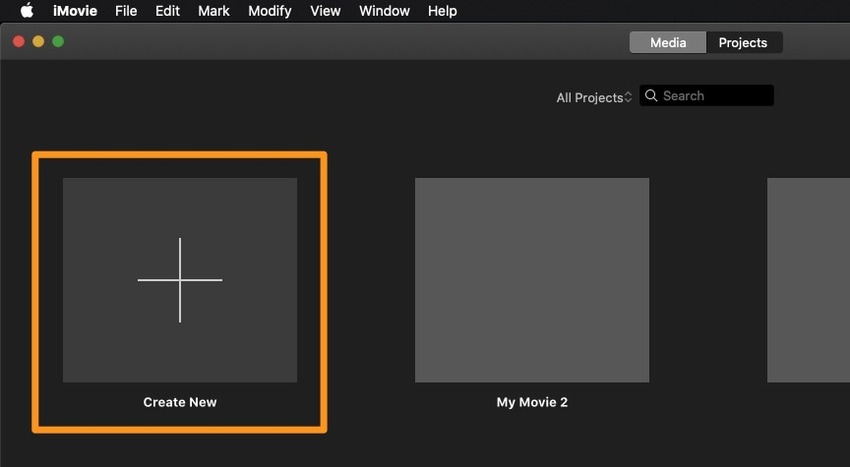
- Step 2: Select the Movie option.
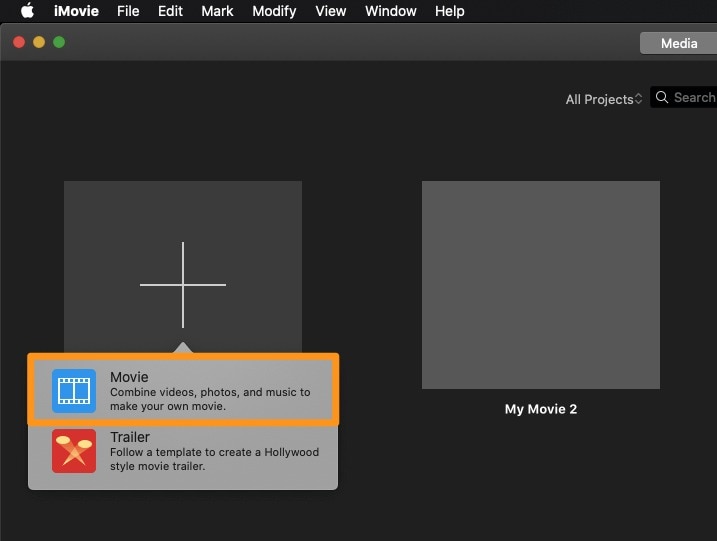
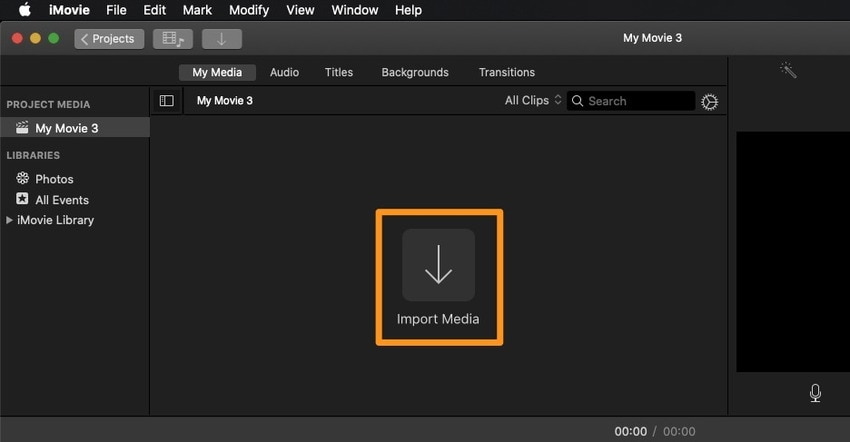
- Step 3: Click Import Media and choose the desired video.
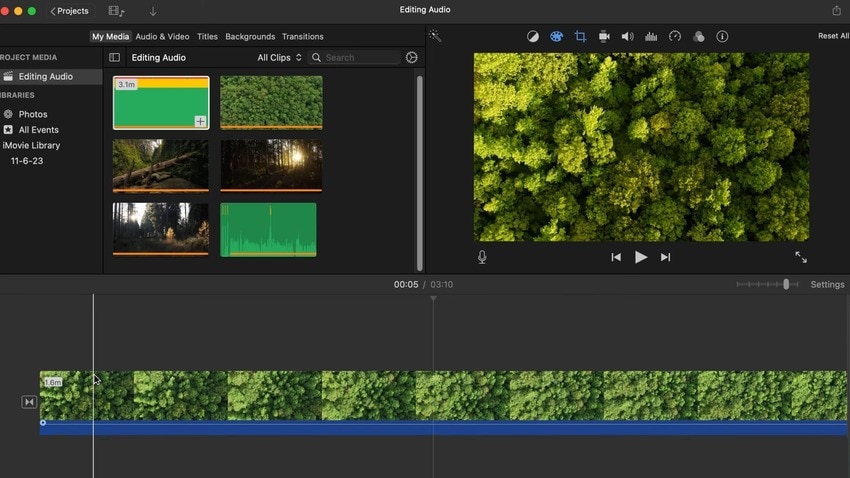
- Step 4: Drag and drop the video onto the timeline.
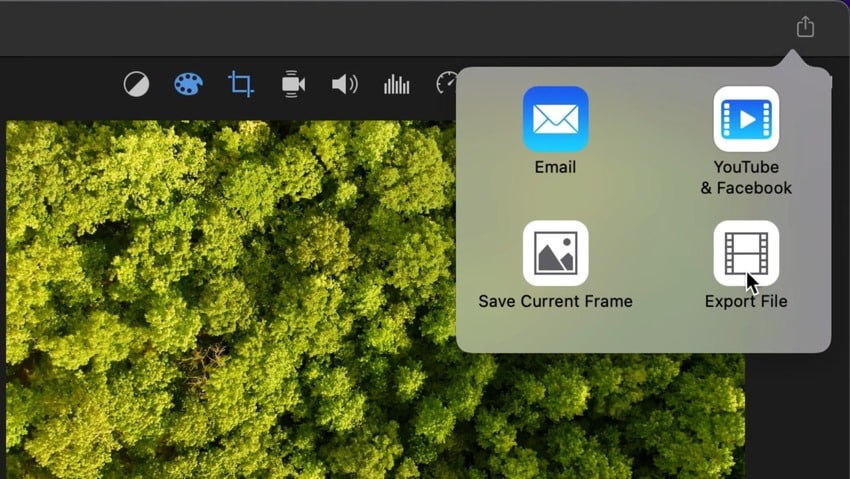
- Step 5: Click the Export button and select Export File.
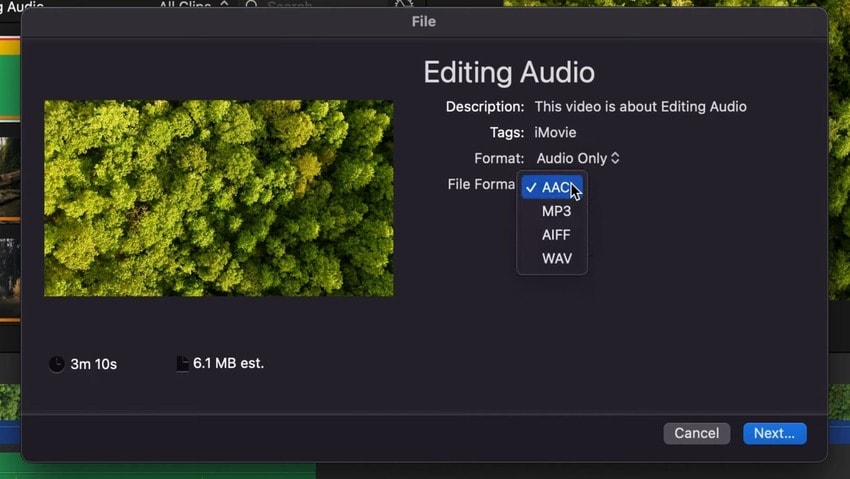
- Step 6: Select Audio Only under Format and choose from AAC, MP3, AIFF, and WAV under File Format. Click Next.
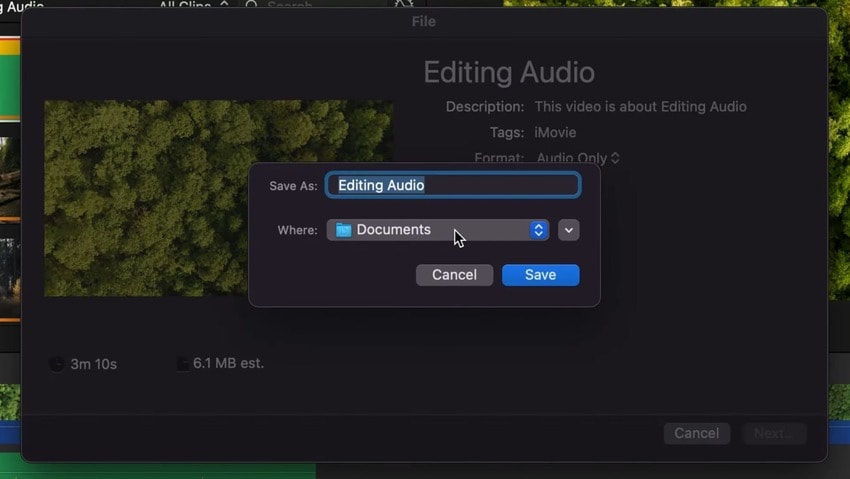
- Step 7: Name your audio file and specify the location before clicking Save.
Method 2: Detach and Remove Audio
This method is perfect for editing your audio separately or making room for a new soundtrack or voiceover. Here's how to detach audio in iMovie:
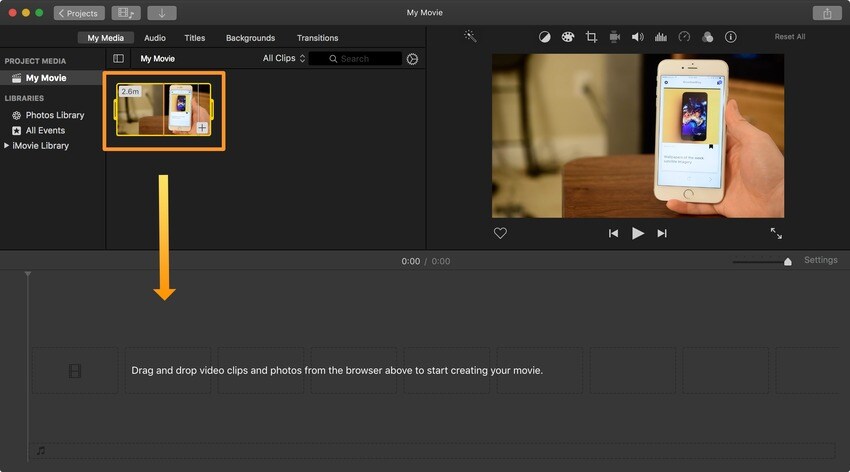
- Step 1: Click Create New > Movie > Import Media and drag and drop your video onto the timeline.
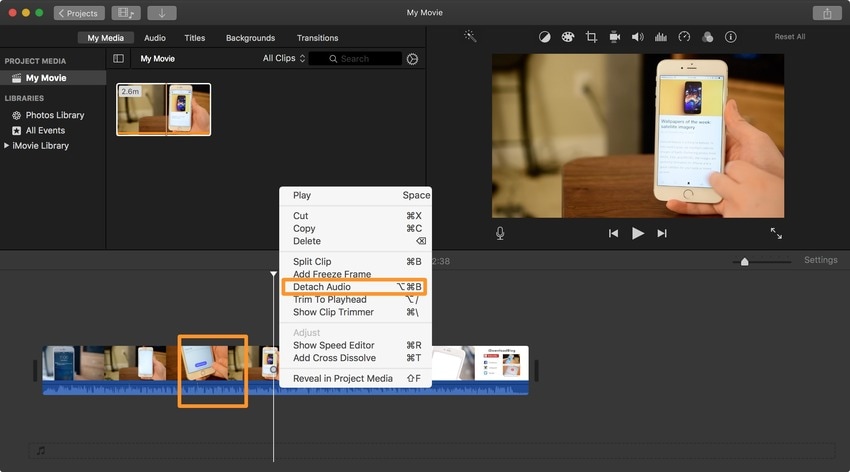
- Step 2: Right-click the video and select Detach Audio.
- Step 3: You'll see the audio track in green, so edit the audio and video without affecting one another. For instance, make multiple audio splits to add commentary or sound effects or cut out specific sections.
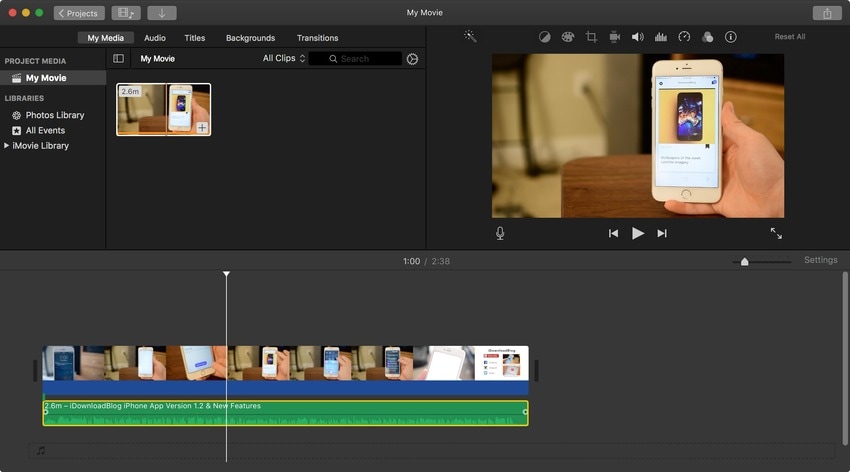
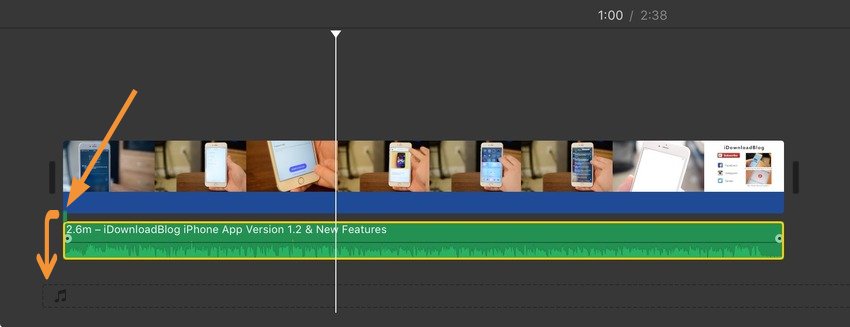
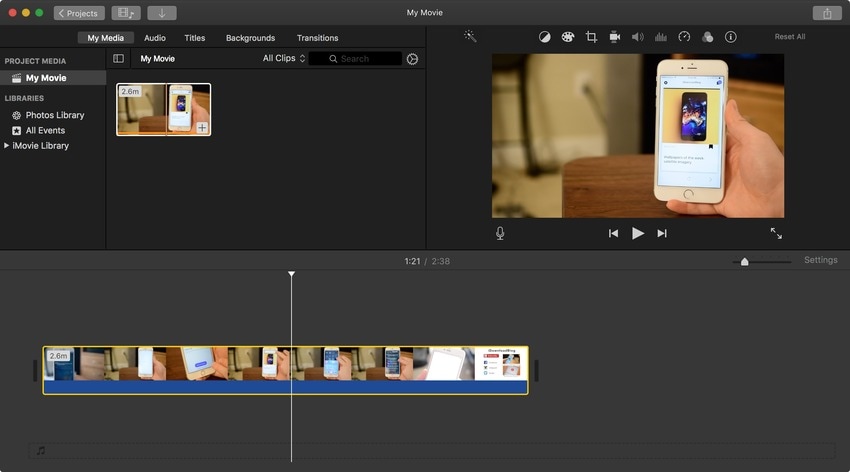
- Step 4: Notice the tiny lock handle linking your audio and video. It allows moving the audio to another position or timeline track. The latter lets you unlink the tracks to remove the video without losing the audio. Simply drag the lock handle to the Background Music Well below before right-clicking the video and selecting Delete.
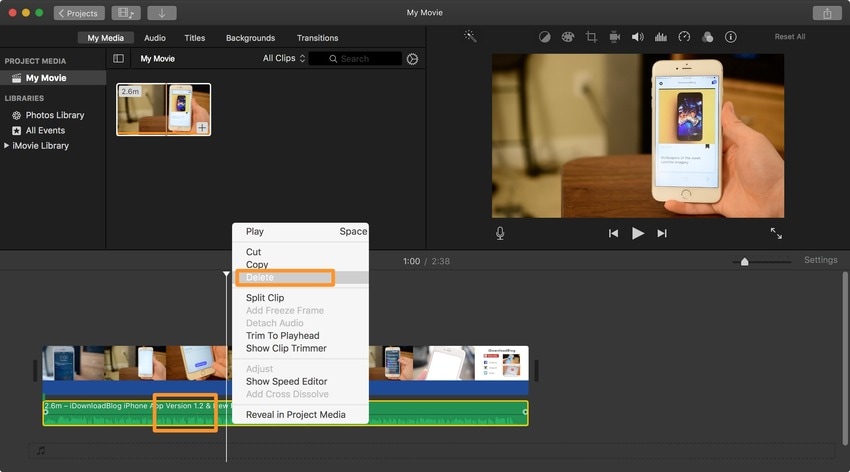
- Step 5: Alternatively, right-click the audio track and select Delete. You don't need to uncouple it from the video previously.
- Step 6: Fine-tune the video (e.g., add text, transitions, and background music) and click the Export button.
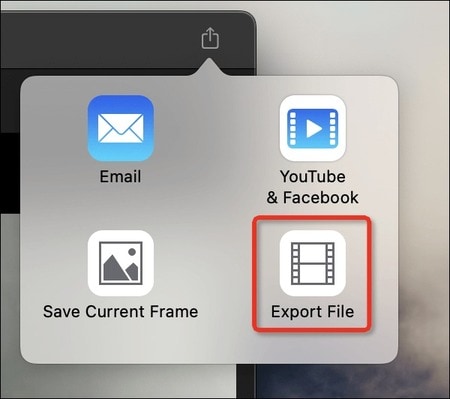
- Step 7: Email or share your video on YouTube or Facebook or click Export File to save it to your Mac.
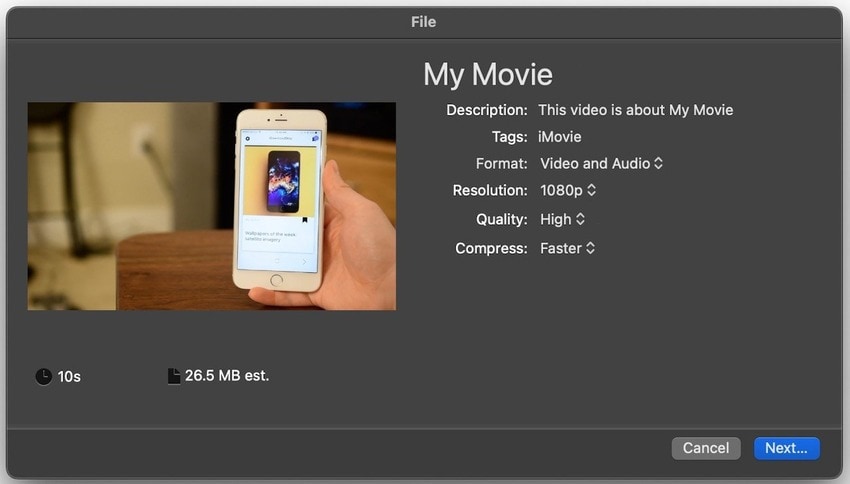
- Step 8: Customize the export settings and click Next to pick a location and rename the video. However, don't choose the Best (ProRes) quality when exporting to MP4. Otherwise, iMovie will automatically save the video in the MOV format.
Remove or Detach Audio Clips on a Mac With Filmora
Wondershare Filmora is cutting-edge editing software with more capabilities than iMovie, making it perfect for personal and professional use. Besides standard tools like cropping, trimming, cutting, splitting, and detaching audio, it offers advanced features like Keyframing, masking, Audio Ducking, and AI Audio Denoiser.
You can also enjoy AI-powered editing with audio denoise, motion tracking, frame interpolation, audio stretching, silence detection, etc. The ever-expanding AI toolbox is ideal for making pro-level videos, including transcribing and translating them. It can even hook you up with copyright-free music.
Download Filmora to your Mac to explore its vast universe of helpful features, AI capabilities, and creative assets.
Here's how to detach audio from a video with Filmora:
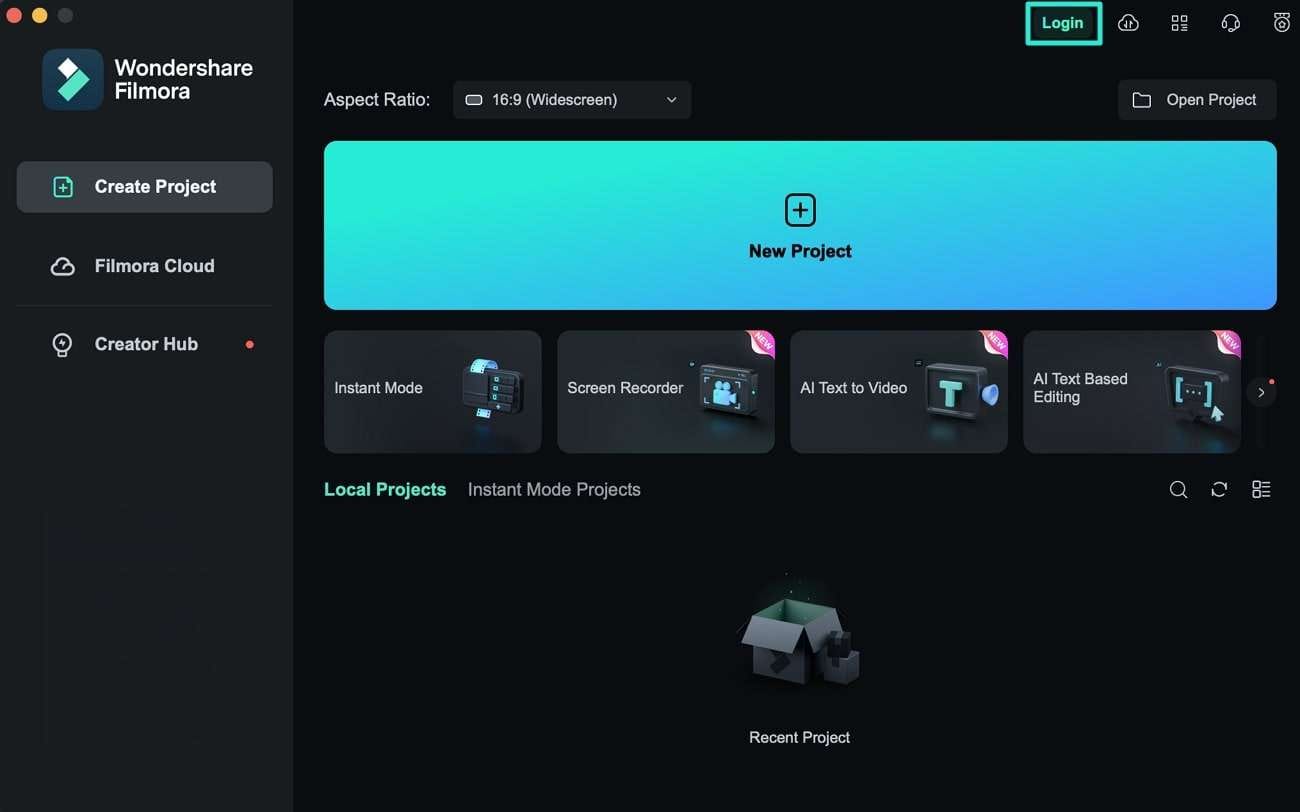
- Step 1: Launch Filmora and click Create Project > New Project.
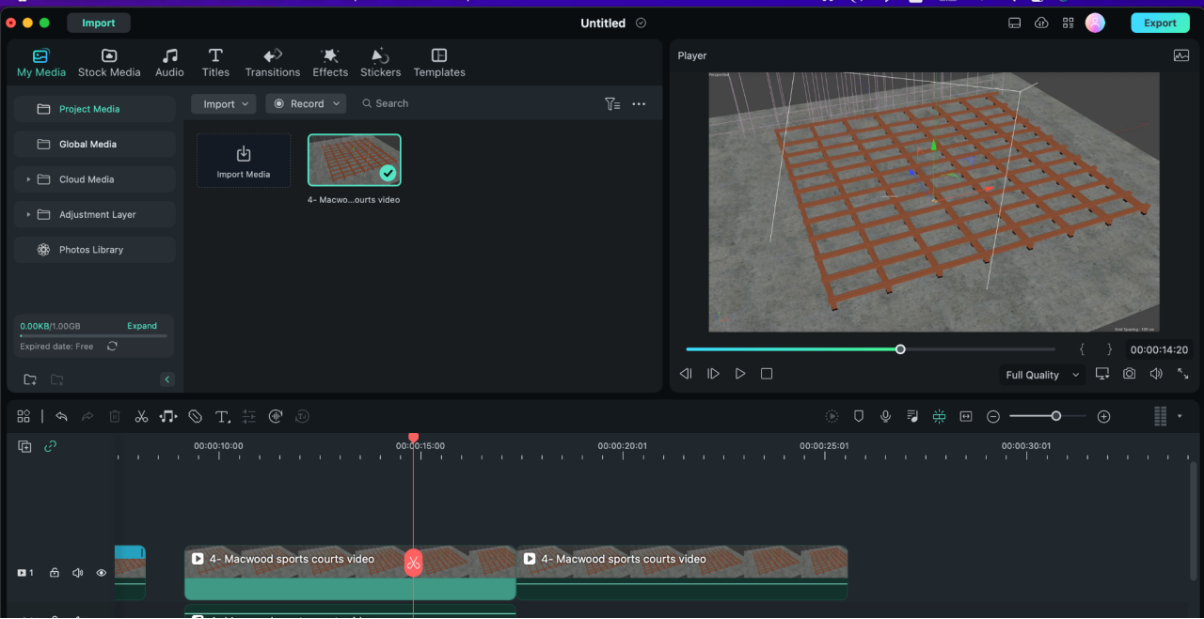
- Step 2: Click the blank space in the Media panel to import the desired video. Then, drag and drop it onto the timeline.

- Step 3: Right-click the video and select Detach Audio.

- Step 4: Edit the audio track without affecting the video and vice versa. For instance, use the Split tool to make multiple audio clips, delete specific sections, add fade-ins and fade-outs, reduce noise, etc. You can also right-click the entire audio track and click Delete to save the video without sound or add a voiceover or background music.

- Step 5: Once you finish editing, click Export or select the desired clip and hit Export > Export Selected Clips.
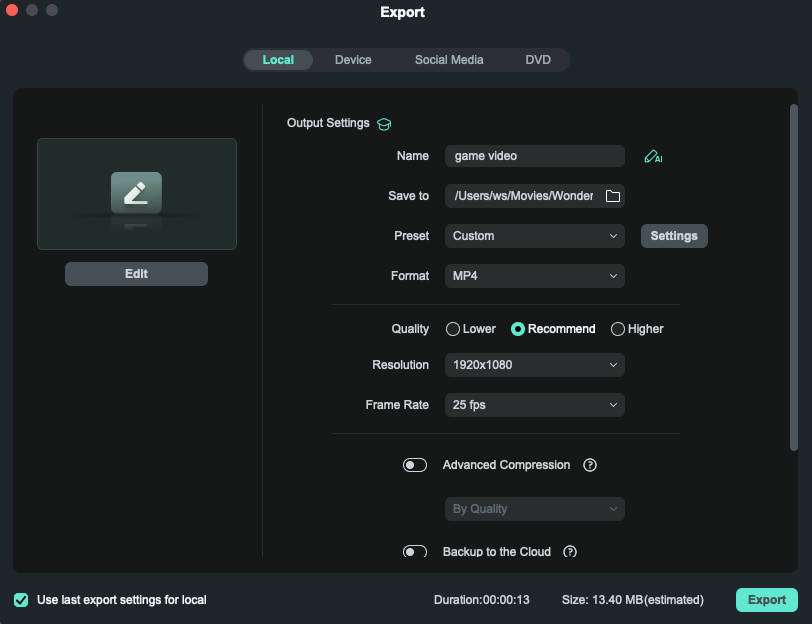
- Step 6: Choose a location, format (e.g., MP3 or WAV for audio), quality, resolution, frame rate, and other parameters under Settings and click Export.
Conclusion
Separating audio from a video in iMovie is a walk in the park on any device. However, iMovie limits your editing options. An advanced video editor like Filmora opens up more possibilities, including AI-powered video and audio editing.
iMovie may be readily available on your device, but it's better for personal use. Filmora is ideal for content creators, educators, and business professionals seeking creative freedom, including generating captions and subtitles to make content more accessible. It's as intuitive as iMovie, so there's no learning curve. Try it for free to see it in action.


 100% Security Verified | No Subscription Required | No Malware

