


 100% Security Verified | No Subscription Required | No Malware

You may know iMovie as a built-in video editor for Apple devices like Mac, iPhone, and iPad. But can we record audio on iMovie? The answer is yes! To be exact, you can record and add voiceover to your video on iMovie.
You can use voice memos to record audio. But if you want to add audio directly to your video, iMovie lets you do that easily. Since iMovie comes pre-installed on all Macs, iPhones, and iPads, there is no need to download any additional software. This is great because you can integrate audio into your videos without having to find or buy other tools. Also, you don’t have to record audio separately and then import it manually into your video anymore.
To help you out, we will break down how to use iMovie audio recording to add voiceover to your video.

In this article
Part 1. How to Record Audio Directly on iMovie for Mac
iMovie is a free video editing tool developed by Apple that is specifically designed to be user-friendly, making it accessible even for those with minimal video editing experience. iMovie can also be the solution if you need to record voice-over audio for your video projects directly within the application. You can use the built-in microphone on your device or an external microphone connected to it.
So how do I do a voiceover on iMovie? Follow these steps to record audio on iMovie for Mac:
Step 1: Open iMovie and set the playhead
Launch the iMovie app on your Mac and open your video. Place the playhead in the timeline at the point where you want to start recording audio.
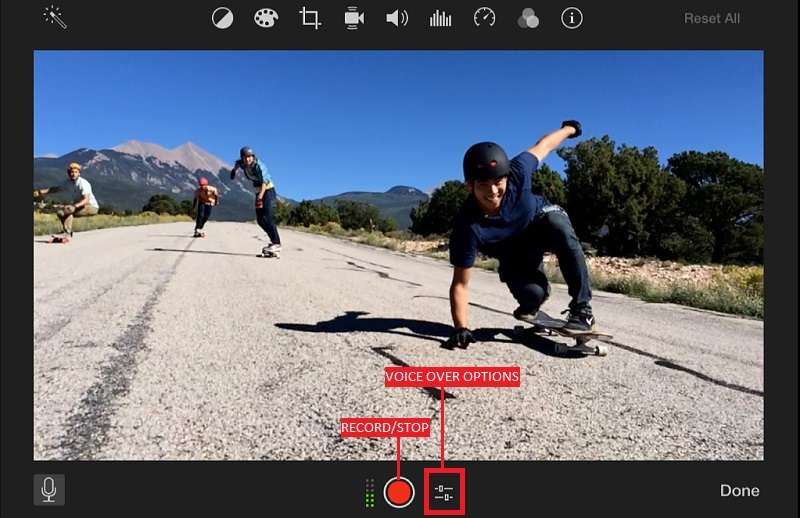
Step 2: Access voiceover recording
Click the "Record Voiceover" button (the mic icon) located below the viewer.
Step 3: Adjust recording settings
If you want to change the input device, click the "Voiceover Options" button. Then, open the "Input Source" pop-up menu and select your preferred input device.
To adjust the microphone input level, you can move the Volume slider to the right to increase the input volume or to the left to decrease it. Check the "Mute Project" box to avoid background noise from other clips.
Step 4: Monitor Audio Levels
Use the audio meter next to the red "Record" button to monitor levels. Ensure the meter stays in the green zone, even at your loudest speaking volume.
Step 5: Start and stop recording
Click the "Record" button to begin recording your voiceover. To stop the recording, click the "Record" button again or press the Space bar.
Step 6: Finalize recording
Your recorded audio will appear as a new clip in the timeline, positioned above the background music. The voiceover clip is linked to the clip that was under the playhead when you started recording. When finished, click "Done" to the right of the voiceover recording controls.
Part 2. How to Record Audio and Voiceover on iMovie for iPhone/iPad
Doing a voiceover on iMovie for an iPhone or iPad isn't much different from doing it on a Mac, only the interfaces vary slightly. Here are the steps on how to record audio on iMovie for iPhone/iPad:
Step 1: Launch iMovie and open a movie project
Open iMovie and select a movie project or import your video.
Step 2: Set the playhead
Scroll the timeline to position the playhead (the white vertical line) where you want the recording to start.
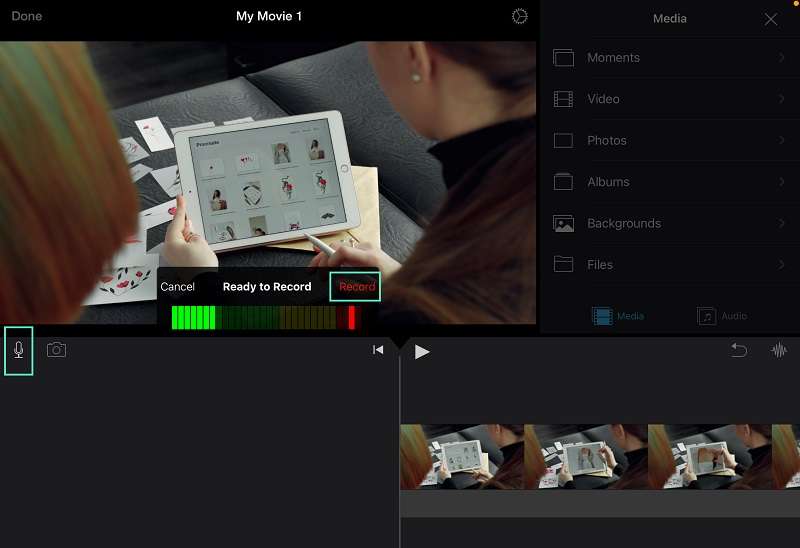
Step 3: Start recording the voiceover
Click the Voiceover button (the microphone icon) and click "Record" to start recording. After a 3-second countdown, the recording will begin.
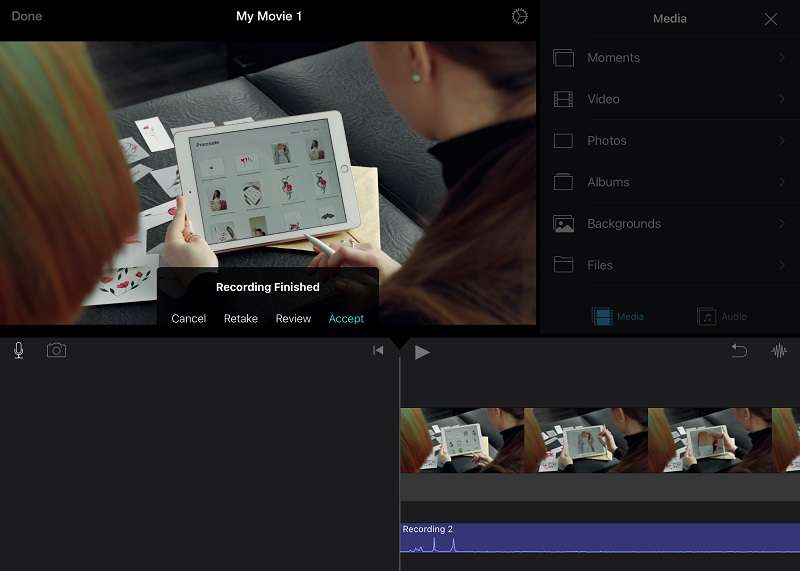
Step 4: Stop the recording
To stop recording, tap Stop. Then, tap Review to listen to the recording. If you want to delete and dismiss it, you can tap Cancel. But if you want to restart and record a new audio clip, tap Retake.
And if the recording is okay, tap Accept to keep the recording and add it to your project.
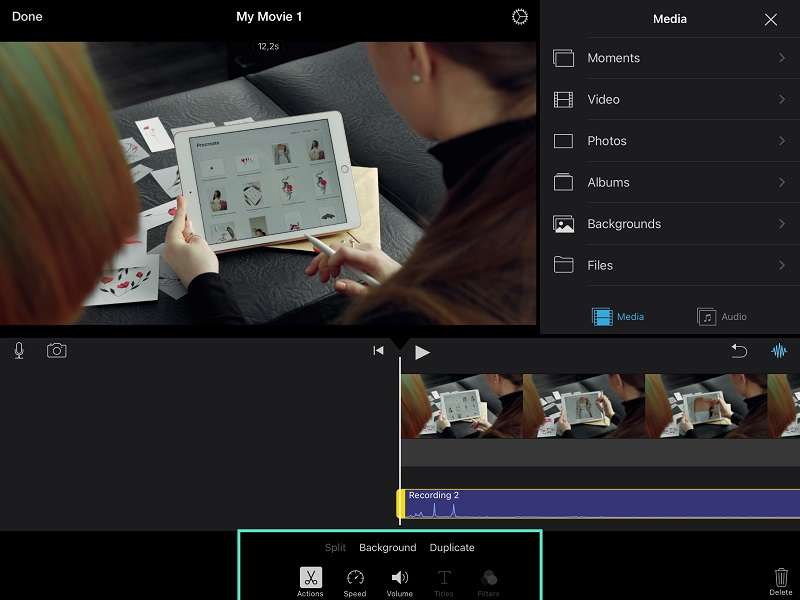
Step 5: Edit the audio recording
If you want to edit the audio, click on the waveforms button and choose the action you wish to perform. You can adjust the playback speed and volume level, as well as apply fade effects.
Part 3. Other Easy Software to Record Audio and Voiceover for Videos – Wondershare Filmora
If you think that the iMovie audio recording tool doesn’t cater to your needs because of its limited editing function, you can try another user-friendly option for recording audio and adding voiceovers to videos that is Wondershare Filmora. Besides macOS, this software is also compatible with Windows, so it can also be a convenient choice for Windows users.
With Wondershare Filmora, you can easily record audio directly within the software and seamlessly integrate it into your video projects. Although it’s easy to use with simple user interface, Filmora offers a wide range of advanced capabilities, including:
- Voice Changing Effects: Add effects like echo, old radio, diving sound, and more.
- Denoise Options: Improve audio clarity with AI speech enhancement, dereverb, hum removal, hiss removal, and wind removal.
- Sound Balancing: Ensure consistent audio levels throughout your project.
- Fade In and Fade Out Effects: Create smooth transitions at the beginning and end of clips.
- Pitch Modification: Adjust the pitch of your audio to suit your project's needs.
- Audio Ducking: Automatically lower background music when dialogue or voiceover is present.
- Stock Media Library: Access a vast collection of music, sound effects, image backgrounds, and more to enhance your project.
These features make Filmora a powerful tool for both beginners and advanced users to create high-quality videos with ease. Here’s how to record and add voiceover on Wondershare Filmora:
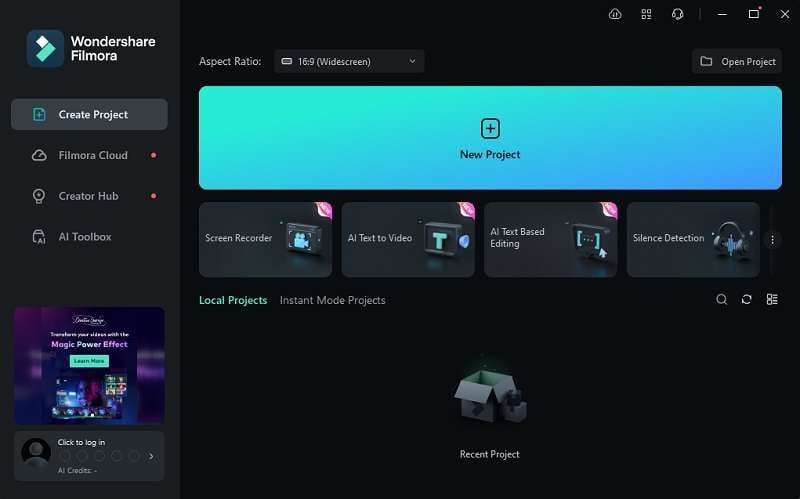
Step 1: Launch Wondershare Filmora and create a New Project.
After installing Wondershare Filmora, you can open the software and click “New Project.”
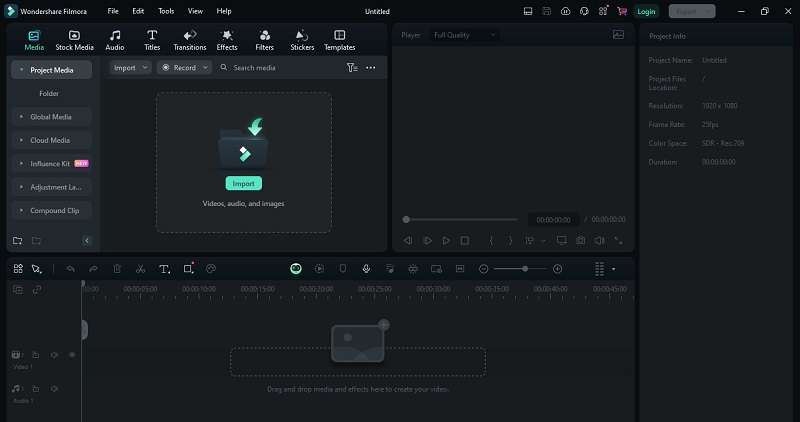
Step 2: Import the video
Once on Filmora’s editing interface, import the video file you want to voiceover by clicking “Import.”
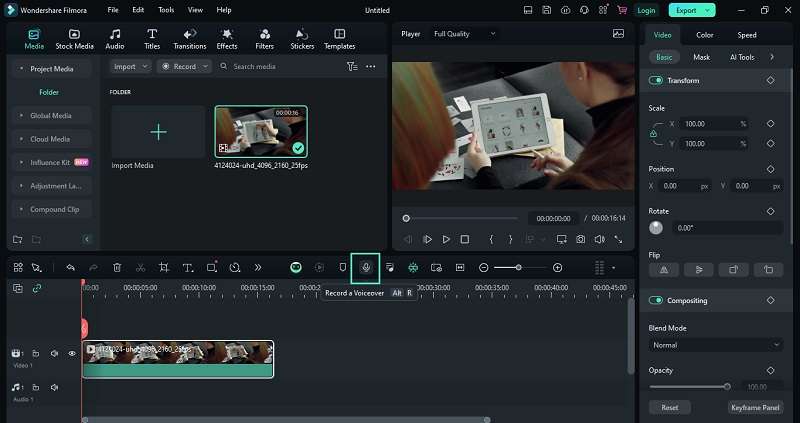
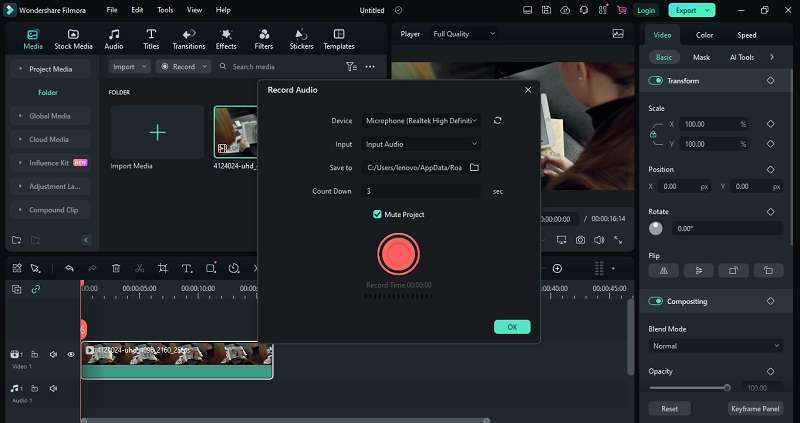
Step 3: Drag and add the video to the timeline and start recording the voiceover.
Once imported, drag the video file to the timeline to prepare the voiceover. Then, click the microphone button to start recording a voiceover. You can also press ALT + R on your keyboard to start recording.
After clicking the voiceover button, a pop up screen will show as below. Select the recording device and input audio to ensure high quality recording. You can also customize the countdown and specify the location for saving the recording file in advance. Check the "Mute Project" box if the video already includes pre-recorded audio and you wish to prevent overlap.
To start recording the voiceover, click the red button.
Step 4: Stop the audio recording.
To stop sthe audio recording, you can click the red button again or press the spacebar on your keyboard.
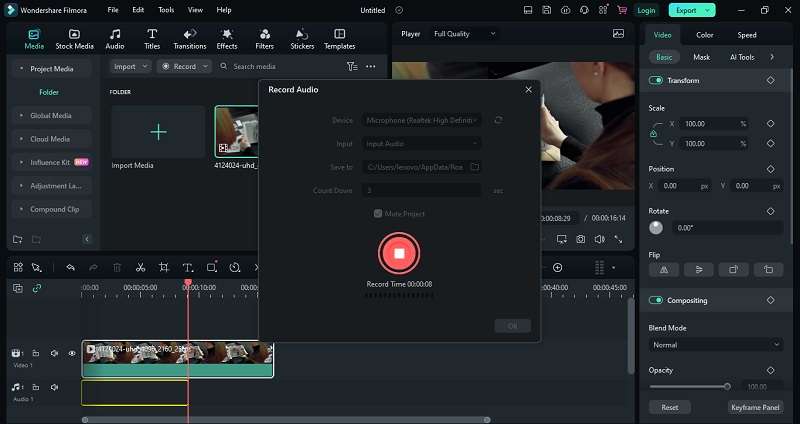
Step 5: Edit the voiceover audio recording.
After completing the recording, you can edit the audio as needed. You can trim, split, adjust the audio level, change the voice, and apply various audio effects like denoise, wind removal, deverb, hum removal, hiss removal, and more.

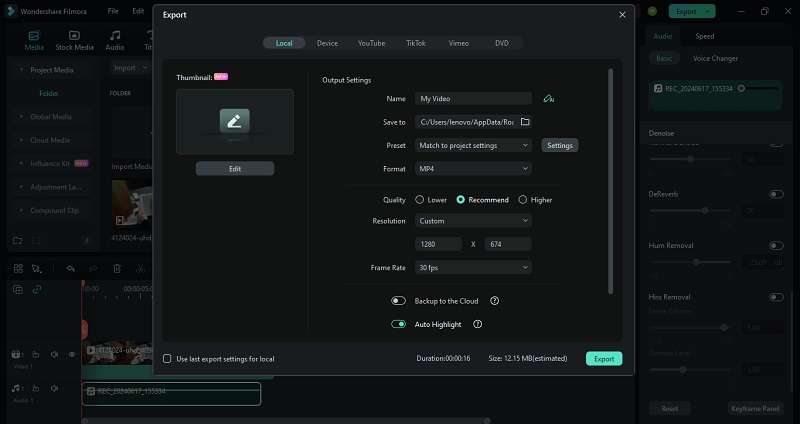
Step 6: Export the video.
To save and export the final video, click "Export." Rename the file and adjust settings such as file format, resolution, frame rate, and quality. Additionally, you can directly share the video to social media platforms like YouTube, TikTok, and Vimeo, or burn it to a DVD.
Conclusion
Recording voiceover on iMovie is a simple process thanks to its user-friendly interface and accessibility across Apple devices. You can do it on your Mac, iPad, or iPhone easily without problems if you are following the steps we have provided in this article.
And if you need more advanced audio editing capabilities or specific effects like voice changer or noise reduction, you might consider using alternative software such as Wondershare Filmora. Filmora offers a broader range of tools that cater to both macOS and Windows users. It’s suitable for users who need extra control over their projects.
FAQ
1. Can you change your voice on iMovie?
No, you can’t change your voice in iMovie. iMovie does not have built-in features for altering voice pitch or adding voice effects. If you need to change your voice or apply sound effects, you will need to use other software capable of these functions, such as Wondershare Filmora. This program offers a range of voice modification tools and effects to achieve the desired sound.2. Can I add background music to my iMovie project?
Yes, you can easily add background music to your iMovie project. Just import the desired music file into iMovie and drag the music file to the timeline below your video clips. You can then adjust the placement and duration of the music, as well as the volume levels.3. How to make sure good audio quality when recording in iMovie?
It is highly recommended to use an external microphone rather than the built-in microphone on your device. External microphones generally offer better sound quality and can reduce background noise. Additionally, recording in a quiet environment and speaking clearly will further enhance the quality of your audio.
