Key Steps of This Video Tutorial To Follow
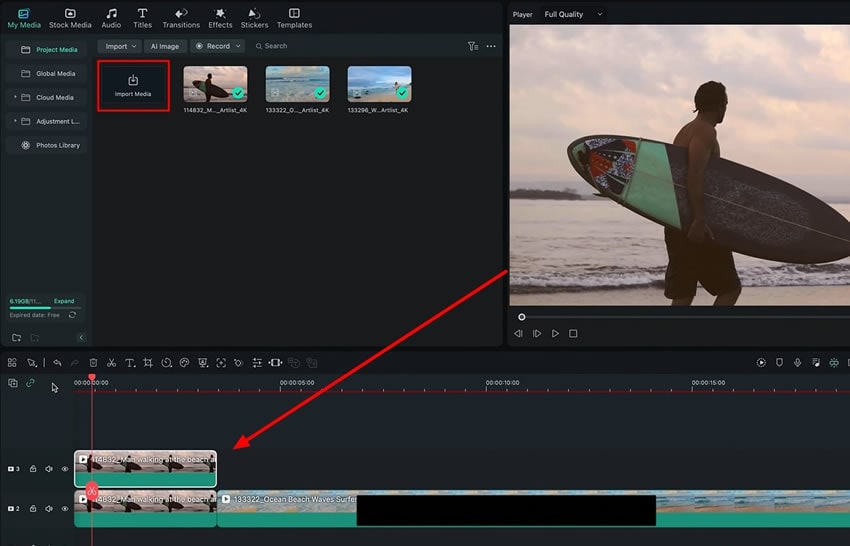
Open Wondershare Filmora, create a new project, and import your videos into the timeline. Next, duplicate your video file and paste it on another track in the timeline.
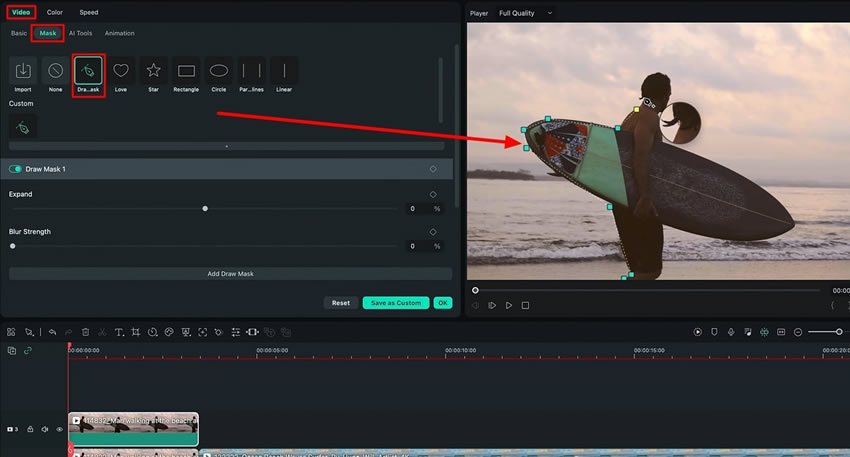
Continue by clicking the duplicated video, going to the "Video" tab, and pressing the "Mask" button. Then, select the "Draw Mask" tool from the available options in the panel. Use your mouse to draw a mask around your subject in the video. Adjust the mask’s "Size" and "Position" as needed.
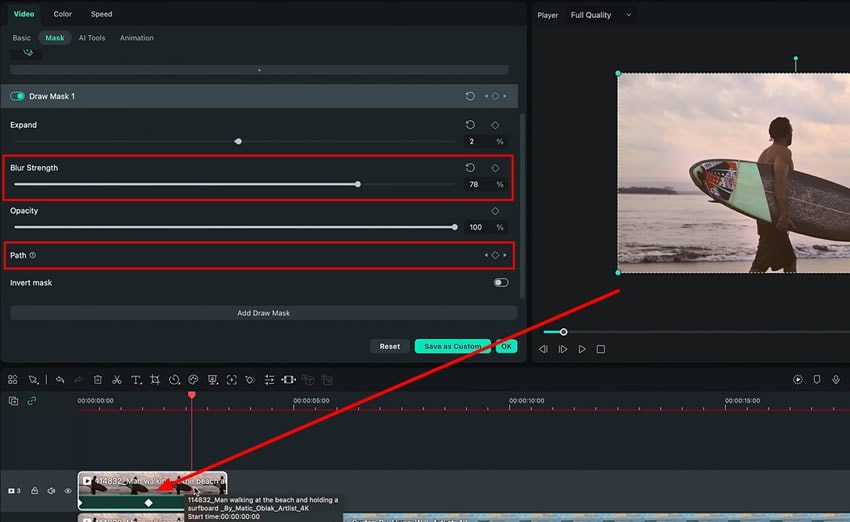
Press the "Path" keyframe button and move the "Playhead" in the timeline a bit further and adjust the subject mask according to the new position of the subject. Increase the "Blur Strength" using the slider to create a blurred effect. Repeat this process multiple times to complete the path of your video footage.
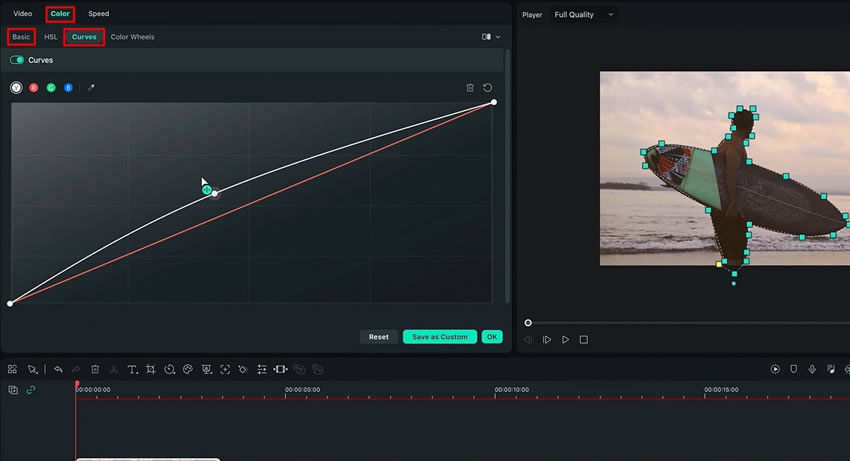
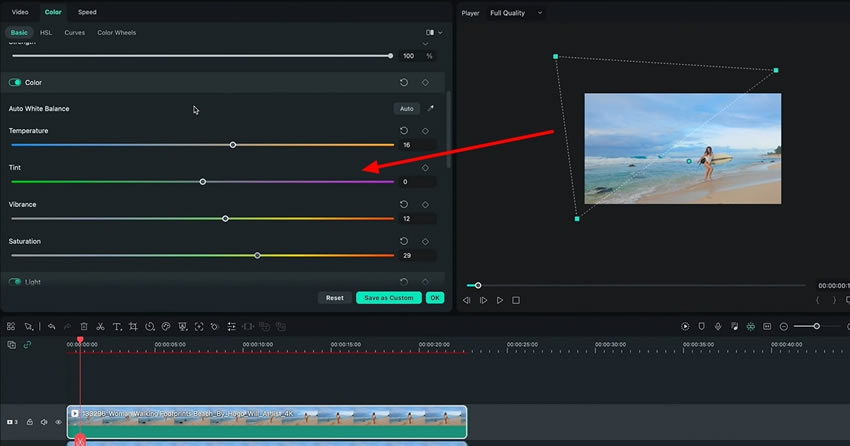
After that, choose the "Color" option from the same panel. Tweak the settings in the "Basic" tab to adjust the overall color of your video. Proceed further, select the "Curves" tab, and adjust the color curves to refine the look of your video further.
Explore other mask options like "Parallel Lines" or "Rectangle" if needed for your video. Duplicate and mask the video to create shadows using the "Shadow" effect in the "Color" settings. Once done, you can review your video and make changes to your liking. Lastly, export your video file with the desired settings.
Color grading mask is easy and simple once you learn how and where to color-correct your video footage. With Wondershare Filmora, you don't have to apply an overlay to your whole video clip. You can also make color adjustments to a particular subject. This technique helps you to completely color grade video or a specific portion of your video.
Luca's Other Filmora Master Lessons


