Learning how to record in Steam has become essential for gamers wanting to share their best moments. Fortunately, there are many tools available to help you record game footage. With the right tools, everyone from beginners to seasoned pros can record on Steam. They allow you to easily capture your gameplay, making it accessible to everyone.
In this article, you’ll know five easy ways to record Steam gameplay with ease. Learn how to capture your game footage like a pro. Read on to explore the best options available!

In this article
The best recording method for Steam gameplay depends on your needs:
| Tool | Ease of Use | Features | OS Compatibility |
| Wondershare Filmora | Easy | Advanced Editing, AI Tools | Windows, Mac, Mobile |
| Windows Game Bar | Very Easy | Basic Recording | Windows |
| OBS Studio | Moderate | Customizable, high-quality recordings | Windows, Mac, Linux |
| DemoCreator | Very Easy | Basic, no download needed | Browser-based |
| Frapsr | Easy | Lightweight, works on older computers | Windows |
Part 1. How To Record Steam Gameplay Using Windows Game Bar
For Windows users, the Windows Game Bar is a free and built-in tool that lets you record Steam gameplay without additional software. Here are the steps to record your Steam gameplay using Windows Game Bar:
Step 1: Press Win + G to open the Game Bar while in-game. Click the Record button (or press Win + Alt + R) to start recording.

Step 2: Press the same keys to stop the recording. When done, your recorded gameplay will automatically save in the Videos folder under Captures.
If you’re looking for more features like annotations, trimming, and advanced editing, Wondershare Filmora offers a complete package for gamers.
Part 2. Recording Steam Games With Filmora Screen Recorder
Filmora is a fantastic tool for gamers who want to capture high-quality gameplay with ease. It’s not just a screen recorder—it’s an all-in-one video editing platform. Filmora is a handy option for creating polished gaming videos that are ready for upload. Whether you’re making tutorials, sharing game highlights, or creating professional content, Filmora has everything you need. Here are its key features:
High-Quality Recording
Filmora captures both video and audio in high definition. Select the screen area to record, and Filmora will ensure smooth gameplay footage, free from lags or stutters.
Advanced Editing Options
Once you’ve captured your gameplay, Filmora’s powerful editing tools allow you to enhance your footage. You can trim unnecessary parts, annotations, and effects to make your videos more attractive. Here’s a breakdown of what you can do:
- Annotations. Add text, arrows, and shapes to highlight key moments.
- Trimming and cutting. Remove unwanted parts with precision.
- Transitions. Apply smooth transitions between scenes for a more professional feel.
Powerful AI Features
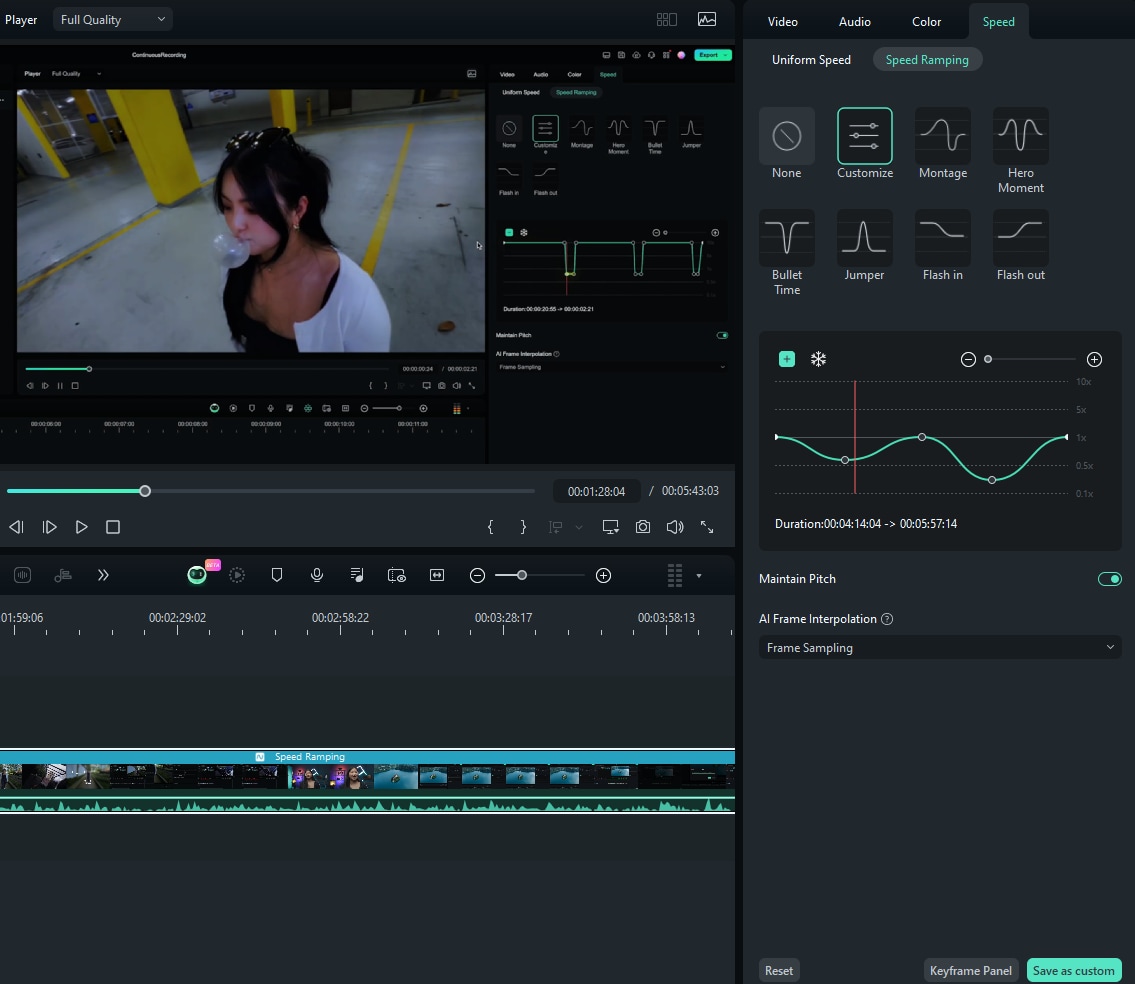
One of Filmora’s standout features is its AI-powered tools. With motion tracking, you can focus on in-game objects or characters. Keyframe editing allows for dynamic effects. Meanwhile, the speed ramping feature lets you control the pace of your gameplay videos for dramatic effects.
Audio Enhancements
Audio plays a significant role in gameplay videos, and Filmora doesn’t disappoint. It includes tools like:
- Auto ducking. Automatically lower background music when dialogue or in-game sounds are present.
- Audio synchronization. Sync recorded gameplay audio with voiceovers seamlessly.
- Audio visualizer. Add visual effects that react to your audio for an engaging experience.
How To Record Steam Gameplay With Filmora
Follow these steps to start recording your gameplay in Filmora:
Step 1: Download and install Filmora on your computer. After installation, launch the software and sign in or register for a Wondershare account. Or, you can use other available sign-in options.

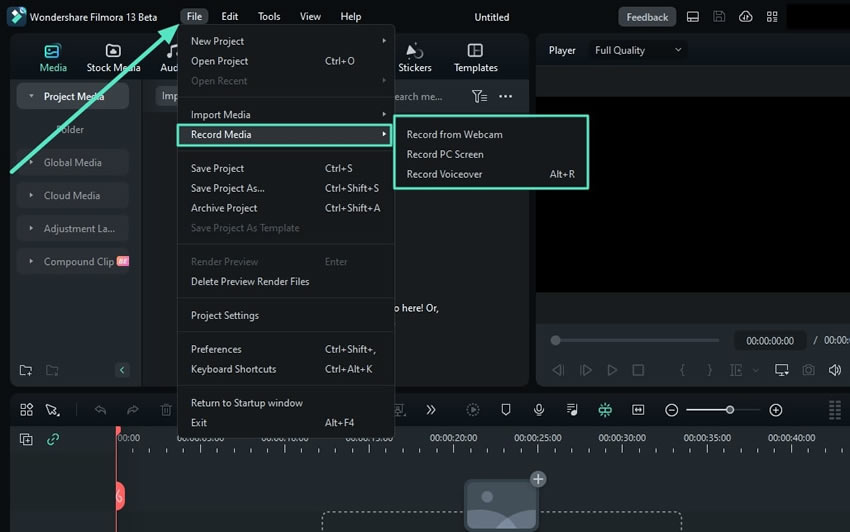
Step 2: From the main menu, click the Screen Recorder option. Then, choose File > Record Media > Record PC Screen. Adjust the screen capture size. Next, select your audio sources.

Step 3: Start Recording. To start capturing your Steam gameplay, click the red REC button. You can also use hotkeys to control the recording process. After recording, you can edit your footage.

Step 4: For example, add speed effects to your Steam gameplay recording. Click Speed and choose Speed Ramping. Choose between different presets and adjust the speed using the sliders.

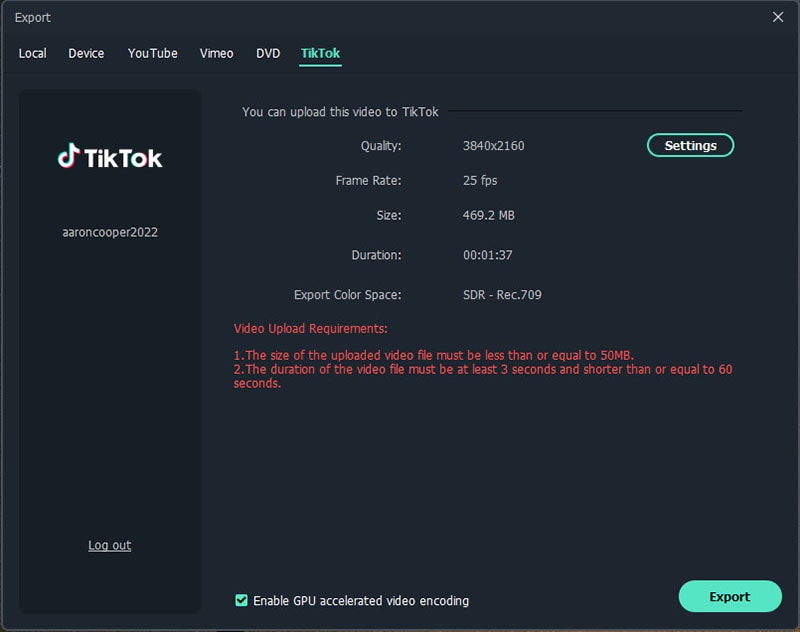
Step 5: Once you’ve finished editing, export your video in various formats. Share it directly to platforms like YouTube, TikTok, or Vimeo with a single click.

Part 3. How To Record Steam Games With OBS Studio
OBS Studio is a popular, open-source tool for both recording and live streaming. It provides high-quality recordings and advanced customization options, perfect for experienced users. Here are the steps to record Steam games with OBS Studio:
Step 1: Download and install OBS Studio from their official website.
Step 2: Set up your sources by adding a Game Capture source for Steam. Choose the resolution and frame rate for recording.

Step 3: Click Start Recording to begin recording your gameplay. When you’re done, stop the recording. Your video will be saved to your computer automatically.

Part 4. Other Tools To Record Gameplay
While tools like Game Bar, OBS, and Filmora are great tools, there are other options worth considering:
DemoCreator
DemoCreator is a beginner-friendly screen recorder designed for gamers and content creators alike. It’s useful for those who need real-time annotations and basic editing tools within the recording software. Here’s how to record your Steam gameplay with DemoCreator:
Step 1: Download and install DemoCreator on your computer or use the online tool to start immediately. Next, choose Video Recorder > Game.

Step 2: Set up the video and audio settings. When done, click the red REC button to start recording. Press F9 to pause or F10 to stop during capture. Click the Export button to save the video to your computer.

Fraps
Fraps is a longstanding favorite for recording gameplay among gamers with older systems. It’s a classic and simple game recording tool. The platform is especially useful for users with older systems. Here’s a quick guide on how to use it:
Step 1: Download and install Fraps on your computer. Launch the software, and it will operate in the background as you play.

Step 2: Set your recording resolution, FPS, and other options. Hit the shortcut key (F9 by default) to begin recording your Steam gameplay. Stop the recording when done, and Fraps will save it to your hard drive.

Part 5. Which Recording Method Is Best for You?
For beginners, the Windows Game Bar or DemoCreator offers a straightforward solution. For advanced users looking for detailed control and editing, Filmora or OBS Studio is ideal.
Filmora, in particular, provides an all-in-one solution with its built-in editing features. It’s the perfect tool for those who want both recording and professional-level editing.
Conclusion
Learning how to record in Steam has never been easier, thanks to these top tools. From Windows Game Bar to Filmora, each method provides unique features catering to different user needs.
For gamers looking to streamline their recording and editing process, Filmora offers the most comprehensive solution. It allows you to record Steam gameplay, edit, and share with ease. Give Filmora a try today, and start recording your gameplay in a few clicks. Share your best gaming moments with the world!


