


 100% Security Verified | No Subscription Required | No Malware


 ChatGPT
 Perplexity
 Gemini
 Claude
 Grok
Grok
Recording your screen with audio on a Mac is essential for many tasks. Whether you’re creating tutorials, giving presentations, or recording your gaming sessions, capturing both the visuals and sound makes your content more engaging and clear. Knowing how to record screen and audio on Mac can save you time and improve the quality of your work.
This article will introduce several methods to achieve this, from using built-in tools to leveraging powerful third-party software like Wondershare Filmora. By the end, you’ll be equipped to create high-quality recordings for any purpose, ensuring your audience gets the best experience possible.
In this article
Part I: Screen Capture With Sound on Mac With Wondershare Filmora
When it comes to capturing your screen with audio on a Mac, Wondershare Filmora stands out as a powerful and versatile tool. It is designed to meet the needs of both beginners and professionals, offering an array of features that make screen recording and video editing a breeze.
Filmora is more than a screen recorder. Actually, it is an all-in-one video recording and editing software. With Filmora, you can easily capture high-quality video and audio from your Mac, using its built-in editing tools to enhance your recordings. This makes it perfect for creating tutorials, presentations, gameplay videos, and more.
Why Choose Filmora?
Filmora offers a range of unique features that set it apart from other screen recording software. Its intuitive interface and robust functionality mean that everyone can benefit from using this software:
- High-quality recording. Filmora ensures that your video and audio recordings are of high quality, providing a professional finish to your content.
- Built-in editing tools. After recording, you can immediately edit your video within Filmora. It includes tools for trimming, cutting, adding annotations, and applying effects without additional software.
- Ease of use. The software is user-friendly, making it simple for anyone to start recording and editing videos, even if they have no prior experience.
- AI noise reduction. Filmora combines artificial intelligence techniques to reduce background noise and enhance audio quality. With the help of this tool, you can ensure that the audience understands every word you say in your movies and eliminate any background noise that can turn them off.
- Automatic beat synchronization. This program allows you to ensure that your film and video clips match automatically.
- Audio visualizer. Add some graphic elements to your computer music.
- Automatic synchronization. It is easier and more direct to match your audio to your video, which improves clarity and crispness.
- AI audio stretch. You can stretch any audio track to match the length of the audio you’re utilizing.
- Silence detection. You may also automatically remove dead air with this Filmora feature.
- Ducking audio. You may quickly adjust the audio with this option if you want the dialogue to be more prominent.
How To Record With Audio on Mac Using Filmora
Follow the steps below to learn how to screen record and audio on Mac with Filmora:
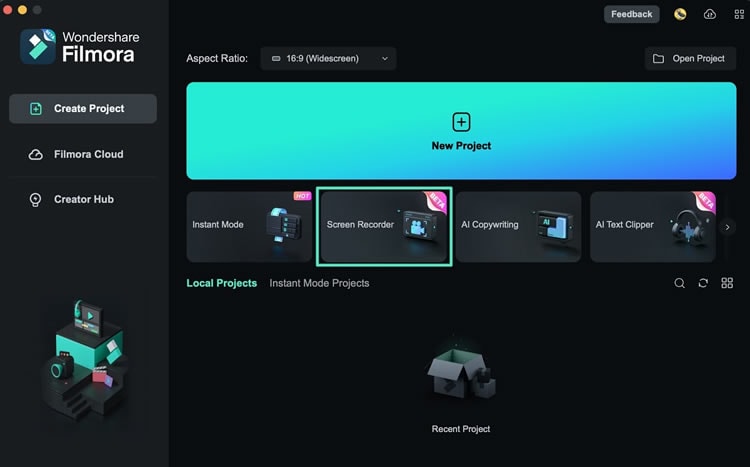
Step 1: Launch Filmora on your PC, then select Create Project. Click New Project after selecting your desired Aspect Ratio at the top.
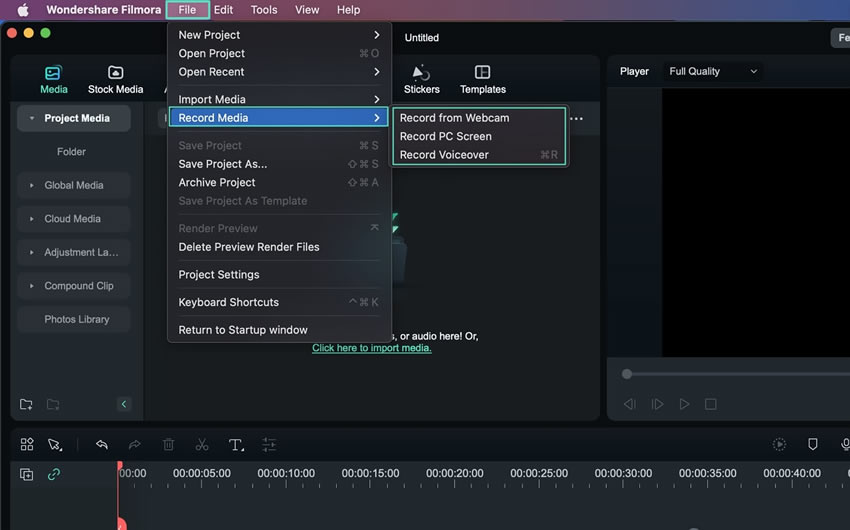
Step 2: After navigating to the player panel, pick File > Record Media. Next, select your favorite recording option from the list, which includes Record from Webcam, Record PC Screen, and Record Voiceover.
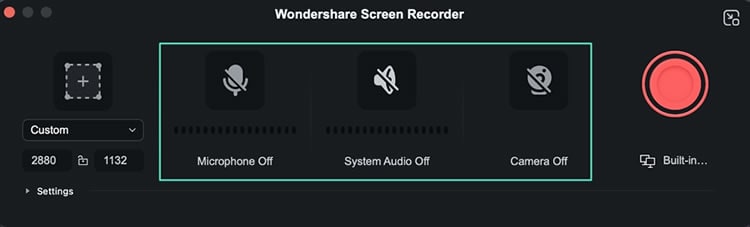
Step 3: It’s time to decide on the resolution for your project. To select Full Screen, Custom, or Target Window, simply click the downward arrow beneath the "Square" icon. You can manually adjust the width, length, and ratio that show on the screen by selecting the Custom option.

Step 4: The screen recorder interface in Filmora offers users three recording options. You can use the Microphone feature to record your speech during the recording session. Additionally, you will be able to turn on and off the Camera and System Audio.
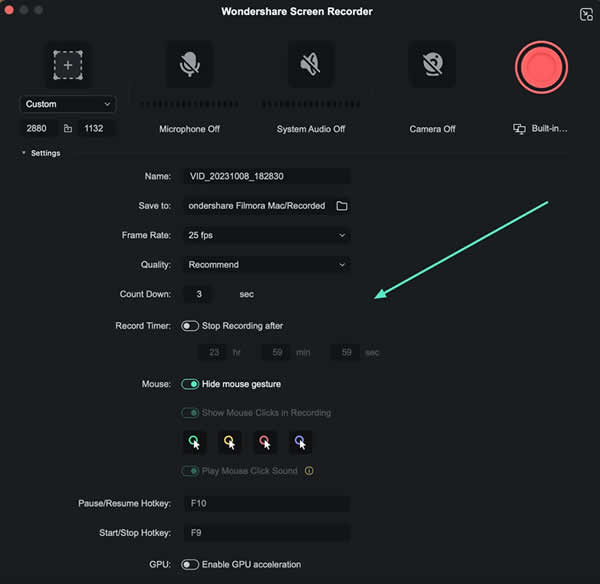
Step 5: Expand the Settings option from the lower left corner of the recording window to alter the remaining parameters.
Step 6: Click the "red recorder" icon to start recording your screen. A countdown will appear; however, you can bypass this step by selecting the Start Directly button underneath the countdown. You can also use the screen recording from the player that is supplied below to Pause, Stop, and start over when you want to re-record.
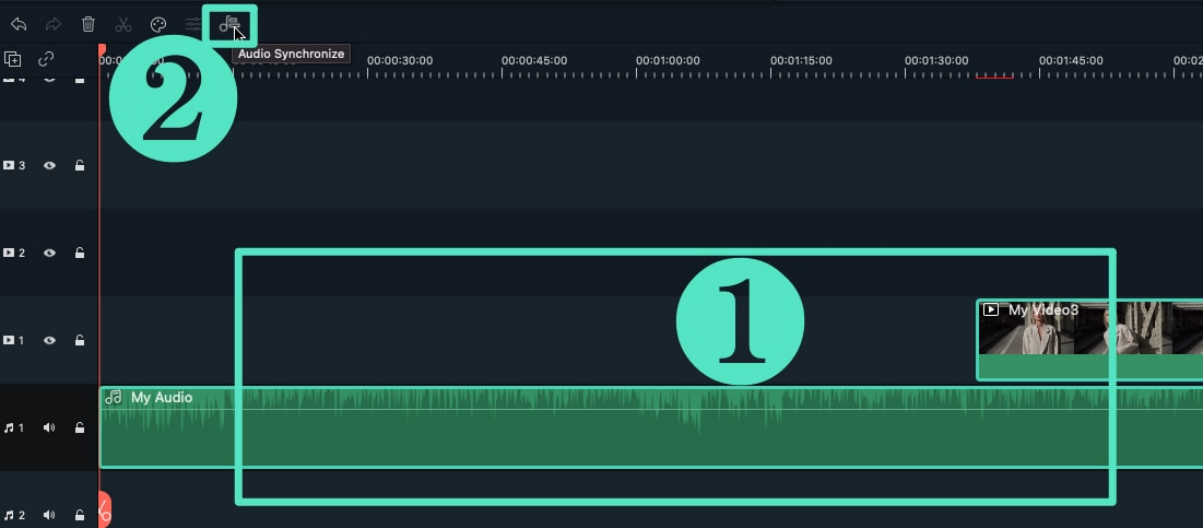
Step 7: Edit your project when you’ve finished recording. With the many audio editing options available in Filmora, make the required changes based on your preferences.
Step 8: After your recording is finished, save it. Just click Export, enter the desired export format, rename the file if desired, and then adjust the output resolution, frame rate, size, and length before clicking the Export button.

Wondershare Filmora is an excellent choice for anyone looking to screen record with audio on Mac. Its powerful recording and editing features and straightforward interface make it a top choice for creating high-quality videos. Whether you’re a beginner or a professional, Filmora has everything you need to produce polished and engaging content.
Part II: Record Screen and Audio on Mac Using Built-in Tools
Recording the screen and audio on a Mac doesn’t always require third-party software. Mac computers also come with built-in tools that make capturing your screen and audio easy. This section will explore two main methods: QuickTime Player and the macOS Screenshot Toolbar. These built-in tools are great options if you’re looking for straightforward software to record screen and audio on Mac.
QuickTime Player
QuickTime Player is a versatile tool that is pre-installed on all Mac computers. While it’s commonly used for playing videos, it also has a screen recording feature that’s quite handy.
How To Use It
Here are the steps to record screen and audio using QuickTime Player:
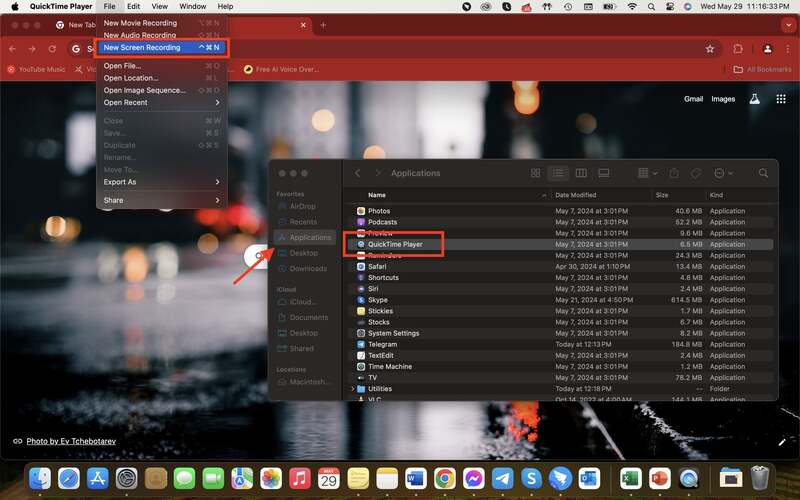
Step 1: Open your Applications folder and launch QuickTime Player from there. Click File in the menu bar, then select New Screen Recording.
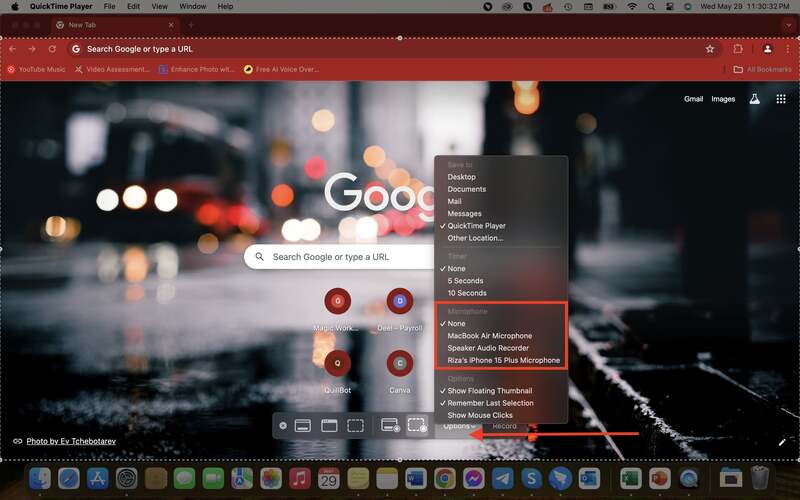
Step 2: Configure the audio settings. In the screen recording window that appears, click the Options button. Select your microphone to record audio on your screen.
Step 3: Select your capture area. Then, click the Record button to start recording.
Step 4: Click the stop button in the menu bar or press "Command + Control + Esc" to stop recording. After stopping the recording, QuickTime will automatically open the video file. It will also automatically save the recording to your Desktop folder.
Advantages of QuickTime Player
- Built-in and free. QuickTime Player is pre-installed on all Mac computers, so there’s no need to download additional software.
- Easy to use. The interface is straightforward, making it easy for anyone to use.
- Basic editing. You can do basic trimming of your recordings within QuickTime Player.
Limitations of QuickTime Player
- Limited features. QuickTime Player lacks advanced recording and editing features found in specialized software.
- Audio recording setup. It requires manual audio input selection, which can be tricky for new users.
macOS Screenshot Toolbar (For macOS Mojave and Later)
For users running macOS Mojave or later, the macOS Screenshot Toolbar is another great tool for recording your screen. This feature is integrated into the operating system and provides an easy way to capture both screenshots and screen recordings.
Steps To Access and Use the Screenshot Toolbar
The Screenshot Toolbar works basically the same as the QuickTime Player. The only difference is the way to access it. Learn how below:
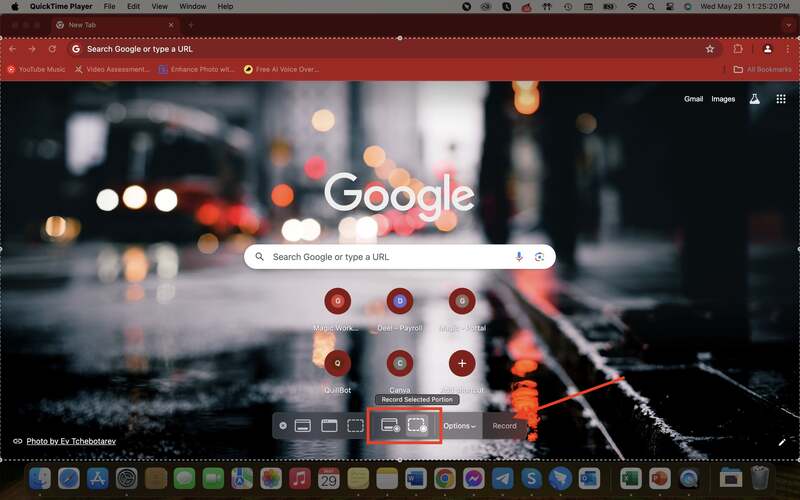
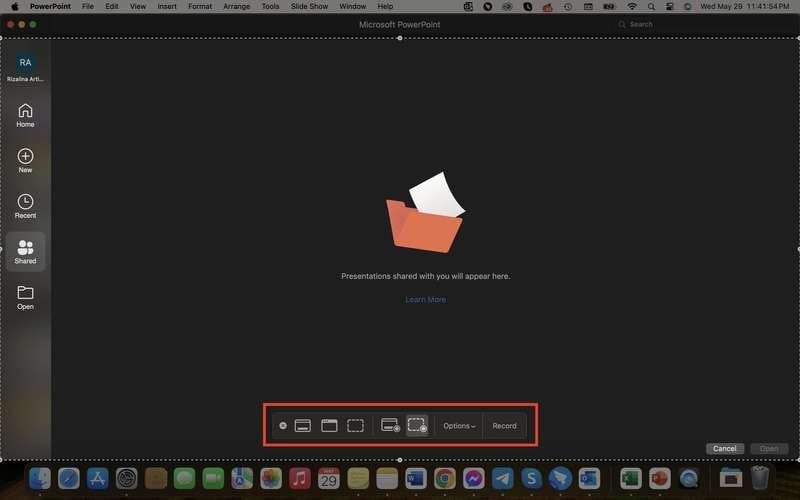
Step 1: Press "Shift + Command + 5" on your keyboard. This will open the Screenshot Toolbar at the bottom of your screen.
Step 2: Once the toolbar appears, you’ll choose to capture the entire screen, a selected portion, or record the screen.
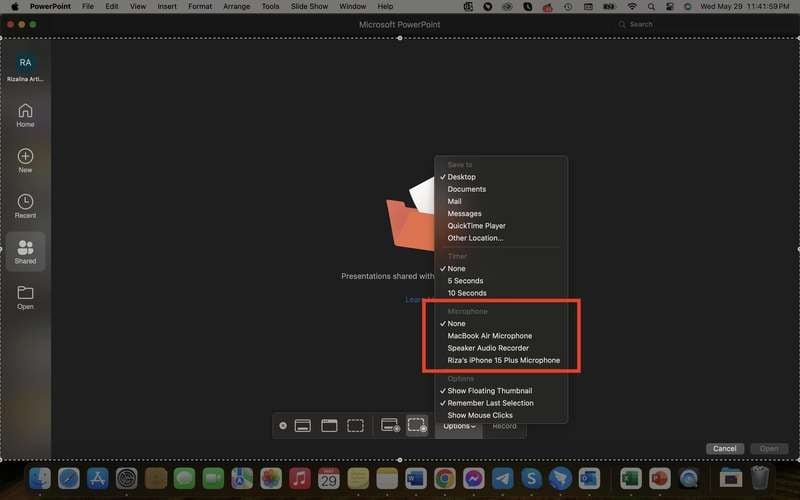
Step 3: Click Options in the toolbar. Under Microphone, select your desired audio input to ensure your voice is recorded along with the screen.
Step 4: Click the Record button to start recording and the stop button in the menu bar to stop recording.
Step 5: After stopping the recording, the system will automatically play and save the recording to your Mac device, which you may find in your Desktop folder.
Benefits of the macOS Screenshot Toolbar
- Flexible recording options. You can record the whole screen or only a portion of it.
- Integrated and free. This tool is built into the macOS, making it free and easily accessible without any additional downloads.
- User-friendly. The interface is intuitive, and the toolbar provides quick access to screen recording options.
Downsides of the macOS Screenshot Toolbar
- Basic features. Like QuickTime Player, it lacks advanced recording and editing features.
- Manual audio setup. You need to select the audio input each time you record manually.
Using built-in tools like QuickTime Player and the macOS Screenshot Toolbar, you can easily record screen and audio on a Mac. While these options are convenient and free, they have their limitations. For more advanced features and better control over your recordings, you might consider specialized software to record screen and audio on Mac, such as Filmora.
Conclusion
Choosing the right tool to record screen and audio on Mac is crucial for creating high-quality content. Built-in options like QuickTime Player and the macOS Screenshot Toolbar offer convenience, but Wondershare Filmora excels with its comprehensive features. Filmora provides powerful recording and editing tools, an intuitive interface, and high-quality output, making it perfect for both beginners and professionals.
For those looking to elevate their screen recordings, Filmora is the ideal choice. Try Filmora today to experience its full capabilities. Visit the Filmora website to learn more and start creating impressive videos with ease!
