
 100% Security Verified | No Subscription Required | No Malware

You may be recording gameplay for a tutorial or teaching an online class. Chromebooks are great for many things but still leave so much to be desired in regards to audio and video recording. The need to screen record on Chromebook is more relevant than ever.
So, how do you screen record on Chromebook with audio and turn that raw capture into polished, shareable content?
This guide goes beyond the basics. Through easy, actionable steps, you'll learn how to screen record, capture high-quality audio, and upgrade your video using desktop-level editing.
Let's get started and transform your Chromebook recordings into pro-level creations.
In this article
Part 1. How To Screen Record Using Chromebook's Built-In Options
There are a few ways to record your Chromebook's screen.
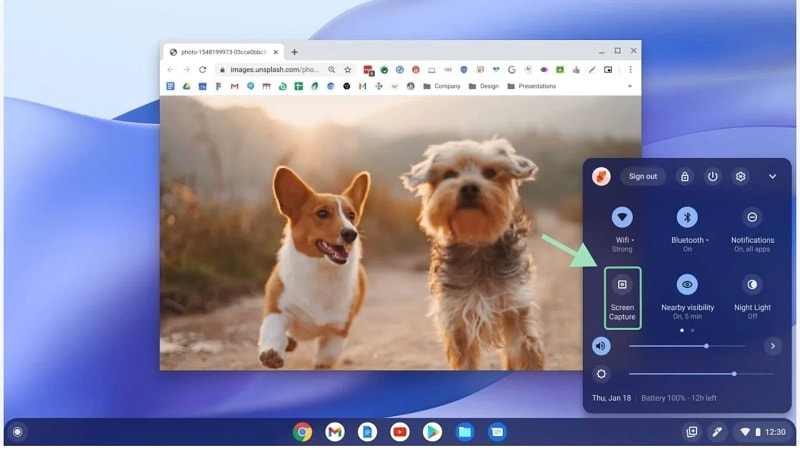
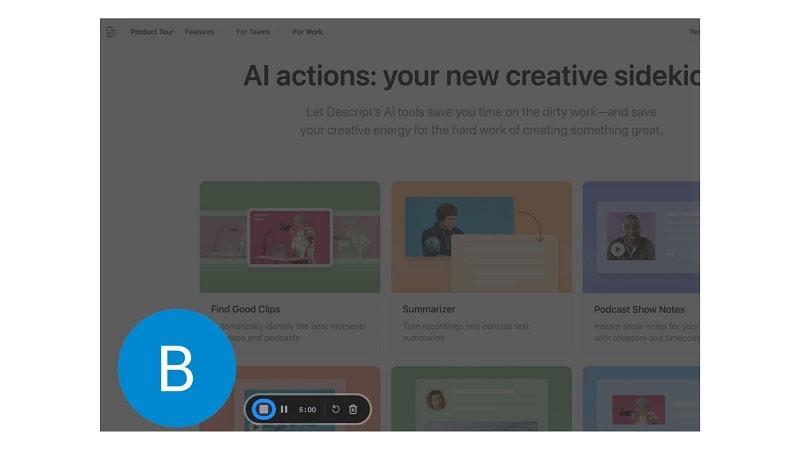
1: How to screen record on Chromebook (using Screen Capture)
With devices like Chromebooks, which operate on Chrome OS 89 and higher, users have access to a built-in Screen Capture tool. This tool serves the purpose of recording screenshots within the OS's ecosystem easily without any third-party app installations.
Users can capture the entire screen, a designated area, or a singular window. Additionally, there is also an option to integrate voice recording through a microphone. This method is perfect when you need to screen record on a Chromebook with audio for short tutorials or walkthroughs.
Steps to Use Screen Capture on Chromebook
Step1Open the Screen Capture Tool
Press the small clock icon on the right-hand side of your screen. Head to the Quick Settings panel and find the Screen Capture option. If the options aren't accessible, you can enlarge them by clicking the little arrow.
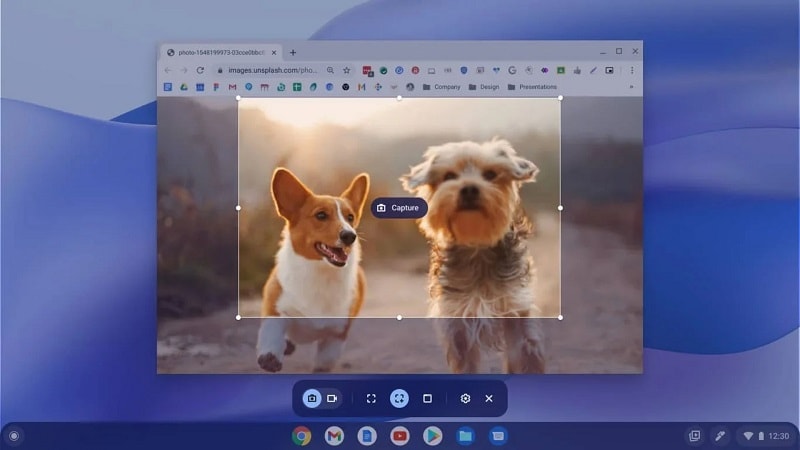
Step2Adjust Settings
Click the gear icon for more options. To begin recording audio, activate the microphone. Choose where to save your video file. You can also enable "Show Clicks and Keys" for visible gestures.
Step3Pick What to Record
Choose from three screen modes:
- Full screen
- Partial screen
- Window only
Step4Begin and End Recording
Click the video icon to start. To start, you can also touch any part of the screen. Press the red stop icon on the taskbar. Or press Search + Shift + X to stop quickly.
Step5Locate Your Recording
Your video will appear in the folder you chose. If none was picked, check your Downloads folder.
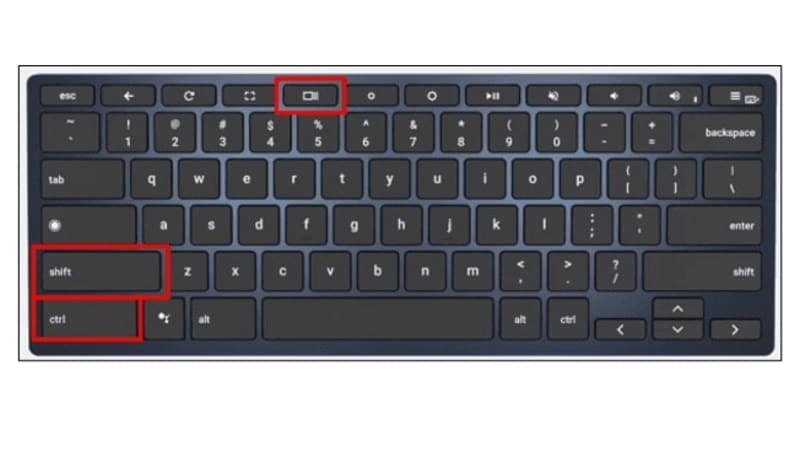
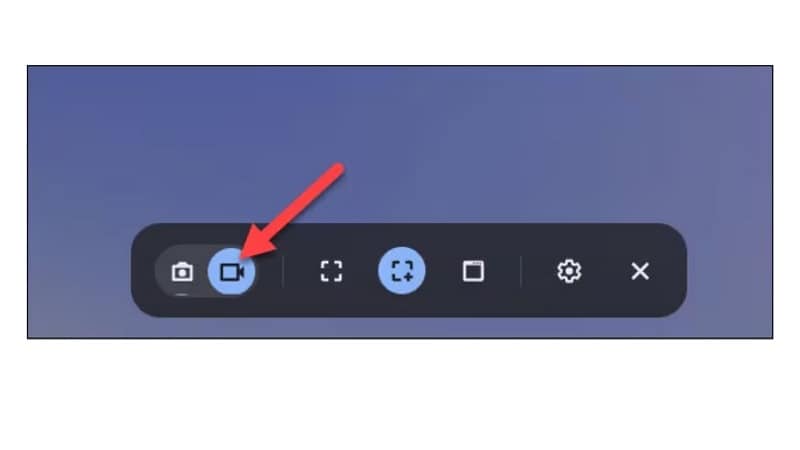
2: How To Record Screen on a Chromebook (Using Hotkeys)
Want to fast screen record on Chromebook? Hotkeys are your answer. The built-in recorder can be activated within seconds using keyboard shortcuts instead of clicking through multiple menus. It offers the same recording options as the Quick Settings method, but gets you there quicker.
Steps to Record Using Keyboard Shortcuts
Step1Open the Screen Capture Menu
Press Shift + Ctrl + Show Windows (the rectangle with two lines). This opens the screen recording bar at the bottom of your display.
Step2Choose Recording Mode
Click the video icon to switch to screen recording. This prepares the tool to capture your screen activity.
Step3Pick a Screen Area
- Full Screen: Records everything on your display.
- Partial Screen tool: Choose a precise area to capture by dragging it
- Window: Select the window that you wish to capture.
Step4Adjust Your Settings (Optional)
Click the Settings gear at the bottom. Turn on the Front Camera to show your webcam. Choose Microphone or Device Audio to include sound. Enable Show Keys and Clicks to display interactions.
Step5Start Your Recording
For full screen: click anywhere to begin. For partial screen: drag and select, then hit record. For window: click the target window to start.
Step6End the Recording
In the lower right corner, you should see a red Stop icon; click on it. You can also exit keyboard mode by pressing Search, Shift, and X. The Downloads folder will be immediately saved with your screen recording.
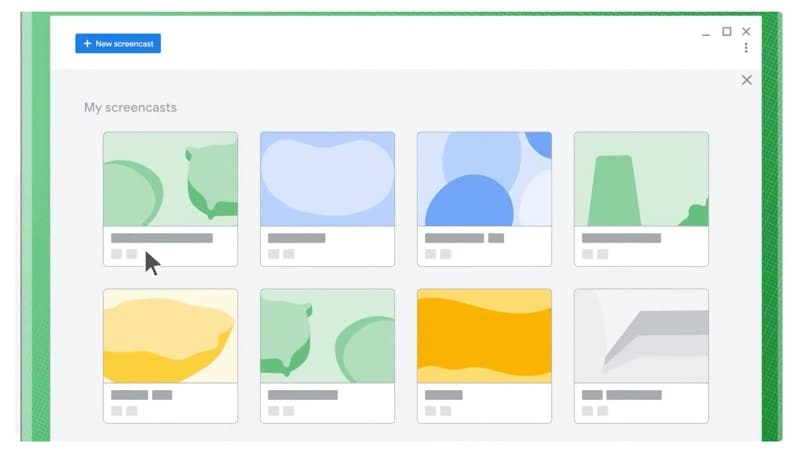
3: How to screen record on Chromebook (Using Screencast APP)
Users can also record a video on a Chromebookvia Screencast software (running on Chrome OS 104 or newer). This tool allows screen recording with voice, webcam feed, live annotations, and even automatic transcriptions. It also connects smoothly with Google Drive for saving and sharing your videos.
Steps to Record Your Screen with Screencast
Step1Open the Screencast App
Select the launcher located on the bottom left corner of your screen. Search for "Screencast" in the search bar. Click the app to open it. (Optional) Right-click the app icon and choose "Pin to shelf" for quick access next time.
Step2Start a New Recording
Inside the app, you'll see a few short tutorials. A new screencast can be started by clicking the plus sign (+) in the upper left corner.
Step3Adjust Screencast Settings
Turn on the microphone to record your voice. Enable camera if you want your face shown in the corner. Use Show Clicks and Keys to highlight taps, clicks, or key presses during the recording.
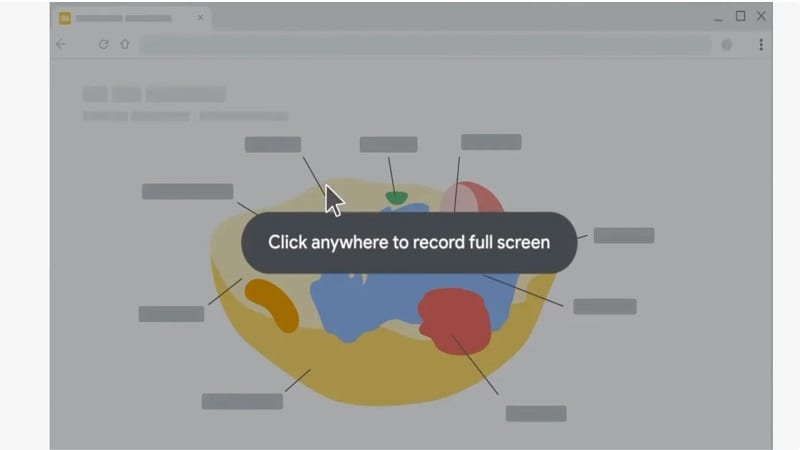
Step4Choose What to Record
Select one of the following screen modes:
- Full Screen: Records the entire display.
- Partial Screen: Drag to capture a custom section.
- Window: Picks one active tab or app window.
To start recording, click on the area you wish to capture.
Step5Begin Recording
Click the red Record icon on the menu to begin recording. While recording, you can use the marker tool to write or draw on the screen to highlight points.
Step6Stop the Recording
Click the red Stop button again when you're done.
Step7Find and Save Your Video
The recording will save automatically to Google Drive. In your Drive, you should see a folder called Screencast Recordings.
Step8Edit the Transcription (Optional)
Screencast creates a written transcript of what you say. To access the recording, open it and then choose the menu icon (three dots) on top. Choose "Edit Text" to fix or improve the transcription. You can undo changes later if needed.
4: How to Record your screen on a Chromebook (Using Browser Extension)
Browser extensions are a smart way to upgrade your Chromebook's screen recording abilities. These tools plug into Chrome and offer features that go beyond what's built into your device. You can screen record on Chromebook with audio, record specific tabs, and even add voiceover.
One of the most popular extensions is Loom. This tool is ideal when you want to record a video on a Chromebook with better control. You also get editing tools, no watermarks, and simple sharing options.
Steps to Use Loom Extension on Chromebook
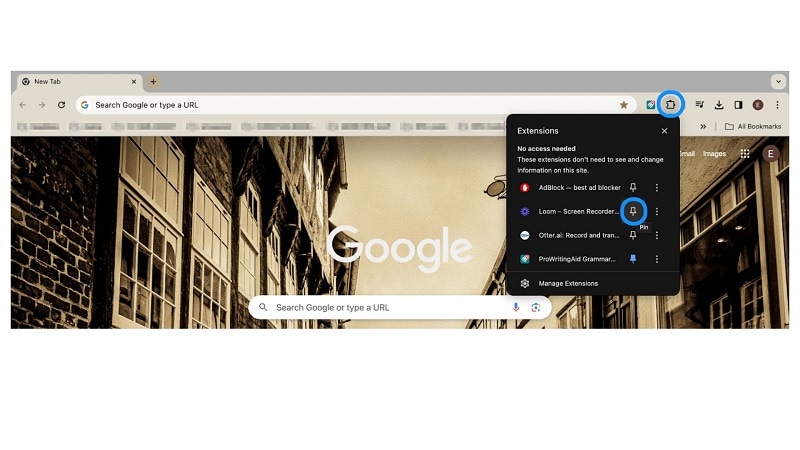
Step1Install Loom Recorder from the Chrome Web Store
Install "Loom Screen Recorder & Screen Capture" from the Chrome Web Store.
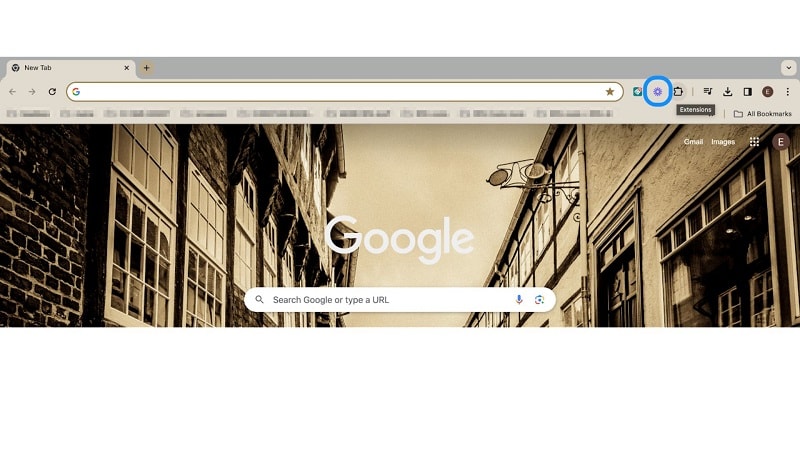
Step2Access the Chrome Extension
Then click the puzzle icon (Extensions) in the top-right browser bar. Find Loom and click the pin icon to keep it visible.
Step3Open the Loom Tool
Click the Loom icon from your Chrome toolbar. A recording setup screen will appear.
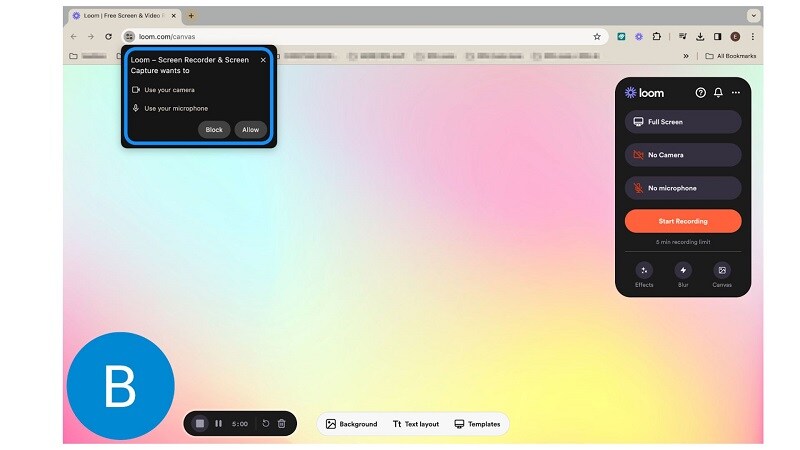
Step4Allow Permissions
Grant Loom access to your microphone and camera. You'll see permission requests. Approve them to record with audio or webcam.
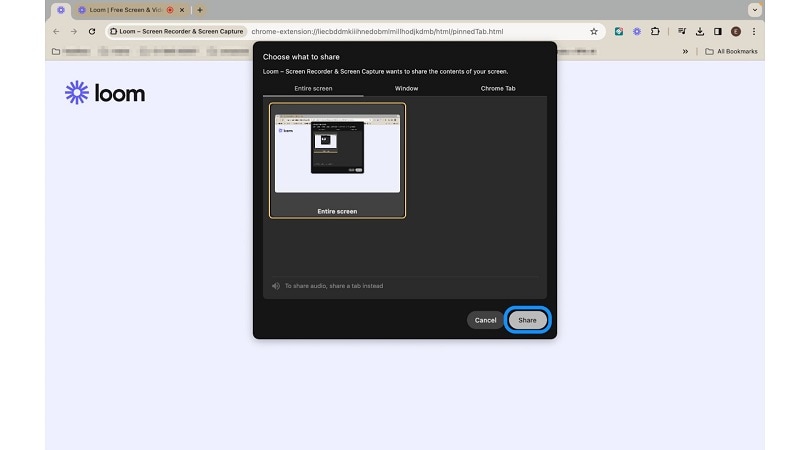
Step5Select What to Record
Choose the screen area:
- Full Screen
- Specific Window
- Current Chrome Tab
Choose your audio preferences:
- Mic only
- Mic + system audio
- Audio off
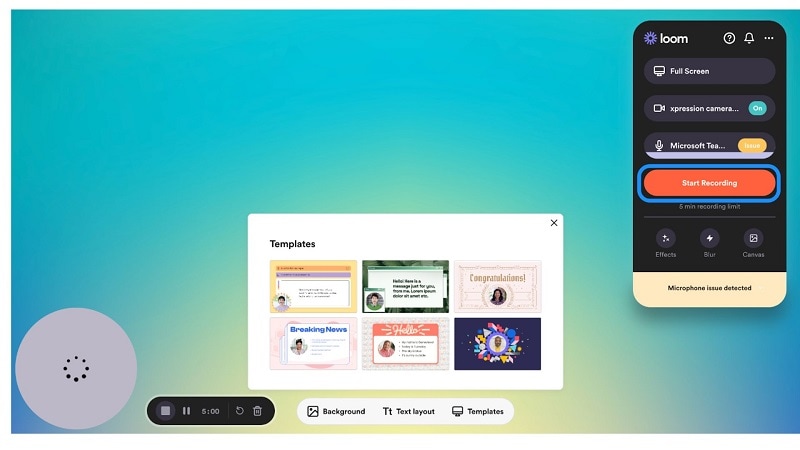
Step6Start Recording
Click the Start Recording button. Loom will capture your screen based on the settings you selected.
Step7Stop Recording
When finished, click the Stop button in the Loom control bar.
Loom will upload your video to your account. You can review it right away. Save it to your device or share the video link with others.
Browser Extensions vs. Built-in Tools: What You Gain
If you're deciding between Chromebook's default screen recorder and browser extensions like Loom, here's a clear side-by-side comparison to help you choose the right tool:
Chromebook Screen Recorder: Built-in vs Extensions (Comparison)
| Tool/Method | Audio Options | Webcam/Annotations | Save/Share | Pros | Cons | Best For |
| Built-in Screen Capture | Mic (+ Device audio on some versions) | Clicks/keys; no rich markup | Local (Downloads) | No install, fast | Limited editing; system audio varies | Quick tutorials |
| Keyboard Shortcuts | Same as built-in | — | Local | Fastest workflow | Same limits as上 | Power users |
| Screencast App | Mic | Webcam bubble, marker, transcript | Google Drive | Transcript & easy sharing | Fewer pro controls | Classes/teams |
| Loom (Extension) | Mic + system audio | Webcam overlay, basic edits | Cloud link | Great sharing; system audio | Account needed | Demos & reviews |
Part 2: Limitations That Stop You From Creating Great Content
Recording with Chromebook tools gets the job done—barely. Here's what's missing:
- No way to trim, cut, or rearrange clips
- Lacks transitions and visual effects
- You can't highlight clicks, annotate, or zoom
- Audio is basic, and background noise can't be removed
- System audio often isn't recorded unless you use extensions
So, while you can learn how to screen record on Chromebook, the results may feel unfinished. What you need is a way to elevate those clips.
Overcome Chromebook Limitations with Filmora
As we've seen, Chromebook's built-in tools have many limitations. Here's how Wondershare Filmora solves those problems to help you create truly professional videos:
- Problem: No way to trim, cut, or rearrange clips. Filmora Solution: Use the simple cut/split tools to edit your footage in seconds.
- Problem: Audio is basic, and background noise can't be removed. Filmora Solution: Instantly remove background noise with the AI Audio Denoise feature.
Fix & Improve Audio on Chromebook Recordings
- Enable the right input: In recorder Settings, turn on Microphone; choose the correct mic device.
- System audio: Availability may vary by ChromeOS version/app. If you need tab/system audio, consider extensions such as Loom.
- Reduce noise: Record in a quiet room; after recording, run noise reduction in an editor.
- Headset mic: Use a USB/3.5 mm headset for clearer narration.
Part 3. Capture First, Enhance Later: Your Smart Workflow
Recording on a Chromebook is quick, but raw footage isn't enough. Want sharp visuals, clear audio, and real impact? Capture your screen first, then elevate it with powerful desktop editing.
This simple shift, recorded on a Chromebook, enhanced with Filmora, transforms basic clips into polished, scroll-stopping content. Here's how to make that workflow work for you.
- Use any of the methods above to record a video on a Chromebook. Make sure your mic is enabled if you're narrating.
- Use Google Drive or a USB to transfer the video from your Chromebook to a Windows or Mac computer.
- Launch Filmora on the desktop and drag the video into the timeline.
 secure download

Step-by-Step Guide to Editing Chromebook Screen Recordings with Filmora
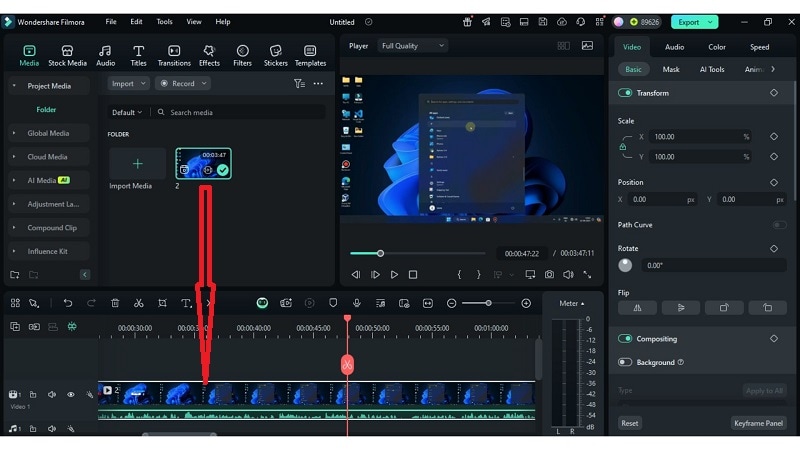
Step1Import Your Chromebook Recording
Open Filmora on your desktop. Click "New Project" to get started. Drag your Chromebook screen recording (from Downloads or Google Drive) into the Media Library. Drop it into the timeline at the bottom of the editor.
Step2Trim and Clean Up
Use the cut/split tool to remove silent or unwanted sections. Trim the start or end for a cleaner intro and outro. Adjust the clip's speed or reverse it if needed.

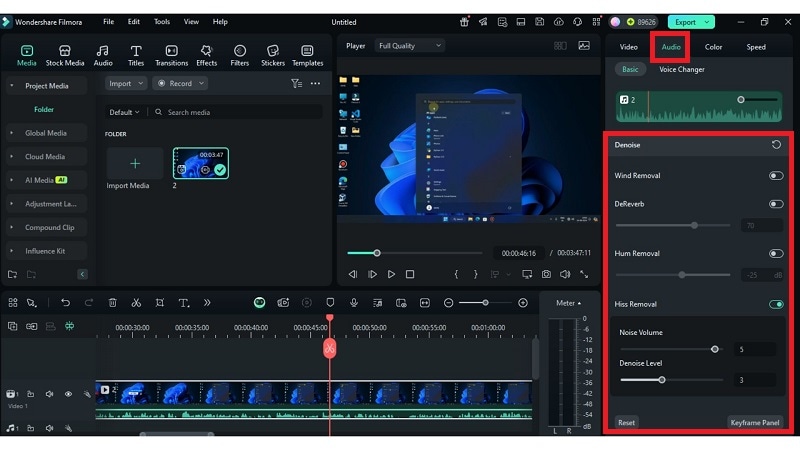
Step3Enhance the Audio
Click on the video in the timeline and select "Audio" settings. Use Noise Reduction to remove background sound. Adjust volume levels or add fade-in and fade-out effects. You can also detach the audio and edit it separately if needed.
Step4Add Animated Titles and Text
Go to the Titles tab. Choose from built-in animated title templates. Drag a title onto the timeline and edit the text to match your content. Use lower-thirds or intro text for tutorials, walkthroughs, or branding.

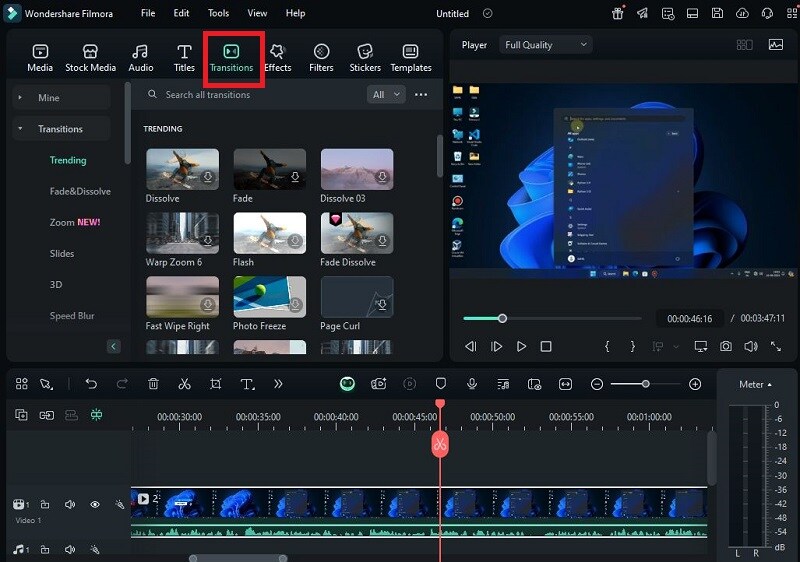
Step5Apply Transitions and Overlays
Open the Transitions tab and choose from various effects. Drag transitions between clips for smooth flow. Add overlays or elements like arrows, speech bubbles, or animated icons.
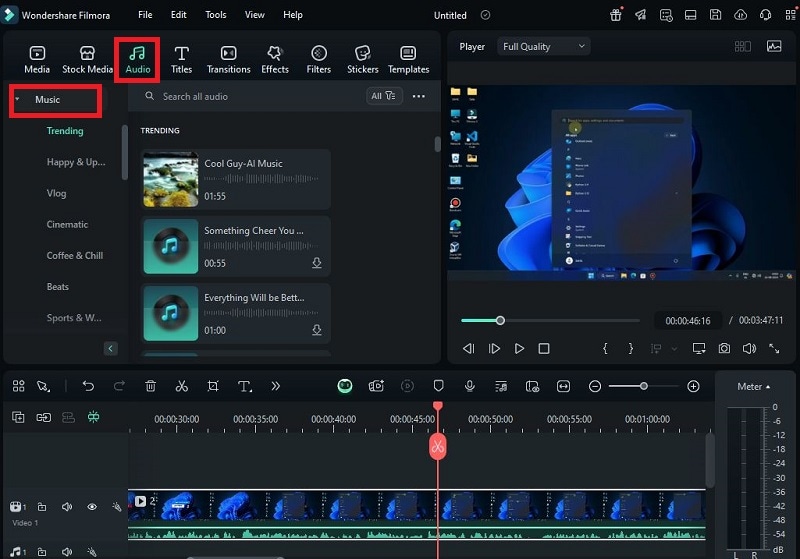
Step6Add Background Music or Voiceover
Click on Audio and choose royalty-free tracks from Filmora's music library. Drag your chosen track to the audio timeline. Use the Voice Recorder feature to narrate your video directly inside Filmora.
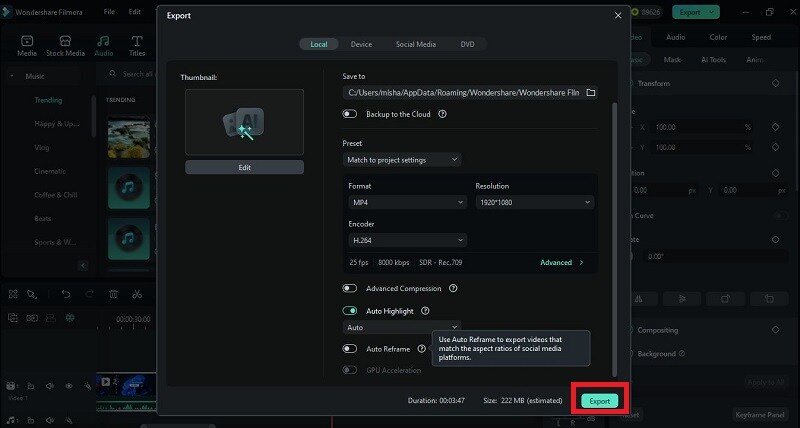
Step7Export and Save Your Final Video
Click Export once you're done editing. Choose your preferred format (MP4 is recommended). Select the resolution: 1080p for HD or 4K for high-quality content. Save the file to your device or upload it directly to YouTube or Vimeo.
Conclusion:
You've now seen the full process of how to screen record on Chromebook using built-in tools, hotkeys, apps, and browser extensions. Each method serves a purpose, but raw footage alone won't deliver standout content.
To refine your recordings, a desktop editor adds the polish you need. From trimming to adding effects, Filmora makes editing fast and intuitive. Whether it's tutorials or walkthroughs, this smart workflow turns a simple capture into an engaging video.
If you've been wondering how to screen record on Chromebook with audio, the steps are now clear, and your next great video is already in the making.
secure download
