
 100% Security Verified | No Subscription Required | No Malware


 ChatGPT
 Perplexity
 Gemini
 Claude
 Grok
Grok
In professional and formal settings, people prefer sharing content through email. Whatever your field may be, it is the standard means of sharing video files. Besides offering quick processes of video sharing, this mode also enables quality preservation. However, people face the challenge of file size limits while sharing large video files. To help you avoid this limitation prompt, this article will show you how to compress a video for email.
In this article
Part 1. Why Is It Necessary to Compress Video For Email?
Reducing file size eases the sharing process across any platform and device. The following list features the reasons why you must compress a video for email:
- File Size Limits: Most email services limit attachment sizes to around 20–25 MB, but uncompressed HD or 4K videos often exceed that. Compressing the video ensures it stays within these limits and prevents delivery issues like bounced emails.
- Faster Upload and Download Times: Large video files take longer to upload and download, especially on slower internet connections. Compressing video for email reduces the file size to make transfers faster and more convenient.
- Better Email Deliverability: Oversized attachments can trigger spam filters or be blocked by mail servers. Reducing the size of videos lowers this risk and helps ensure your email is delivered successfully.
- Efficient Use of Storage Space: Large video files can quickly fill up storage in both your and the recipient’s inbox. Changing the video size conserves space and keeps email storage more manageable.
Part 2. 4 Ways to Compress Video for Email [100% Effective]
Having understood the significance of optimizing file size, let’s now look into the following tools that offer effective utilities for this purpose:
Way 1: Compressing as a ZIP File
One of the most effective techniques of video optimization is making a ZIP file of them. This method reduces the total size by eliminating redundant data, making it easier and faster to store or transfer. Additionally, ZIP files can bundle many files into one to simplify organization and file management. The following guide features steps on making a ZIP file to compress a video file for email:
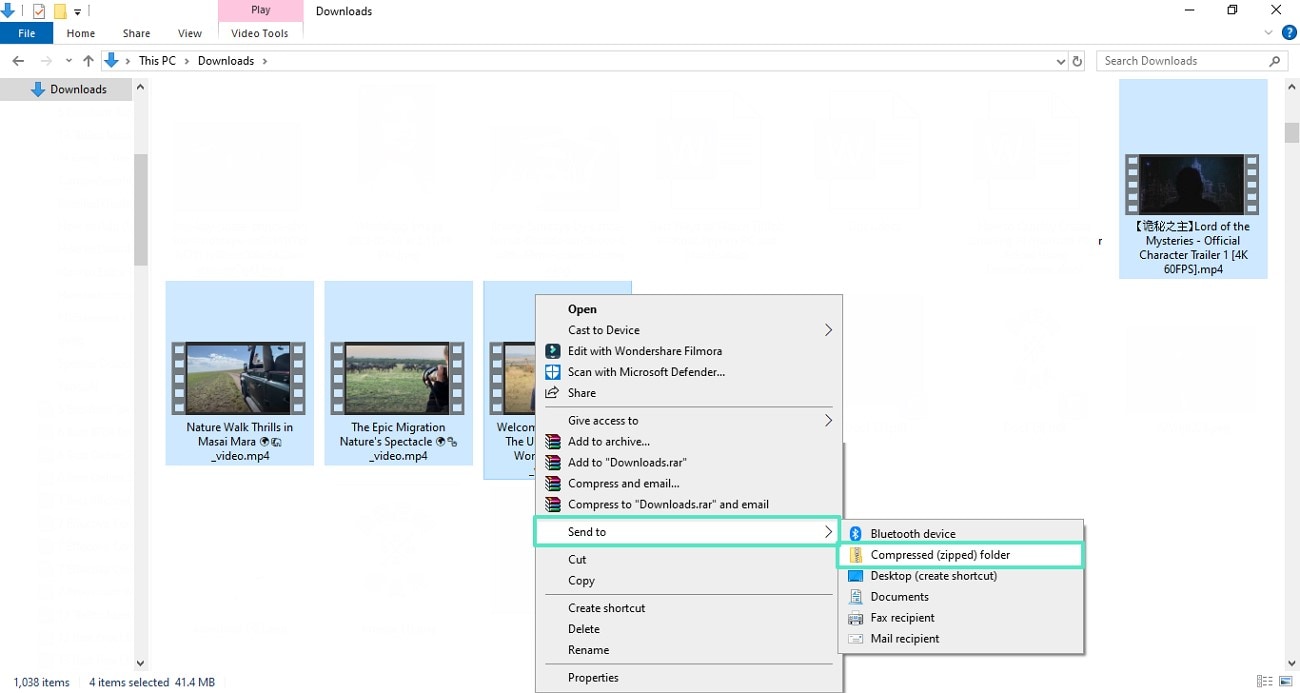
Instructions. To begin with, locate and select the required video files on your PC and right-click on them. Using the extended menu, hover over “Send To” and select “Compressed (zipped) folder” to merge and compress files.
Way 2: Using Filmora For Compressing via Resolution
If you want to share just one file and optimize it for sharing, you will need a third-party tool. Wondershare Filmora is an all-in-one AI video editor that offers numerous manual features as well. With its mobile and desktop versions, you can reduce the size to send large videos by email. Users looking for extensive editing besides changing the video resolution can look into the desktop version.
The PC variant allows you to select the resolution when you drag the video to the timeline for editing. If those resolution presets are unsuitable, you can choose custom options in the export window. In contrast, the mobile version is for those who want a quick solution for file optimization. As you export the video, the tool allows you to pick a desired video quality and FPS for optimization.
 secure download

1. Compressing in Wondershare Filmora Desktop
The following guide will focus on using the desktop version of Wondershare Filmora for reducing file quality:
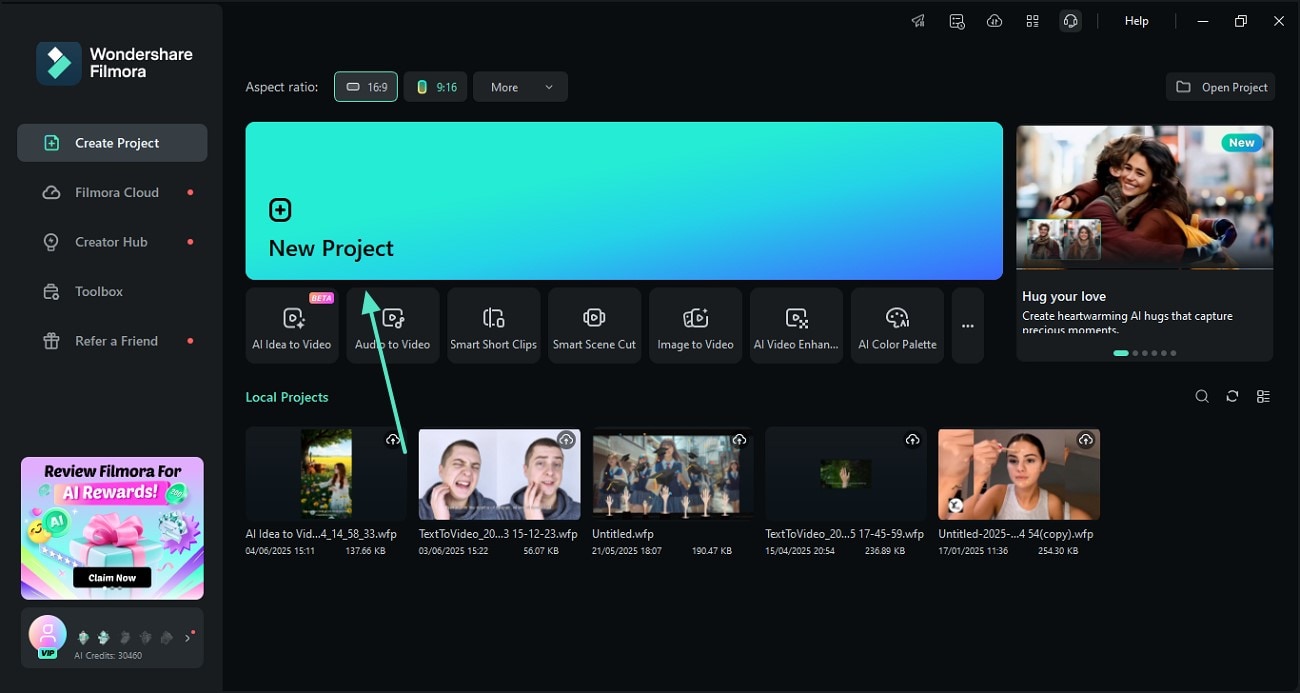
Step 1. Select a Video to Import in the New Project
To begin with, open Filmora and use the “New Project” button to import the targeted video file.
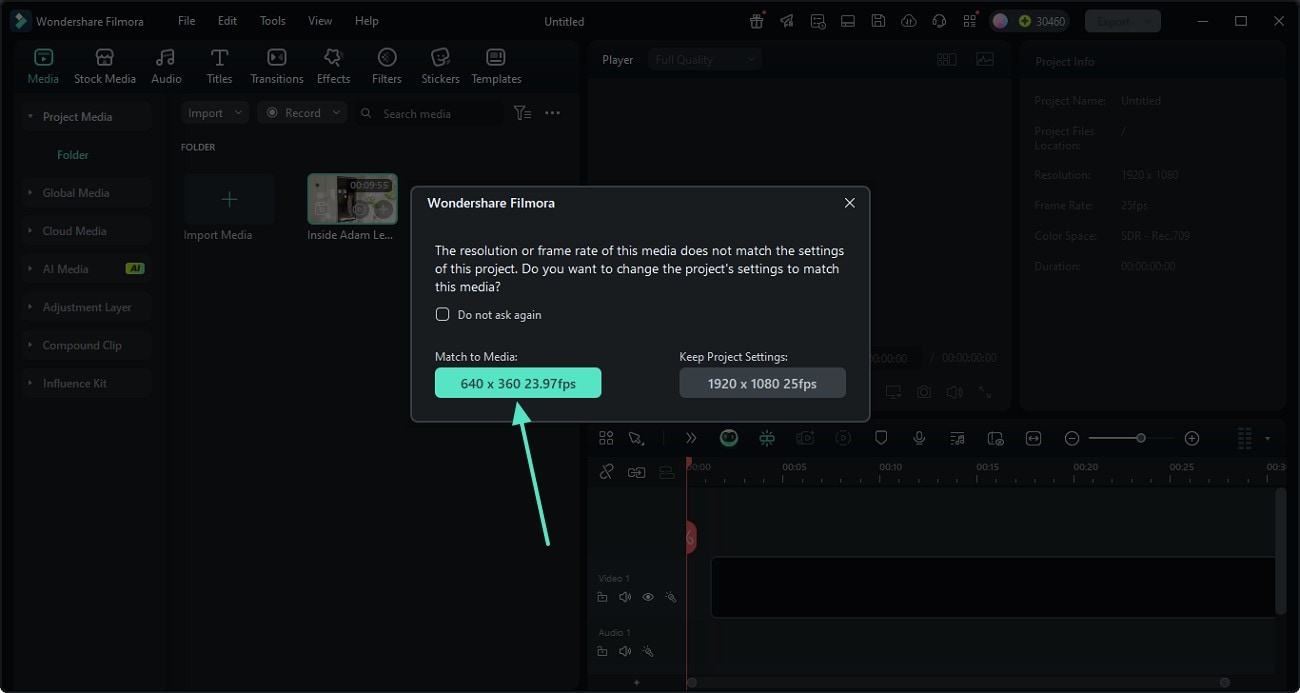
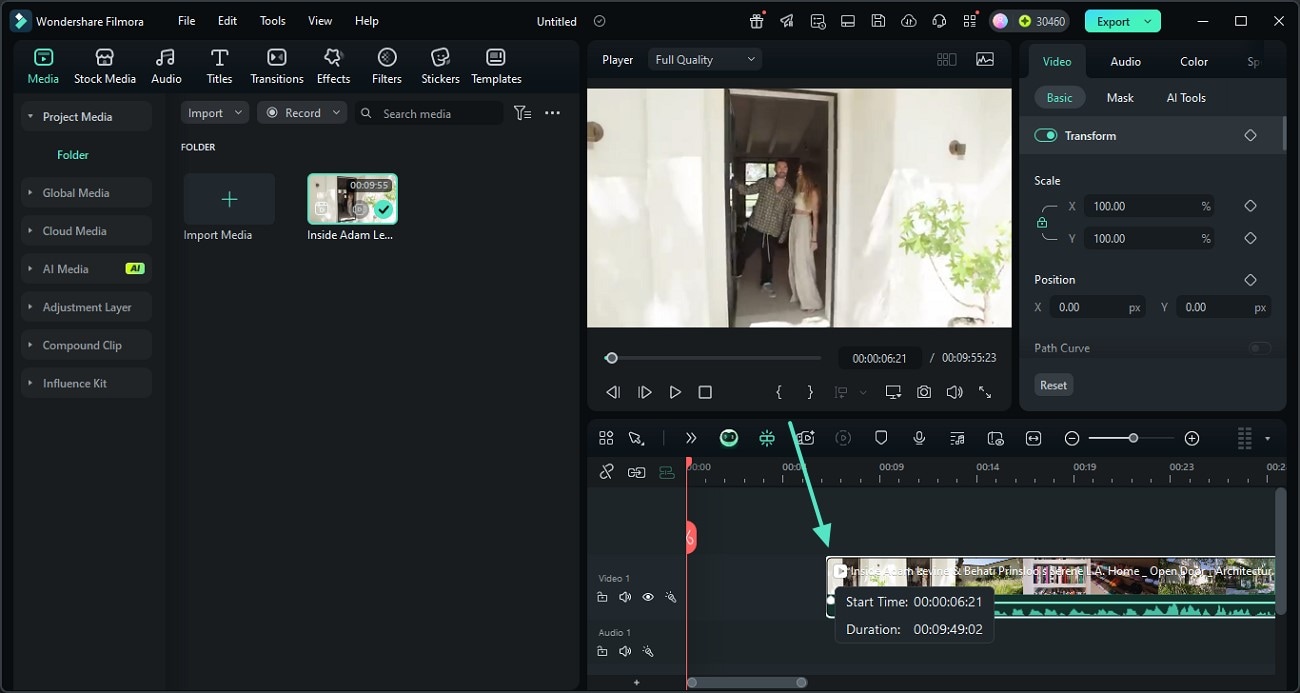
Step 2. Choose the Preset Resolutions While Moving the Video to the Timeline
As you drag the video to the timeline, select the lower resolution using the following dialogue box.
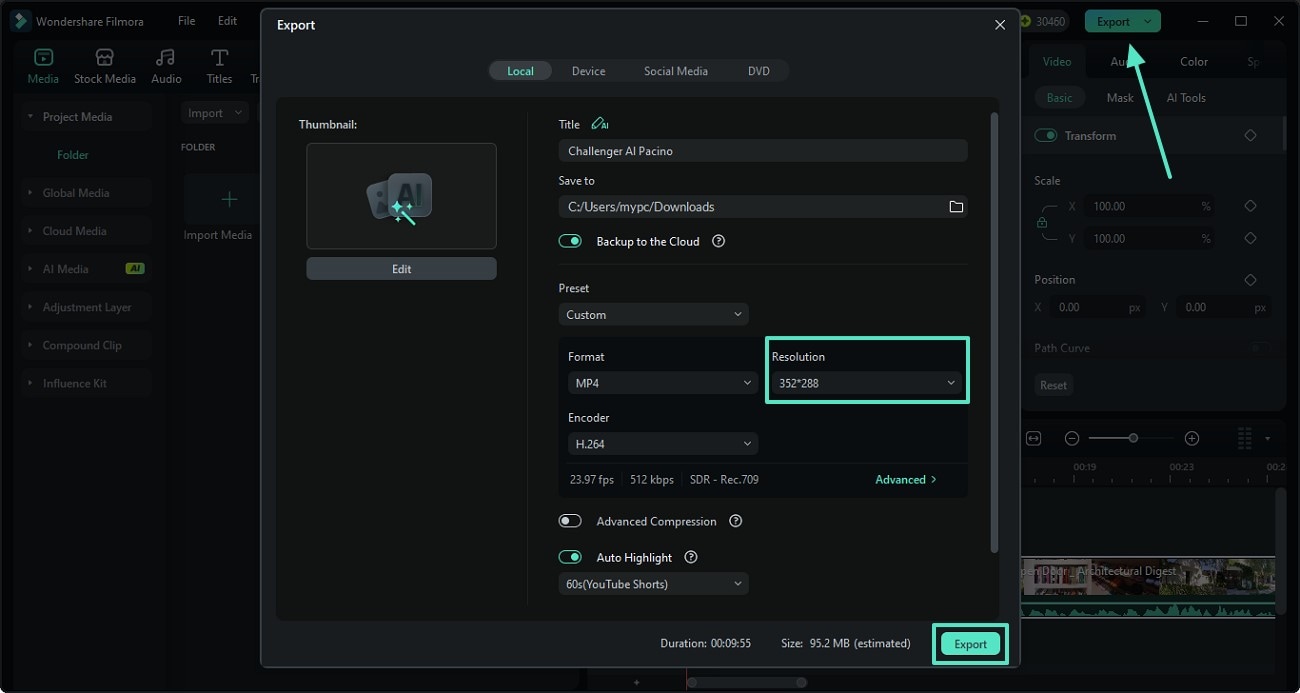
Step 3. Apply Further Reduction While Exporting the Video
If the preset options are not satisfactory, access the “Export” window using the top right of the screen. Now, select a custom “Resolution” from the respective menu to “Export” the video.
2. Compressing With The Filmora App [iOS/Android]
If you want to learn how to make a video smaller to email using the Filmora App, refer to the following guide:
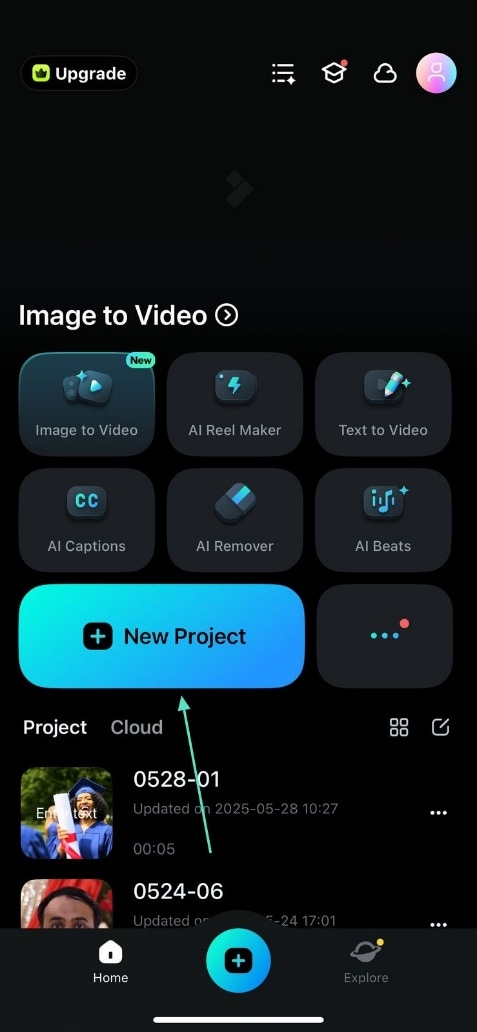
Step 1. Select the Video to Shrink
Upon opening the app, press the “New Project” button to import a video that needs to be shrunk.
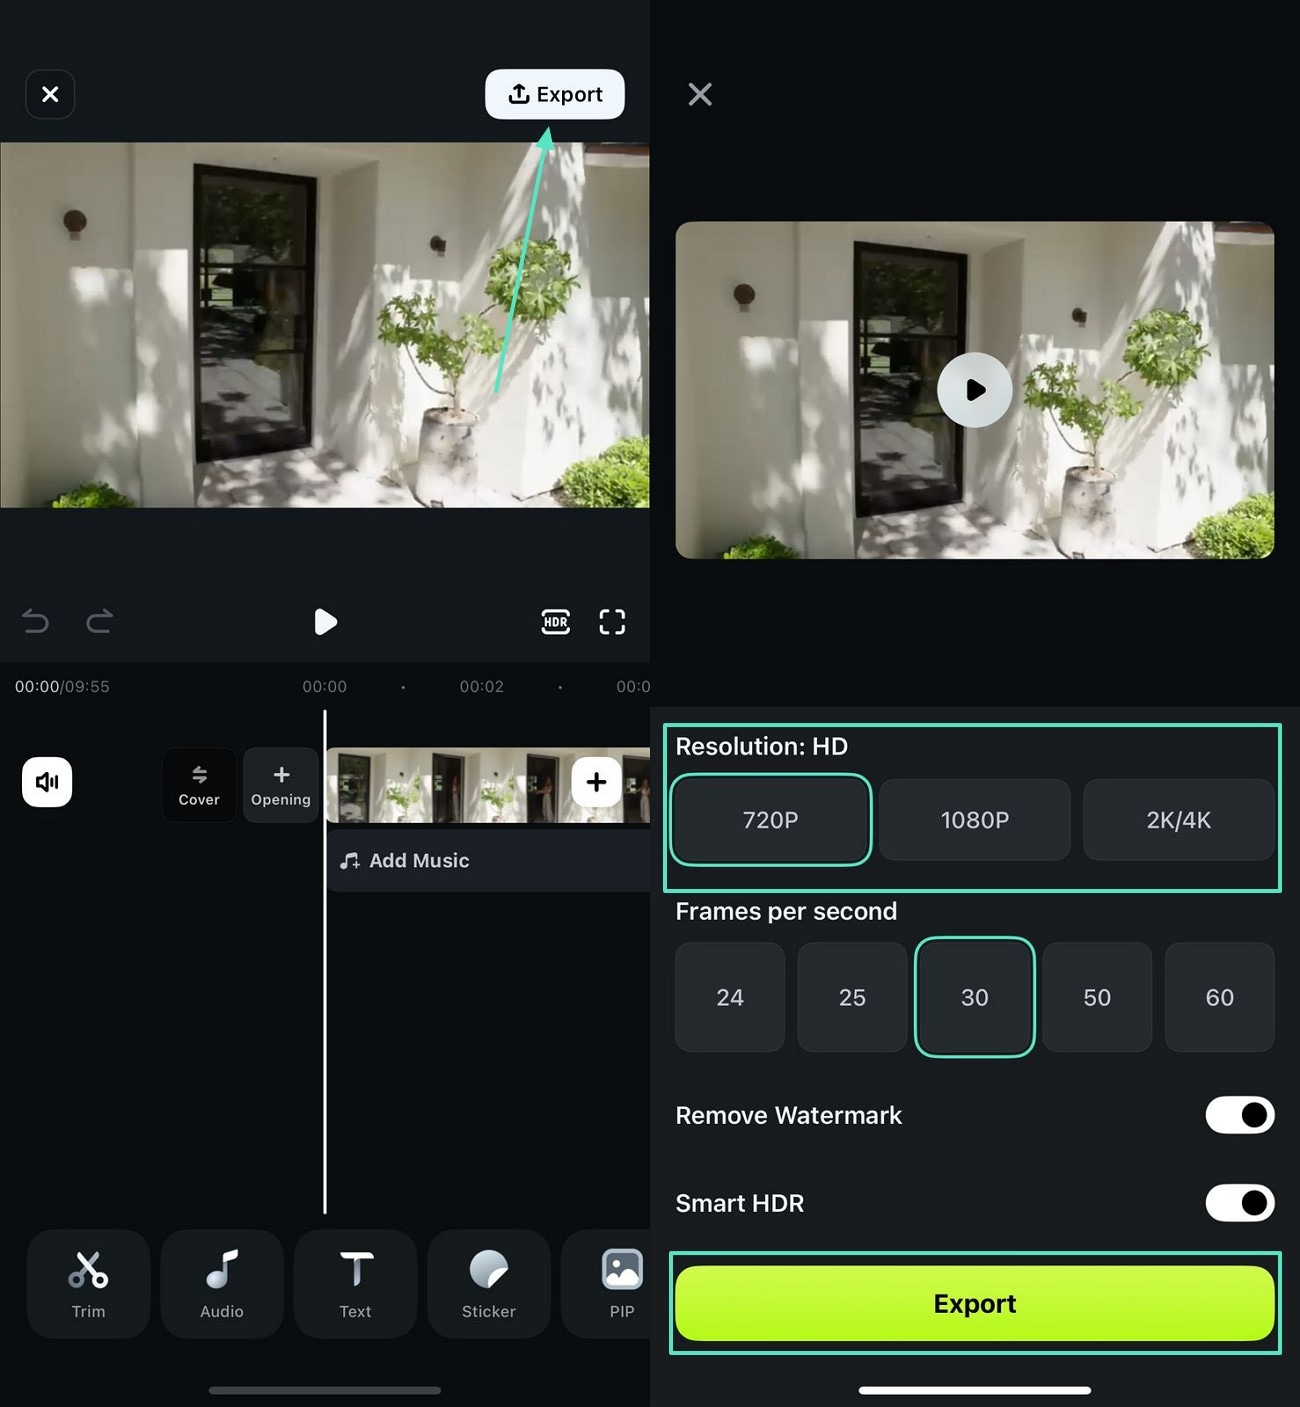
Step 2. Select the Lowest Resolution Before Exporting the Video
Once the video is in the editing interface, tap “Export” and select the “720P” resolution.
Way 3: Using Filmora to Trim Parts
Another effective way to compress and email video is by trimming the undesired parts from it. Like many other features, Filmora offers video trimming as well. In both versions, you can benefit from the easy-to-use interface to delete the unneeded sections from a film.
Desktop Guide to Trimming Video Parts
Follow the guide below and learn how to remove the undesired parts of a video using Filmora on desktop:
Instructions. Once the video is in the timeline, select its track and drag the start point to the right. If you want to cut scenes from the end of the video, you can head to the end scene and drag the track towards the left.
Mobile Guide To Trim Video on App
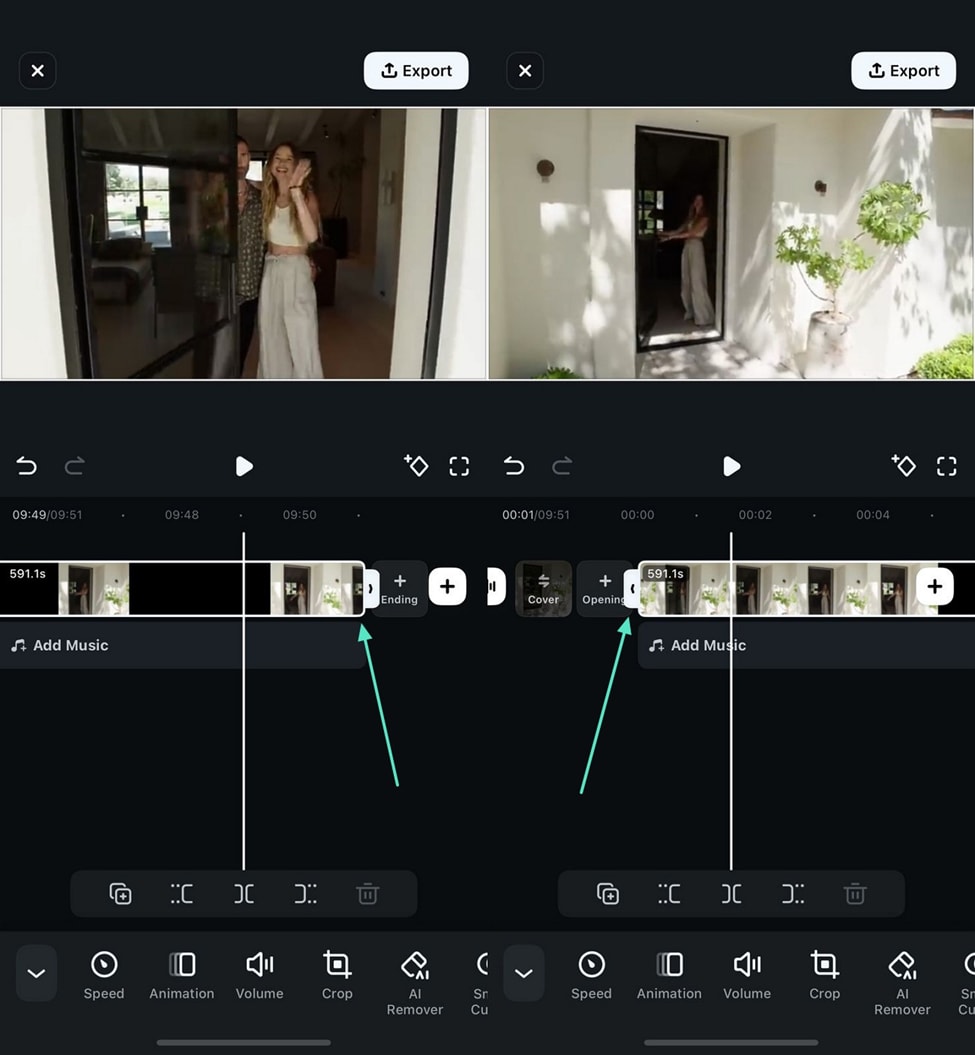
The following section features a guide on how to condense a video to send via email using the Filmora App:
Instructions. Upon importing the video, tap the timeline and drag the in and out points of the video to trim it from the start or the end, respectively.
 secure download
Way 4: Using an Online Video Compressor
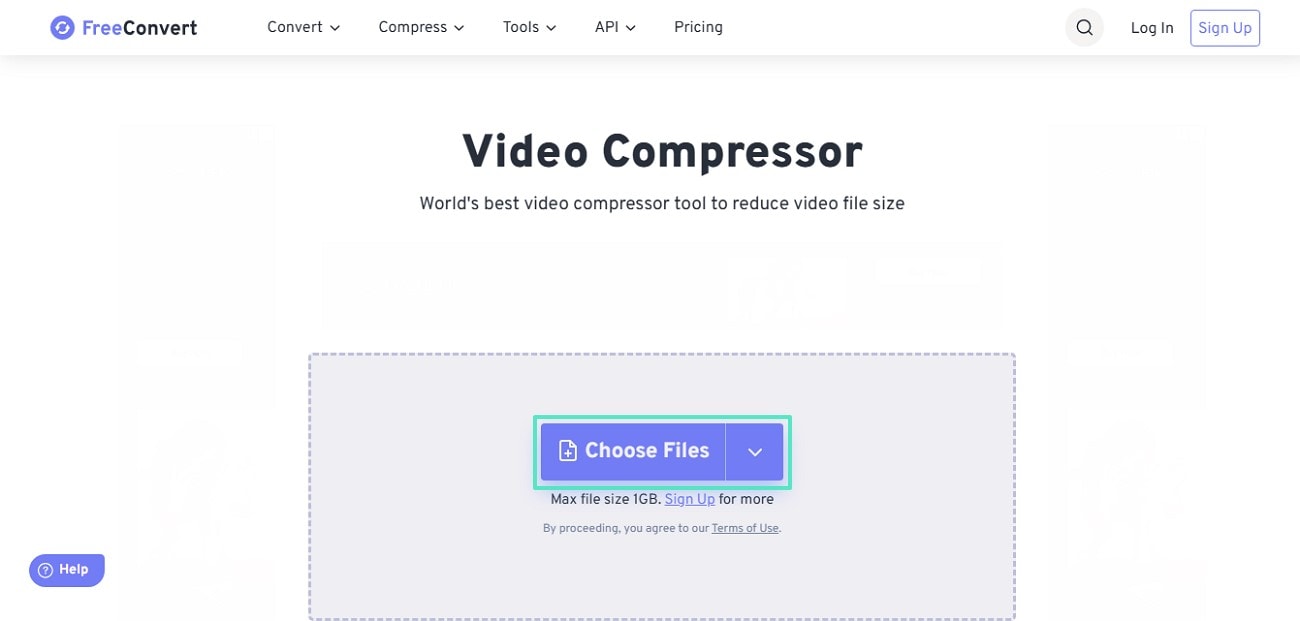
When you are not looking to download any heavy software for video compression, you can explore any online facility. With its commendable abilities to shrink a video’s file size, FreeConvert emerges as a versatile tool. For precise compression, it allows you to set a custom percentage of level for file size reduction. The following guide shows you how to compress a video for email using FreeConvert:
Step 1. To begin with, open the website and import the video using the dedicated button.
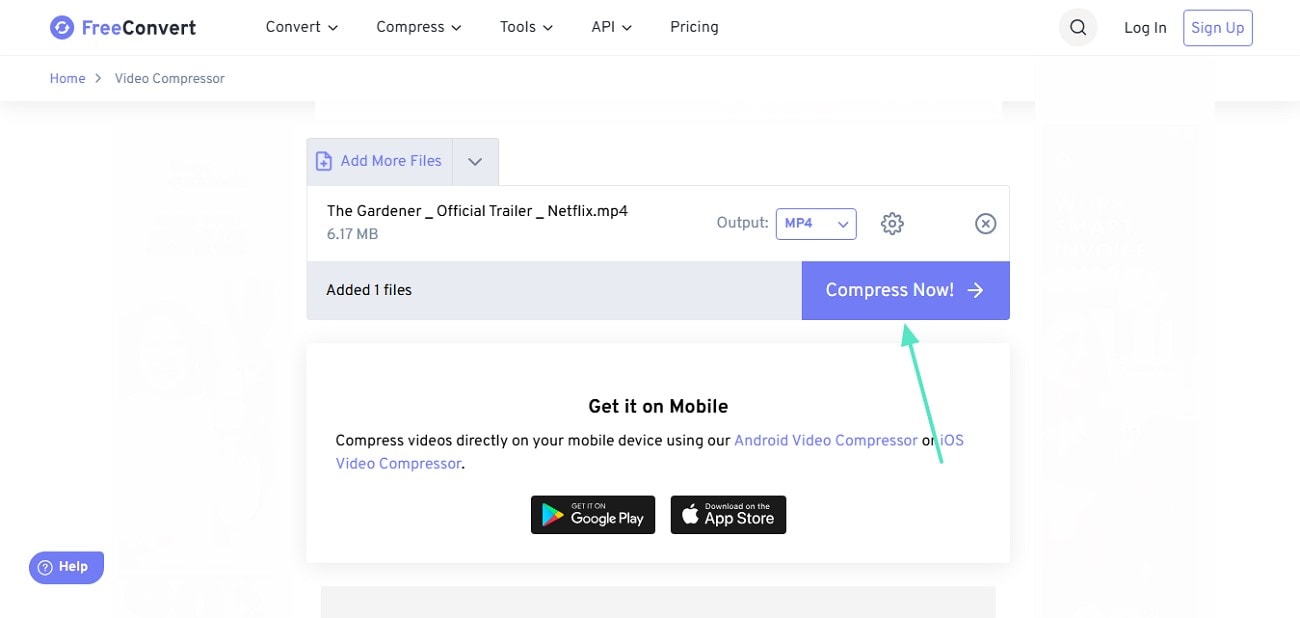
Step 2. After selecting the desired compression level from the “Advanced Settings,” select the “Compress Now” button to download the results from the next page.
Limitations
Unlike Filmora, FreeConvert has lots of ads on its interface that impact the experience.
This tool does not let you select a custom video format and downloads the files as MP4.
Part 3. Send Video via Email Without Compressing: Cloud Services
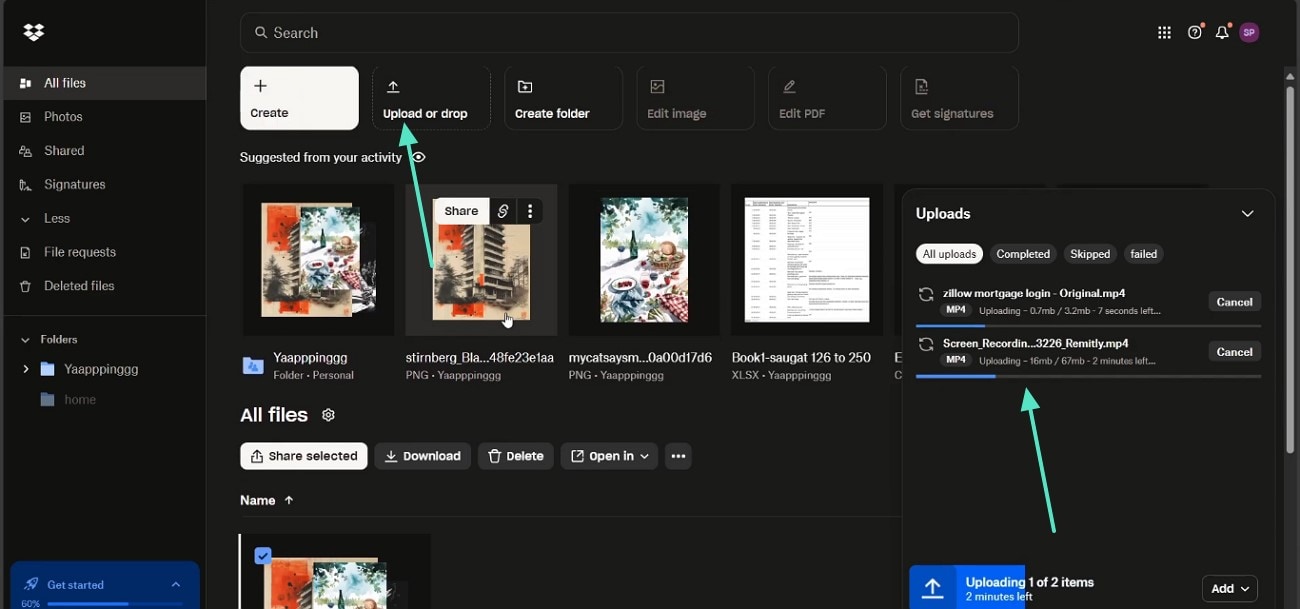
If you are unsure about compression tools, there is a way you can share videos without reducing file size. Cloud services like Dropbox have a unique way of video sharing without impacting the size of the file. With its ability to share a video up to 250GB, this platform serves as a comprehensive file-sharing service.
To add protection to the content, you can add a password as well. The following instructions are about how to make a video smaller to email:
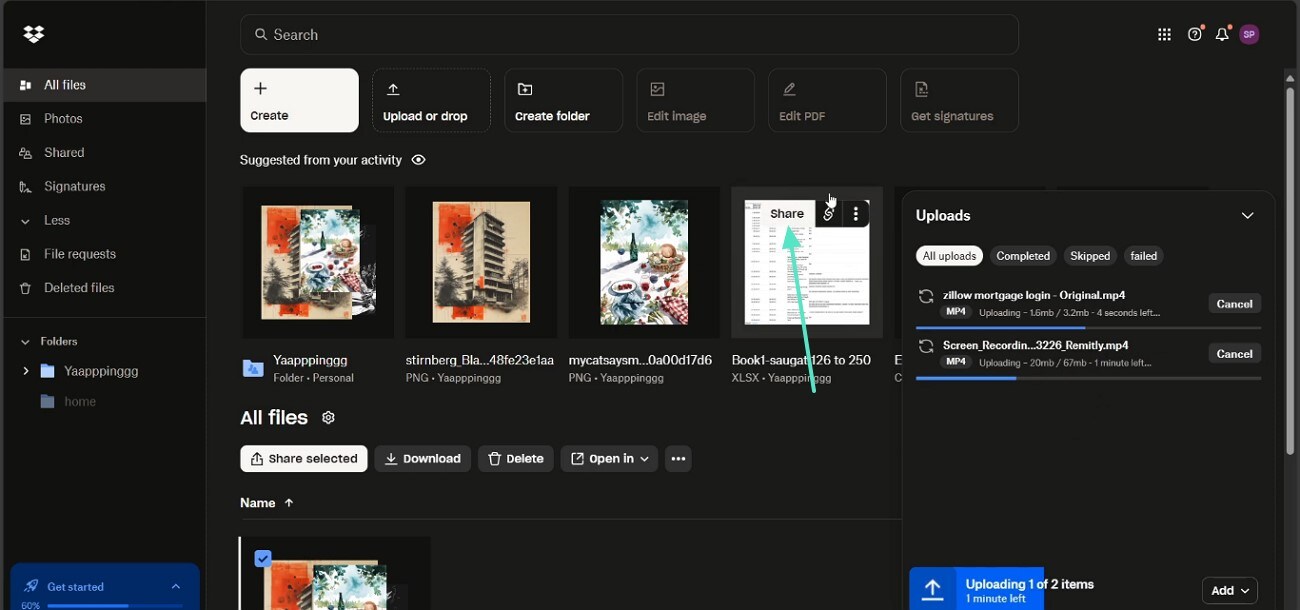
Step 1. From the main page of Dropbox, “Upload” the video using the designated button. You can check the upload progress using the right panel.
Step 2. As the video is uploaded, hover over it and press the “Share” button to access a new window. To share the video across some other platform, you can also use the “Link” button to copy the video’s URL.
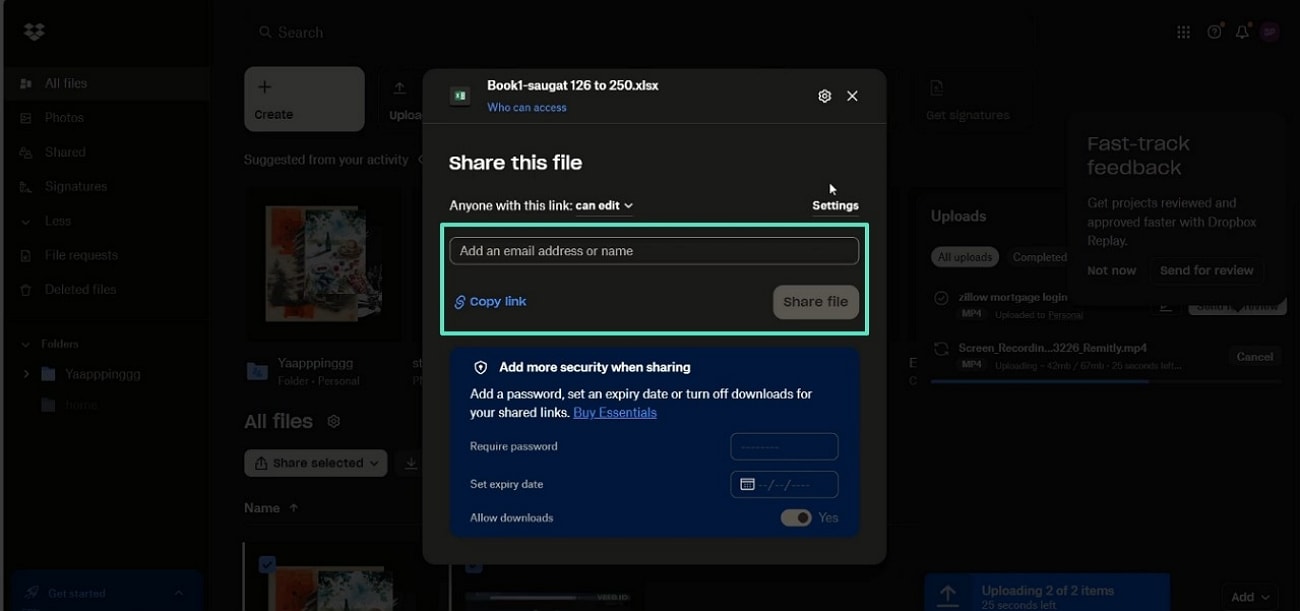
Step 3. From the next window, enter the email address where you need to share the video and press “Share File” to transfer the file.
Final Thoughts
Conclusively, this article was a beginner’s guide on how to compress a video for email using various tools. Out of all the platforms discussed, Wondershare Filmora was the most reliable one. You can use its desktop and mobile versions to compress file size through two methods.
