
 100% Security Verified | No Subscription Required | No Malware

Ever since the first Harry Potter movie came out, we have seen how images in their magical newspapers come to life and move around. People have been looking forward to a time when technology will allow us to do the exact same thing, and that time has finally come.
Whether you want to animate old photos to make them vivid or catch the audience's eyes by converting static images into vibrant videos, you can achieve that with a free photo animation maker.
This article will discuss the best photo animation maker and tell you the four best methods to animate photos.
In this article
What Is The Best Photo Animation Maker?
With a powerful video editing tool by your side, you will be able to manipulate photos and make them move. One of the best software solutions that can achieve this is Filmora, a stellar video editing tool with image and video editing capabilities that make film editing techniques like J-cut and L-cut quite easy, including a rich library of stock media like B-Roll clips, aerial shots, advanced video effects, montage templates, and dissolve transitions.
 secure download

Available on Windows, Mac, Android, and iPhone, Filmora offers four methods to animate photos; whether you are looking for a quick and efficient AI-powered way or want to customize it by yourself, all can be done with Filmora!
To animate photos with Filmora, you can choose any of the following methods.
- Use the AI image-to-video feature to Turn Images into Animated Videos
- Use the Zoom In and Zoom Out Effect
- Apply the Various Animation Effects
- Add Keyframe Animation
Get your preferred device, download and install the software, and let's see how to achieve photo animation in a few simple steps.
Method 1: Animate Photos With an AI Image-to-Video Generator
Filmora's Image-to-Video feature is one of the most interesting ways to animate your photos with AI and make them do something. This feature offers several templates that you can use, like AI Kiss, AI Hug, and even AI Fight. You also have the option to go with a custom prompt.
- Tap on Image to Video on Filmora's welcome screen.
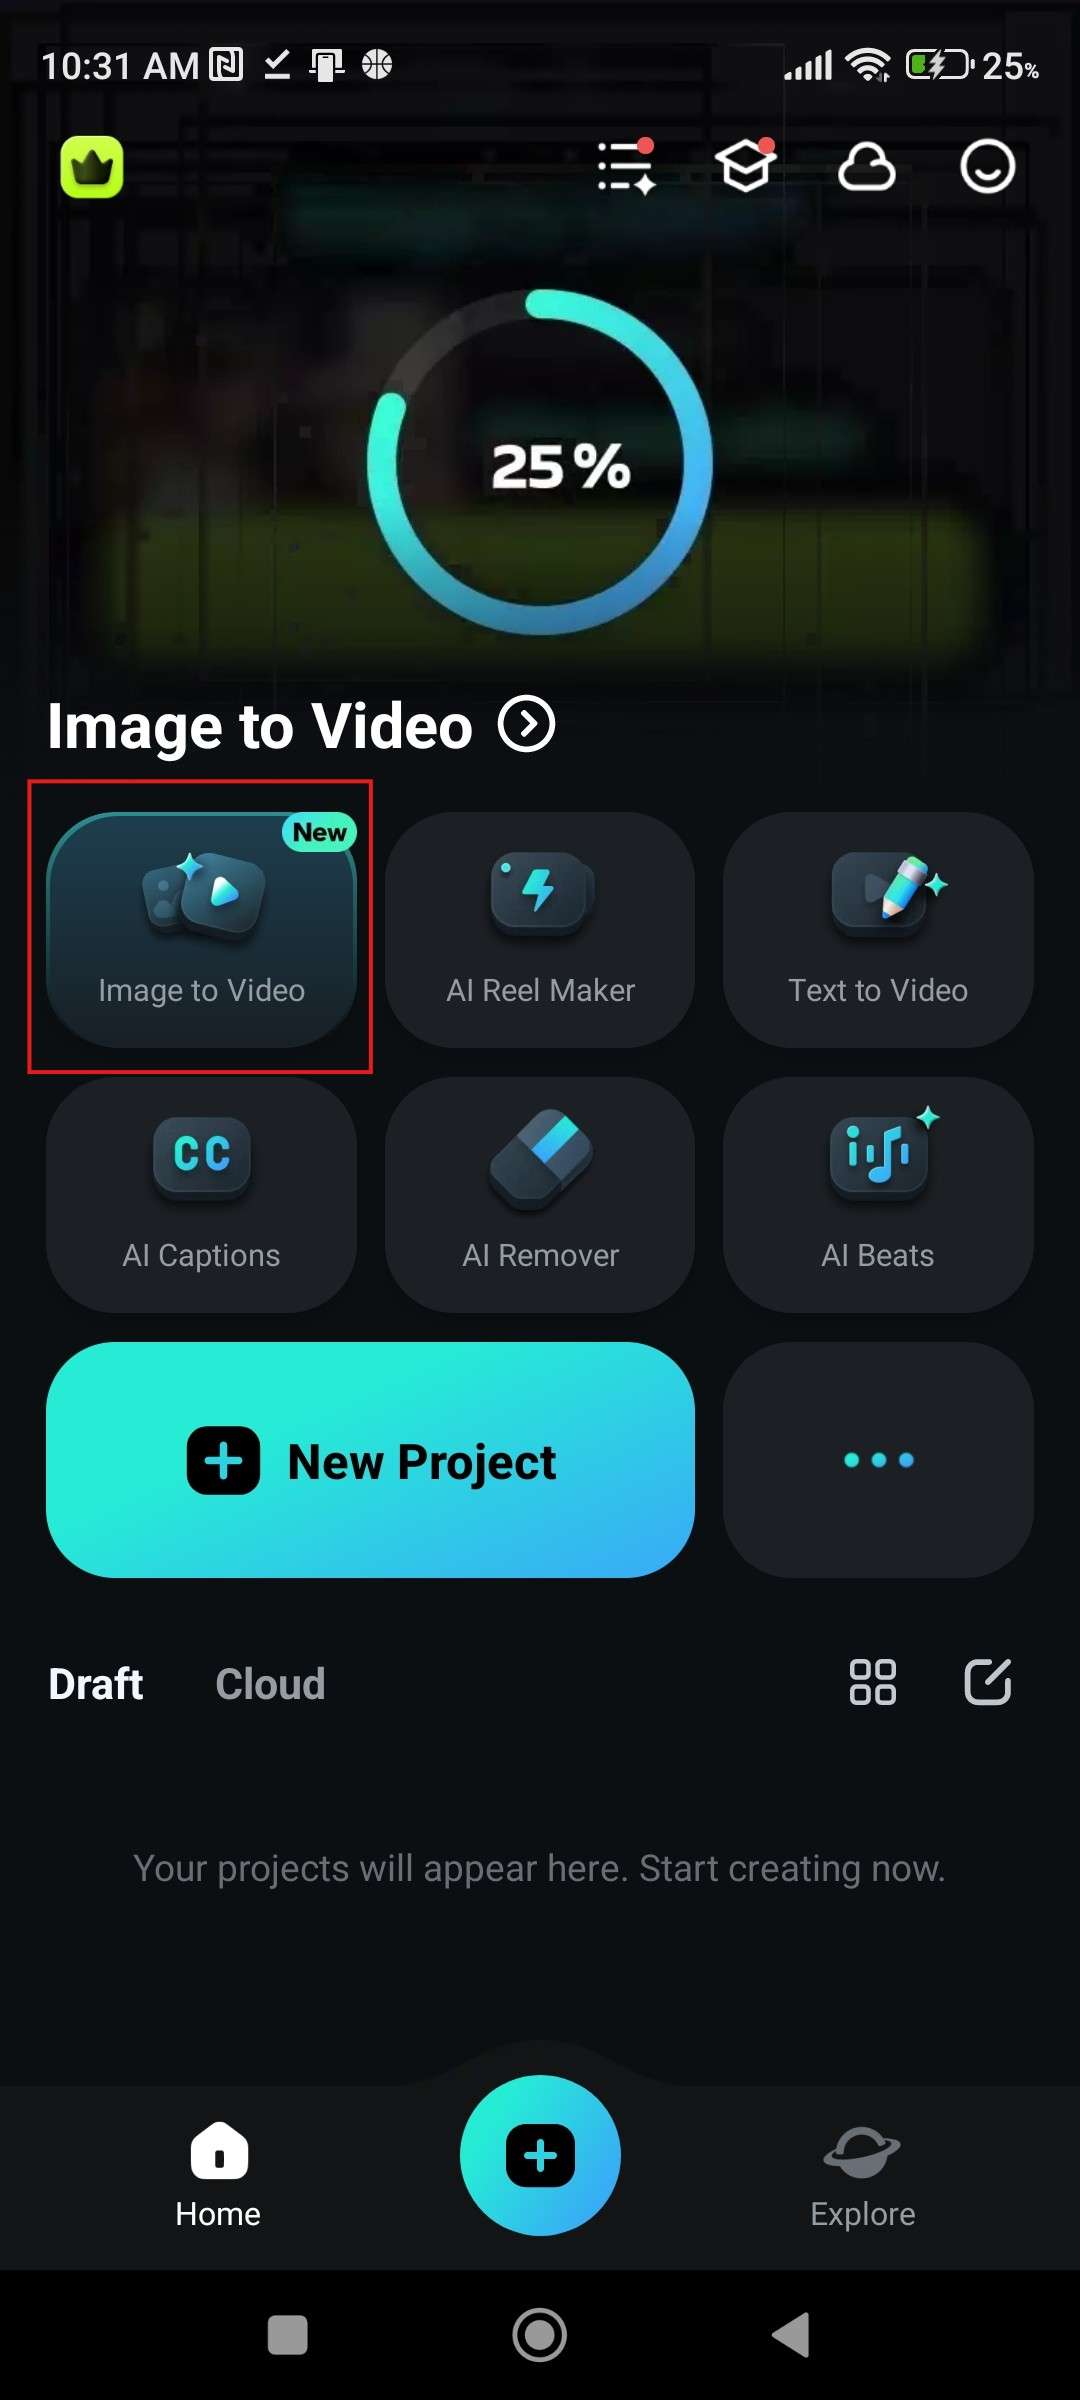
- Upload a photo, select a template, and click on Generate.
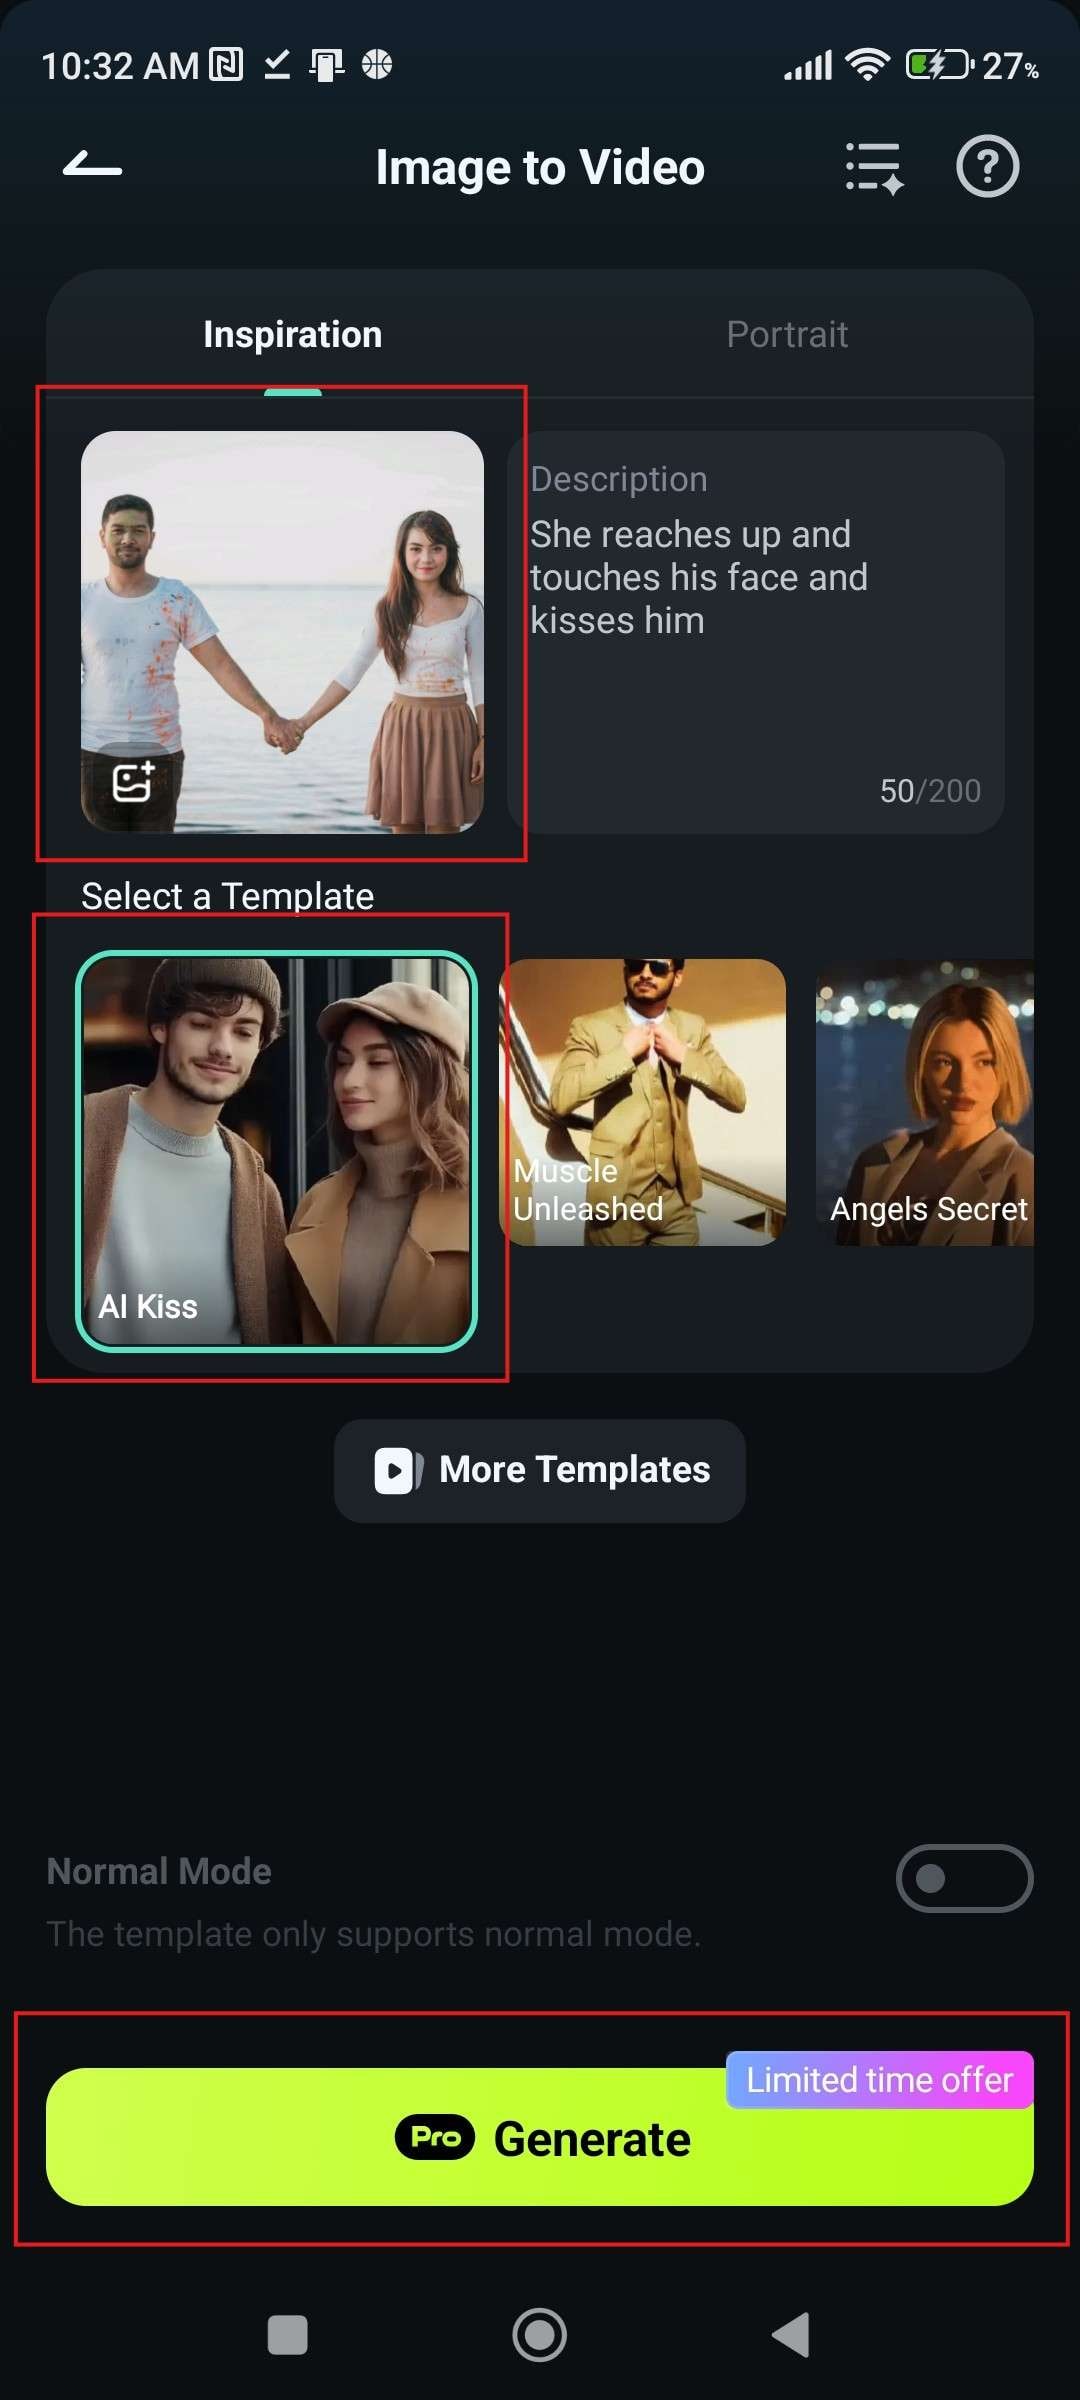
- Check out the results.

The Filmora app cannot only animate photos with images and prompts, but it also allows you to choose the preset templates, and you only need to upload the picture, without the skills for writing Nano Banana pro prompts. As Google Gemini continues to evolve rapidly, it has recently unveiled its Nano Banana Pro model—and Filmora has quickly integrated this cutting-edge technology! Now featuring 36+ exclusive preset templates tailored for Nano Banana Pro, which lets you craft stunning videos from just one photo in minutes. Let's see how to use Nano Banana Pro to make a trending comic video in the Filmora app.
Note: Learn the best prompts for making AI comic photos if you are interested.
- After launching the app, go to Templates > Trending > Switch to Nano Banana Pro.
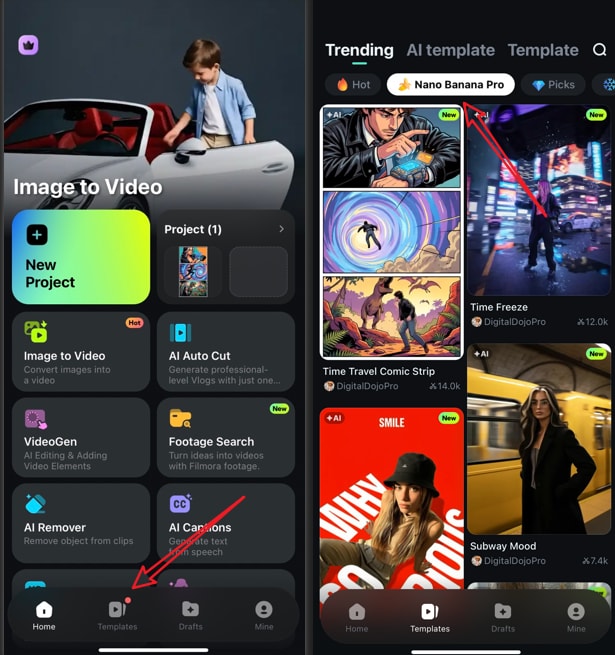
- Select a template such as "time travel comic trip" in our example, tap on use > import a photo.
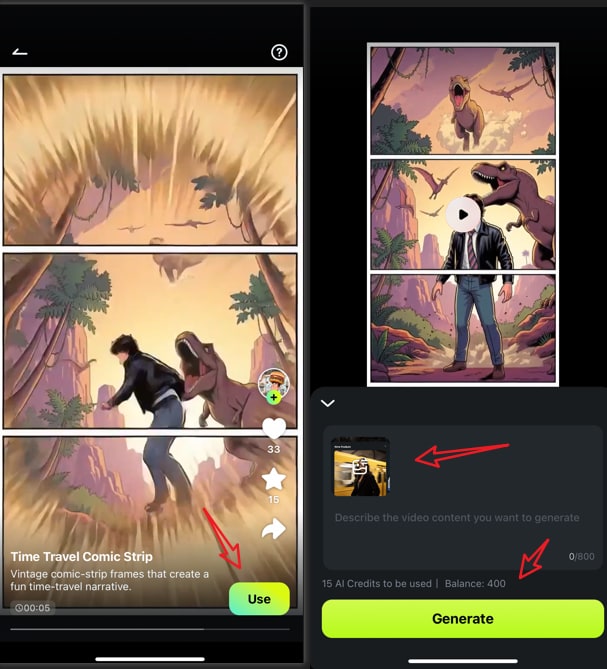
- You can choose to add prompt or not, then tap on Generate to start making AI comic style videos with Nano Banana Pro in the Filmora app. Finally, you can save the video if you are satisfied.
Let's see the final AI comic videos created by Nano Banana Pro in the Filmora app.
For desktop and laptop users, the steps are more or less the same, and the interface is similar. If you are using such a device, follow these steps.
- From the Toolbox section in Filmora's welcome page, select Image to Video.
- Select a template or create a custom prompt.
- Upload an image (or two images).
- Click on Generate.
Method 2: Make Photos Move with the Zoom In Zoom Out Effect
You have already seen this video effect in documentary movies. It's called the Ken Burns effect, and essentially, it's achieved when you take a still image and slowly zoom in, zoom out, or pan across with the camera. Let's see how it is done in Filmora.
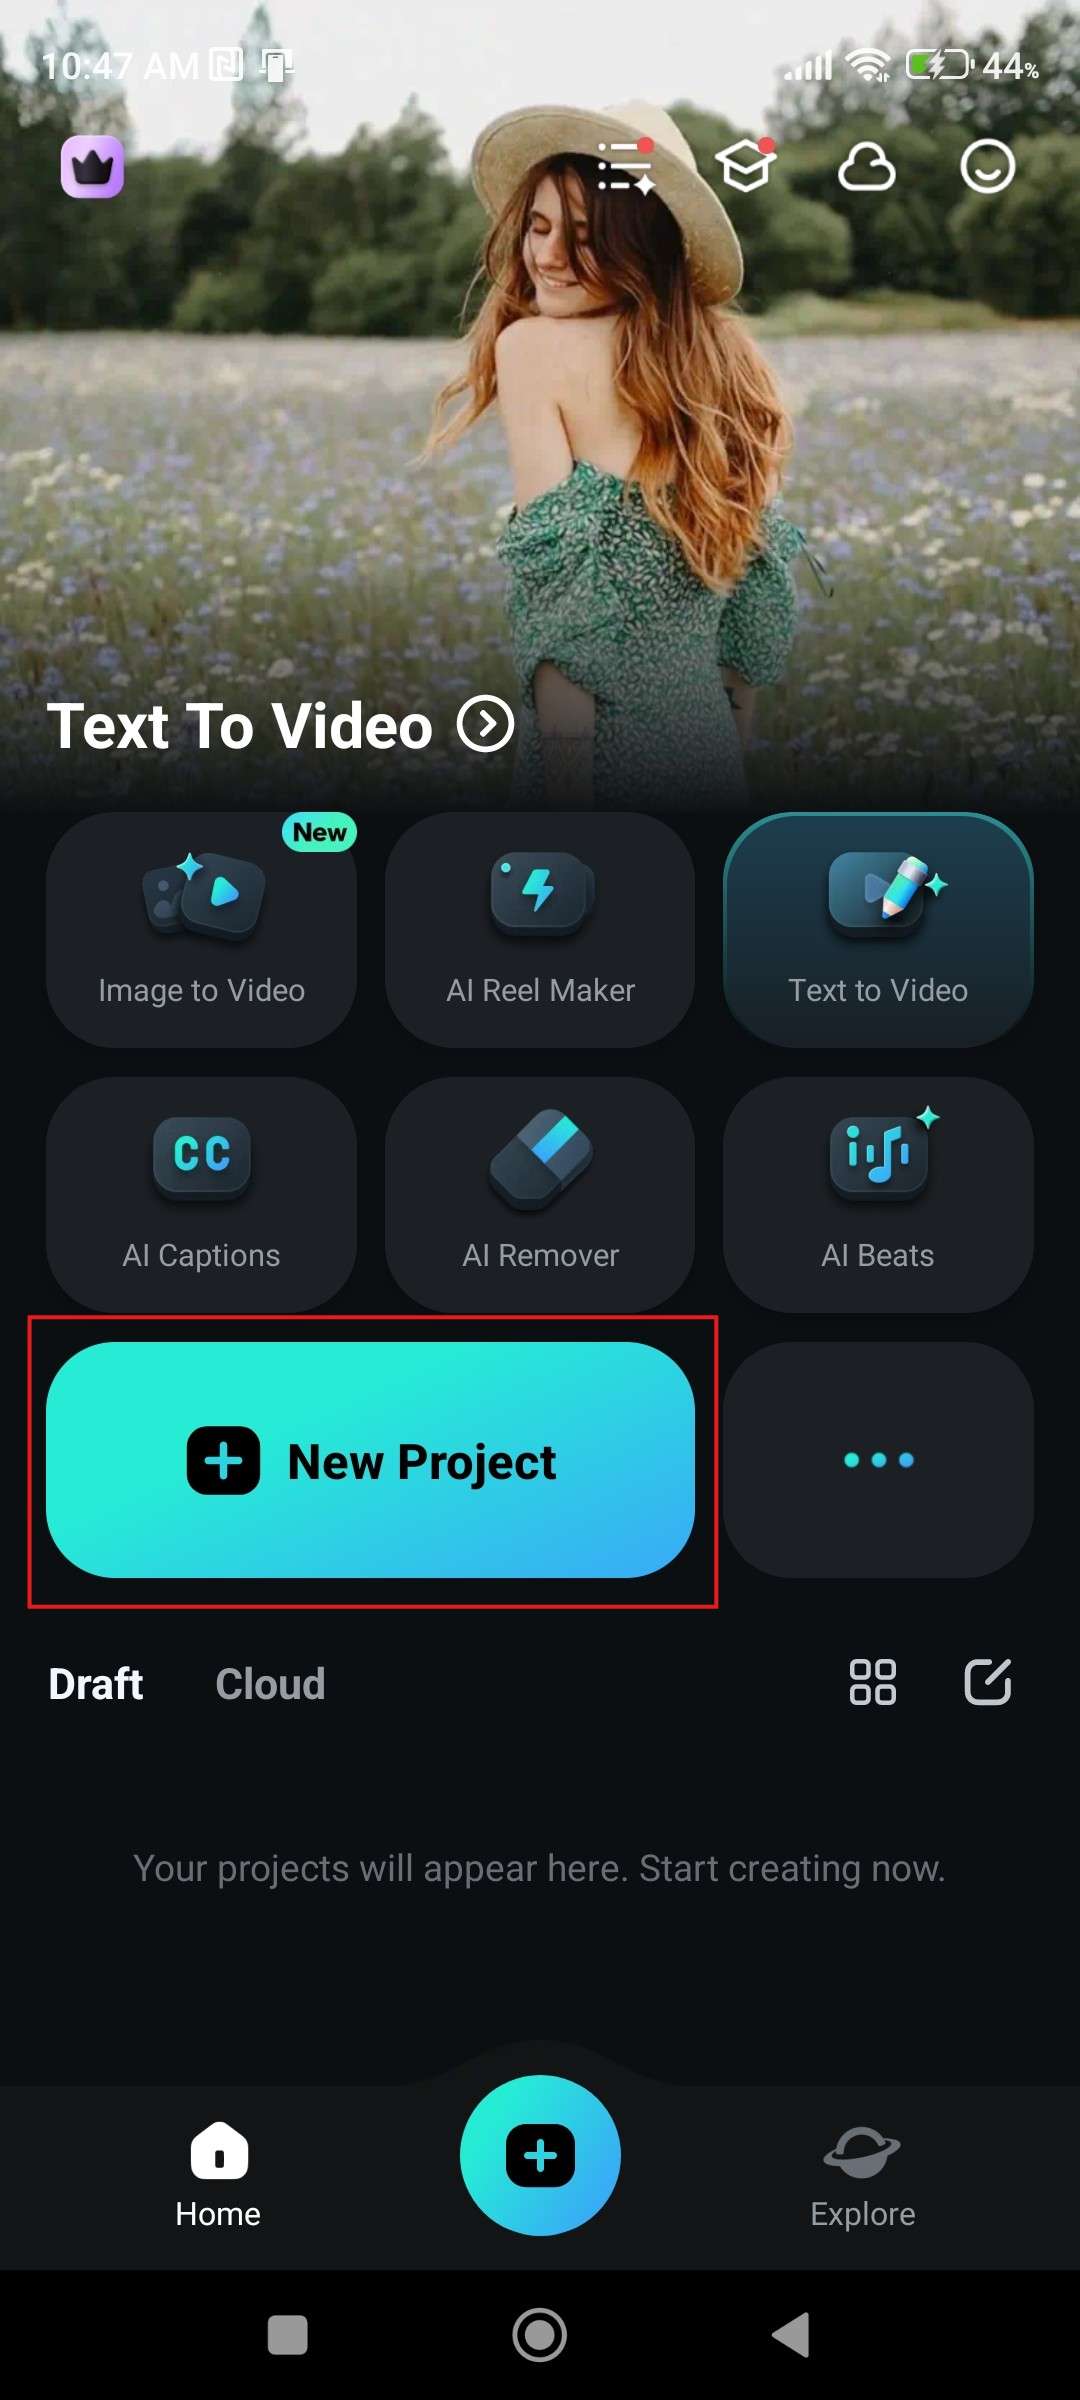
secure download - Click on New Project. Then, select the image you want to animate.
- Find the Effect tab at the bottom of the screen.
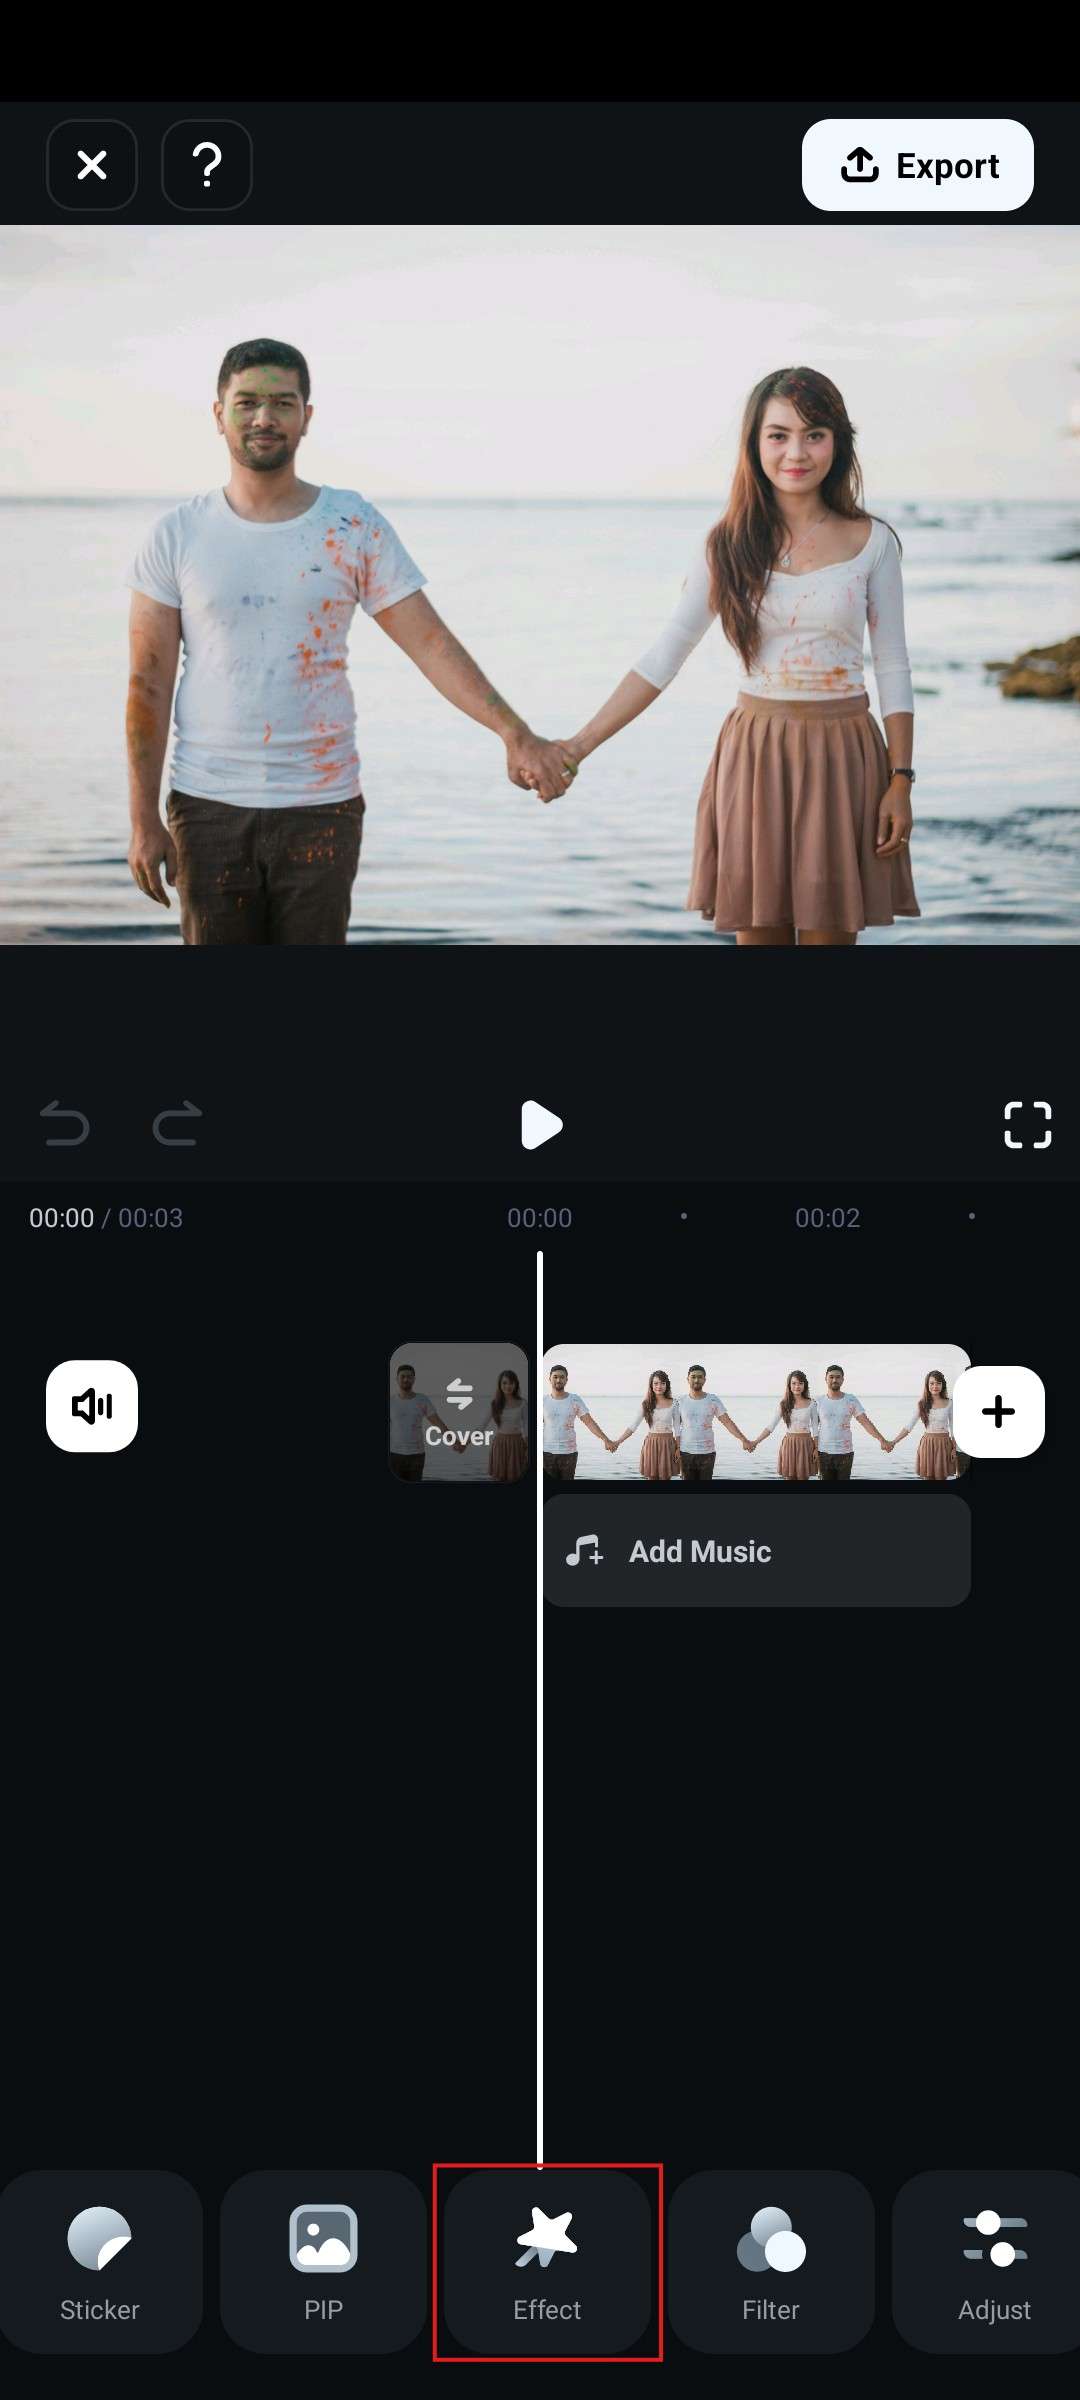
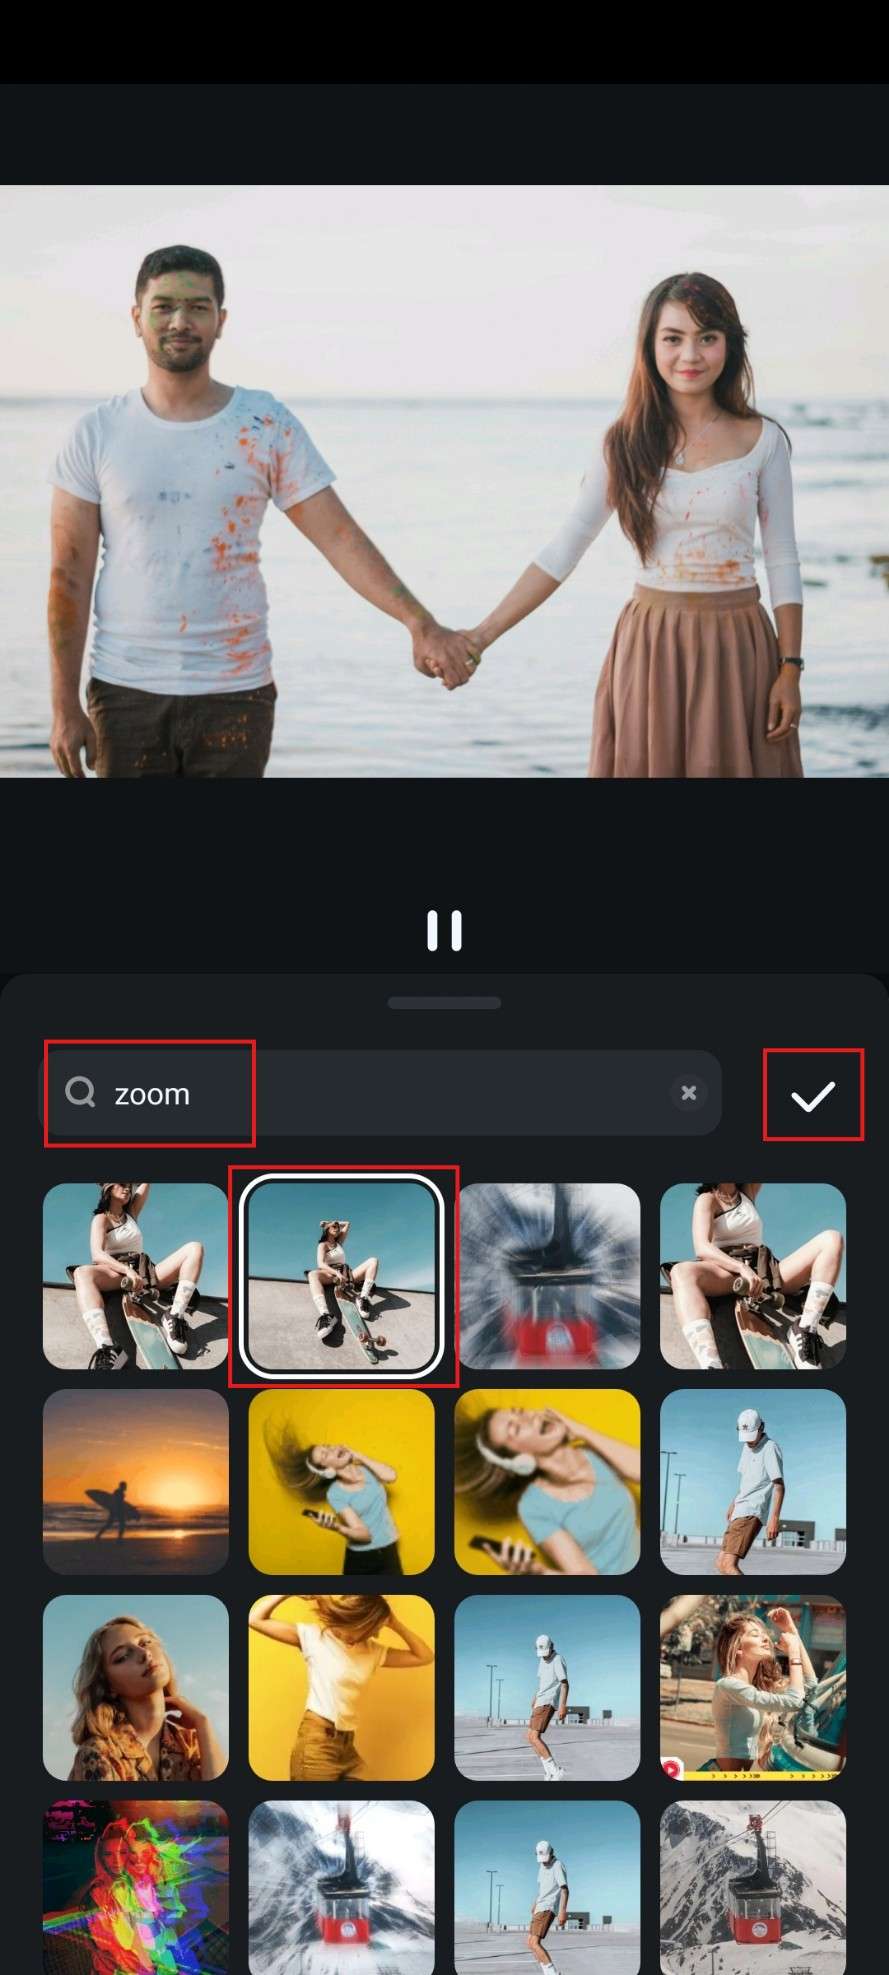
- In the search bar, type "zoom" and pick something that you like. Then, click on the Tick.
- The effect will appear in the timeline, and you can review the results by clicking the play button.
Filmora desktop offers more video effects; if you want to apply the zoom effect to animate images on a PC, here are the steps:
- Download and install the Filmora desktop on your computer.
secure download
- Click New Project> import the image > drag it to the timeline.
- Navigate to effect > search zoom > choose one of the effects to apply.
- Preview and export it.
Method 3: Animate Photos Free with the Animate Function
There is another way to achieve, more or less, the same effect as with the previous method. To avoid repeating ourselves, for this guide, we will assume that you have already created a new project and added an image to the timeline.
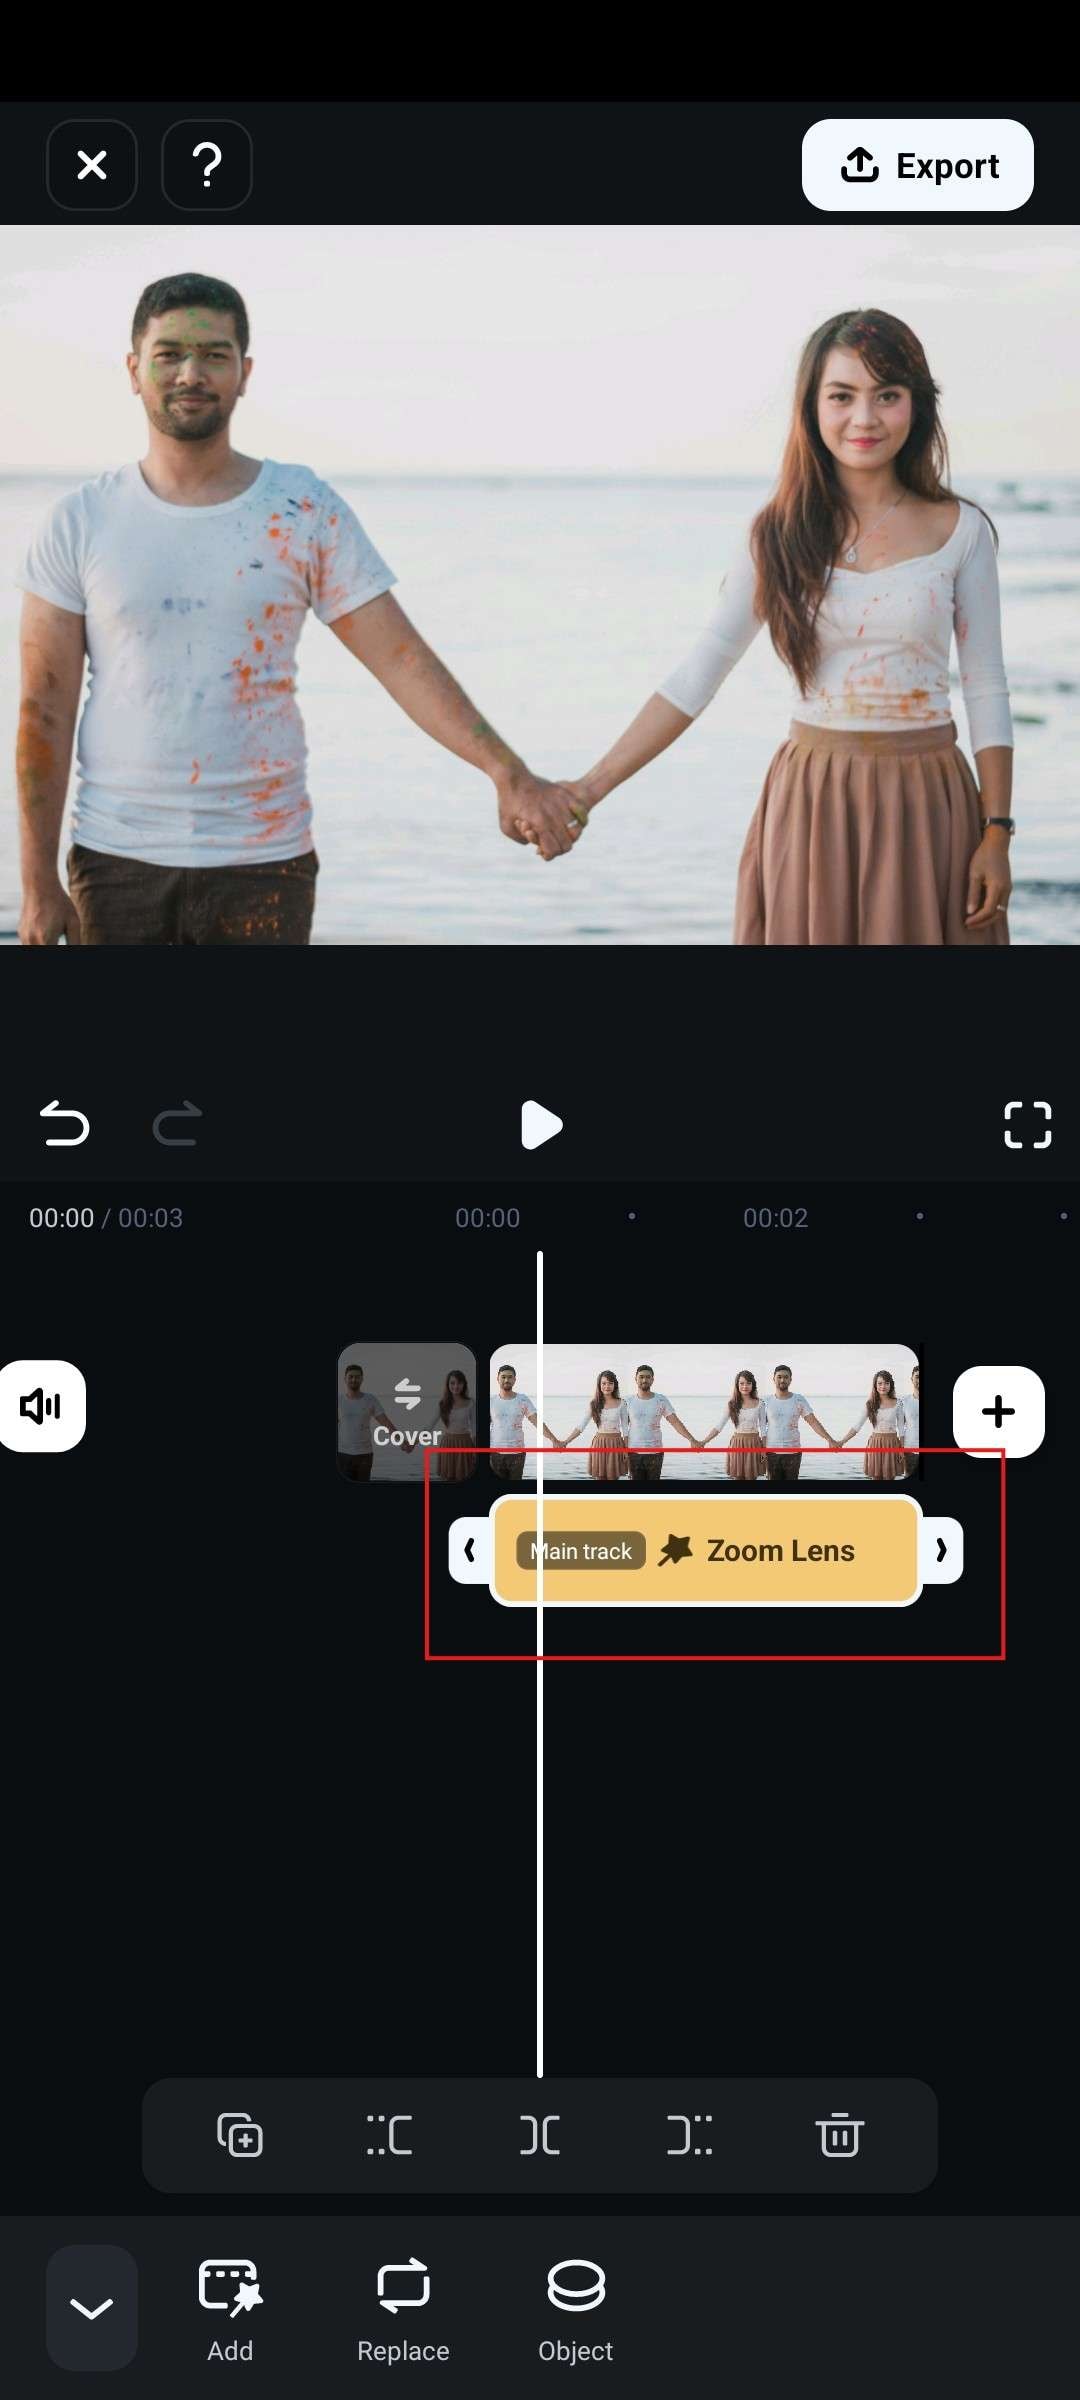
- Tap on the image in the timeline and locate the Animation feature.
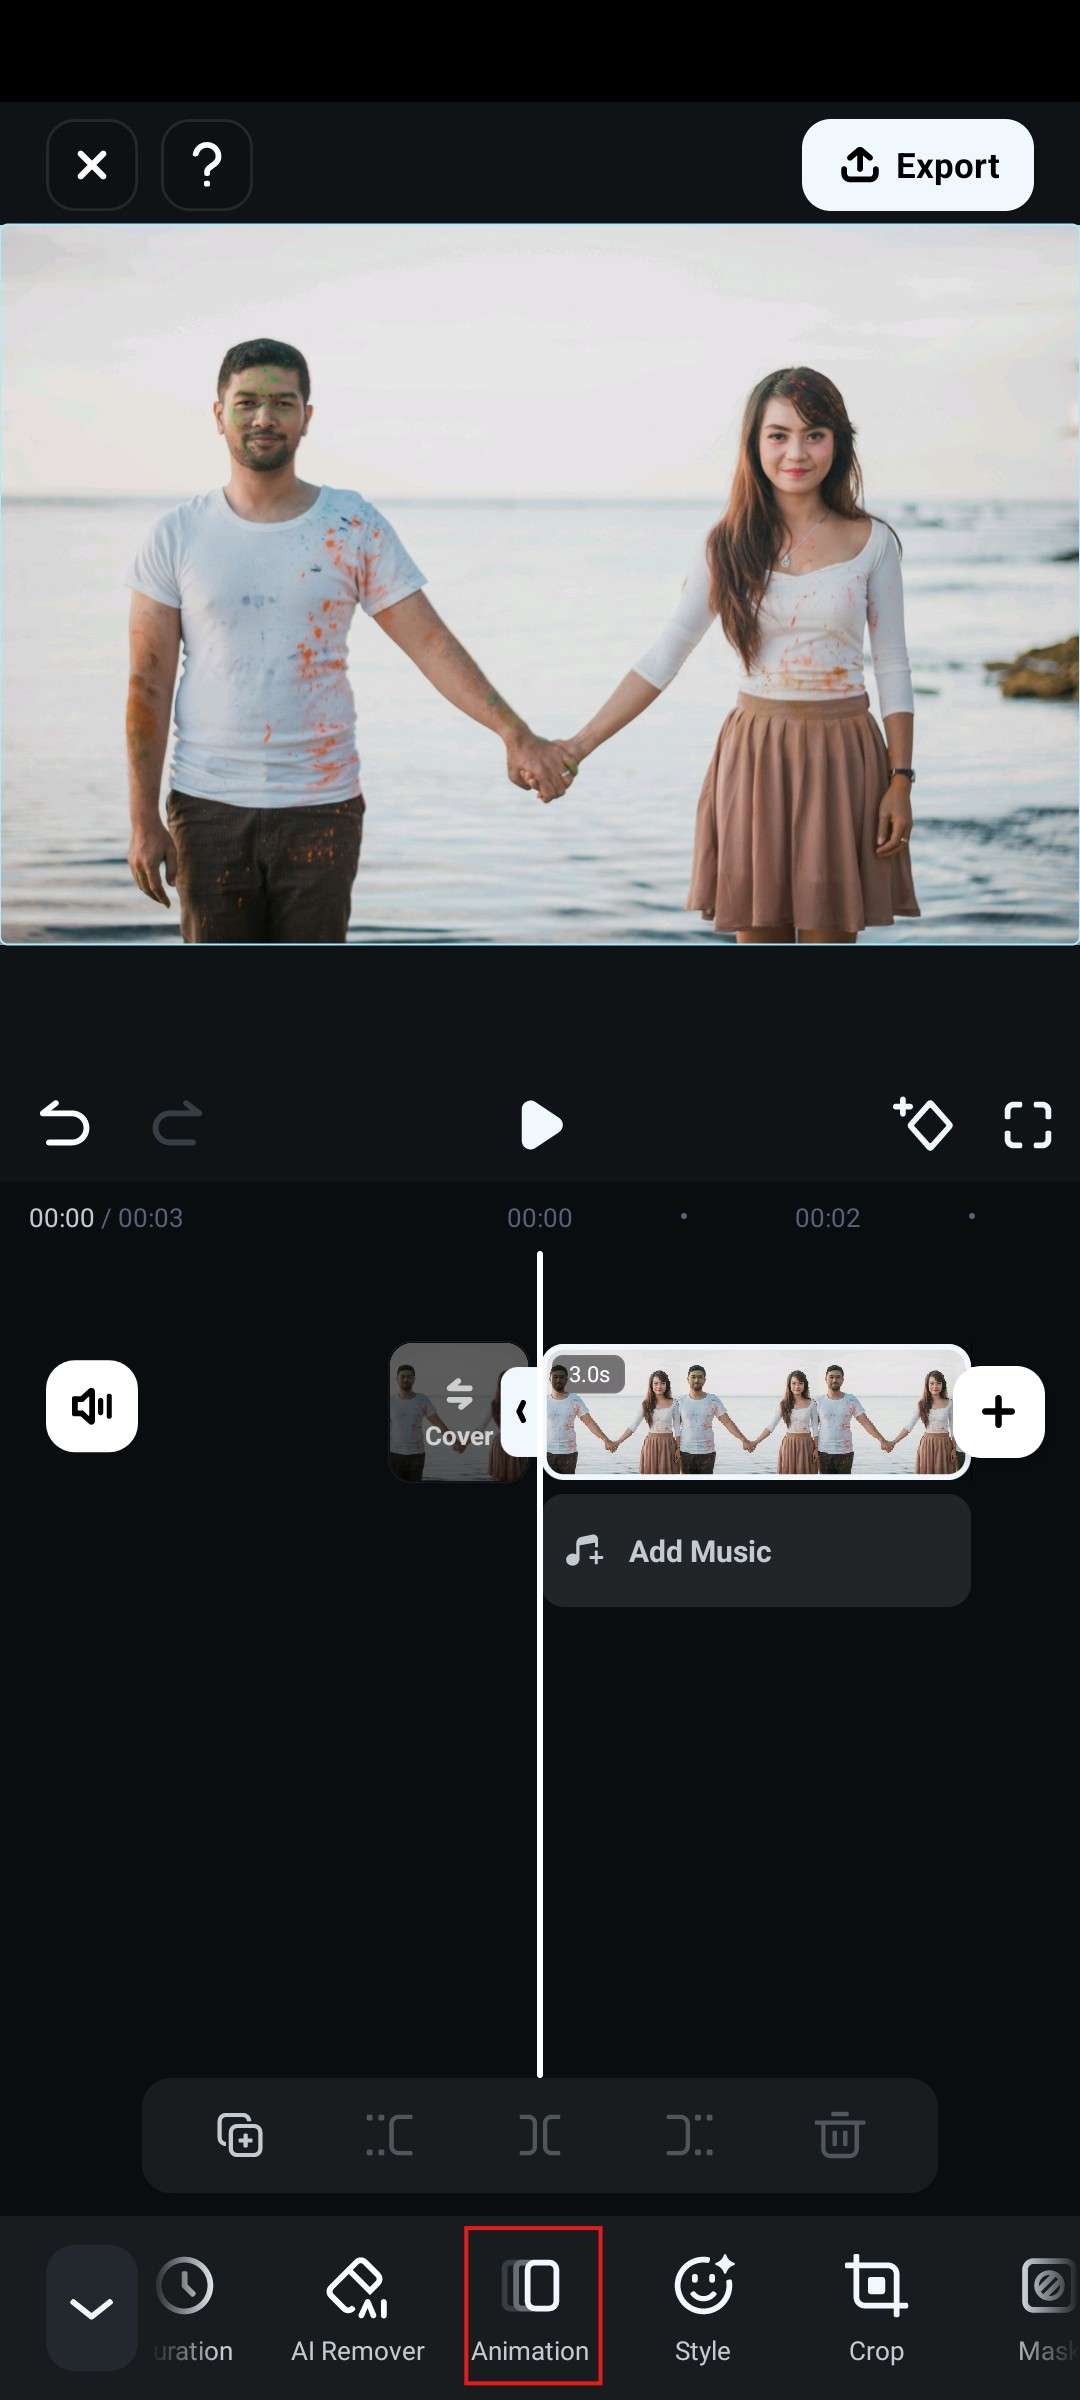
- Select an animation that you like, adjust its duration, and click on the Tick when you are satisfied.
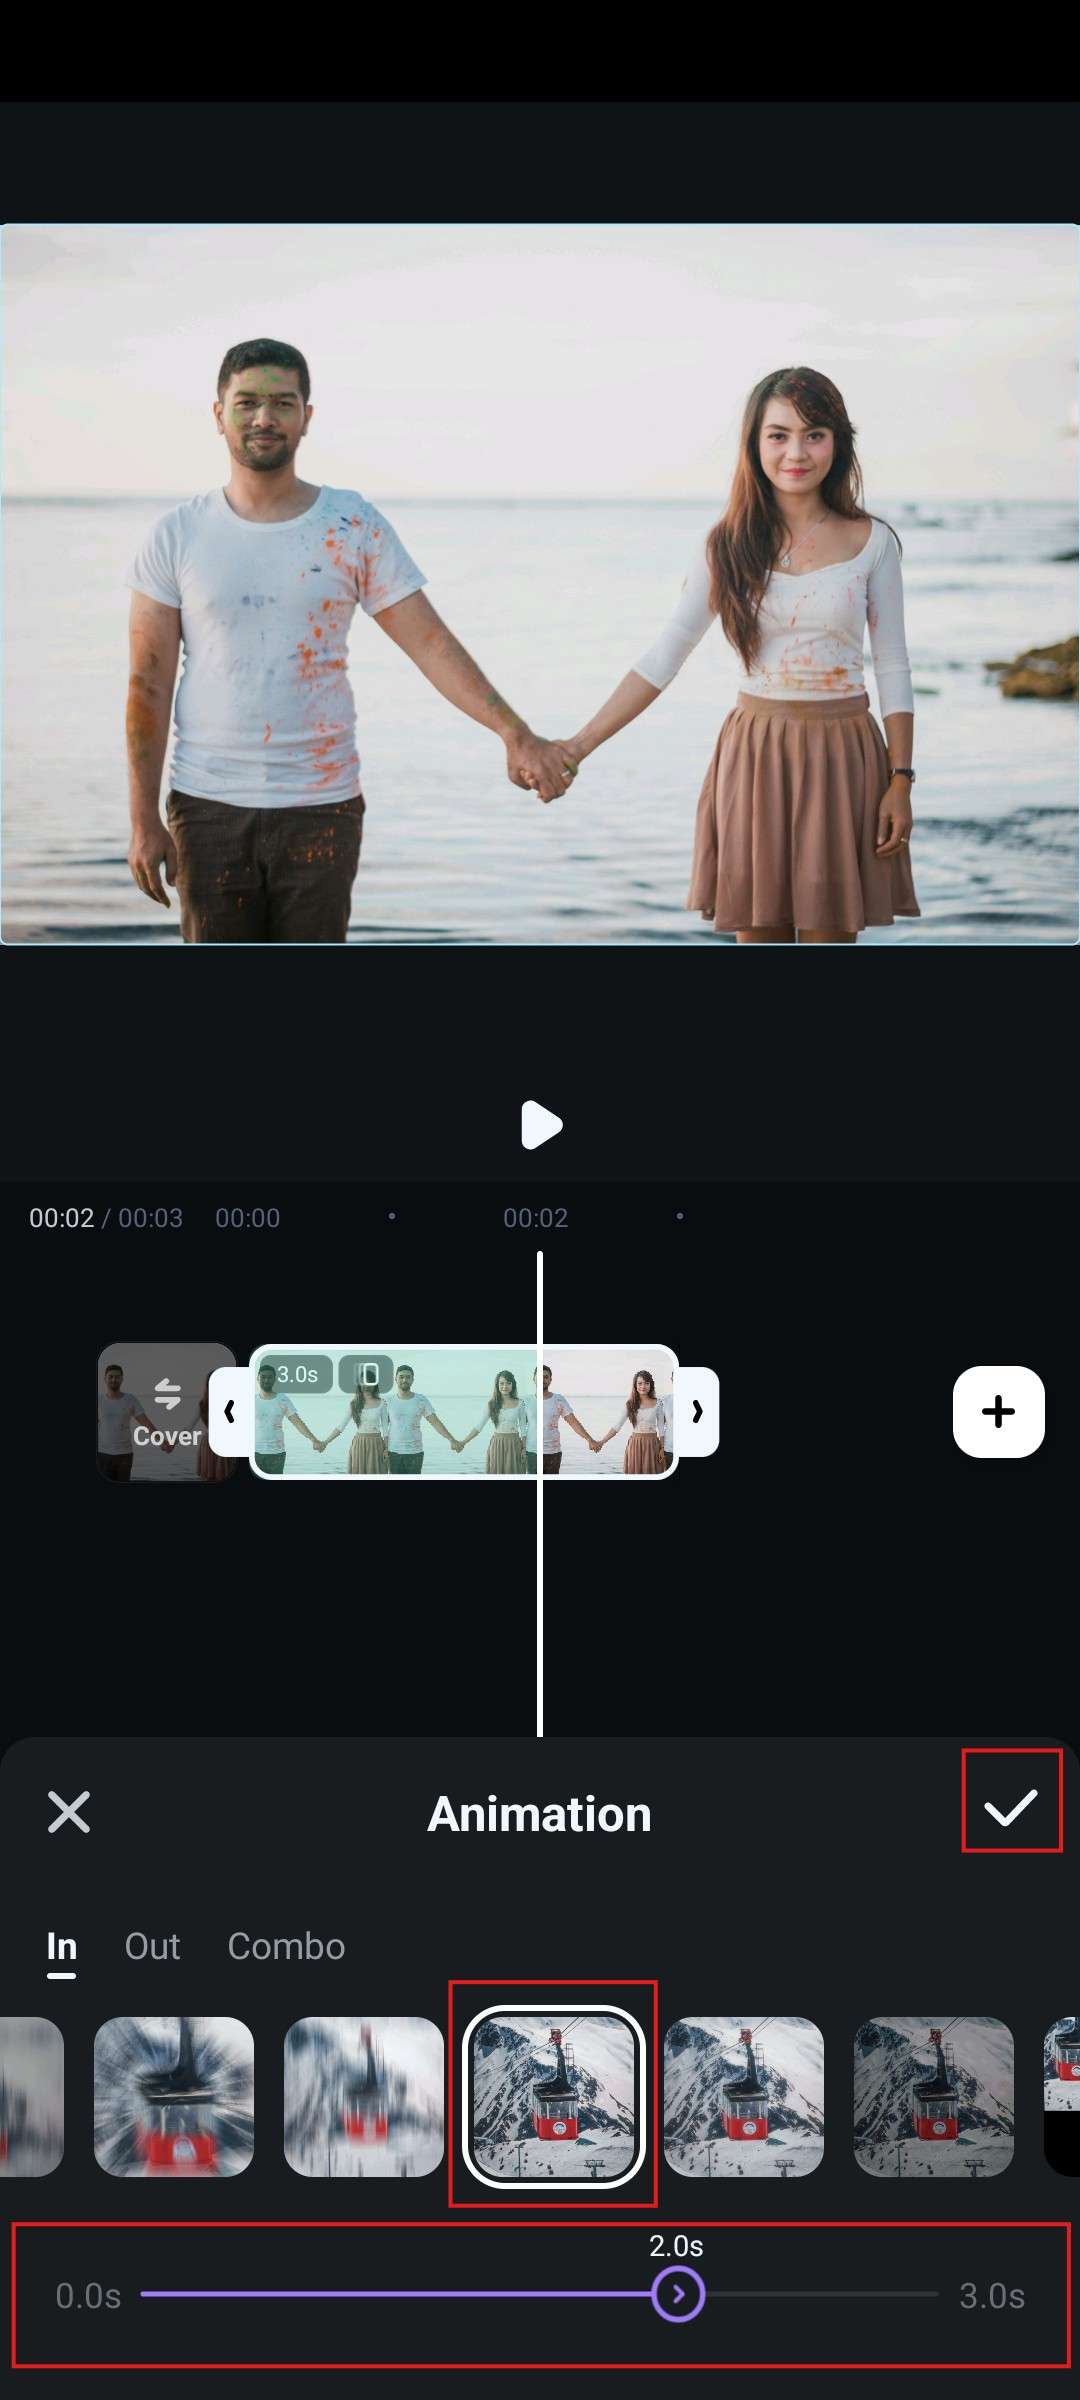
The animation will automatically be added to the image in the timeline.
As for PC and laptop users, you can do similar things by locating the Animation tab and dragging the chosen effect over the image in the timeline.
secure download Method 4: Turn Photos Alive with Keyframes
Keyframes are defined as the beginning and end frames of a particular animation in video editing, so we have also included this method here. Here are the steps for doing it on Filmora's mobile app.
- Select the image in the timeline, and drag the cursor to the point where you want to add the keyframe. Then, tap on the Keyframe icon. This will add the first keyframe.
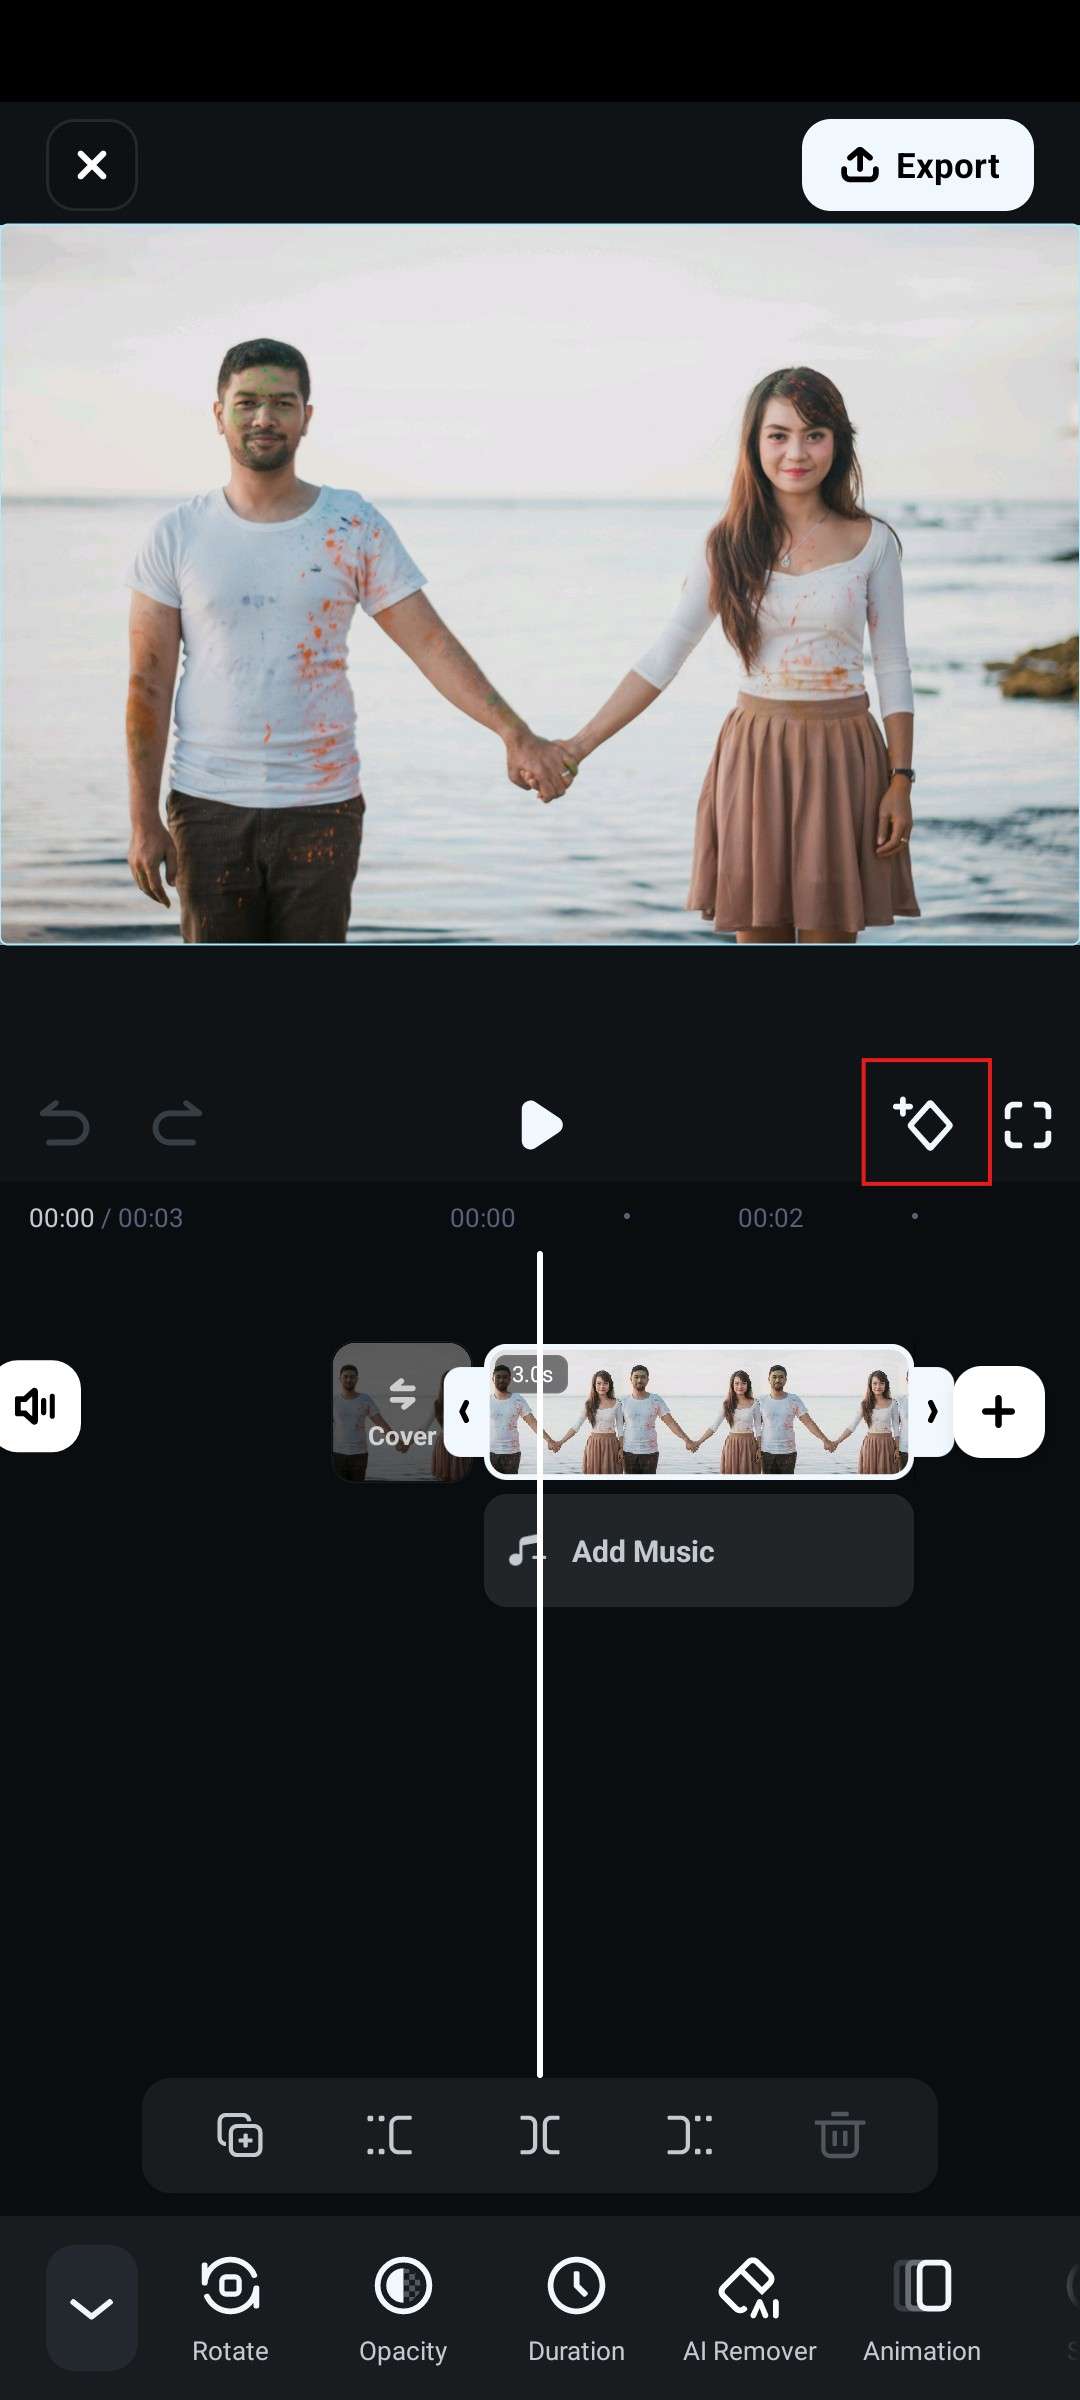
- Move the cursor toward the end of the clip, enlarge, rotate, or make other movements to the images, and then it will automatically add the second keyframes.
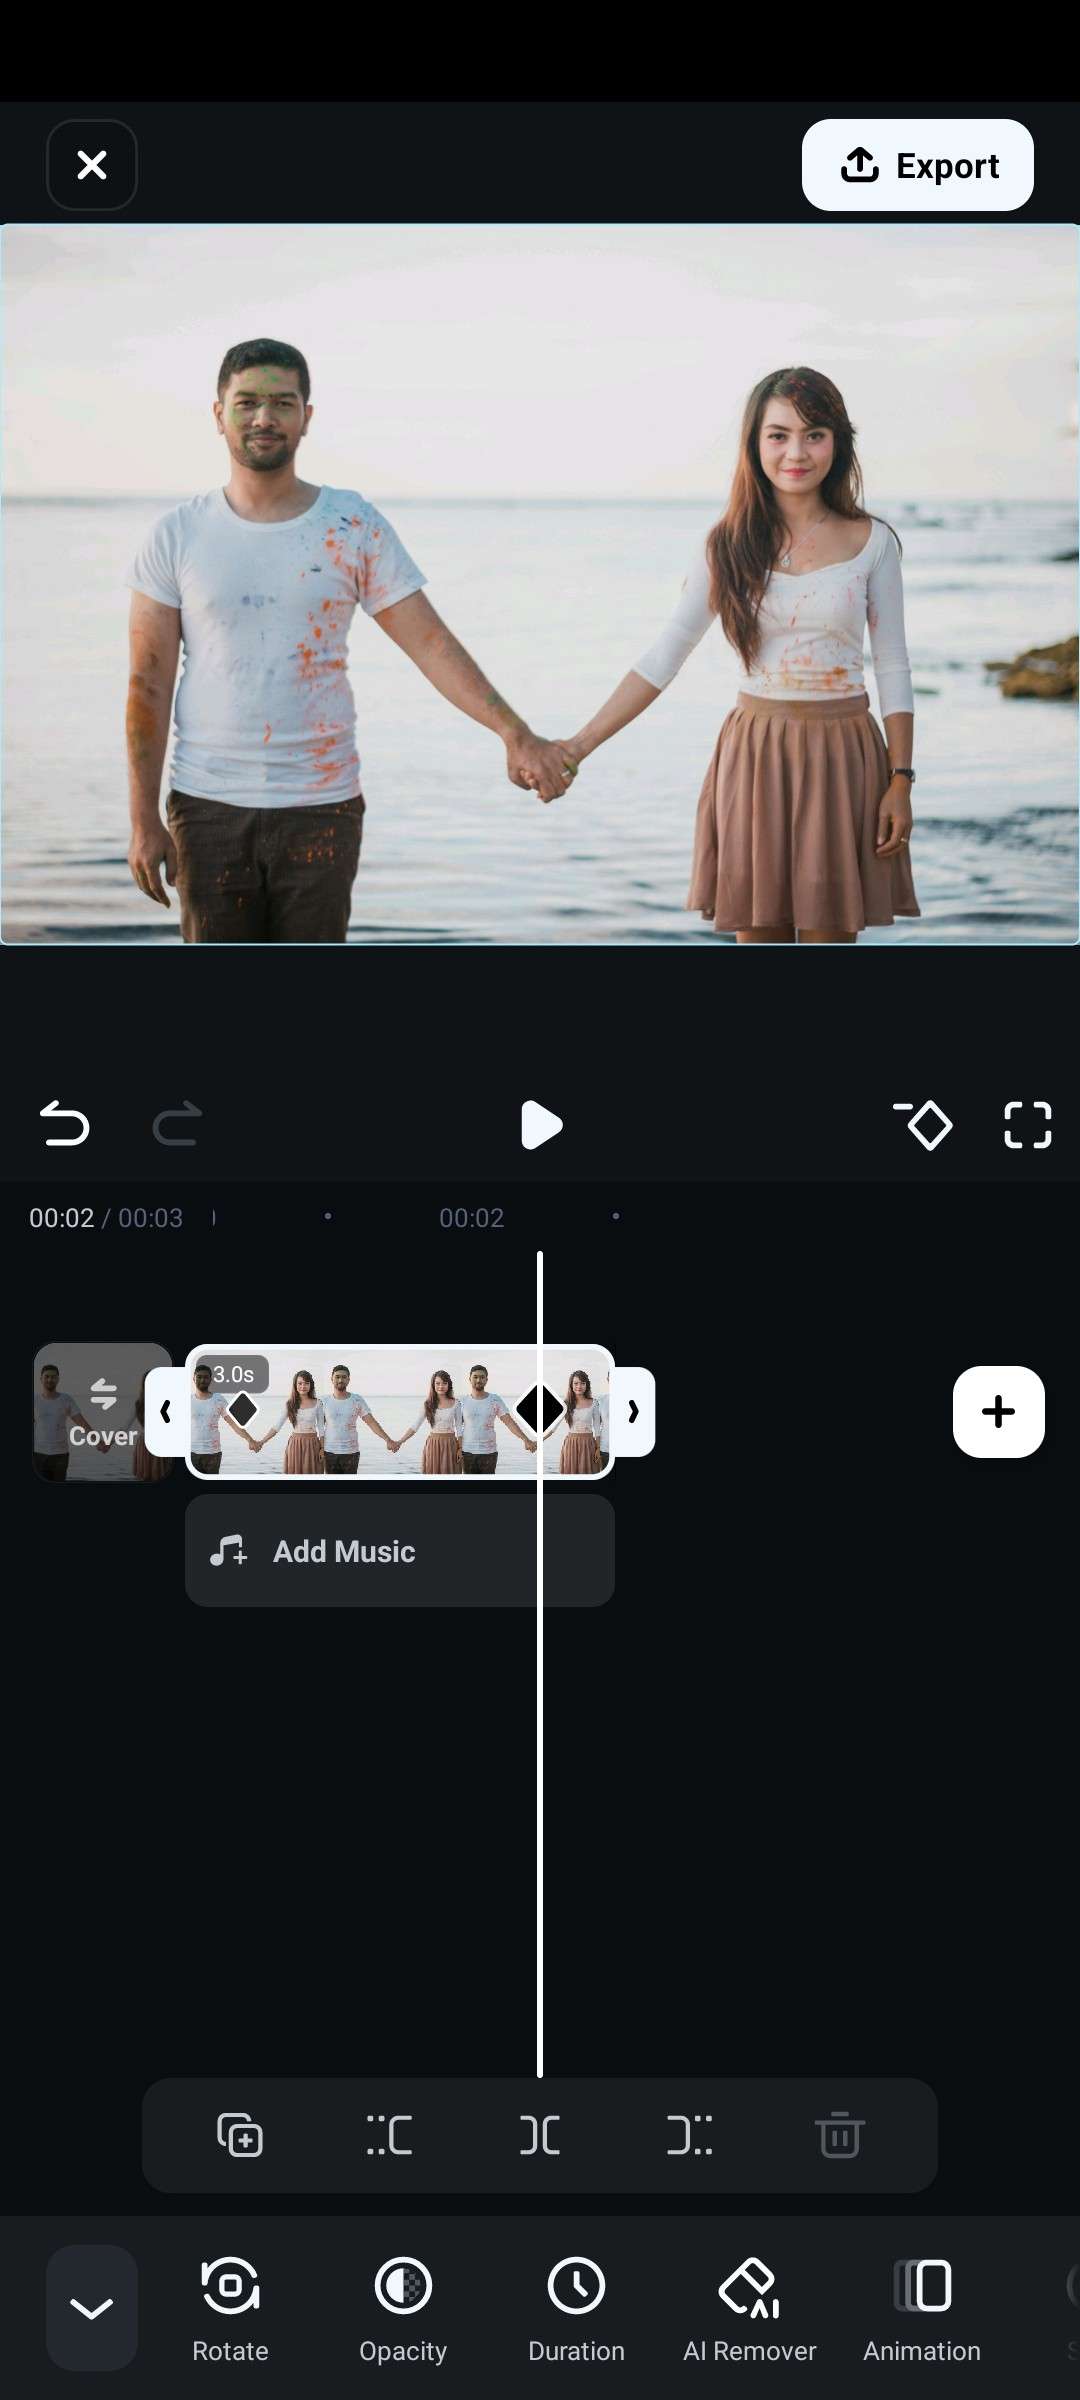
- Preview the image and see how it animates.
With these keyframes added, you can control any animation or effect you add to your photo more easily, as the software will know where you want the effect to begin and where you want it to end.
For more precise control, you can use the PC version.
Conclusion
As you can see, Filmora's extensive toolset allows you to quickly bring your photos to life and make them move. The best method on this list is certainly the AI Image-to-Video feature because it can literally make characters in photos come alive. The other options on the list are also good ways to add animations to photos and make amazing collages. Try Filmora and unlock your potential to make magic happen.
secure download FAQs
-
Is AI photo animation free?
There are free AI photo animators, but these tools usually have a watermark or very limited features. Proper AI animators require a subscription or a one-time purchase. -
What is the best app to animate a picture?
Filmora, developed by Wondershare, offers four different methods to animate a picture, including AI image to video, animation effect, zoom effect, and keyframe animations. It is the best tool for animating pictures and making them come to life. -
How to animate a photo on an iPhone?
To animate a photo, download Filmora and use the AI Image-to-Video feature. Select one of the provided templates and wait for the AI to do its work. -
How can I animate a still picture?
There are many ways to animate a still picture. You can add transitions and effects, zoom in or out, or pan across the picture. The choice is yours.
