Resizing videos has become essential for Mac users. It can make all the difference, whether it’s to optimize for social media sharing or ensure compatibility across different devices. Sometimes, a video shot in high resolution may be too large to upload quickly, or the aspect ratio might not suit a specific platform. That’s where a video resizer on Mac can be incredibly helpful!
Luckily, there are many tools compatible with macOS that can help you resize videos. One standout solution is Wondershare Filmora. This software makes resizing videos super easy and customizable—perfect if you need a fast, reliable solution on your Mac.

In this article
Part 1. How To Resize Videos on Mac Using Filmora🎥
If you are using macOS, you can resize video using Filmora’s Auto Reframe. This feature makes it easy to get the perfect frame without any hassle. It uses smart AI to automatically detect the subject in your video and adjust the aspect ratio to fit perfectly on different platforms, like Instagram, YouTube, or any other format.
- Auto reframe video in 16:9, 1:1, 9:16, 4:3 or 21:9.
- Offers cool video effects and filters to make your video become professional.
- Cross-platform supported - (Windows, Mac, iOS, Android)
- Resize Your Videos Without Quality Lose

Here’s a quick and easy guide to using Filmora as a video resizer on Mac.
How To Use Auto Reframe in Filmora
Step1Open Filmora and Select Auto Reframe
To start, open Filmora on your Mac and locate the Auto Reframe option in the AI Toolbox.
auto reframe

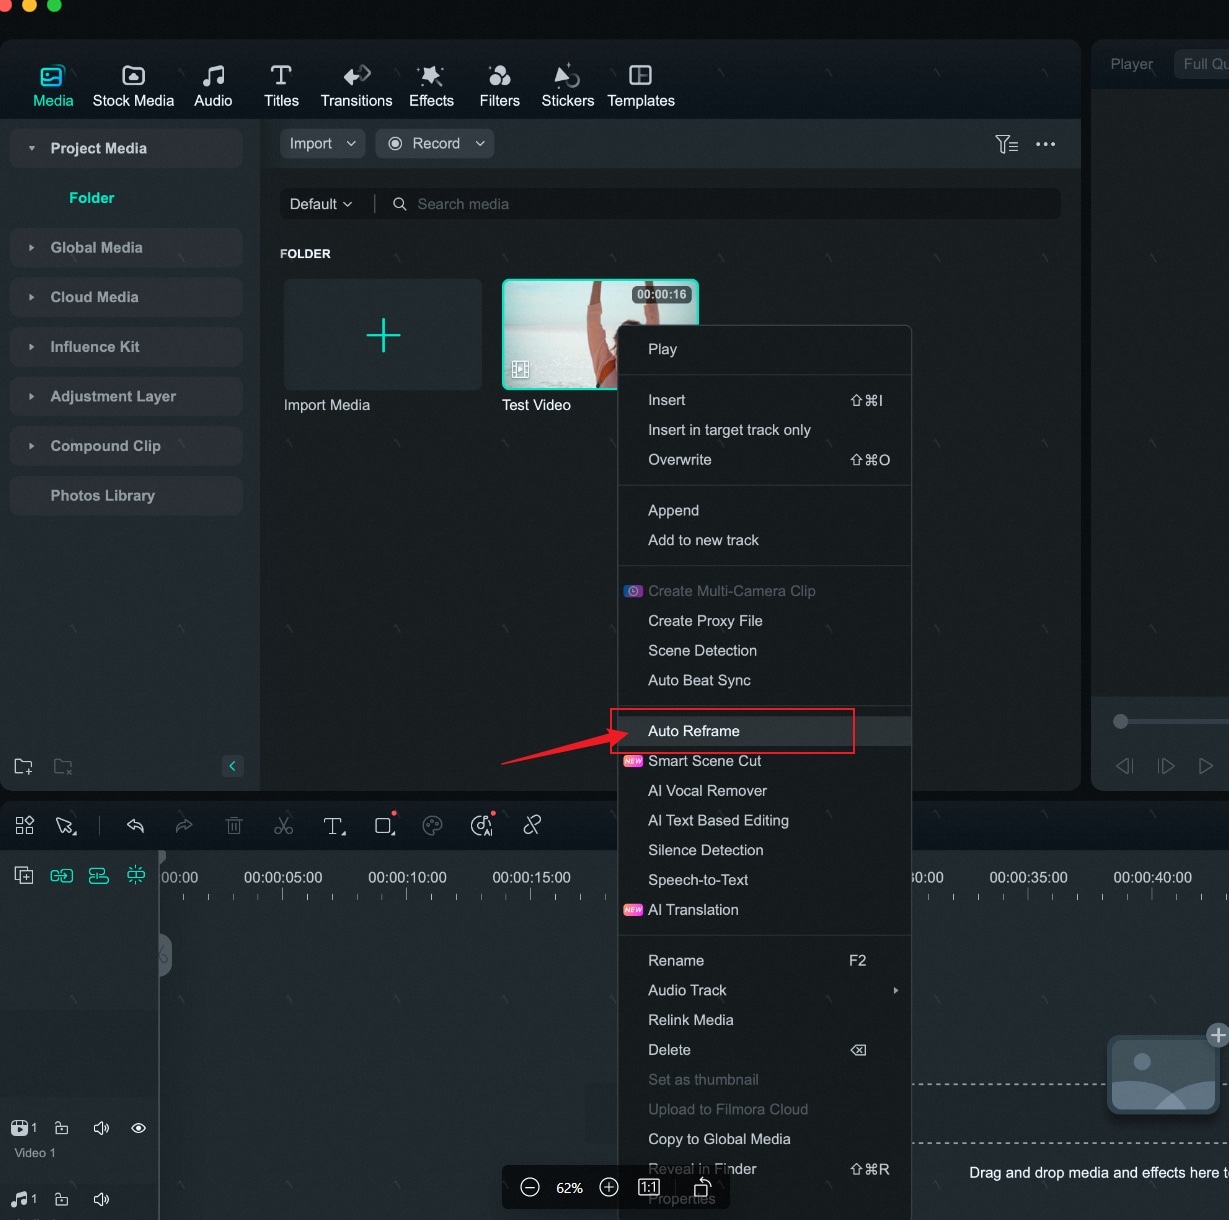
Or, if you prefer, import your video to the Filmora video editing interface. Once your video loads, right-click on it and select Auto Reframe from the menu.
Step2Choose Your Aspect Ratio
After loading the clip, pick the aspect ratio you need. Filmora offers several options, including 1:1 (square), 9:16 (vertical), and 16:9 (widescreen). For example, use 9:16 for Instagram Stories, 1:1 for Feed posts, or 16:9 for YouTube. As soon as you choose an aspect ratio, Auto Reframe gets to work, adjusting the frame around your subject automatically.

You can preview the result right in the window, and if you want to see the entire frame, click the eye icon in the upper-right corner.

Step3 Fine-Tune the Frame
Want a little more control? Just hit the Adjust Frame toggle and move the crop box to adjust the frame exactly as you like. When it looks good, click OK to lock in the changes.

If you need to go further, check out the Advanced tab. Here, you can switch the tracking subject or adjust the speed for smoother transitions.

Step4 Edit the Reframed Video
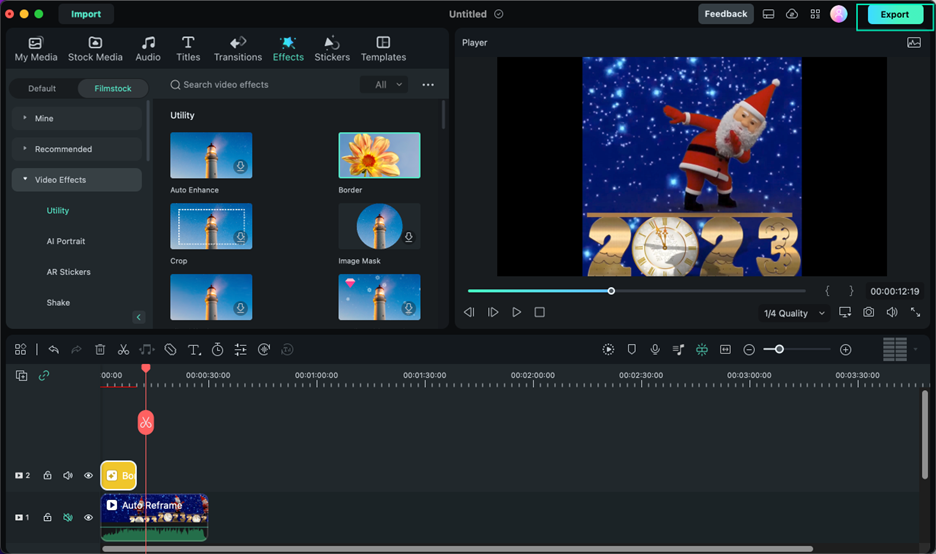
Once you’re done with Auto Reframe, click Upload to Filmora to add the reframed video to the Media window.

From here, you can drag it to the timeline and add music, titles, effects, or transitions to make it shine.
Step5 Export Your Video
When you are satisfied with your resized video, just click Export to save it.
Additional Ways to Resize Video in macOS with Filmora
If Auto Reframe’s presets aren’t exactly what you’re after, Filmora also lets you resize videos on macOS with manual cropping and quality adjustments:
1. Manual Crop and Adjust
This method lets you crop your video exactly the way you want, which is perfect if Auto Reframe’s options don’t fit your needs.
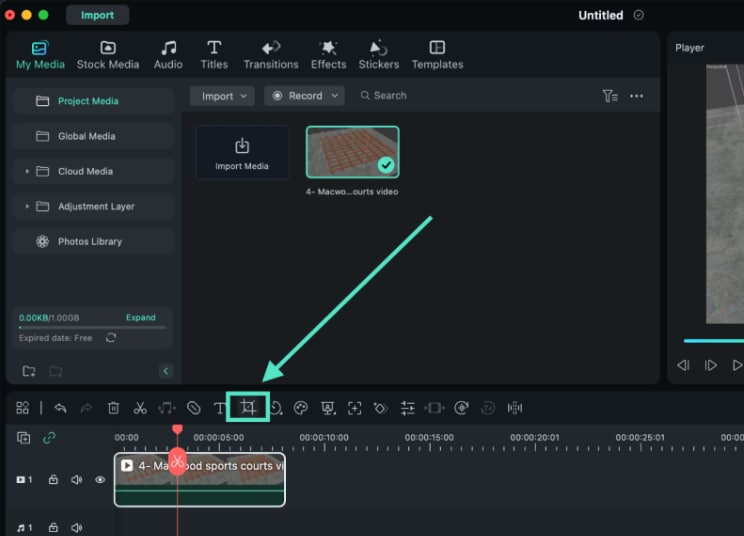
Step 1. Select your video in the timeline, then click the Crop icon.
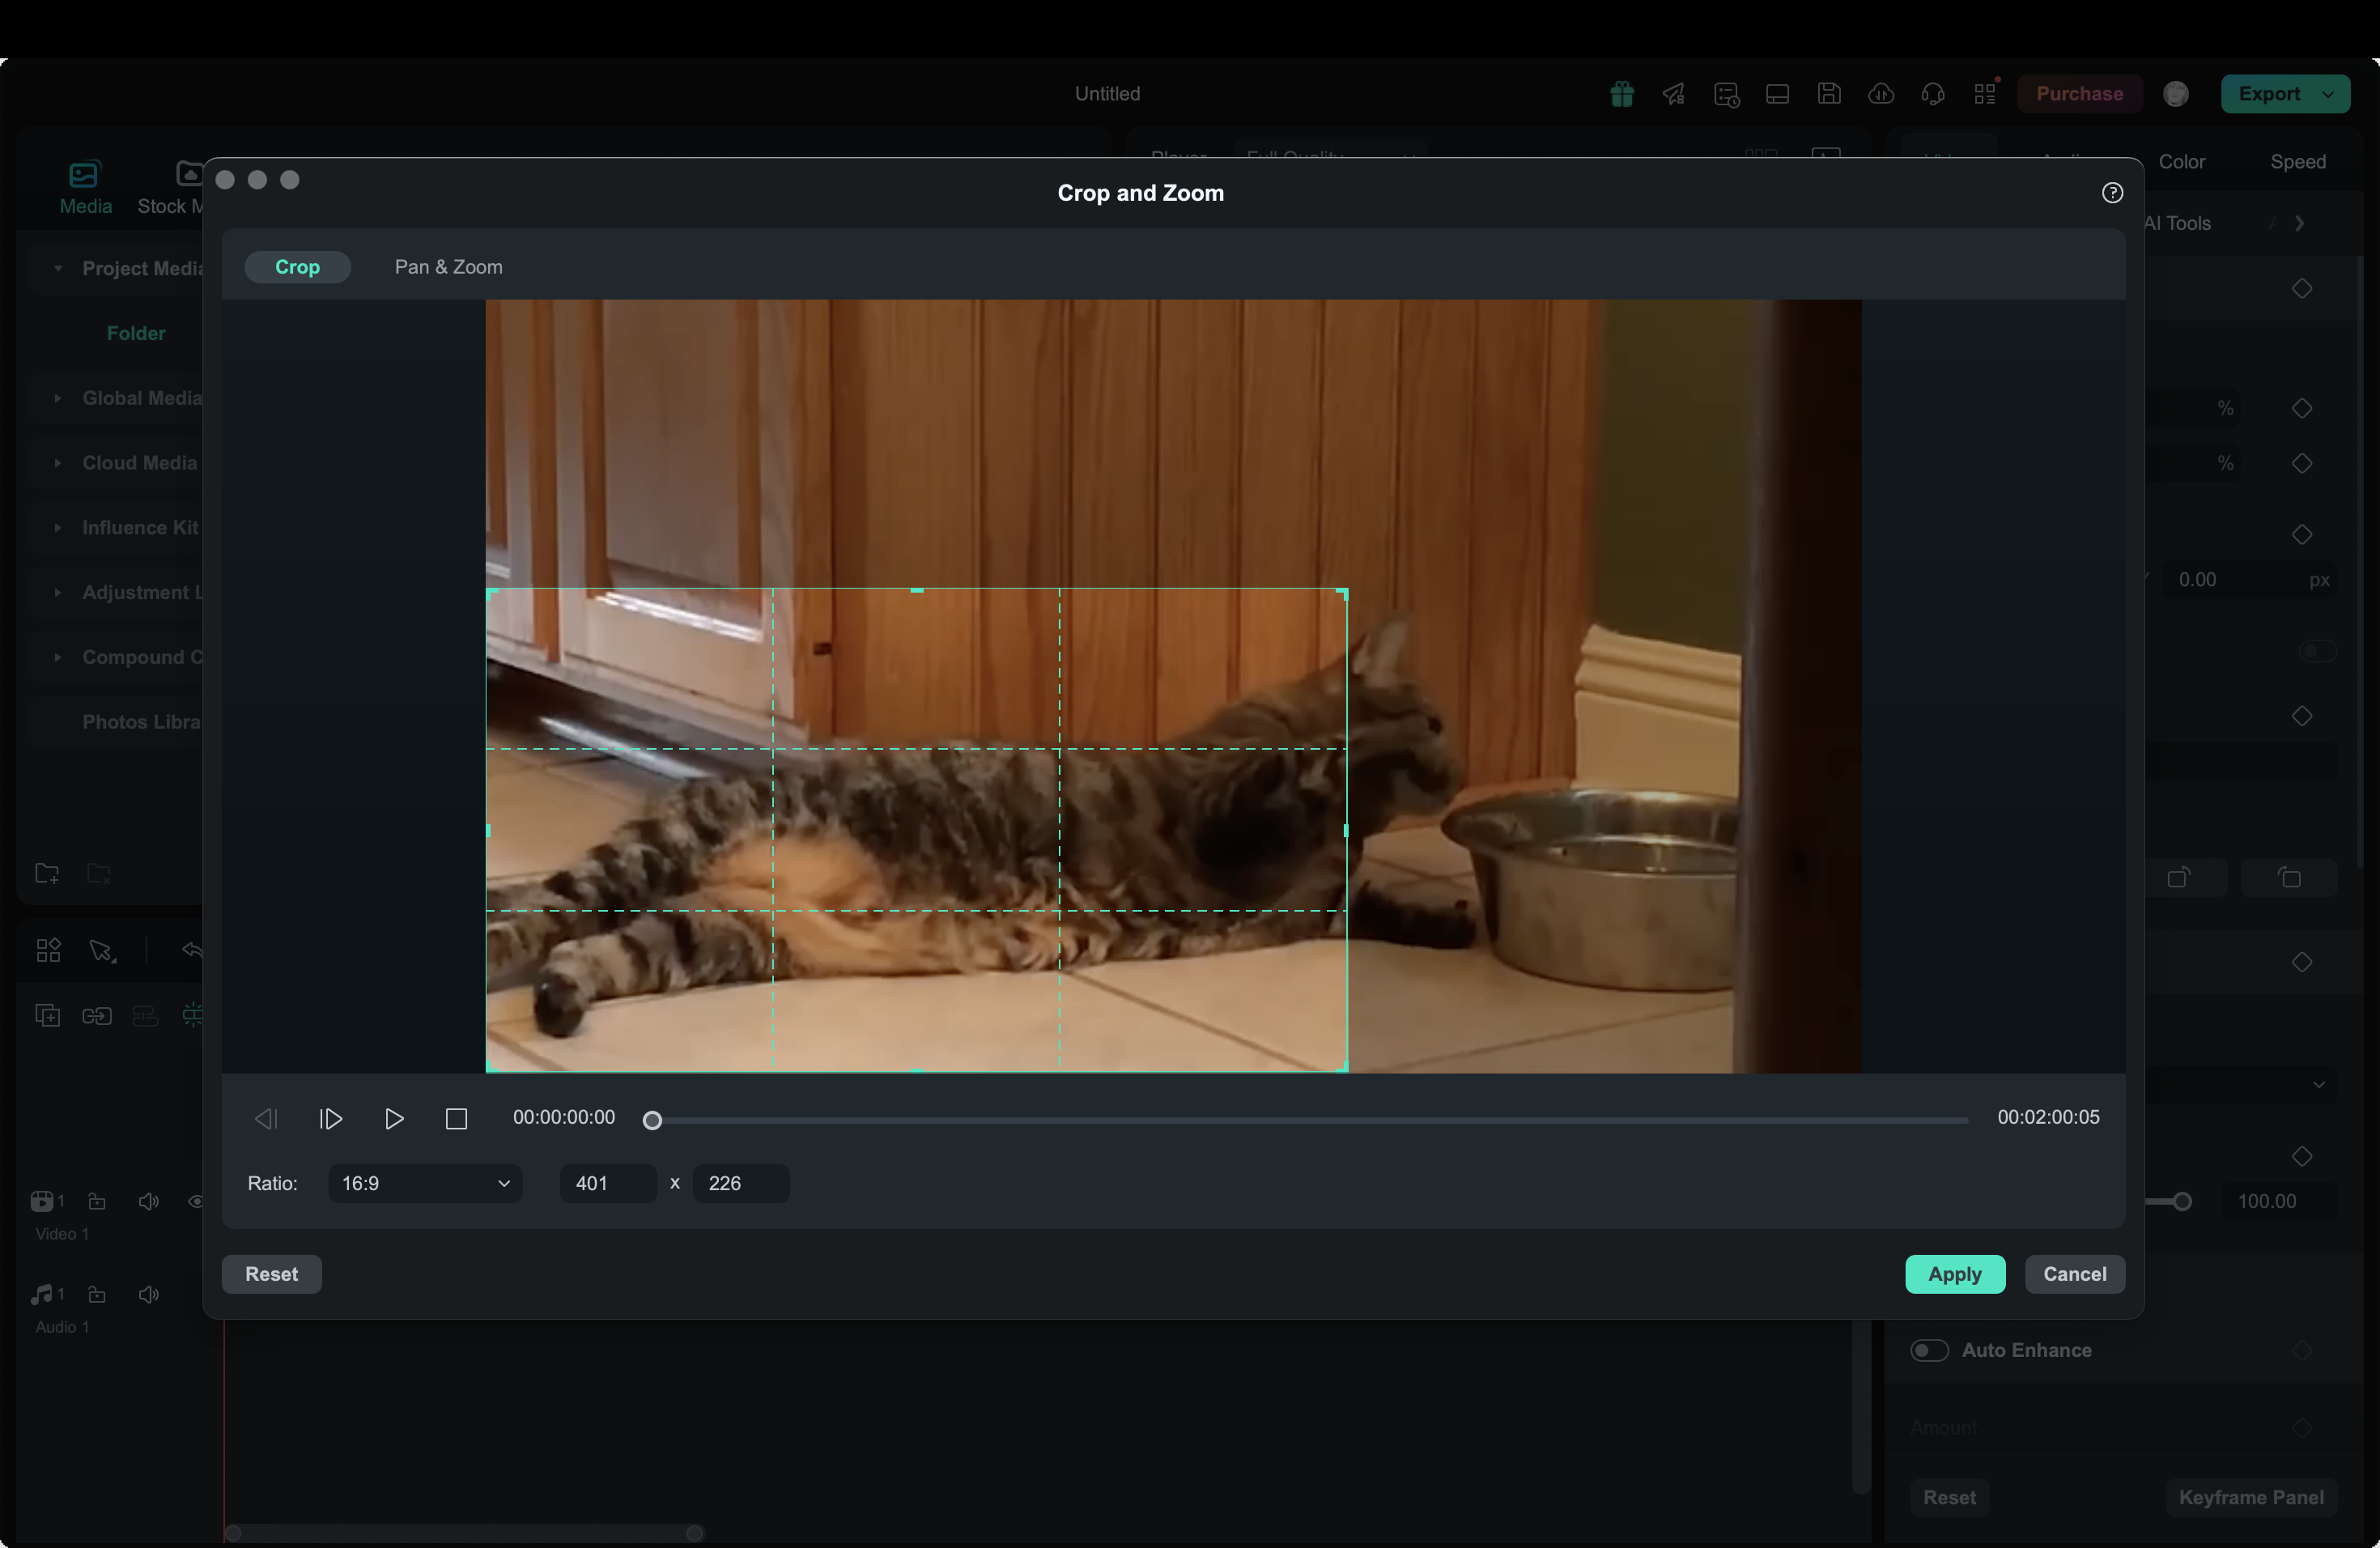
Step 2. In the Crop and Zoom panel, choose a preset aspect ratio like 1:1, 9:16, or 16:9. Alternatively, you can also select Custom to manually adjust the frame to your desired dimensions.
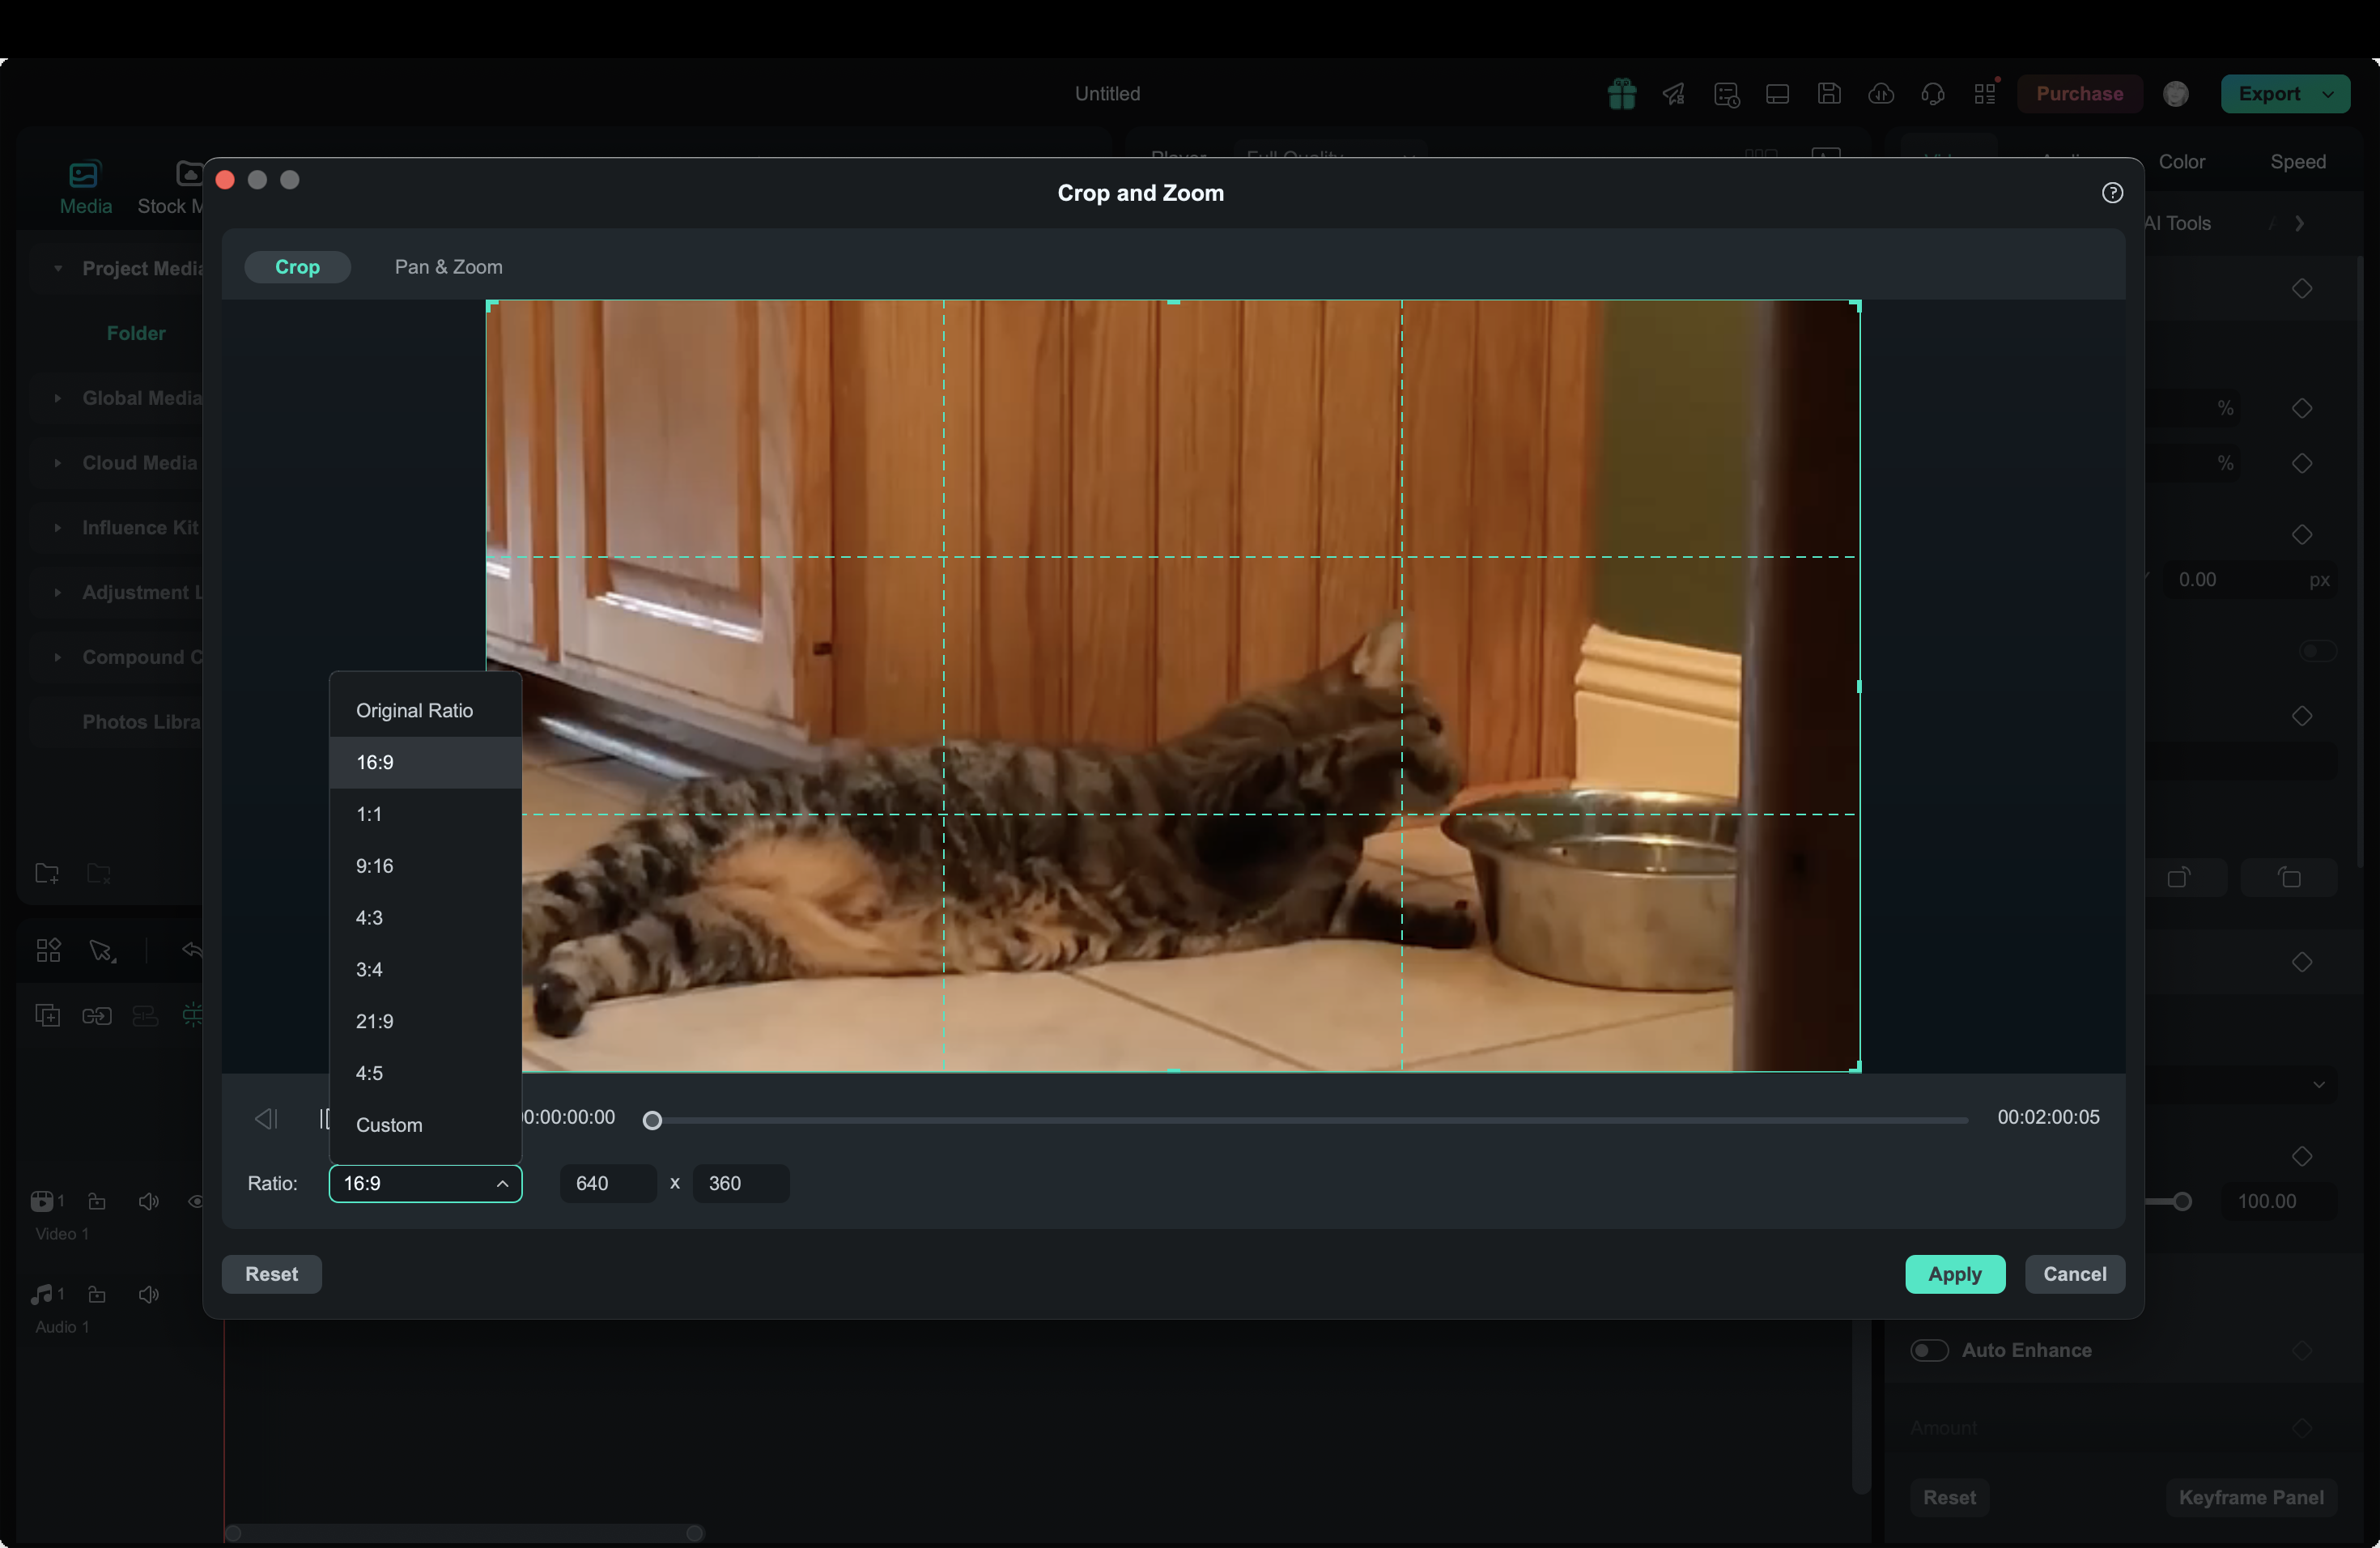
Step 3. Drag the handles to adjust the crop area and keep the focus on what matters most.
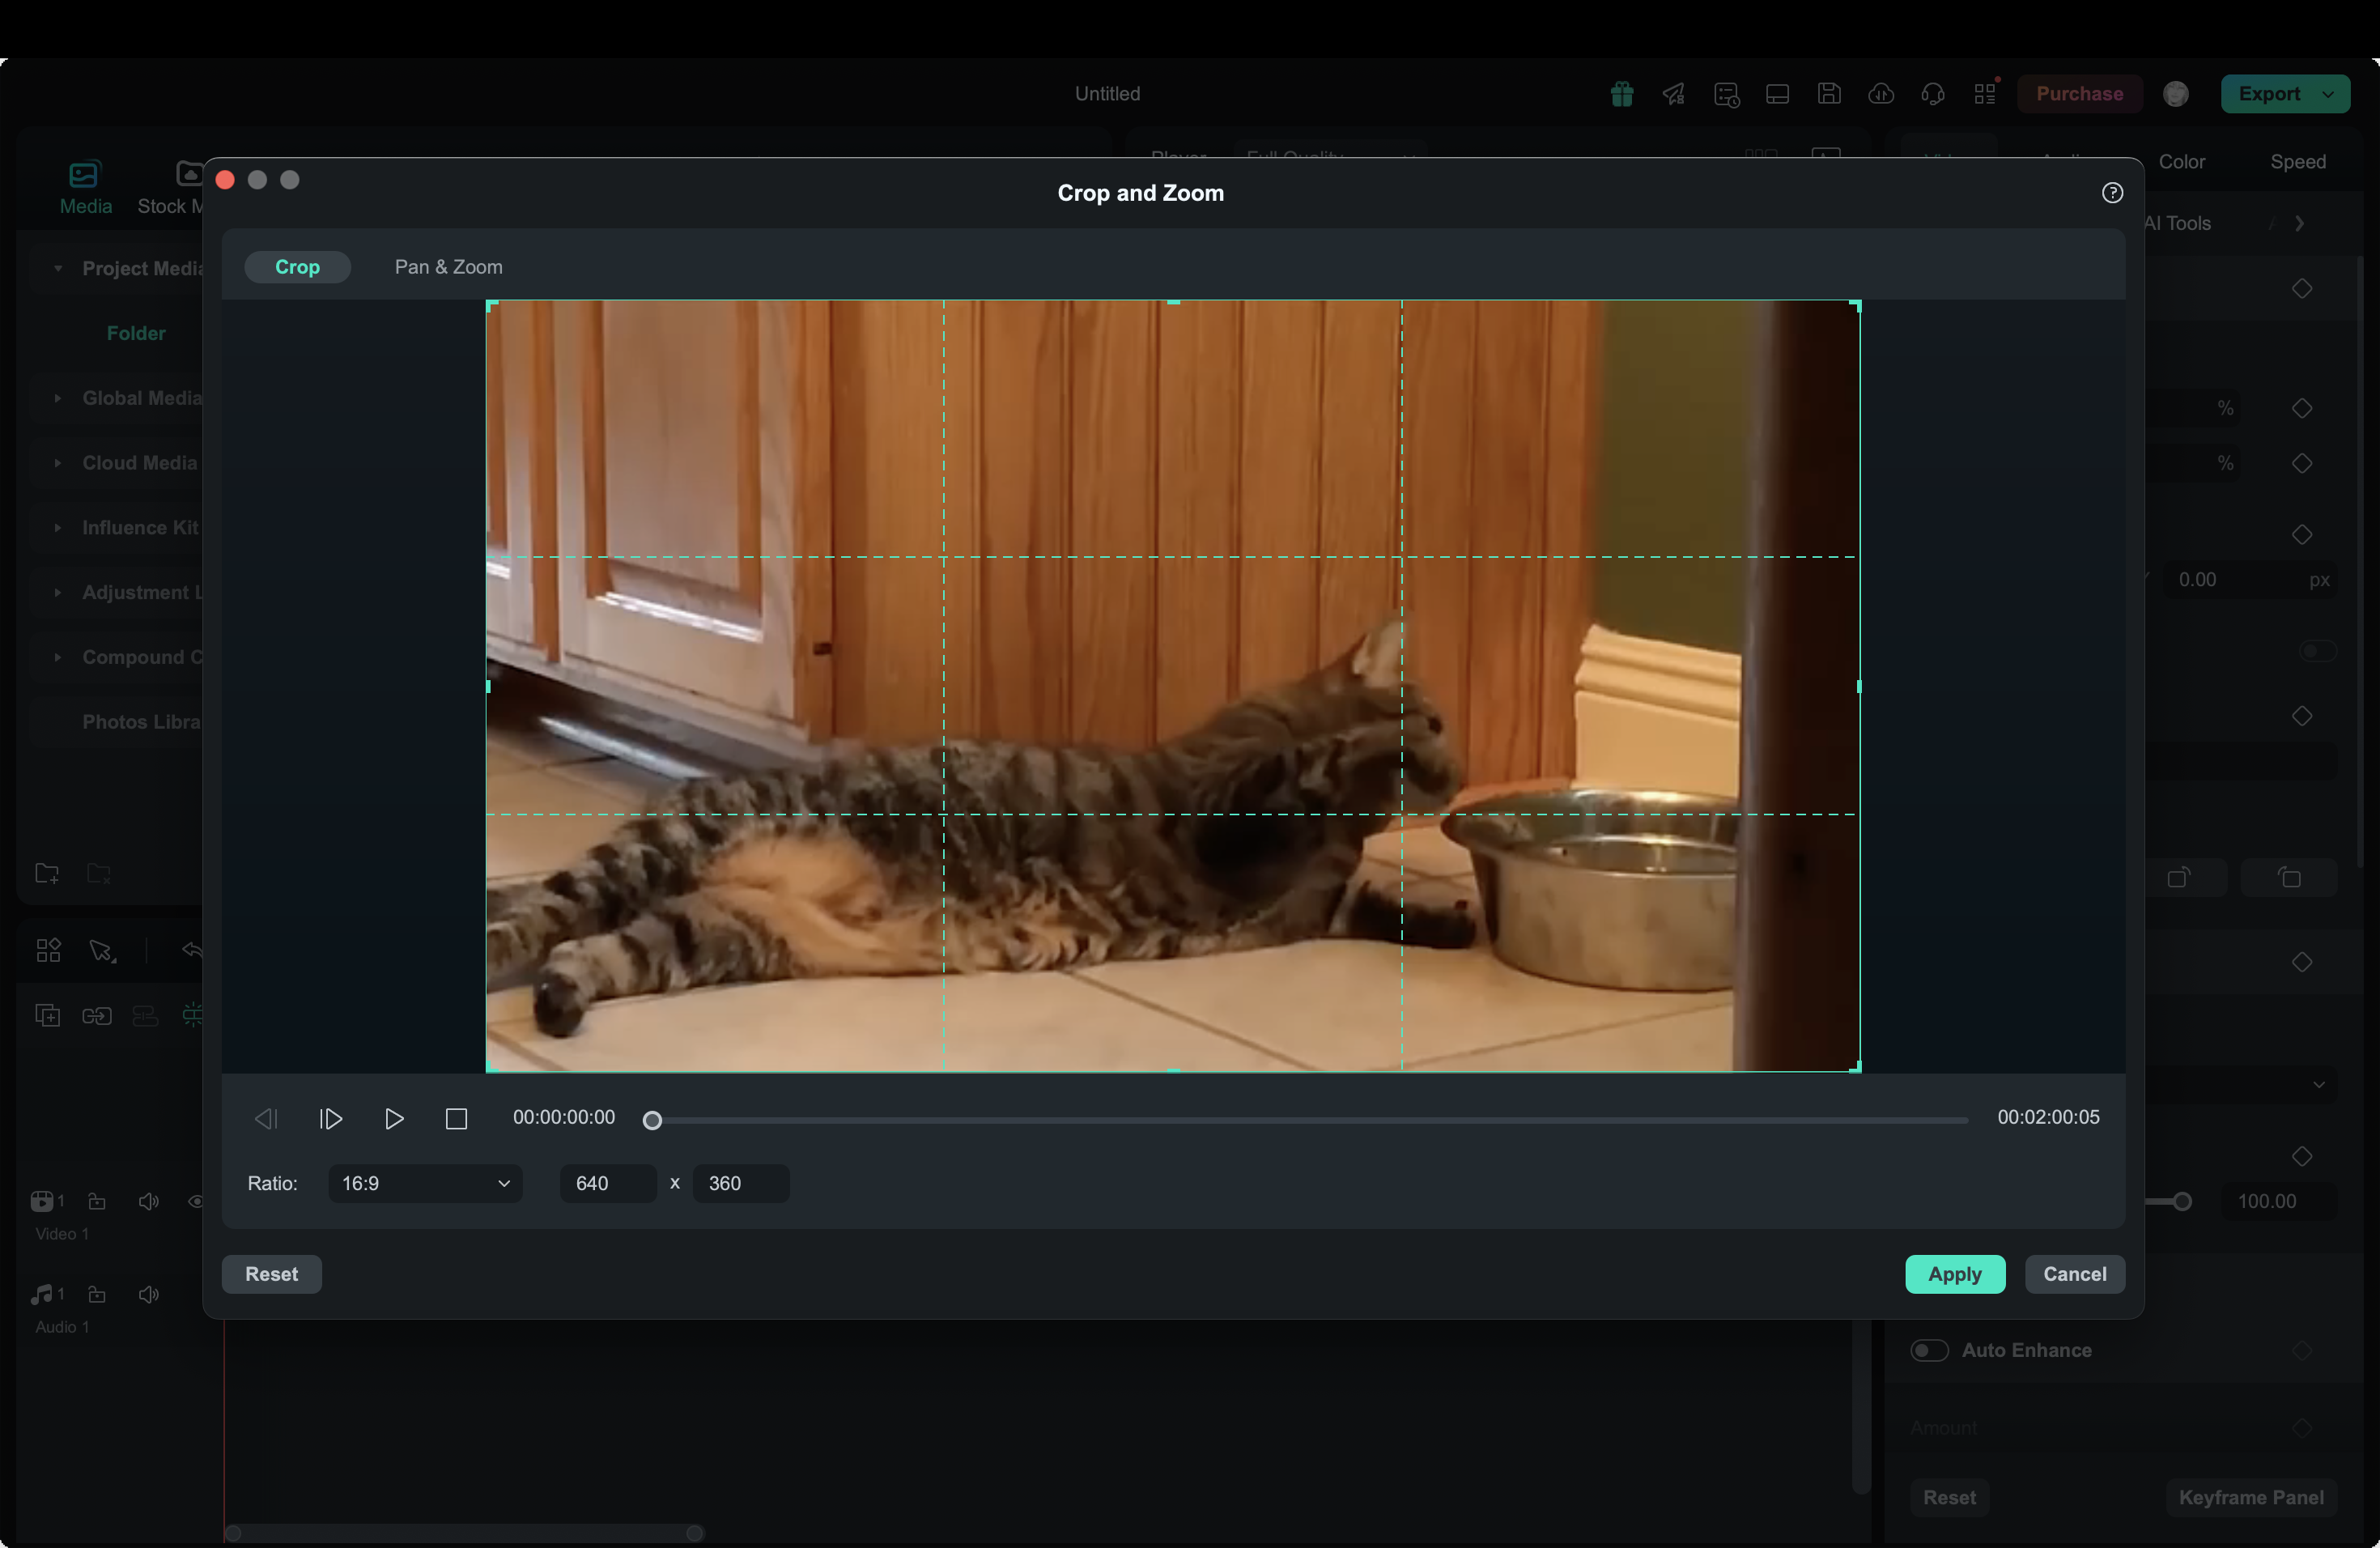
Step 4. When you’re happy, click Apply to save the changes.
Adjusting the Project Aspect Ratio
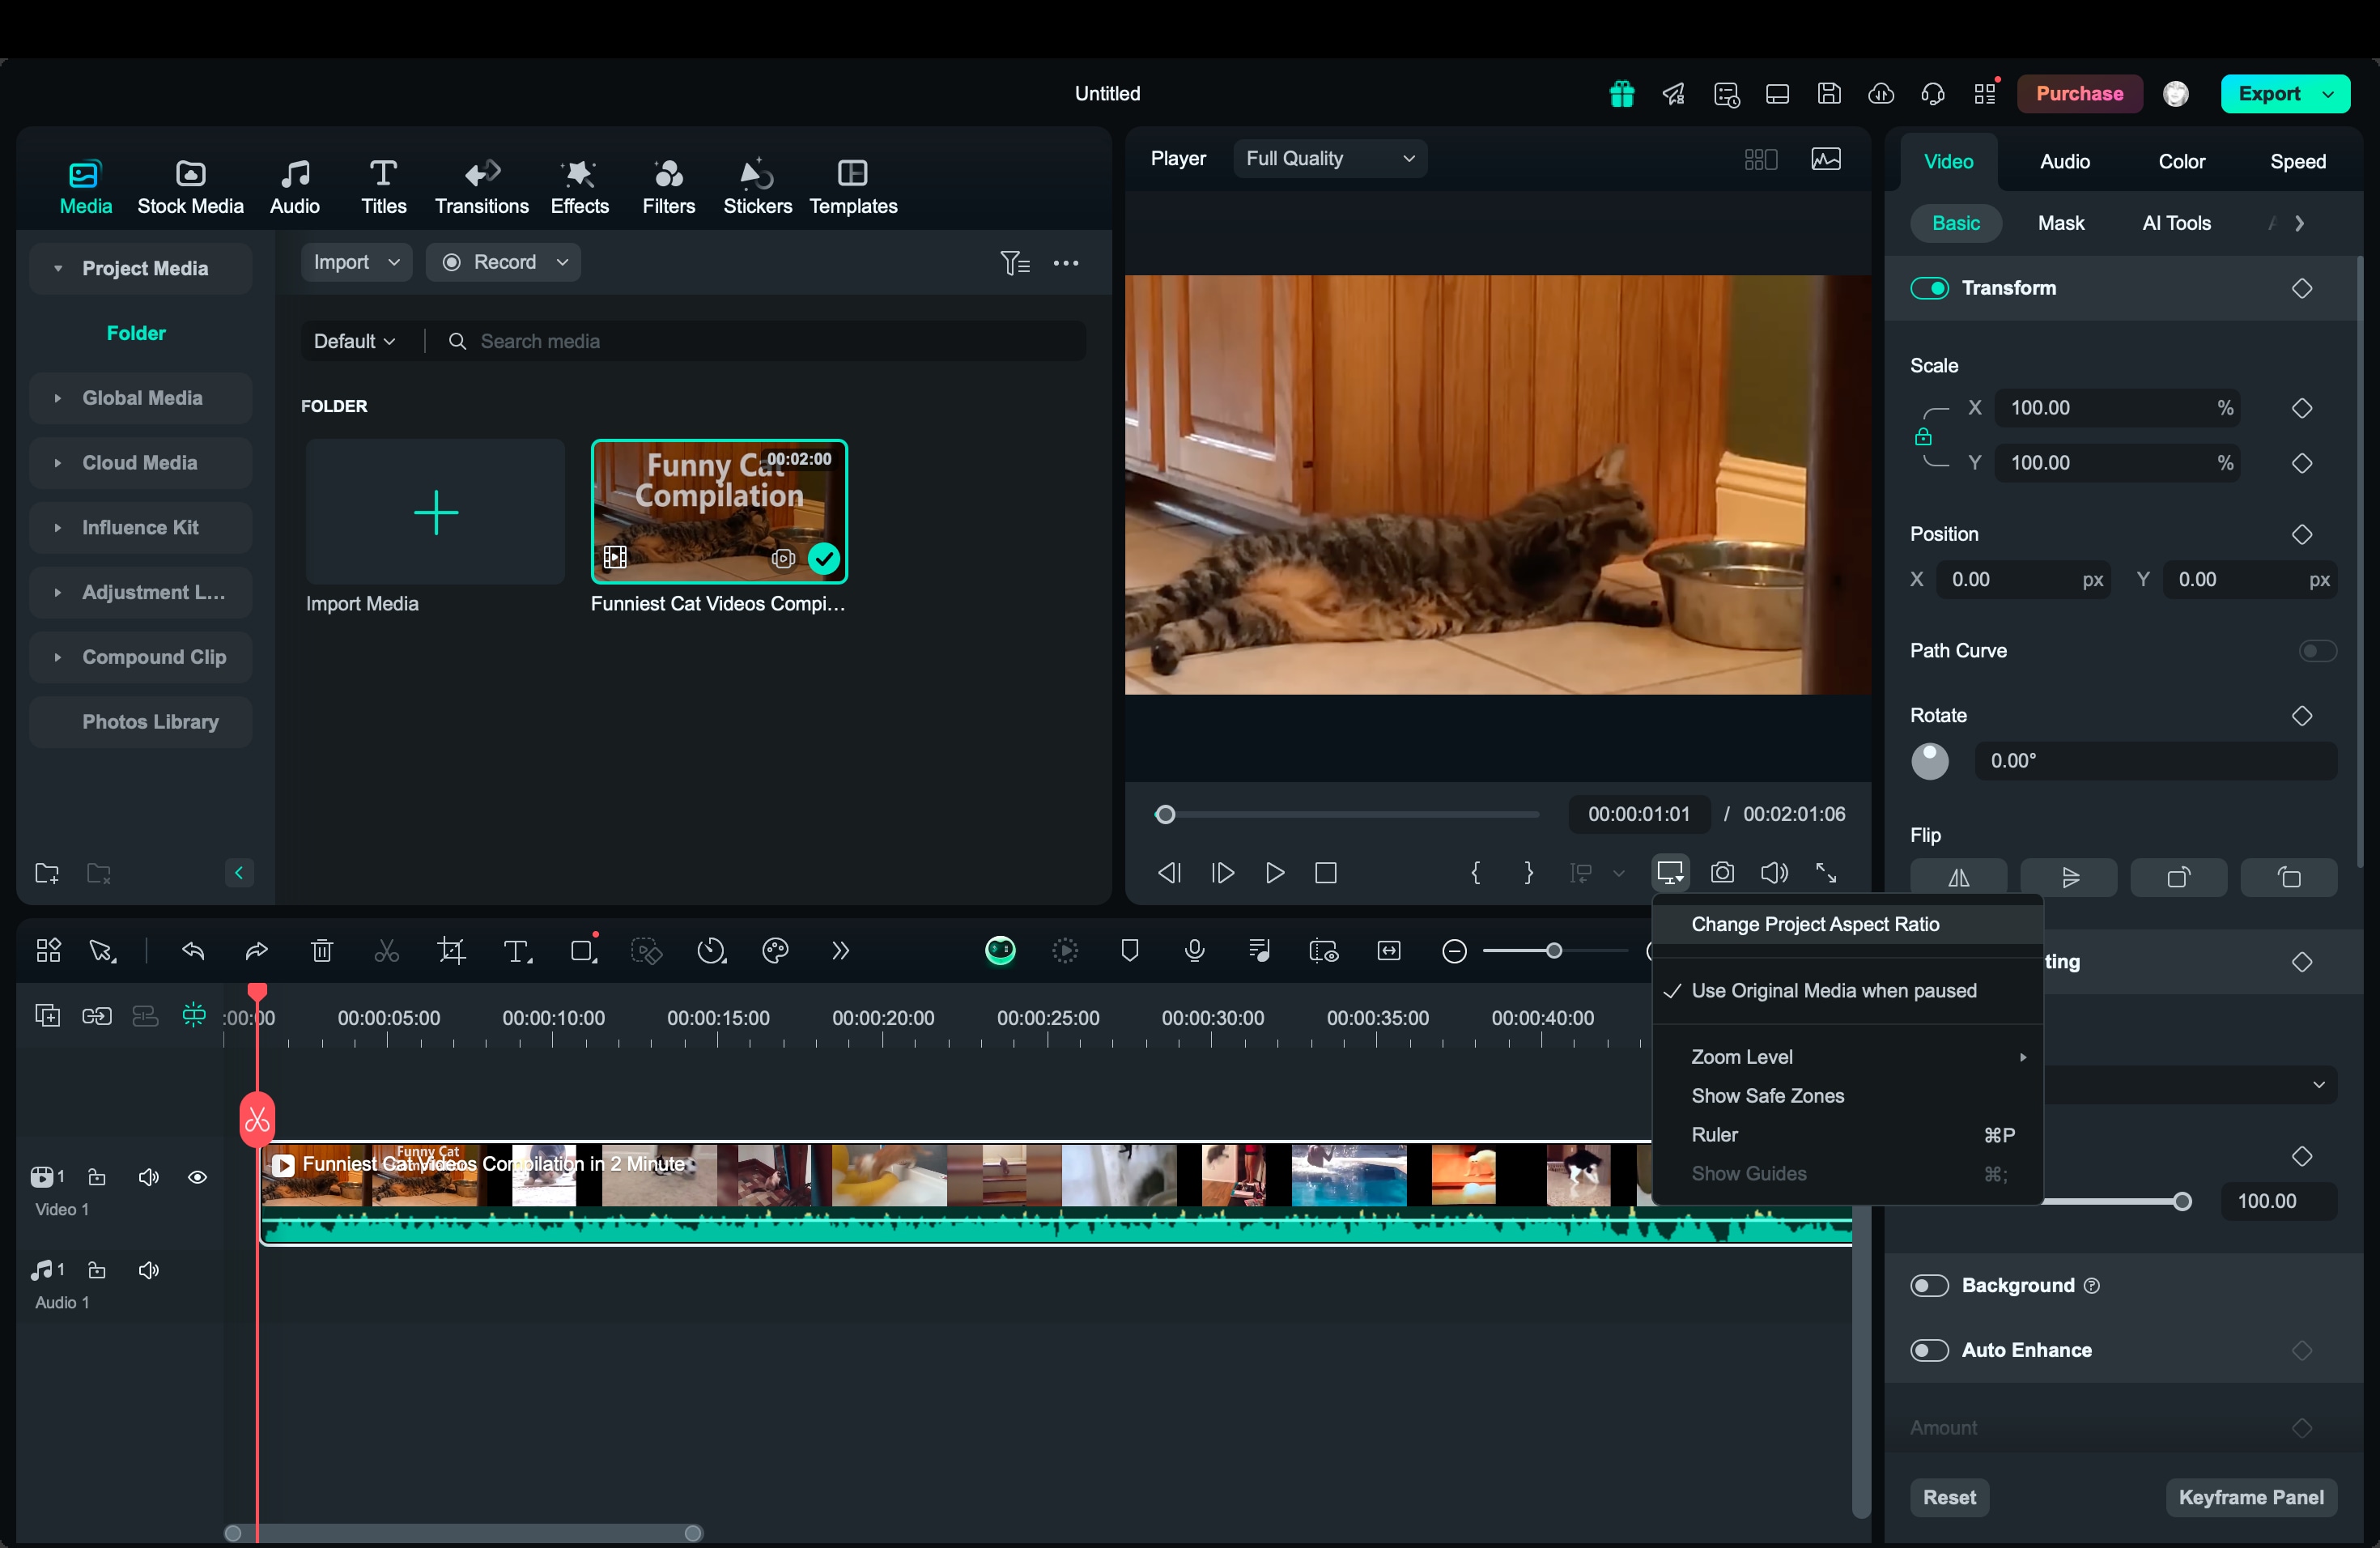
If you’re looking to reduce file size without changing the aspect ratio, Filmora also lets you adjust the video’s resolution and bitrate.
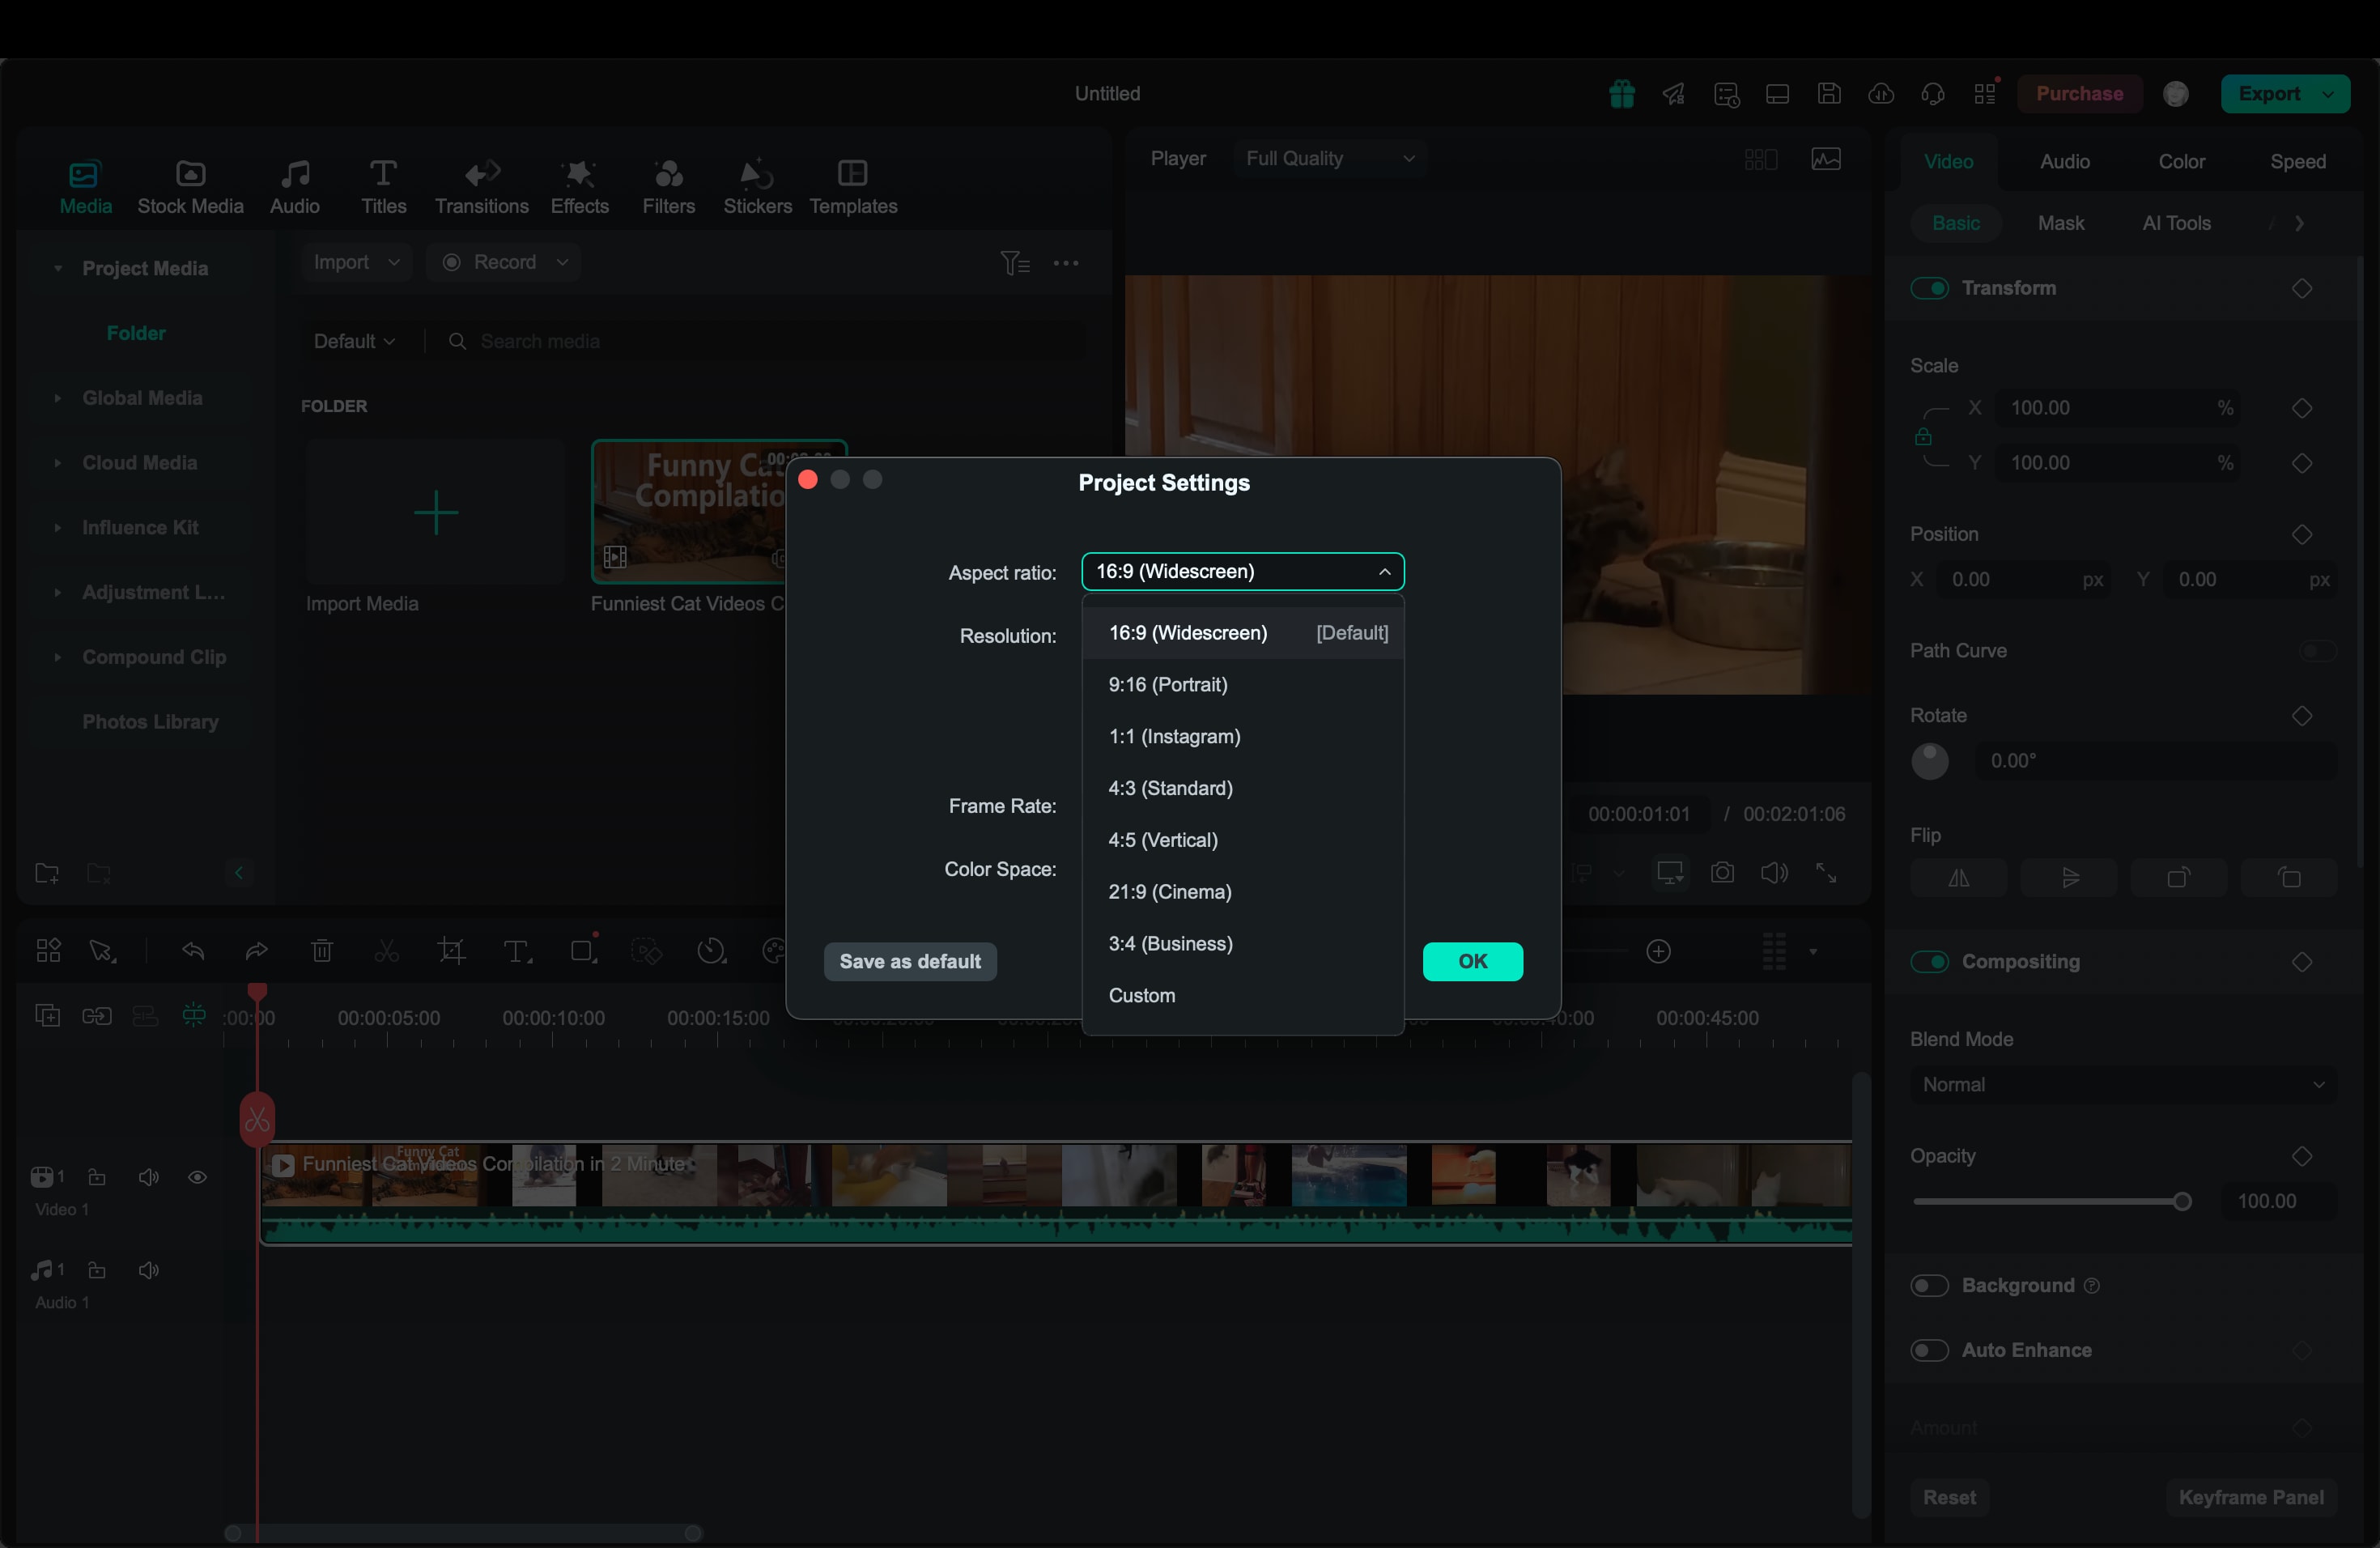
Step 1. After importing, open the Settings and select Change Project Aspect Ratio.
Step 2. Here, you can select the aspect ratio to resize your video on your Mac. There are also options to tweak the resolution and frame rate if needed.
Reducing Video File Size Without Affecting Quality
After resizing your video into different aspect ratios, you can also reduce the video size using Filmora Advanced Compression. This feature lets you lower the file size without affecting the quality, which is handy for storage or faster uploads.
Step 1. After editing, click Export . Then, enable Advanced Compression in the Export window.

Step 2. Pick By Quality to set a compression level or YouTube Upload if you want to upload your video to YouTube to match platform settings.
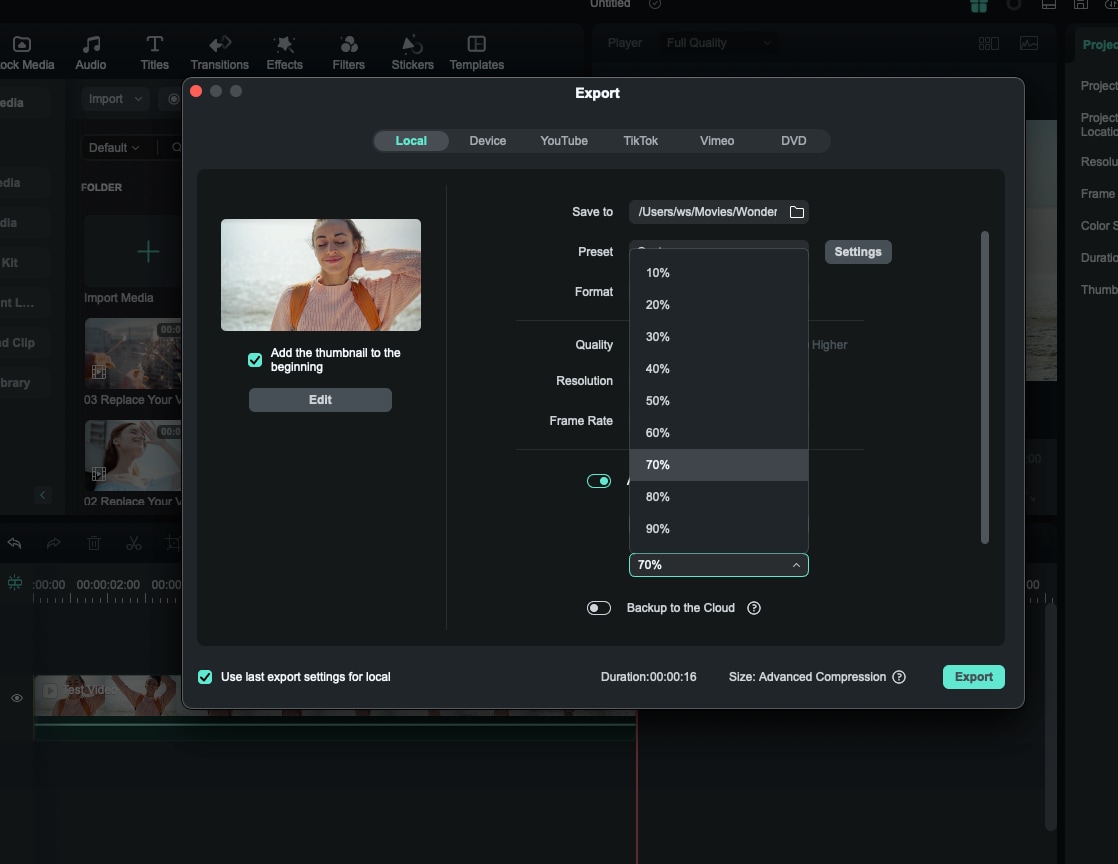
Step 3. When everything is set, click Export to save!
Part 2. Alternative Video Resizing Tools on Mac
While Filmora is a fantastic tool for resizing videos on macOS, you’ve got a few other options on Mac if you want to explore alternatives. These include iMovie, VLC Media Player, or an online option like Kapwing. Each tool offers different features for resizing videos on Mac.
Here’s a quick breakdown of how these tools stack up for video resizing:
| Tool | Features for Video Resizing | Ease of Use | Customization Options | Platform Support | Best For |
| Filmora | Auto Reframe, manual crop, custom aspect ratios, compression | Easy | High | macOS, Windows | Great for high-quality resizing with AI-powered tools, multiple export settings, and an intuitive interface |
| iMovie | Basic cropping, preset aspect ratios | Easy | Limited | macOS, iOS | Quick, simple edits but fewer options for detailed resizing |
| VLC Media Player | Aspect ratio adjustment, cropping | Moderate | Limited | macOS, Windows, Linux | Basic resizing; better as a media player than an editor |
| Kapwing (Online) | Online resizing, aspect ratio presets, cropping | Easy | Moderate | Online | Convenient for fast edits |
| QuickTime Player | Simple trimming, limited aspect ratios | Easy | Very Limited | macOS | Super quick but minimal resizing options |
Why Filmora is the Best Video Resizer on Mac?
When it comes to video resizing on macOS, Filmora is tough to beat. It’s super easy to use and offers way more flexibility than other options. Thanks to its Auto Reframe feature, Filmora can detect your video’s main subject and adjust the frame automatically, which is perfect for resizing videos for social media.
Plus, Filmora lets you customize your video by cropping and adjusting aspect ratios. After that, you can reduce your video size while maintaining the quality using the Advanced Compression feature—giving you full control over the final look and file size.

If you’re looking for something simple, iMovie and QuickTime Player are good for basic edits and quick resizing, but they don’t offer much in terms of customization. VLC Media Player is a handy tool for adjusting aspect ratios but is more of a media player than a full editing tool. And if you’re in a rush, Kapwing can resize videos directly in your browser, though advanced features might require a subscription.
Overall, if you want a video resizer on a Mac that’s both powerful and easy to use, Filmora is the go-to choice. It’s packed with features that let you resize videos without a fuss, making it ideal for both beginners and experienced users alike.
You May Also Like
Create Projects on Wondershare Filmora for Mac
Conclusion
Resizing videos on macOS is simple with the right tools. Filmora stands out as a versatile video resizer on Mac, thanks to its Auto Reframe feature, customizable aspect ratios, and user-friendly interface.
While alternatives like iMovie, VLC, and online options offer basic resizing features, Filmora provides unmatched ease and flexibility for any platform or purpose. Filmora makes it easy to resize videos on macOS with professional-quality results, whether you need a quick crop or detailed adjustments. Give it a try, and enjoy seamless resizing tailored to your needs!


