For the Best Results, Use the Latest Version.
-
Preparations for Mac
-
Account (Mac)
-
Get Started & Basic Settings (Mac)
- Release notes for Mac
- Latest Versions and Features for Mac
- Get Started on Mac - Full Guide
- Download/register/uninstall on Mac
- Panel Layout on Mac
- Keyboard shortcuts on Mac
- Touchbar on Mac
- Change playback quality on Mac
- Render preview files on Mac
- Manage timeline on Mac
- Media for use on Mac
- Logo Reveal For Mac
- Marked Favorites for Mac
-
Compatibility & Tech Specs (Mac)
-
Performance Settings (Mac)
-
-
Creating Projects - Mac
-
Creating New Projects (Mac)
-
-
Importing & Recording - Mac
-
Importing (Mac)
-
Recording (Mac)
-
-
Video Editing for Mac
-
Basic Video Editing for Mac
- Edit Live Photos on Mac
- Enable/Disable Clip for Mac
- Magnetic Timeline For Mac
- Select All Clips on Timeline for Mac
- Auto Ripple for Mac
- Split & cut videos on Mac
- Compositing on Mac
- Crop and zoom on Mac
- Playback Zoom Level for Mac
- Change speed on Mac
- Play video in reverse on Mac
- Mark In and Mark Out for Mac
- Markers for Mac
- Group clips on Mac
- Customized Backgrounds for Videos and Images in Mac
- Video snapshot on Mac
- Freeze frame on Mac
- Auto enhance on Mac
- Applying Drop Shadow for Mac
- Adjustment Layer for Mac
- Mark clip on Mac
- Video Editing Ruler – Mac
- Apply Transforming for Mac
-
Advanced Video Editing for Mac
-
AI-Powered Video Editing for Mac
- Smart Scene Cut for Mac
- Smart Short Clips for Mac
- Image to Video for Mac
- AI Idea to Video for Mac
- AI Text-to-Video for Mac
- Instant Cutter Tool on Mac
- AI Face Mosaic for Mac
- Keyframe Path Curve for Mac
- Planar Tracking for Mac
- AI Extend For Mac
- AI Script-to-Video for Mac
- AI Text-Based Editing in Mac
- Create With Instant Mode on Mac
- ChatGPT Plugin - AI Copywriting on Mac
- AI Smart Cutout for Mac
- Auto reframe on Mac
- Lens correction on Mac
- AI Portrait Cutout on Mac
- Scene detection on Mac
- AI Smart Masking for Mac
- AI Mate Editing for Mac
- Motion Tracking on Mac
- Stabilize video on Mac
- AI Object Remover For Mac
- AI Smart Search for Mac
- AI Skin Tone Protection for Mac
- Green screen on Mac
- Super Slow Motion with Optical Flow for Mac
- AI stylizer on Mac
- Video Denoise for Mac
-
-
Audio Editing for Mac
-
Basic Audio Editing for Mac
-
Advanced Audio Editing for Mac
-
AI-Powered Audio Editing for Mac
- Audio To Video for Mac
- AI Sound Effect for Mac
- Smart BGM Generation for Mac
- AI Voice Enhancer for Mac
- Audio Stretch for Mac
- AI Audio Denoise for Mac
- Auto synchronization for Mac
- AI Vocal Remover for Mac
- Auto Beat Sync on Mac
- AI Music Generator for Mac
- How to Perform AI Voice Cloning in Wondershare Filmora?
- Silence detection on Mac
-
-
Text Editing for Mac
-
Basic Text Editing for Mac
-
Advanced Text Editing for Mac
-
AI-Powered Text Editing for Mac
-
-
Video Customizations for Mac
-
Video Effects (Mac)
-
Audio Effects (Mac)
-
Transitions (Mac)
-
Stickers (Mac)
-
Filters (Mac)
-
Color Editing (Mac)
-
Animations (Mac)
-
Templates (Mac)
-
Asset Center (Mac)
-
-
Exporting & Share & Cloud Backup - Mac
AI Image Stylizer for Mac
Transform your images instantly with Filmora’s AI Image Stylizer on Mac! This powerful feature uses cutting-edge Flux generation technology to convert any image into stunning artistic styles—no prompts needed. Perfect for social media creators, gamers, and designers, it supports all formats (JPG, PNG, etc.), resolutions, and sizes without restrictions. Create unique avatars, game-inspired visuals, or professional artwork in seconds.
How to Use Filmora's AI Image Stylizer Feature on Mac?
To get a better understanding of how to utilize the AI Image Stylizer feature, follow the simple guide below:
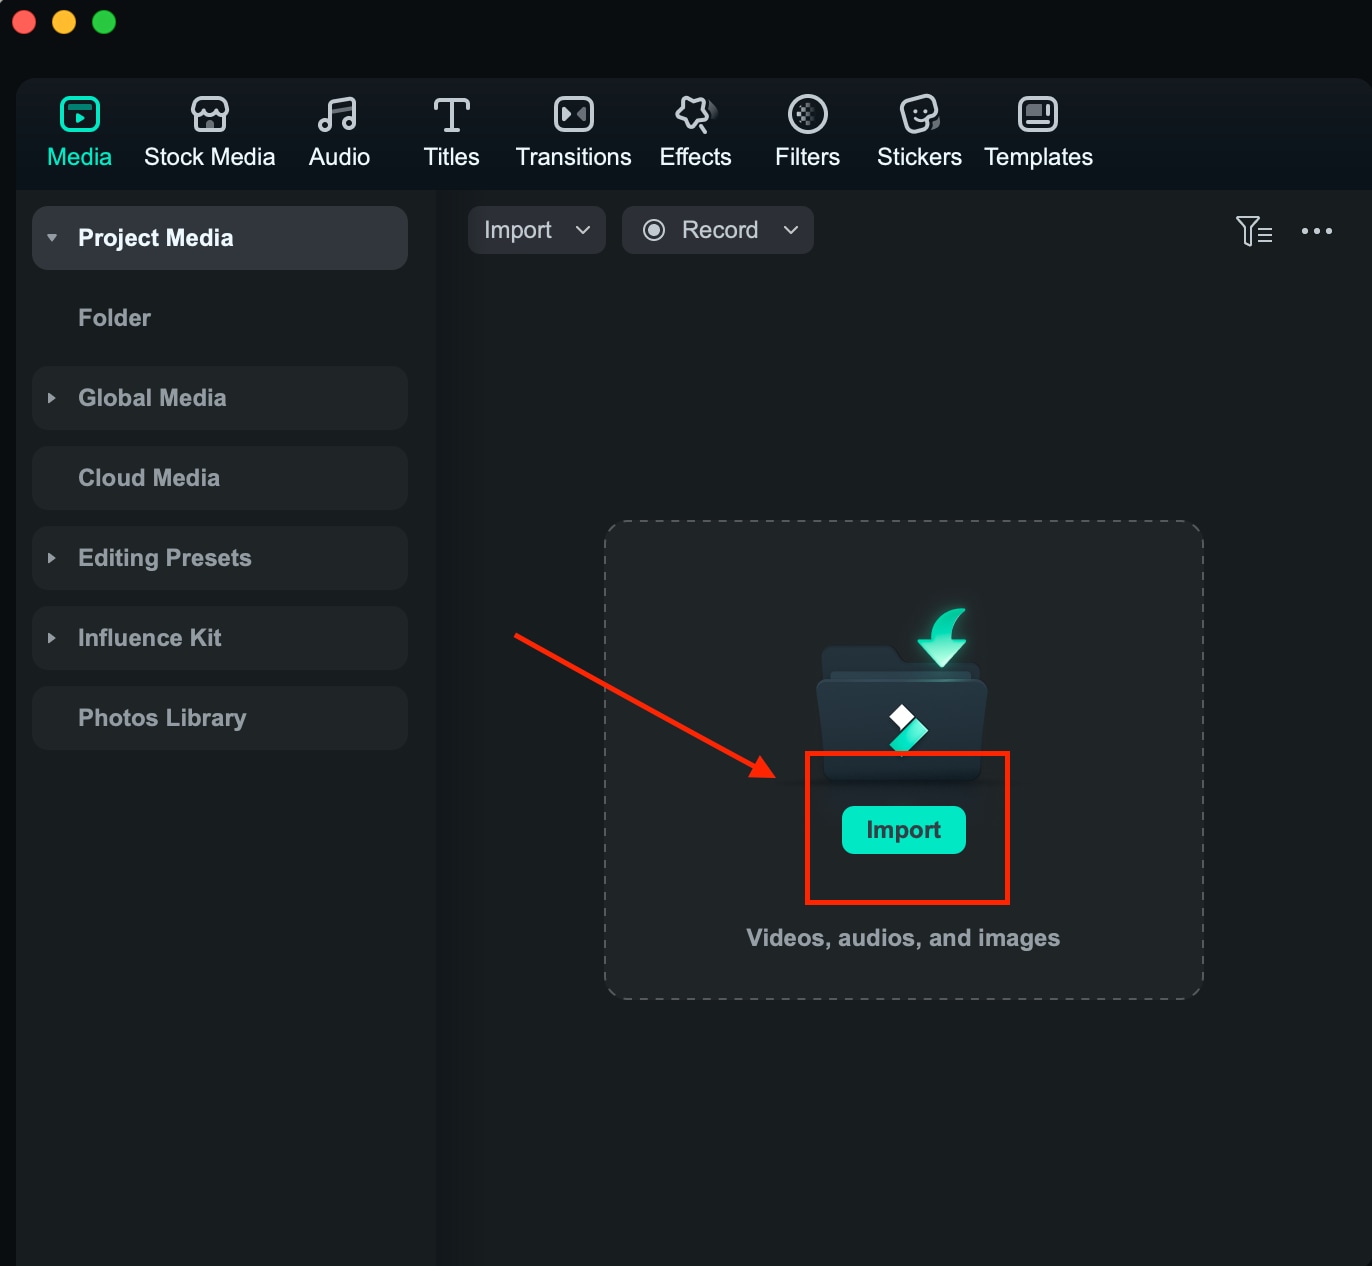
Step 1: Import Your Image
Import the image that you want to stylize into the application. This is the starting - point for using the AI image stylizer.
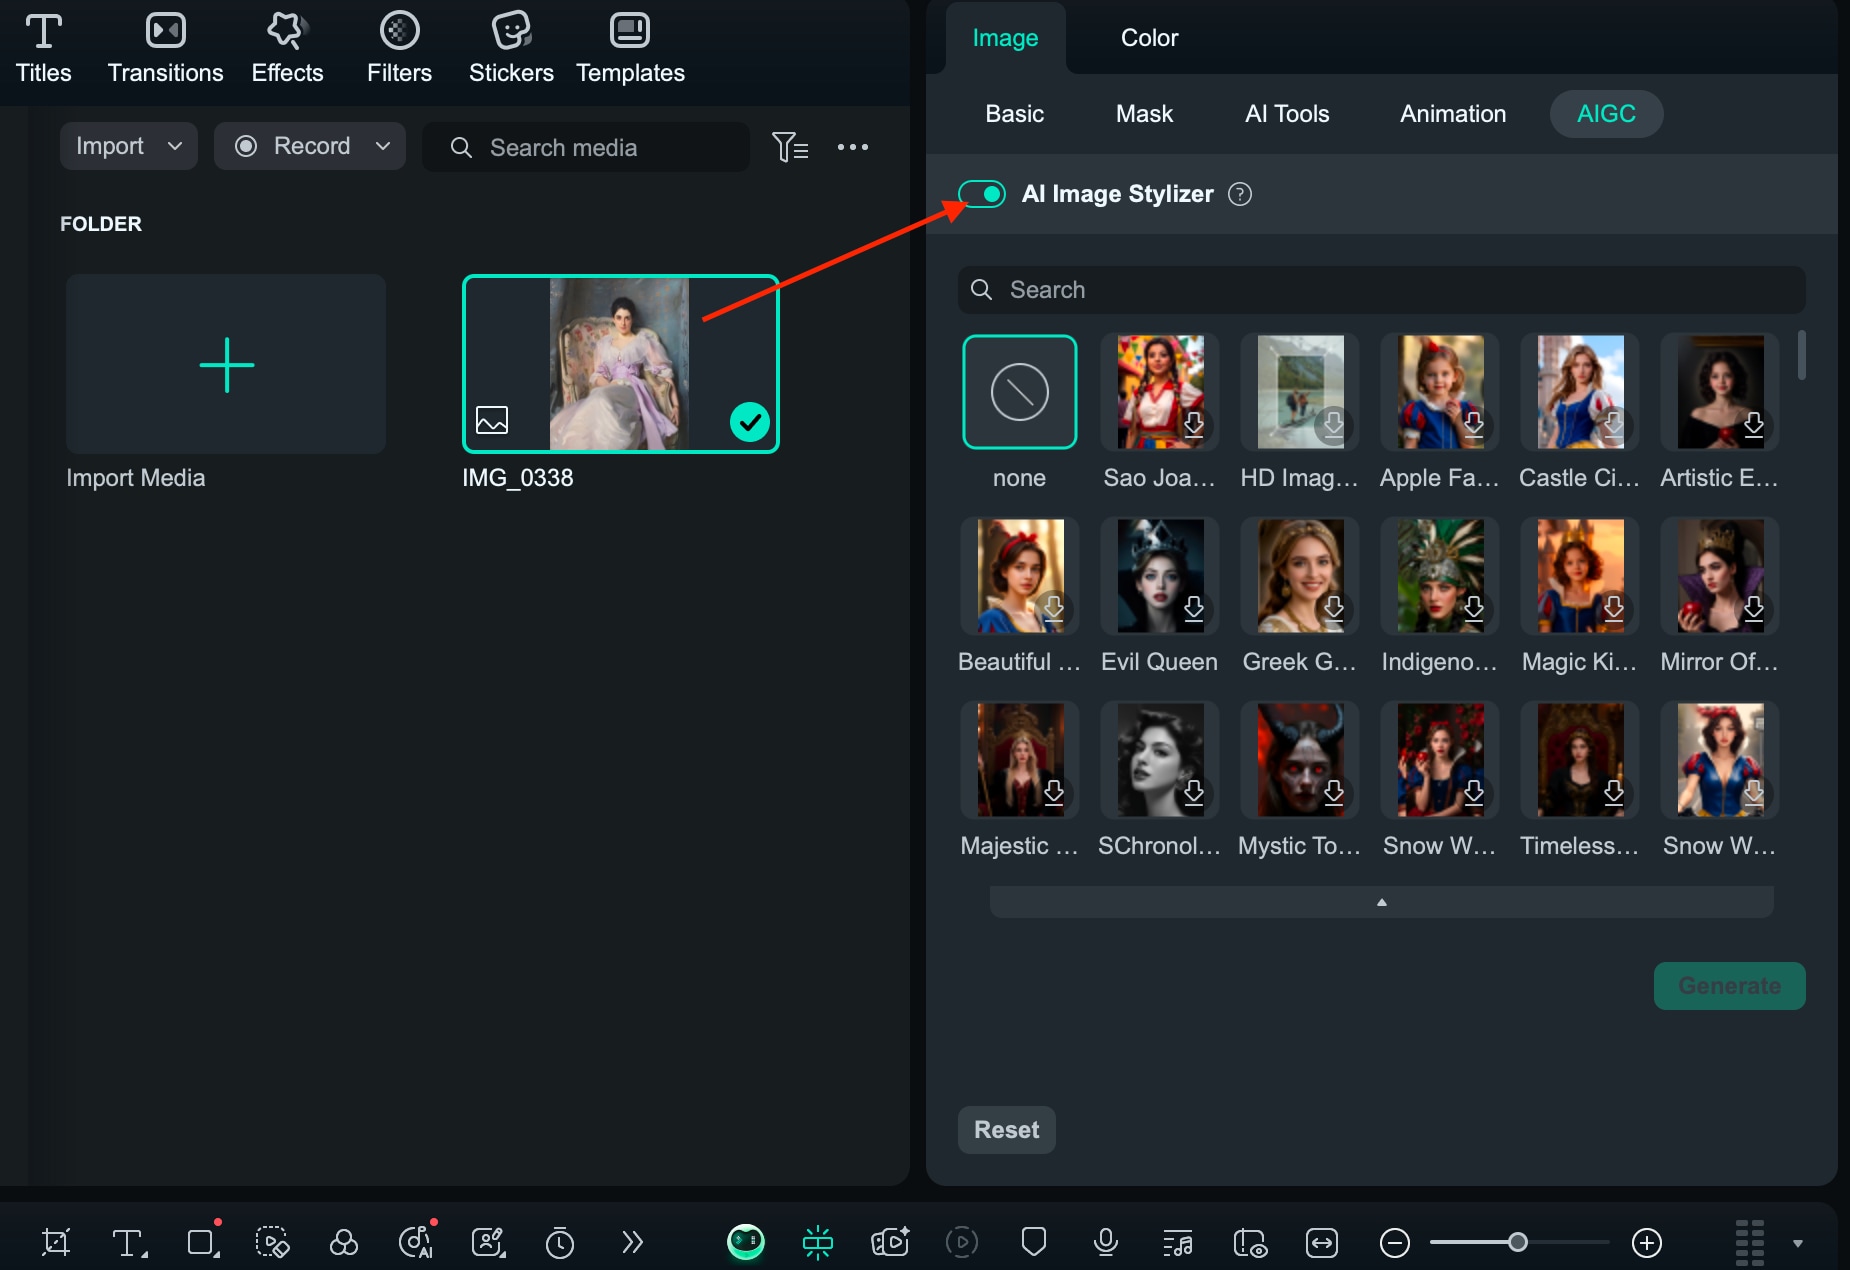
Step 2: Enable AI Image Stylizer
Go to Image - AIGC - AI Image Stylizer and enable the AI-powered feature for image styling.
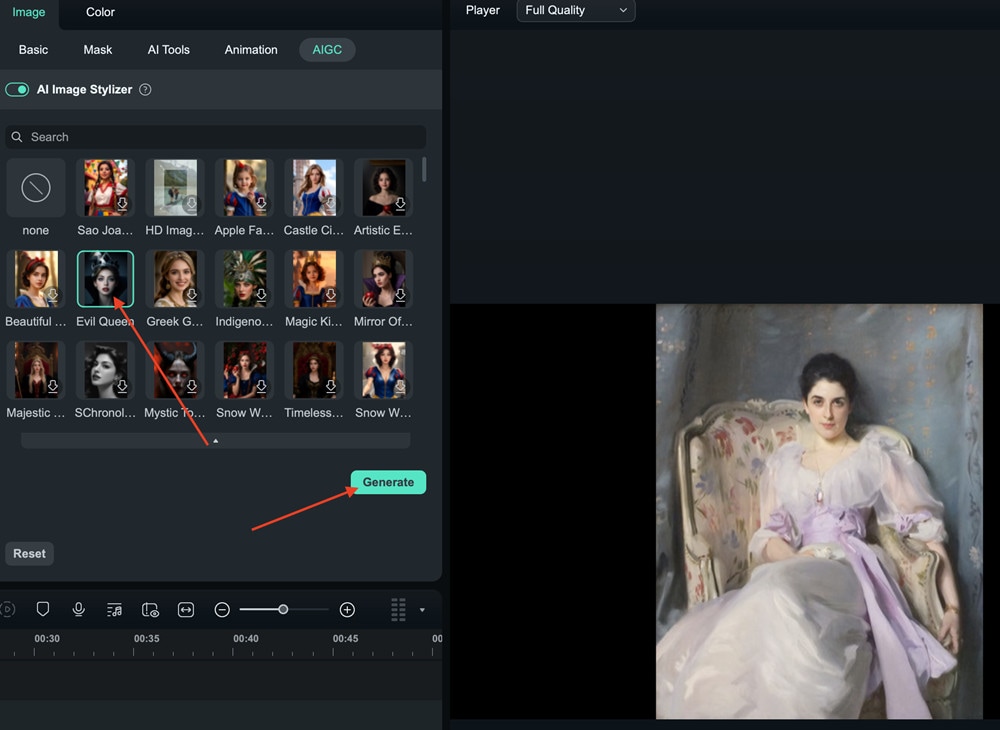
Step 3: Apply Style
Choose a style from the available options (which provides 10+ styles for your choice) and apply it to the imported image. This step transforms the look of the image according to the selected style.
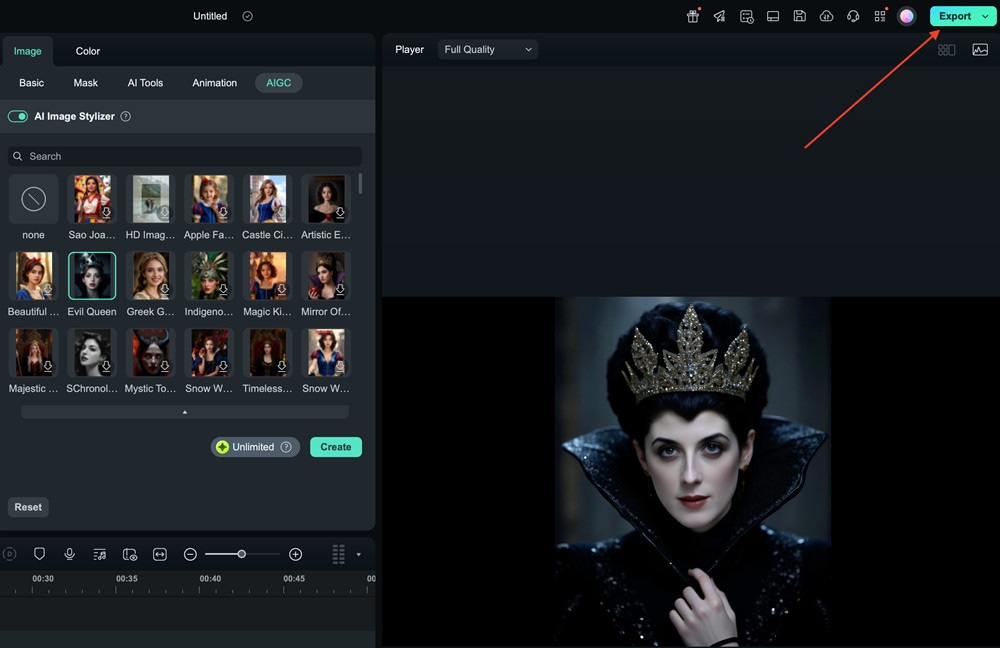
Step 4: Export
Once you are satisfied with the stylized image, export it to save it to your device or share it.
Unleash creativity without limits—turn ordinary images into extraordinary art in under 10 seconds! Experiment freely across styles and formats to level up your visual storytelling.
Related Posts
Featured Articles
Step-by-Step Guide on How To Resize Video in Davinci Resolve
Here are a number of tools used in the market to resize the videos. We are going to teach How to resize the video in Davinci Resolve and Fimora.
8 Best Transparent GIF Makers: Different Types
Easily remove your GIF backgrounds with these transparent GIF makers you can find online. Add cool GIF elements to your video, making it more engaging, livelier, and visually-appealing.
Top 6 Best Free Online Audio Editor to Use (100% Free)
Do you know which are the 6 free online audio editor? In this article, you will know the best online audio editor for editing music. Check this out!
