
 100% Security Verified | No Subscription Required | No Malware

Have you ever dragged clips around for minutes in the timeline, only to mess up the timing and sync again? We have a solution for that. Instead of guessing where a clip should start and stop, you can use the features available in modern video editing tools to mark three time points. Two of them will be on the source clip (Source In and Source Out points), and one will be on the timeline (Timeline Point). This technique is fast, reliable, and ideal when you're syncing B-roll to a voiceover, replacing placeholders, or building tight montages.
In this guide, you'll learn the definition of three-point editing, how to do it in Premiere Pro, where it shines (and doesn't), and why many creators prefer a simpler alternative.
In this article
What Is a Three-Point Edit?
Three-point editing is a specific video editing method that utilizes any three of the four possible time points to control an edit. Let's see what they are and how they are marked.
Source In (SI) and Source Out (SO) — define the portion of the source clip you want to use in your video. SI is the beginning, and SO is the endpoint.
Timeline In (TI) and Timeline Out (TO) — define where the source clip goes in the timeline sequence. TI is the beginning, and TO is the end.
Think of it like copying and pasting with rulers. You first choose exactly which slice of the clip to paste, and then you decide where you want to place it in the timeline, where it belongs. Tools like Premiere Pro will automatically calculate the missing fourth point.
Let's examine the most common types of three-point editing combinations in Premiere Pro and other tools. We'll also provide a clear, concise sentence that perfectly describes what each three-point combination does.
Types of three-point editing:
1. SI + SO + TI
"Use this part of the clip and start it here on the timeline."
NOTE: The duration of the clip comes from the source slice.
2. SI + TI + TO
"Start from this moment in the clip and make it fit this window on the timeline."
NOTE: Premiere Pro and similar tools will trim the source to match the timeline duration.
3. TI + TO + SI
"I have a hole here on the timeline. Fill it starting from this point in the source."
NOTE: This is useful for back-timed inserts, such as matching a hit.
Three-point editing has been a broadcast staple for decades because it's repeatable, precise, and fast, especially in large projects with extensive B-roll and voiceovers.
When Should You Use Three-Point Editing?
Here are the most common scenarios where three-point editing is useful.
- Lining up B-roll with voiceovers or music: Mark the exact word or beat on the timeline, then drop perfectly trimmed shots to those points.
- Replacing placeholders without breaking timing: Keep your sequence timing intact while you swap in final video selections.
- Editing interviews (cutting dead space): Mark the usable section on the source, target the dead spots in the sequence, and overwrite with ease.
- Fast-cut montage sequences: Mark clip durations on the timeline beforehand and fill with one keystroke per shot.
- Pin-point SFX on action marks: Set the sound file to land exactly on a door slam or a punch.
Pro tip: Three-point editing shines when you know the timing you want exactly. If you're still exploring, you can play around with the structure first and tighten it all up with three-point edits later on.
How to Use Three-Point Editing in Premiere Pro
Premiere Pro is one of the most popular professional video editing tools, and today, we'll teach you how to use its three-point editing features.
- Download and install Premiere Pro on your desktop or laptop.
- Create a new project and import as many clips as you want. Arrange them in the timeline as you see fit.
- Before you import a video, find it in the media tab in Premiere Pro, and then find the frame where you want the clip to begin. Click on the { icon to set the in point.
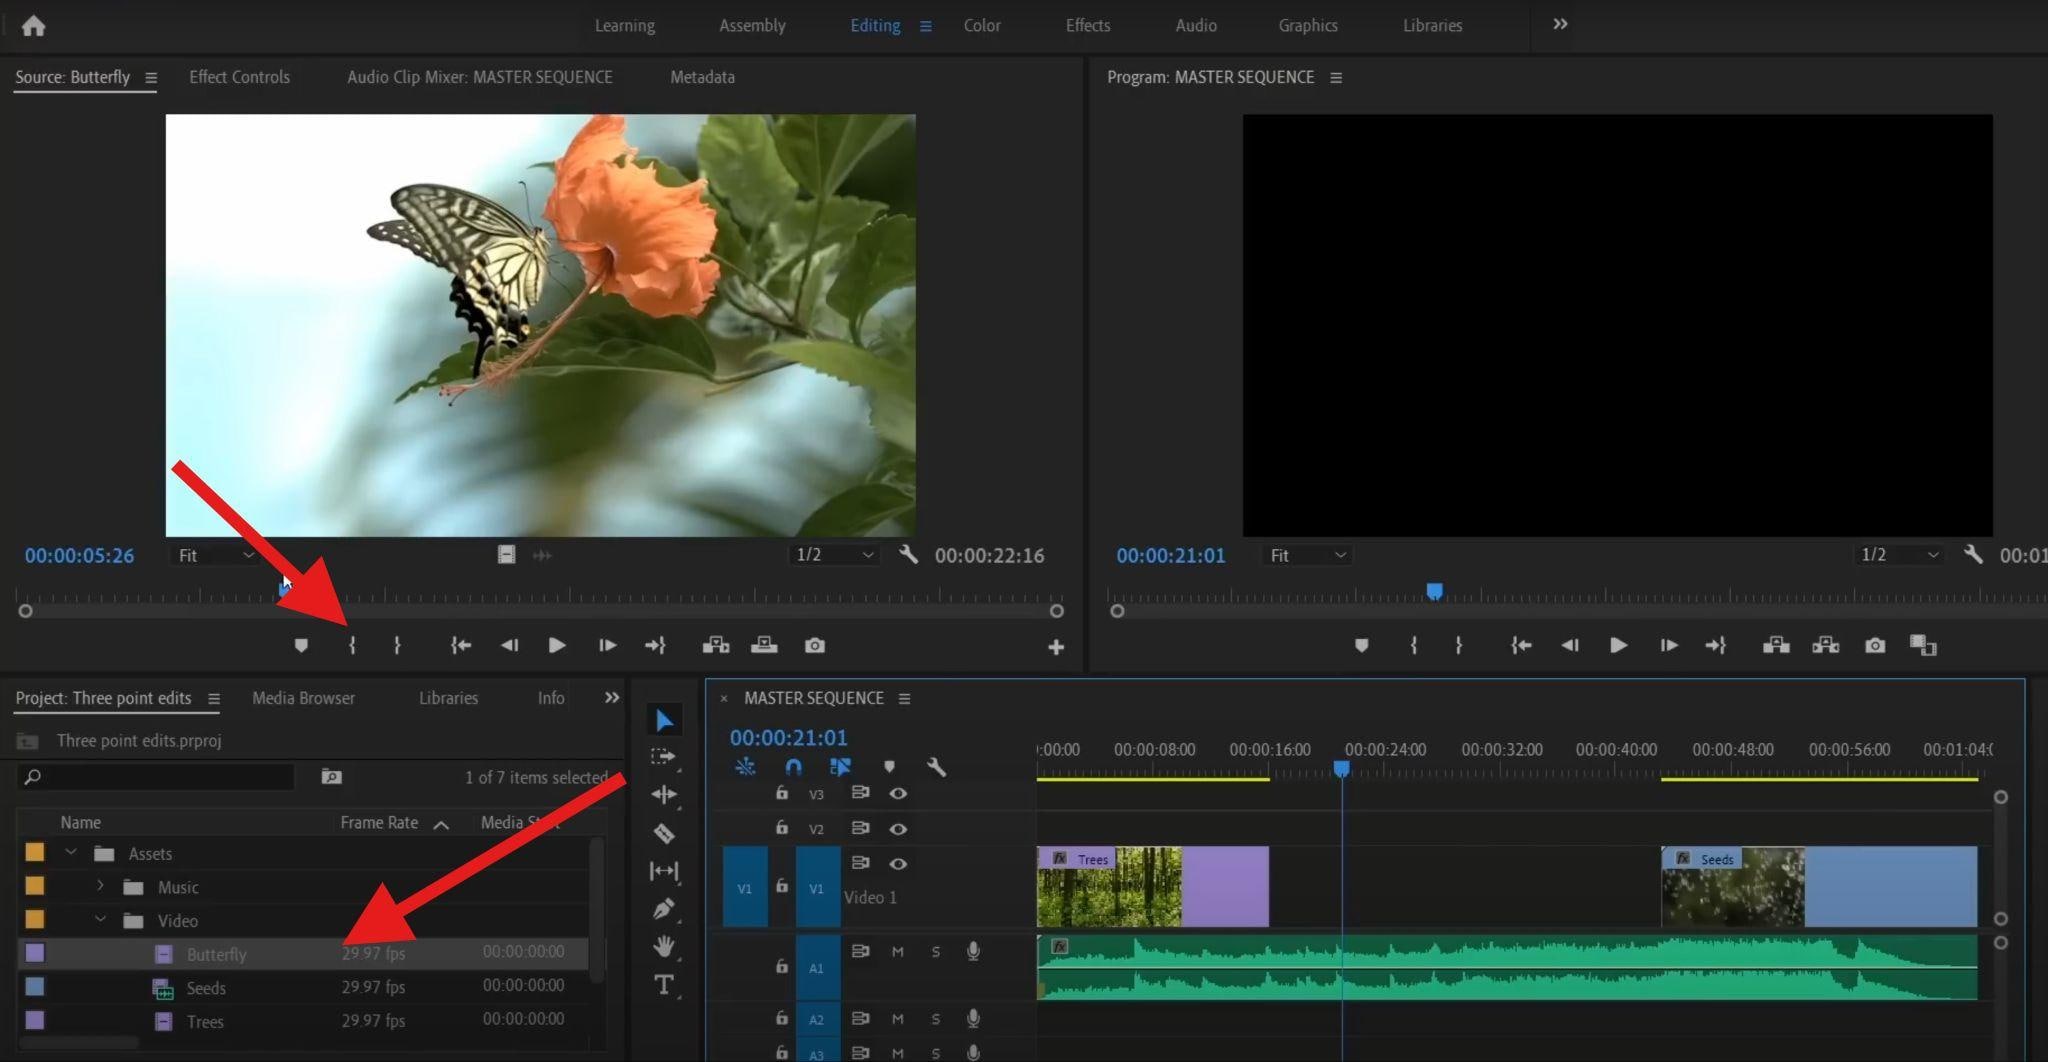
- Now, find a suitable last frame of the clip and click the } button to set the endpoint.

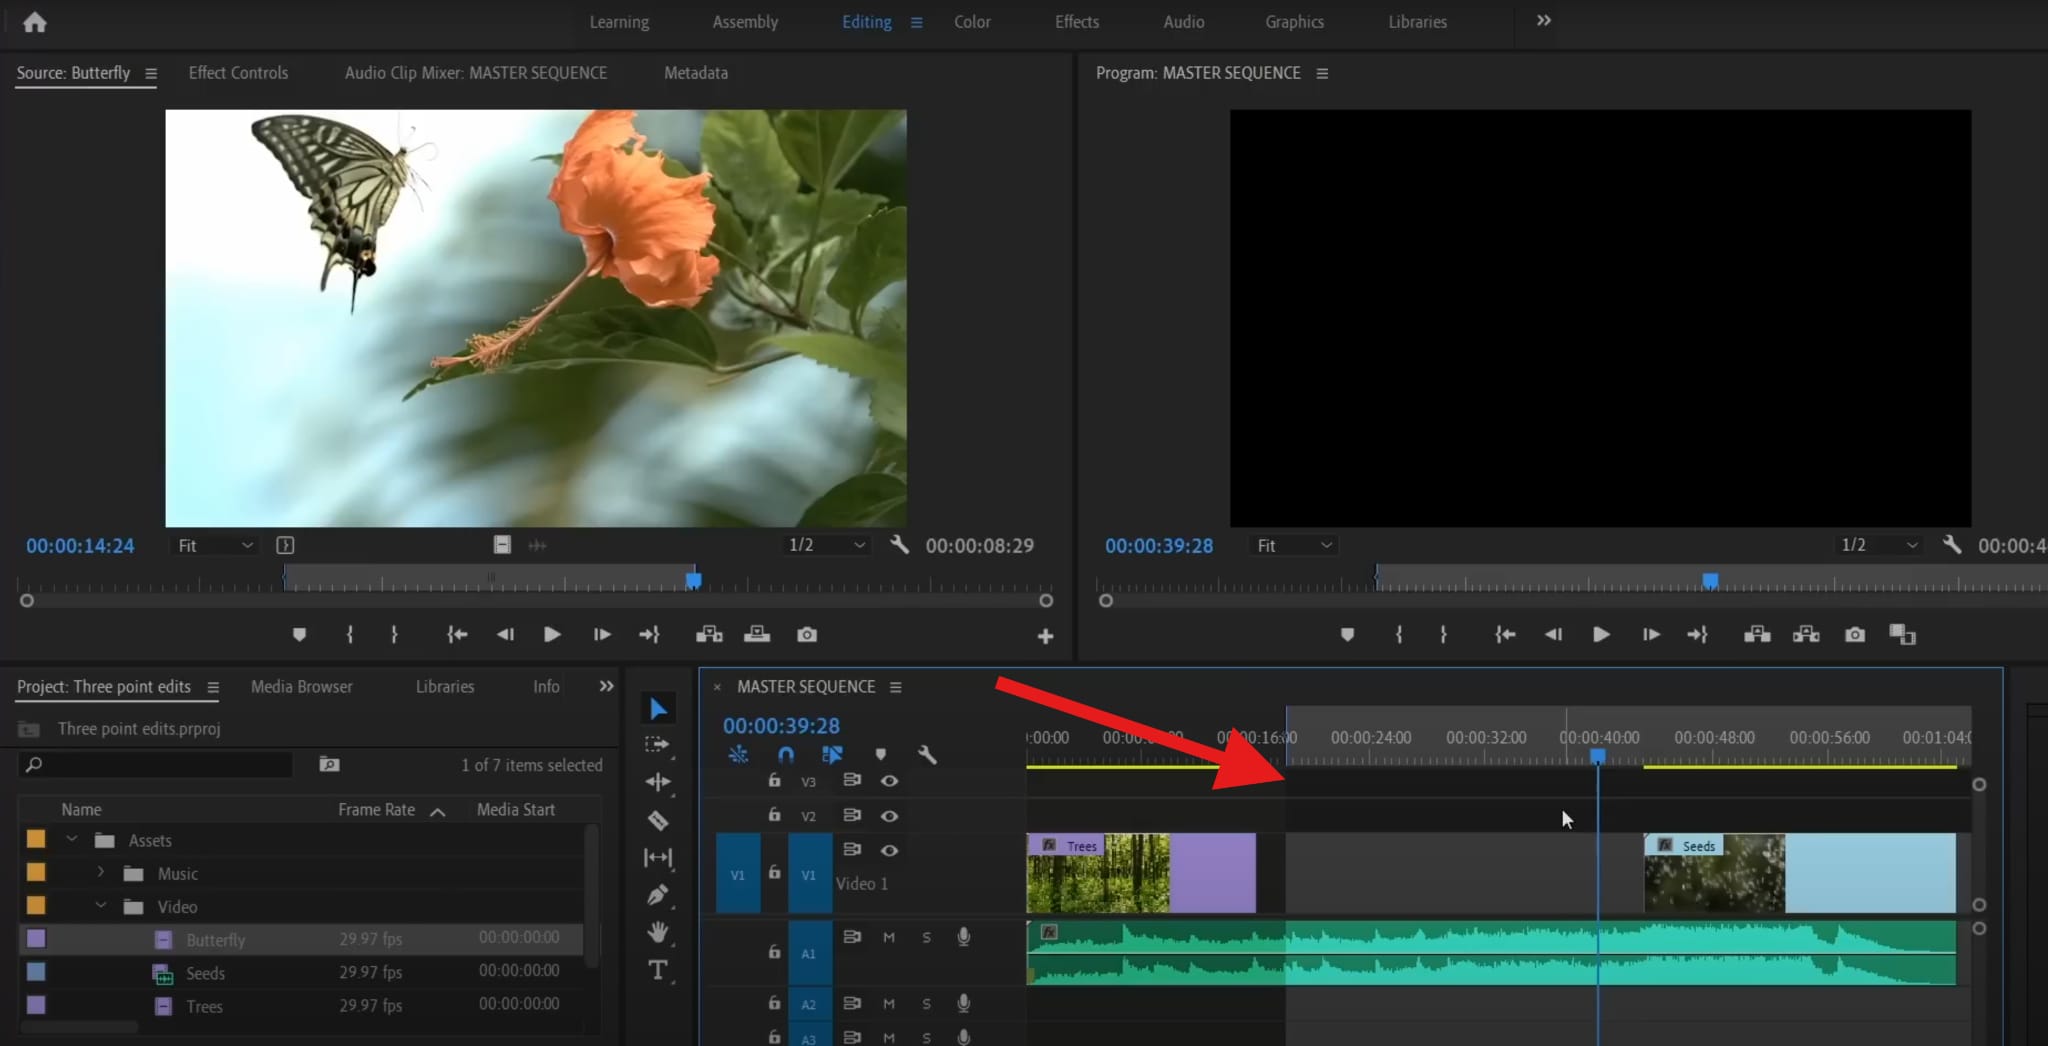
- Those were the SI and SO points. Now, we need a TI point. To do that, place the playhead on the timeline and type the letter I on your keyboard.
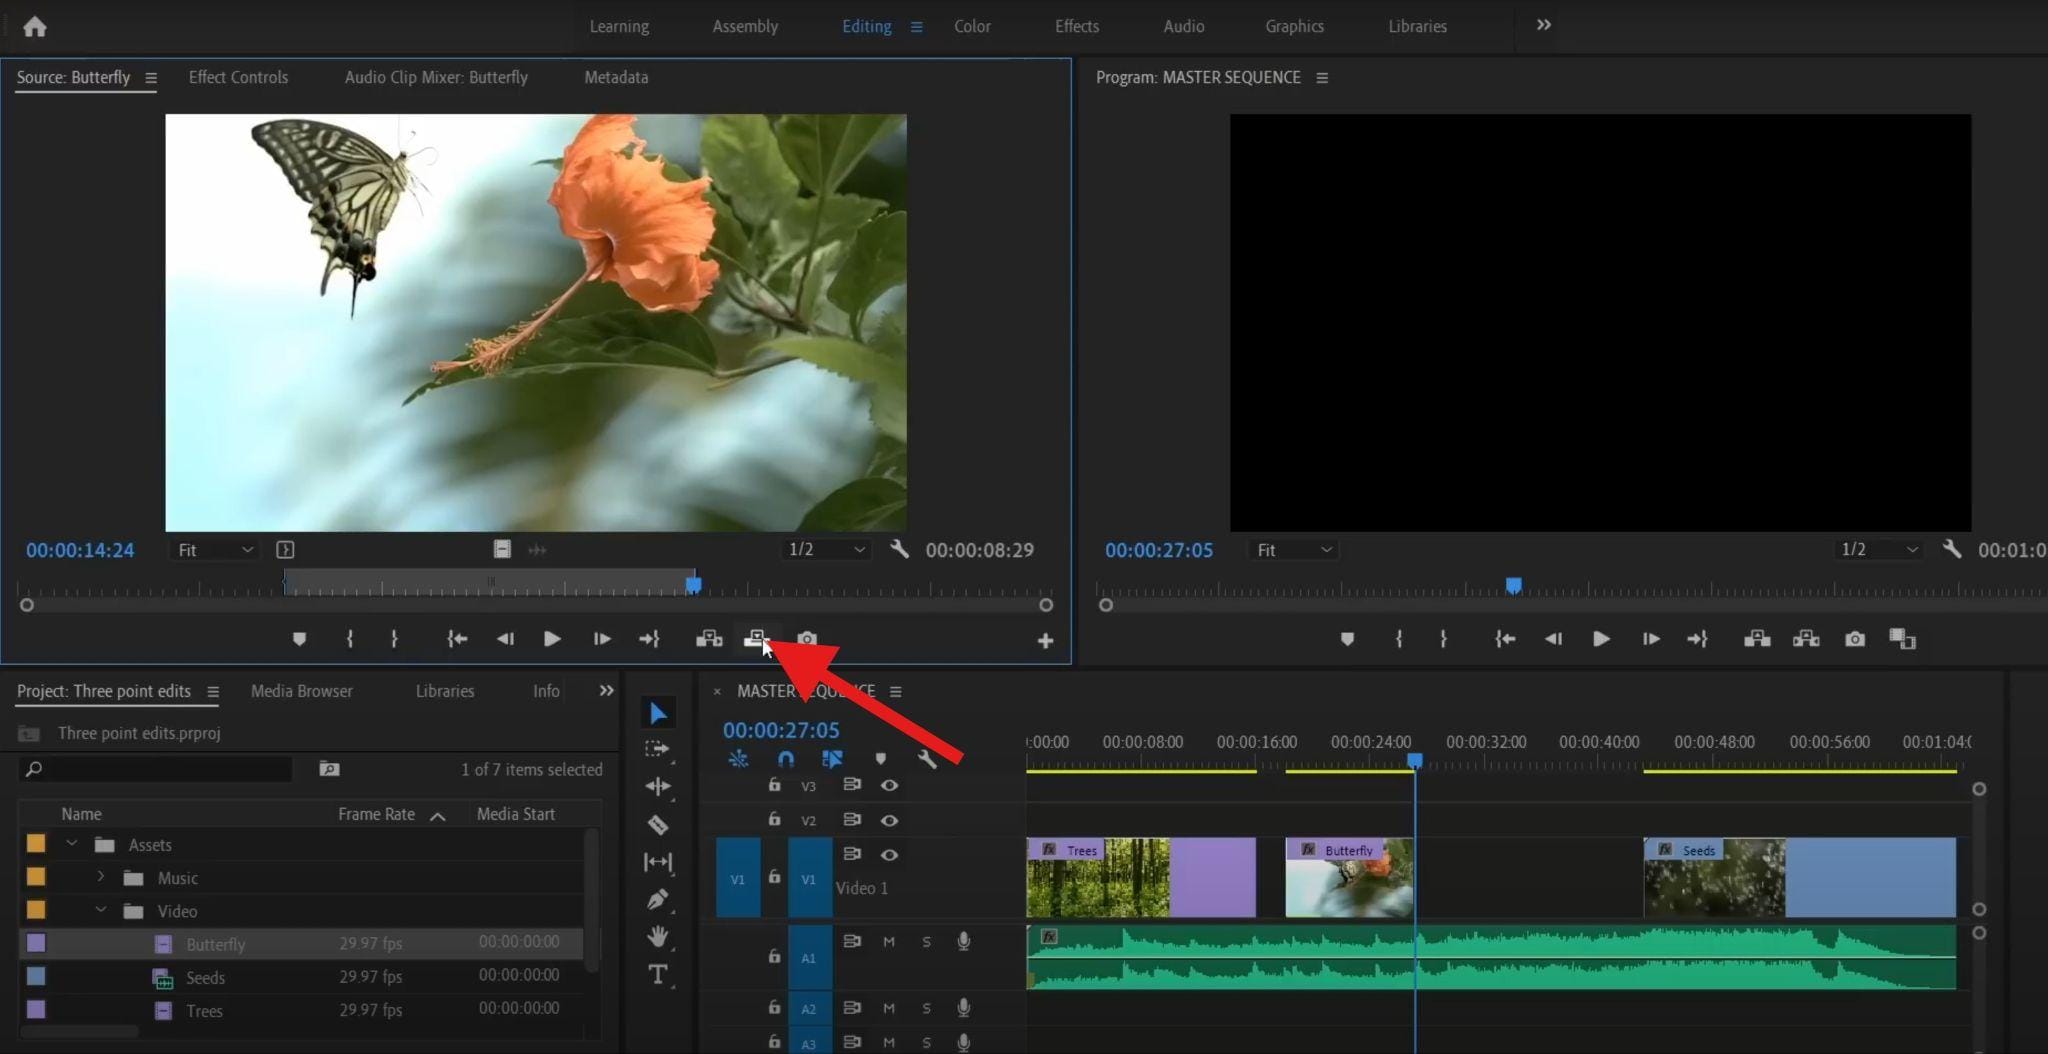
- Finally, click on the Overwrite button, and this will insert the clip with two source points (SI and SO) directly at the timeline point (TI).
That's three-point editing in a nutshell. Learn other video editing techniques for Premiere Pro like J-cut and L-cut, the Premiere Pro razor tool, track select tool, and more.
Pros and Cons of Premiere Pro Three-Point Editing
The above steps have clearly presented how to apply three-point editing in Premiere Pro. Here are the pros and cons of using Premiere Pro to add ins and outs for footage for users.
Why Filmora Is a Smarter Alternative to Premiere Pro
Premiere's three-point method is powerful and can exactly tell you how long you need for the footage, which excels over other video editors.
But many people in the niche, especially YouTubers, marketers, and short-form content creators, want to work efficiently without spending hours on training. That's where Wondershare Filmora comes in. This tool gives you the same type of control you get with Premiere Pro, but there are far fewer moving parts.
Filmora offers a feature to Mark in-points and out-points, which is almost the same as Premiere Pro's three-point editing. But there is no need to switch between the source monitor and the timeline, and it provides a real-time preview while adjusting points.
In addition, it offers numerous AI features and easy drag-and-drop simplicity with auto-snapping so clips stick together cleanly. You gain access to pre-built templates for intros, titles, lower thirds, and more, and the platform also offers cross-platform support, with apps available for Windows, Mac, iOS, and Android.
 secure download

How to Make In-Points and Out-Points in Filmora?
Let's take a look at how Filmora works. Follow the steps below to master three-point editing in Filmora.
- Download and install Filmora on your Windows or Mac device.
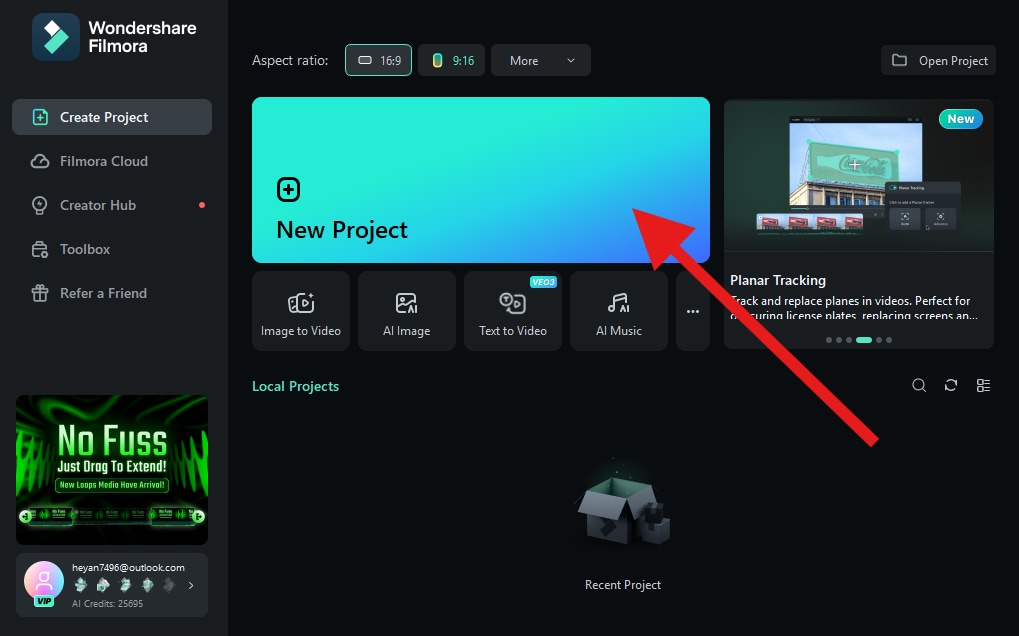
- Open Filmora and create a New Project.
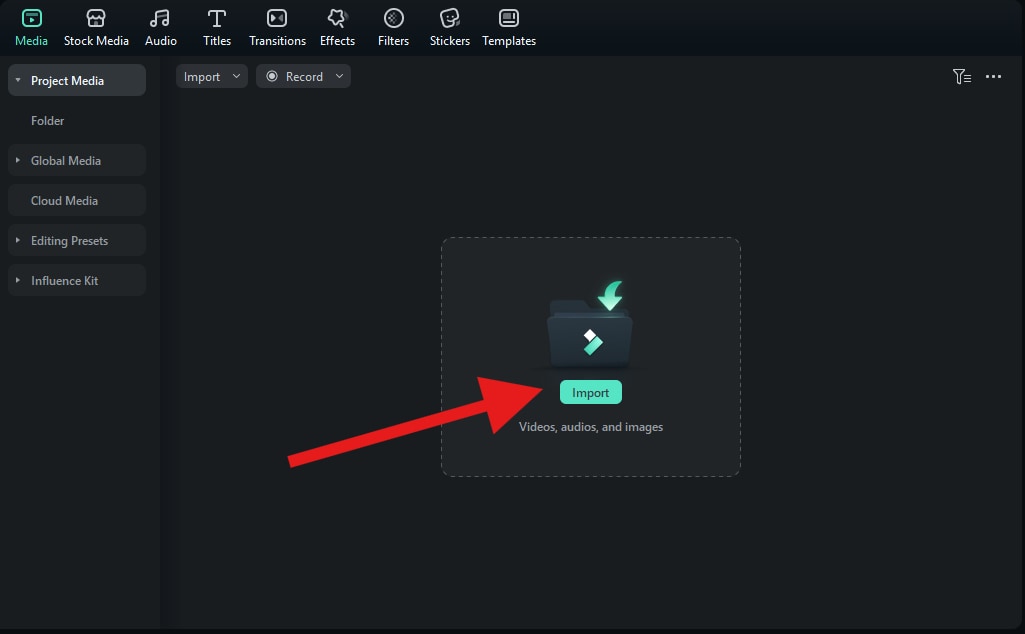
- Click to Import videos, photos, or audio tracks.
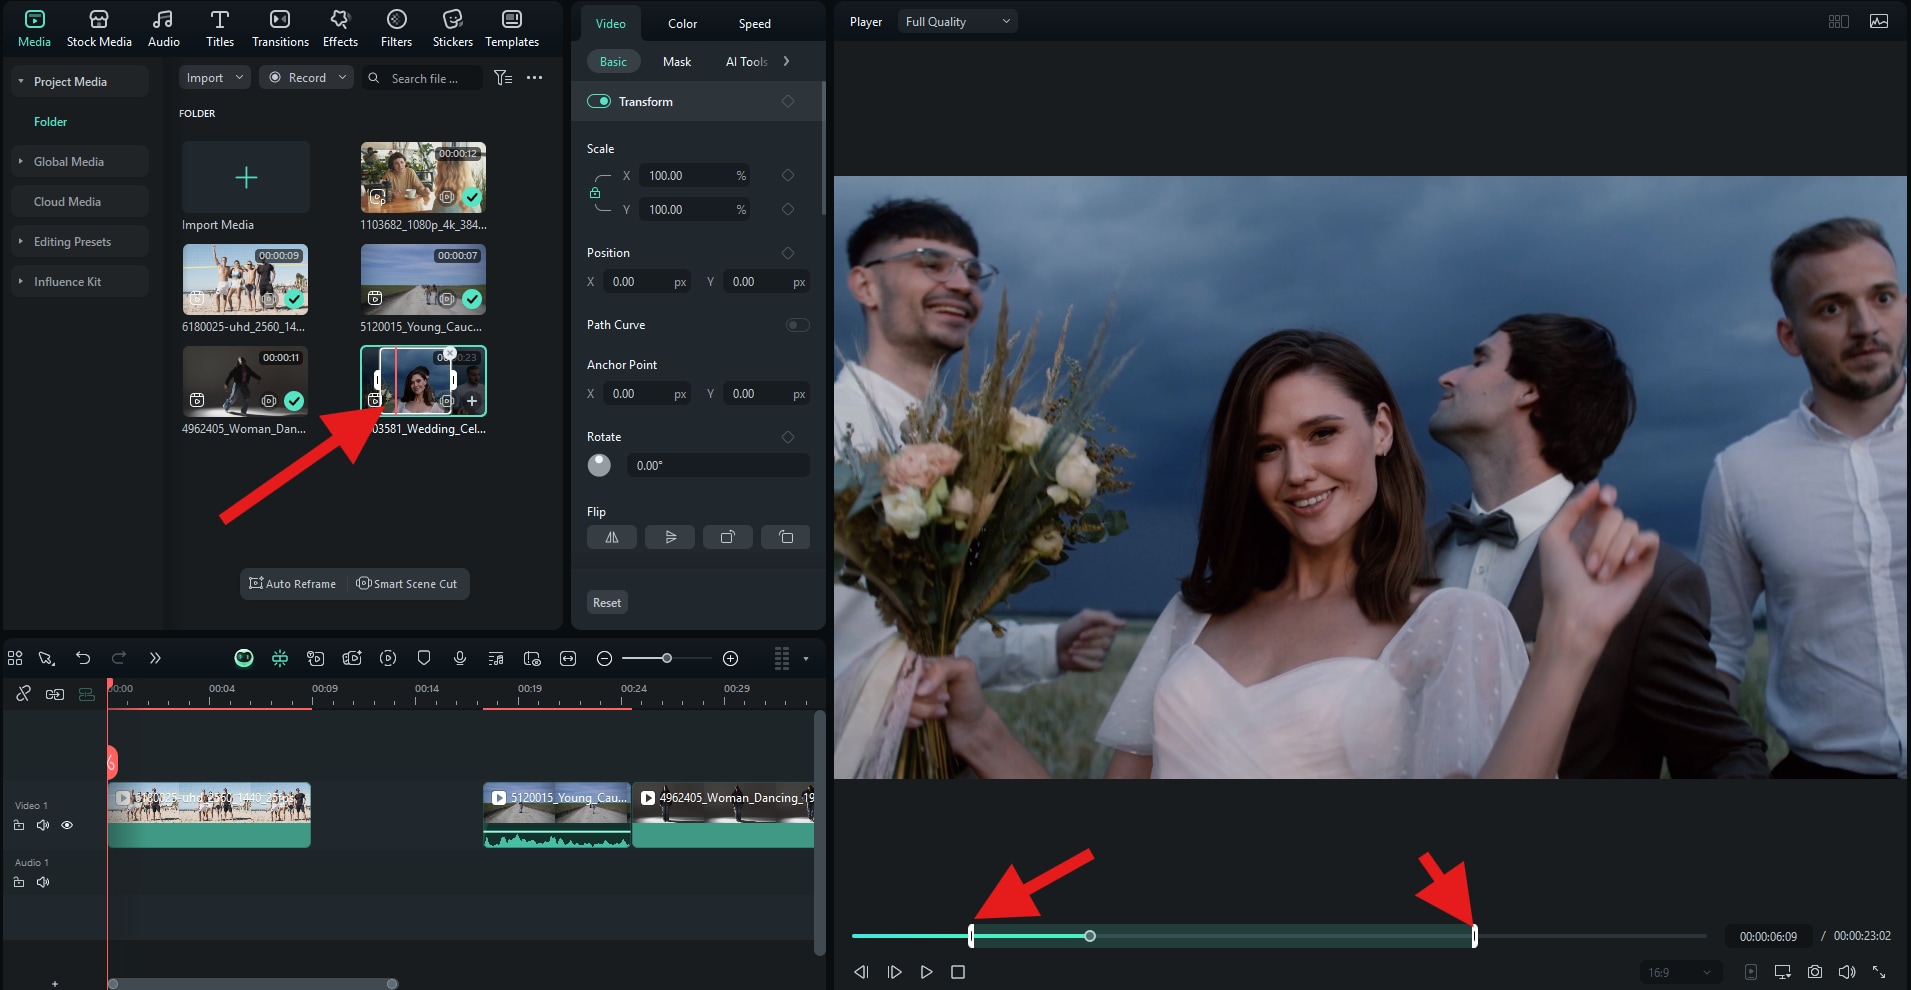
- Drag some clips to the timeline and start working on honing your video editing skills. Before you drag the clip, you can double-click on it in the Media tab, and then find the in point in the clip and type I on your keyboard. Then, find the out point and type O on your keyboard. Those are SI and SO points.
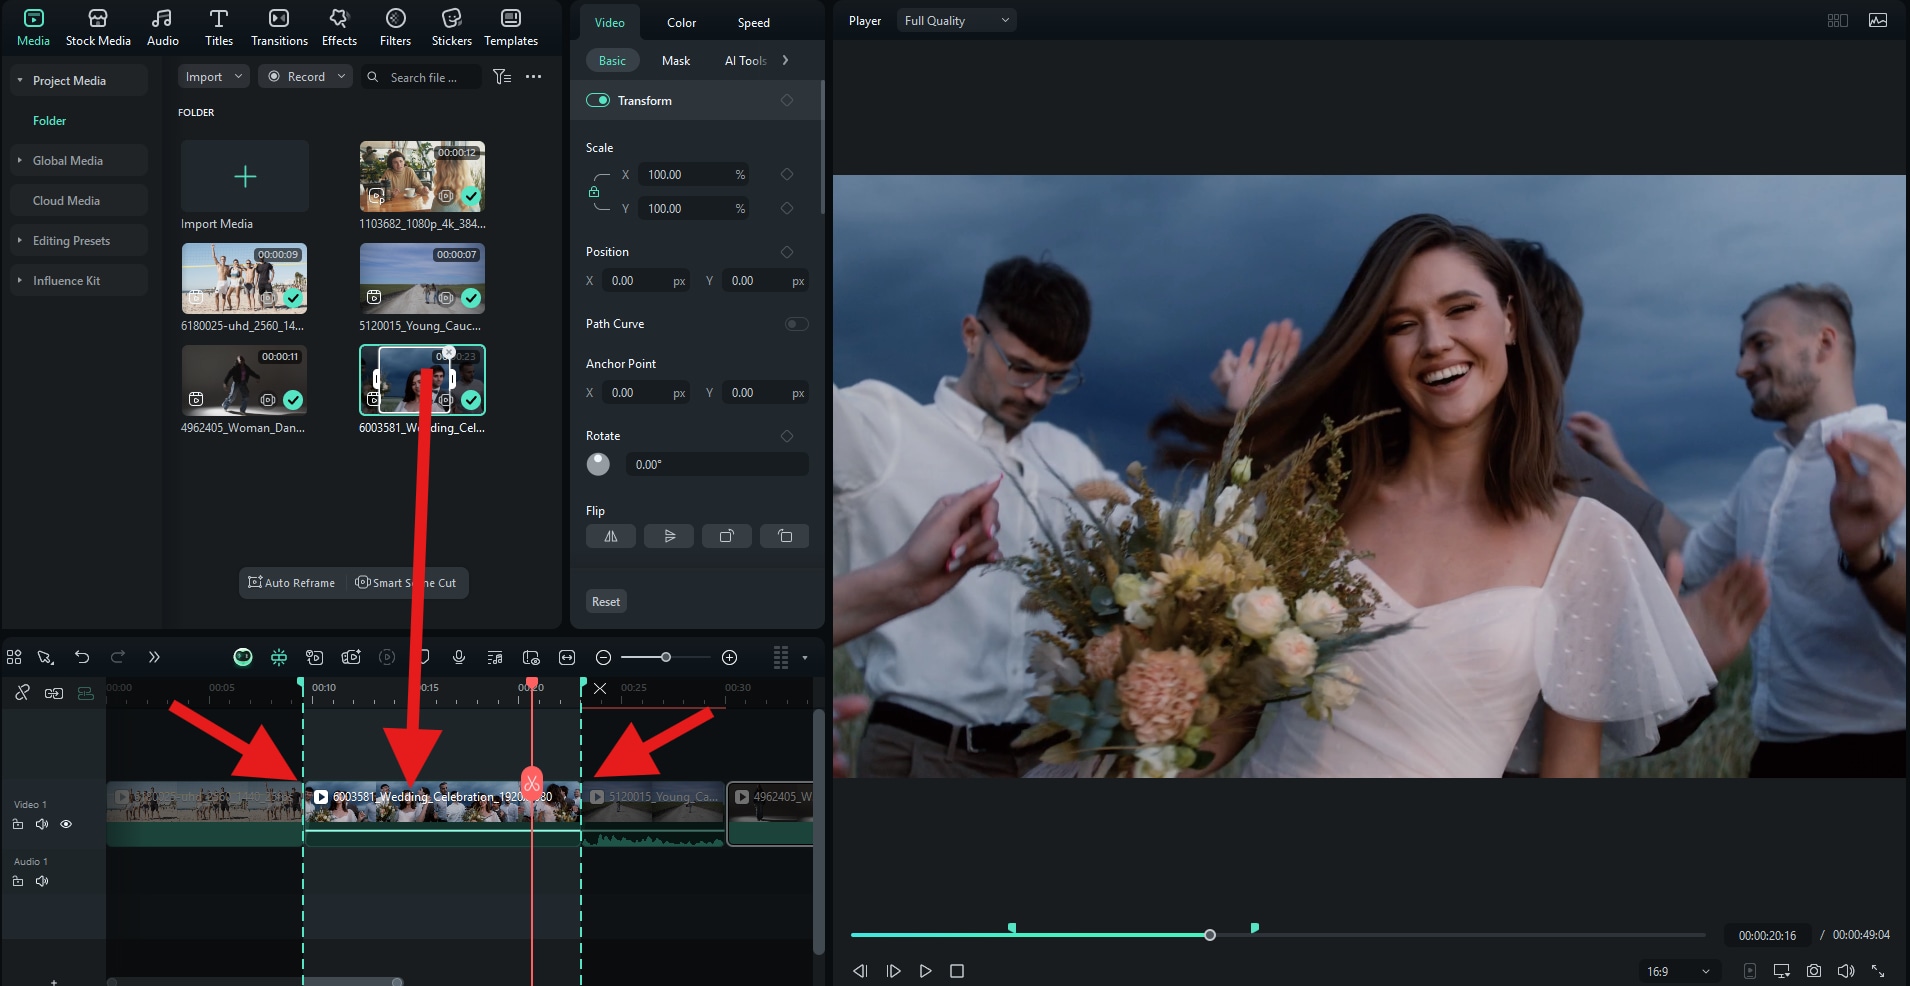
- To set the points on the timeline, follow the same steps as with source points. Find the first point and type the letter "I", then locate the last point and type the letter "O" on your keyboard. Those are TI and TO points. After that, you can drag the clip to fill the void.
As you can see, Filmora is more or less the same as Premiere Pro when it comes to three-point editing, but if you want to continue with your video editing journey, you will have a far easier road if you choose Filmora.
Final Takeaway
Three-point editing is very important because it gives you repeatable precision when timing truly counts. Premiere Pro handles it brilliantly once you're comfortable with selecting In and Out points and choosing the right three-point combo. However, as you have seen, Filmora offers a faster, simpler path to the same outcome, especially for creators who publish often and value momentum over manual setups.
Download Filmora today and start editing smarter, faster, and with more creative freedom. By the way, Filmora is also available as a mobile app for Android and iOS.
secure download 