
 100% Security Verified | No Subscription Required | No Malware


 ChatGPT
 Perplexity
 Gemini
 Claude
 Grok
Grok
Have you ever found yourself in a situation where you feel like your edits are clean, but your scenes still feel a bit stiff? If this happens to you, please note that it's usually an audio timing issue, rather than a problem with the video. The difference between a video being "fine" and having it "flow beautifully" often comes down to how you arrange audio and video when cutting. And, that's exactly what J-cuts and L-cuts do.
If you are curious about how to perform J-cuts and L-cuts in Premiere Pro, this article is here for you.
Learn other video editing techniques for Premiere Pro, like the track select tool, the Premiere Pro razor tool, three-point editing, and more.
In this article
The Definition of J Cuts and L Cuts
Let's start with the basic definitions.
What's a J Cut?
J Cut is a type of cut where the audio starts first, followed by the new scene. Imagine hearing the next line of dialogue before we see the person speaking. In the video editing timeline, the incoming audio clip extends to the left under the previous scene, forming a shape that resembles the letter J. That's why it's called a J-cut.
What's an L Cut?
L Cut is a type of editing where the audio continues after the video has already cut to a different scene. For example, we cut away from Speaker A to Speaker B's reaction, but we still hear A finishing their line. On the timeline, the outgoing audio extends right under the next clip, creating a shape that resembles the letter L.
These video editing techniques are important because your eyes often follow your ears in real conversations. The audio that precedes or follows a certain scene can create a seamless transition between shots, preserving the emotional impact of the scene. It also removes those standard clip-to-clip cuts that can feel a bit amateurish.
If you are new to Premiere Pro and looking for tutorials to make J-cuts and L-cuts in it, let's dive into the steps.
How to Make J Cuts and L Cuts in Premiere Pro (Step-by-Step)?
- Purchase, download, and install Premiere Pro on your desktop or laptop device.
- Open it, create a new project, and import a clip (or clips) that have audio and video linked together. Arrange them in the timeline as you see fit.
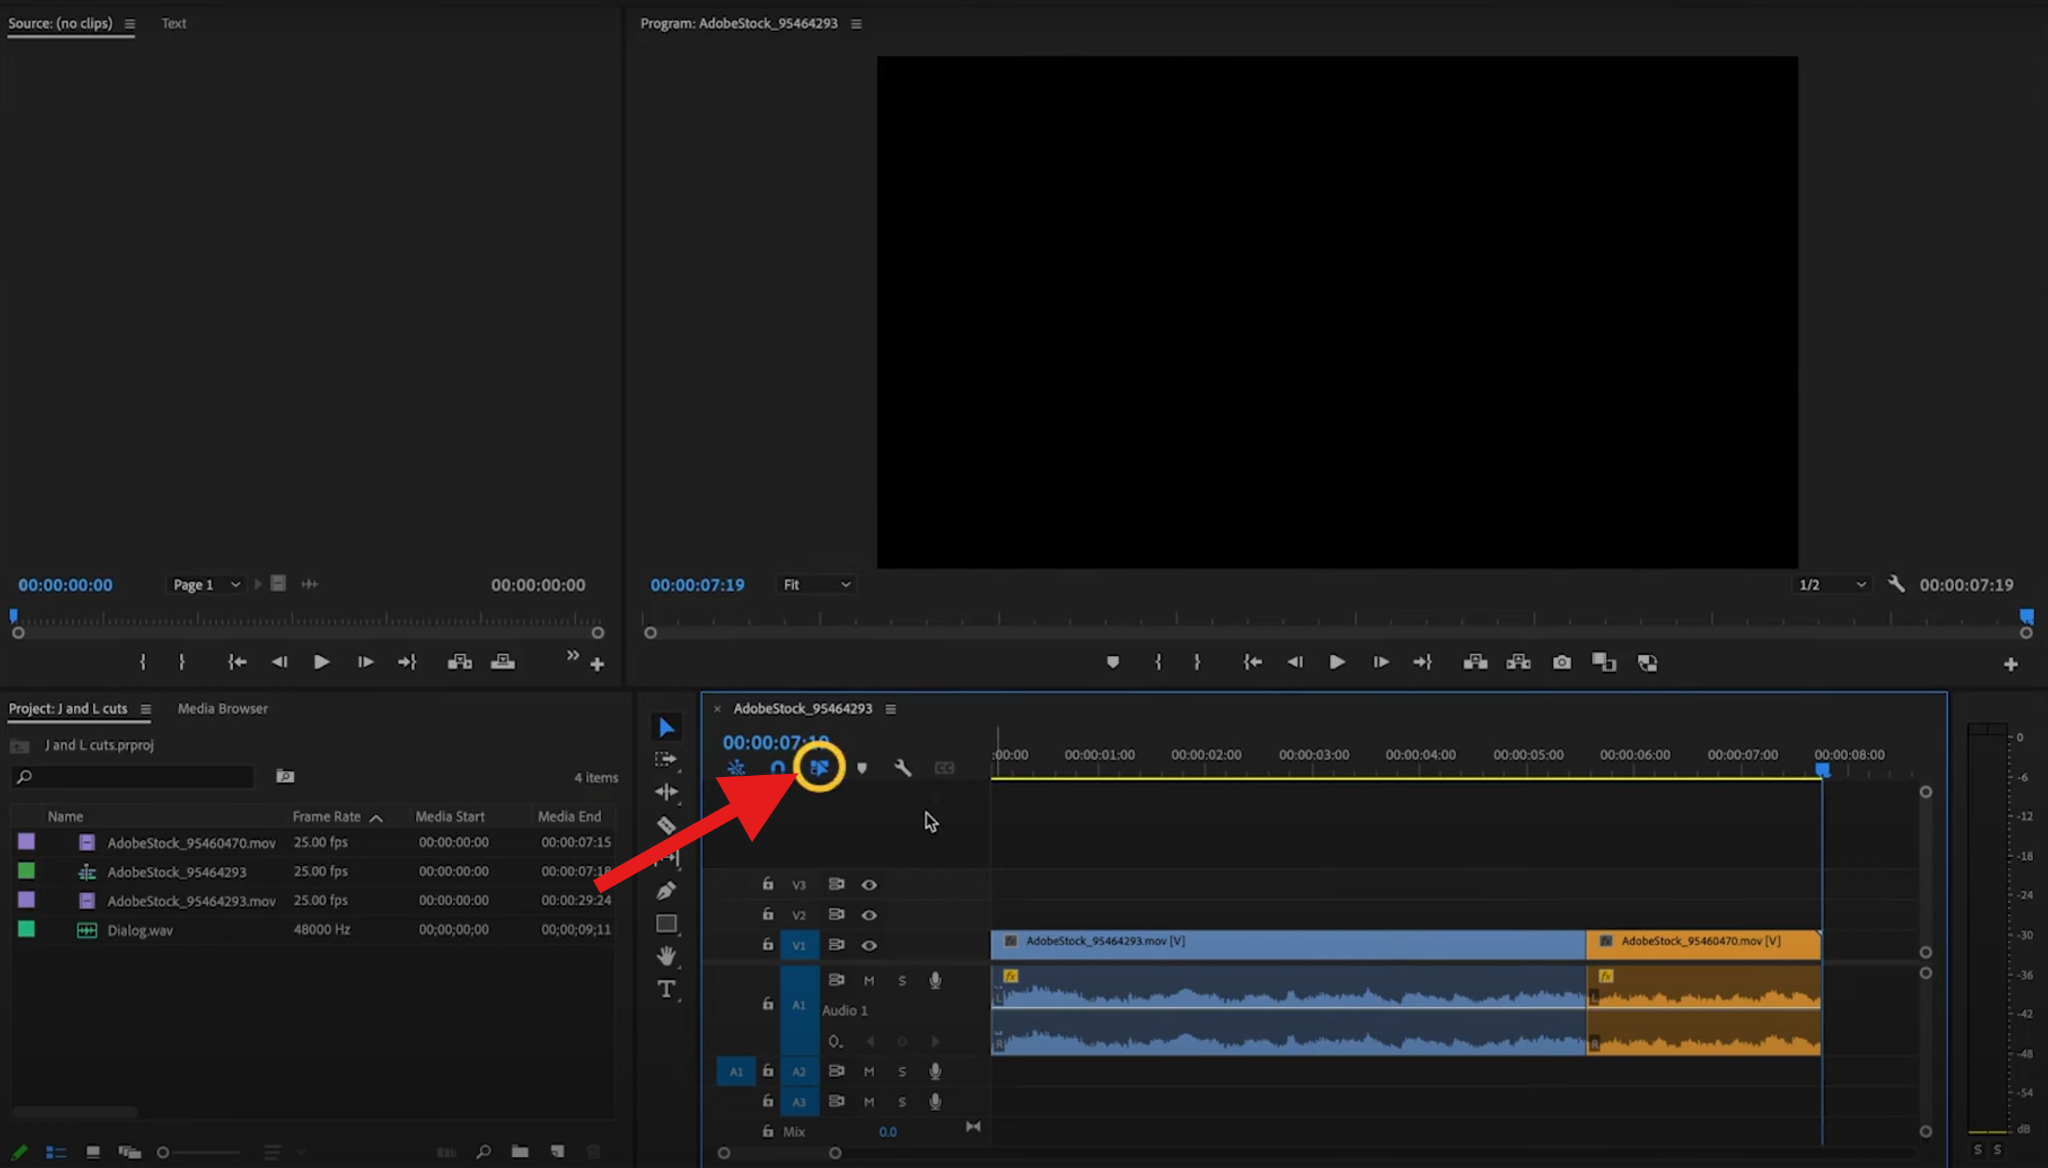
- Now, click on the Link Selection button to deselect it. This will allow you to edit video and audio files separately.
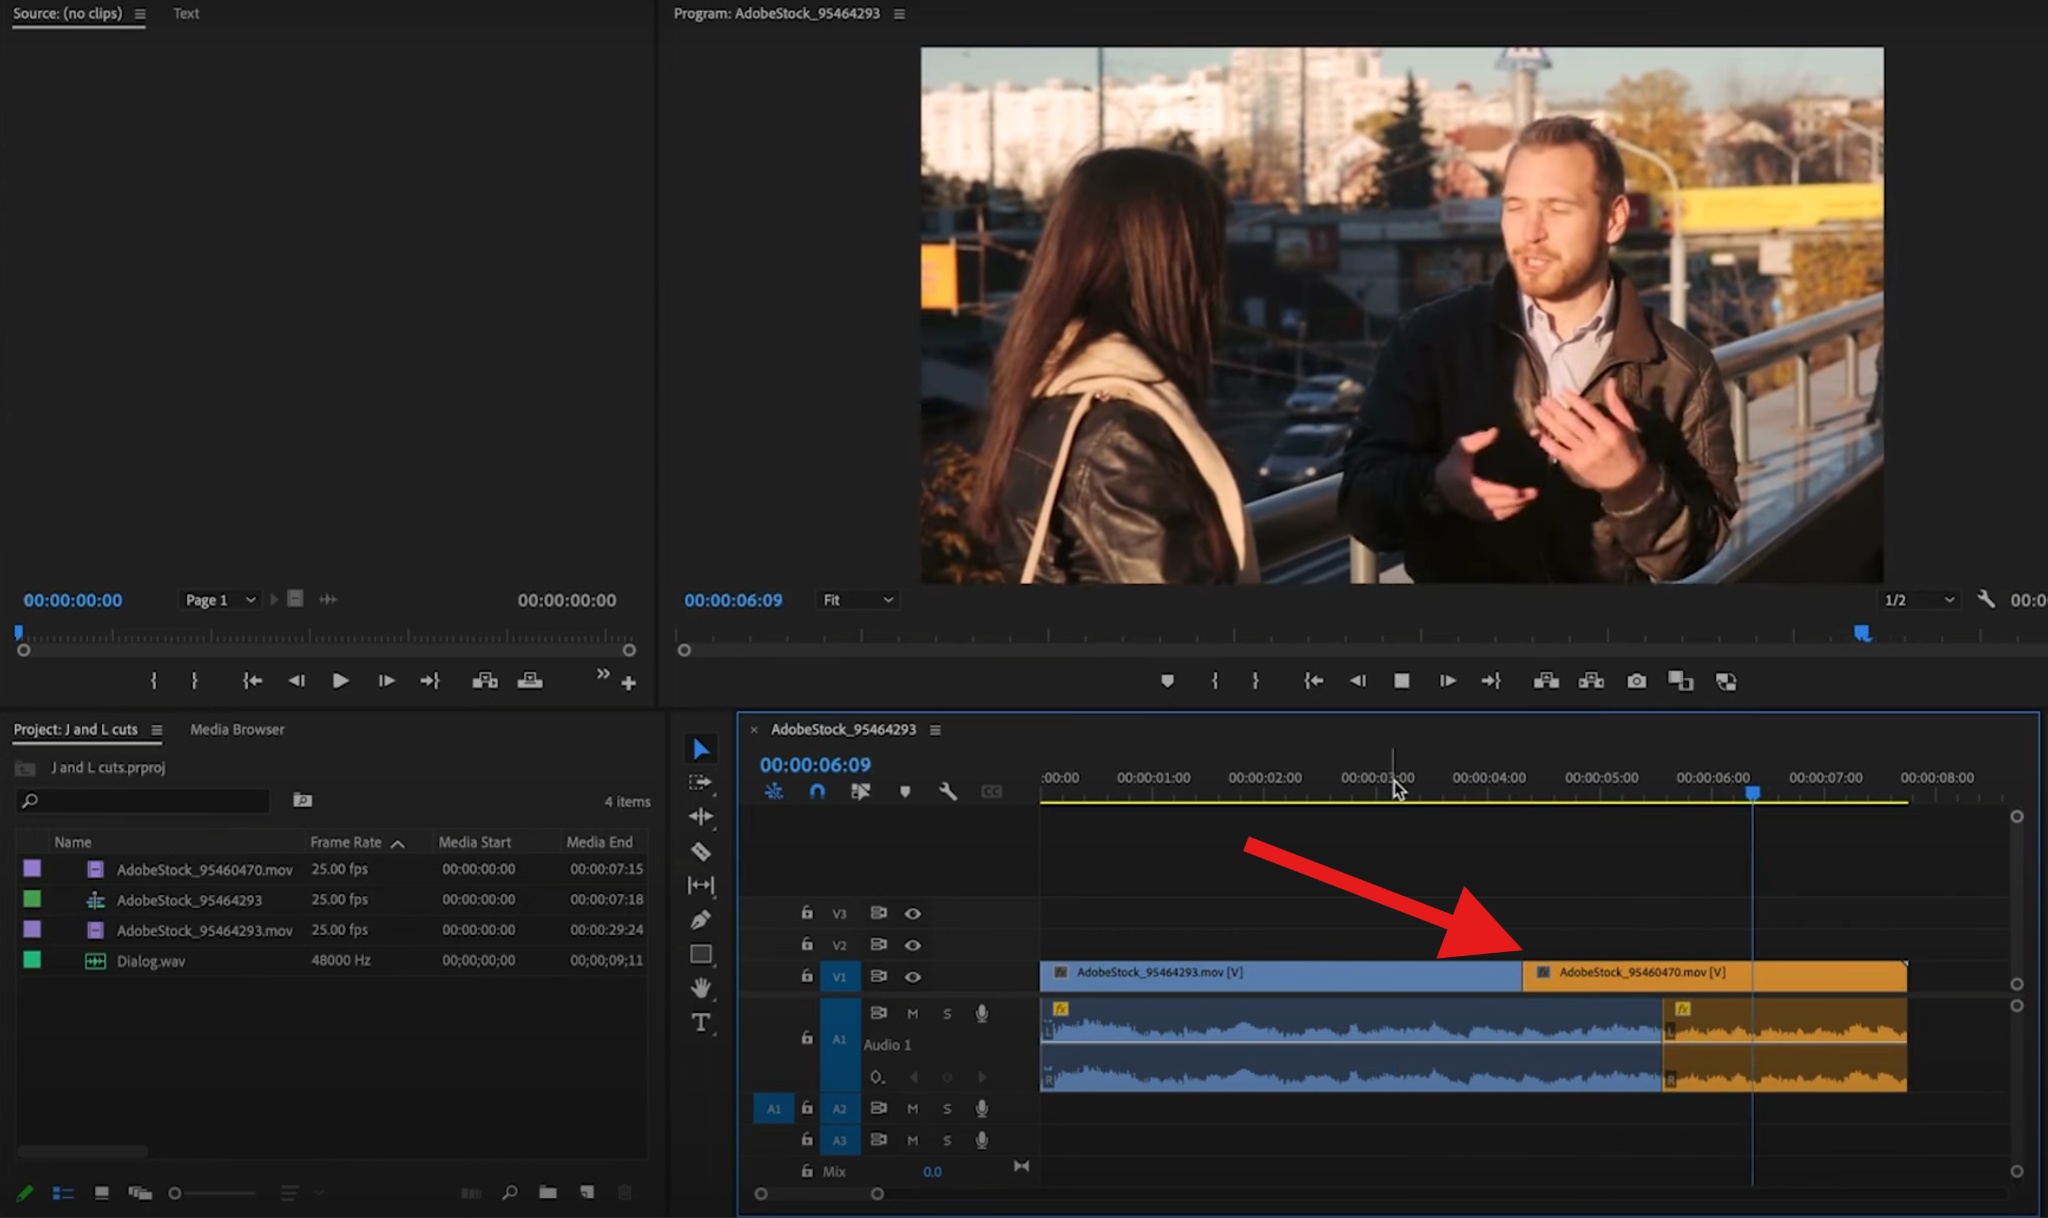
- To create an L cut, move the video from the next scene to the left so that it starts while the audio of the first scene is still playing.
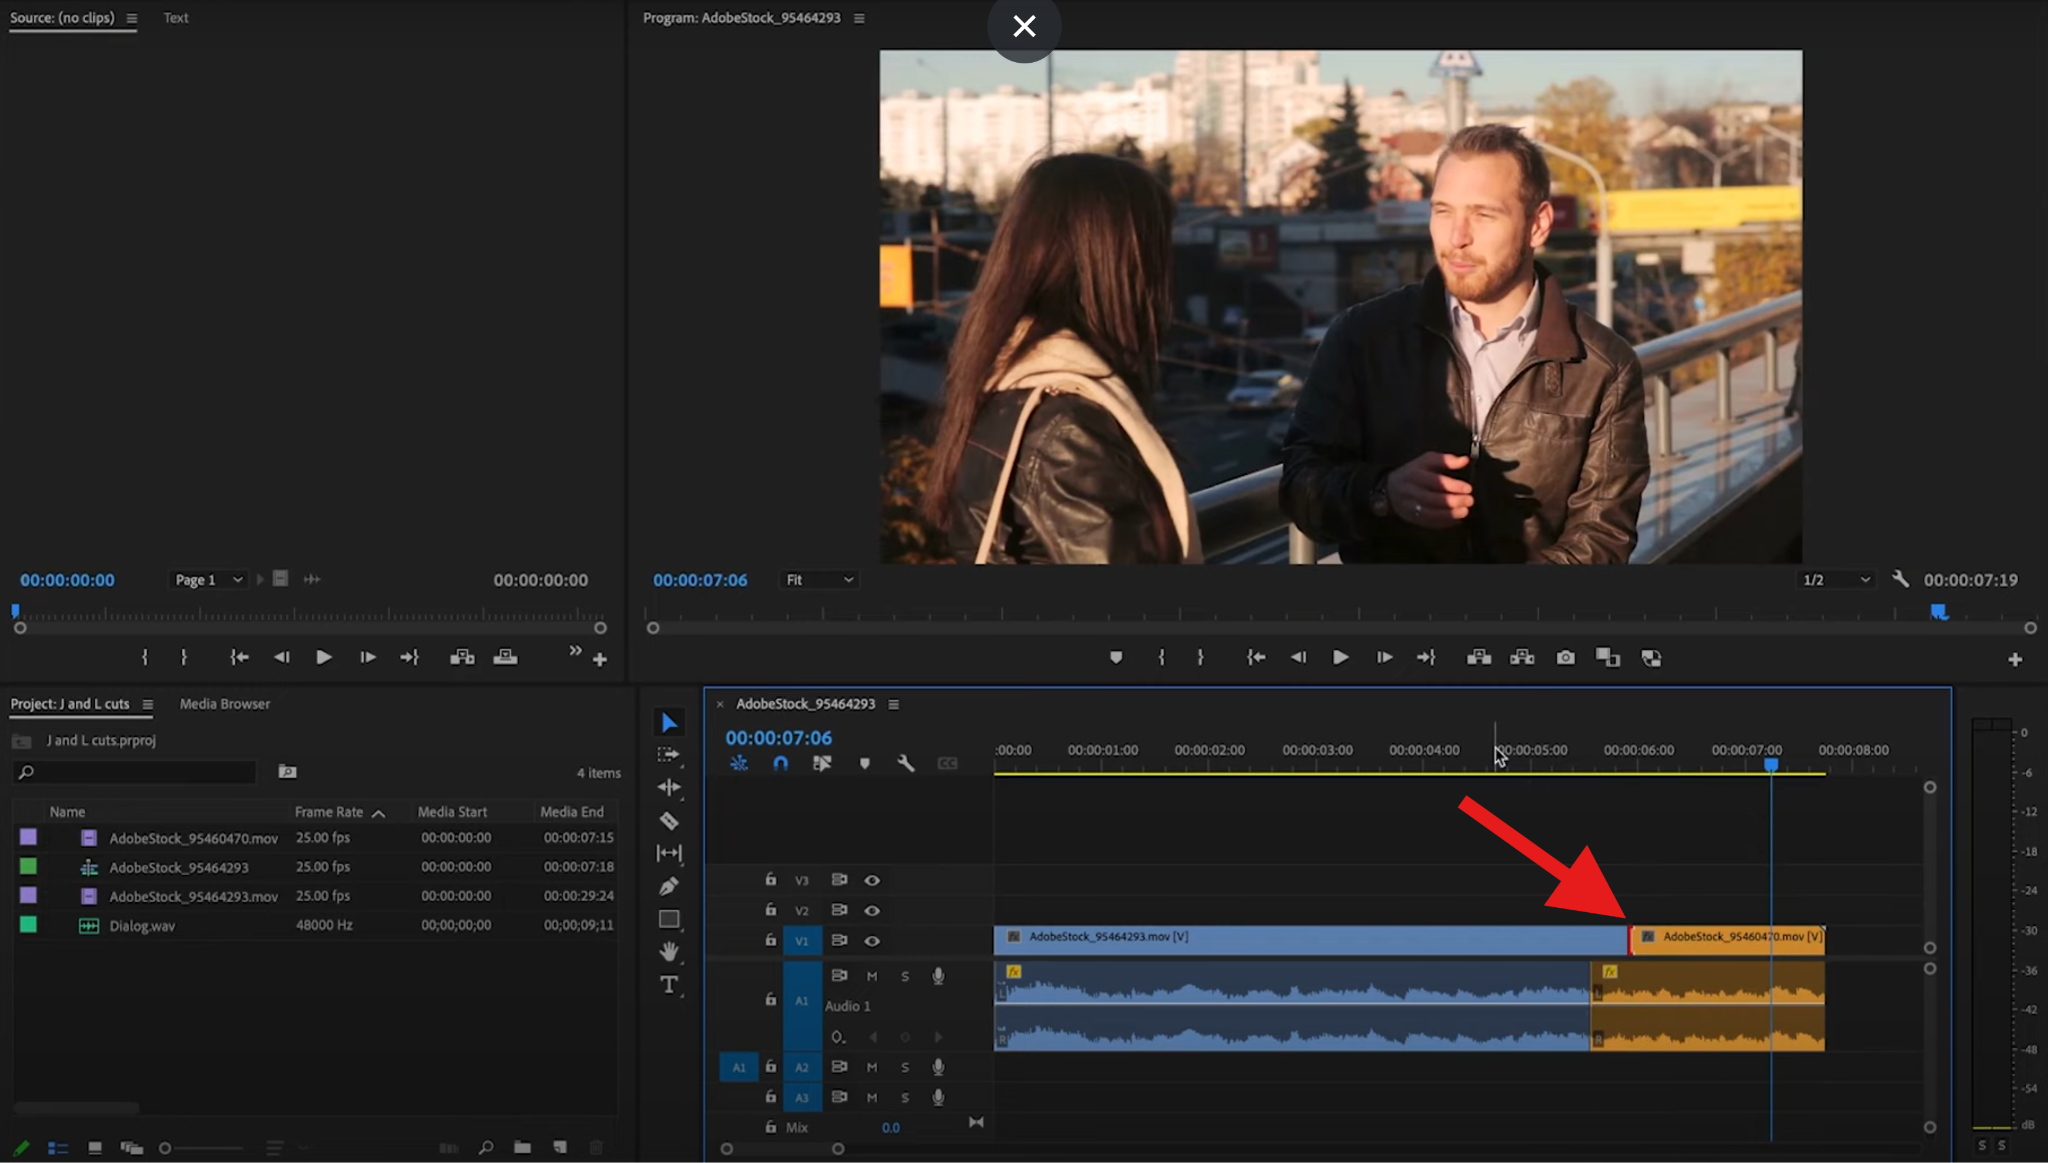
- Doing the opposite, or moving the beginning of the second clip to the right and extending the duration of the first clip so that it goes over the audio from the second clip, will create a J cut.
An Easier Alternative: Making J Cuts and L Cuts in Filmora
As we all know, Premiere Pro is a powerful and comprehensive video editor, which allows you to perform professional film editing techniques like J-cuts and L-cuts, jump cuts, match cuts, and more. But you need to spend time learning about track targeting, linking, unlinking, and multiple trim modes. Additionally, the expensive subscription costs quickly add up. If you want to make J cuts and L cuts more easily, consider giving Wondershare Filmora a try.
 secure download

It makes these edits feel very lightweight. Here's a quick comparison table.
| Comparisons | Adobe Premiere Pro | Filmora |
| Ease of Use | Deep toolset; steeper learning curve for linked/unlinked trims and trim modes. | Drag-to-trim behavior that just works; fewer modes to think about. |
| Hardware Needs | Heavier on CPU/GPU, especially with big projects and effects. | Generally lighter; runs smoothly on modest machines. |
| Timeline Clarity | Very customizable, but it can get busy with targets, modes, and lanes. | Clean, magnetic timeline; easy to keep clips snug and in sync. |
| J/L Cut Workflow | Unlink or Alt/Option-select audio/video, ripple/rolling trims, manual crossfades. | Simplified split editing - split audio/video with one click, then drag to overlap. |
| Price | Subscription. | More affordable plans; strong value for creators. |
| Best For | Professionals, complex projects, Adobe ecosystem users. | Creators who want fast, polished results with minimal setup. |
Why Filmora Makes J and L Cuts Easier?
Filmora is a simple, stress-free alternative to Premiere Pro. Take a look at the key advantages.
- No manual unlinking needed. Just treat audio edges directly when necessary.
- The drag-to-trim interface with waveform feedback makes it easy to see whether the audio leads or trails.
- The non-linear, magnetic timeline preserves sync issues by default. The magnetic behavior prevents those pesky tiny gaps.
- Filmora comes with built-in audio transitions (like gentle crossfades), and you can add them easily without worrying about keyframes.
- Filmora works on both PC (Windows and Mac) and mobile (Android and iOS).
In Filmora, J and L cuts feel like dragging puzzle pieces into place, rather than performing heart surgery with a scalpel. The point is that it's much easier.
How to Create J and L Cuts in Filmora (Step-by-Step)?
- Download and install Filmora on your PC or laptop.
secure download
- Open Filmora, create a new project, and import at least two videos with sound to your project. Then drag them to the timeline one after the other.
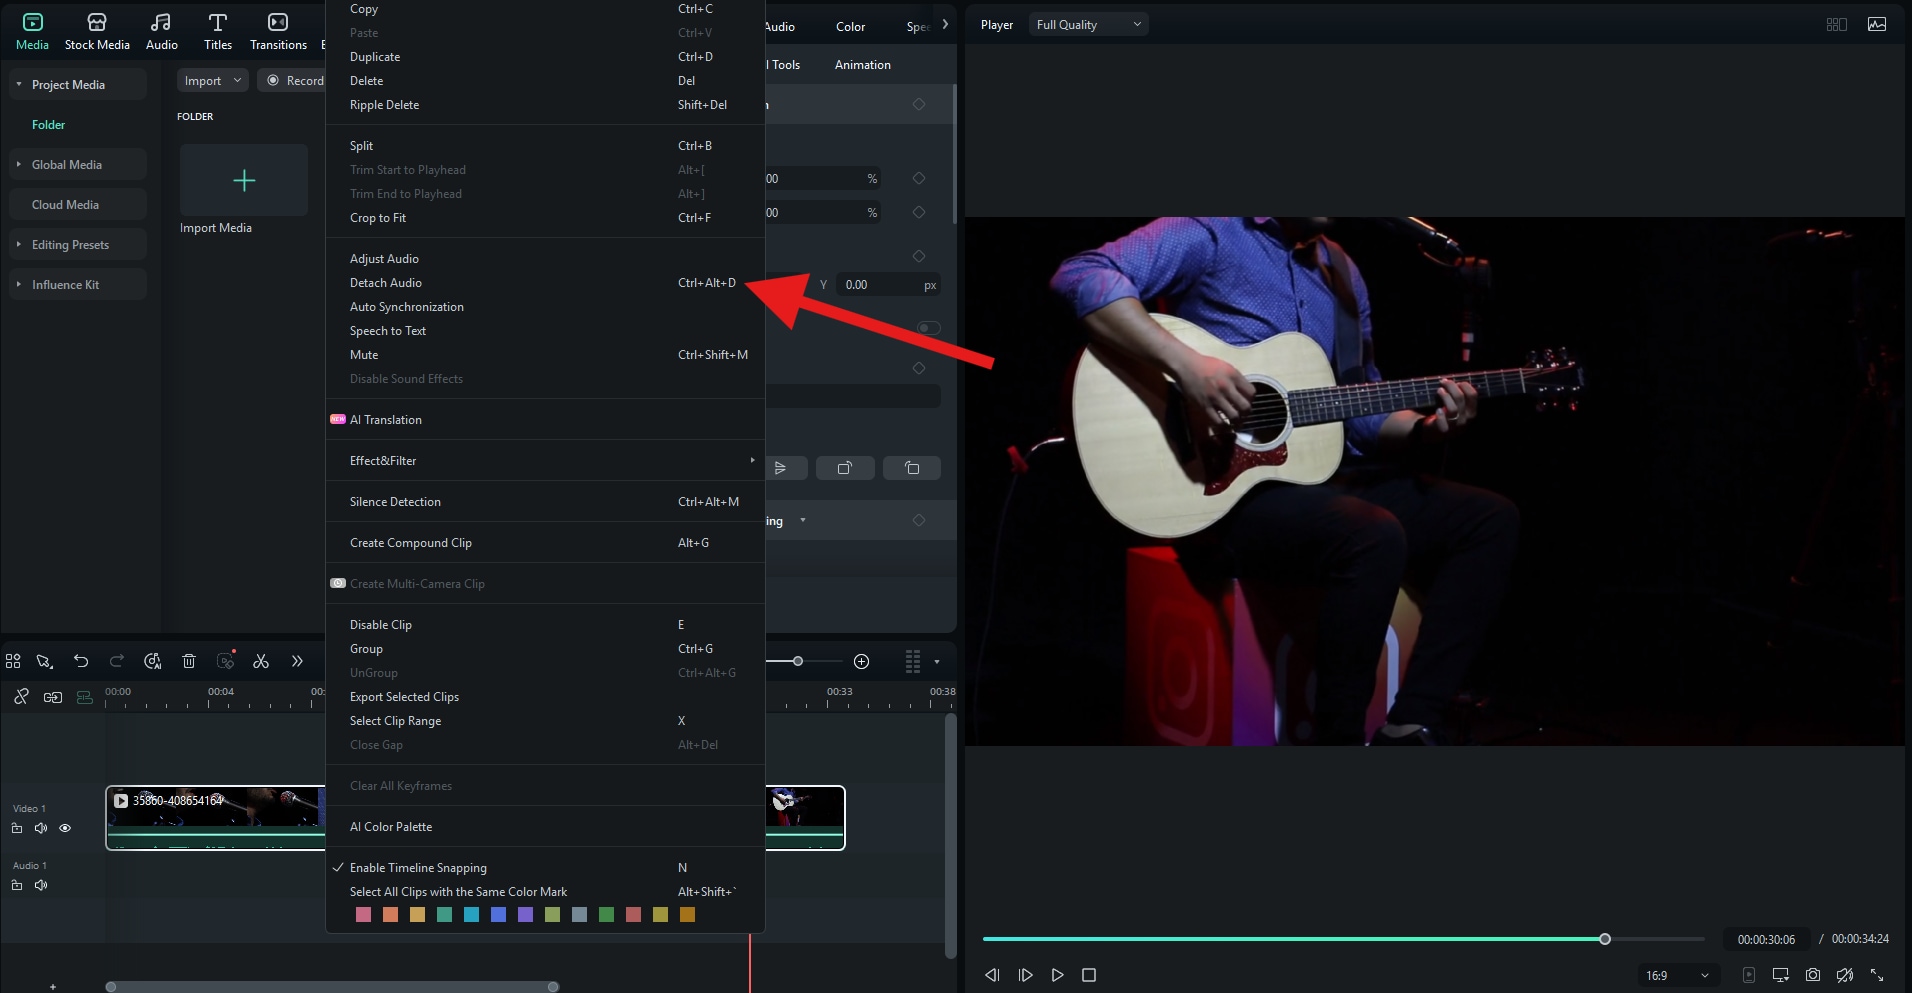
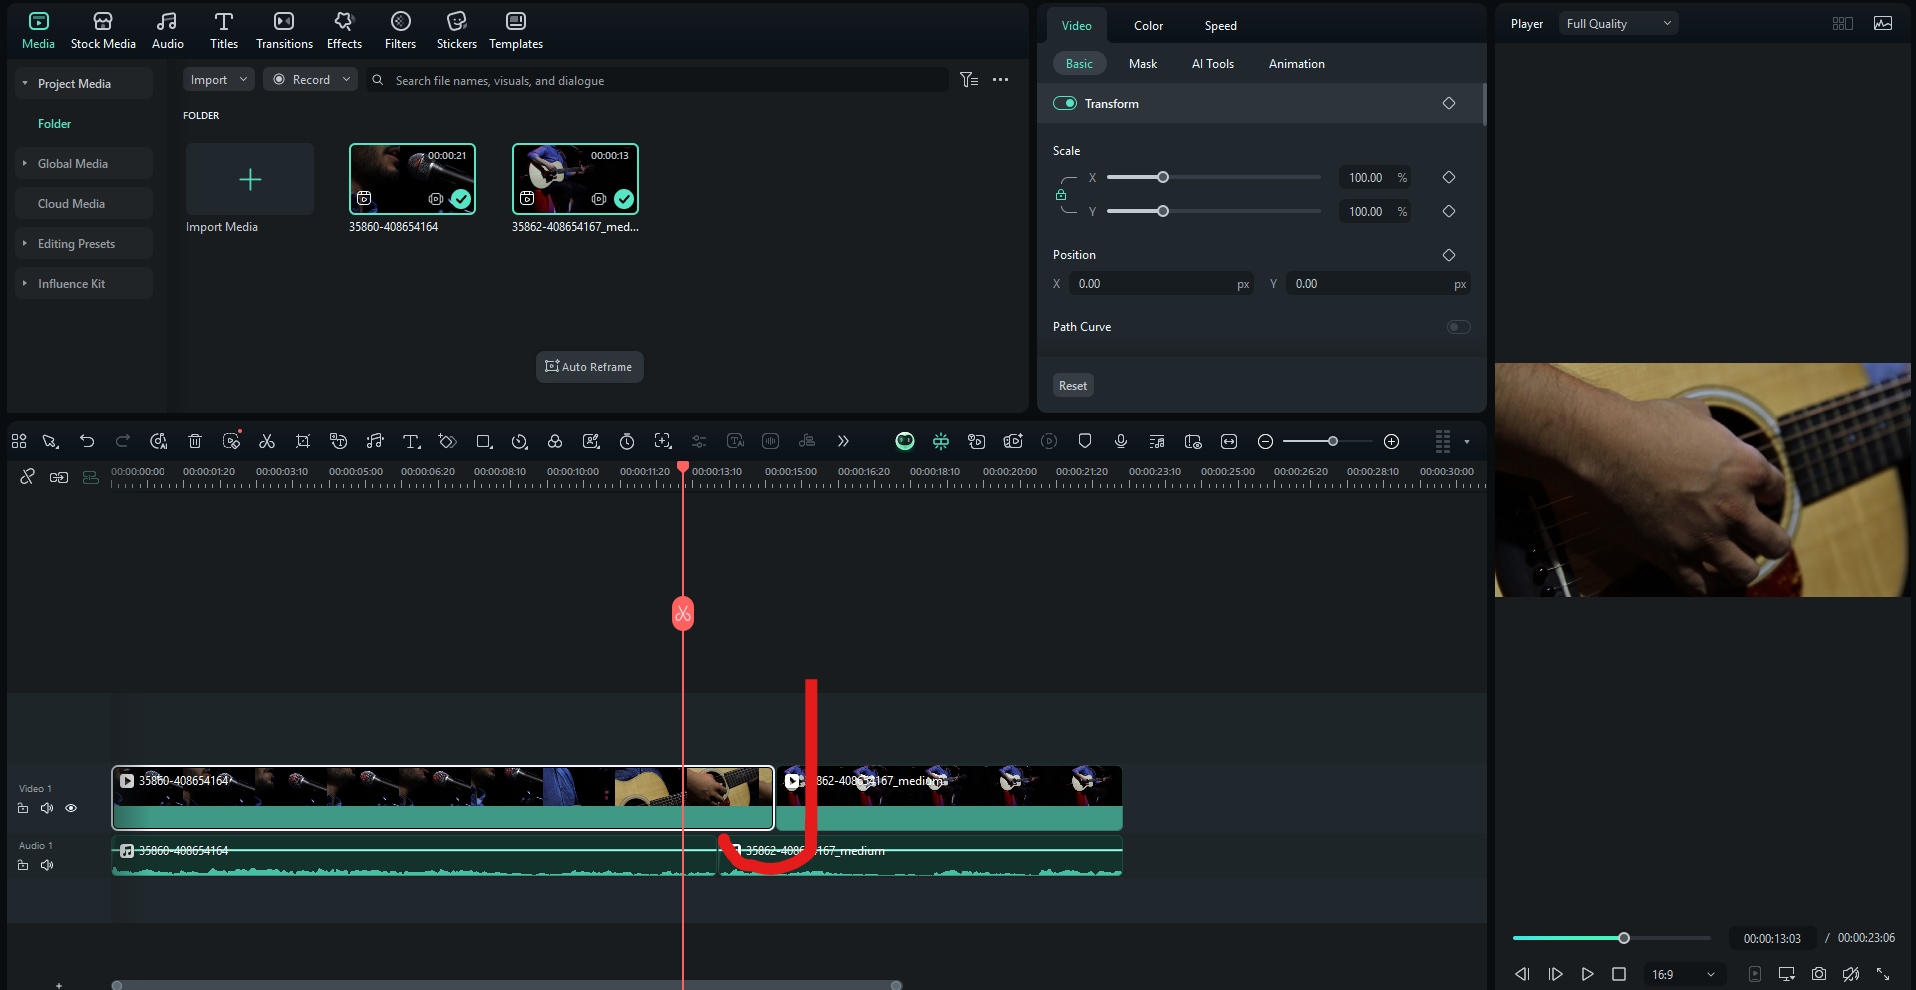
- Select both videos in the timeline, right-click, and select Detach Audio.
- Hover over the beginning and end points of each clip and trim them just like in Premiere Pro to create an L cut. As you can see, it looks like the letter L in the editing timeline.

- Do the opposite if you want to create a J cut.
And that's how it's done in Filmora. As you can see, it's very simple and intuitive, and that's what Filmora is all about. Regardless of the task, you can find a straightforward way to accomplish it in Filmora, especially when compared to complex tools like Premiere Pro.
Final Thoughts
J cuts and L cuts are small changes on the timeline that make a big difference on the screen. Premiere Pro provides you with every trimming tool imaginable, and you can build these transitions with precision. However, if you get stuck with Premiere Pro, we have found that Filmora offers the same features to polish your story with less setup and fewer steps.
Whichever tool you choose, once your ears learn to spot where the audio should lead or trail, your edits will become professional, and your scenes will feel more natural.
Download Filmora today and start making pro-level J and L cuts in minutes.
secure download 