

Ever recorded a video that looked perfectly fine while shooting, only to discover an annoying flicker during playback? This common issue often comes from lighting, screen refresh rates, or camera settings and can quickly ruin an otherwise great clip.
The good news is that flicker can usually be fixed in post-production. Both the desktop and mobile versions of CapCut include a Remove Flickers feature designed to reduce light and screen flicker, helping your footage look smoother and more stable.
That said, CapCut's anti-flicker tool isn't always strong enough for severe flicker problems. If you're dealing with tougher cases, we'll also walk you through an alternative solution that delivers more reliable results.

Part 1. Why Does My Video Show Flicker?
Before you try to remove flicker in videos , it's worth knowing why it showed up in the first place. Once you get the basic idea, you'll know what to watch out for next time and won't be stuck fixing the same problem again.

- LED or Fluorescent Lights: These lights turn on and off really fast. Your eyes can't see it, but your camera can, and that's what causes flicker.
- Screen Recordings: Filming a phone or computer screen often creates bands or flickers because screens refresh differently than cameras record.
- Slow Motion Videos: High frame rates make light flicker stand out more than in normal clips.
- Time-Lapse Clips: As the light changes over time, your camera keeps adjusting exposure, which makes the brightness jump around.
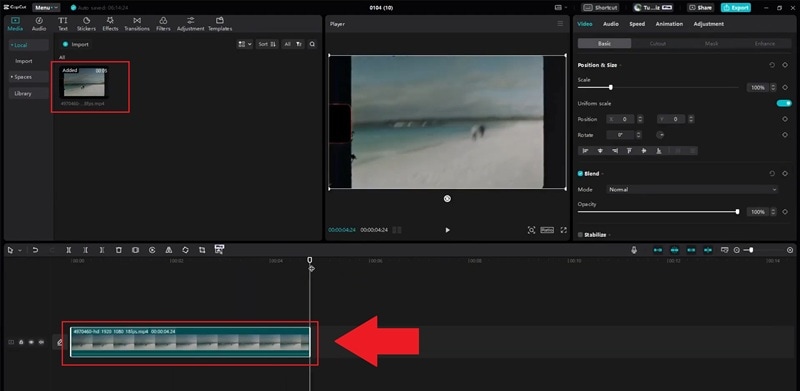
Part 2. How to Remove Flicker from a Video in CapCut
Alright, now let's get into the actual fix. But the thing is, while CapCut remove flicker tool is there, it's part of the Pro plan, so you do have to upgrade to use it. The price is about $19.99 per month.
Also, the way CapCut anti-flicker works on mobile isn't exactly the same as on desktop, which can get a little confusing if you jump between devices. No worries though, we'll walk through both versions step-by-step so you can see what to tap, what to click, and which option makes the most sense for your clip.

Remove Flicker on CapCut (Mobile App)
On your phone, CapCut flicker effect removal is pretty simple to use. You just move a slider to control how strong the anti-flicker effect should be. We followed a clear walkthrough from TutorialTV on YouTube and broke it down into easy steps below so you can do the same thing without guessing.

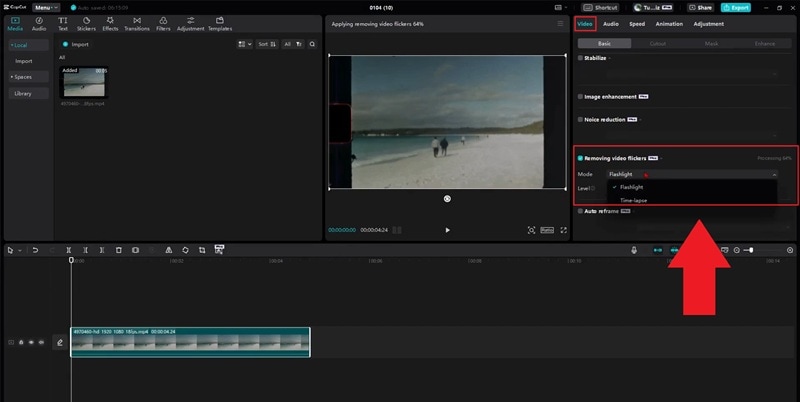
Remove Flicker on CapCut (Desktop Software)
On desktop, the CapCut remove flicker tool gives you a bit more control than the mobile app. You get two modes to pick from, depending on what kind of flicker you're dealing with.
- Flashlight Mode: Designed for clips with sudden light changes or uneven brightness.
- Time-lapse: Even out slow brightness shifts so the video looks smoother and works best for time-lapse videos where lighting changes gradually over time.

We followed a clear walkthrough from Tutorial Wiz on YouTube and turned it into simple steps below so you can copy along without getting lost.
Part 3. CapCut Flicker Removal Not Working? Here's What to Try
If the flicker effect removal tool in CapCut still is not doing the job on your clip, don't panic yet. There are a few simple things you can try before giving up on it:
- Re-encode Your Clip: Save your video again with a standard frame rate and codec. Weird formats can mess with how CapCut anti flicker works.
- Turn Off AI Ultra HD or Hardware Acceleration: These features can sometimes cause processing glitches that make flicker worse instead of better.
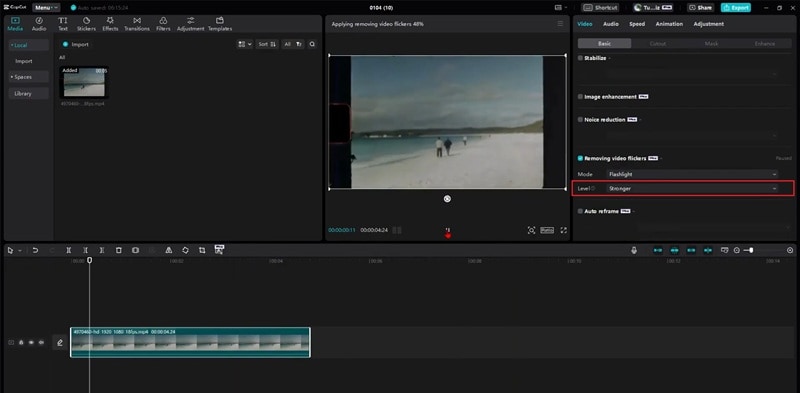
- Push the Flicker Strength a Bit Higher: On desktop, try increasing the flicker removal level from Recommended to Stronger instead. Then, preview the result again.

If these steps still don't fully solve the issue, then maybe it's time to consider other tools to help you out. Thankfully, you don't need to look for long because Filmora Flicker Removal is here to save the day!

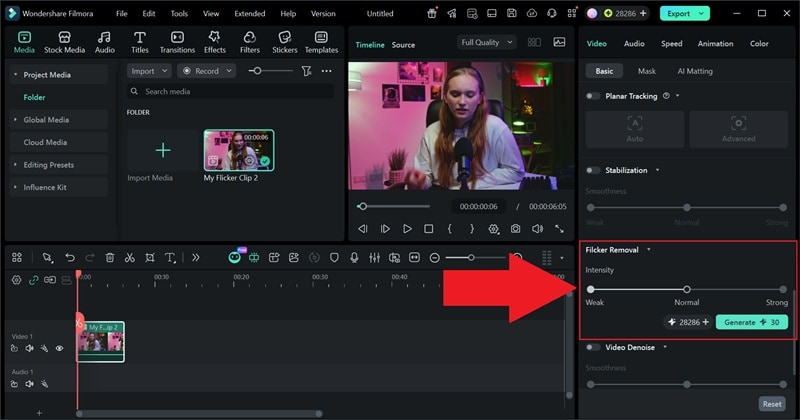
In its latest version, Filmora comes with an AI Flicker Removal tool that does most of the work for you. It scans your clip in the cloud, figures out what kind of flicker is going on, and smooths it out in one go. You don't have to guess which setting might work or keep re-exporting the same video again and again.

Why Filmora Is a Better Fix for Stubborn Flicker
- One Tap and You Are Done: You add your clip, click Generate, and let the AI deal with the deflicker. No weird sliders or confusing settings to mess with.
- Works in all the Usual Problem Scenes: It does a good job with night videos, indoor lighting, LED heavy rooms, and other setups where flicker always shows up.
- Handles Most Clip Types Just Fine: It supports regular videos, proxy files, and clips with overlays. It also tells you upfront what it does not support, like audio-only files or compound clips.
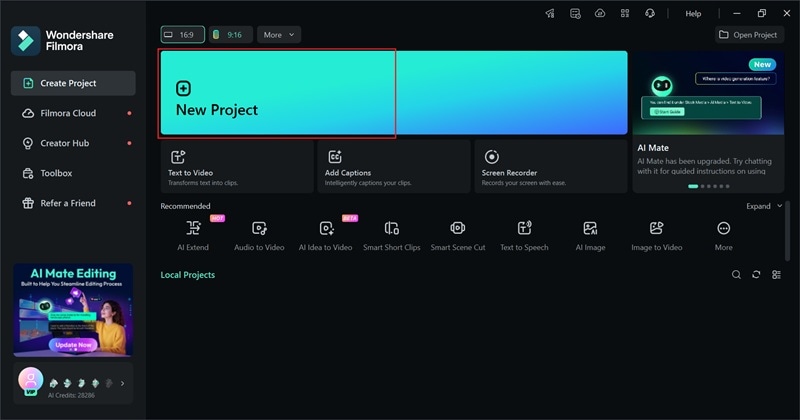
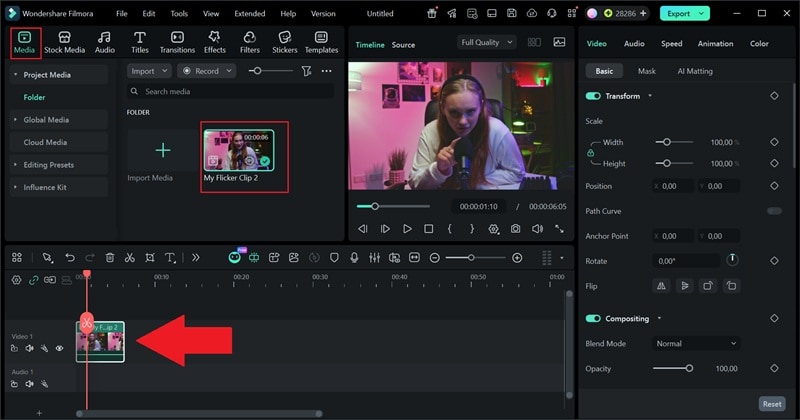
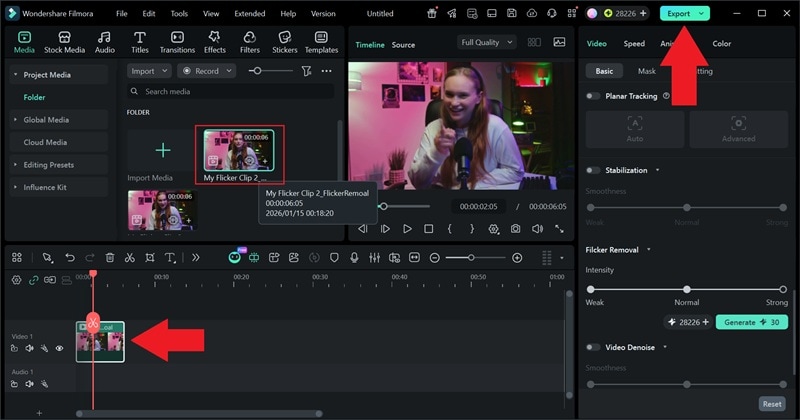
Tutorial: How to Remove Flicker with Filmora
Part 4. CapCut vs Filmora: Which Works Better for Flicker Removal?
Now you have seen how CapCut removes flicker and how Filmora handles the same problem with its AI flicker removal. Both apps are solid video editors, and honestly, they are pretty close overall. But when it comes to flicker, they do feel different in how much effort you have to put in and how clean the result looks at the end.
To make things easier, we put CapCut and Filmora side-by-side so you can see what each one does better. This quick comparison should help you decide which one makes more sense for your clip and how much time you want to spend fixing it.
| Feature | CapCut | Filmora |
| Adjustment Controls | Strength slider | One-click AI plus optional strength control |
| Flicker Removal Quality | Good for light to medium flicker | Good for light to heavy flicker |
| Processing Speed | Fast on desktop, slower on mobile | Fast and consistent with cloud AI |
| Mobile Support | Yes | No |
| Export Quality | Great | Excellent |
| Artifact Control | Can leave slight blur or ghosting | Usually cleaner with fewer artifacts |
| Best Use Case | Quick fixes and mobile edits | Tough flicker and cleaner final output |
|
Show More
Show Less
|
||
Conclusion
Flickering videos can be frustrating, especially when everything else in your clip looks perfect. Luckily, CapCut removes flicker tools to make it easy to fix light issues on both mobile and desktop. For light flicker, CapCut anti-flicker usually gets the job done, but it can struggle when the flicker is heavy or keeps coming back. In that case, it's better to rely on Filmora.
Its AI Flicker Removal does the hard work for you by scanning the clip, spotting the flicker patterns, and smoothing them out in one clean pass. You do not have to guess settings, redo exports, or fight sliders over and over. If you care about getting a cleaner result fast with less effort, Filmora is the more reliable choice for serious flicker problems.
