

 TL;DR:
For creating reaction videos in 2026, Wondershare Filmora is the most comprehensive tool offering simultaneous screen and webcam capture with AI auto-sync across all platforms, while OBS Studio is the top free recommendation for multi-source live recording.
● VSDC (Windows) and iMovie (macOS, iOS) provide free, beginner-friendly Picture-in-Picture layout tools, but neither supports simultaneous dual-recording, requiring creators to capture screen and webcam footage separately and sync them manually.
● VegasPro 18 delivers advanced layered timeline control and chroma keying for experienced Windows editors, but it completely lacks built-in screen recording capabilities and requires footage to be captured via third-party tools.
● OBS Studio allows streamers to record custom resolutions and bitrates across Windows, macOS, and Linux, but it features a steeper learning curve, may crash on low-end systems, and requires an external video editor for post-production.
Ask AI for a summary
 ChatGPT
 Perplexity
 Gemini
 Claude
 Grok
Grok
A reaction video can be any type of video in which the host reacts to ideas and opinions that are expressed in another video. Reacting to a video that attracts a lot of attention on the Internet might put you in the middle of the debate the video you're commenting on is covering.
Reaction videos boil down to expressing your attitude about the topic you feel strongly about, but they must also be entertaining to watch. That is why you are going to need software that enables you to capture both your screen and webcam footage, as the audience needs to see the host and what he or she is reacting to. So, in this article we are going to take you through the top 5 reaction video software you can use on PC and Mac computers.

Top 5 Reaction Video Makers for Windows and Mac
It is worth noting that besides software that enables you to create reaction videos, you are going to need an external microphone, and in some cases lighting and other equipment that is commonly used for the production of YouTube videos. Let's take a look at what the top 5 reaction video makers have to offer.
Wondershare Filmora - Best Reaction Video Software for Creators of All Levels
Wondershare Filmora is an intuitive reaction video software designed for creators who want to record, edit, and share engaging videos across platforms like YouTube, TikTok, or Twitch. With support for screen and webcam capture, smart background removal, and streamlined editing tools, Filmora simplifies the process of making professional-looking reaction content.
- User-friendly drag-and-drop interface
- Fast learning curve, even for beginners
- Supports all major formats including WebM, MP4, MOV
- Smooth 4K export performance
- Free version exports videos with a watermark
- Basic editing skills needed for best results
- Screen & webcam capture in real-time (up to 4K/120fps)
- AI portrait cutout (background removal without green screen)
- Auto reframe support for vertical/horizontal layouts
- Motion tracking and multi-layer editing for dynamic overlays
- Smart short clip creation for social media sharing
- AI audio clean-up built in (denoise & ducking)
- Rich in-app templates, transitions, and royalty-free assets
Filmora balances simplicity and power, making it ideal for creators who want to make high-quality reaction videos without needing advanced editing skills or expensive setups. It's one of the best software options for reaction videos across desktop and mobile.
For more details, please visit the purchase page where various pricing plans are available.
Windows, Mac, Android, iOS
2. VSDC– Best Free Reaction Video Software for Windows Users
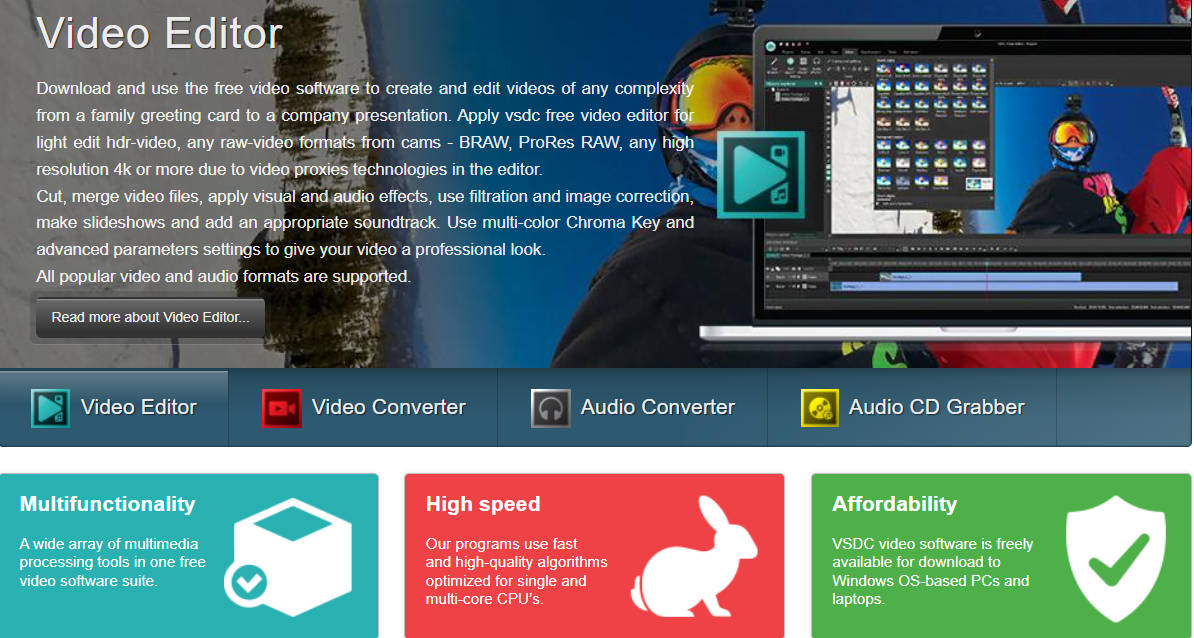
VSDC is a free Windows-based reaction video software that provides all the essential tools for creating split-screen or picture-in-picture (PiP) reaction content. Although its interface looks outdated, VSDC can handle reaction workflows if you're familiar with the basics of video editing.
To make a reaction video, users need to first record both the original footage and their webcam reaction separately. Then, VSDC allows you to layer these videos using its timeline editor and adjust positions manually in the preview pane.
- Beginner-friendly and entirely free to use
- Includes basic screen capturing features
- Lacks modern AI-based tools and automation
- Outdated user interface and less intuitive navigation
- Limited compatibility (Windows only)
- Allows multi-layer editing for PiP (picture-in-picture) effects
- Supports direct YouTube export up to 4K
- Includes desktop screen recording tool
- Offers a wide range of built-in visual effects and transitions
If you're looking for a free, lightweight reaction video software on Windows that doesn't require much prior experience, VSDC is a practical starting point.
Free
Windows
3. iMovie– Best Reaction Video Editor for Apple Ecosystem Users

iMovie is Apple's free video editing software and a great entry-level tool for creating reaction videos on Mac and iOS devices.
The process is simple: import your reaction clip and the original video, drag them onto the timeline, then use the Video Overlay Settings to enable Picture-in-Picture mode. You can reposition and resize the overlay in the preview window for the final layout. Once satisfied, export the final video directly to YouTube or your device.
- Free and pre-installed on Apple devices
- Intuitive interface ideal for beginners
- Offers basic visual effects and templates
- Lacks screen recording capability
- Audio editing tools are limited
- Not available for Windows or Android
- Picture-in-picture mode for easy reaction video creation
- Touch-friendly interface on iPhone and iPad
- Built-in transitions, sound effects, and visual filters
- Direct export to YouTube or Photos app
iMovie is a great starting point if you want a simple, no-cost reaction video software on Apple devices. It's especially convenient for beginners making YouTube or TikTok-style reaction content.
Free
macOS, iPhone, iPad
4. OBS– Best Open-Source Reaction Video Recorder for Streamers
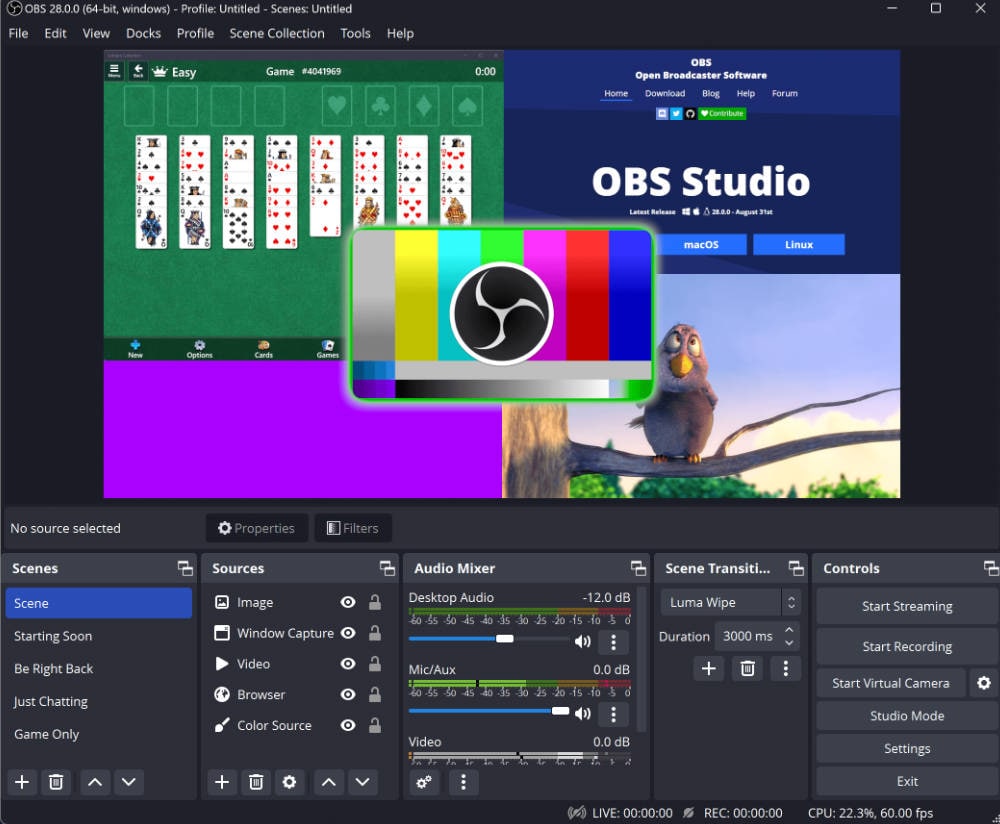
OBS Studio (Open Broadcaster Software) is one of the best free reaction video software options for creators who want full control over screen and webcam recording. It's especially ideal for live reactions or high-quality recordings where both the original video and the user's facecam need to be captured simultaneously.
To create a reaction video with OBS, you'll set up multiple input sources—like Display Capture for screen recording, Audio Output Capture for system audio, and Video Capture Device for your webcam. Once everything is positioned in the preview window, you can hit “Start Recording” to begin. OBS also lets you save recordings in custom resolutions and formats.
- 100% free and open-source
- High-quality audio & video capture
- Ideal for live streaming and live reaction setups
- Steeper learning curve for beginners
- No built-in editing tools
- May crash or lag on low-end systems
- Multi-source recording: screen, webcam, and system audio
- Custom output settings: choose resolution, bitrate, and format
- Supports HD video recording and streaming
- Scene transitions and real-time audio mixer included
OBS is perfect for creators who need pro-level control over live or recorded reaction content—especially on Twitch, YouTube Live, or when post-editing in software like Filmora.
Free
macOS, Windows, Linux
5. VegasPro 18– Best Professional Reaction Video Software for Experts
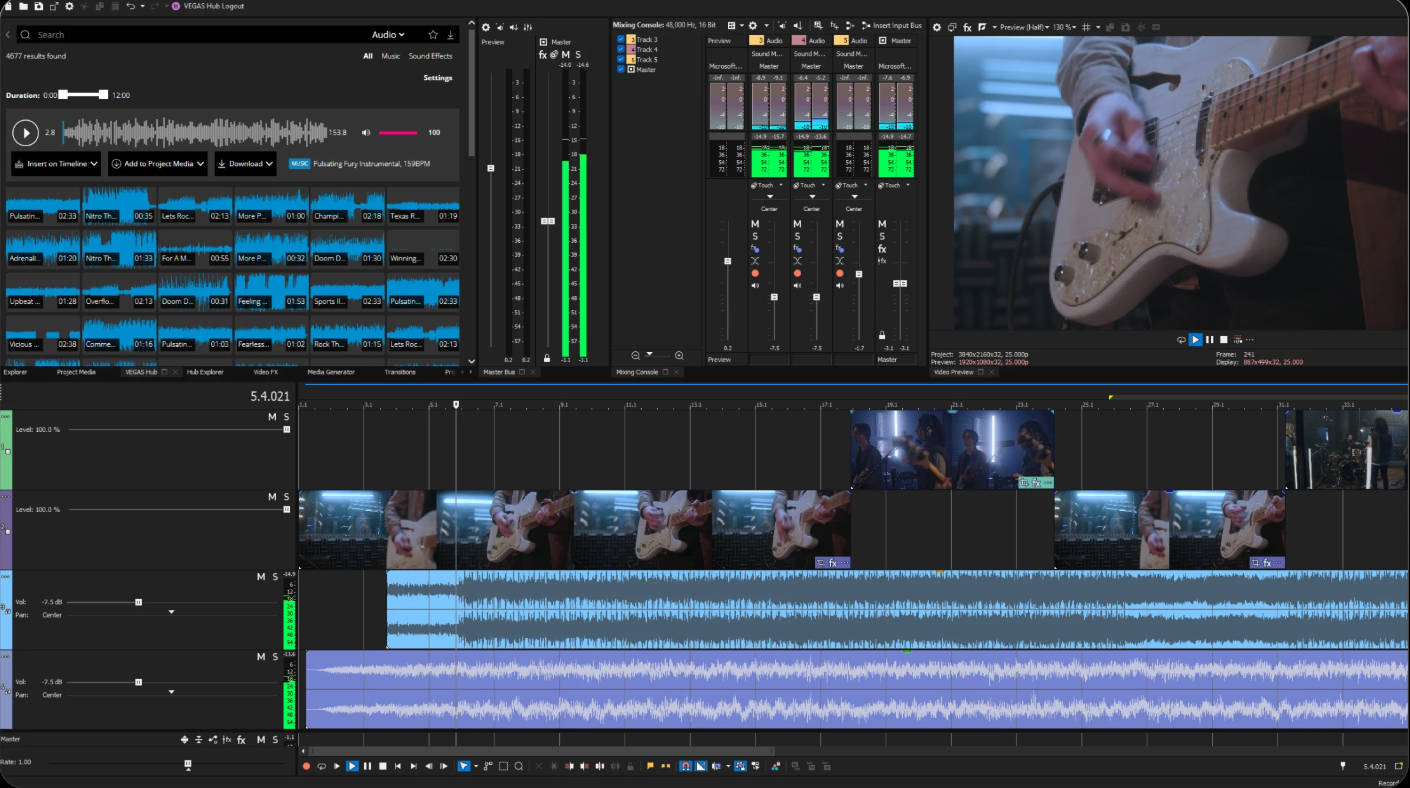
Sony Vegas Pro is a powerful video editing software ideal for professional users who want complete control when making reaction videos. Before editing, you need to have both your reaction footage and the video you're reacting to recorded separately.
To create the reaction video, place your reaction clip below the original video on the timeline. Use the Event Pan/Crop tool to resize and reposition the video you're reacting to as an overlay. Then, sync both clips so your reaction matches the video events. Preview before exporting your final video.
- Layered Timeline Editing - Place reaction and source videos on separate tracks for precise sync.
- Pan & Crop Controls - Resize and position your reaction video with flexible overlay options.
- Chroma Key - Remove background for green screen reactions.
- 4K Export Support - Export high-resolution videos in various formats.
- Audio Waveform Display - Sync commentary accurately using visual audio cues.
- Comprehensive tools for detailed edits
- Intuitive, modern interface
- Supports high-quality video exports
- No built-in screen recording capabilities
- Designed primarily for professional editors, not beginners
Sony Vegas Pro is best suited for experienced editors who want precise control over their reaction videos and don't need screen recording features within the software.
Free
Windows
Top Reaction Video Software Compared: Features, Tools, and Ideal Uses
When choosing the best software for reaction videos, it's important to consider key features like recording capabilities, synchronization options, AI-powered editing tools, and export quality. To help you make an informed decision, here's a clear comparison of the top reaction video makers available for Windows and Mac users.
| Feature | Filmora | VSDC | iMovie | OBS Studio | Sony Vegas Pro |
| Screen + Webcam Recording | Yes (simultaneous or separate) | No (desktop capture only) | No (no recording feature) | Yes (advanced multi-source capture) | No (no recording feature) |
| Sync Reaction & Main Video | Auto-sync with AI tools | Manual sync using visual/audio cues | Manual sync using visual/audio cues | Requires external editing for sync | Manual sync using timeline adjustments |
| AI Editing Tools | Background removal, motion tracking, smart cutout | None | None | None | None |
| Export Quality & Formats | Up to 4K, multiple formats | Up to 4K, common formats | Up to 4K, Apple-specific formats | Customizable formats and quality | High-quality export, various formats |
| Additional Features | Direct upload to YouTube/Vimeo, templates | Desktop screen capture tool | Integration with Apple ecosystem | Live streaming, multi-source capture | Advanced timeline control, plugin support |
| Ideal For | Content creators & vloggers | Windows users new to editing | Mac & iOS users, casual editors | Advanced users & streamers | Professional editors |
Each reaction video software has its strengths depending on your needs—whether it's the intuitive AI tools in Filmora, the streaming power of OBS, or the professional editing environment of Sony Vegas Pro.
Bonus Part: Popular Themes for Reaction Videos
Creating engaging reaction videos often starts with choosing the right theme.

Here are some of the most popular topics that creators tend to focus on:
Music Reactions
React to new music videos, album releases, live performances, or cover versions. Music reaction videos attract large audiences who want to share in the excitement or discover new tunes.
Movie and TV Show Reactions
Share your genuine first impressions while watching trailers, episodes, or memorable scenes. These videos tap into fan communities eager for fresh takes and commentary.
Gaming Reactions
React to gameplay highlights, new game releases, esports events, or funny in-game moments. Gaming reaction videos resonate well with both casual and hardcore gamers.
Viral Videos and Memes
React to trending internet clips, viral challenges, or meme compilations. These videos often have high shareability and quick audience engagement.
Product Reviews and Unboxings
Showcase your reactions to new gadgets, tech products, or consumer goods. Honest first impressions help build trust with viewers.
Challenge and Trend Reactions
Participate in or respond to popular social media challenges and trends. This keeps your content fresh and relevant.
Conclusion
In order to gather thousands of views, comments, and likes, every detail in your reaction videos needs to be perfect. Video reaction makers we featured in this article enable you to have complete creative control over the process of making a reaction video.
Among all these above, if you want to go for a free one, I'll say you should go for OBS.
If you want to go for a paid one but don't want to pay too much for it, I'll suggest you go for Filmora, which provides you several ways to create a reaction video easily on Windows and Mac.
FAQs
-
Q1. What’s the ideal camera setup for recording reaction videos?
For most creators, a basic webcam or smartphone camera works well. However, for higher production quality, consider using a DSLR or mirrorless camera with softbox lighting and an external microphone for better visuals and clearer audio. -
Q2. How do I keep my reaction videos engaging throughout?
To retain viewers, focus on genuine expressions, concise commentary, and good pacing. Incorporating cutaways, overlays, zoom-ins, or text highlights can also boost engagement and prevent viewer drop-off. -
Q3. Can I monetize reaction videos on YouTube?
Yes, but only if your content adheres to YouTube’s fair use policies. To avoid copyright issues, provide clear transformative value (e.g., commentary, criticism, education) and consider using royalty-free or licensed content when reacting to third-party videos.
