
 100% Security Verified | No Subscription Required | No Malware


 ChatGPT
 Perplexity
 Gemini
 Claude
 Grok
Grok
Editing a YouTube video to perfection is imperative if you want to succeed as a creator on this platform. New YouTubers are constantly uploading new videos, and if you are one of them, the situation can be a little overwhelming.
Luckily for you, this guide will not focus on complicated editing software. Instead, we will show you how to use Wondershare Filmora to take care of all your YouTube video editing needs in one place. Stick around!
In this article
Requirements for Posting a YouTube Video

There are two things to pay attention to. The first is connected to the subject matter of your video. Before recording or preparing your video in any way, you should read YouTube's Community Guidelines thoroughly and familiarize yourself with the best practices for choosing the subject matter of your video.
The second thing you should look into is connected to video formatting specifications. Since you are a beginner, all these terms and numbers might seem complicated, but if you use good software, these exporting recommendations will be set as default, so no worries there.
Now, let's move forward and explain the process of video editing for YouTube using Wondershare Filmora, one of the best (if not the best) software solutions for this purpose. We will explain how to create and edit your first YouTube video without having to record anything with your camera. It sounds impossible, but it isn't.
4 Simple Steps to Edit YouTube Videos with the Best Video Editing Software
As with any other software, the first step is to download and install Filmora. Then, you need to consider what the first thing you need to do to make a video is, and the answer is simple. The first thing, or actually the first two things you need, are an idea and a script. The idea should come from you, but Filmora can help you with the script.
- Superb video stabilization with low distortion.
- Vast video/audio effects and creative assets.
- Powerful AI for effortless content creation.
- Intuitive, professional yet beginner-friendly.
- Works on Mac, Windows, iOS, and Android.


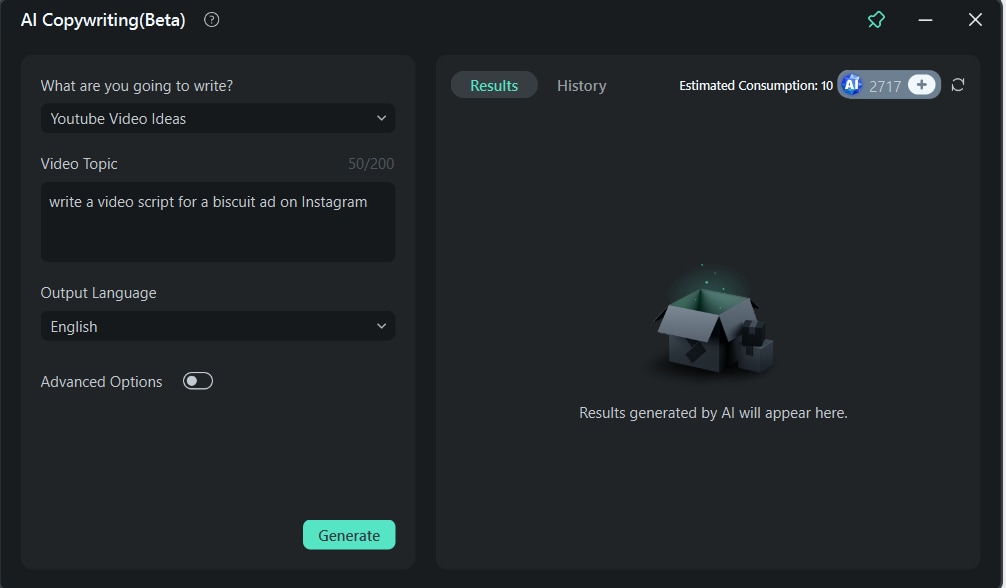
Step 1: Write the script
 secure download
To generate the script, you will need to activate Filmora's AI Copywriting feature. You will find it when you open the program in the Toolbox section, as shown in the screenshot.

From there, you just need to answer a few questions to let the AI know what type of content you are looking for. When you have answered all questions, just click on the green Generate button.
Wait for a few seconds, and you will see the results. Select the script you like and copy it to Notepad on Windows, just to be sure that you have the text somewhere.
Step 2: Generate the video
Now that you have a script, you can use Filmora's Text-to-Video feature to generate the video. This is very easy to do. Accessing this feature is the same as accessing the AI Copywriting feature. It is also located in the Toolbox when you open the program. You can check the first screenshot from Step 1.
When you open the feature, you will be met with a text box. Copy the generated script to this text box, and click on the green Text to Video button.

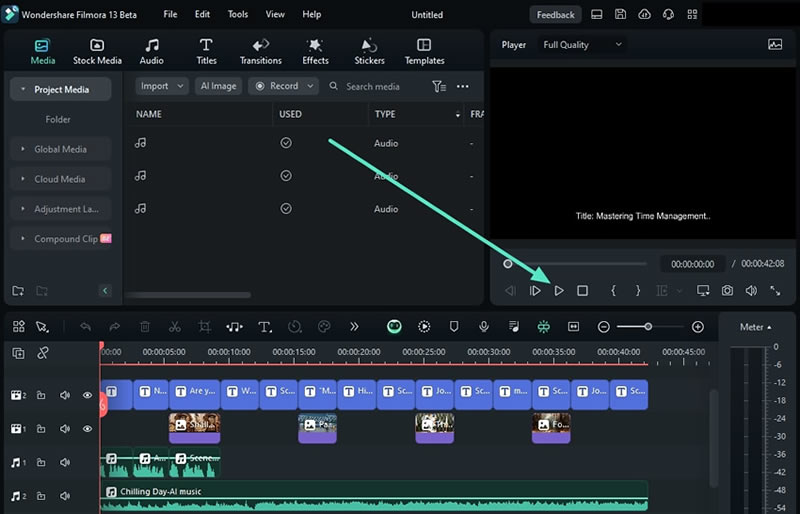
Wait for a short while, and you will see Filmora's project interface with the newly generated video in the timeline. You can click on the Play button to preview it.
Of course, you might need to edit the video which leads us to the next step.
Step 3: Edit the video
When the video is in the timeline, you can edit it in several ways. First, you can split it into smaller parts and trim the video files to the ideal length.
Split
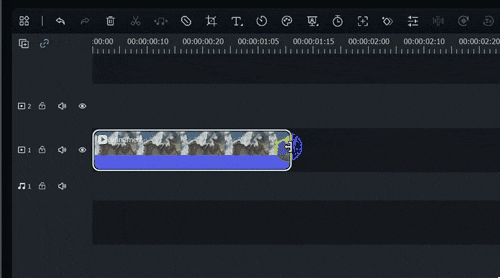
To split the video, activate the Quick Split Mode in Filmora. The screenshot below shows how to do it in the timeline.

When this mode is active, simply click on the moment in the video where you want to make the split, and it will happen automatically.
Trim
If the split wasn't precise, you can use the Trim function to correct this mistake. Simply hover over the beginning or end of the video in the timeline until the Trim tool appears, and then drag the video to the left or right, depending on how much you want to trim. The Trim icon looks like this.
Add effects and explore other creative assets
You can also add several types of effects to the video. In Filmora, you can find all sorts of effects in the Effects tab. To use them, just drag them to the timeline. If you are having issues, consult the screenshot.

Filmora also offers several other creative assets that you can explore at your leisure.
Use the AI Video Enhancer
Let's assume that a certain part of your video is a bit blurry. If you want to improve the quality of your video further, you can try the AI Video Enhancer. Using it is very simple.
After you select the video in the timeline, go to Video > AI Tools and turn on the enhancer. Then, simply click on Generate.
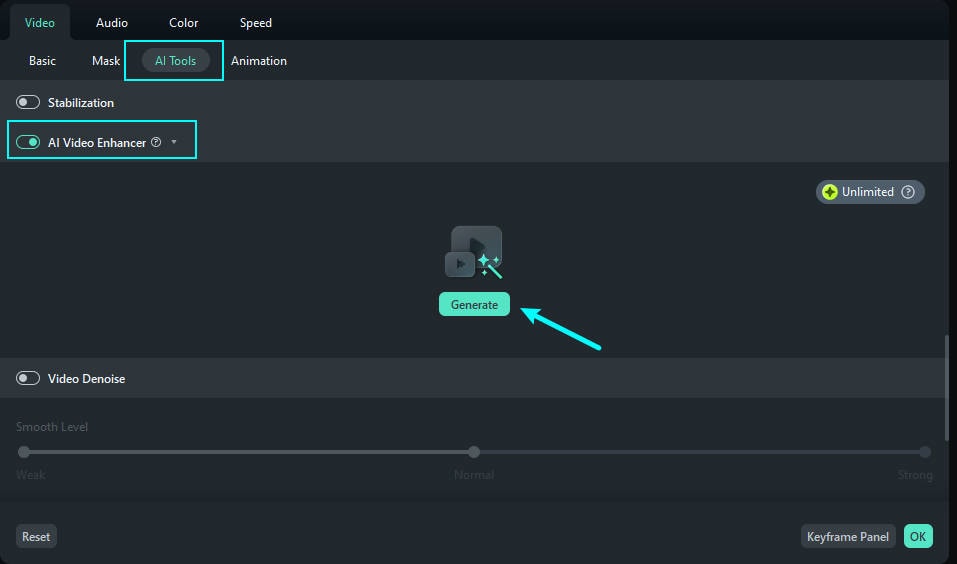
You will need to wait for the process to finish, and you can preview the results in the timeline.
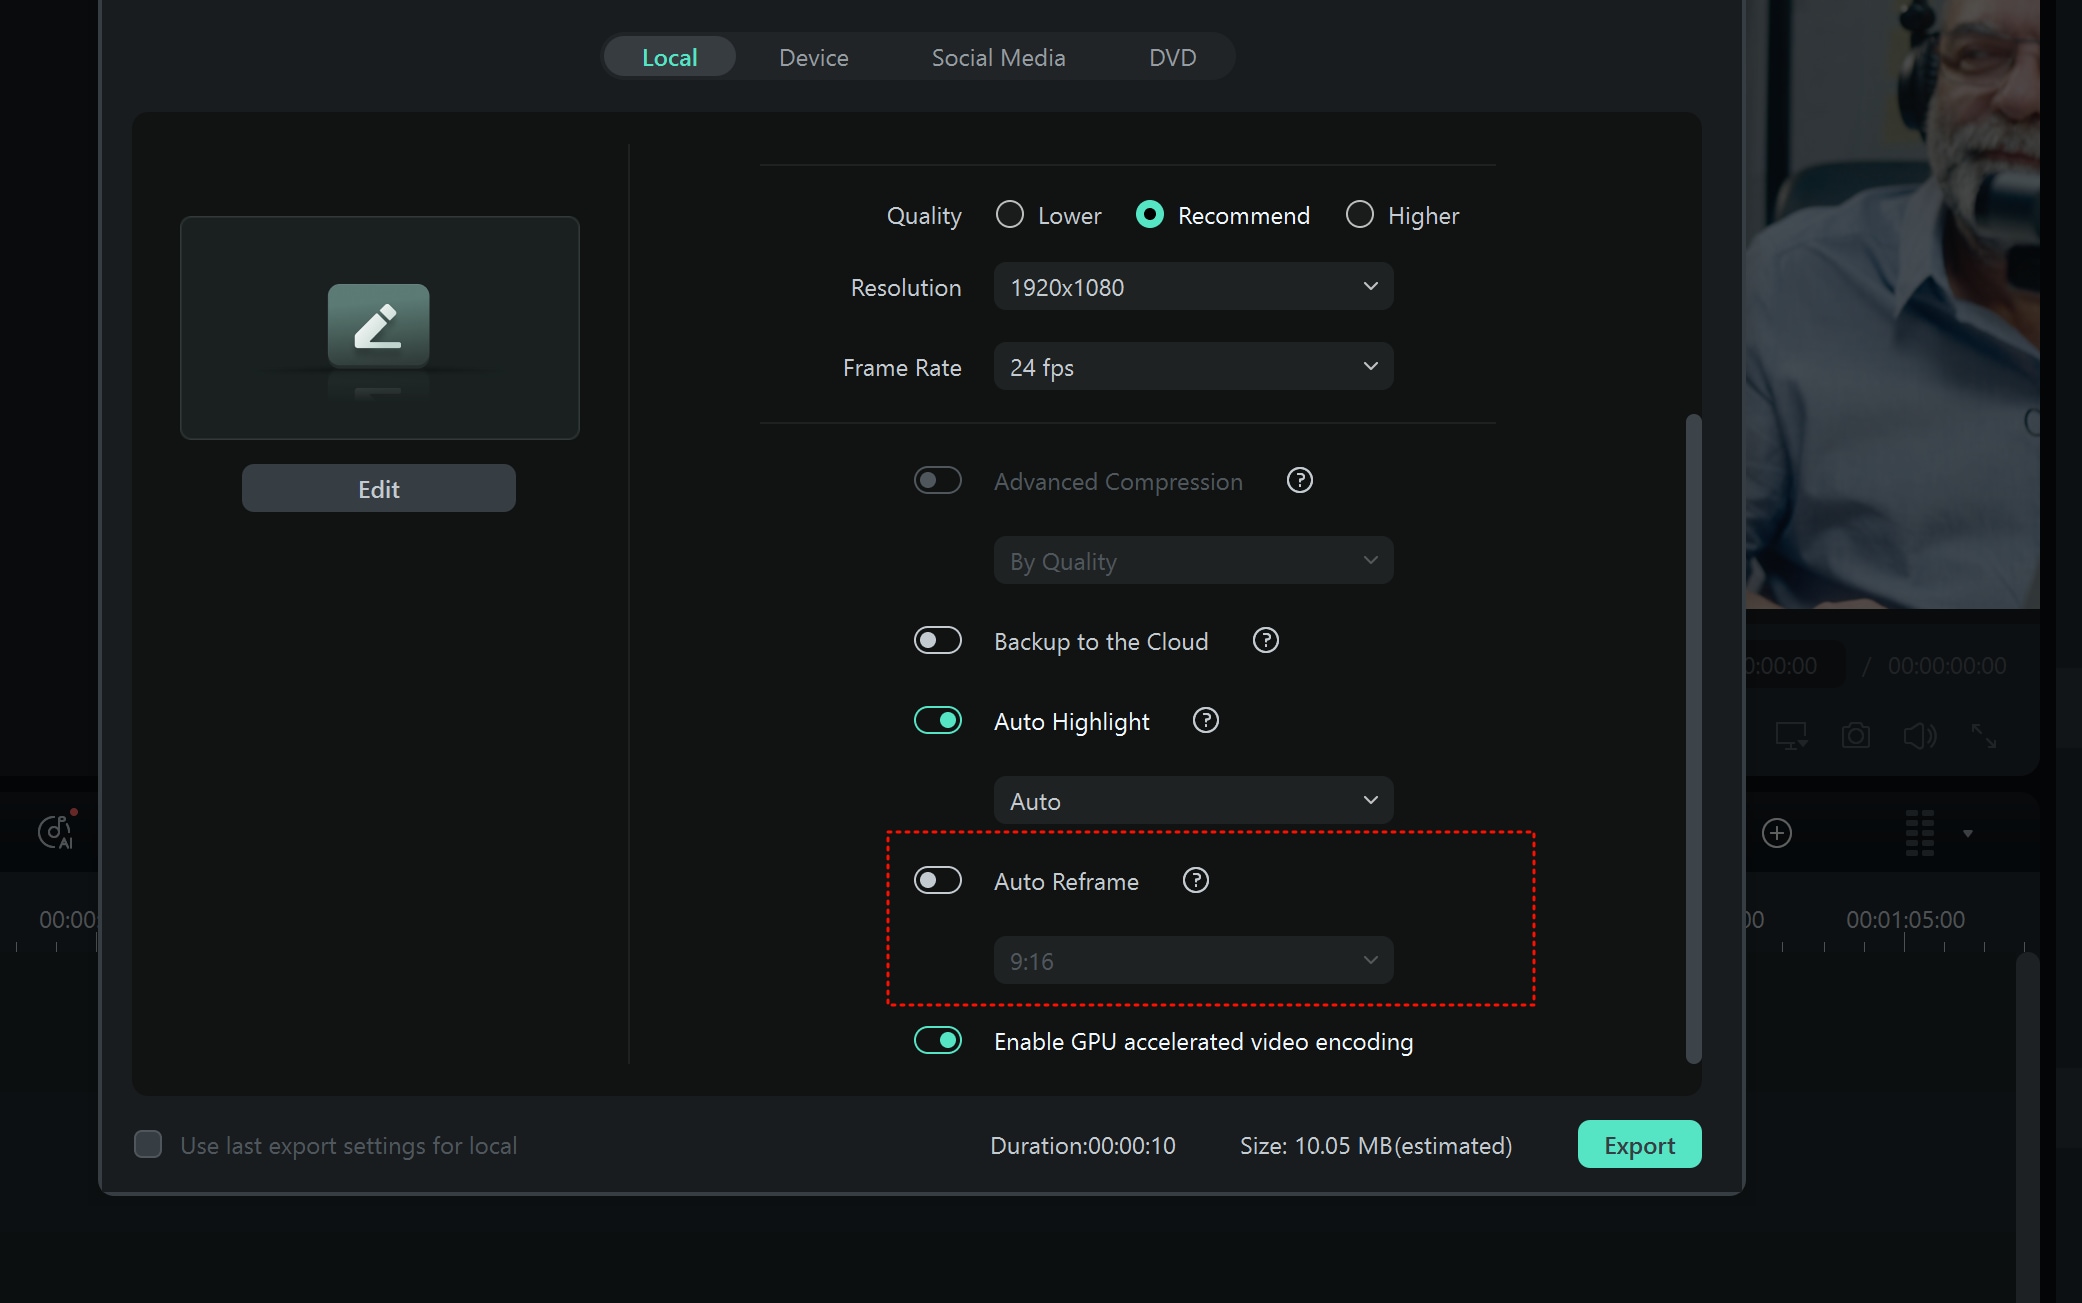
Use the Auto Reframe feature
If you want your video to have a focal point throughout its duration and feel that this is not optimally achieved by now, you can use this feature to ensure that the camera is always focused on what's important. Also, you might need to export videos in different aspect ratios.
The best way to do all this is to finish with your video editing tasks and, when exporting the video, select the Auto Reframe option, as shown in the screenshot below.
Filmora offers many other video editing features, and it is advisable that you explore and test them while you are improving your YouTube videos. On top of that, Filmora offers excellent audio generation and editing features. You don't want to upload a silent video to YouTube, right?
Step 4: Generate and edit audio
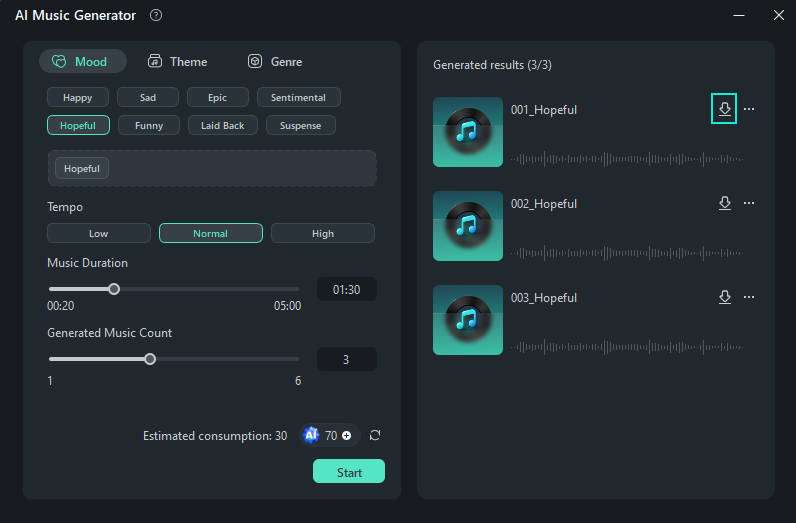
You can use Filmora's AI Music Generator to create music for your video. To do this, you need to click on the Audio tab, then select AI Music, and click on the Start button.

A new window will appear where you can customize what you want the song to sound like. When you are done adjusting, you can click on Start again, wait for the songs to be generated, listen to them, and download the ones you like. The Download button is clearly visible in the screenshot below.
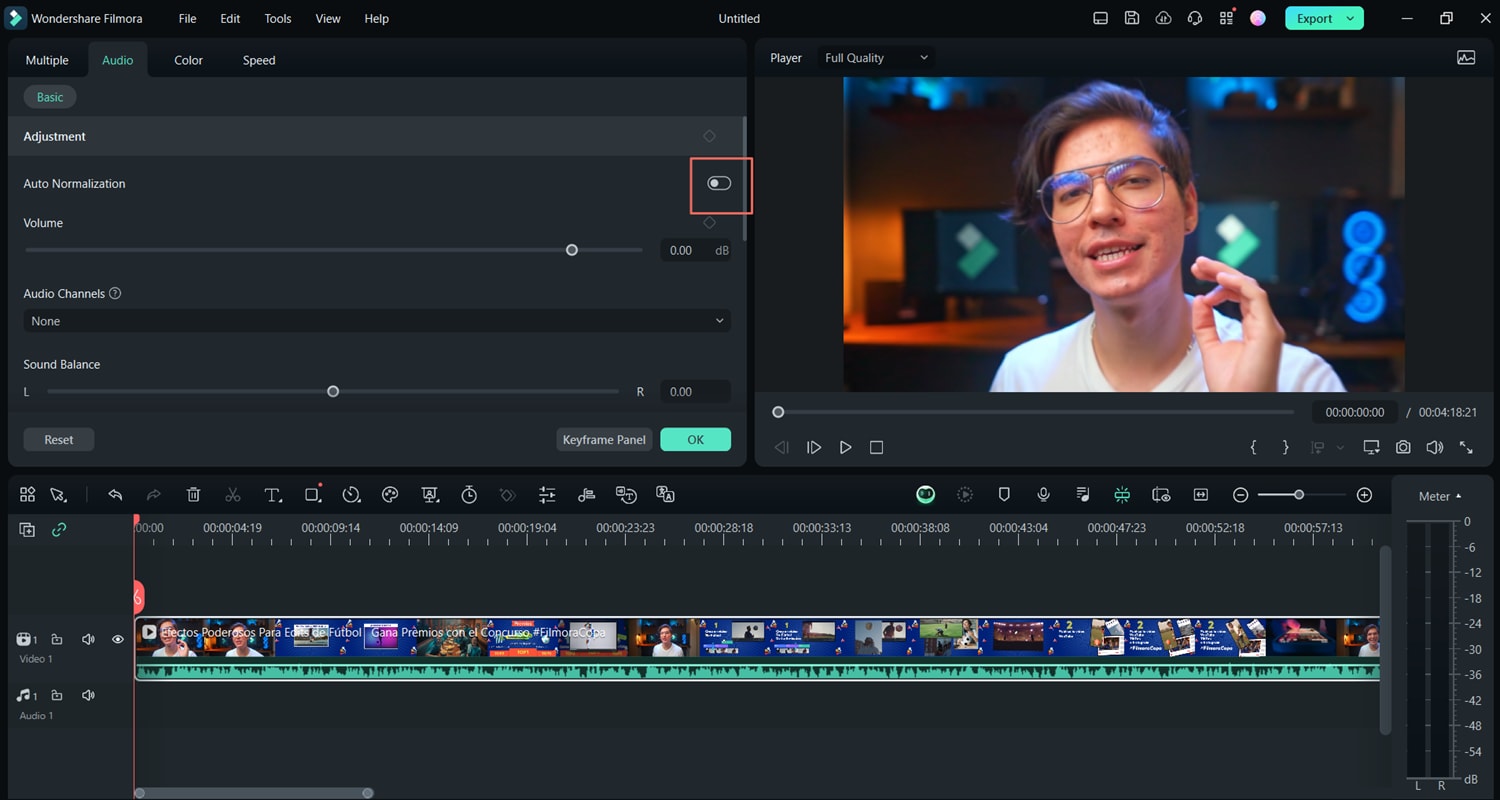
If the generated audio needs some more work, you can do that by clicking on the audio file you want to edit in the timeline and going to Tools > Audio > Adjust Audio. You will be met with several options to improve the sound of your video. You can play around with several options provided here, but make sure to normalize your audio.
Audio normalization is important if you want your video to sound good on all devices (laptops, speakers, TV speakers, mobile phone speakers, etc).
Since Filmora offers the Auto Normalization option, you should simply activate it, as you can see in the screenshot below.
There are many more audio editing options that you can explore while you are perfecting your video.
When you are done, simply export the video and upload it to your YouTube channel.
Conclusion
It is a common misconception that editing videos is a complicated process. It used to be back in the day when the only way to do the job was to learn how to use complex software solutions. Nowadays, with intuitive and affordable products like Filmora, video editing, audio editing, making videos, and building a brand on YouTube is easier than ever before.
secure download
