While watching a YouTube video, have you ever noticed how strategically positioned text can enhance the overall appeal? It could be an engaging title, helpful subtitle, or playful textual effects that grabbed your focus.
Text can genuinely elevate your videos! It's like putting an extra shine to make your content stand out.
If you have the same thinking as me, understanding how to put in a text could be complex at first. However, the concern is unnecessary—we are here to help.
We will show you how to add text to your YouTube videos in this guide. It can be done either before or after uploading them.
Are you prepared to make your videos more noticeable? Let's jump in!
In this article
Part 1: Why You Need to Add Text to YouTube Video
Adding text to your YouTube videos is like giving them a little extra sparkle—it makes everything shine more. Text can help keep your viewers interested, make your content more accessible, and even add a personal touch. Here’s why you should think about it:
the stunning fonts, text animation and music are created by Filmora
Why Add Text to Your YouTube Videos
- Explain Complex Topics: When you explain something complicated, adding text can help make sure your viewers get it.
- Keep Viewers Engaged: We all get distracted sometimes. Eye-catching text can grab attention and remind viewers that this part is important.
- Perfect for Watching with Sound Off: Text makes sure people can follow along even if they’re in a quiet place or just prefer to read.
- Make Your Videos Accessible: It also makes it easier for non-native speakers to understand your content.
When to Add Text to Your YouTube Videos
Now, let’s see when you should use text:
- For Context or Explanation: If you’re talking about something complicated, add text to help explain it. It’s like giving your viewers a little extra help to understand your message.
- For Accessibility: Subtitles or captions make your content available to more people so everyone can enjoy it.
- To Highlight Key Points: If you want your audience to remember something important, use text to make it stand out.
- To Keep Things Exciting: Text can make your videos more fun. Add some creative text elements to keep your viewers interested from start to finish.
- For Corrections or Updates: If you make a mistake or have new information, adding text is an easy way to update your video without having to redo it.
- To Reinforce Your Brand: Adding your logo, channel name, or a catchy tagline in text keeps your brand visible throughout the video.
- For Promotions: If you have something to promote, text is a good choice. You can use it to highlight important stuff without interrupting the video.
Now, let’s see how you can add text to YouTube videos before uploading.
Part 2: How to Add Text to YouTube Videos Before Uploading
Okay, so imagine you're editing a YouTube video, and you want to add some cool text to make it pop—like those fancy titles, funny captions, or even some smooth animated text effects. Enter Wondershare Filmora, the superhero of video editing. Seriously, it’s like having a magical editing sidekick.
You just drag and drop your video into the timeline (super easy), pick a text style that makes you go, “Ooh, that’s nice,” and you’re all set. Want to add some bounce or slide animations to your text? Filmora’s got a bunch of those, and they’re really fun to play around with.
Now, if you’re feeling extra creative and want to go all out with kinetic typography, Filmora lets you animate individual letters or words to move with your audio. It’s like giving your text a little personality of its own. And, if you’re like me and subtitles are your best friend, Filmora’s Speech to Text feature is a game-changer. It even supports multiple languages, so everyone can join the fun!
Adding text to your YouTube videos before uploading can really make them shine! Filmora makes this easy and fun. Here’s how you can do it:
How to Add Text Using Wondershare Filmora’s Title Presets
Want to make your YouTube videos pop with some snazzy text? Filmora's title presets are like magic for your videos! Here’s the lowdown:
Step 1: Open up Filmora and toss your video into the editor.
Step 2: Head over to the “Titles” tab and scroll through the options. Find one that screams “awesome!”
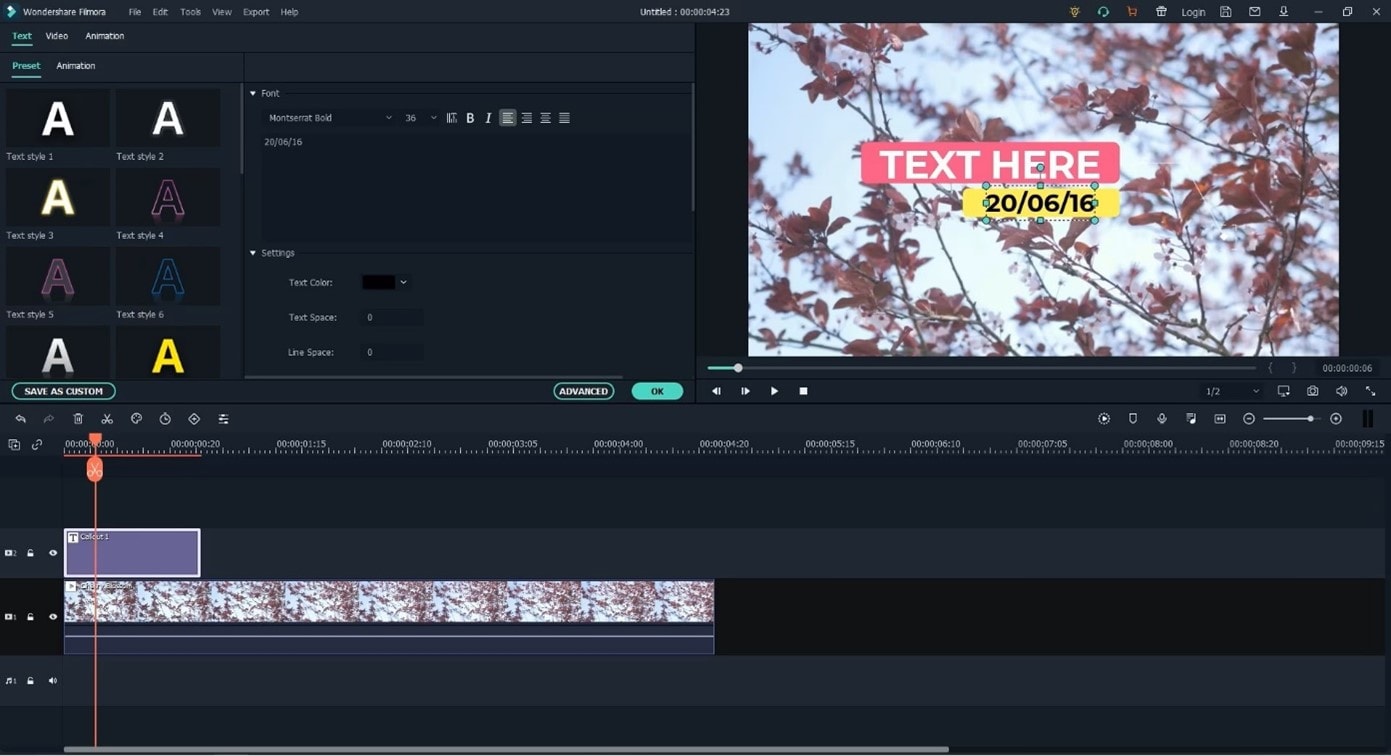
Step 3: Drag your chosen title onto your video timeline.
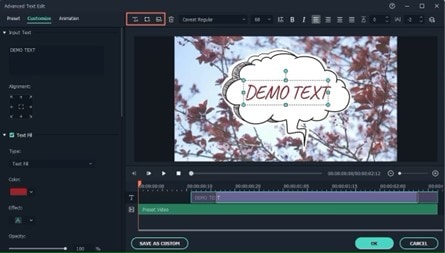
Step 4: Double-click the title to type in your message or quote. Make it fun!
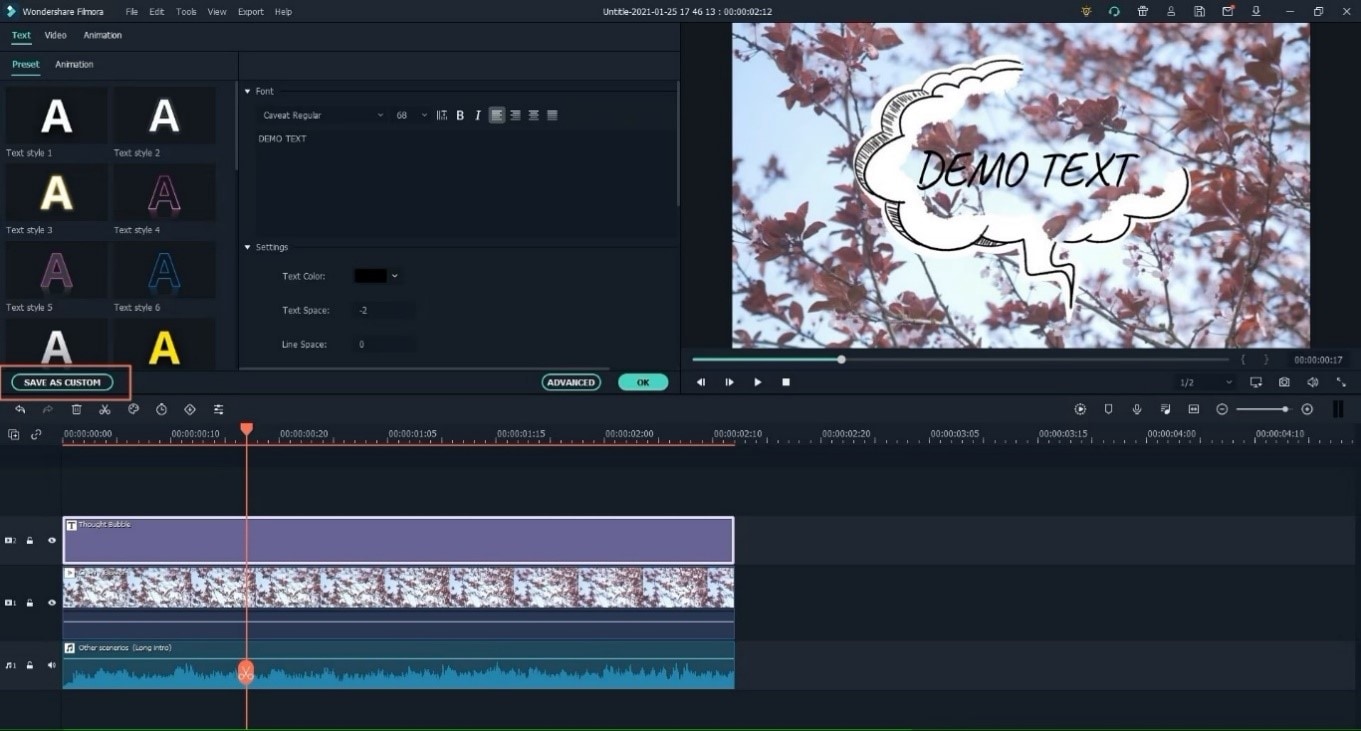
Step 5: Go to “Animations” and pick an effect like “Bounce” or “Slide” to make your text dance.
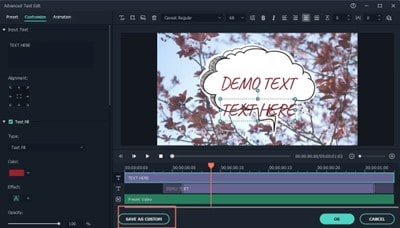
Step 6: Adjust when your text appears by moving it around on the timeline.
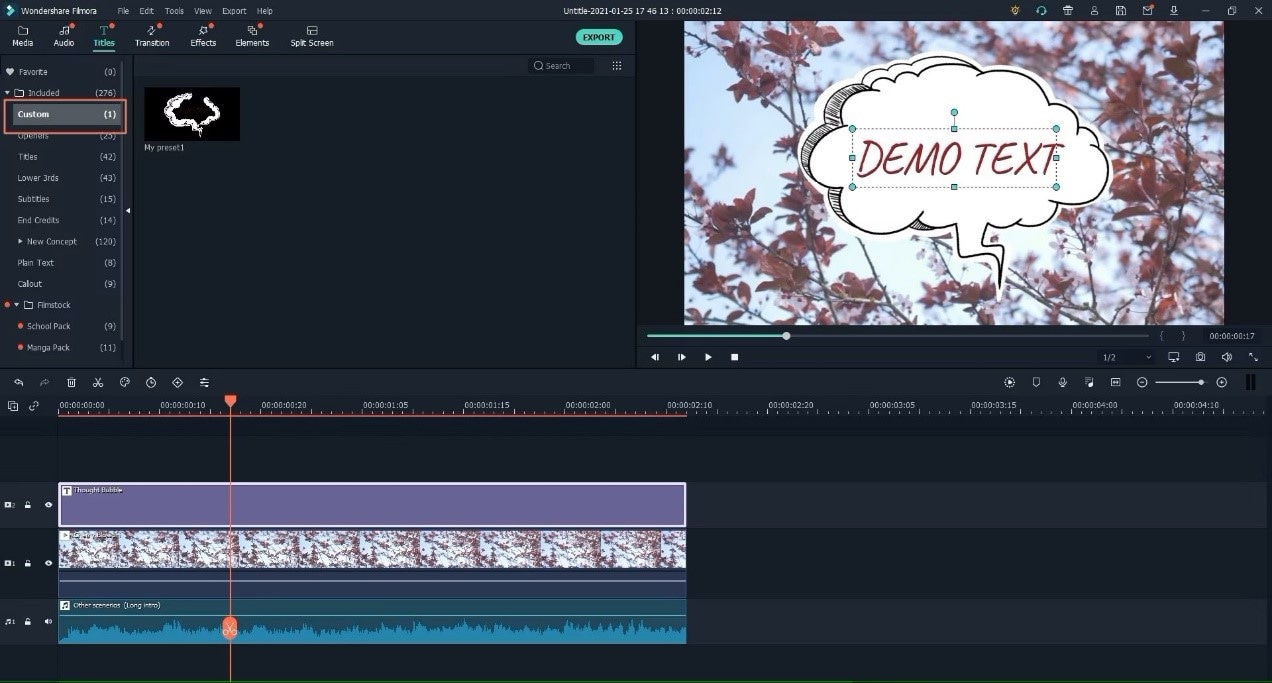
Step 7: Hit “Play” to see how it looks. If it’s perfect, click “Export” and you’re done!
Now, your videos will have text that’s as lively and fun as you are!
How to Add Text Using Wondershare Filmora’s Kinetic Typography
Step 1: Fire up Filmora and drag your video into the project. It’s time to get creative!
Step 2: Hit up the “Titles” tab and pick a text style that fits your vibe. Drag it onto your video timeline—easy peasy!
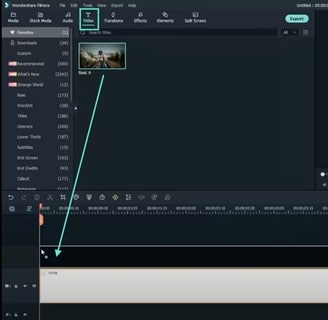
Step 3: Double-click the text to mess with fonts, colors, and sizes. Make it look just how you want it.
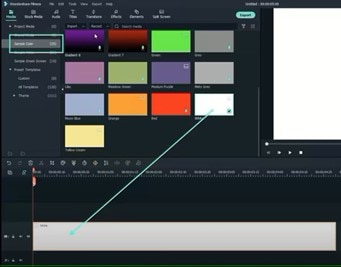
Step 4: Head to the “Animations” tab and add effects like “Bounce” or “Slide.” Watch your text come alive!
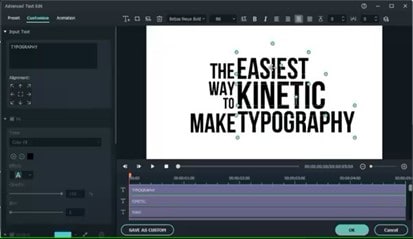
Step 5: Feeling fancy? Split your text into individual letters or words and animate them to groove with your video’s beats. It’s like magic!
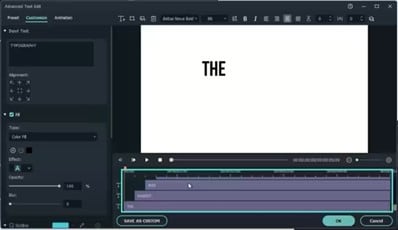
Step 6: Adjust where and when your text appears to sync perfectly with your audio. Make sure it’s all in the right spot!
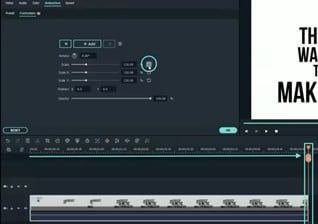
Step 7: Hit “Play” to see your text in action. If it’s looking great, click “Export” and share your awesome creation with the world!
And there you go! Your text is now ready to shine and keep your viewers hooked!
How to Add Text Using Wondershare Filmora’s Speech-to-Text
You can also add text to your YouTube video by using Filmora’s Speech-to-Text feature. It automatically converts the audio to text. No hassle, only ease!
Step 1: Open Filmora and import your media.
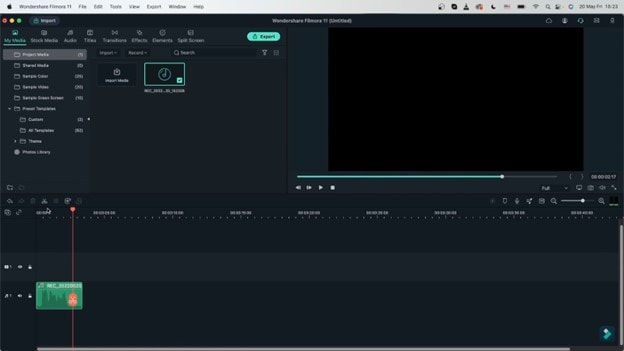
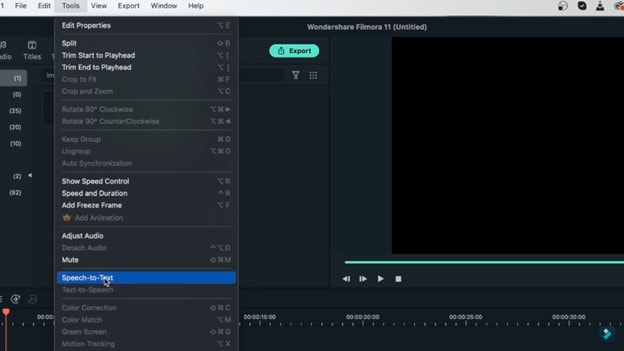
Step 2: Select the media and go to “Tools” on the toolbar. Here, click on “Speech-to-Text.”
Step 3: In the dialog box that appears, adjust the settings as needed. Then, click “OK.”
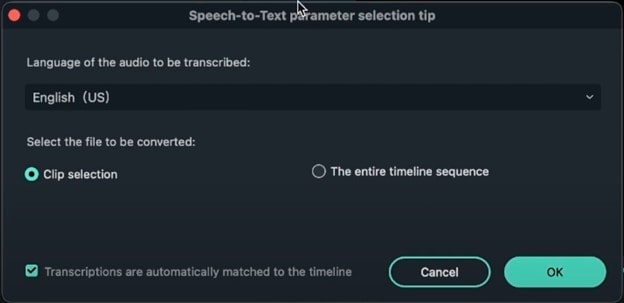
Step 4: Wait for the processing to complete.
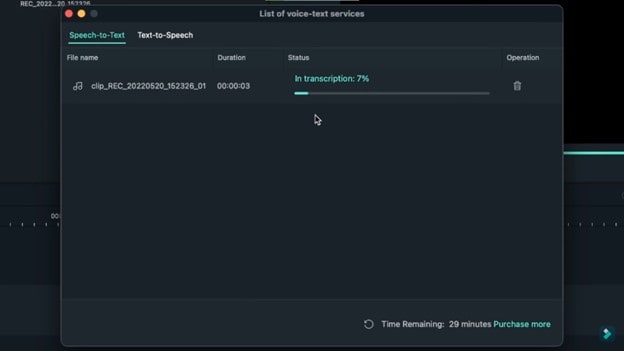
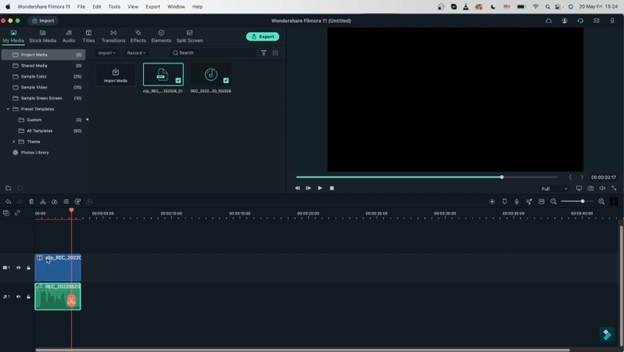
Step 5: Once its done, you will see a text track above the video track.
Step 6: If you want to edit the text track, double-click on it. You can change the font, style, etc.
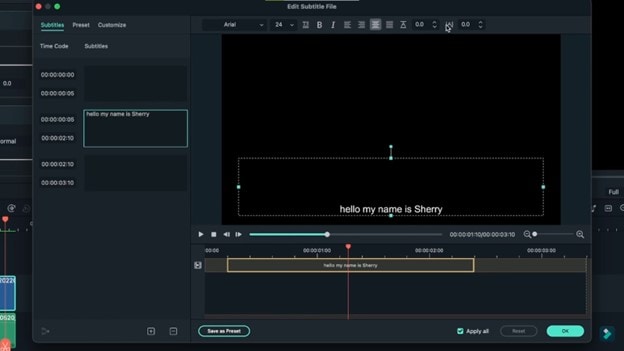
Step 7: Play the preview and see what your video looks like.
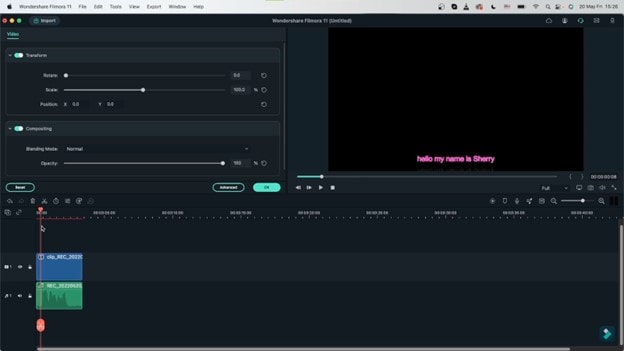
Step 8: Now, click “Export” to save your video.
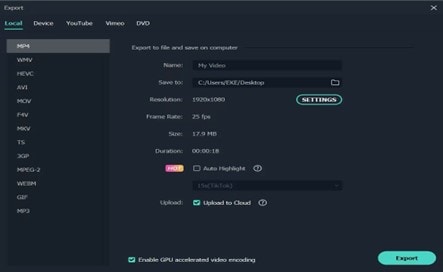
Choose the format and resolution, and you are ready to upload it to YouTube!
Part 3: How to Add Text to YouTube Videos After Uploading
If your YouTube video is already up, but you think it could use some extra text, don’t worry! You can add and adjust text using YouTube Studio. Here’s how:
How to Add Text Using YouTube Studio
Step 1: Alright, let’s get some text on your YouTube video! First, sign in to YouTube Studio.

Step 2: Find the video you want to edit and give it a click. Now, click on the “Editor” tab on the left side. This is where the magic happens.
Step 3: In the editor, you can add cool end screens or cards. Just click on “End screens” or “Cards,” pick what you need, and jazz up the text however you like.
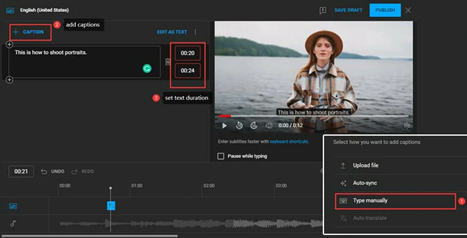
Step 4: Use “Auto-sync” to create captions from your video’s audio. You can tweak the text in the auto-generated captions.

Step 5: Adjusting the timing of your captions is a breeze. Click “Edit” on the caption file.
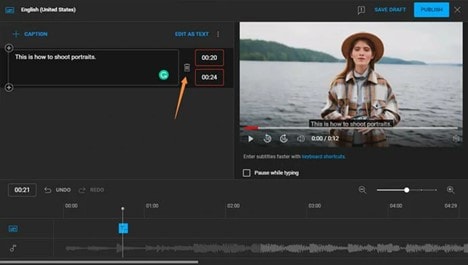
Step 6: Happy with everything? Click “Save Changes” and preview your video to check if the text is on point. When you’re all set, click “Publish” or “Update” to make your changes live.
Don’t forget to check out viewer feedback after publishing to see if the text improvements are a hit and make any extra tweaks if needed!
Part 4: Where to Add Text to Your YouTube Video
From eye-catching titles to fun captions and helpful subtitles, we’ll cover where and how to make your videos more engaging and entertaining:
- Captions: Add captions in YouTube Studio under “Subtitles” for accessibility and clarity.
- Thumbnails: Use custom thumbnails with text overlays to attract viewers. Upload in the “Content” tab.
- End Screens: Add text to end screens for video promotions and subscription prompts using the video editor.
- Subscribe Buttons: Place text on subscribe buttons in end screens to encourage subscriptions.
- Links: Add text to links directing viewers to websites or other channels using “Cards” or end screens.
Part 5: Creative Ways to Use Text in YouTube Videos
Alright, let’s add some flair to your YouTube videos! We’re diving into how to use text to make your videos pop. Let’s get creative and make your content stand out:
- Animated Text: Use dynamic text animations to make key points stand out and keep viewers engaged.
- Text Overlays: Add text overlays to emphasize important messages or highlight specific parts of your video.
- Lower Thirds: Incorporate lower thirds to introduce speakers or provide additional information without distracting from the main content.
- Text Callouts: Use callouts to point out details or add context to scenes.
- Interactive Text: Create clickable text for end screens or video links to guide viewers to related content.
Conclusion
Adding text to your videos and then posting them on social media platforms such as YouTube for marketing is like giving them a special touch! It helps catch attention, explain things better, and make your videos more interesting.
Now that you’ve mastered the art of how to add text to YouTube videos, go try out different text styles and see how they make your videos shine.
Have fun, and let your creativity flow!


