


 100% Security Verified | No Subscription Required | No Malware


 ChatGPT
 Perplexity
 Gemini
 Claude
 Grok
Grok
As a creator, you may want viewers to be automatically notified of your new updates. In that case, you may need to encourage them to subscribe to your channel first. Besides producing good quality content, adding a subscription button to YouTube videos is the best way to entice viewers to subscribe. If you are wondering about how to add a subscribe button to a YouTube video, you are in the right place. We've compiled a quick guide for you.
In this article
3 Easy Ways To Add Subscribe Button on YouTube Video
Here are 3 easy ways how to put a subscribe button on YouTube videos:
Method 1: Add the Subscribe Button Directly Via the YouTube Video
YouTube Studio's built-in features allow users to add a subscribe button directly to their YouTube videos. In this method, you will have to find a suitable subscribe button online and then upload it. The same applies if you are looking for how to add a subscribe button on YouTube shorts.
How to Add a Subscribe Button Directly via the YouTube Video?
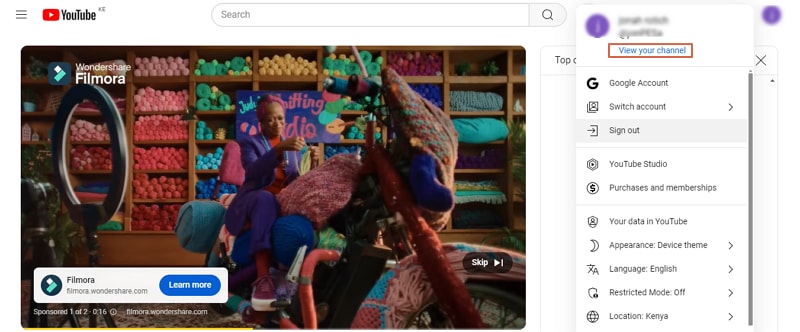
Step 1. To begin with, open YouTube on your browser and make sure you sign in to your account. Click your name icon at the top-right corner and select the "View Your Channel" option.
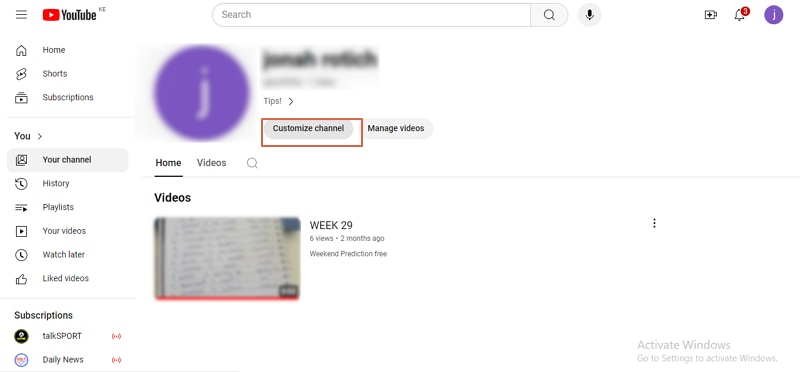
Step 2. Once you are in your channel, choose the "Customize Channel" tab to access the "Channel Customization" window.
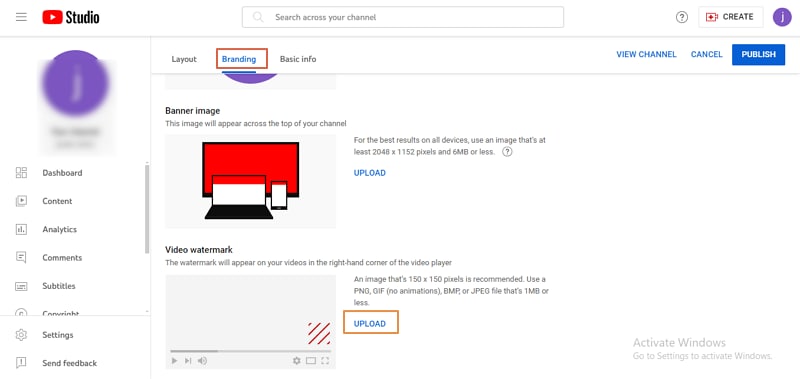
Step 3. Now, choose the "Branding" tab and head to the "Video Watermark" section. Click the "Upload" button and import the subscribe button image for your video.
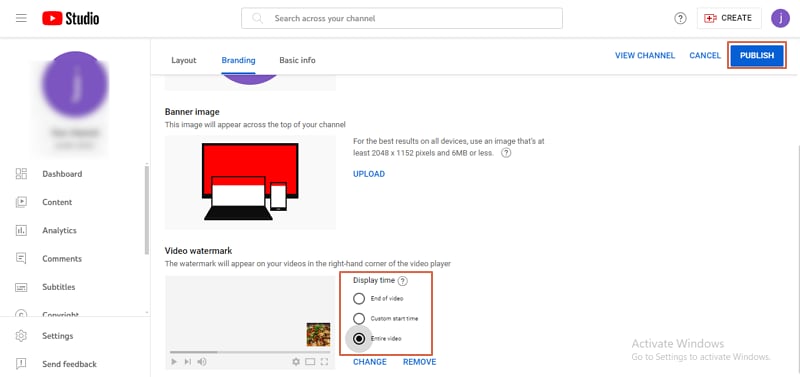
Step 4. Once your YouTube subscribe watermark is uploaded, choose the display time for your subscribe button. You can choose the end of the video, custom start time, or entire video depending on your needs. When you are satisfied with your selections, click the "Publish" button to add the subscribe button to your video.
Method 2: Add Subscribe Button Using Filmora Stickers
If you want to have a standout subscribe button for your YouTube video, use Wondershare Filmora.
Yes, this tool comes with a plethora of top-grade features that make it easy to create a stylish subscribe button that seamlessly attracts and retains viewers. Unlike other YouTube subscribe watermark editors, the Filmora Editor gives you tons of amazing subscribe button templates.
Your job is to customize these templates to meet your needs.
You can proceed and add animations, filters, captions, shapes, and other effects to make your YouTube subscribe button stunning. Once you are done editing, you can upload your subscribe button to your local device or directly to YouTube or other social media platforms.
This tool is easy to use, affordable, and compatible with popular operating systems and file formats.
Features of Wondershare Filmora
- Plenty of templates and stickers suitable for different needs including subscribe buttons for YouTube videos.
- Supports using AI stickers to create a specific YouTube video subscribe sticker.
- More than 300 amazing visual effects.
- Plenty of animation styles for your needs.
- Wizard-style interface that makes it easy to navigate.
- Powerful YouTube video editing features to create stunning YouTube videos like keyframing, speed ramping, etc.
- Offers more than 30 different AI features to improve your editing efficiency, whether you want to edit videos based on texts, apply voice changer effects to clips, or generate a high-click YouTube thumbnail.
- Direct connection with YouTube so you can export videos to the platform without any hassles.
Here are the steps to add a subscribe button with stickers:
Step 1: Click on the "Stickers" tab and search "YouTube" to find the sticker you would like to use.
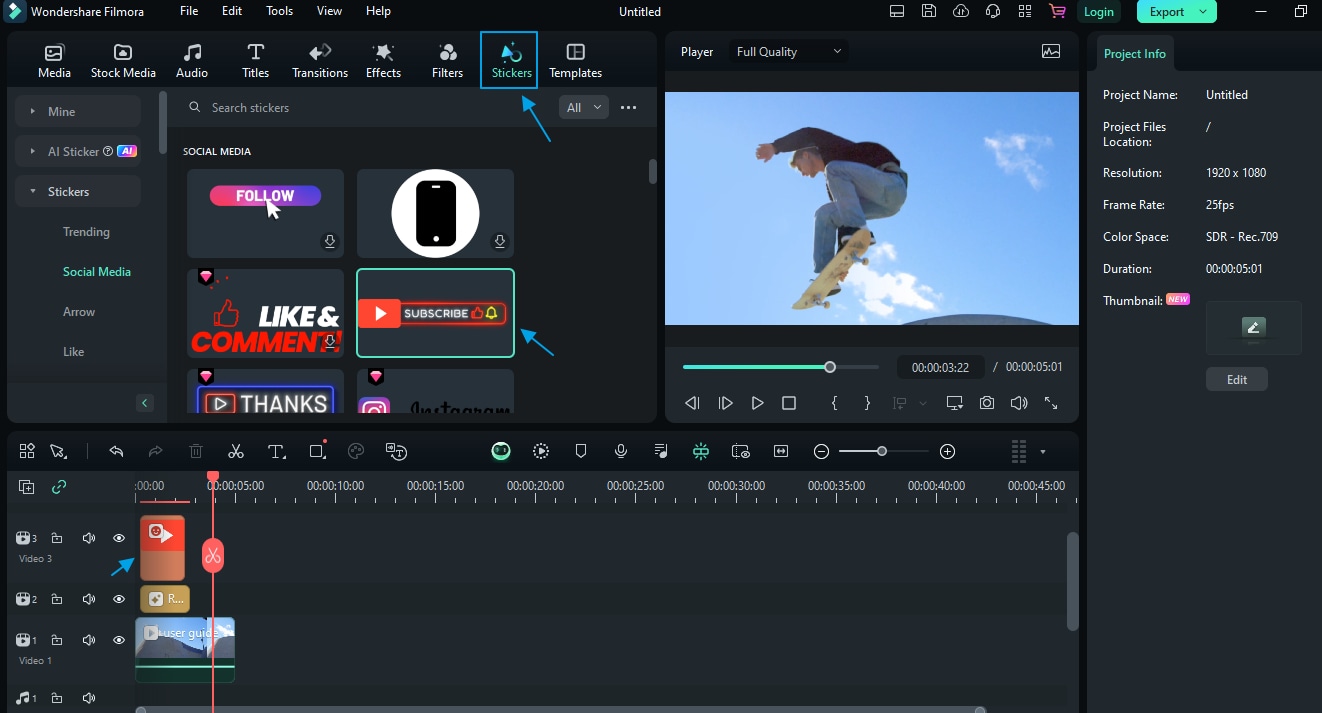
Step 2: Click on the subscribe stick on the time and adjust the size and position of the YouTube subscribe sticker.

How Easy is it? Right?
Method 3: Add a Stylish Subscribe Button Using Wondershare Filmora
You may also want to create a customized YouTube subscribe button by yourself, if so, here are the steps, and it is a little bit more complicated than simply adding the stickers. Just follow the steps below:
How to Add a Stylish Subscribe button using Filmora Editor?
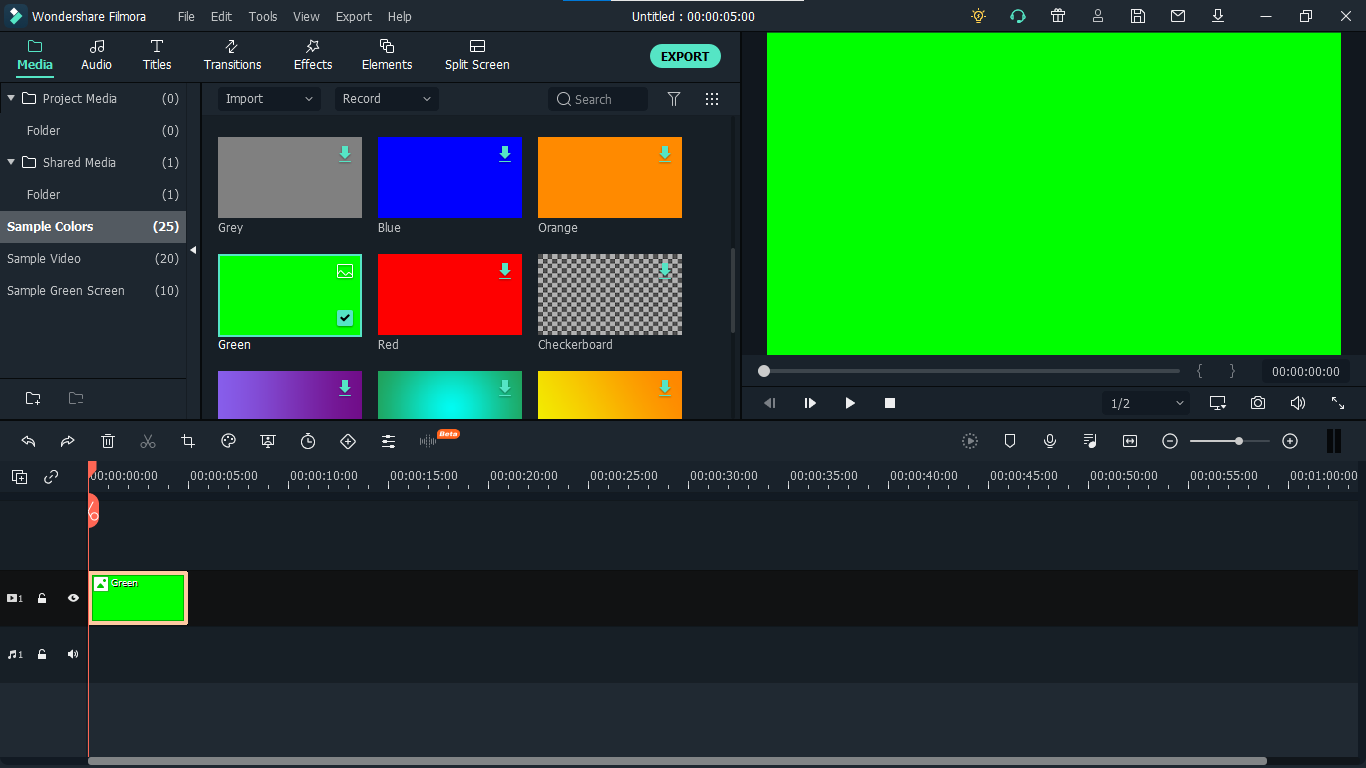
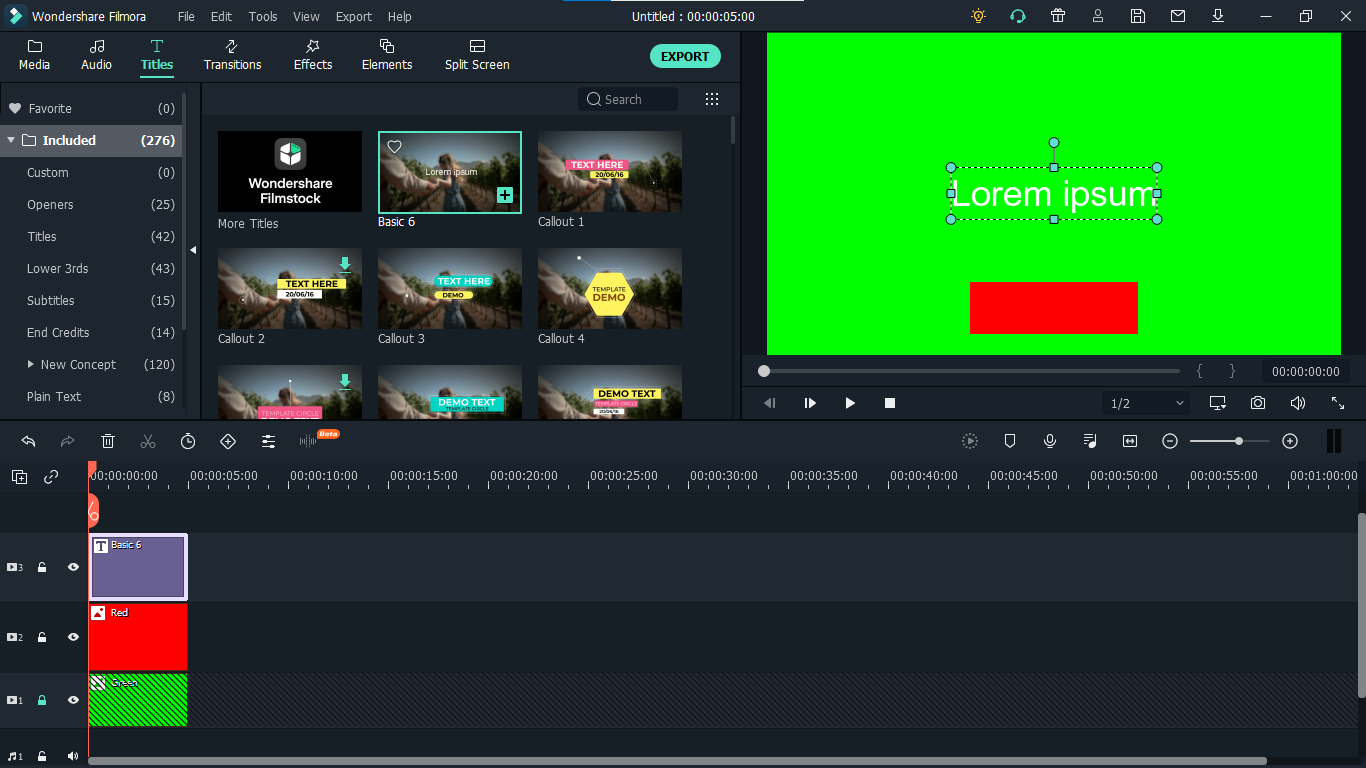
Step 1. Download, install, and run Filmora Editor on your device. Now, head to the "Media" section and click the "Sample Colors" option. Choose a suitable background color, say green, and drag it to the timeline. Also, adjust the duration to around 5 seconds.
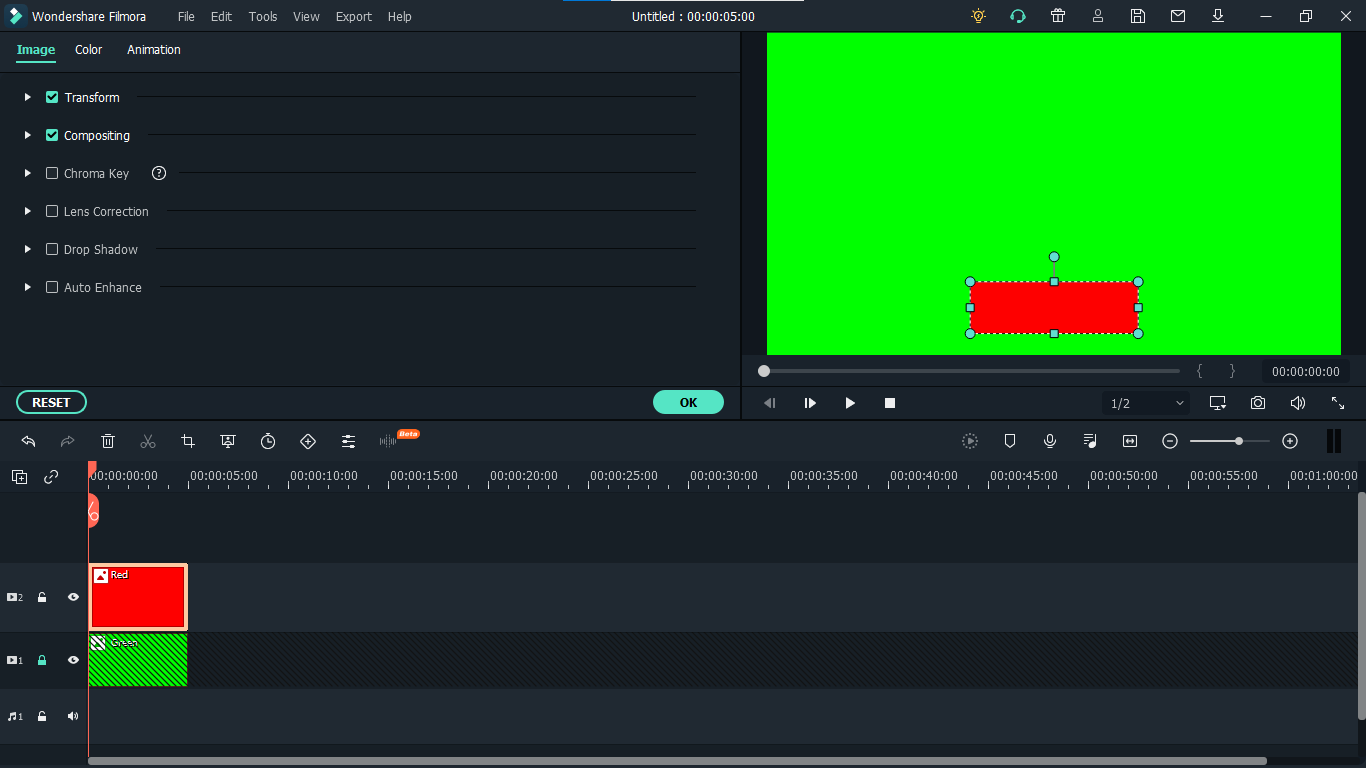
Step 2. Next, go back to the sample colors and choose another color, say red as the subscribe GIF. Drag it also to the timeline above the green background color. Double-click it and adjust it to a suitable size.
Step 3. Now, go to the "Titles" section and choose your desired style. Also, drag it to the timeline, double-click it, and edit it to read "Subscribe". Once edited, drag it to a convenient place inside the GIF subscribe button.
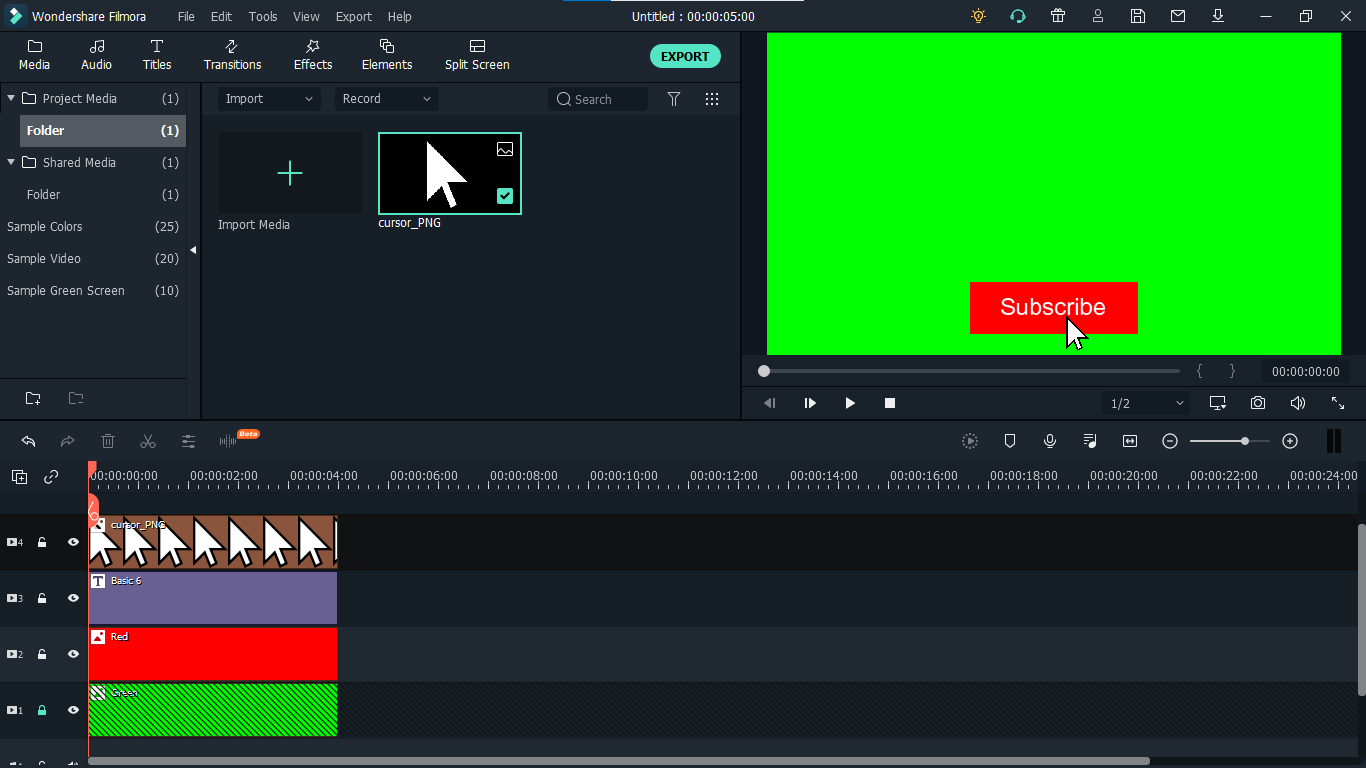
Step 4. Find a transparent cursor on Google and download it as a PNG file. Now, import it to Filmora and drag it to the timeline. Also, adjust its size and place it on your subscribe button.
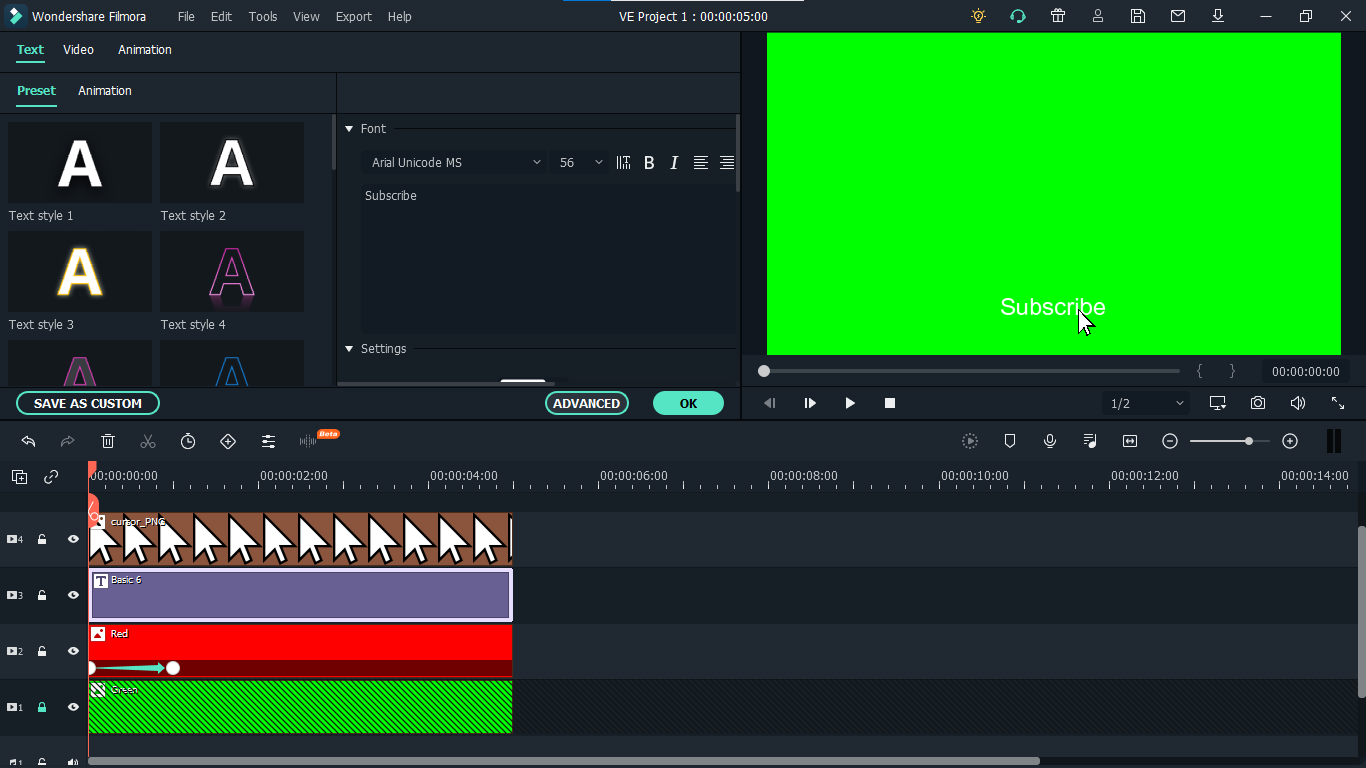
Step 5. Next, select each element, starting with the green color, and head to the "Animation" tab. Click customize and adjust to meet your needs. Now, go to "Presets" then "Advanced". Choose desired animations and confirm.
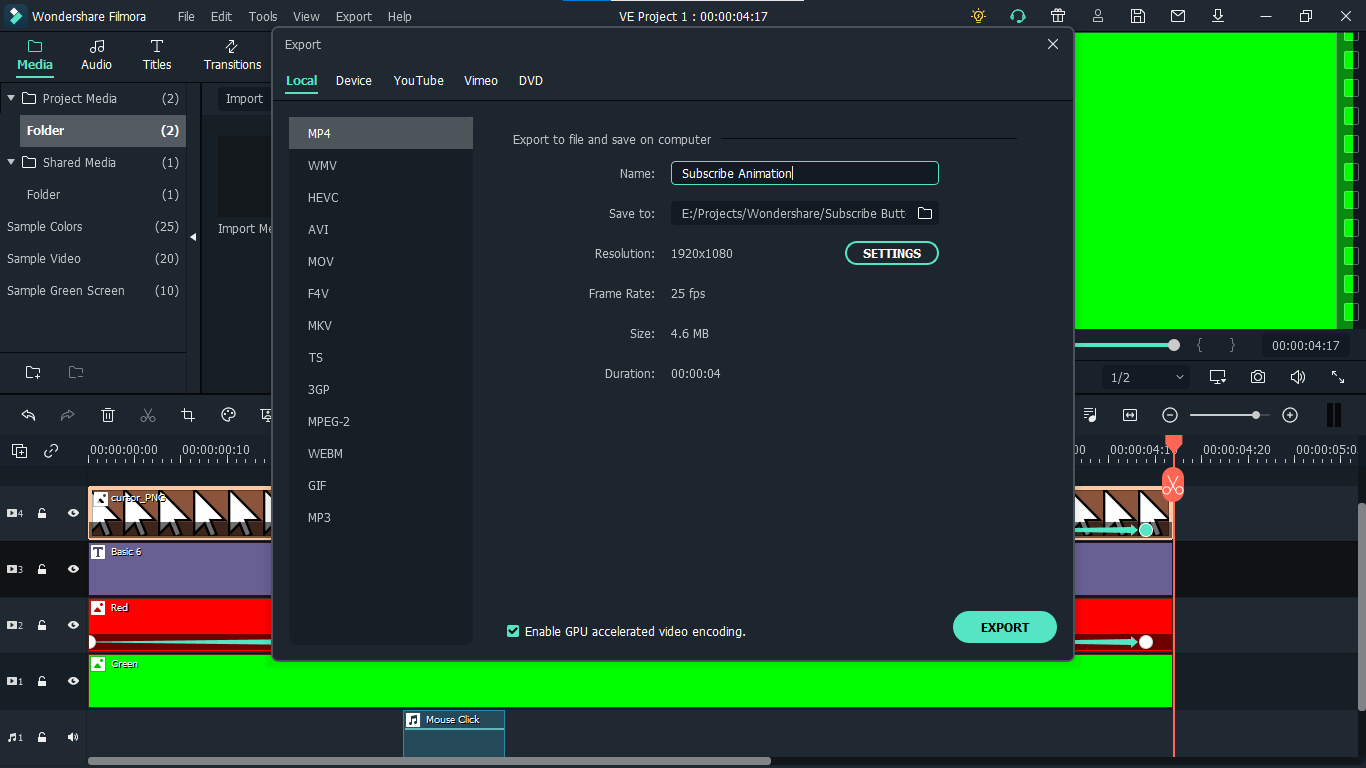
Step 6. Finally, click "Export" and choose the desired output options for your subscribe button.
Tips to Get More People to Subscribe on YouTube
The goal of every YouTube content creator is to have as many subscribers as possible. While adding a subscribe button is a massive step in the right direction, this alone is not enough if you want to get more people to subscribe to your YouTube channel.
Nevertheless, many practical tips can significantly attract and boost the number of subscribers on your YouTube channel. Some of the hottest tips include:
1. Add subscribe on the screen end
The end screen is a popular still image that appears at the end of the video to remind viewers to subscribe. It can only be added to a video whose length is more than 25 seconds. While you would add it when publishing the video, you can still add it even after uploading your video. The following steps show how to add subscribe on the screen end.
Step 1. Go to your YouTube channel and select the "Content" tab on the left menu.
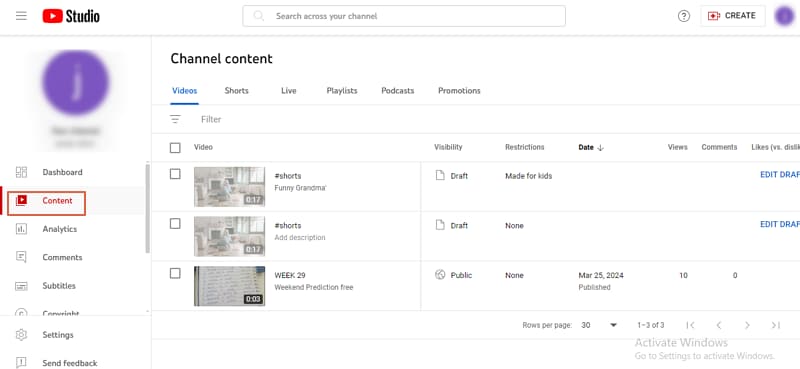
Step 2. Tap the video you want to add to the subscribe screen end. On the right edge, scroll down and click the "End Screen" box. Upload the subscribe button image and publish it.

2. Add subscribe link
Links provide an easy way to promote subscriptions to your viewers. When the viewer hits the texts with the subscription link, they are redirected to your channel for the subscription. The following steps illustrate how to add the subscribe link to your YouTube video.
Step 1. Open your YouTube channel and copy your channel's URL in the address bar.
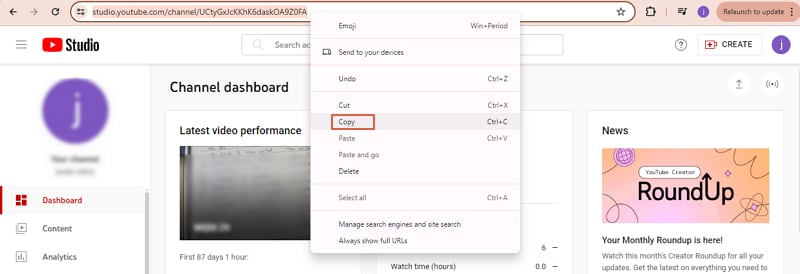
Step 2. Paste this url in a notes app say Notepad and then add the "?sub_confirmation=1" at the end of this link. Don't insert a space anywhere. Just start typing after the end letter of your channel's URL code.
Step 3. Proceed and open the section you want to add the link and paste it.
3. Use the Embedded Subscribe button.
If you want viewers to follow you on other social media platforms, you can use the embedded subscribe button to redirect them. With embedded subscribe buttons you can gain visibility in other sites and improve your traffic.
4. Use Branded Video Thumbnails
Video thumbnails tell a viewer what your content is all about even before watching it. Therefore, it creates an impression in the mind of the viewer as to whether your content is worth watching or not.
To attract your viewers and convince them to subscribe, make sure your video thumbnails are branded and stylish. You can use reliable video editors to create and edit your video thumbnails to meet your needs. Always make sure your video thumbnails have consistent layouts and themes.
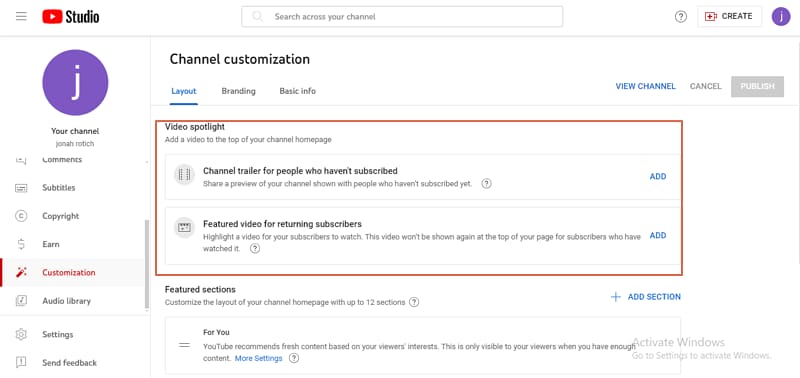
5. Leverage Video Spotlight
Video spotlight lets you add a video on top of your channel homepage. Here, you can create separate videos for your subscribers and those who haven't yet subscribed. You can put a video for those who haven't subscribed showing them what they miss in your channel.
Be creative in how you do it. You can add a preview video.
Conclusion
Adding a YouTube subscribe button is that easy! You've seen there are several practical ways in this article. Although you can use the built-in feature of YouTube Studio, we still suggest you try Wondershare Filmora because it provides more customization options, and is full of amazing YouTube video editing features. Download Wondershare Filmora today to add a stylish subscribe button to a YouTube video and other edits to create quality videos.
