Note: This video tutorial is compatible with Filmora V11, V12 and V13 versions.
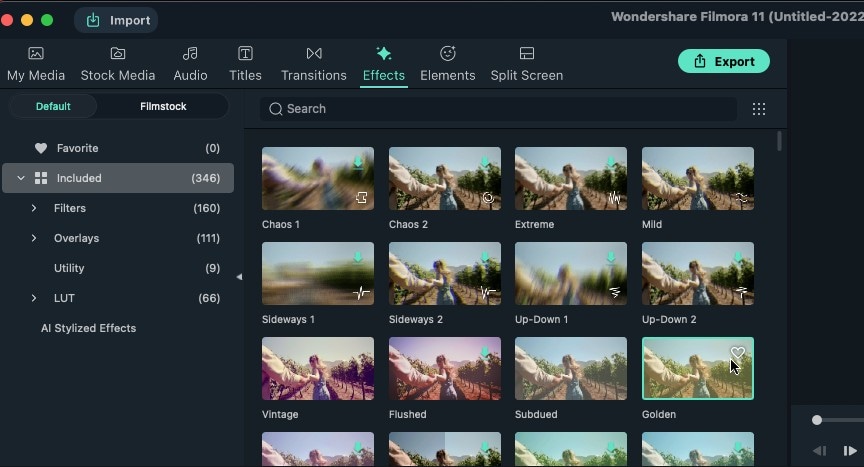
Extensive Library of Effects
When choosing the Filmora graphic editor software to explore your graphic design creativity, you are entitled to free access to the softwares huge effects library, a visual storehouse of the classiest and most professional audio-visual effects and tools.
You can work with to add the extra grit to your otherwise regular videos and images.
Special Elements of Filmora
You can learn various unique elements of Filmora in this tutorial.
You can gain appreciable momentum and comfort with the software usage and editing process even as a beginner. However, even as a graphic design and editing expert, the preset templates and tools are always something new to offer for polishing your creative skills.
The enormous effect library of Filmora is further enhanced with the introduction of the Filmora upgrade.
 Filmora Editing Effects and Tools
- You can use it to amplify videos with classic effects like:
- Audio design
- Color grading
- Clip cutting
- Trimming
Upgrading to the latest version guarantees you a smooth and seamless workflow with no inherent bugs and mid-operation software crashes, as you may occasionally encounter in the earlier versions.
Filmora Quick Start Guide
Having learned about the basic features and utilities of the Filmora graphic design tool, let us now dive into understanding the elementary procedure to work with the tool in the following section:
Navigate to the official Wondershare website to make a free download of the software to your preferred Windows or macOS-supported PC and proceed to launch the same.
To begin a new project, you can click on the New Project option on the main interface, or as an alternative, navigate to the Menu Bar at the top and click on the File tab, followed by selecting the New Project option.
To open an already saved project, you can tap on the Open Project option in the apps welcome interface or select any Open Project or Open Recent options in the File tab of the top Menu Bar.
 Create a New Project
Tap the + icon to browse and import media files locally saved on your system.
Use the Drag and Drop method to directly add media files to the softwares media library.
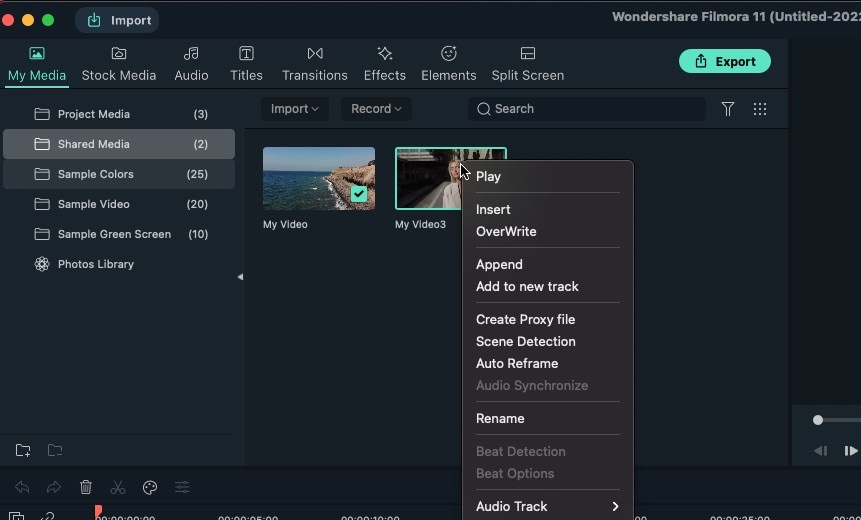
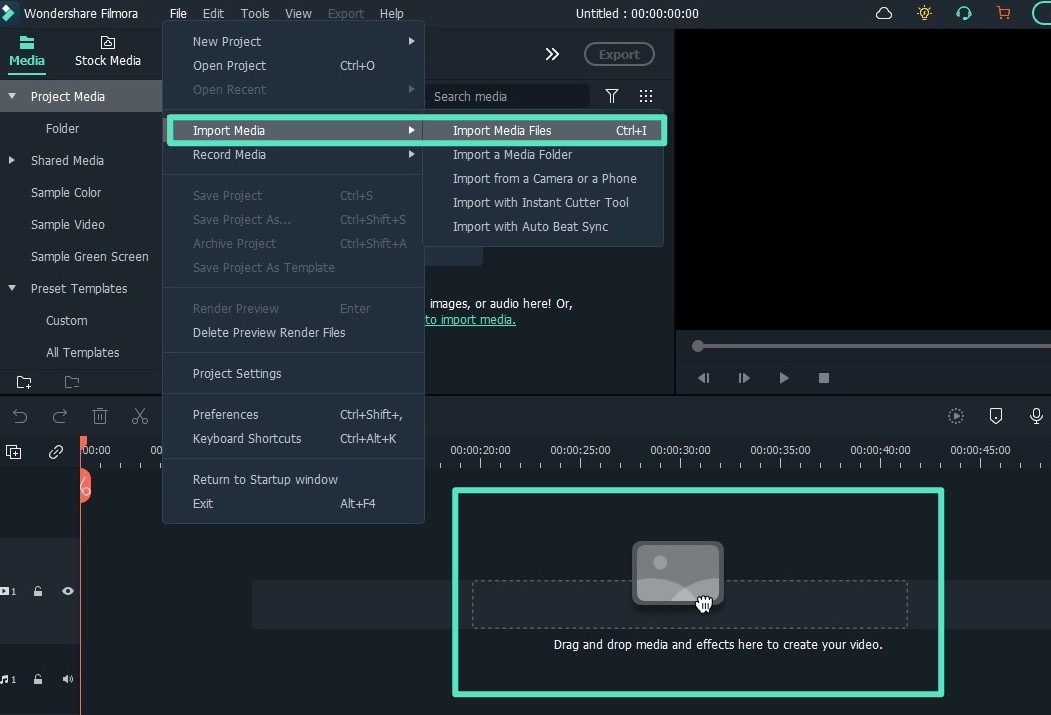 Import Media
Start with locating your desired video and dragging it to the softwares editing timeline. Once added, right-click on the video icon to open a list of editing options, like, Overwrite, Append, Insert, Add to New Track, etc.
 Customize and Arrange Media
To add a title, navigate to the Titles panel in the Functions Toolbar at the top and click on the same to access a library of preset title templates to add a suitable one to your video.
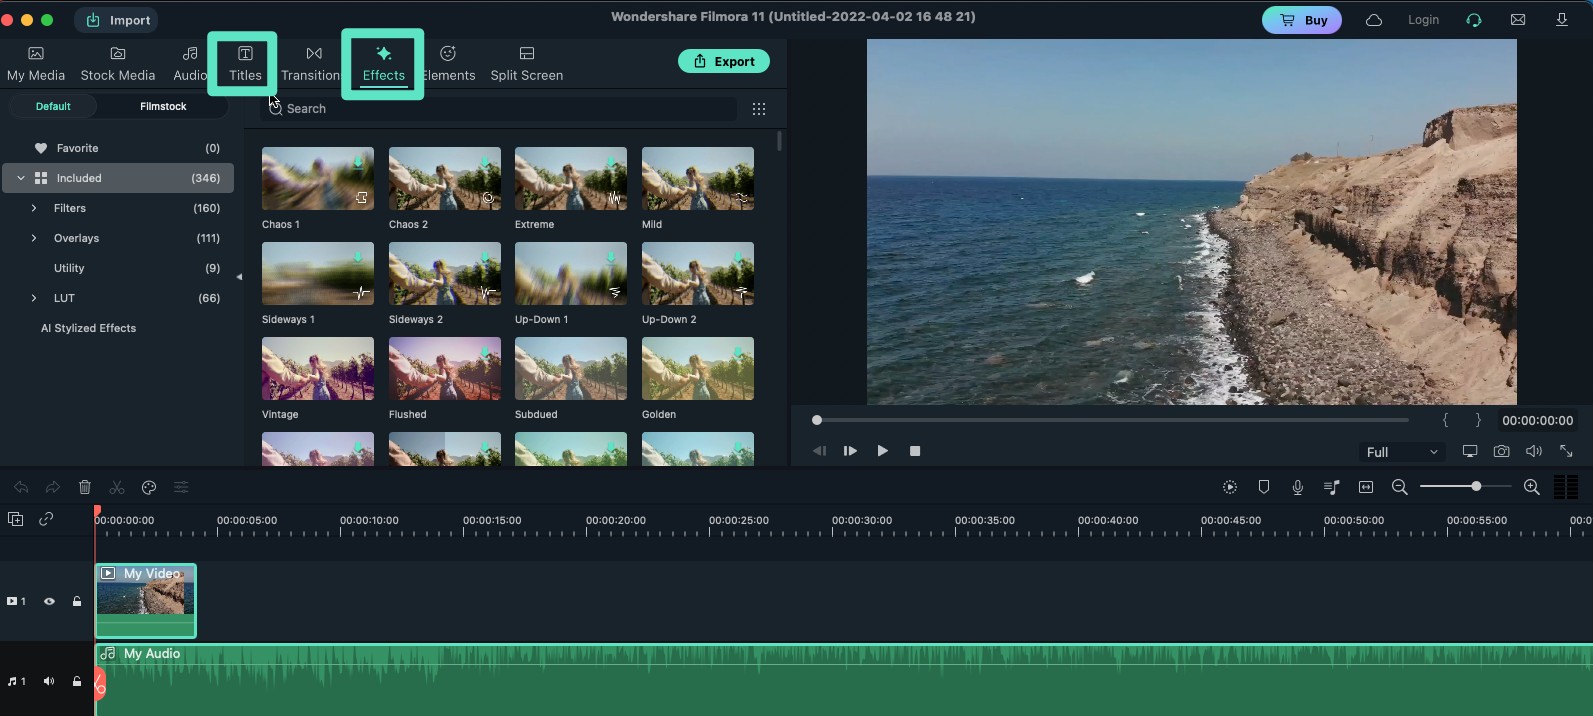 Titles and Effects
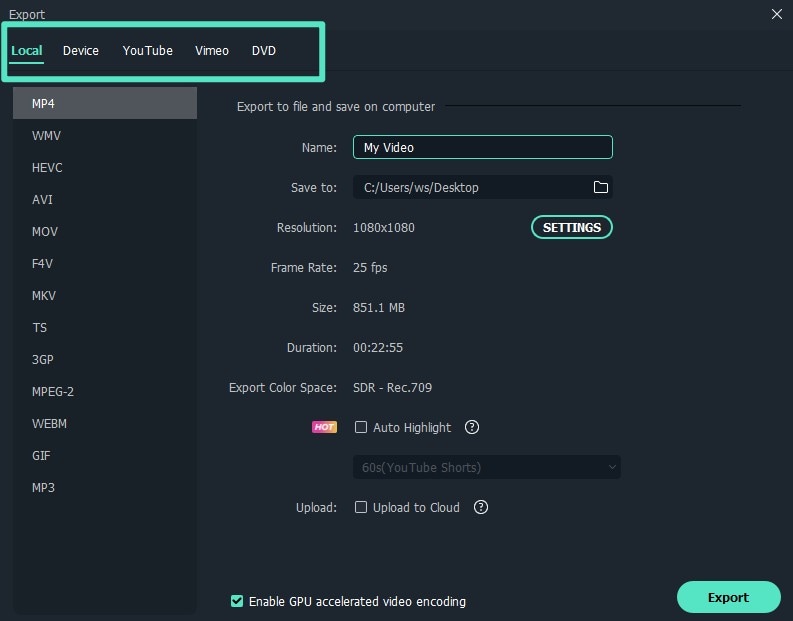
Save your creation in a file and export it locally to your system or an external device.
Launch the Export Settings to directly export your video to YouTube.
To burn your video on DVD, click on the DVD tab at the top of the softwares Export interface and provide information on video parameters, like disk type and aspect ratio, etc.
 Export and Share
If you are working with the trial version of the software, your video editing creations will have a watermark on the final output clip.
To remove the same, you need to upgrade to the paid version of Filmora. Talking of the different subscription plans available, you can choose from an annual or a perpetual premium plan.
However, you can proceed to export your creation with the watermark if you are not interested in buying the software package.
 Watermark Removal