Note: This video tutorial is compatible with Filmora V11, V12 and V13 versions.
Users Guide to Record Voiceovers in Filmora
Start with visiting the official Wondershare website to download the Filmora media editor program on your preferred devices, then install the same in your system.
Launch the software application after its successful installation in your system, and wait for its welcome interface to appear. On the launch screen, click on the My Media tab in the editor workspace and import a media file, preferably a video, to the app's timeline.
Drag the timeline indicator to the specific point from where you wish to start the voiceover recording, then click on the Microphone icon above the editor timeline to see the Record Audio window pop up on your device screen.
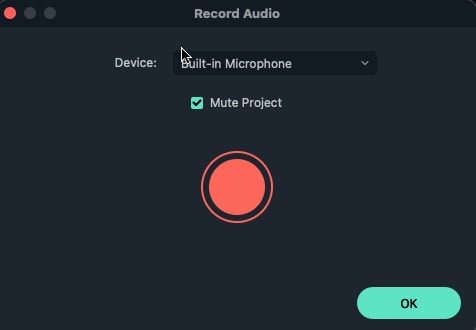
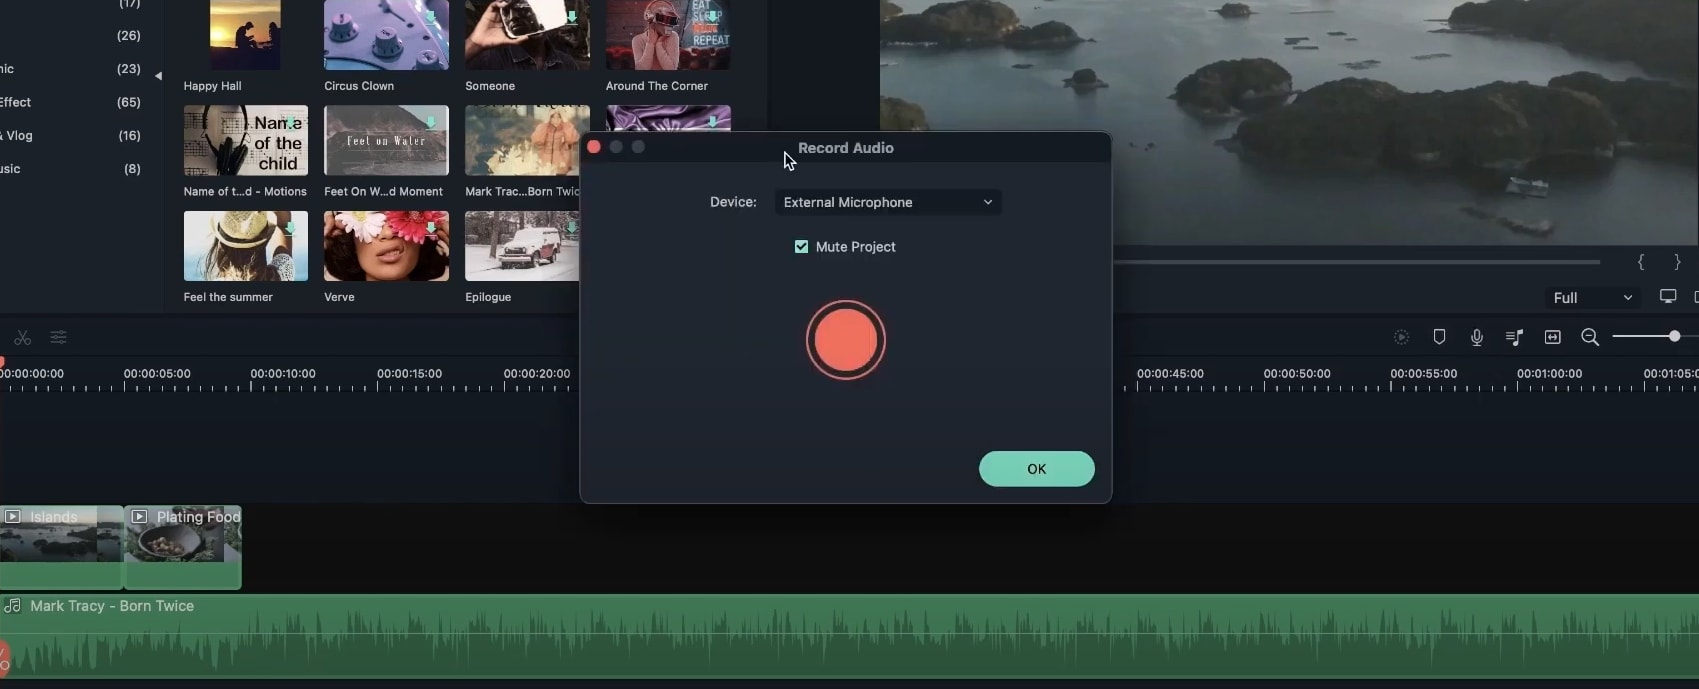
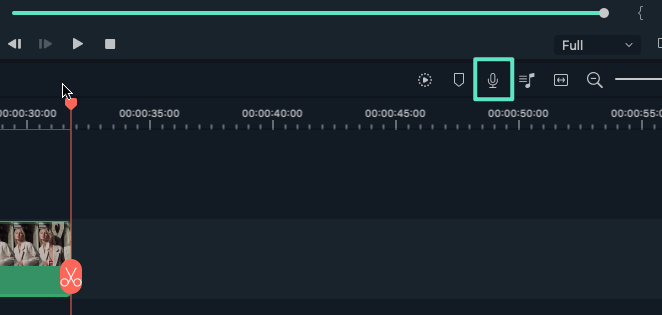 Microphone Selection
Select the recording device, which can either be your device's internal microphone or an external one. Remember to uncheck the Mute Project option since there is no background music in the recorded voiceover. Next, tap the red Record button to record your voiceover and track its progress in the project timeline.
 Filmora Start Recording
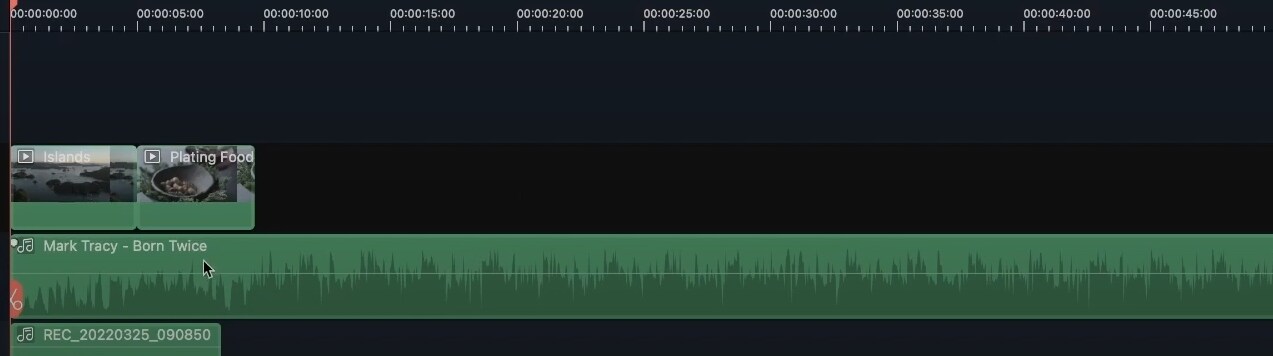
Tap the Record button again to stop the process when you have recorded the needful. Tap OK to see your recorded voiceover file displayed in the Project Media folder. Right-click on the audio thumbnail and select the Rename option from the dropdown to assign a proper name to your audio file. Select the recorded audio track to trim or split in the editor timeline according to your specific needs.
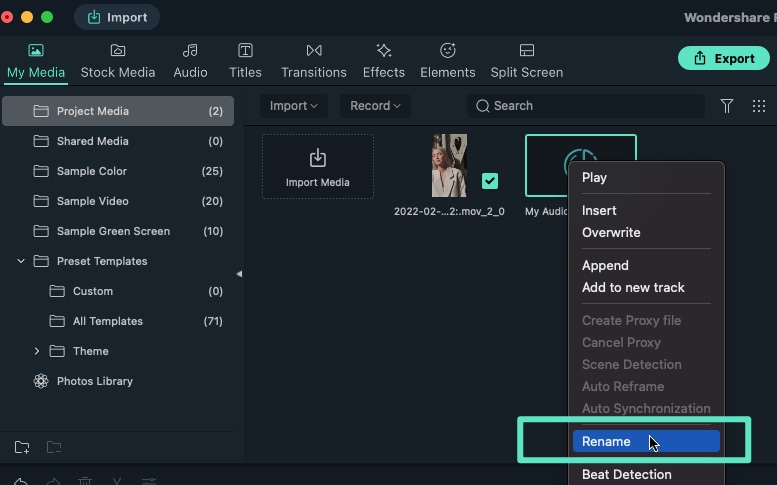 Filmora Find and Rename File
Navigate to the Audio tab in the project workspace to include a background music file in the editor timeline, then drag the timeline indicator to the point where you wish the voiceover to start.
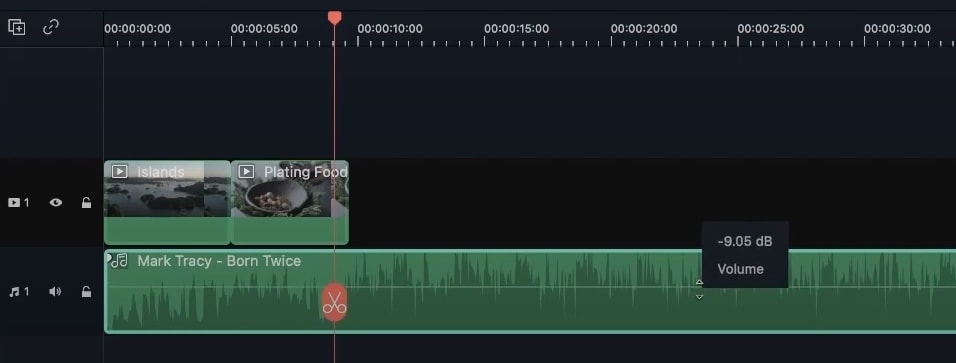 Adding Background Music to the Voiceover
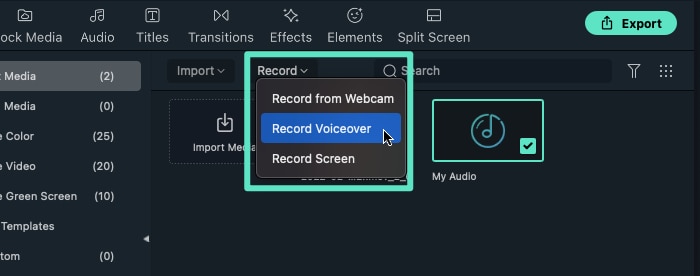
An alternative method to record voiceovers is, navigating to the My Media tab and hitting the Record option above the media files in the workspace. As you hit the Record tab, a dropdown menu appears, from where you need to select the Record Voiceover option. Then, the Record Audio window pops up, and you can proceed with the recording process.
 Filmora Timeline Voiceover Recording
You can add voiceovers at different points in your audio track by splitting the ways in the editor timeline and including the recorded voiceover within the spaces. Then, merge the cut track pieces ahead of the voiceover file to create a unified audio track.
 Including Voiceovers between Audio Tracks
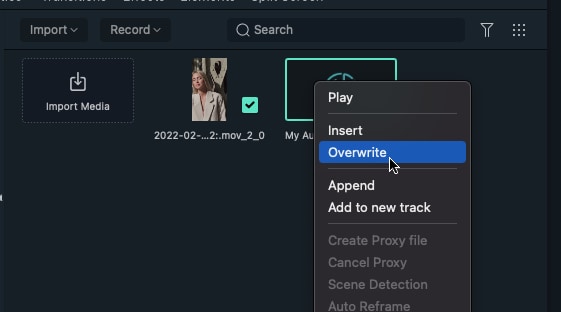
To overwrite a recorded voiceover, select the desired point of the audio track on the editor timeline, followed by right-clicking on the thumbnail of the voiceover that you wish to overwrite.
 Filmora Record Voiceover
Select the Overwrite option from the dropdown menu that follows and drag the ends of the audio track to be in line with the overwritten voiceover that appears above the audio track in the editor timeline.
 Filmora Overwrite
Follow the same process to insert a voiceover between an audio track, except for selecting the Insert option instead of Overwrite from the dropdown menu. Then, again, you can choose the Append option from the same menu to add your voiceover to a space in the editor timeline.
