Note: This video tutorial is compatible with Filmora V11, V12 and V13 versions.
Filters help you create a powerful video and add spice to your content. These effects are different from color correction since you are not correcting anything. Instead, you'll be adding a combination of colors or other effects not related to colors to your video. That said, here is how to add and customize filters in Filmora.
Type of Filters
You do not have to be a pro in color grading or correction to apply filters in Filmora. Click on your video in the timeline and go to Effects. Then go to the Filter options. This software has an expansive selection of filters that you can use in your videos to make them more expressive and engaging.
The Shake subcategory shakes your video to highlight movement in a scene. You can apply this effect in different directions, including sideways, up, and down.
 Shake Filters
To make changes to your filter, double-click on the effect, and you'll see the option to change the Frequency of the movement. The higher you go with the frequency, the more your video will shake. You can also work with Positions X, Y, and Z to adjust the intensity of the shake.
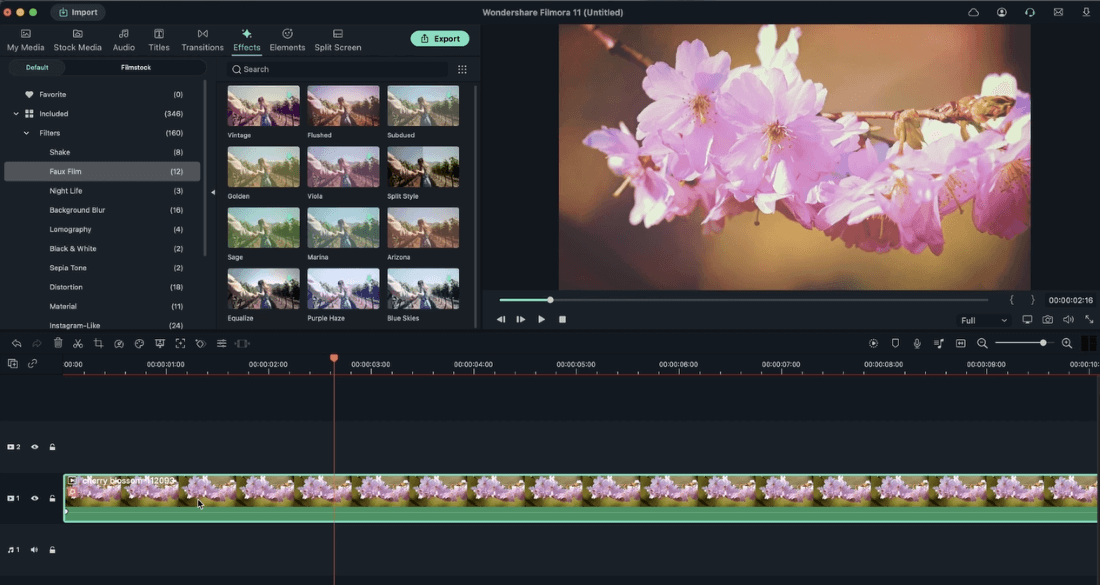
The Faux Film subcategory allows you to add various film effects in your video, including Vintage, Flushed, Sage, and Marina. T
 Shake Filters
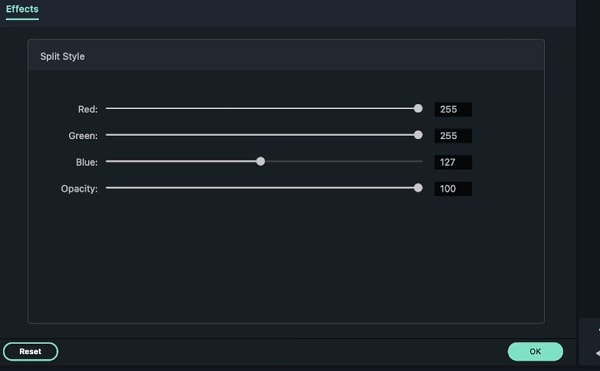
The Split Screen filter splits the screen in your video into two. To change its properties, double-click on the filter on your timeline. A screen will pop up and allow you to adjust the Reds, Greens, Blue channel, and Opacity.
 Split Screen Filters
The Sepia Tone subcategory features Sun-Kissed and Rise filters simulating the sepia-tinted film; you can use these effects to recreate the stunning visual style of old films.
The Sun Kissed filter emphasizes brown and red colors that give your video image the warm ambiance of old sepia photos. The Rise filter desaturates the video while keeping the blues and greens at a low value, making it ideal for recreating the visual style of black and white film stock. You can adjust the intensity of these filters with the alpha slider under the Effects tab.
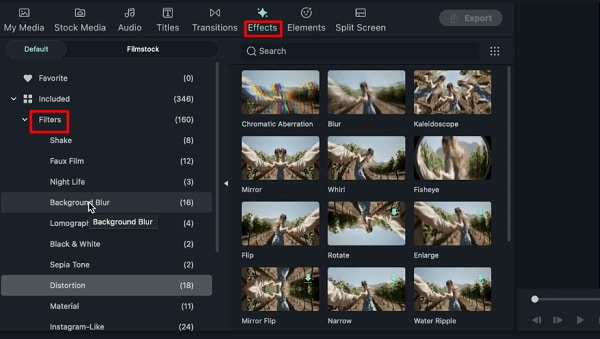
The Background Blur filter is designed for vertical videos, and it has several options that allow you to blur the background of your video. You can double-click on this filter if you want to make adjustments. Essentially, you can change the background color, luminance, feathery, and opacity. You can also adjust the source width.
 Background Blur
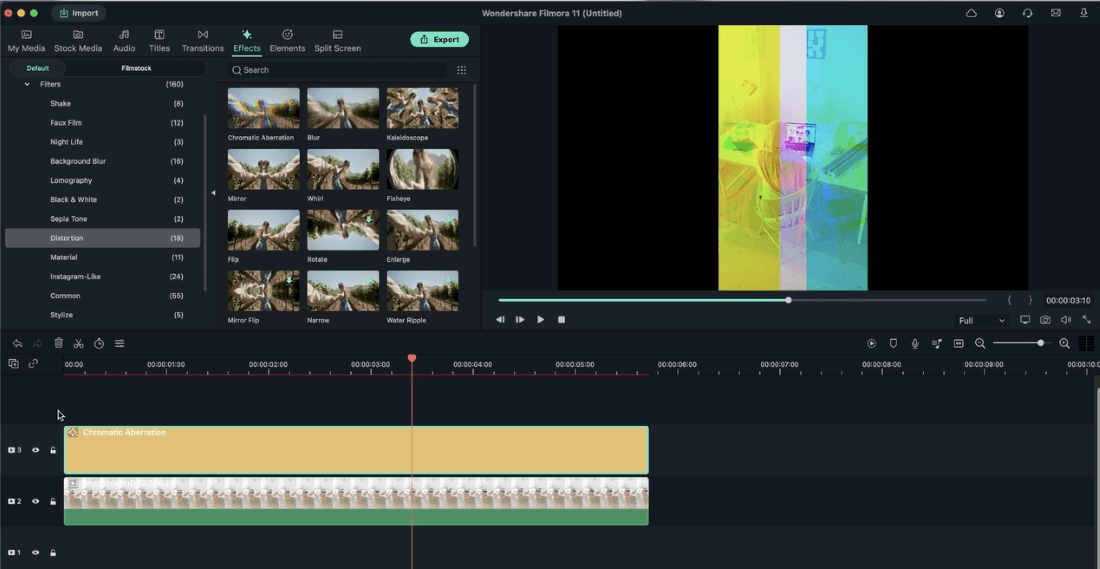
The Distortion subcategory has a range of filters that allows you to apply distortion effect in your video. To change the settings on the filters under Distortion, double-click on the filter in the timeline. You'll then see the options to adjust how the color in the video fades and the visibility of the effect (opacity).
 Distortion Filter
Additionally, you can change the mood of the video. Filmora allows you to make your video look sad or happy by using the filters in the Instagram-Like subcategory.
 Instagram Like
For instance, the Romantic filter gives your video a nostalgic and happy mood with its warm colors.
 Romance Filter
How to Add And Customize Filters in Filmora
The first step is to import your video into Filmora's media library. You can do this by dragging your video and dropping it into the media library or heading to File>Import Media and selecting the Import Media Files Here option. You can also press the Ctrl + I keys on your keyboard.
The next step is dragging and dropping your video to the Timeline.
Click the Filter tab and choose the filter you would like to use under this tab. For different types of filters you can adjust different parameters to customize the filters. Thn you can just apply the filter to your video footages.
 Choose Filter