Note: This video tutorial is compatible with Filmora V11, V12 and V13 versions.
Create Split-Screen
Split screen is a tool used mainly for more than 1 members, sources, or angles. It is a cool way to present multiple videos at the same time for efficient working space. Filmora, along with its many other services, provides the split screen option with a variety of different settings for videos. From the picture below, you can see where the split screen option lies in the Filmora environment. The option of screen-splitting is at the right end.
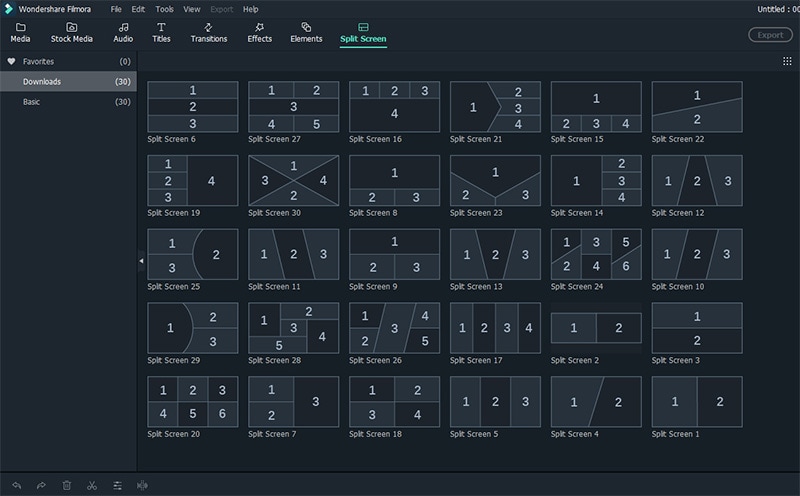
The split screen window presents you with a variety of options to choose the proportions of the screen splitting and also the design with which you want different videos to be played simultaneously. After clicking on the “split screen” the following channel will open. This channel contains the “favorites” and “included” libraries. The included library has a total of 38 different splitting styles. Some of these styles have pre-designed graphics.
 Split Screen
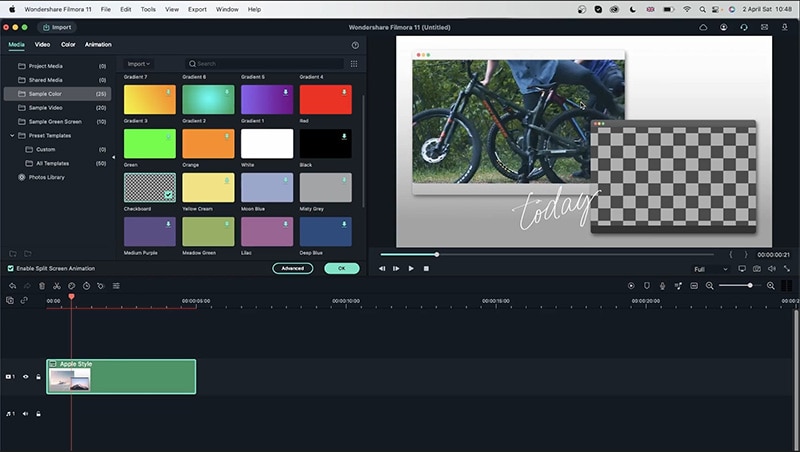
In the beginning, you have to pick the layout, and drag it on to the timeline.
Then you can drag your videos or images on to the boxes.
You can see that I have split the screen in a way to accommodate 2 images/videos.
As you select the layout, Filmora opens up the video importing options for you.
Go to “stock media” to import concerned stuff.
Images, GIFs, as well as videos can be placed in these boxes.
Media can be imported from computer, external hard drive, or internet.
 Drag Image
The length of video can be altered, though its span can only be shortened or kept to original, but not increased, because you cannot add up non-existing frames. In case of images, the span of visibility can be increased and decreased both. Because image is merely one frame so it can be kept constant.
 Drag to TimeLine
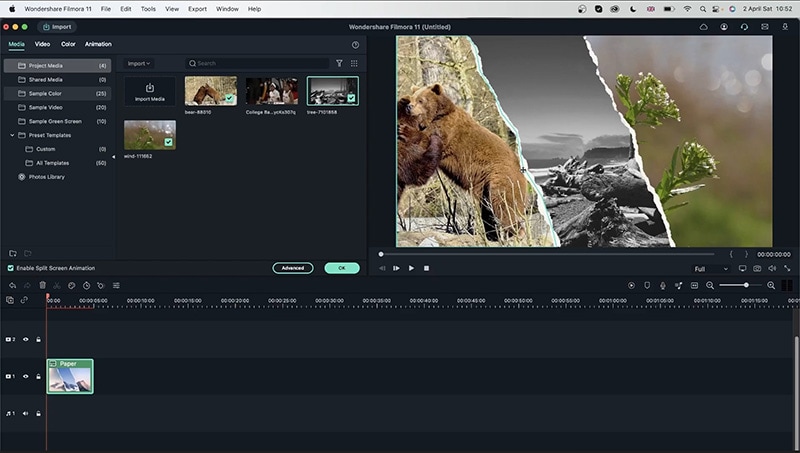
Let’s take another example of paper splits. Now in this setting we have 3 split screens to add up to 3 media files at a time. Now let’s place the three videos.
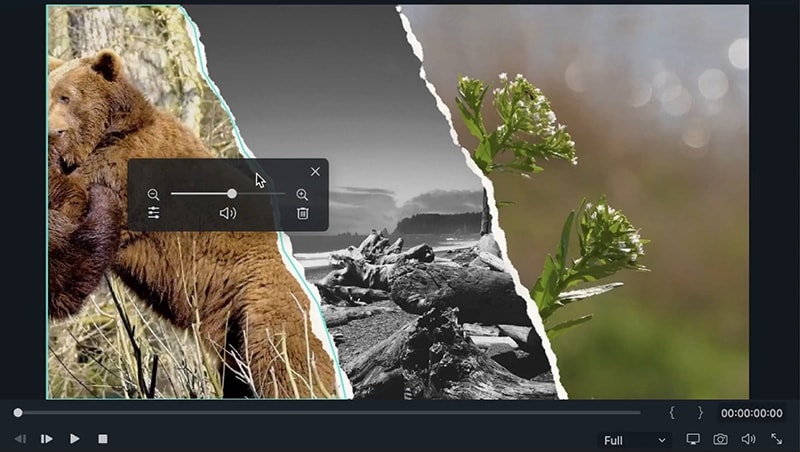
In this setting, if you are met with a problem of less or more zooming, you can easily click on that video which gives you a pop-up scale where you can select the zooming, audio and other properties. Audio can be muted to avoid interference. This pop-up window also has an option for deletion, so if you are unhappy with the video, just hit it. And from the previous lesson of elements, you can also use all those functions here in the split screen setting on particular videos. Video/image transforming, stabilization, lens correction or drop shadow.
 View Split Screen Video
In the audio box, you can change the volume of the videos and the pan. Sound can be faded in or faded out along with the pitch of the videos.
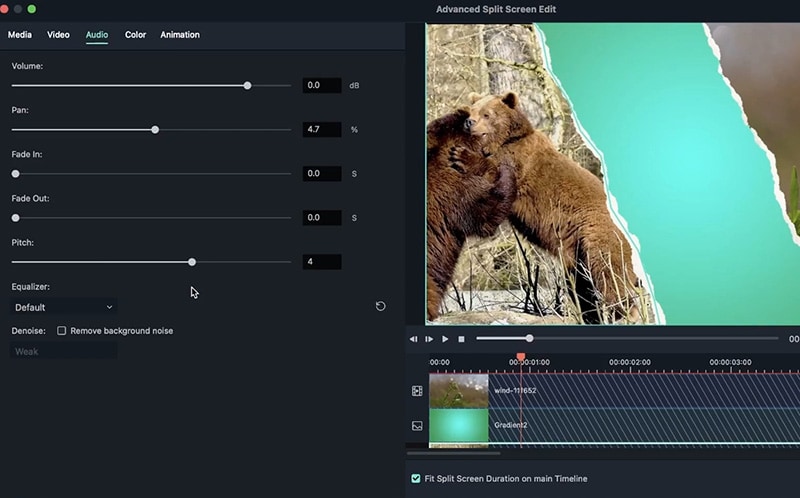 Edit Audio Split Screen
Using this option you can adjust the color enhancement, white balance, tone and 3d LUT. Tone offers changes in contrast, sharpness. White balance changes the temperature of the video.
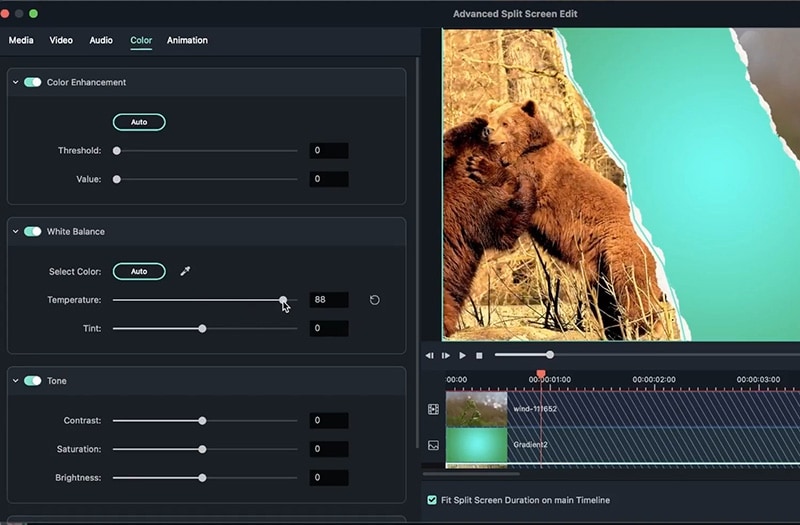 Edit Color Split Screen
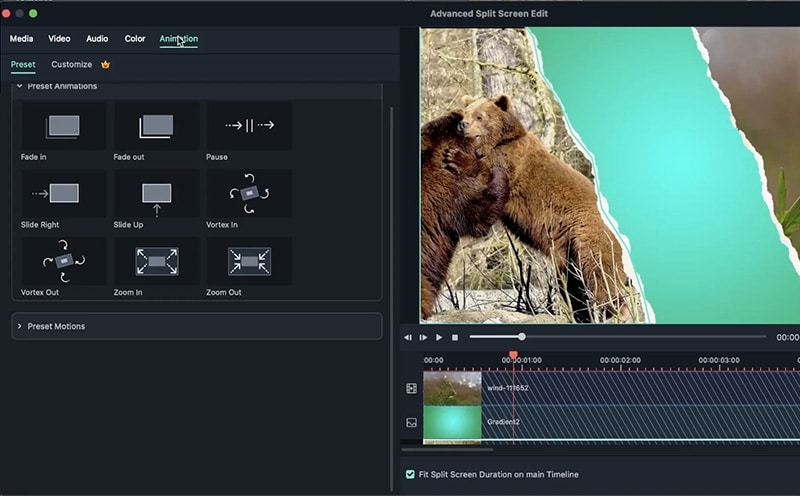
Animation allows changes in the frame rate, its rotation. And when you are finished, you click ‘ok’ to save changes. Animation allows you to add frames, combine videos and different cool elements and overlays. Using animation section you can edit a video in diverse way, for instance, if the video goes out of angle and the element or the overlay loose synchronization, the video can be edited and the camera angle can be fixed after different number of frames to keep the video in sync and proper function. Different transitions can exponentially increase the video’s coolness. In this case, my favorite transition is the ‘fade’ which starts and ends our video with a brilliant and brief effect.
In this next example, I am going to make use of the options of image stabilization and lens correction. You can see in the image below that three videos are being played simultaneously, but what you cannot see is that two of them have quick vibrations and need stabilization and lens correction.
 Split Screen Animation
In the top-left video, we require lens correction, so what I am going to do is to click on the video, then go to the video section, next to media section. In the video section, I am going to scroll down to ‘lens correction’, switch it on and select the ‘GoPro hero +’ and the resolution and the level of lens. I have selected lens level at -100 so, now it works just fine.
For the video on the right, stabilization is required, select the video and then turn on the option of stabilization. Filmora will analyze the video initially; make sure to select the reflect option and also set the smoothness level as per your liking.
With the third video, I wish to zoom in as it fades out and ends. For this we can go to animation and chose a frame at a specific time and add an end point. After choosing the interval, I can scale in and position the xy-coordinates according to my liking and click ok.
So, by far we have seen how to manage videos which require fixing and those which were fine already. Other than all this, there are other graphic settings for split screen, like there is a split screen for Instagram. And with Instagram you can put in images, scale them and set them accordingly, or you can have multi-angled pictures of the same area and make a long picture/panaroma. Some split screens have built in transitions but not all. So, you can add transitions if you like them but transitions can actually help in making the video or images very cool.
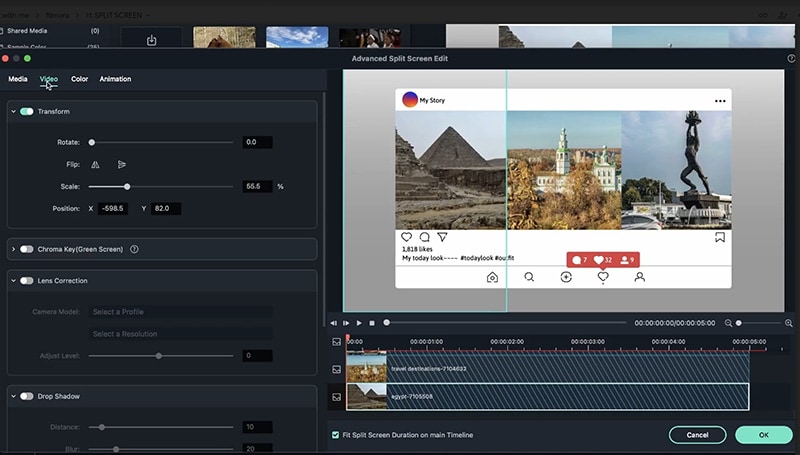 Split Screen Instagram
Obviously, in Filmora, you must’ve expected to find the split-screen option; but with this option so many ways to do it is quite awesome. Not only can you select a wide range of split screen options, but also the options of editing, animating and coloring make it very comprehensive and let’s your imagination guide you in this endless environment of workspace.
