Note: This video tutorial is compatible with Filmora V11, V12 and V13 versions.
Render and Playback
Rendering and playback is very important to learn if you are up to the editing of videos in Filmora. We will learn about three things in this article about rendering and playback. The right rendering settings for your videos, how can we get smoother playbacks and how can we achieve smoother video editing experience. What if you don’t do the right settings of rendering for your videos is you will see that your program will lag, the affects will not be applied with their full potential and at worst scenario your program may crash.
Let’s take three types of videos with each of them with different resolution and time and we will do its rendering settings.
Checking for rendering weather you should do the rendering settings or not. To do that you will need to drag a video clip to the timeline. Once you drag it to the timeline you should check for red line above it. IF there is a red line it means this video needs to be rendered as shown below. If your video is large enough you might need to create a proxy file out of it.
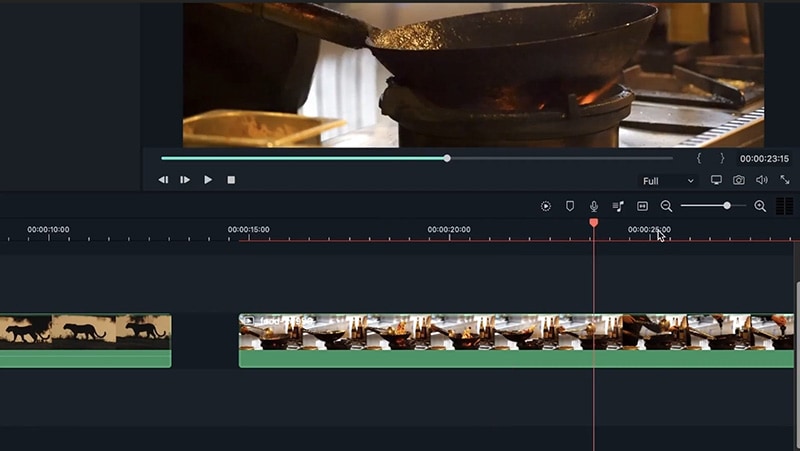 Check for Render
If you drag a video that’s not heavy you will not see any red line above it as shown in in the above picture. The rendering get activated only when its need to be rendered. It is decided based on how much your computer can take. Rendering is pretty much easy let’s do some rendering of a video in the coming sections.
Once you see that red line over a large or high-quality video, now it’s time to render it. You can do that by clicking on the rendering icon in right tab above the timeline as shown.
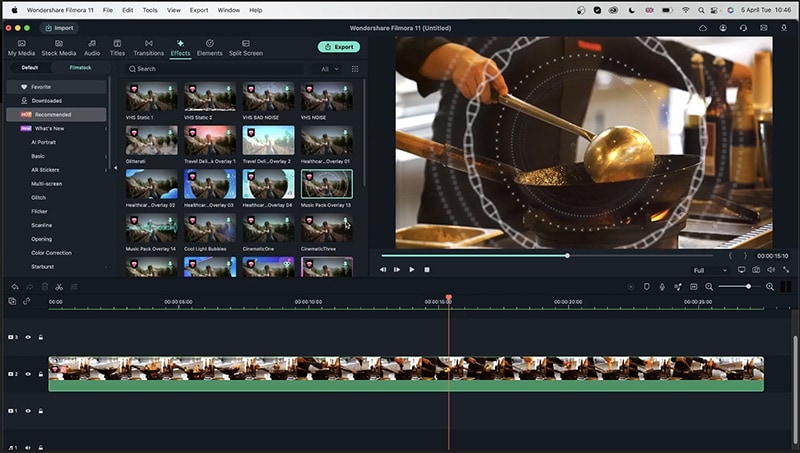 Render 4k Video
Upon clicking you will see that Filmora will rendering the file. Once it’s completed the red line above the timeline will get green. It will mean that the video has been rendered as shown below.
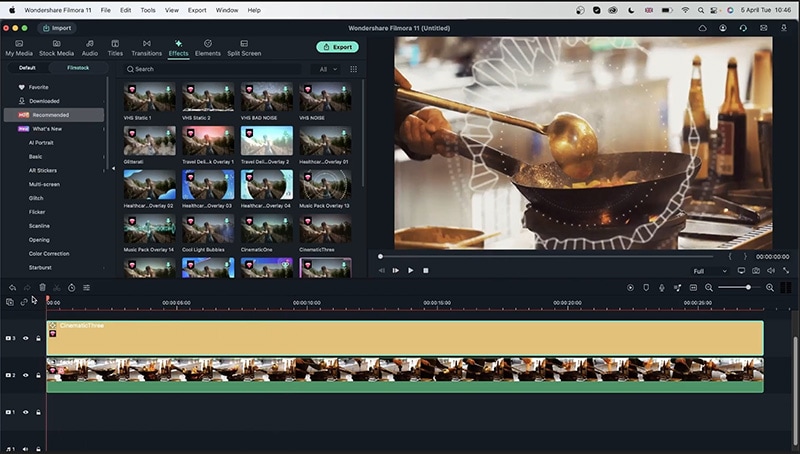 Prepare Render
Well, this is not it. You will see that the video doesn’t need rendering but if you add some more effects and check again. You will see that the rendering line will get red again means the video needs to be rendered as shown below. If you are using a powerful computer, playing that video will not show any laggy effect but leaving it without rendering might make it not work for other computers playing it.
We learned about how can we render a video. But what we need is how can we have a smoother playback. One way is to render it but once we play that video slower it might need to be rendered again. But upon doing so you might still not get a green line of rendering.
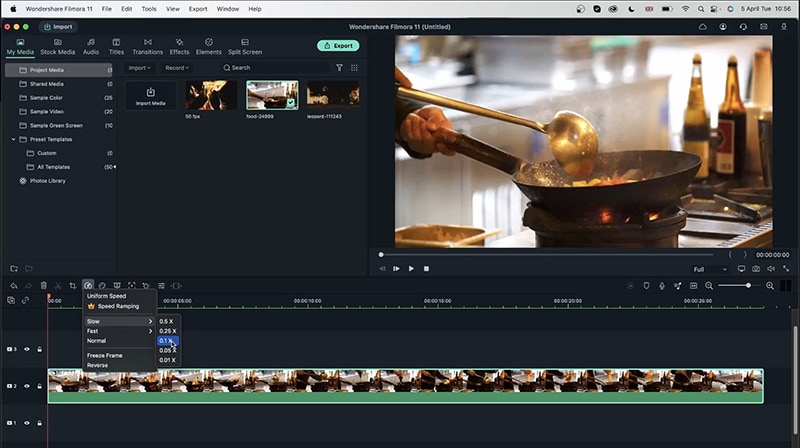 Smoother Playback
At the point where rendering might not work for you. If you still have the laggy playback after rendering then it's time to reduce the resolution of your video. You can do that by going to the top-right menu of the timeline and switching from full screen to half screen as shown in the figure.
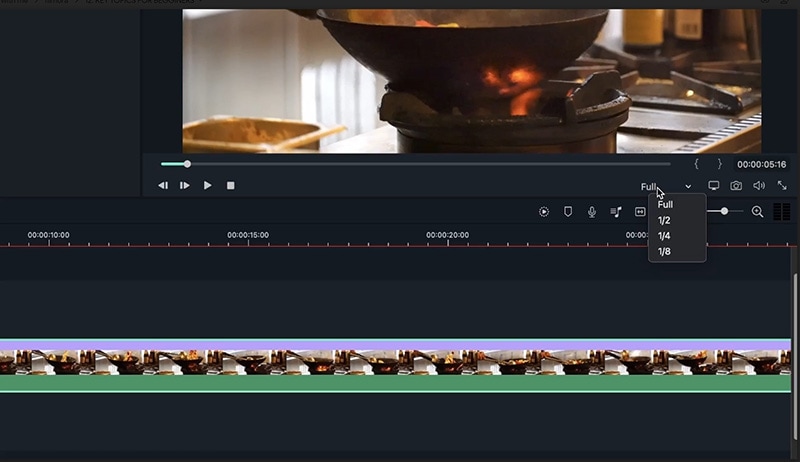 Playback Options
This will reduce the resolution of your video but it will improve your playback speed when you are editing. This way you will have a better experience when you are editing and it will not affect the quality of your exported video but only affect what you see here in the video. Doing this will help when you are dealing with many videos in a project at a time. After reducing the resolution, you can render it now as shown below.
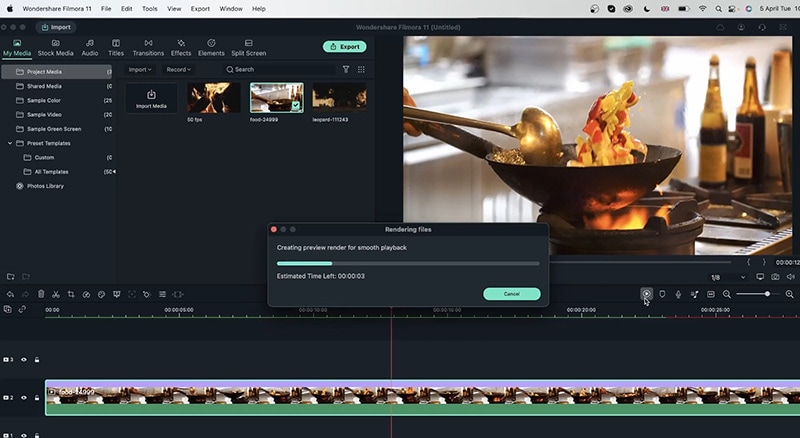 Create Smooth Playback
After that, you can bring up your original resolution back after rendering it and you will see that your video will have full quality without the need for rendering it. Moreover, your video will be smooth and have a lot of good quality.
Now let's have a look at our preferences settings for a better experience in editing videos with Filmora. So head towards the Filmora title in the top left corner of the main screen, click on it and choose preferences from the list as shown in steps 1 and 2 in the picture. After that go to the save menu from the preferences tab as can be seen in the picture. You will the option of “time for auto backup” as shown.
 Save Performances
Through this option, you can ask the Fimlora application to backup your project after a certain period. This is useful when you are working with a lot of programs because you will have a backup of your project if you put too much pressure on video or applied heavy effect your Filmora might get crash so it is highly recommended.
