Note: This video tutorial is compatible with Filmora V11, V12 and V13 versions.
Working With Proxies
Before going into the details first you need to know what is a proxy? So basically, a lot of video content creators and designers face the common problem of a laggy editor or crashing editor while working with high-resolution images and videos (4K/Ultra-HD). To deal with such as problem there is a copy made of the original video or image of higher resolution into a much better lower resolution. This copy of the original is called a proxy of that video.
However, the video is converted back into its original resolution once the work is done on it in the editor without any issues. Therefore, learning about the proxies in the journey of video editing is a crucial step. But you don’t have to worry because we have got you covered here on proxies using Filmora. So, let's dive in!
It's important to know how to decide whether a video should be edited using its proxy copy or in its original form. You can do that in Filmora by checking the properties of a video as shown below. If any video resolution is greater than 1920 x 1080 means it’s a 2k or 4K resolution then you should consider it for proxy. You will see the difference in file size too, usually, 4K files are much larger.
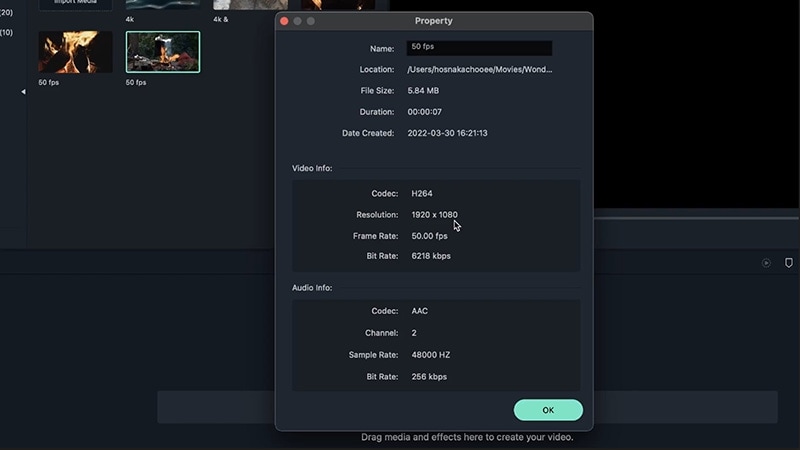 Check Properity
It's also very important that you should check for the fps of the video. A video can have 4K resolution and larger size but if its fps is low then this video is still not a quality video. Similarly, a video having HD resolution but having higher fps can be a good quality video. So, make sure you check the fps to decide whether the video will do great while editing or not. So enough of this discussion let's move toward making the proxy files.
Making proxies out of your multimedia is very easy. All you must do is go to the "My Media" section. You will see a bunch of videos under this section. Right-click on the one you want to change into a proxy and click on Create a proxy file. Once you do that, it will have a proxy icon on it, which means it's converted.
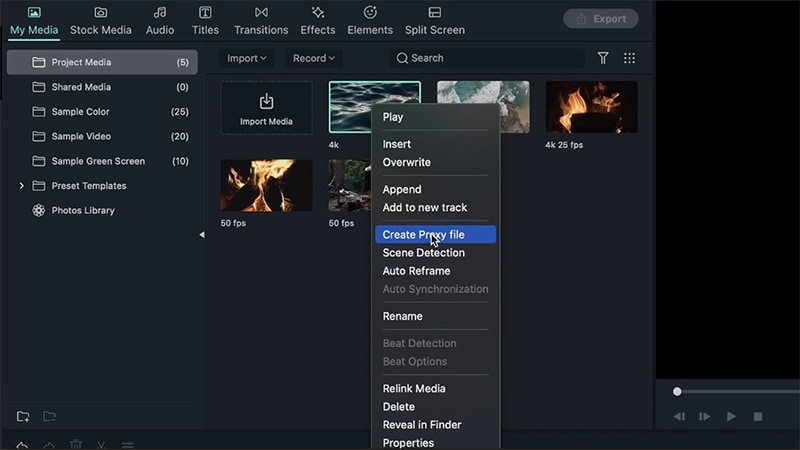 Create Proxy File
You can now add the proxy video to the Filmora timeline and check for its quality. You will see no difference in the quality of the video since Filmora has a copy of your original file. So now it's clear to you that proxy doesn’t affect the quality of your video, but compromises a little bit on your resolution temporarily. You can do this for every video file, and all the videos will have their original quality.
If you are on a lot of high-quality video files, it's annoying to convert every video file into a proxy file. So don’t worry, we have a solution for it. You just need to understand the preferences tab of Filmora to set auto proxy on whatever video file is larger than a certain resolution.
For that, you will need to click on the Wondershare Filmora title in the top-left menu and choose Preferences in the list as shown. Once you are done with it, a preferences setting will open up as shown. For now, we will focus on the performance tab and ignore the rest of the preferences window. So, click on a performance to go to its settings.
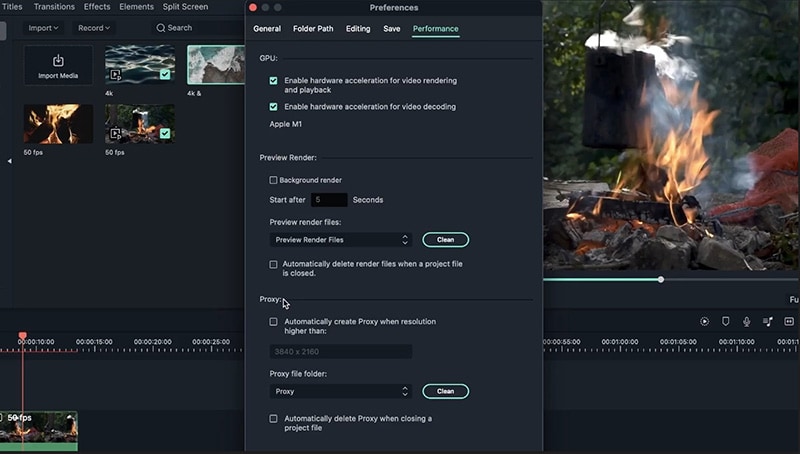 Auto Set Proxy
Under the performance tab, you will find three main sections. The first section is about the GPU options. The Second is Rendering settings as shown in step 5. While the third one is proxy settings. You can go and check the box “Automatically Create Proxy when resolution higher than” and select your desired resolution as shown in step 4. This will mean that the video above this resolution will be automatically converted into proxies.
If you have already piled up a lot of proxy files and want to delete them to free up space. You can select the “clean” button to remove the existing proxies, as shown in step 4.
You can also check the last box of “auto delete proxies”, this will delete the associated proxy with the project once the project is closed.
Now, as you know how you can make proxies, set automatic proxies, and manage them from preferences. Now it's time to see a proxy converted back into its original resolution. First, drag all the proxy files into the timeline as shown in the figure. Now it’s time to do some editing on your proxy videos.
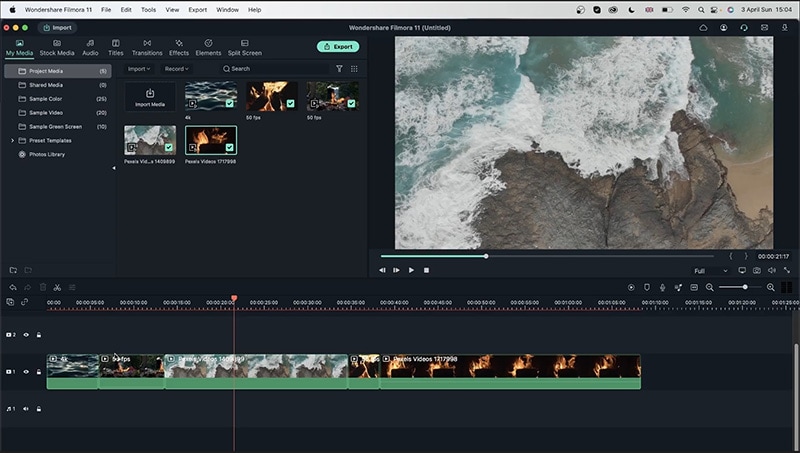 Exporting Video
Suppose you are done with the editing of your proxy videos on your timeline all without any issue. You just need to click export now. Once done so, you will see the resolution is turned back to its original resolution as shown below. You see that the proxy doesn’t affect your original resolution of the video.
 Video Format
Once you are done, just click export after renaming the output. After exporting, it will take some time to bring in the original resolution as shown. It takes time because your processor is working on it to bring it to a larger resolution and apply the changes you made to it. So, stay patient and wait for it to complete.
 Share Video
Once completed, you can now go and check the properties of the output file as shown in the figure below. You can see that the resolution is 4k in the resultant video from its properties.
 Check Video Details