Note: This video tutorial is compatible with Filmora V11, V12 and V13 versions.
Transform Video: Rotate, Flip, Scale, Position
Filmora is a video editing software that offers you a lot of amazing features to enhance your videos. One of these features is the ability to transform videos in various ways. In this guide, we will discuss some of the best ways to use this feature in Filmora.
Transforming videos is one of the most exciting features in Filmora. You can rotate, flip, scale, and position your video clip using this feature. You can also use it for other purposes like rotating an object in a picture or flipping an image horizontally or vertically. If you want to create a mirror effect on your video, transforming videos is an excellent option for you. Filmora will help you achieve exactly what you want without much effort or time consumption.
Let's start our video transformation tutorial using FILMORA.
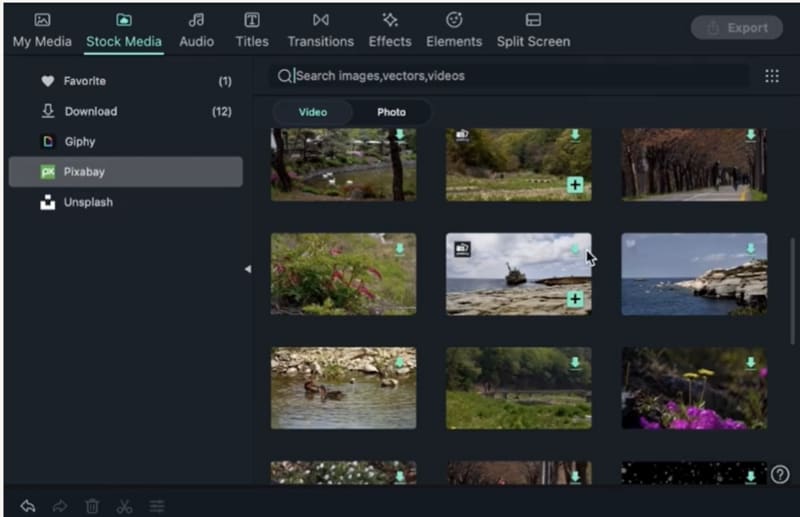
We need to get started by firstly importing our footage. We can import video from your storage, or we can use one from the stock media. We can choose some high-quality videos using "Pixabay".
We can select the video of our choice. Click the download option. Hit the "plus" icon and then choose the "match to media" option to keep the quality of the video intact.
 Click on the “Add” button to add a video
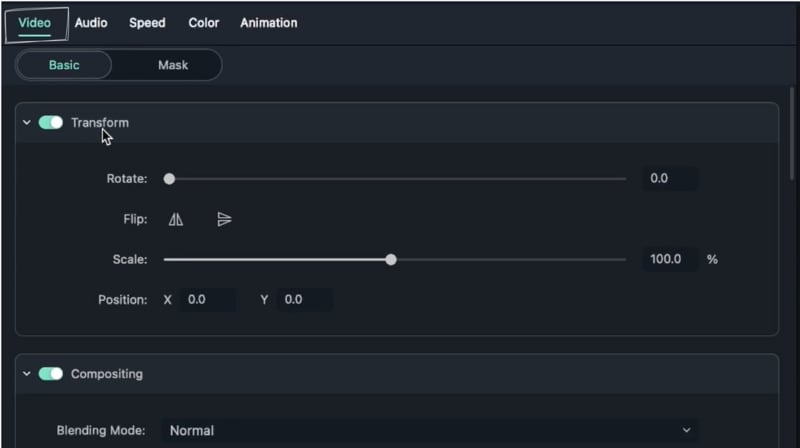
We will double-click on the video to get the properties tab. We will go to the "VIDEO" panel which showcases the video properties of the footage and various tools we can use on our video.
Under the video section of the panel, we have the "Transform tab" which has a switch adjacent to it that can be turned on or off as per our requirement. If we put any transformation effect on the selected video, however, if we are not satisfied with the results, we can turn off the tab to undo the changes that were made.
 Transform option for various transformations
Under the transform tab, we have the "ROTATE OPTION". It can rotate our video up to 360 degrees. The video is at 0-degree rotation by default. Filmora provides us with a slider to change the degree of the video as per our preference.
We can also manually type in the degree of the angle we want to rotate our video into, in the column adjacent to the rotate option.
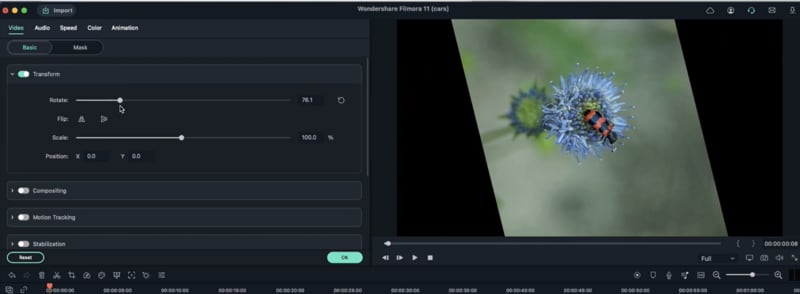 Rotate Slider to rotate video up to 360 degrees
The next is the Flip option. This option flips your video either horizontally or vertically.
 Flip presets to flip video vertically or horizontally
The first option helps you flip your video vertically. It would give you the mirror image of your video. The object on the left goes to the right and the object on the right goes to the left.
The second option which is the horizontal flip option moves your video upside down.
 Horizontally flipped image
 Horizontally flipped image
Next, we will learn to use the scalability option. This option helps us to zoom in or zoom out the frame of the video according to our preferences. For scaling the video, we will double-click the video. The video properties window will pop up. Under the video panel, we will choose the transform option. The "SCALE" option is provided right under the transformation option.
 Video scaling slider
Filmora, by default, offers video scalability of 100%.
Similar to rotate option, we will be offered a slider in front of the scalability option. We can move the slider toward the left to decrease the scalability of the video to anything less than 100%. Doing this will give us a frame black frame outside the video. Moving the slider toward the right will zoom in on the frame of the video.
Another good video transformation tool offered by Filmora is the "Video Positioning" tool. The Video Positioning tool has 2 options, i.e., the X-axis positioning and the Y-axis position. The basic use of this tool is to move the position of the video up and down in regard to Y-axis and left or right in regard to X-axis. We can use this tool when we have to showcase more of the left or right side of the frame or hide the left or right side of the frame in regard to X-axis. In regard to Y-axis, this tool is used when we have to show or hide the top or bottom of the frame.We can use this tool by double-clicking on the video, then under the video panel, we will select the transform option.
 Video Positioning Preset
Under the transform option, we will see the "POSITION" option. As mentioned, the position option further has 2 options, X and Y.
In order to move the video frame from left to right, we will tap on the X option and move the cursor toward the left and vice-versa.
If we want to move our video frame up, we will click on the Y option and move the cursor downwards to upwards. The frame on the screen will move along the cursor, we will stop when we get the required frame.
*Important Note*
While using these transformation tools, we should make use of high-quality videos. The low-quality videos lose their quality further while using these tools.
