After recording or downloading a video for your favorite YouTube project, you realize your video contains unnecessary or undesirable parts. Maybe it captures some inappropriate/unwanted images or that section is unclear or blurred. Whichever the reason, splitting YouTube videos will help you separate those unwanted segments from the useful portions. This article concludes with different ways to split YouTube videos on different devices. Let's expound more on the best ways.
In this article
Split YouTube Video on PC/Mac Using Wondershare Filmora
With more than 14 years of experience in video editing, Wondershare Filmora has millions of users in the world and it gradually become the leading video editing software. It is a powerful all-in-one video editor that lets you effortlessly split YouTube videos on your PC/Mac. With this tool, you can split any video format and divide YouTube videos into parts quite easily even as a beginner.
Key Features
- Powerful keyframing creates fantastic visual animations.
- A wide library of effects, stickers, texts, and transitions.
- Color adjusting makes your video more professional and attractive.
- Matching the footage with music will no longer be hard with Auto Beat Sync.
- It provides a collection of filters to enhance your video's visual appearance.
- It provides the scene detection function to automatically cut the right video scenes.
- Export video in various formats, devices, and directly to YouTube and other sites.
- Easily remove unwanted objects out with AI smart cutout.
How to Split YouTube Videos with Filmora?
Step 1. Launch Filmora Editor on your PC and New Project. Now, click the "+" button to upload the YouTube video you want to split.
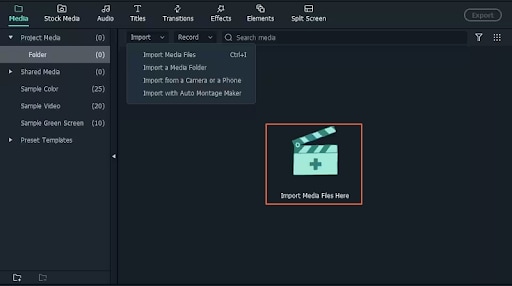
Step 2. Once uploaded, you can now split your video via the "Scene Detection" mode (if the video has multiple scenes) or normal manual mode.
For Scene Detection mode:
- Right-click the video and choose the "Scene Detection" option. In the Scene Detection window, click "Detect" and the program will automatically split your YouTube video into multiple segments corresponding to the scenes.

- Delete the unwanted segments then click "Add To Timeline" to merge the remaining segments into a single video on the timeline.

For Manual mode:
- Drag the video to the timeline and move the play head to the beginning of the section you want to split. Hit the split icon (the one that resembles the scissor) on the toolbar and the video will be split.

- Now, move to the next section and repeat this until you are done. Once done, select the unwanted parts and click the "Delete" icon. Proceed and merge the remaining segments on the timeline.

Step 3. After merging your video, you can start editing it to meet your needs. You can add transitions, filters, captions, and other suitable video effects.
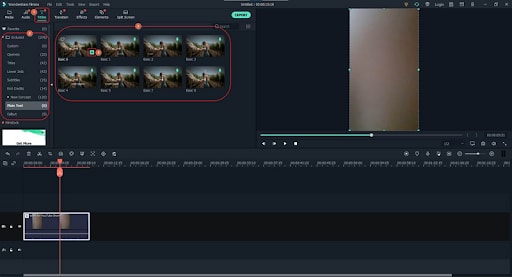
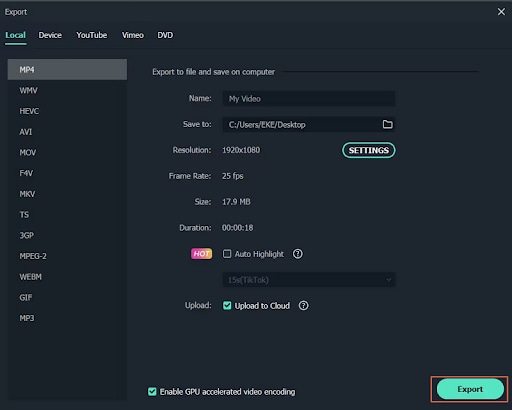
Step 4. Finally, click the "Export" button and choose desired output options.
Cut YouTube Video Online Using Flixier
Flixier is another wonderful online editor that lets you split YouTube videos with Ease. With this online platform, you can cut a video into several segments then delete the unwanted parts and merge the remaining sections. It also provides transitions, texts, and shapes, so you can apply them to the video. You can rotate, mirror, and crop your YouTube videos to meet your needs.
However, as it is an online tool, it takes a longer time to upload YouTube files so it is not suitable for sensitive or large videos.
How to Cut YouTube Videos Online Using Flixier?
Step 1. Using your browser, navigate to the Flixier YouTube online YouTube video splitter page and click the "Choose Video" button. Follow the on-screen instructions and upload the target YouTube video.
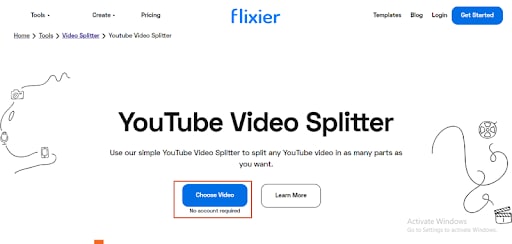
Step 2. Once uploaded to this online YouTube video splitter, drag it to the timeline and you should see the ruler-like slider. Just move it to the position you want to split your video then click the "Split" icon on the left edge of the timeline.
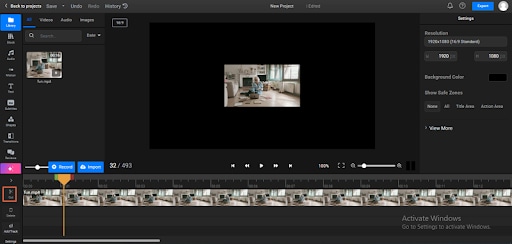
Step 3. Select unwanted sections and hit the "Delete" button to remove them. Also, combine those remaining sections.
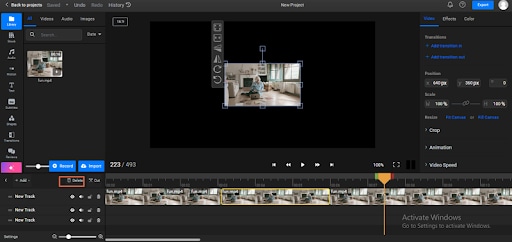
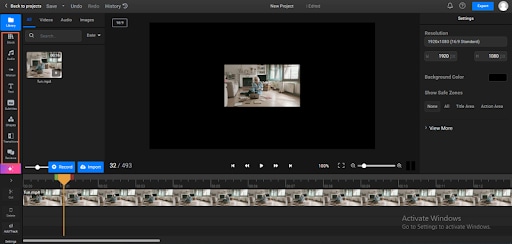
Step 4. Now, you can edit the remaining video depending on your needs.
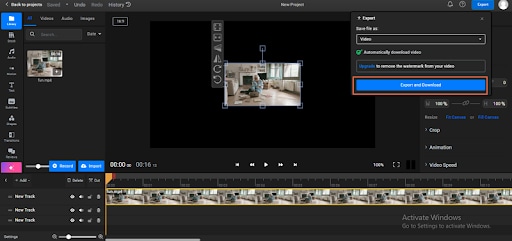
Step 5. Finally, click "Export" then choose "Video" as your output format. Again, hit "Export and Download" to fetch it to your device.
Divide YouTube Video on Android Using Better Video Splitter
Video Splitter & Trimmer is a popular Android tool that lets you split and trim videos into multiple sections. This tool also lets you edit and compress your videos without quality loss. You can choose to split your videos into desired numbers and see the respective duration on the app.
Once you are through, you can share them on WhatsApp or across other social media platforms.
How to Divide YouTube Videos on Android Using Video Splitter & Trimmer?
Step 1. Visit Google Play and install Video Splitter & Trimmer on your Android device.
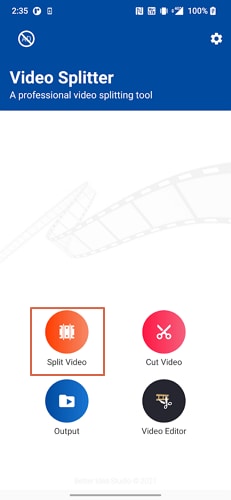
Step 2. Open the app, select the "Splitter" option, and add the YouTube video you want to trim.
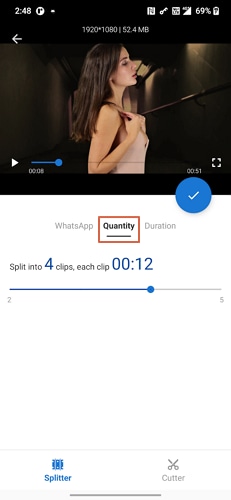
Step 3. Select the "Quantity" tab and choose the desired number of splits.
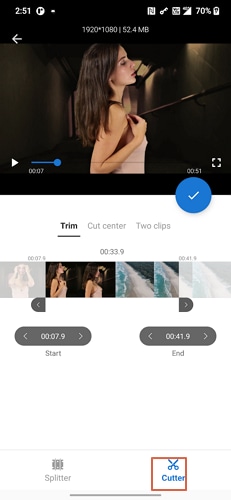
Step 4. Tap the "Cutter" icon at the bottom-right of the screen to split your video.
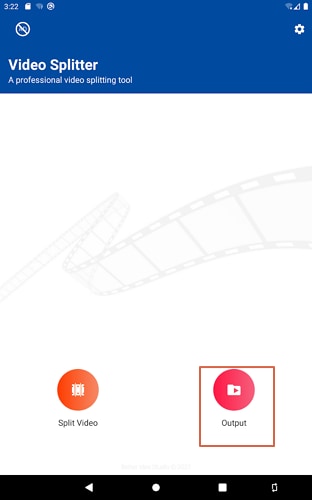
Step 5. Click the tick icon to confirm then head to the "Output" tab to locate the split videos.
Trim a Video on iOS Using the Photos App
Photos app is a simple yet functional YouTube video splitter for iOS. While it comes preinstalled on your iOS device as a photo viewer, be sure to split your videos using this basic app.
It is quite easy to use and you can also use it to edit your video and then share it with your friends. That said, it is not suitable for professional or large videos. Nevertheless, it is worth trying.
Steps to Trim a Video on iOS Using the Photos App
Step 1. Open your YouTube video with the Photo app on your iOS device. Once opened, tap the "Edit" button at the top-right corner.

Step 2. Drag the ends of the frame to the desired section. When you are satisfied, hit the "Done" icon.

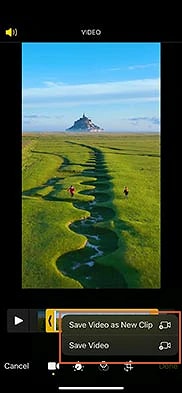
Step 3. Finally, select either to save your video as a new clip or a video. A new clip means the original video is kept intact while the latter means it is replaced by the trimmed version.
Bonus Tip: Best Practices for Splitting YouTube Videos
Now that you have learned how to split YouTube videos on different devices, here are some best practices to help you create a better-split video.
- Use the right YouTube video-splitting tools. Consider tools that offer reliable and versatile video-splitting options.
- Preview your trimmed videos before uploading them to correct the anomalies while it is still early.
- Consider automated splitting especially where you want accurate splitting based on varying scenes.
- Add transitions between the split sections to ensure a smooth video.
Conclusion
Splitting YouTube videos is that easy! You just have to choose a method and an editing tool that suits your needs. There are many nice options in the market including the Wondershare Filmora which allows you to split YouTube videos manually or automatically according to the scene.
Download Wondershare Filmora now and transform how you edit YouTube videos as a creator or for any other purpose for that matter!


 100% Security Verified | No Subscription Required | No Malware

