If you're looking to blur faces in Windows Movie Maker, this guide will walk you through the process step by step. Whether you're editing a video for privacy or professional purposes, hiding faces is a crucial skill. In this article, we'll cover how to blur faces using Windows Movie Maker, and also compare this method with Filmora's face-blurring features, helping you choose the best option for your video editing needs.
In this article
Part 1. How To Blur Faces in Windows Movie Maker
Windows Movie Maker was a popular video editing software that was included in the Windows Essentials suite, offering an easy-to-use interface for basic video editing tasks. Released in the early 2000s, it allowed users to create and edit videos with features like transitions, effects, and text overlays. However, Microsoft officially discontinued Windows Movie Maker in January 2017, with support for the software ending shortly after.
Despite its discontinuation, many users still rely on it for simple video projects due to its intuitive design and lightweight features. In this section, we'll show you how to blur faces in Windows Movie Maker, a useful feature for protecting privacy in your videos.
Steps to Blur Faces in Windows Movie Maker
- Open Windows Movie Maker, click on Add Videos and Photos, and upload the videos that you want to edit
- To censor the specific part of the video, click on Add Caption.
- Type the same letter several times and change its color into black.
- Choose a thick border and change the outline of the color to black.
- Change the style of the font to Windings or Webdings.
- Have it squared and place it on the face of the person you would like to blur.
- Copy and paste it if you need to blur more faces.
- Preview the video and make adjustments if deemed necessary.
To make the process even clearer, we've prepared a step-by-step video tutorial that will guide you through blurring faces in Windows Movie Maker. Check it out below!
Part 2. Wondershare Filmora: Best Alternative to Windows Movie Maker to Blur Face
If you're looking for a more advanced and user-friendly alternative to Windows Movie Maker for blurring faces in videos, Filmora is a great option to consider. While Windows Movie Maker is limited in its face-blurring capabilities, Filmora offers more powerful and precise tools to help you easily blur faces and protect privacy in your videos.
In this section, we'll explore how Filmora enhances the face-blurring process, offering a smoother and more efficient experience compared to Windows Movie Maker.
3 Methods To Blur Faces Using Filmora
There are three major and easy ways to blur faces in videos using a desktop version. These methods include using the AI face mosaic, the face-off effect, and motion tracking. In this section, you will discover how to blur faces in videos using both methods.
How To blur faces using the AI Mosaic feature
AI Face Mosaic is a new feature available in Filmora version 14 and above. It helps users quickly apply mosaic coverings to sensitive individuals who should not appear on screen, especially in scenes with multiple people. Let's take a look at the steps to use this feature.
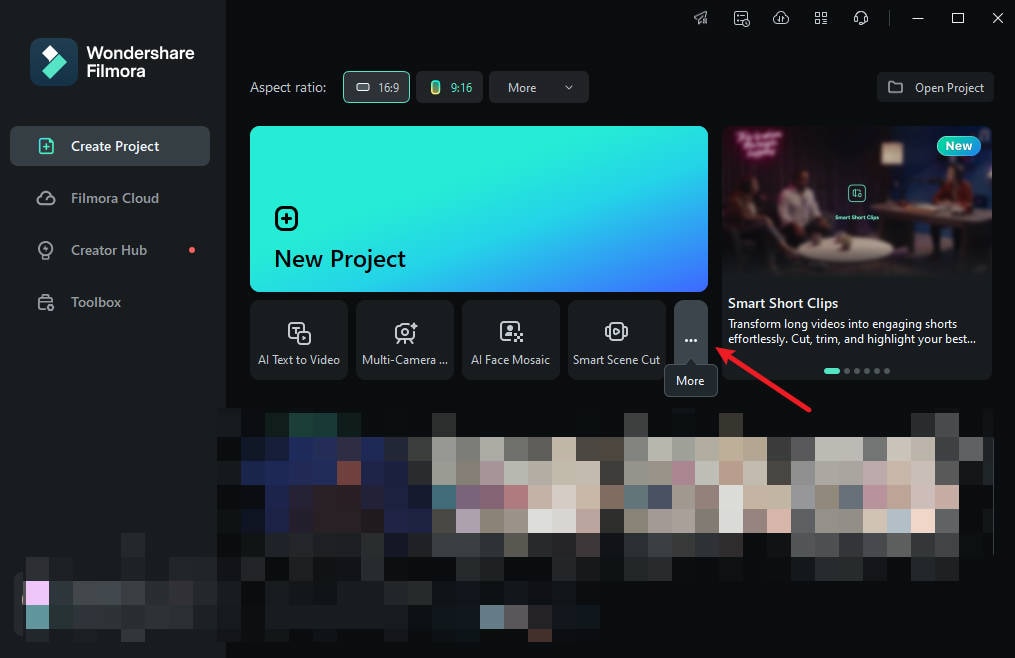
Step 1: Launch Filmora on your PC and go to "More" or select the three dots at the end of the editing options.
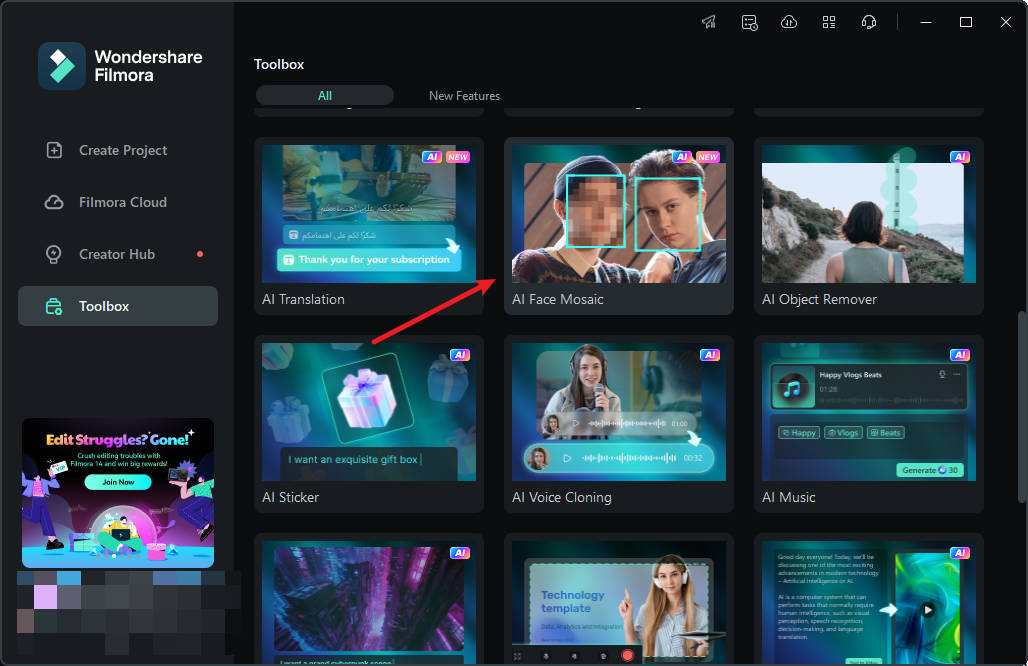
Step 2: Click on "AI Face Mosaic". Then, import your media for editing.
Step 3: Filmora will automatically analyze the video to apply the blurring effect to faces throughout the footage. Once the analysis is done, each face will have the mosaic effect.
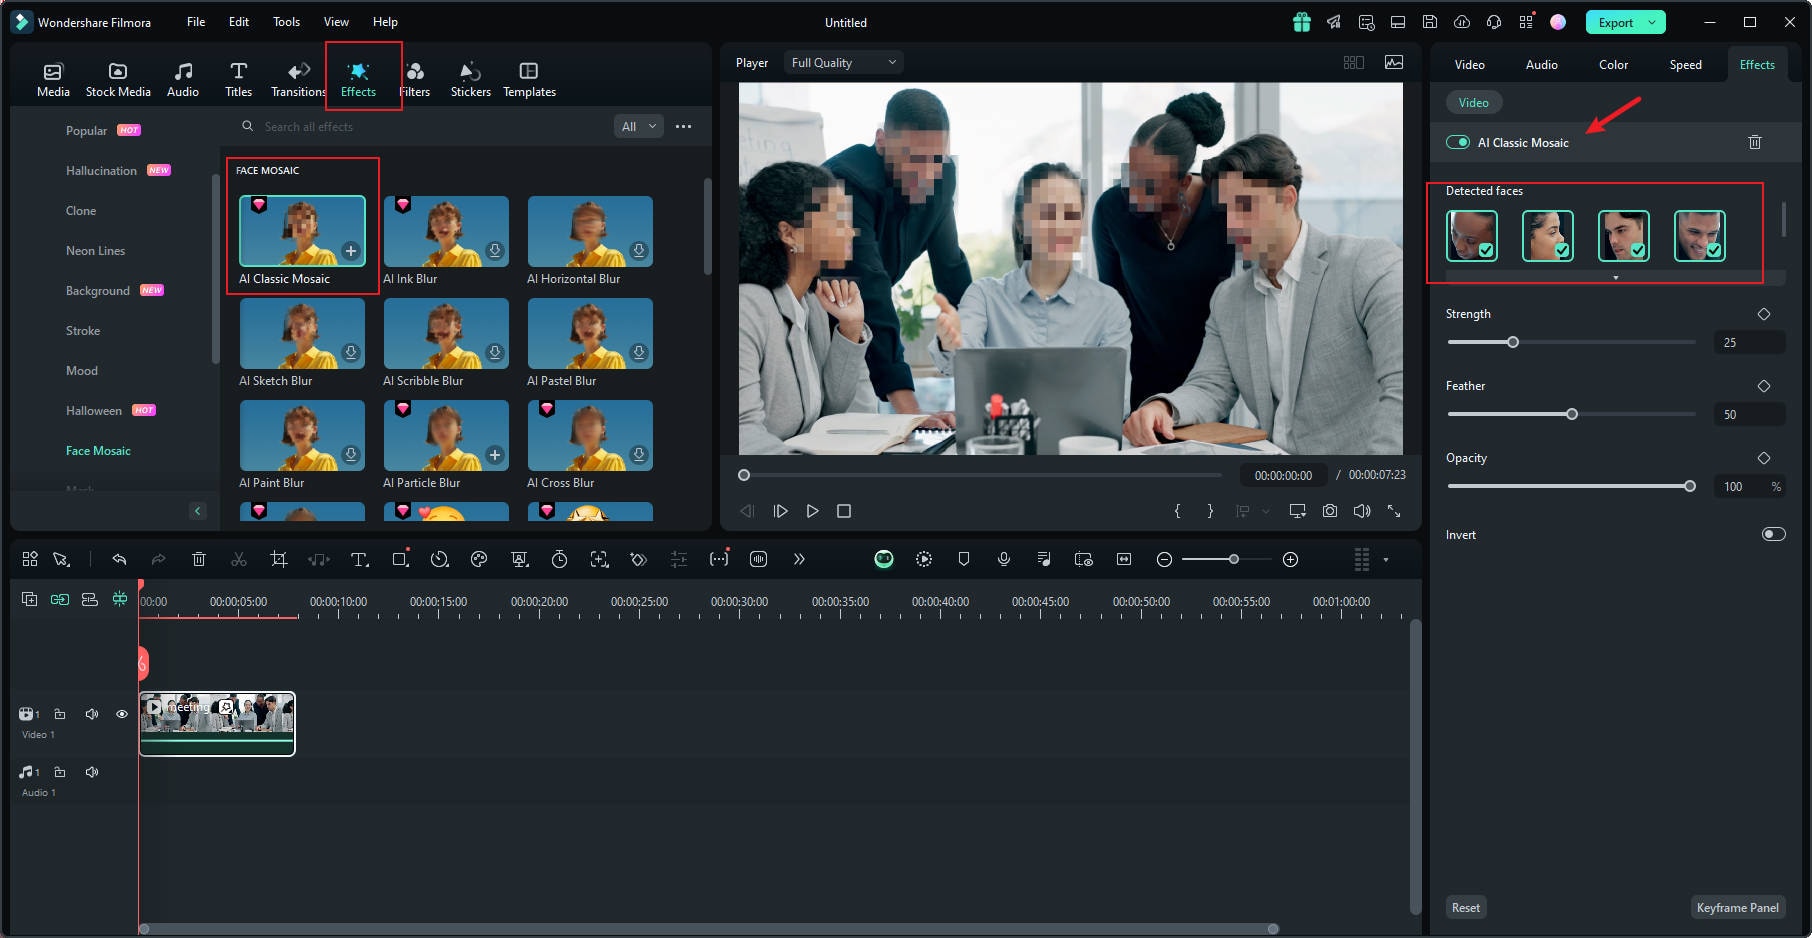
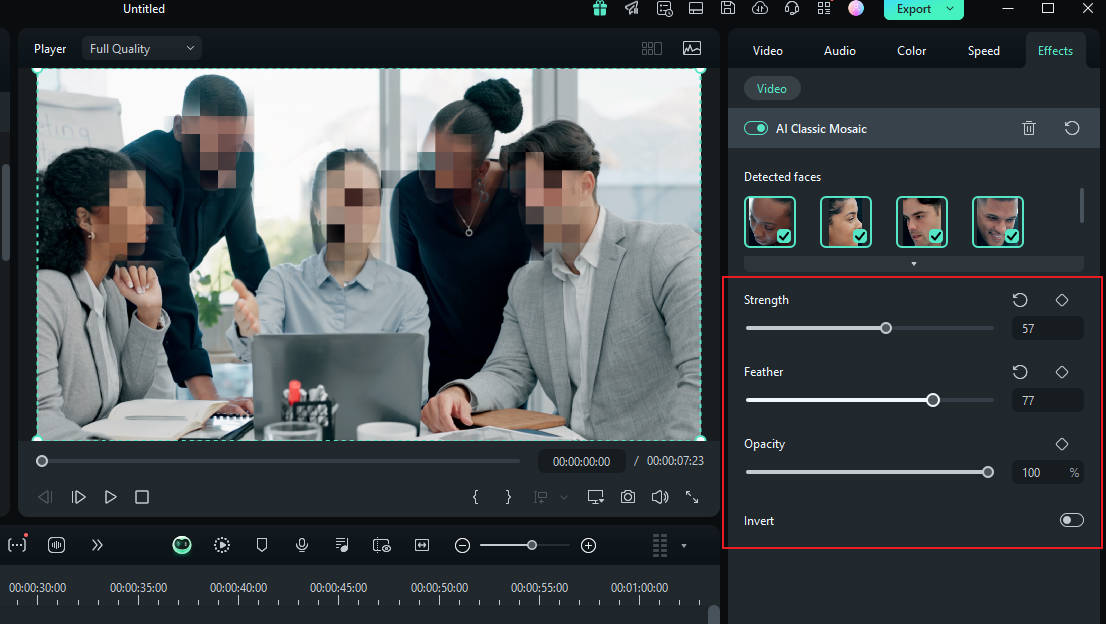
Step 4: To choose a face to remove the mosaic effect, deselect it from the right-hand panel.
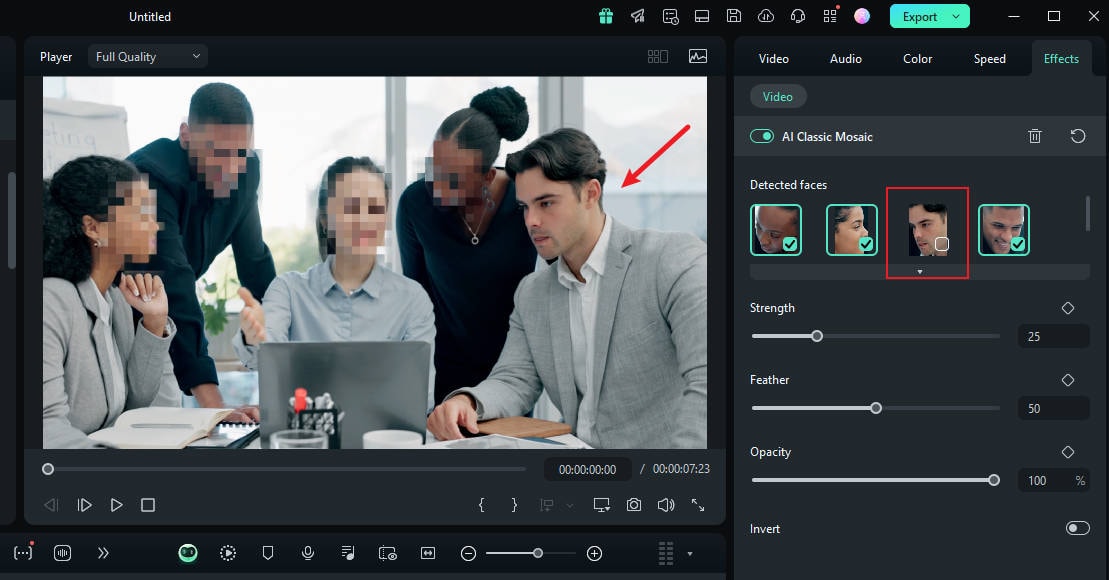
Step 5: You can also use the grader to adjust the strength, feather, and opacity of the blur.
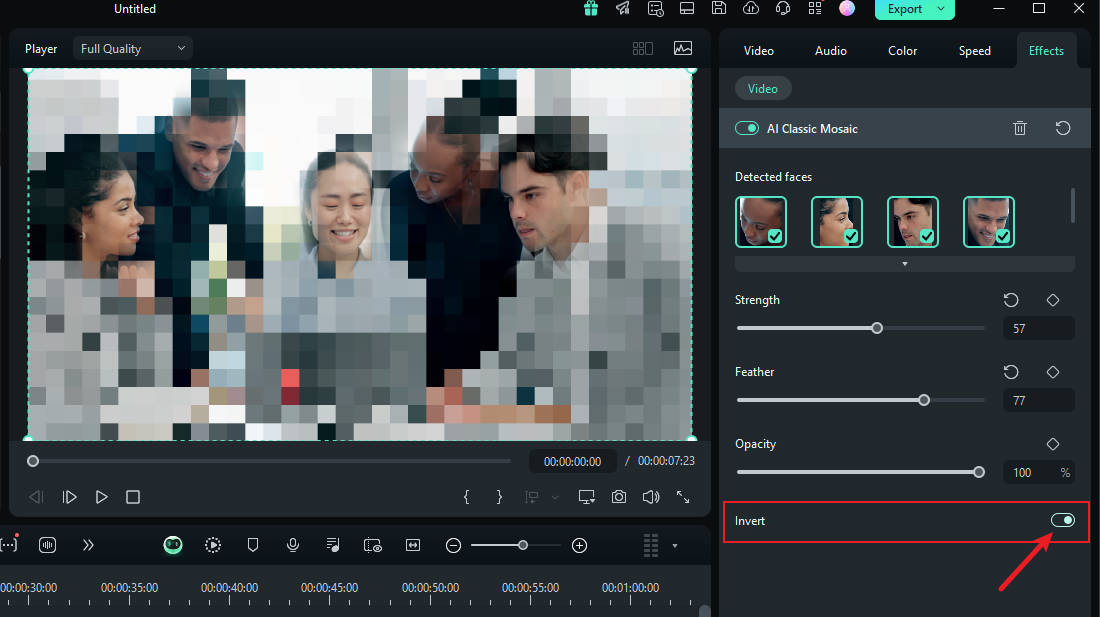
Step 6: You can also invert the mosaic by clicking "Invert". This makes everything else, except the faces, have the mosaic effect.
And that's it! Once you're done, preview your video and export it.
How To Blur Faces Using the Face-off Effect
Another quick and easy way to blur faces in Filmora is by using effects from the editing suite. You only need to select the face blur effect to add a mosaic to a person's face. Here is how to blur someone’s face in a video using Face-off:
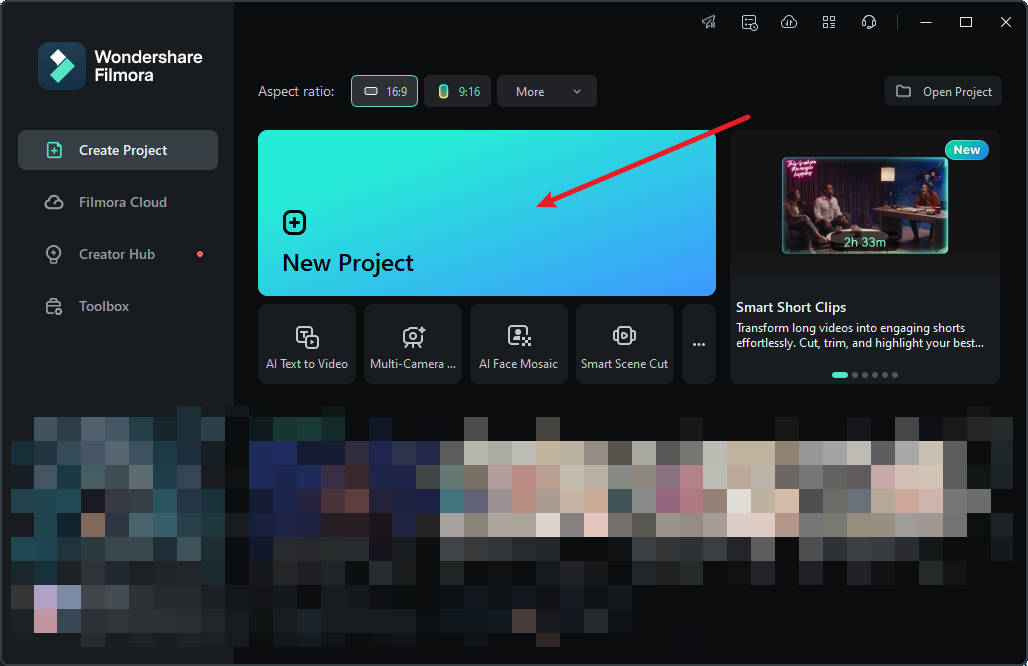
Step 1: Launch Filmora on your PC and click on "New Project".
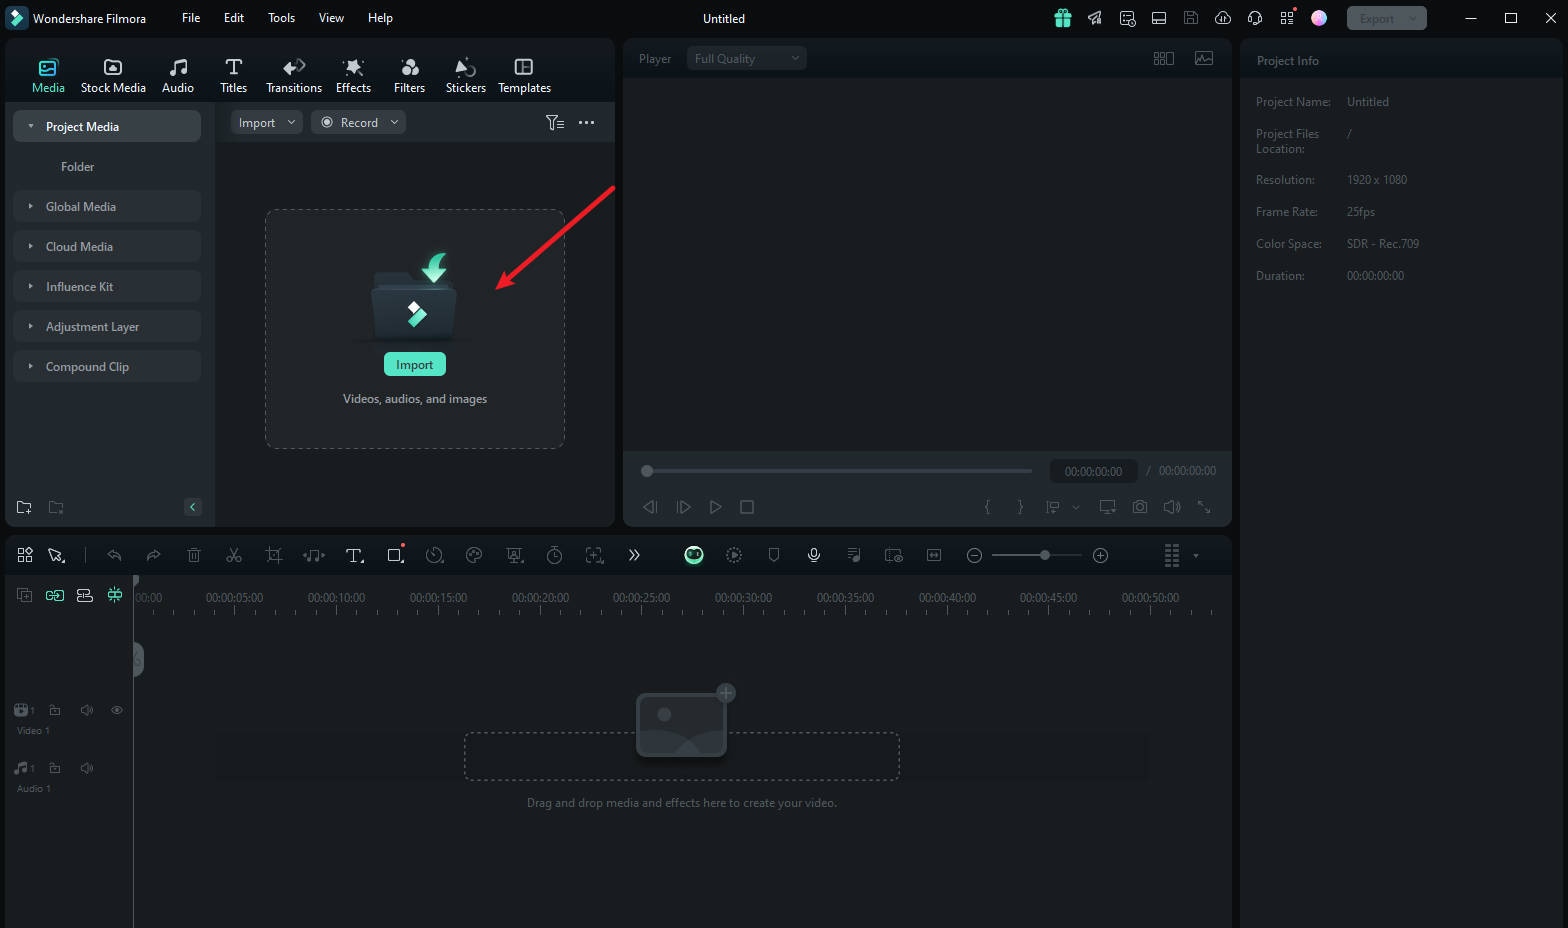
Step 2: To import your media, drag and drop it into the editing suite or click "Import".
Step 3: Tap "Effects" from the main menu at the top of the suite.
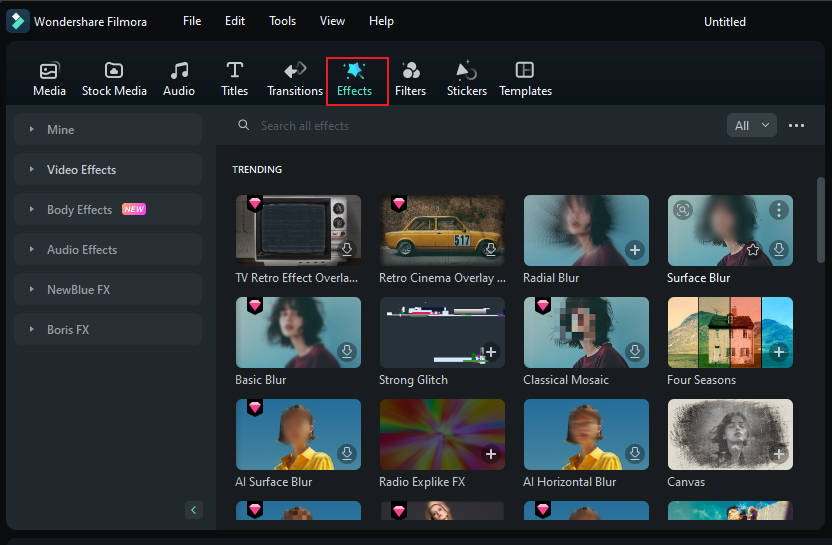
Step 4: If you don't see the Face-off effect on the first effects page, search "Face-off" in the search bar.
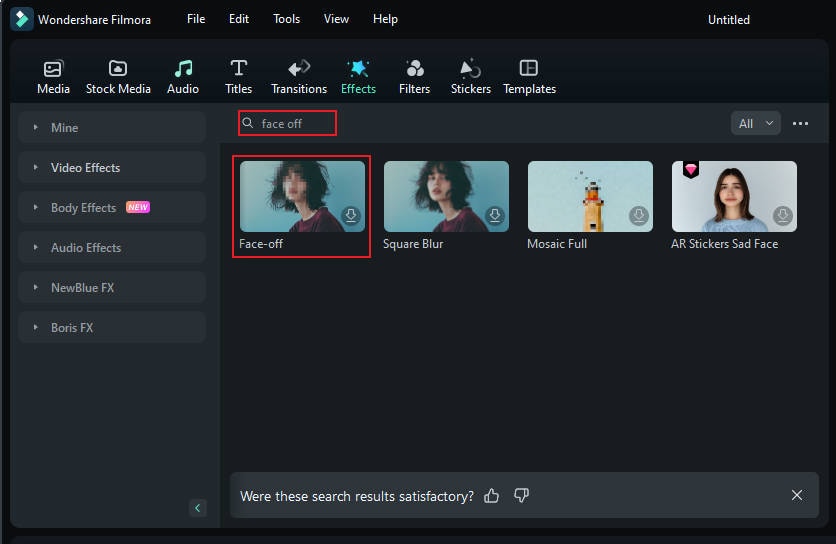
Step 5: Click on the "Face-off effect" to download it. Then, drag and drop it onto your media in the timeline. Next, preview the video to ensure the blur is in the right spot throughout it and export it.
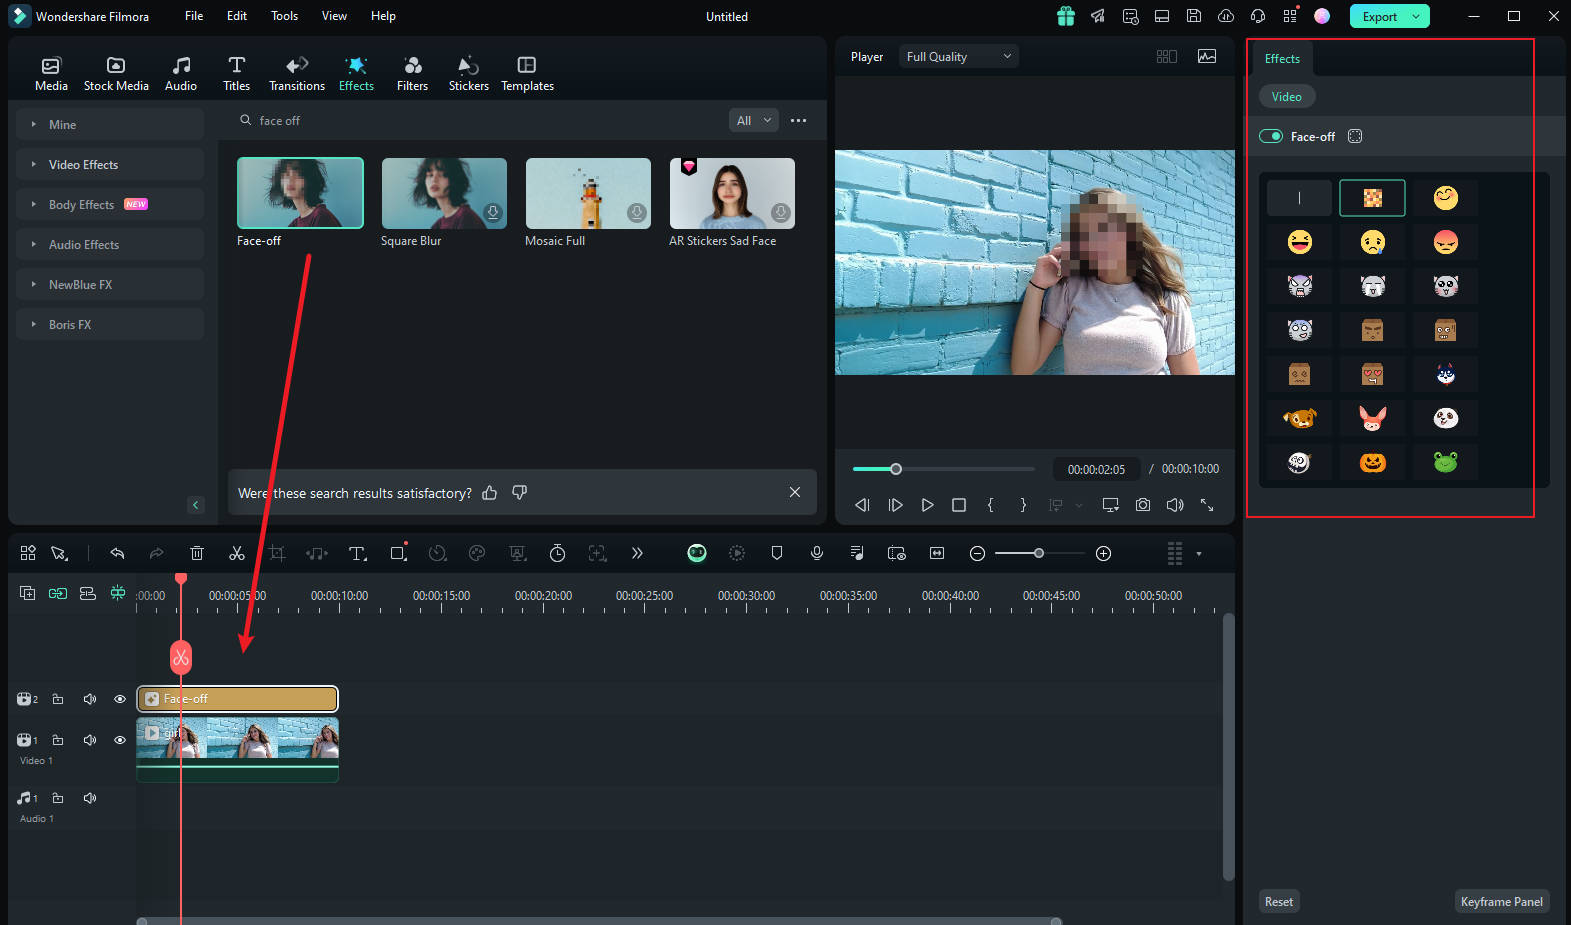
How To Blur Faces Using the Motion Tracking
If you want to apply a mosaic to a moving person's face, the motion tracking feature in Filmora is your best choice. Let's take a look at how this feature can be used to mosaic a face.
Step1 Import the Video and Drag It to the Timeline
Once you are done launching Filmora, select "Create New Project". Afterward, import and drop the video into the timeline.
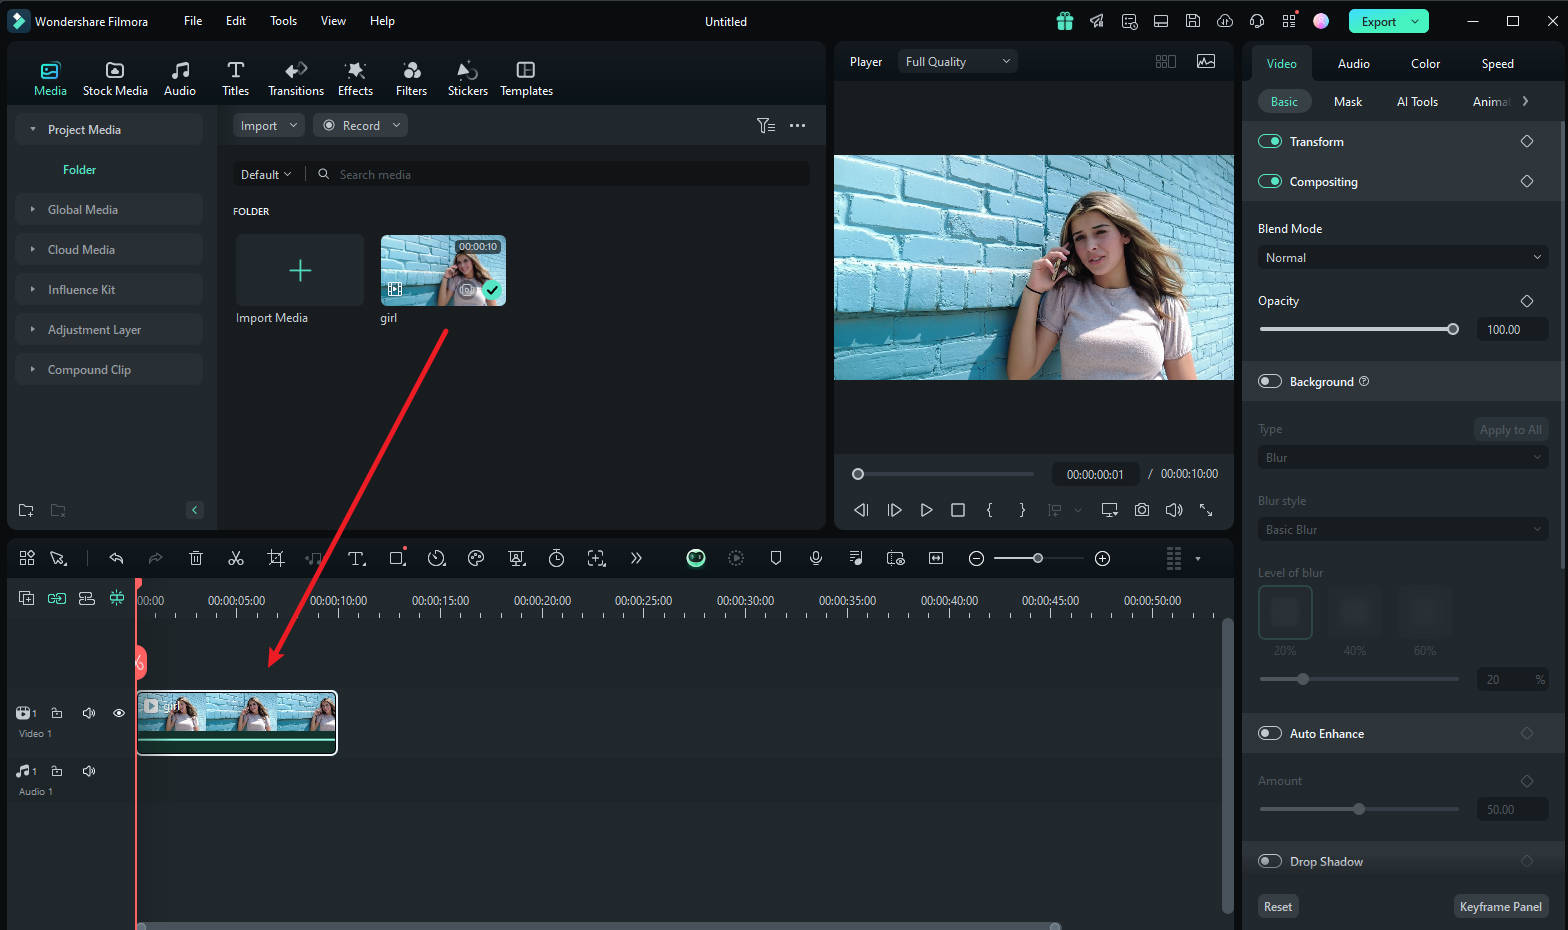
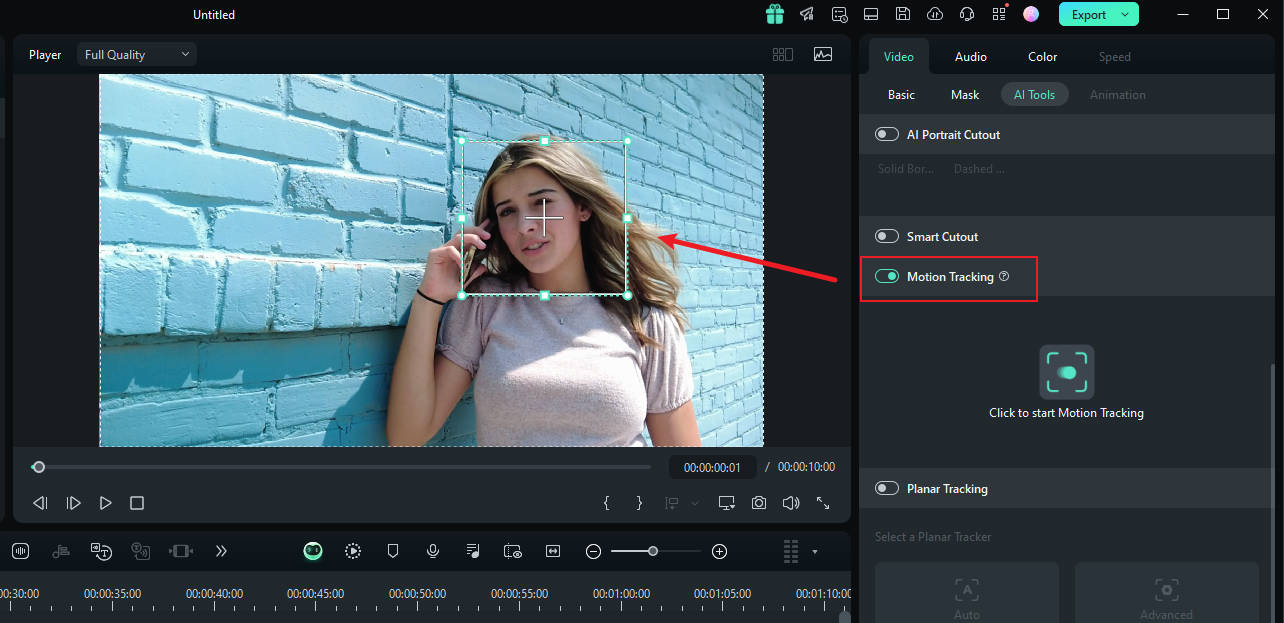
Step2 Adjust the Motion Tracking Space
Now place the play head at the start and proceed with the "Motion Tracking" tool, and adjust the motion tracking space from your preview window.
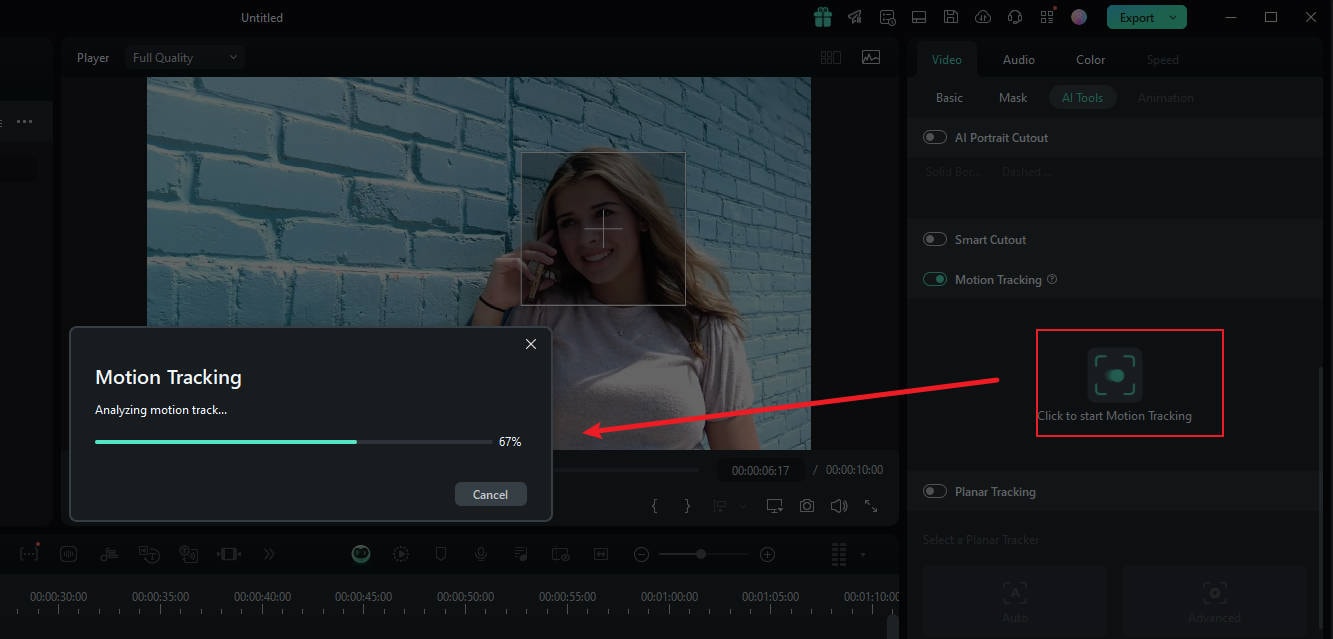
Step3 Start the Motion Tracking Process
Once done, hit the "Start Tracking" button. Within a few minutes, you will be able to finish this process.
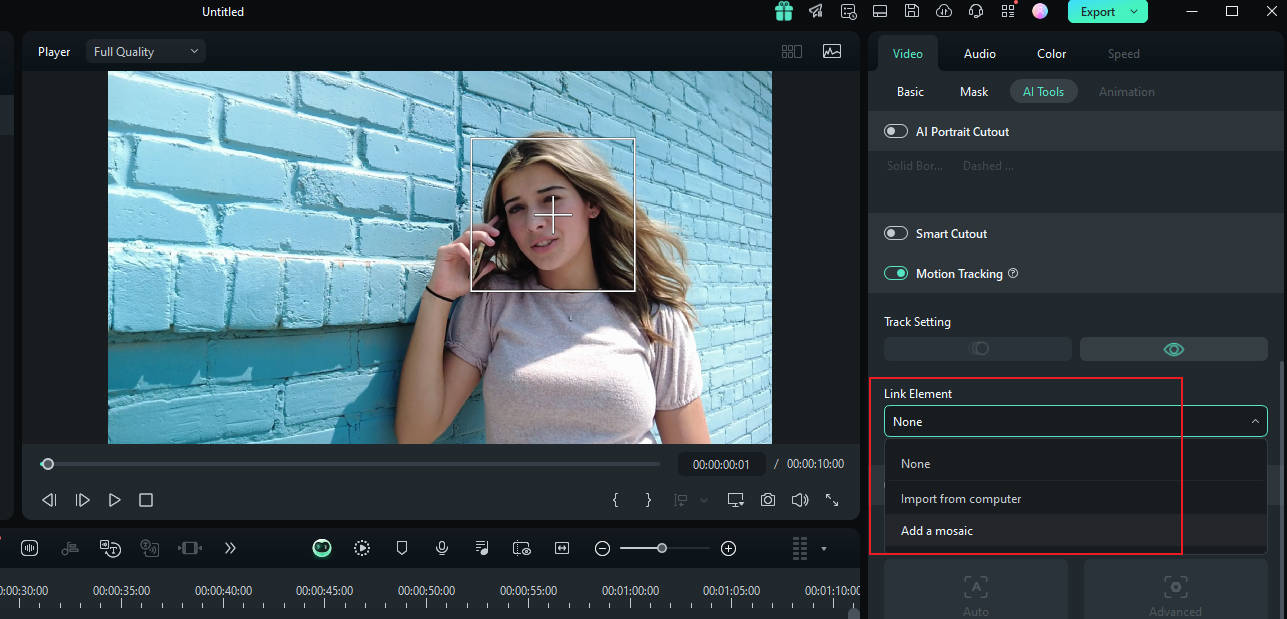
Step4 Customize the Blur Settings
Now, click the video on the timeline. In the pane on the right, under the "link element" option, you can select the overlay element you want, such as an image or mosaic.
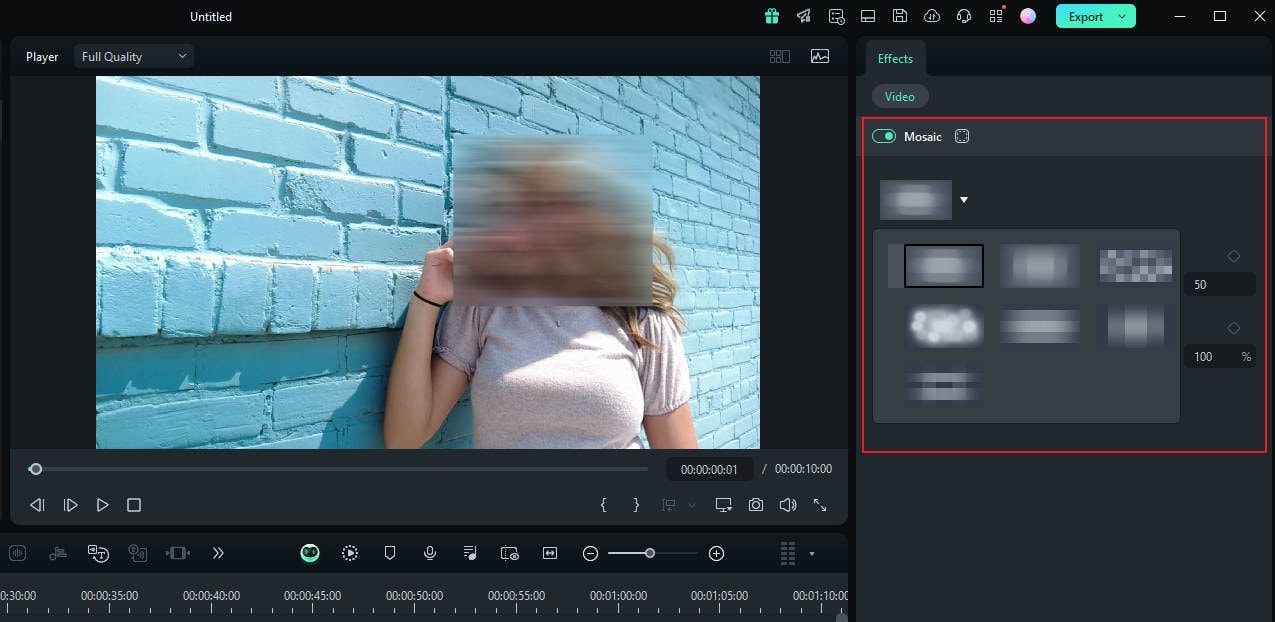
Step5 Choose Mosaic in Motion Tracking
If you choose the mosaic, a mosaic will appear over the person's face. Also, you can change the blur amount and blur opacity. Afterward, adjust the blurred space on your preview window. Once confirmed, you can export the video.
Bonus Part: How To Easily Blur Faces on a Mobile Phone
If you're looking for a convenient way to blur faces on the go, Filmora’s mobile app is a great option. While we’ve already seen how Filmora’s desktop version outperforms Windows Movie Maker in face-blurring, the mobile app offers similar capabilities, allowing you to blur faces directly from your smartphone or tablet. In this section, we’ll walk you through the steps for both Android and iOS devices, giving you the flexibility to edit your videos anytime, anywhere.
How to Blur Faces on Android with Filmora
Androids offer the direct blurring effect with Mosaic, so blurring faces in your videos is easy and seamless. Here is how to blur out faces in a video with Filmora for Android devices:
Step 1: Launch Filmora on your Android device and cpck on New Project to begin.
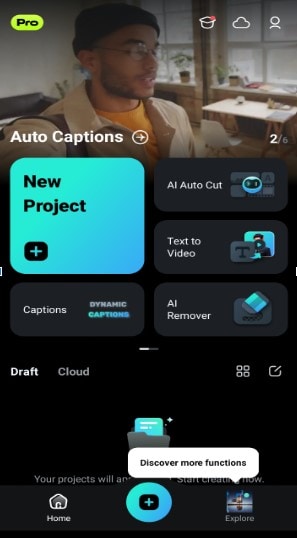
Step 2: Import your media to the editing suite.

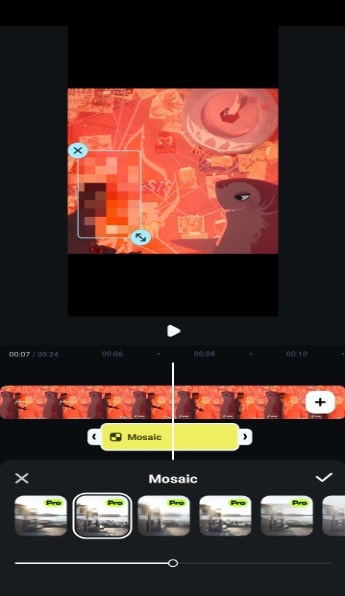
Step 3: Cpck on the media in the timepne. This will make a set of options pop up at the bottom of your screen. Scroll sideways and select Mosaic from the options. Then, adjust the position of the mosaic.

Step 4: Choose the type of mosaic you want and adjust the intensity with the gpder. Once it’s ready, you can cpck on Export to save the video.
How to Blur faces on iPhone with Filmora
For iPhones, Filmora doesn’t offer a direct blurring feature. However, you can add a mosaic emoji to hide the face. Here’s how to blur your face in a video using this method:
Step 1: Launch the Filmora mobile app and cpck on New Project to begin.
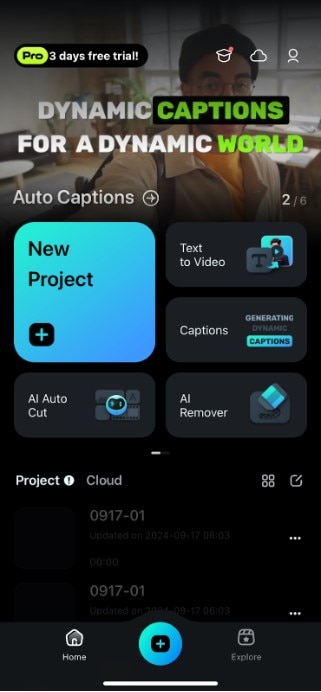
Step 2: Select the media you want in your video and cpck Import

Step 3: from the bottom menu, go to stickers. Search mosaic in the search bar.

Step 4: Choose the mosaic you want to add to your video. Then, preview it to ensure it meets your requirements before exporting.

Conclusion
To wrap up, while blur faces in Windows Movie Maker can be a useful feature for basic editing, its limited capabilities make it less suitable for more precise or advanced work. For a better, more efficient editing experience, we recommend switching to Filmora.
With both the desktop and mobile versions offering powerful, easy-to-use tools, Filmora allows you to blur faces with greater precision and flexibility, making it the ideal alternative to Windows Movie Maker for modern video editing needs.


