
 100% Security Verified | No Subscription Required | No Malware

A designer struggling to achieve consistent results with AI image generation often finds that small changes in prompts lead to drastically different outputs. This is where a ComfyUI prompt generator becomes a powerful tool for streamlining the creative process. The ComfyUI Prompt System is a node-based way to create and manage AI image prompts. Instead of a single text box, it separates prompts into sections like positive and negative inputs.
By structuring prompts in a clear, modular way, users can produce more accurate, detailed, and visually appealing results in less time. Whether you are a beginner exploring ComfyUI or an advanced creator optimizing workflows, understanding prompt design is essential. This guide will walk you through using a ComfyUI prompt generator to improve consistency, creativity, and overall image quality in your projects.
In this article
Part 1. Key Features of ComfyUI Prompt
- Node-Based Prompting: The system allows users to build prompts through a visual node interface, making workflows more flexible and easier to manage.
- Positive Prompt Control: It enables users to clearly define the elements, styles, and subjects they want to include in the generated image.
- Negative Prompt Filtering: Users can remove unwanted details, such as distortions or low-quality elements, by specifying them in negative prompts.
- Text Encoding Integration: Prompts are automatically converted into a format that AI models can understand using built-in text encoding nodes.
- Real-Time Adjustments: Users can quickly tweak prompts or parameters without rebuilding the entire workflow from scratch.
- Reusable Templates: It allows saving prompt structures as templates, making it easy to reuse consistent styles across projects.
comfyui-prompt-generator-2.jpg
Part 2. How Image-to-Prompt ComfyUI Workflow Works Step by Step
As discussed, the ComfyUI image to prompt allows different nodes and models to be integrated into its system and generate results accordingly. To learn how the process works, read the steps provided next:
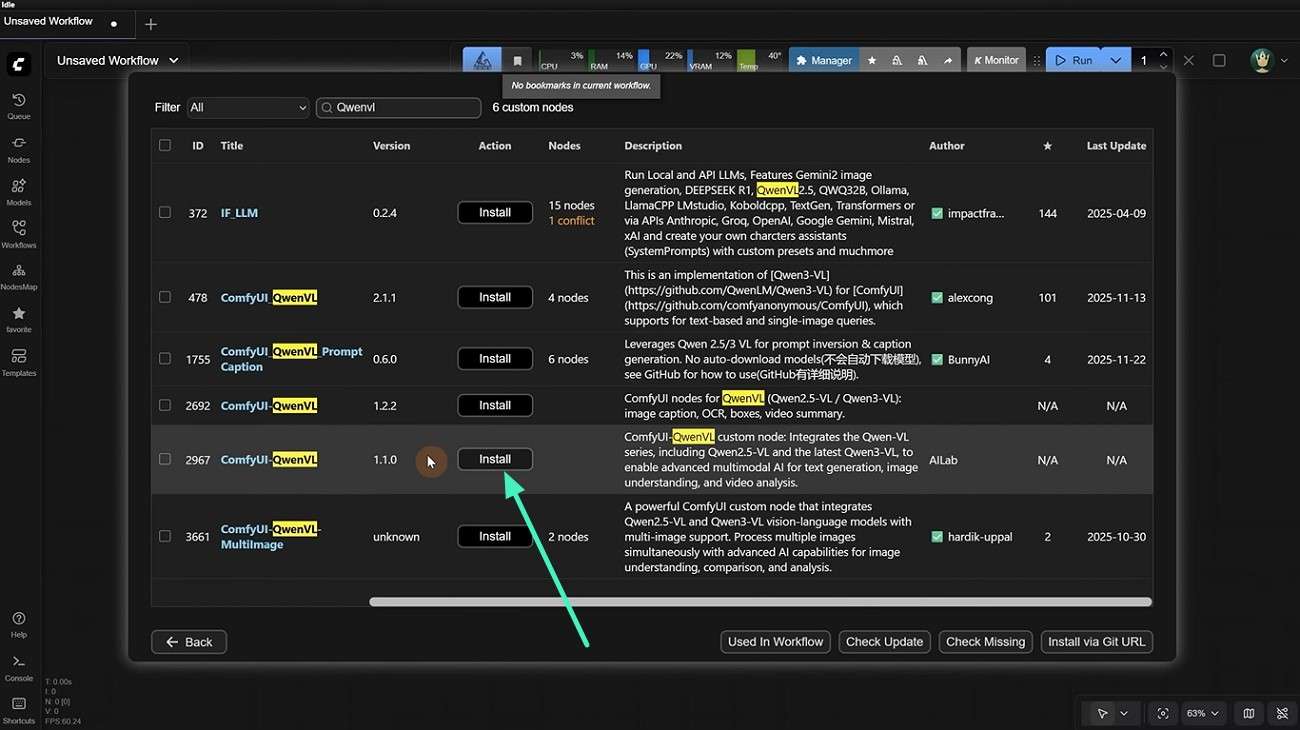
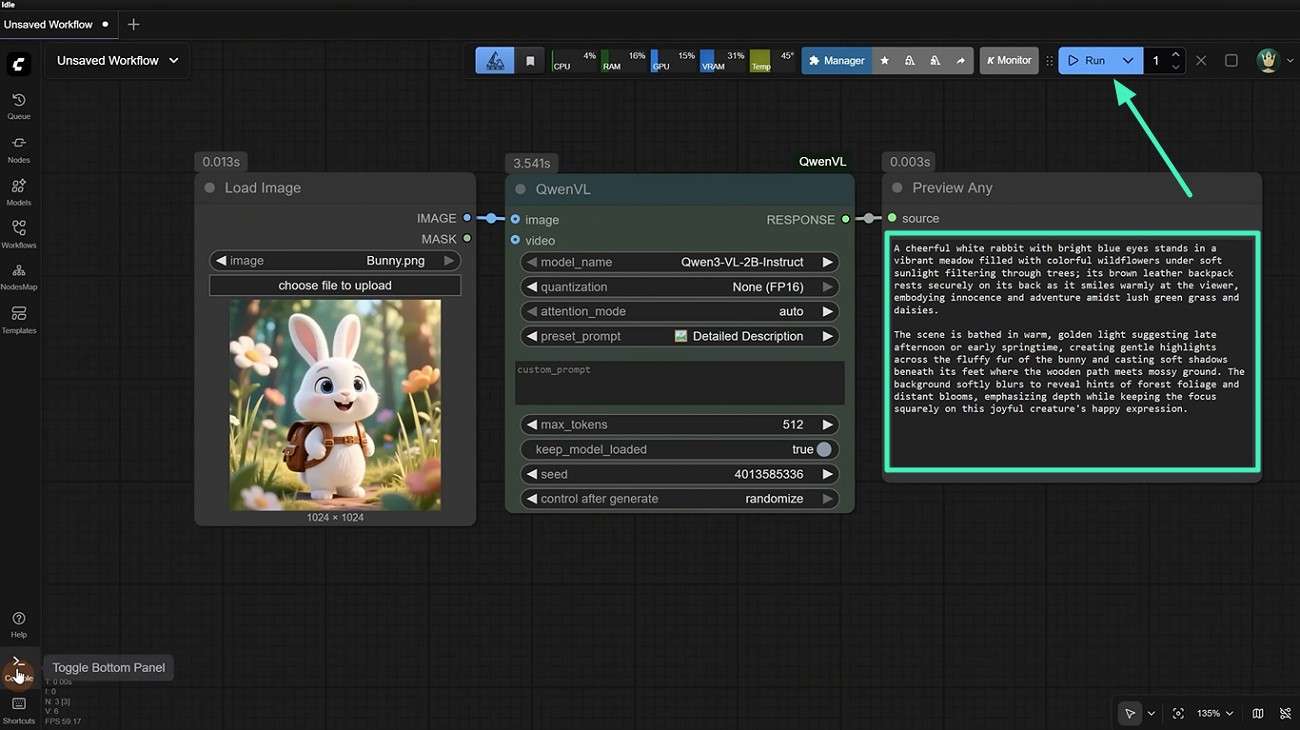
Step 1. Start by launching the tool on your device and selecting the relevant node for prompt generation, such as QwenVL. Press the "Install" button to successfully install the node.
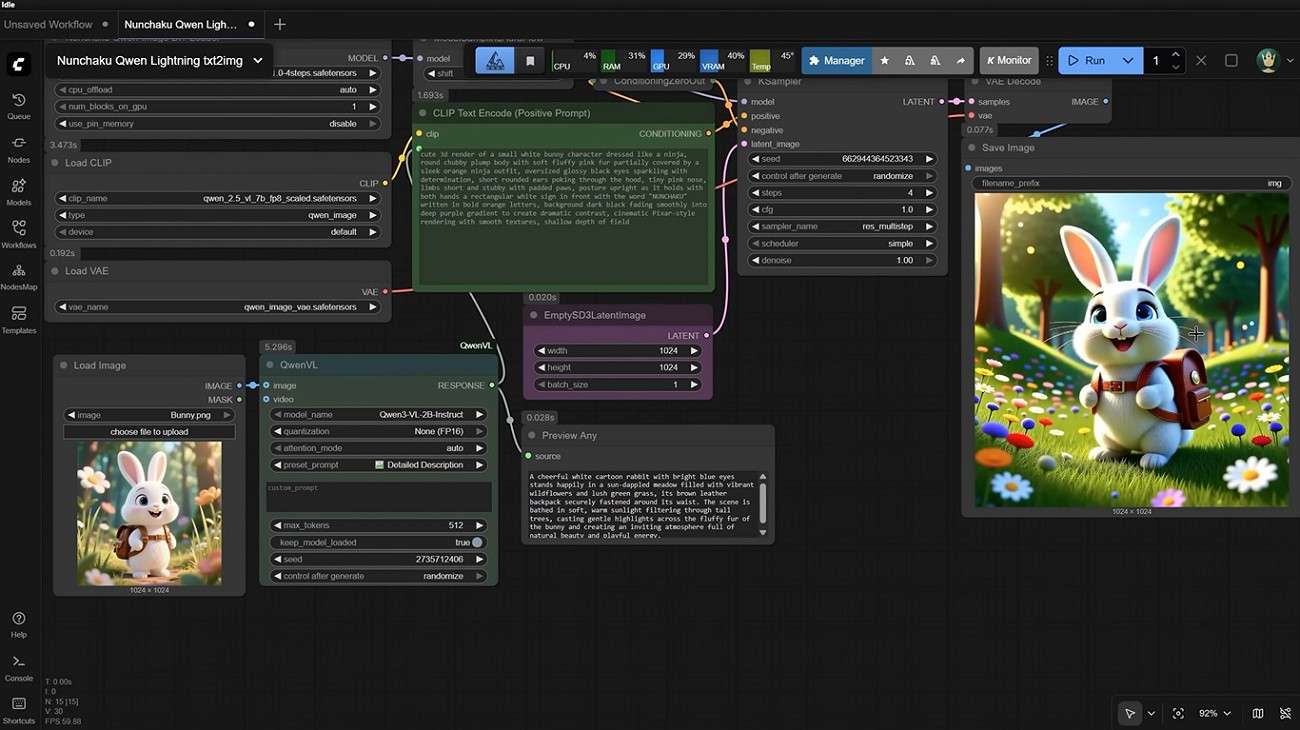
Step 2. Once the node is added, configure settings like model name, quantization, and attention mode. Next, add another node to take image input, such as the "Load Image" node. Connect both the nodes to proceed.

Step 3. Moving forward, add the "Preview Any" node and connect it to the Qwen node to preview results.
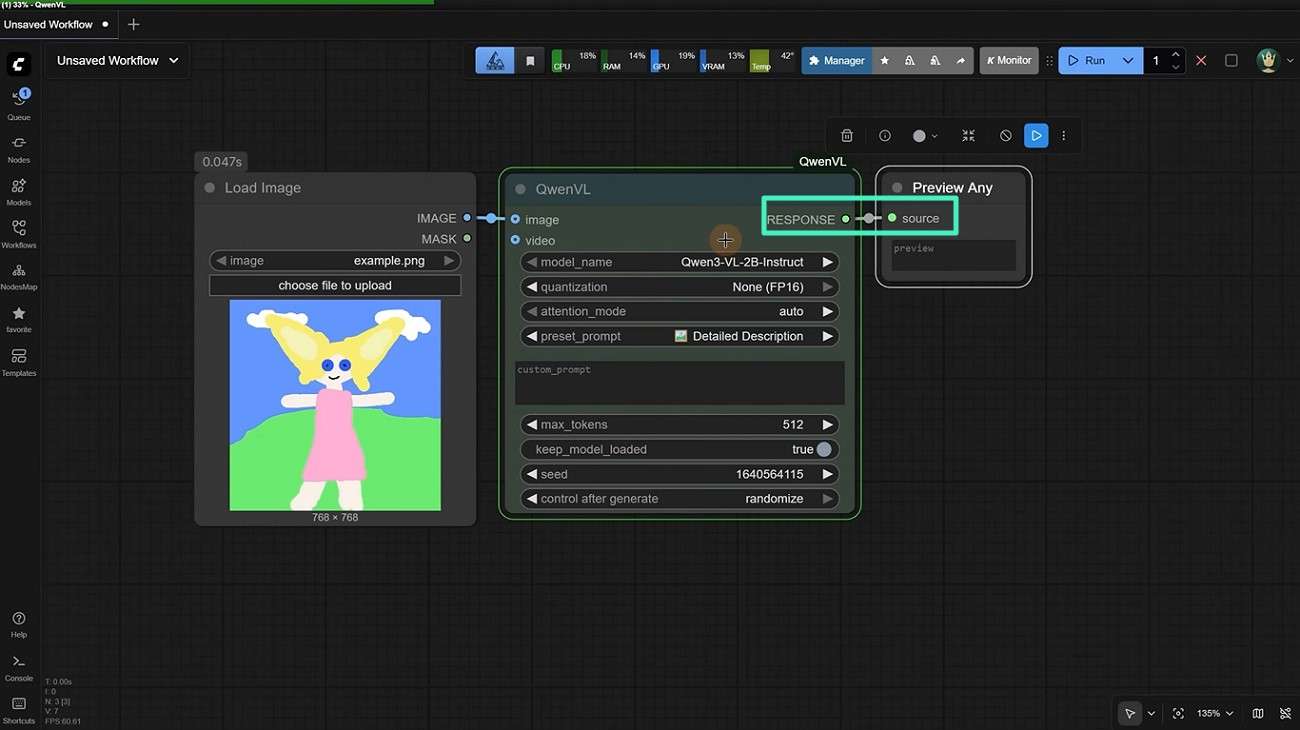
Step 4. Once all nodes are successfully added, upload the image you need to generate the prompt for, then hit the "Run" button. Once the prompt is generated, preview it in the "Preview Any Node" and copy it wherever you want.
Part 3. Pros of ComfyUI Prompt Generator for Advanced Users
The main question comes to whether users should consider using ComfyUI prompt generator or not. To help with this selection, we’ve provided a set of advantages people should look into before choosing this option:
- Seamless integration supports efficiently integrating custom nodes and multiple AI models into an image to prompt ComfyUI.
- Batch processing generates multiple prompts quickly and easily for large-scale projects.
- A single input produces multiple prompt variations for better experimentation.
- Recursive prompting refines prompt details to improve accuracy.
- Reusable templates maintain consistency across projects and workflows effectively.
Part 4. Cons of ComfyUI Prompt System You Should Know
While you highlight the main advantages, it is also important to understand the disadvantages it carries. For that, look ahead into the issues users can face when using the ComfyUI prompt system:
- Complex node setups often make workflows harder to manage and debug.
- Inconsistent outputs may occur when prompt parameters are not tuned properly.
- Dependency on external models can create compatibility and update issues.
- Heavy reliance on models can significantly slow system performance.
- The image-to-prompt ComfyUI workflow in the interface offers limited guidance, which can confuse new users during setup.
Part 5. Is ComfyUI Image-to-Prompt Good for Beginners?
While the ComfyUI prompt generator and its related tools offer powerful control over AI image generation, beginners often struggle when first exploring advanced features such as image-to-prompt workflows. Here are some of the reasons why this tool is not good for beginners:
- Steep Learning Curve: Beginners often find node-based workflows confusing and difficult to understand at first.
- Complex Node Connections: Setting up image-to-prompt pipelines requires correctly linking multiple nodes, which can be overwhelming.
- Technical Parameter Control: New users may struggle to adjust settings such as seed, CFG scale, and sampling steps.
- Lack of Built-In Guidance: The interface provides minimal tutorials, making self-learning necessary.
Part 6. Try Filmora: Easier and Faster Choice Than ComfyUI Prompt Generator
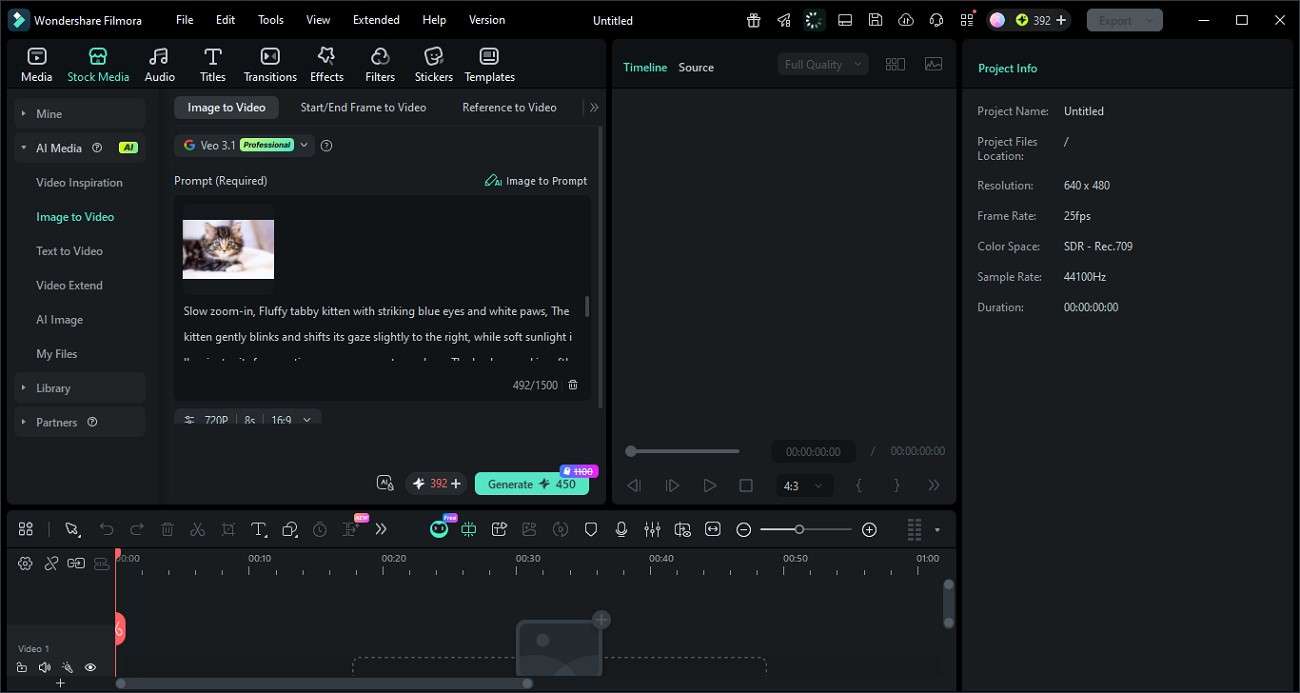
If you are looking for a simpler and faster alternative to complex node-based workflows in the ComfyUI prompt tool, Filmora offers a much more beginner-friendly solution. Instead of manually building prompt systems or managing multiple connected nodes, Filmora provides an integrated Image-to-Prompt feature under its Image-to-Video function. It automatically converts any image into a detailed AI prompt. This helps users quickly recreate similar visual styles and maintain consistency across different projects.
 secure download

By analyzing key image elements such as objects, lighting, color tones, and composition, it generates descriptive prompts that can be directly used or refined. This not only enhances creative control but also simplifies the entire workflow, making AI-powered content creation more accessible, efficient, and consistent for all users.
How to Use Filmora: Step-by-Step for Image-to-Prompt Workflow
After understanding how this ComfyUI prompt generator alternative enhances creative control, the next step is to learn how to use it. Follow the steps below to use this process effectively:
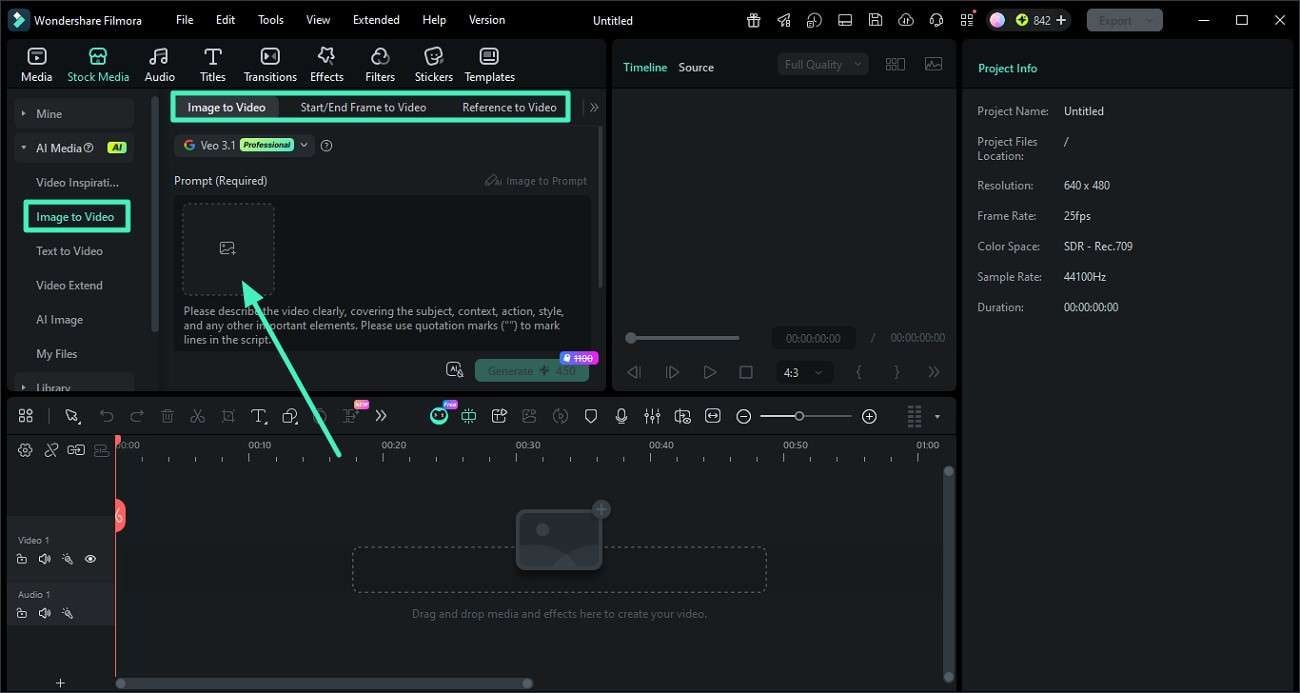
Step 1. Import Your Image into Filmora
Start by creating a new project in the ComfyUI alternative workflow tool Filmora and open the "Image To Video" section from the left panel. Choose your preferred mode, such as "Image to Video, Start/End Frame, or Reference to Video," then upload your selected image into the workspace.
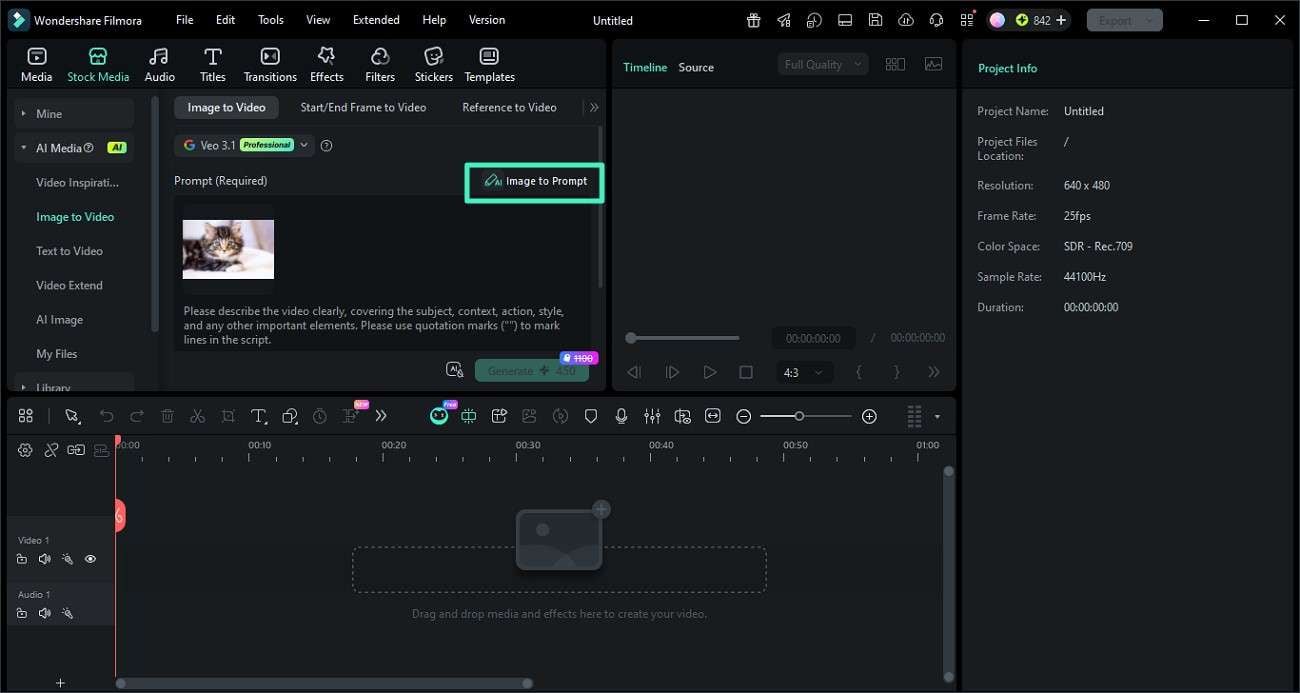
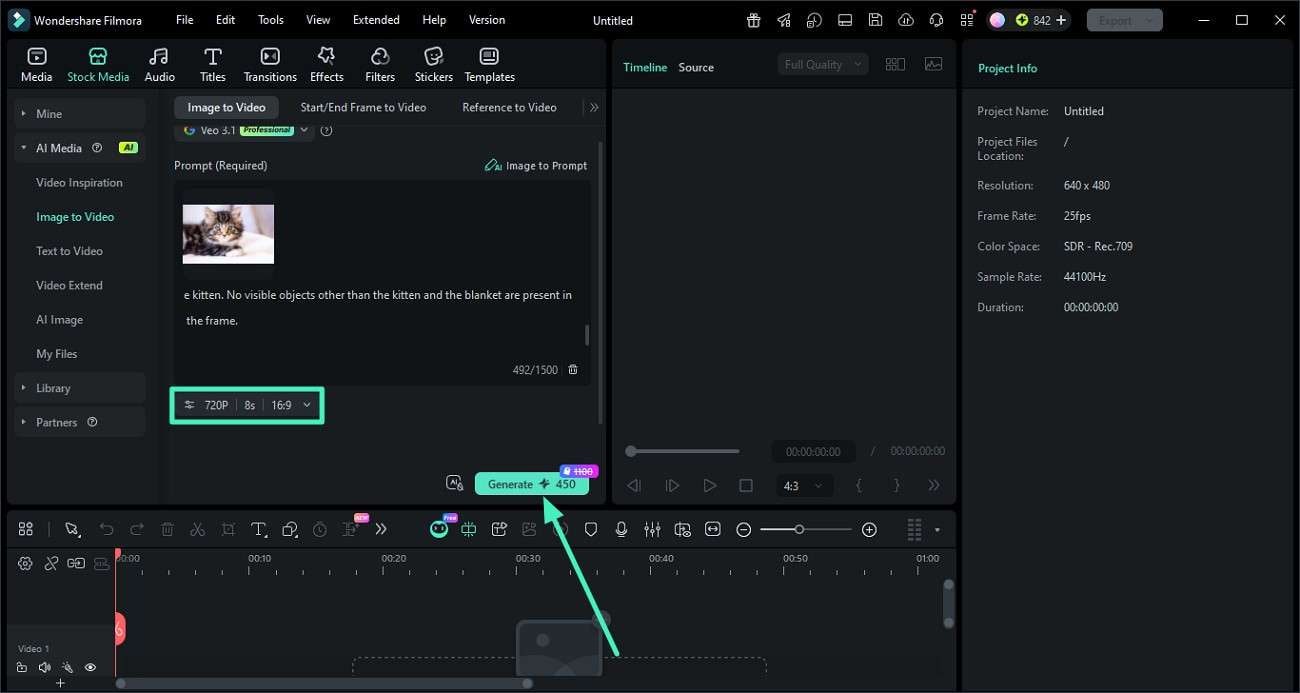
Step 2. Generate an AI Prompt from the Uploaded Image
Once your image is loaded, click the "Image to Prompt" option to automatically analyze the image and generate a detailed AI prompt based on its elements.
Step 3. Edit Prompt and Generate Video
After the prompt is successfully generated, review and edit the text. Once you are satisfied with the text, press the "Generate" button to create a video across it.
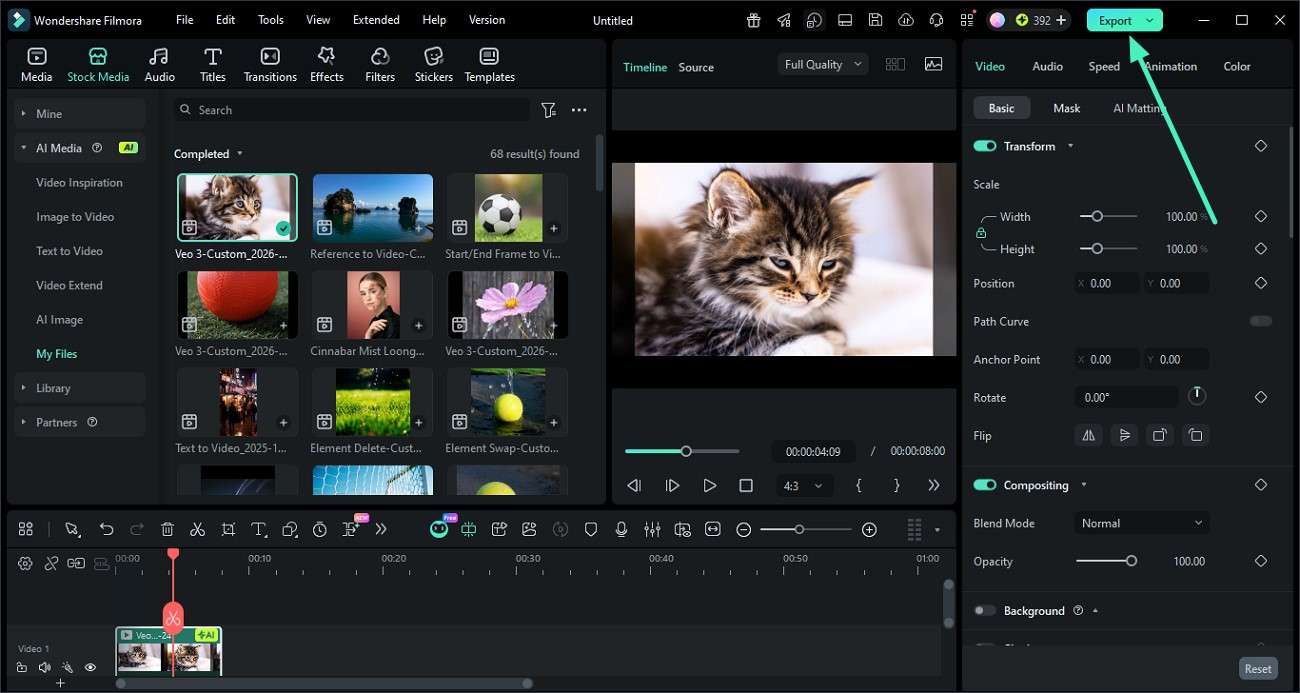
Step 4. Preview and Save the Video
Finally, when the video is generated for the created prompt, preview it within the preview window. Press the "Export" button in the top-right corner to save the results.
 secure download
 Part 7. Filmora vs ComfyUI: Which Tool Is Easier and More Powerful
Both ComfyUI and Filmora offer strong AI capabilities, but they are designed for very different user types. Provided below is a side-by-side comparison of both tools to help you make an informed choice:
| Feature | ComfyUI | Filmora |
| Ease of Use | Requires technical knowledge of node-based workflows and setup | Beginner-friendly interface with simple drag-and-drop tools |
| Learning Curve | Steep, better suited for advanced users | Low, suitable for beginners and casual creators |
| Workflow Type | Highly customizable but complex graph-based system | Streamlined, all-in-one editing and AI generation workflow |
| Speed of Creation | Slower due to manual configuration and testing | Faster with automated AI tools and presets |
| Setup Requirement | Needs installation of models, nodes, and dependencies | Ready-to-use with built-in AI features |
| Overall Experience | Powerful but complex and time-consuming | Smooth, efficient, and productivity-focused |
Conclusion
To sum it up, this article provided a detailed review of how the ComfyUI prompt generator works, its features, pros and cons, and its suitability for beginners and advanced users. It also explored how AI prompt generation improves creative workflows and image consistency. While ComfyUI offers powerful control, it can be complex for many users. For a faster, easier, and more efficient experience, Filmora is highly recommended as a complete AI-powered creative solution.
secure download Frequently Asked Questions
-
What is a ComfyUI prompt generator?
A ComfyUI prompt generator automatically generates structured AI prompts from models or nodes, reducing manual effort and improving output consistency. -
Is ComfyUI suitable for beginners?
ComfyUI is not very beginner-friendly because it requires understanding node systems, technical settings, and workflow configurations, which can be overwhelming for new users. -
Which tool is easier than ComfyUI for creating AI images?
Filmora is a much easier alternative because it offers built-in AI tools like Image-to-Prompt and Image-to-Video. It allows users to generate and refine visuals without complex setups. -
Can Filmora improve AI-generated image workflows?
Yes, Filmora is highly recommended because it simplifies prompt creation, enhances images with AI tools, and provides an all-in-one editing experience.
