Developers might be aware of this term that puts their lives at ease. Talking about GitHub Copilot, the first word that comes to users' minds is coding assistant. Generally, it’s a social networking site for programmers to share codes. Organizations get its help to facilitate project management and collaboration.
When GitHub integrates with Visual Studio, users can team up with the Editor. They can share the source code with others using GitHub Copilot Visual Studio 2022. So, this article is all about how to use Visual Studio Copilot in day-to-day coding.
In this article
- Part 1: GitHub Copilot: A Brief Overview of What It is And What It Offers!
- Part 2: GitHub Copilot in Visual Studio: A Simple Guide
- Part 3: Some Top Examples Showing How to Use GitHub Copilot in Visual Studio Code
- Bonus Part: Make the Finest Video Using AI Mate Services in Wondershare Filmora
- Conclusion
Say goodbye to editing roadblocks and hello to a smoother, smarter editing experience with Filmora's AI Mate!

Part 1: GitHub Copilot: A Brief Overview of What It is And What It Offers!
GitHub Copilot is an AI pair programmer that provides auto-complete suggestions for codes. It can turn your natural language prompts, comments, and method names into coding suggestions. As you type codes, it analyzes the context and provides relevant ideas. This Copilot is trained with vast datasets of publicly available codes.
In Visual Studio, it acts as a pair programmer that increases your productivity. GitHub Copilot Visual Studio offers the following services in the organization field:
- It allows businesses to store and share their code regardless of whether it is public or private repositories.
- Developers use Copilot to build software faster and solve problems in codes.
- Administrators can enable GitHub for their teams in license management.
- GitHub helps in setting policy controls for the organization’s wide policy management.
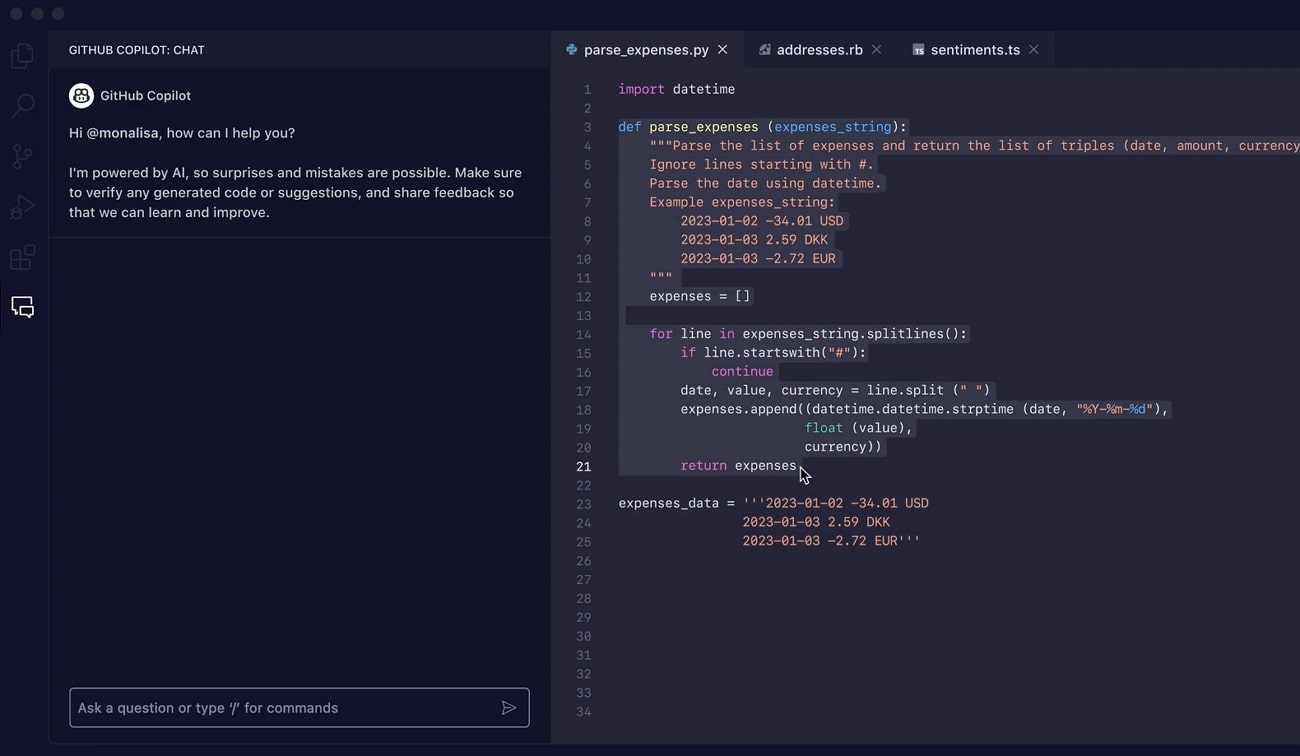
Part 2: GitHub Copilot in Visual Studio: A Simple Guide
According to research, GitHub Copilot helps 74% of developers to focus on their work. Also, it is reported that 88% of developers feel more productive after using Visual Studio Copilot. This Copilot is based on OpenAI Codex, which can generate code from natural language processing. In this part, you will learn everything from prerequisites to steps about Copilot Visual Studio.
Prerequisites
Start coding smoothly, but first, look at the perquisites that need to be fulfilled before starting:
- Visual Studio 2022- Version 17.5.5 or later
- A GitHub Copilot Subscription
Another thing to note is that GitHub Copilot works with any language. It is trained on languages in public repositories, libraries, and frameworks. Some of the popular languages include C++. Razor, Python, JavaScript, and C#.
How to Use GitHub Copilot in Visual Studio
Junior developers, interns, or students can now stand out in their programming projects. The following is a step-by-step guide to using Visual Studio GitHub copilot.
Step 1
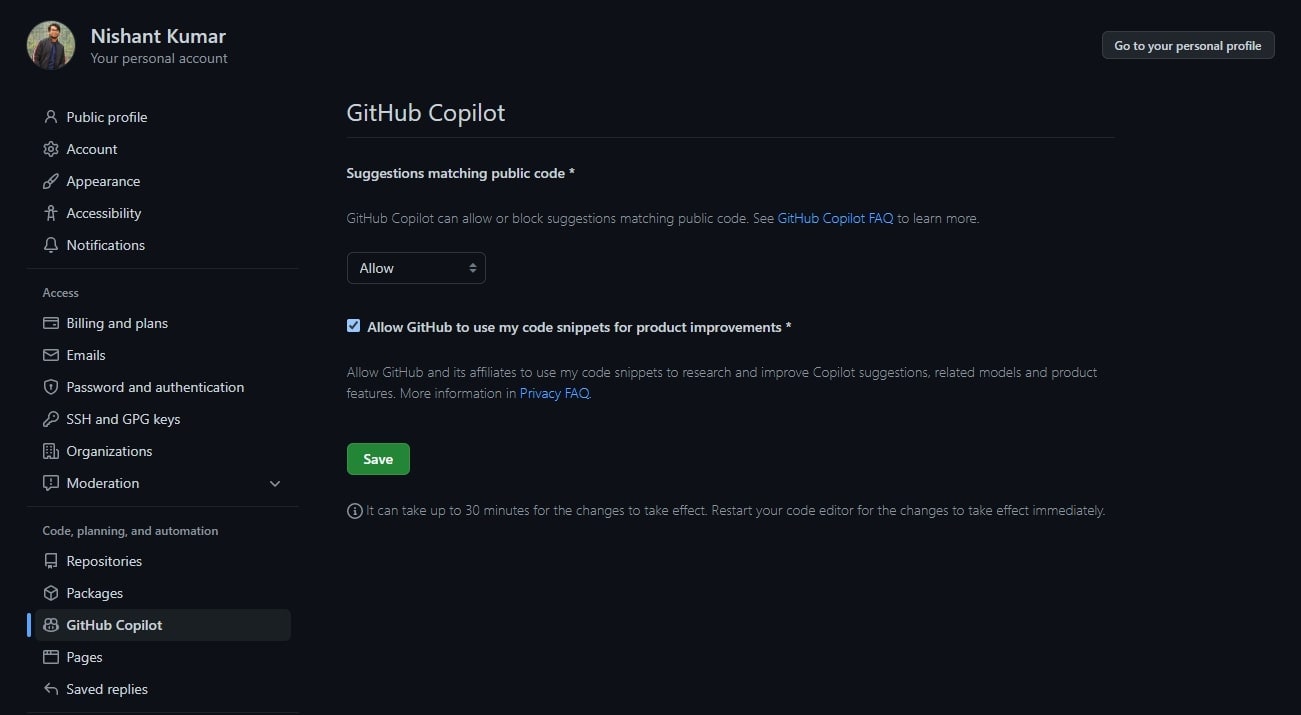
Head towards your GitHub and go to its settings. From the left side panel, choose “GitHub Copilot.” Simply allow it from the main window and press the “Save” button.
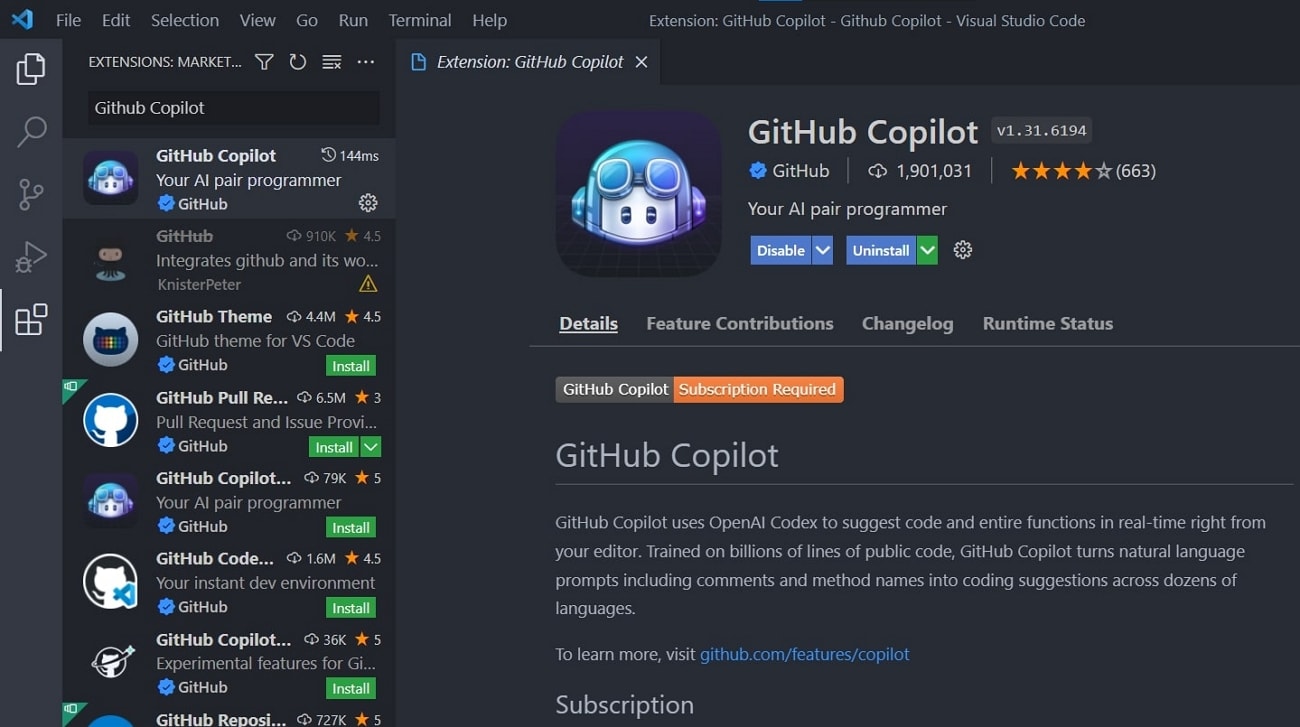
Now, reach out to the Visual Studio Extension and search “GitHub Copilot” in the search bar. Hit the “Install” button and restart the program. From the Copilot icon at the bottom, you can see that it is successfully installed.
Step 2
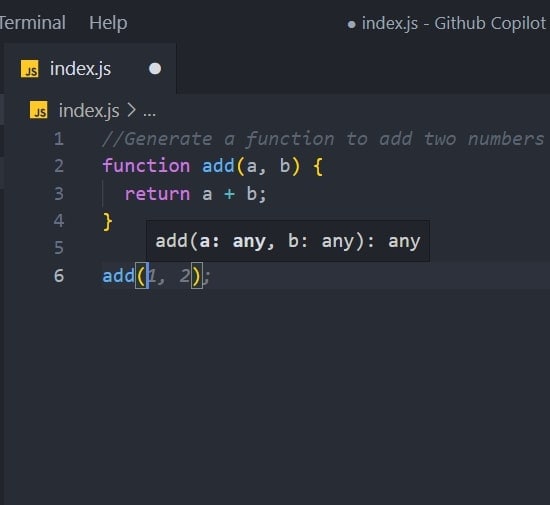
After launching GitHub, generate a JavaScript code using GitHub Copilot. Open your JavaScript file in Visual Studio and write, "Generate a function to add two numbers." Then, press the “Enter” on your keyboard. If you want to accept the suggestion, simply press the tab button.
Step 3
You can insert a comment: "Generate an array of all the colors from the rainbow.” Afterward, press the “Enter” key to accept the suggestions. This way, you will get an array of all the colors in the rainbow.

Step 4
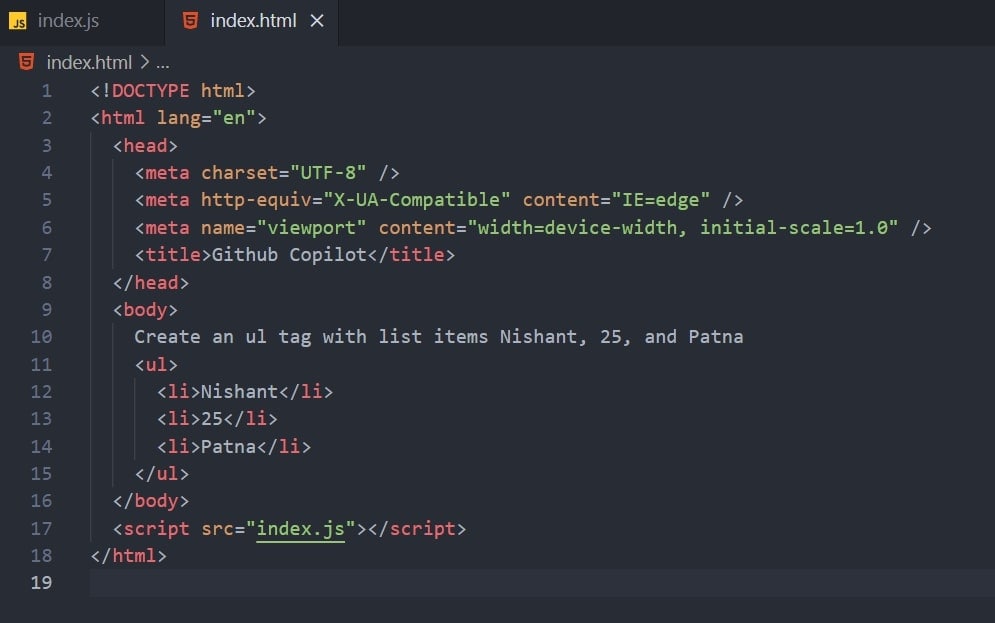
To generate HTML code, reorder the list with Nishant and Patna 25. You can try the same but with a different list style.
Important Points that Users Can look at
After usefully launching Visual Studio and GitHub Copilot, generate codes with ease. The above steps will guide you to make the process quicker. For a better workflow, you should read the given point to maximize the use of code suggestions:
1. Alternative Suggestions
For any output, this Copilot provides many suggestions. You can use such suggestions or reject them. To do so, firstly, create a new JavaScript file. Then, type the given function to get some suggestions. Optionally, you can press Alt+] to see the next or Alt+ [ to see the previous suggestion. Moreover, hit the tab key to accept a suggestion and use the Esc key to reject it.
2. Multiple Suggestions in a New Tab
Developers can use shortcut keys to get suggestions in a new tab. After getting a JavaScript file, they should enter the same function mentioned above. Later, press the Ctrl + Enter key using the keyboard to open a new tab with multiple options. They have to click on Accept Suggestion if they like the idea, or they can close the tab to reject it.
3. Code Suggestions from Comments
Describe something in a natural language comment that you want to do. For this purpose, get a JavaScript file and type the comment. After doing it, you will observe that GitHub will suggest implementing the function.
Part 3: Some Top Examples Showing How to Use GitHub Copilot in Visual Studio Code
There are many things that you can do to help the Copilot for getting the most out of it. Suggestions of Copilot work better when you provide enough context. It's the same as explaining programming concepts to your colleagues with examples. Since examples are vital in exploring concepts, below are some examples of using GitHub Copilot. By following them, you can get the most out of it.
1. Provide Context
Open the VS code file to provide the context to the Copilot. Then, add a top-level comment above as you explain to your co-worker briefly. Provide a meaningful function name to the Copilot that your co-worker can easily understand. You can copy and paste the code to show the Copilot what you want.

2. Consistency and High-quality
Sometimes, developers ignore the quality of the code while typing at speed. So, it is suggested to keep a high-quality bar. When you want to disable the “Hacking” mode, temporarily disable it from the copilot status menu. You can disable completion entirely from the given example.
3. Copilot Facilitating Bootstrap
Prompt with "Add Bootstrap," and Copilot will generate a reference bootstrap link on the CDN. It will also apply Bootstrap classes to your elements. Hit the space bar when you start a <div> element. Copilot will suggest alert and alert-success classes that might vary depending on the context of your code. To accept, simply press the tab key and progress.
Bonus Part: Make the Finest Video Using AI Mate Services in Wondershare Filmora
Visual Studio Copilot has revolutionized the programming field. Now, it’s important to relieve the video editors by providing an AI Mate like GitHub. They put a lot of struggle into editing multiple clips to make a stunning video project. For their assistant, Wondershare Filmora is designed with powerful AI video editing features.
It offers an AI Mate Editor, a personal AI assistant for video editing. Like GitHub, it provides suggestions for professional editing.
A Guide to Use AI Mate Editor Feature of Filmora
Using AI Mate Editor is far easier than GitHub Copilot Visual Studio. Anyone can use it by following the given detailed steps.
Step 1: Download Filmora and Explore New Project Option
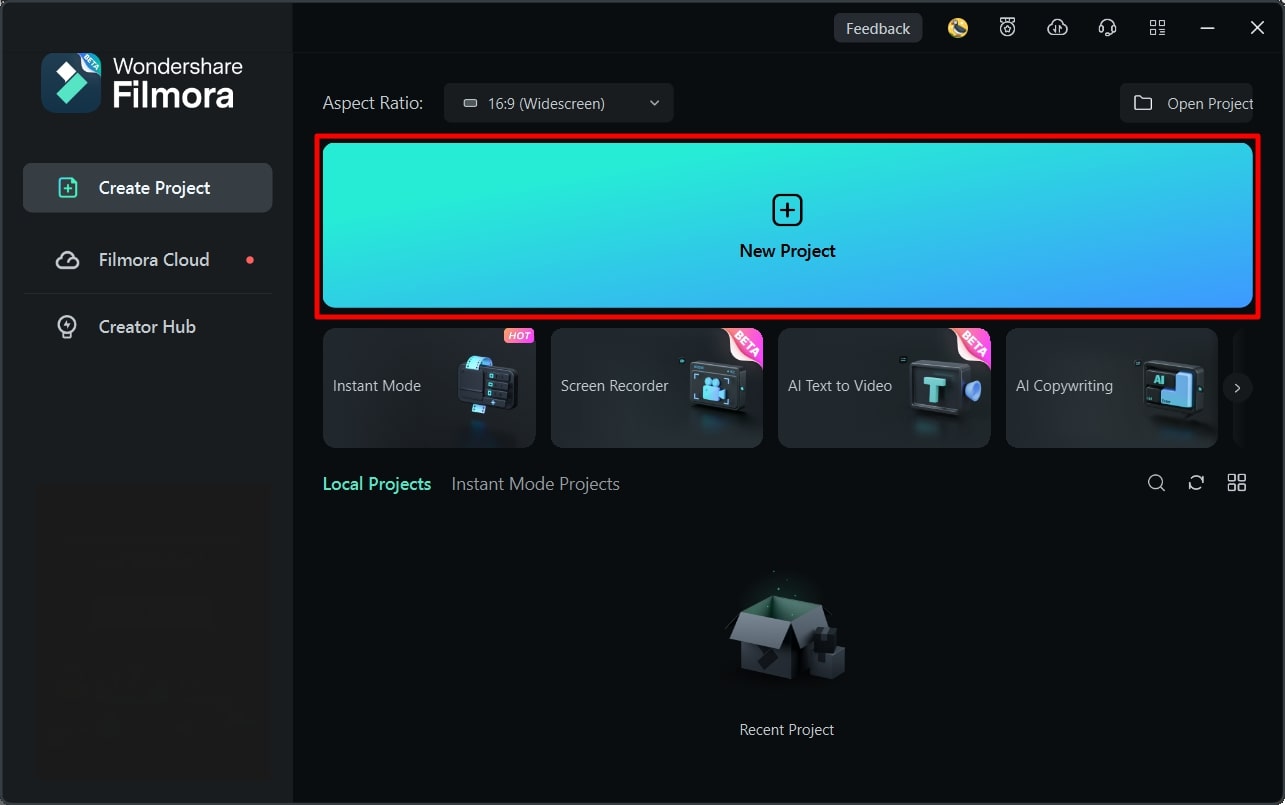
Launch the Wondershare Filmora in your system. To do so, head to its official website and tap on download to get its latest version. After successful installation, open it and enter its main interface. Explore the "New Project" option and get to the editing screen there.
Step 2: Access the AI Mate Editor Using Two Methods
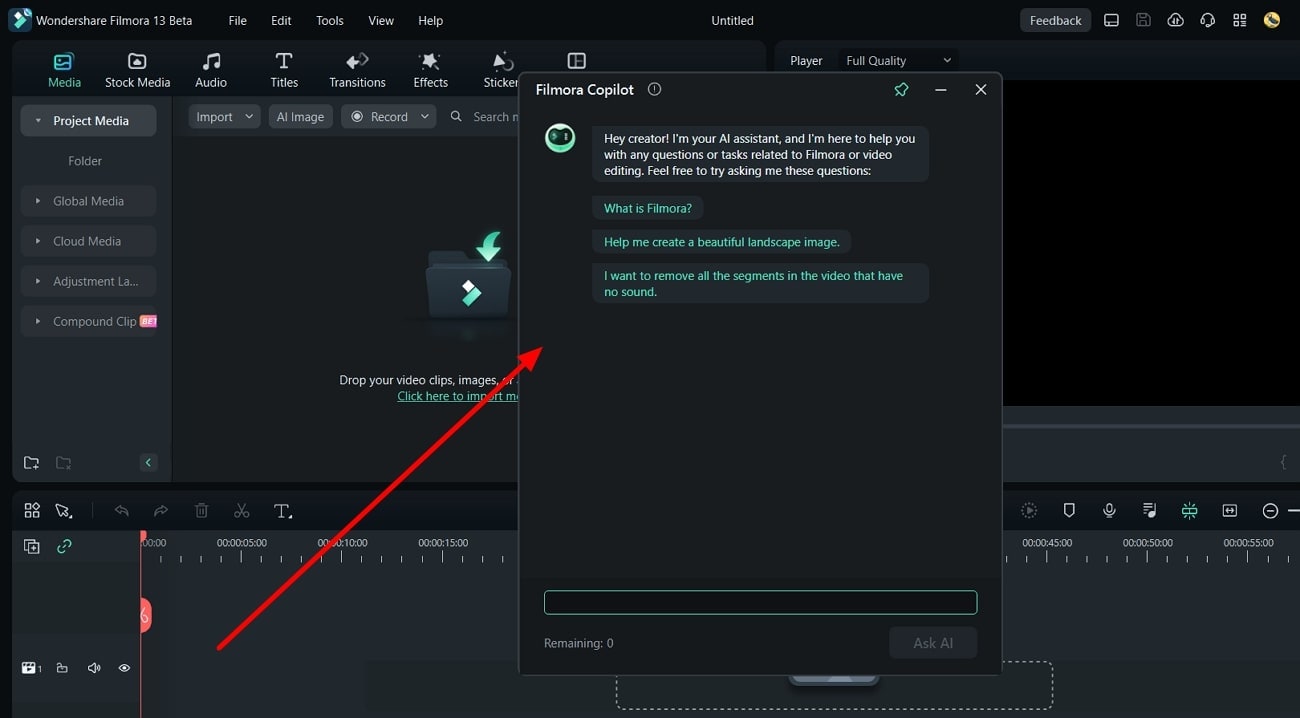
From this screen, access the "AI Mate Editor" icon from the toolbar of the Timeline section. Alternatively, you can import your media in the timeline section and right-click on it. Then, look for the "AI Mate Editor" option in the list.
Step 3: Generate Suggestions from Filmora AI Mate Editor
Later, you will get a “Filmora AI Mate” window to enter a prompt. You can insert a comment or question in natural language. After writing it, press the “Ask AI” button and receive suggestions. There will also appear navigation buttons to get directed toward the required features.
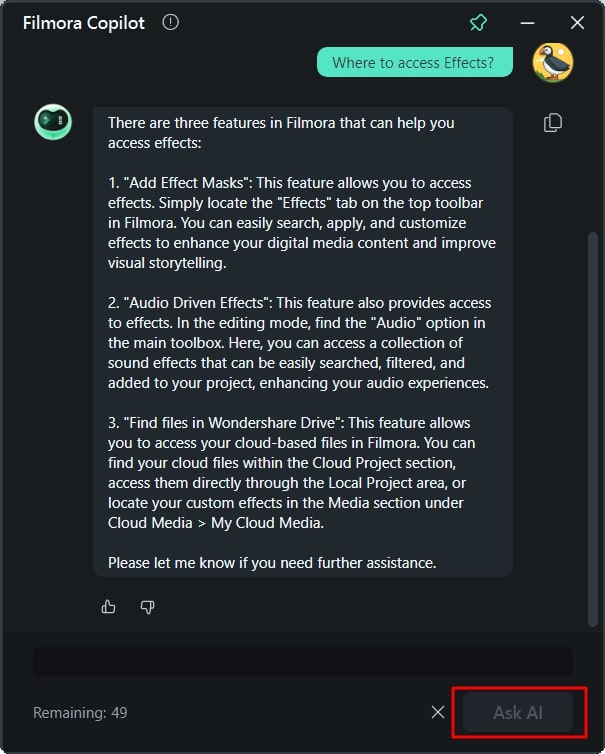
Exceptionally, it gives navigation buttons to reach the respective features. Let's explore some of the main features of Filmora to edit media:
1. AI Smart Masking
To spice up your editing, use the endless possibilities of AI smart masking. You can remove backgrounds and enhance the visual flow through this feature. It offers a multi-subject overlay that isolates subjects from the background. Users can enhance specific scenes of the project by correcting the colors of specific parts.
2. AI Image Generator
Filmora ends the need for internet surfing for images to content relevant images. To address this concern, it provides copyright-free images that perfectly align with your projects. In this regard, you must describe the image you want in natural language. Then, pick one aspect ratio from the given 3 options. Optionally, you can choose an image style for personalized results.
3. AI Copywriting
To maintain workflow, this tool offers ChatGPT integration in it. Users don’t have to use a separate browser for it. You can generate YouTube video titles and descriptions using this feature. It cuts the need for video scriptwriters for engaging and unique content. Even users can set the language and number of results they want to generate.
4. AI Thumbnail Creator
Thumbnails are the main thing that attracts viewers to watch the complete videos. That's why creating an attractive thumbnail is the core part of video editing. Filmora offers AI assistance that captures three captivating images from your content. It allows you to import one or generate a new one with the help of advanced algorithms.
Conclusion
Overall, you can say that Visual Studio Copilot is the ultimate solution to coding problems. For developers, it offers contextually aware suggestions and collaborations. This article has also guided you to effectively use this coding assistant. Moreover, a proven solution for video editors is discussed in this guide, which is Filmora. Without further delay, explore its various fruitful functionalities.


 100% Security Verified | No Subscription Required | No Malware

