What is Audio Normalization, what are its different types, why do we need it and how to do it online? – these are the questions we might ask when first learning about it. Well, then, let’s answer all of them!
Audio Normalization means that the loudest parts of an audio signal are set to a specific value. For example, -18 dBFS (decibels relative to full scale). This is done so that all the parts of the sound mix remain at equal volume levels.
You can use this tool when mixing or editing your music, or during playback on your speakers. In the case of mixing, listen for any clipping (A form of waveform distortion - It sounds like the audio is starting to 'break up,' which is light distortion. The more severe it is, the more distorted the music begins to sound) that could occur in your mix. So, in this case, you need to normalize before it becomes too loud and needs more and more fixing. So, normalizing the audio kind of means balancing the volume of the track.
Mostly, audio normalizers are used for balancing out the volume of music, podcast, or other audio recordings. Whenever you have a variety of audio clips that would sound too loud or soft if listened to together, an audio normalizer helps you create a more cohesive listening experience. So, why, and when, do we need to normalize our tracks?
- To make different music styles sound more cohesive;
- To adjust the volume of podcast to be at a consistent level with one another
- To remove sharp spikes in volume for consistent listening experience for our audiences
So, what are the types of audio normalization? Here you have it:
- peak normalization - helps adjust the recording based on the highest signal level present in the recording;
- loudness normalization - adjusts the recording based on perceived loudness;
- RMS (Root-Mean-Square) - changes the value of all the samples, where their average electrical volume overall is a specified level.
So, say that if you are a creator and have listeners, with this tool, you can count on the expectation that people will more likely want to convert to being loyal subscribers, viewers and listeners. This is what happens when audiences feel their user experience is favored and they enjoy a good content – it makes them come back for more.
But sometimes you don’t have so much time that would allow you to find a software, download its installer, install it, learn how to navigate inside its interface, which might be totally new and in some cases, complicated for you, and learn how to normalize your audio files there. In this case, you might want to find the right tools which would enable you to reach your goal without even having to install anything – simple and fast!
Hence, for this case, we would like to offer you the list of 10 best free online audio normalizers. The list goes:
- MP3 Gain Volume Changer
- Sodaphonic
- Audio Mass
- Audio Online Convert
- Audio Editor
- fConvert Online Converter
- Boost MP3 Volume
- MP3Cut Change Volume
- Audio Alter Volume Changer
- Audio Trimmer Volume Booster
Therefore, let’s delve into each one of them, and learn how to use those online editors in our favor!
In this article
MP3 Gain Volume Changer
This online editor allows you to adjust the volume level of MP3 audio files fast – it can raise, lower, and normalize the volume level of your MP3 files.
The interface is simple and easy to use – exactly what you must be looking for. You can adjust the volume level to make the MP3 the way you want to listen to it.
One of the important things this app is letting you do is to upload from Google Drive or Desktop – it works locally without going through a server, and this means that MP3s do not need to be uploaded to any server.
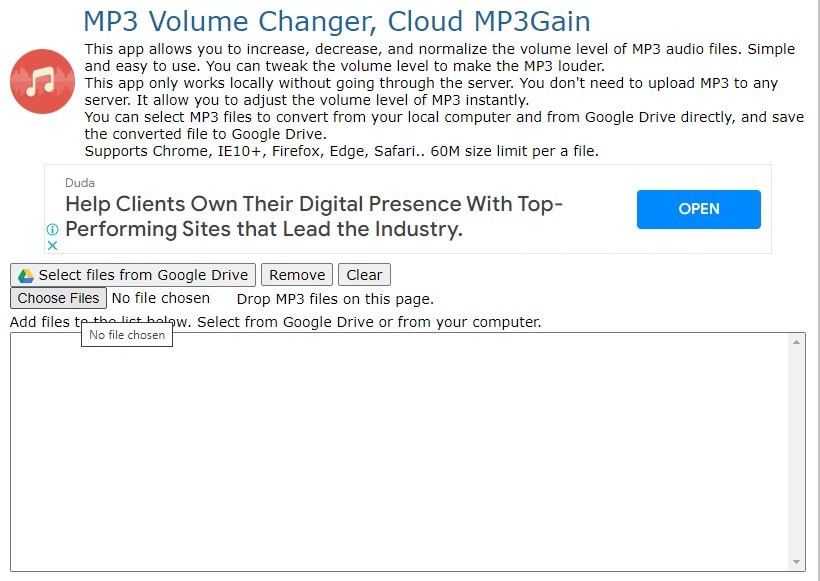
So, go to this link. Click on Choose Files and find the audio clip you would like to normalize.
Now, once your audio track is added, head a little below and find the options you have.
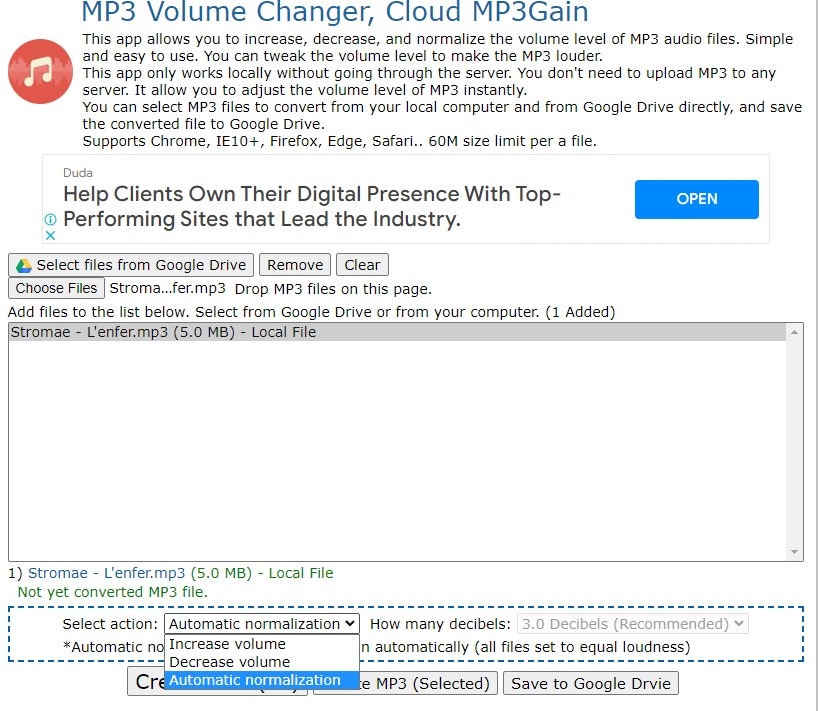
Here, you can decide what do really do with your file: do you want to increase or decrease the volume? If you choose automatic normalization, the app will figure something out itself! And, look at the right side – in case you know well your decibels, you can choose how many decibels to apply. But the web-site itself says that 3.0 decibels is recommended, so it would be nice to just stick with it.
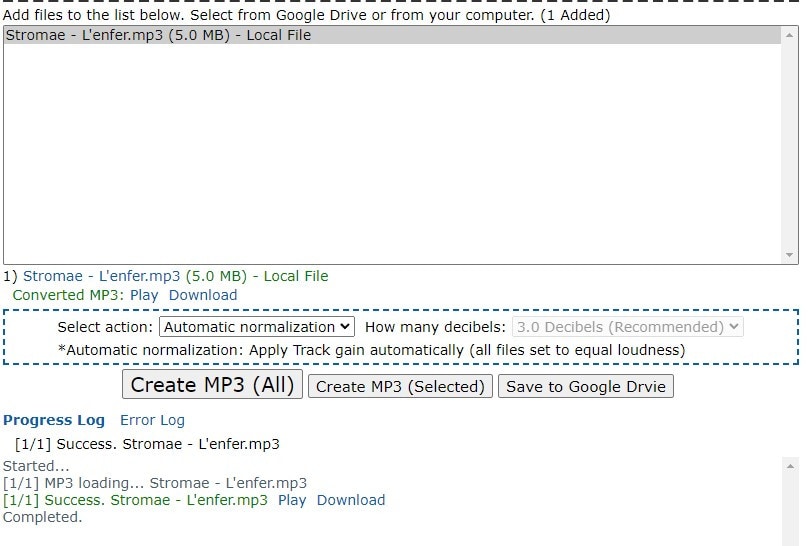
If you have multiple files and you want to normalize them all at once, click on Create MP3 (All); in case you have a lot of files and you would like to normalize one or more of them but not all, then your best choice would be Create MP3 (Selected). Another option is that you save your file on Google Drive.
When you Create your file(s), the normalized one(s) will appear under those buttons in Progress Log, and you can Play right away, or Download and listen to it later on.
Sodaphonic
Sodaphonic also lets you edit your audio files online. With the help of this editor, you can cut, copy, and paste sound segments of an audio. It offers you: normalizing audio, using audio effects, time-stretching, reversing audio, fade-in and fade-out – those tools are really helpful.
Sodaphonic is pretty interesting as the first thing that meets the eye is that it lets you not only pick or drop an audio file there, but record something new, too!
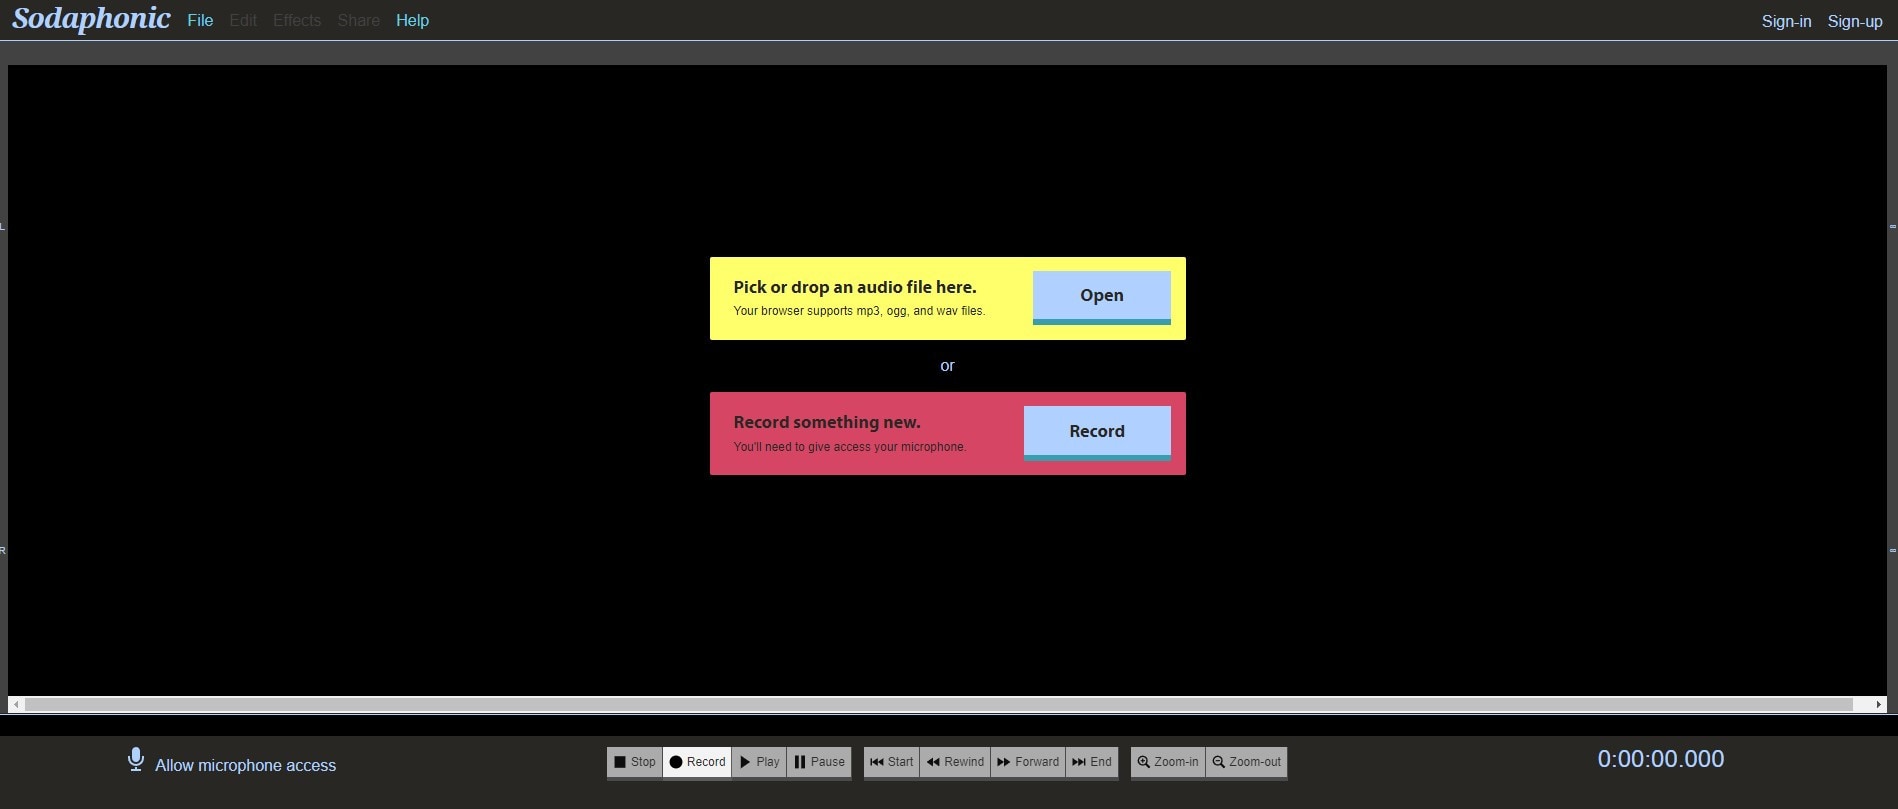
Any option you choose, then when proceeding into the editor, you will see your file waveform there. In order to normalize the audio, on the top left, find Edit, put a cursor on it, and you will see the menu appear. Find Normalize and click on it.
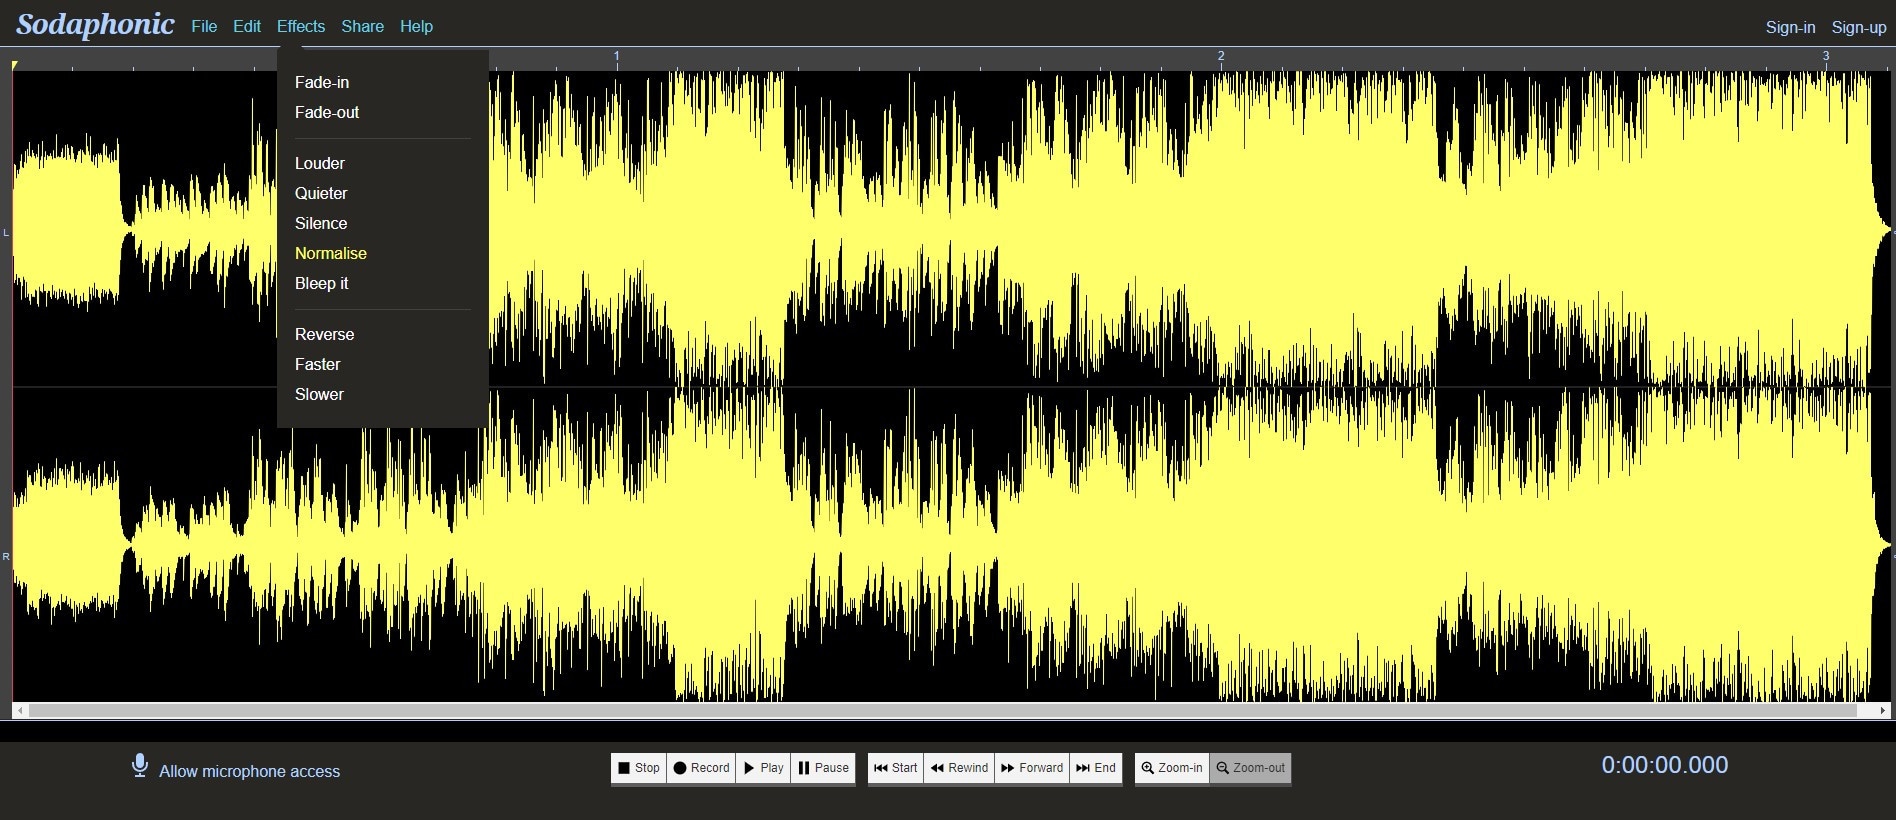
A little window will appear, where you need to fill in how many decibels should be set as the max peak.
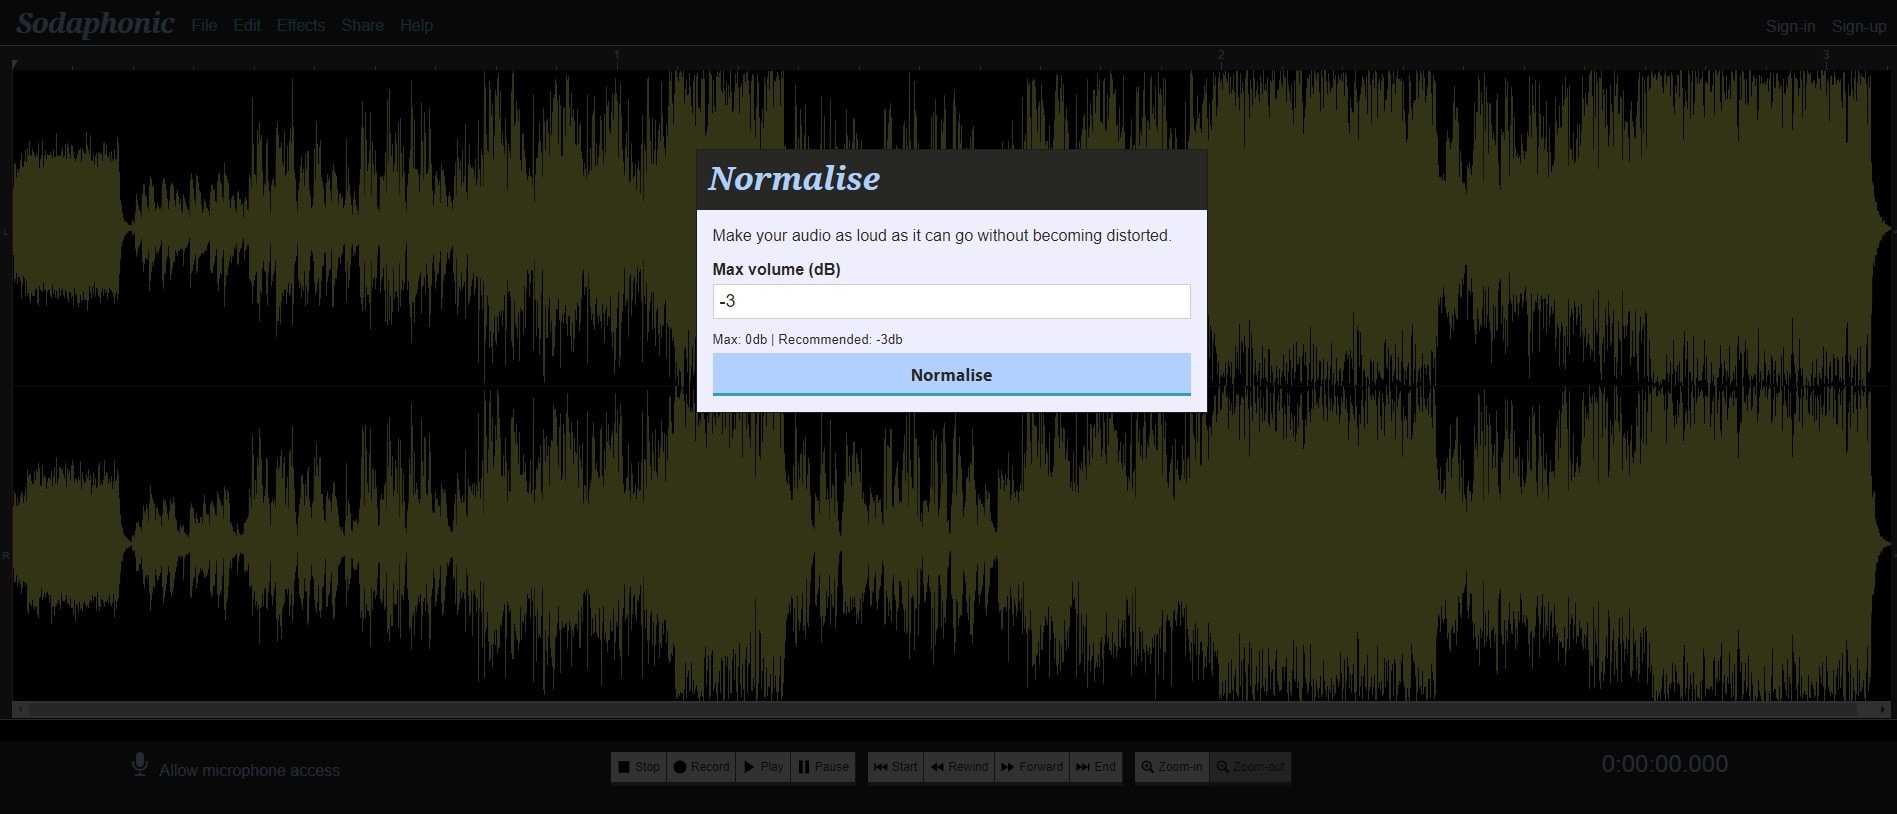
Once you do this and click on Normalize, your file will now be affected, and you can also compare the waveform – it is now a little different, isn’t it?
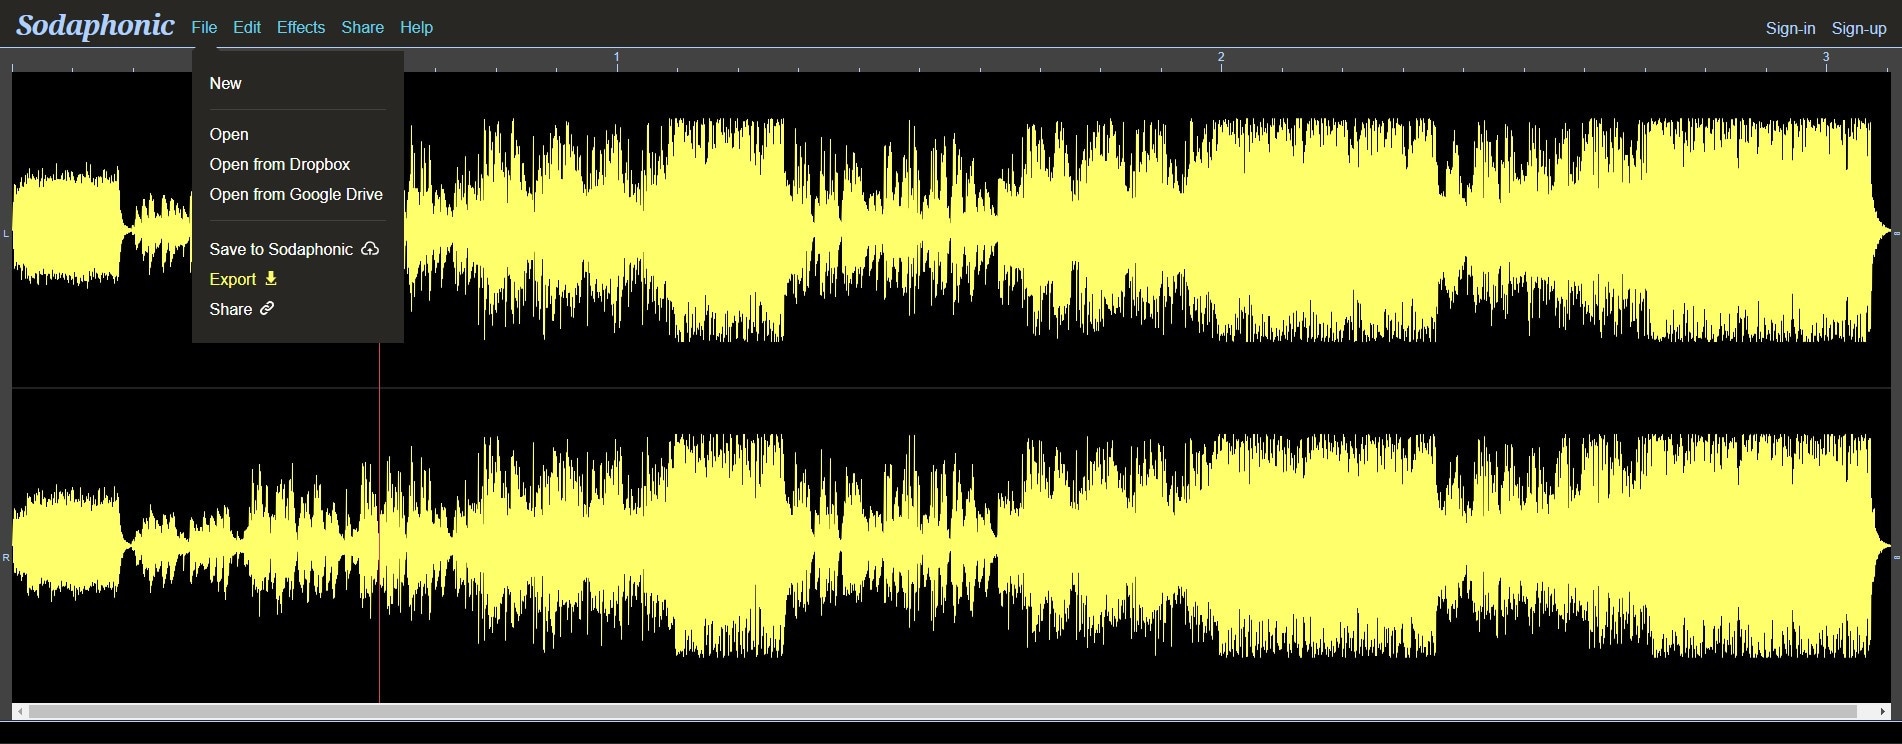
So, when you are happy with the result, just go to File, and Choose Export.
Audio Mass
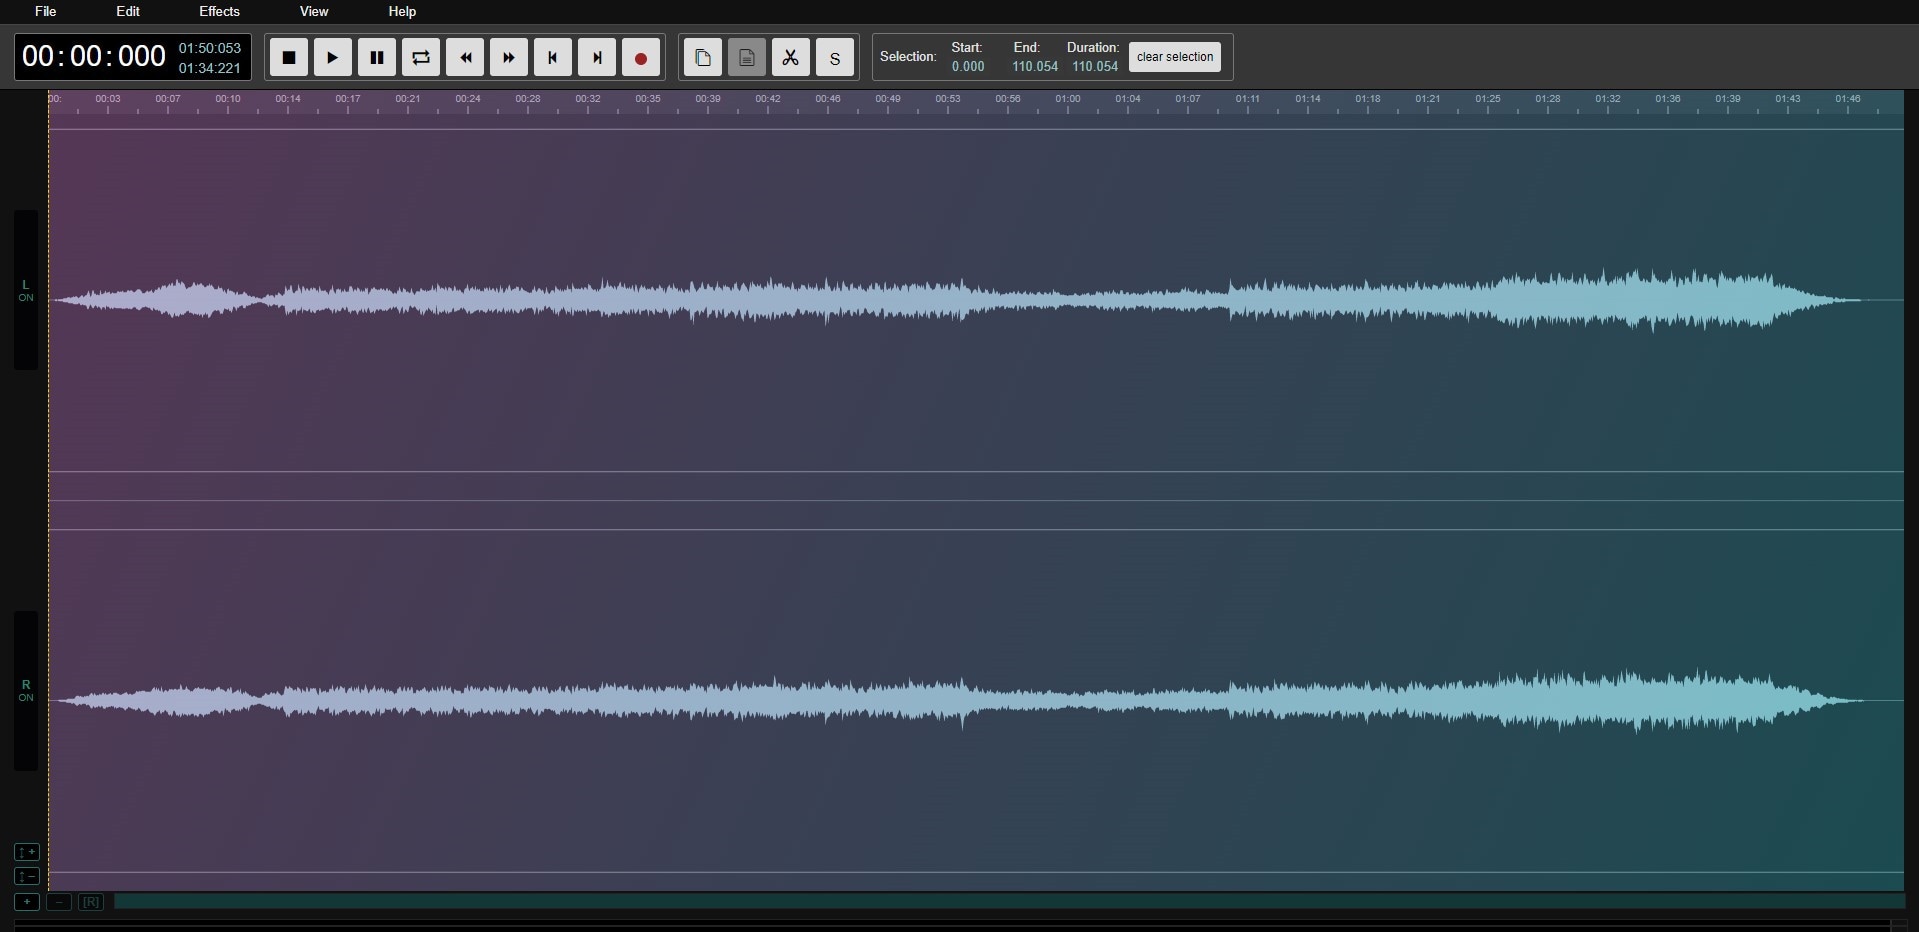
The Audio Mass editor will help you edit audio and waveforms over the web. There, you can load any audio format your browser supports, and apply many different audio effects (fading in, cutting, trimming…)
So, Audio Mass lets you: normalize audio, analyze frequency, signal distortion and peaking, trim, past, cut audio segments, reversing and inverting audio, convert to MP3, change of volume levels, fade in and fade out, audio compressor, adding reverb, delay, distortion.
When you go to the web-site, you can choose your desired file right away and the site will open it in a waveform. Now, the Normalize option is in the Effects (in the menu on the top). Click on it.

The window opened will show the option to Normalize Left and Right Equally, and it also doesn’t give you decibels – instead, you can choose the percentage on how you would like it to be normalized.
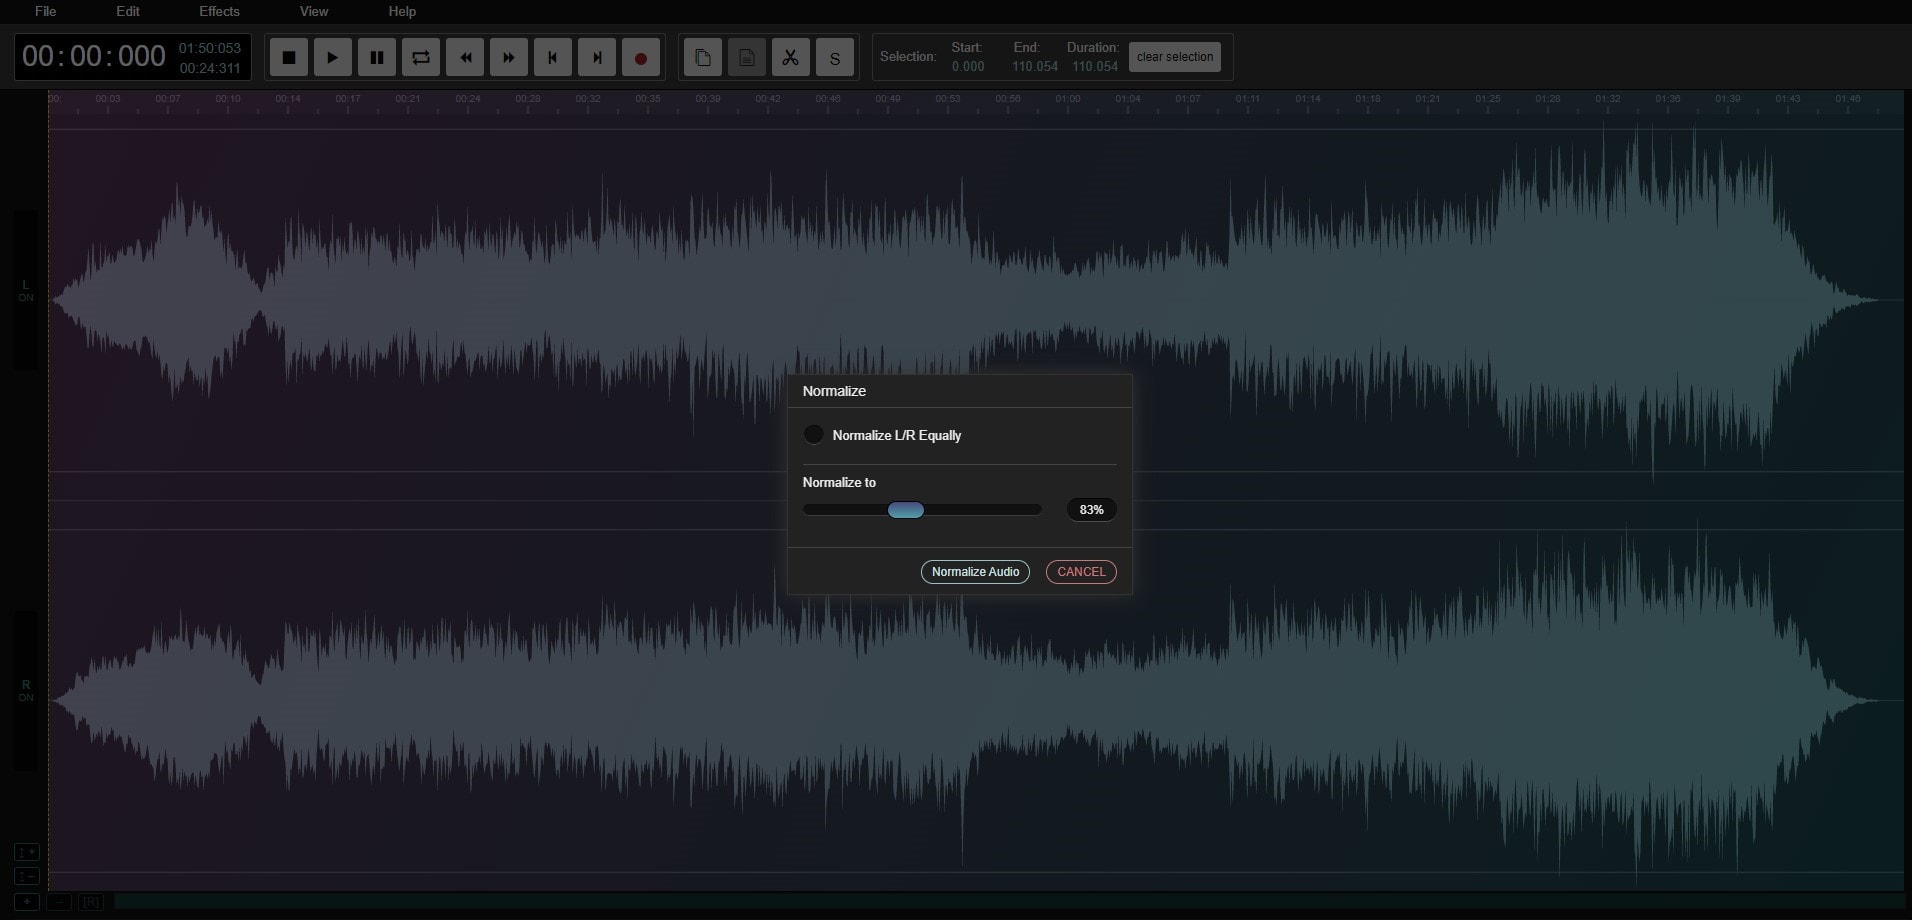
Then, surely, click on the Normalize Audio button and enjoy the result – the waveform itself will show you how different the file becomes…
Audio online convert
This is the tool mostly to be used to convert to different audio formats. In the process if converting audio, you will be able to normalize audio too, as well as change bitrate, sample rate, audio channels, and more.
Go to Audio Online Convert. Of course, click on Choose File and find the track you want to normalize.
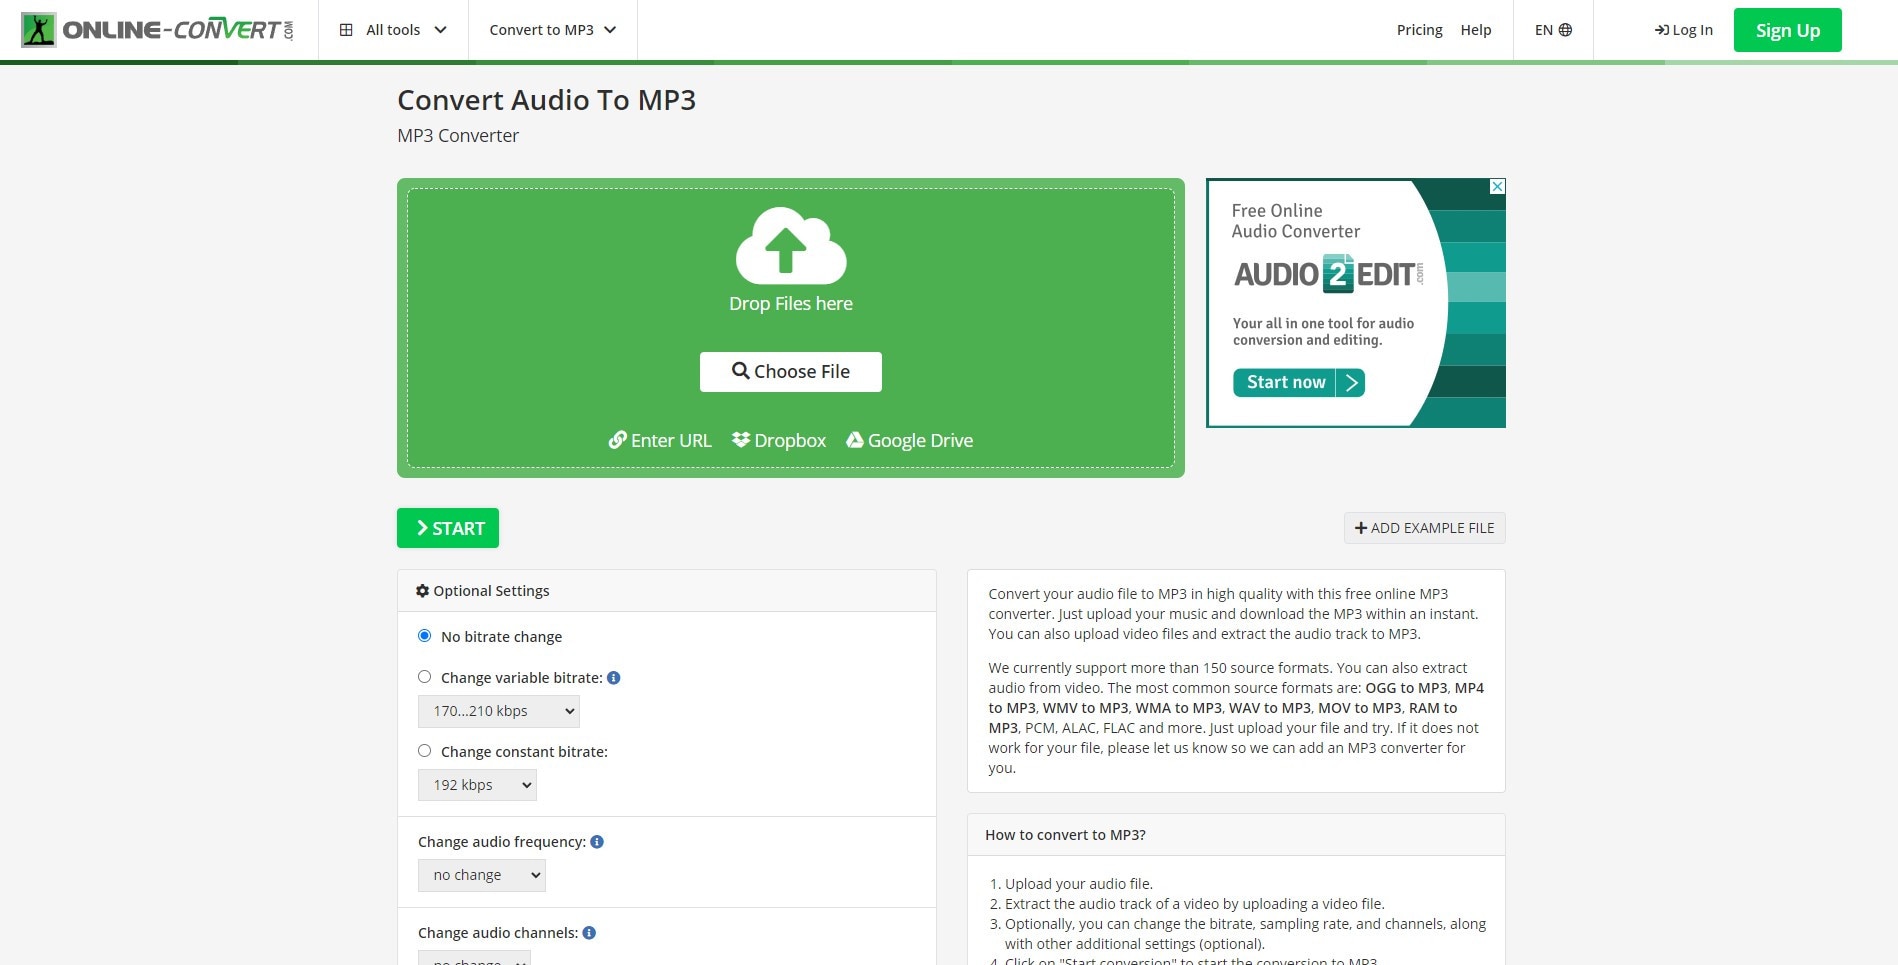
Below, you have some settings you can work on, which we have already mentioned. So, if we focus on our article’s topic, you need to find the option Normalize audio, and check the box there. Then, click to Start and the web-site will work on the track according to what you decided to change there. You will have a little while your file is being processed.

So, when it is completed and your file is ready, just click on Download and you are ready to use it as you like.
Audio editor
The DikTorov Audio Editor is an online app to edit audio, normalize audio, or fade in / out audio. It offers: real-time editing and playback of audio files, supports all popular audio formats, and exports as WAV.
Go to the web-site, choose your file and drag it in the blue space in the center.
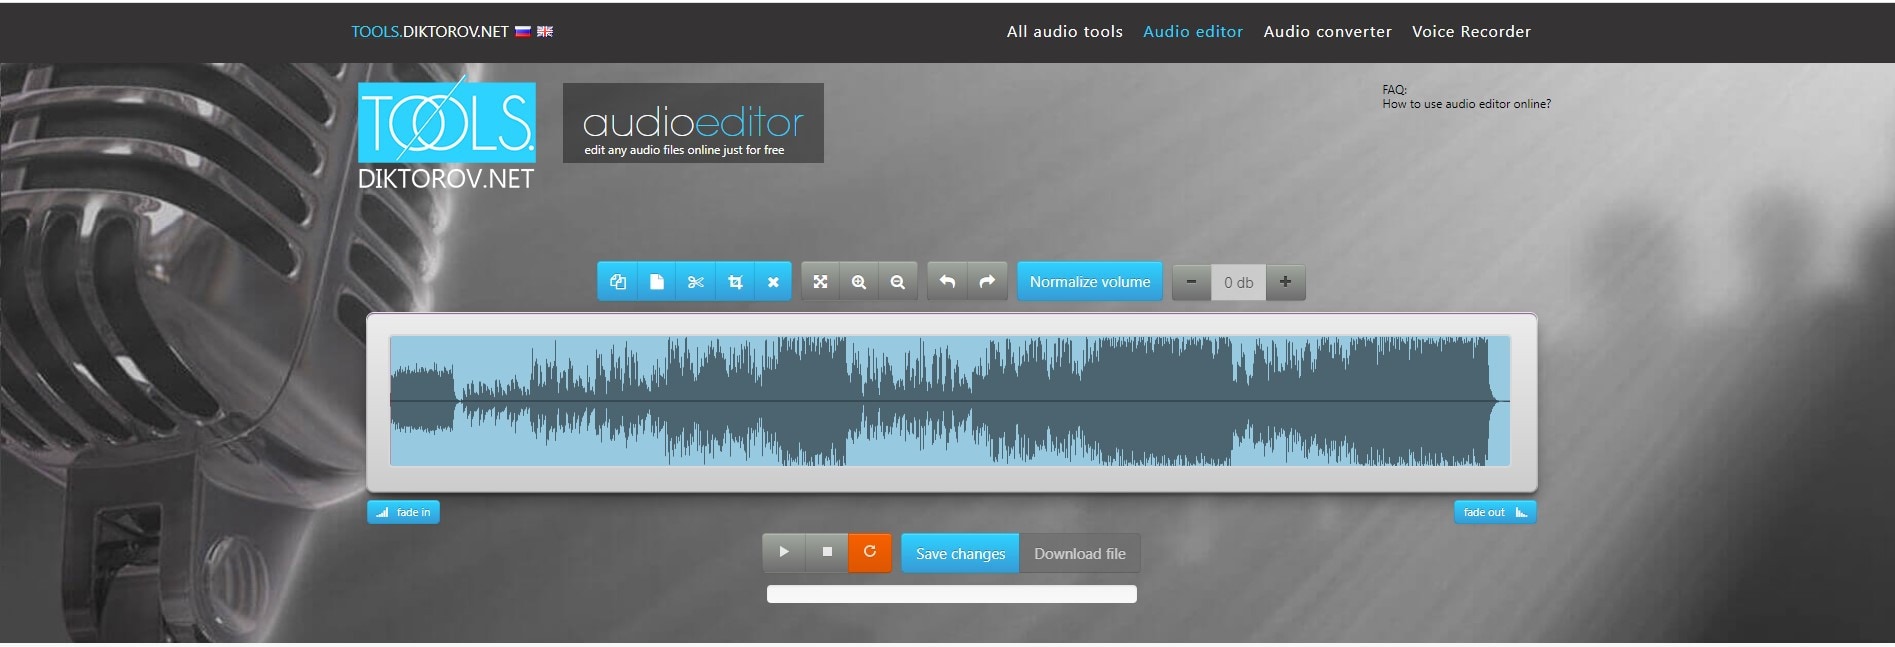
Now, find the blue Normalize Volume button on the top form the audio waveform, notice that on the right of it, you can change the dBs, and fill in your desired max peak decibel. Then, click on the button Normalize Volume, and the setting will be applied onto your track.

fConvert Online Converter
fConvert is an audio converter service that converts any audio file to any format. There, you can: normalize audio, change sample rate, change file format.
Go to the fConvert, Choose File from your computer, do the settings, and don’t forget to check in the box next to Normalize at the end of the settings.

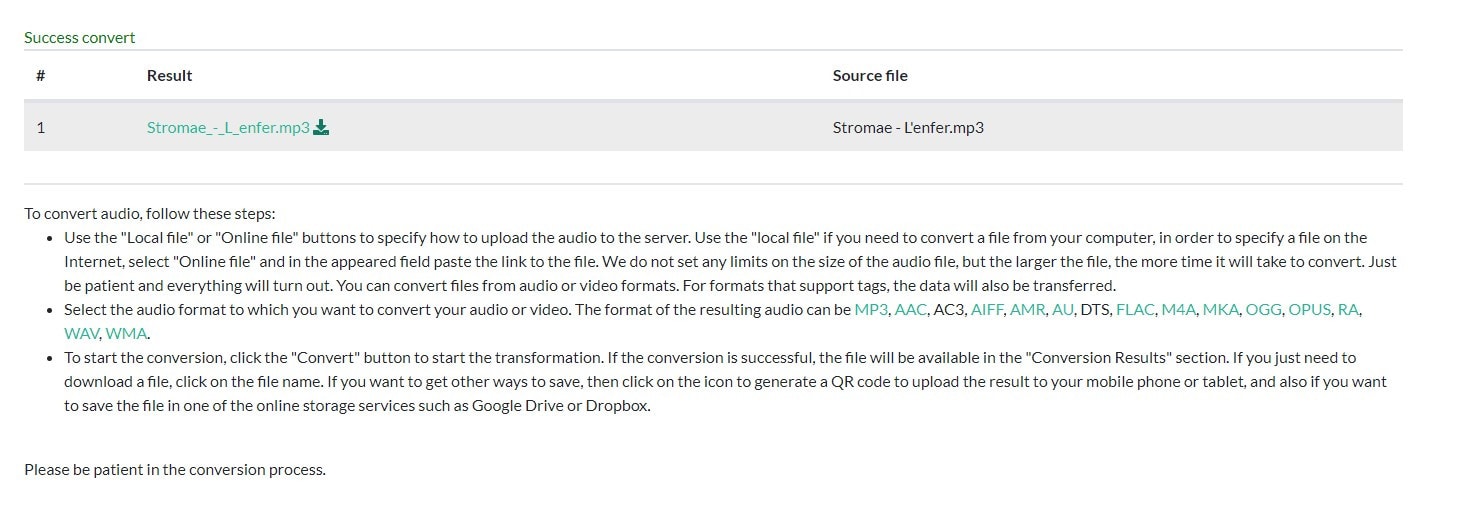
For the conversion process to start, click on fConvert. Then, scroll down a little, and you’ll find that there is a Result you can already download!
Boost MP3 Volume
The MP3 Volume tool can increase or decrease the volume of any MP3 file online, change file from 1 to 25 decibels, and adjust one or both audio channels.
Open the web-site in your browser, select MP3 file, which should be no more than 150 MB, and take care of the settings.
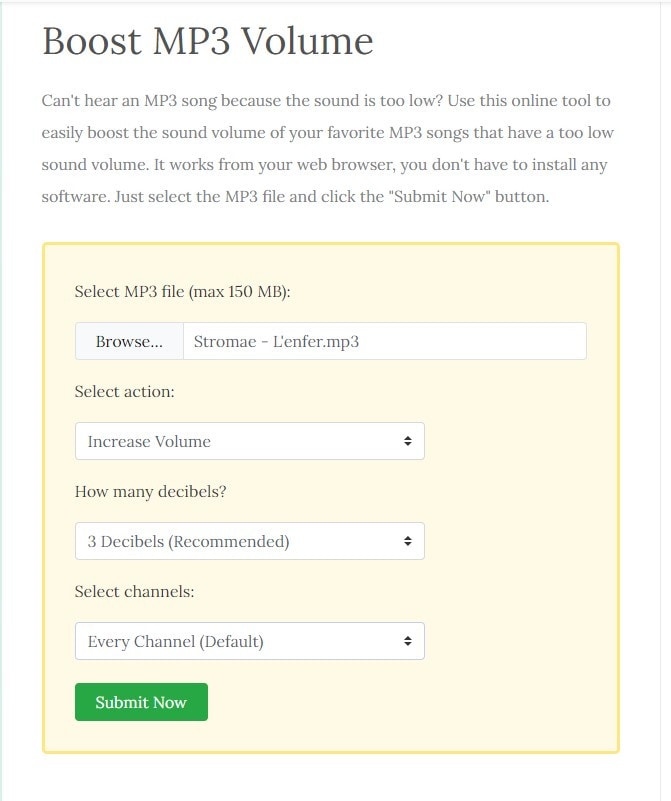
So, as we mentioned, here you can increase or decrease the volume, and choose your desired max peak (3 decibels recommended everywhere!), and select channels – both or only right or left.
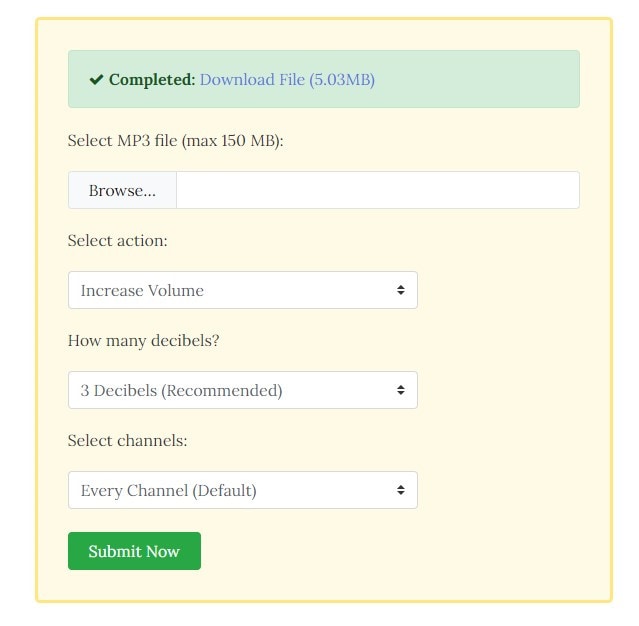
Then, click on Submit Now, wait a little while your file is being uploaded, and once it is finished, you will see the download link on the top of the settings box.
MP3Cut Change Volume
The volume changer app lets you increase audio volume while maintaining the original audio quality. It supports all audio file formats including MP3, M4A, WAV, M4R, FLAC… as an audio converter, it lets you save files in any desired format. Of course, it doesn’t require that you have any technical skills, just move the slider to adjust the volume. It’s very easy to use and offers unlimited file size.
Open MP3Cut, and click on Open file.

Now, instead of Normalize, in this case, you will have to look for the word Equalizer, which you can find in Audio Tools on the top menu. Click on it, wait, and you will see the sliders appear below the waveform of the track.
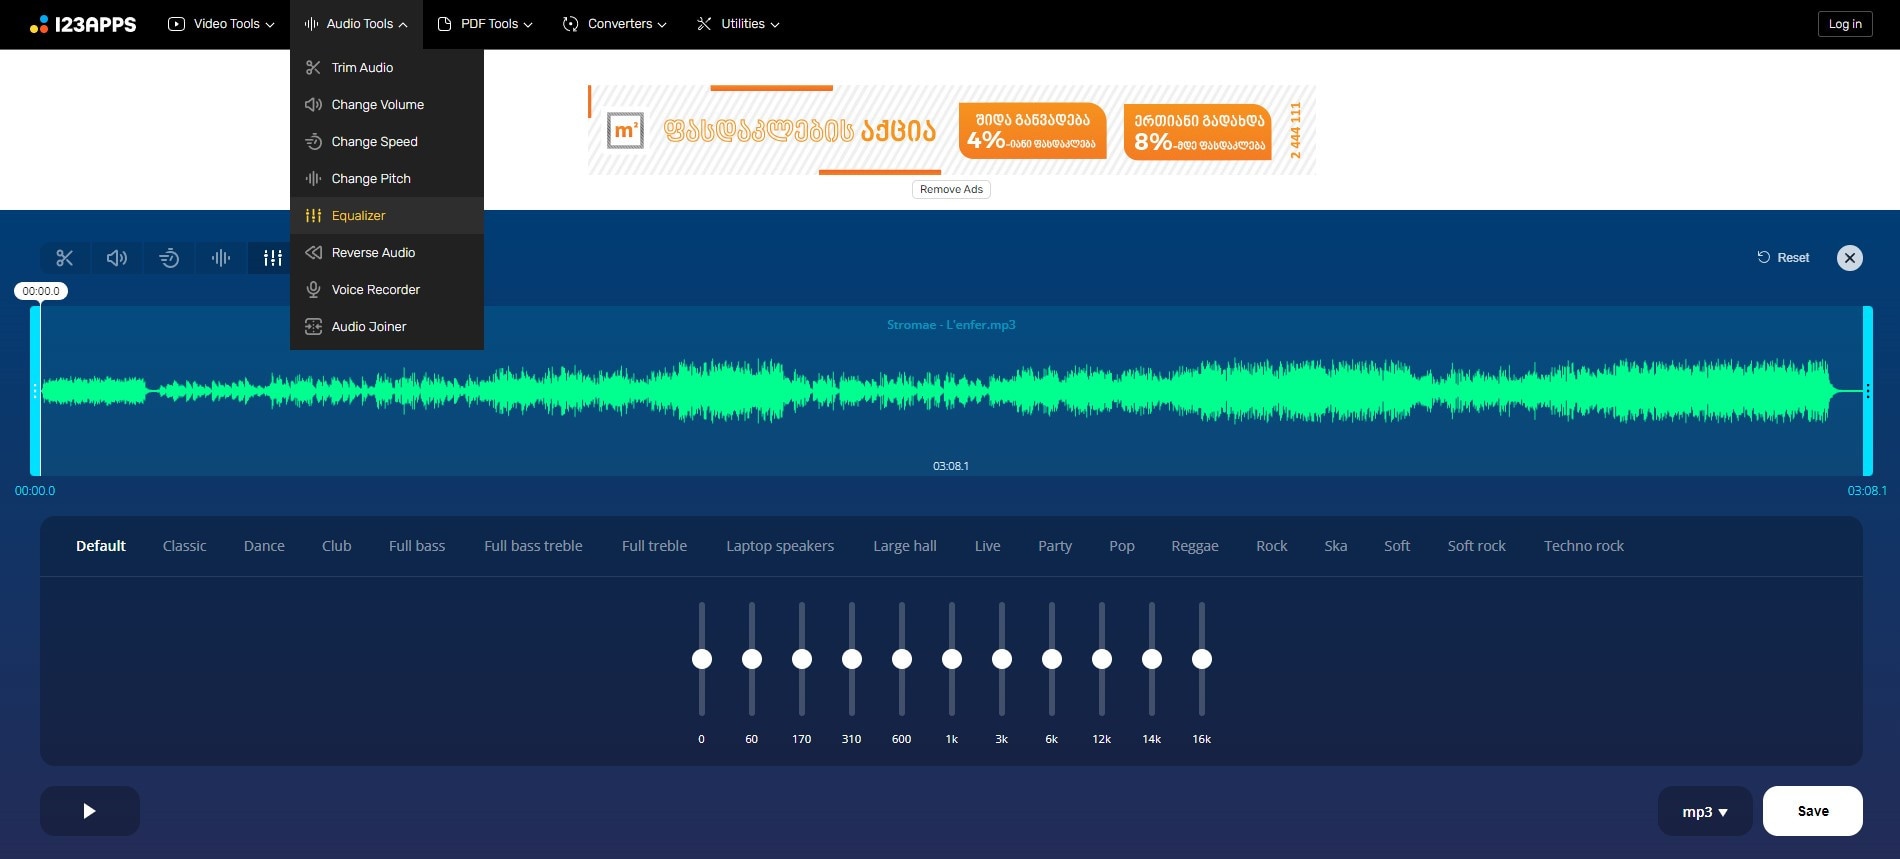
The sophisticated app also lets you choose the options to select the one most compatible with your audio track, such as: Default (it can be anything, surely), Classic, Dance, Laptop speakers, Live, Party, etc…
You can equalize your track by playing around with the sliders, and then save the result when you are satisfied with the result.

Audio Alter Volume Changer
You can raise or lower the volume of any audio file using this free online tool. Its main advantages are that it’s fast and easy to use, and supports MP4, WAV, FLAC, OGG.
After opening the web-site, now click on Browse computer button to select your file. It will prepare your file and as in most cases, the waveform will appear.
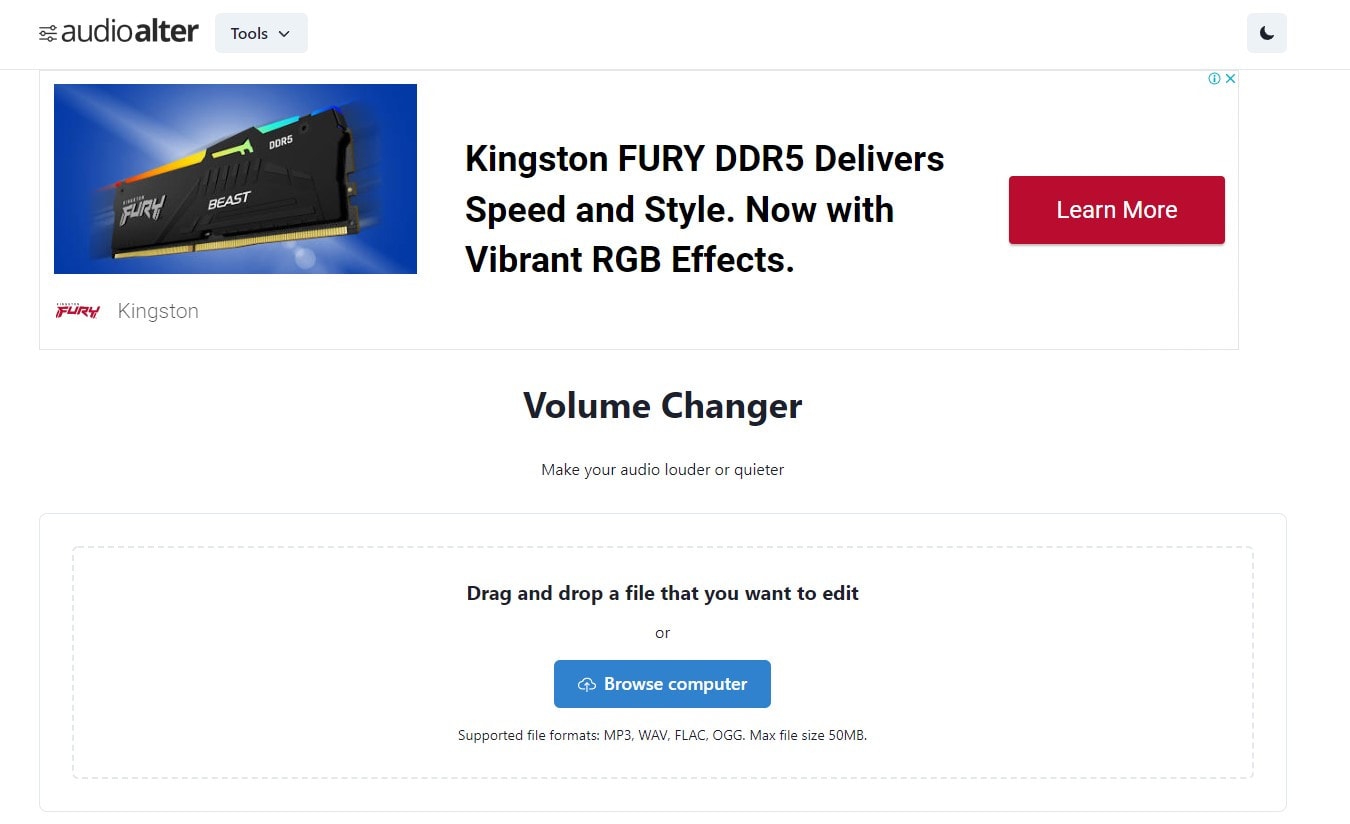
Below, there is a decibels line, where you can once again select your desired max peak dB.
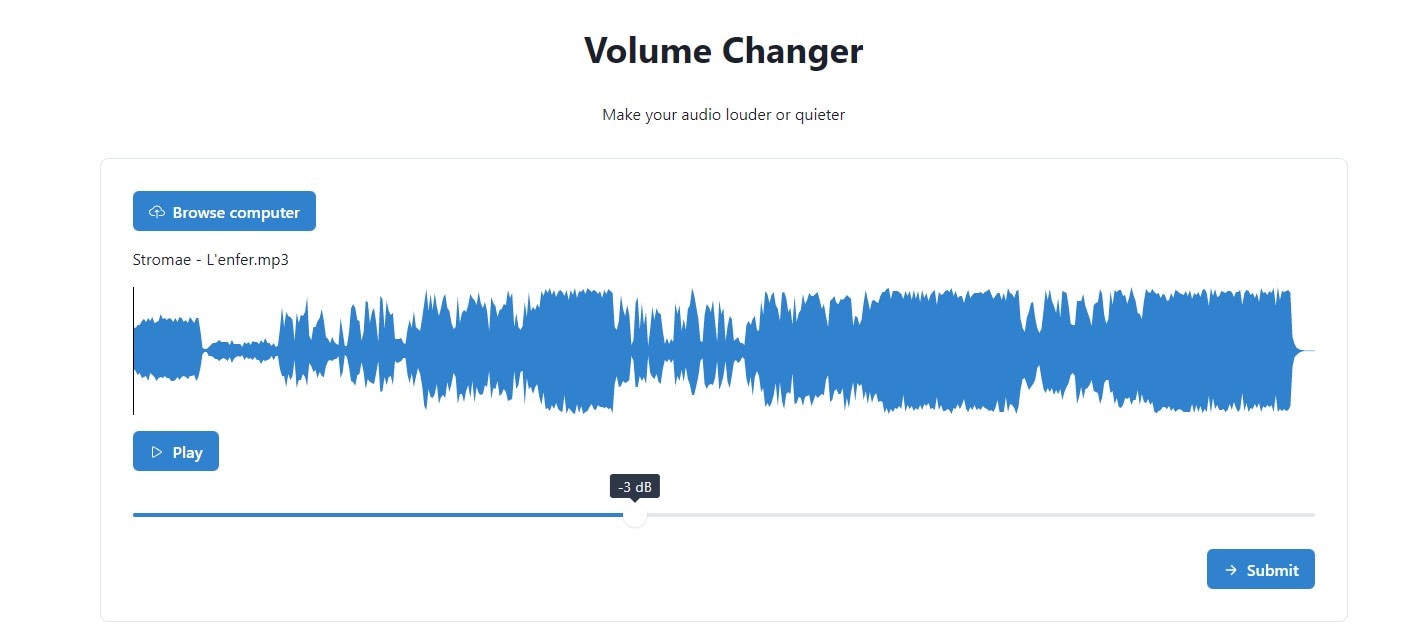
After you have set your dB to the desired amount, click on Submit and wait while your file is being processed. After that, when the audio is converted, you can download it, and also, go back to the main page and edit another file.

Audio Trimmer Volume Booster
This is a free online audio file volume booster. With it, you can very easily increase the volume of songs and make your MP3s louder. Supported formats are: MP3, WAV, WMA, OGG, M4R, M4A, FLAC, AIFF.
Open the site, and find a black line where you will see the option to upload your track. Click on Choose File and select your desired track from your computer.

Now, on the right side under the black line where we uploaded our file, you can see the Loudness options. Click on it and choose from the following: Mild, Moderate, High, and Extreme. Once you have chosen, click on Boost Volume. It will process and in a few seconds, you will have your file ready for download!

Normalize audio in Wondershare Filmora X
Now, even though we already know 10 (which is a lot!) free online normalizers, and we really hope you will be able to choose among them and reach your goal in an easy way, it might be even better if we know some more about normalizing audios using a software.
It is almost as easy to use, but what if you need some more editing opportunities, and with a simple interface? – in this case, worth discussing is a software called Wondershare Filmora X, which helps us have a wonderful, and share-able results. (as the name itself suggests!) It is an actual video editor, and many people all around the world enjoy its presence, especially the ones who don’t want to use a program so sophisticated and complicated for them to require learning for months, but try to have some main editing tools at hand. Filmora operates on Mac and Windows, its interface is very easily understandable for beginners right away. It’s worth noting that not a long ago, Wondershare Filmora X introduced the feature to normalize the audio for the first time. So, go on, download the latest version of Filmora X, and follow along the detailed step by step guideline to normalize audio there!
When it is done installing, open the software. Click and drag the video of which the audio you want to normalize. Select the clip you have chosen – if there are multiple, select all of them, then right-click and choose Detach Audio.

You will see that there is a kind of graphic before your eyes, and if you can see that the waveform is not so equal, you can be pretty sure without even listening, that the noises are so much different from each other, which makes us understand once more, how useful and sometimes, even necessary, audio normalization can be:

Select the files you want to balance, right-click and click on Adjust Audio. New panel will be opened on left top and there, you will see Auto Normalization appear – check the box next to it.


After you have clicked on it, wait until the normalization completes.

With it being done, all your audio clips will be normalized, you will now be able to see on the graphics that the volumes are almost on the same level and when you listen to it, you will make sure that there is not a noticeable difference between how they really sound. So, now you can just go and save the file you have just normalized!
So, in this article, we have learned about audio normalization, we have answered some questions about what it is, why and when do we need it, which are the 10 best online editors that will help us normalize our audio tracks without really wasting a lot of time and installing a software, but we also touched upon one software Wondershare Filmora X which can help us carry out the same task in no time. The best thing we can learn from this article is that there are just countless ways of doing one thing, and in today’s world, we are full of resources to reach our targets and aims. So, we hope this article helped you choose your favorite tool, and facilitate working on the audios for you – until next time!


