Audio recording is very useful for various purposes, such as recording interviews with sources, recording meeting discussions, recording lecture materials, and others. However, manually typing every word in an audio recording is very inefficient because it takes a lot of time.
However, with the advancement of sophisticated AI technology, transcribing audio to text has become easy and fast. With Google audio-to-text transcription tool, you only need to upload the audio file you want to transcribe, and then Google will transcribe every word spoken in the audio file.
If you are a beginner, you don't need to worry; this article will discuss how to use Google Transcription audio to text to transcribe audio files with just a few clicks. Read and learn more!
In this article
Part 1. What is Google Audio-to-Text Transcription and Its Benefits?
Converting audio to text, also known as Transcription, is needed by video editors, journalists, the hearing impaired, meeting note-takers, and so on. And if you are one of them, you need advanced AI technology to help you transcribe audio files to text easily and quickly.
Google Docs has a feature that can transcribe live audio or audio recordings for free. The transcript results can be saved in several file formats, such as DOCX, TXT, or PDF. Before learning how to transcribe audio to text using Google Audio-to-Text Transcription, you need to know the benefits and importance of transcription.
Here are some of the benefits of AI Audio-to-Text Transcription:
- Improve Accessibility
Accessibility is important. It is said to be good when every individual, regardless of circumstances or abilities, including people with physical limitations or disabilities, can feel the ease and availability of access to something. Audio-to-text transcription greatly helps improve accessibility because it allows deaf people to understand what is being said in an audio file.
- Prevent Miscommunication
Transcriptions can prevent miscommunication, for example, in making minutes of a meeting, which are a summary of important things that must be noted. Minutes must be clear, complete, and accurate with the things discussed in the meeting. Using a transcription tool can save time and reduce miscommunication in writing minutes.
- Increased understanding and transparency
Transcribing audio clips as transparency from a source of truth and to re-analyze something based on real evidence, not just perception or memory.
Part 2. Step-by-Step to Transcribe Audio to Text with Google Transcription
In this section, we will explain step by step how to transcribe Audio to Text using 2 methods on Google Transcription. Read and understand carefully!
Method 1: Input with audio file
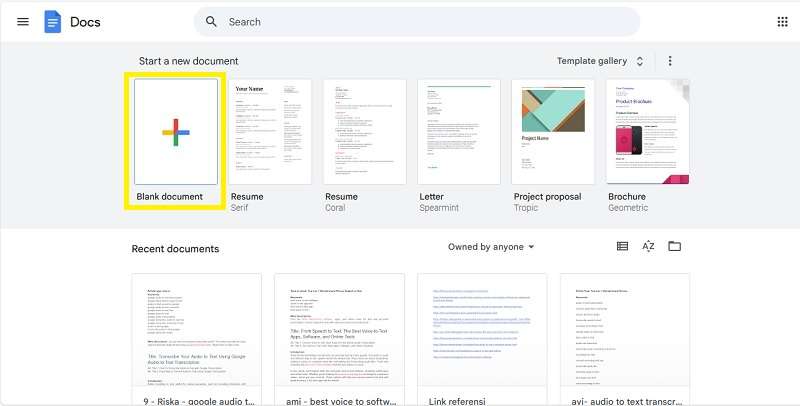
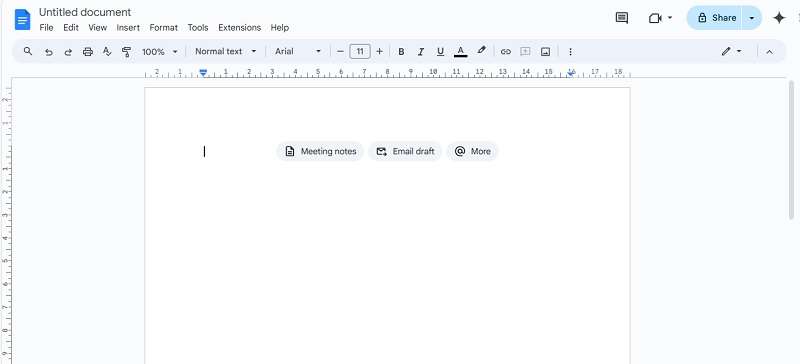
Step 1. Access Google Docs in your browser. Tap the blank document from the template gallery menu.
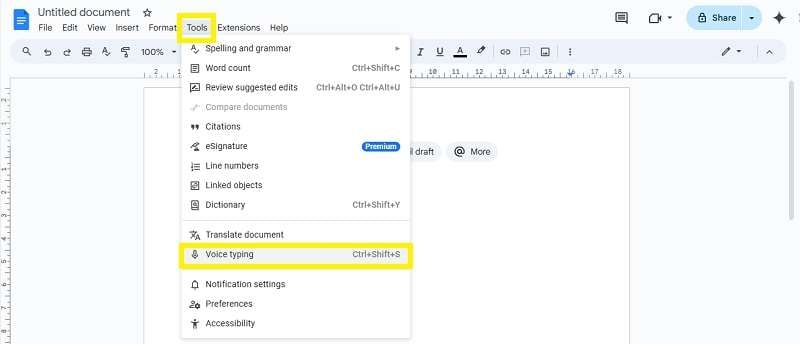
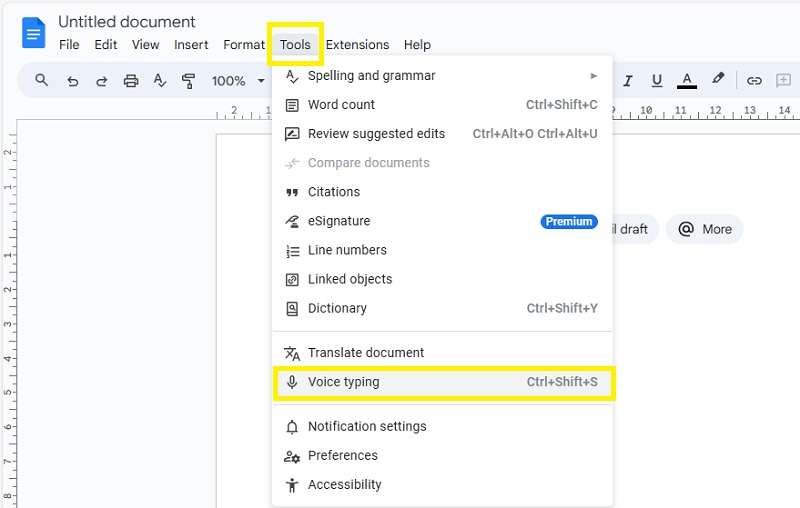
Step 2. Select Tools on the menu bar, then several options will appear in the drop-down menu. Click Voice typing or press Ctrl+Shift+S.
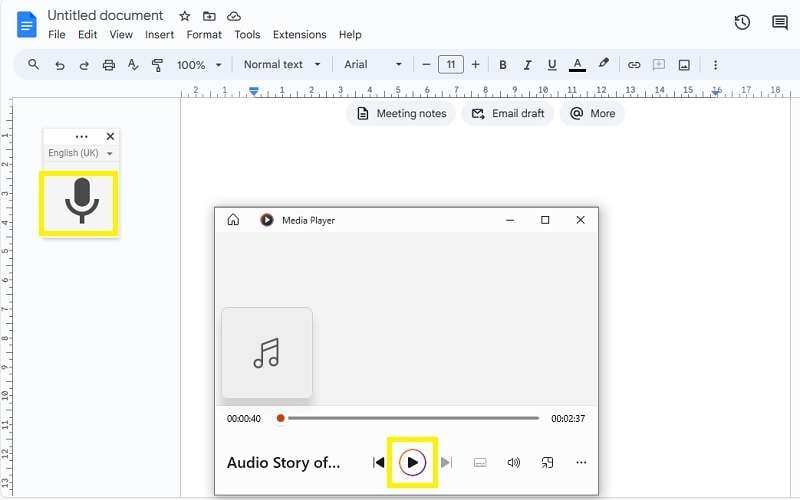
Step 3: Open the audio file you want to transcribe, then tap the microphone button in Google Docs to start transcription.
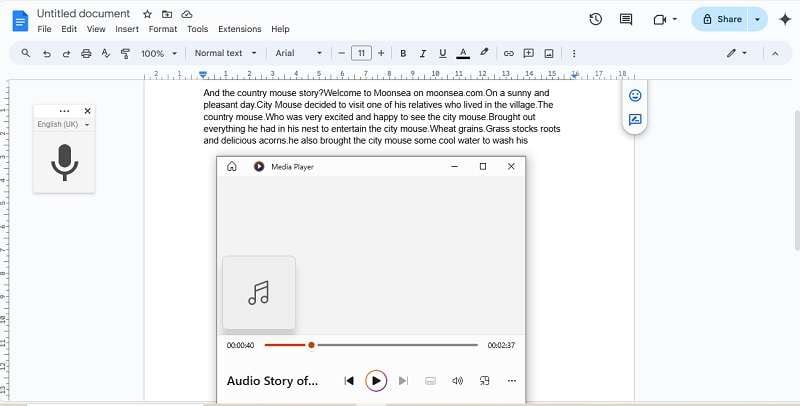
Step 4: Tap the microphone button again if you want to stop the transcription process.
Method 2: Input with a microphone
Step 1. Access Google Docs in your browser. Tap the blank document from the template gallery menu.
Step 2. Select Tools on the menu bar, then several options will appear in the drop-down menu. Click Voice typing or press Ctrl+Shift+S.
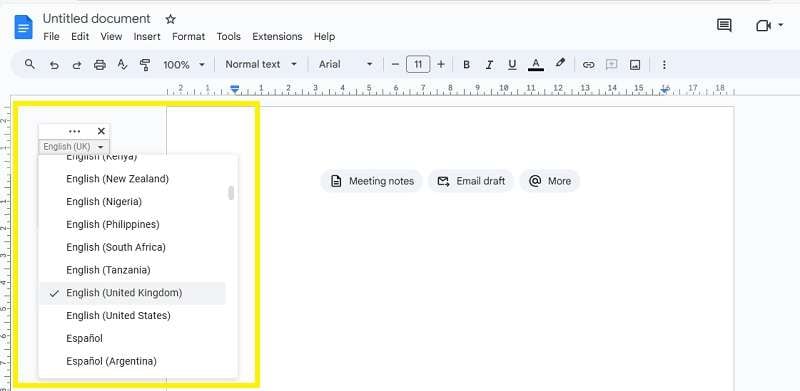
Step 3. Select your desired language from the drop-down menu, and tap the microphone to start transcribing your speech.
Step 4. Say the sentence you want to transcribe, making sure your voice is clear and normal. Tap the microphone again if you want to stop the transcription.
Part 3. Step-by-Step to Transcribe Video into Captions
Google Transcription is very effective for transcribing audio to text. But if you want to transcribe video to text, you need a more advanced tool.
One of the recommended options is Wondershare Filmora, a video editing software that can convert audio to text with its Speech-to-Text feature. The transcription process can be done during the video editing process, so there is no need to extract audio separately, which is more time-saving (efficient).
Below are step-by-step Transcribe Video-to-Text using Filmora:
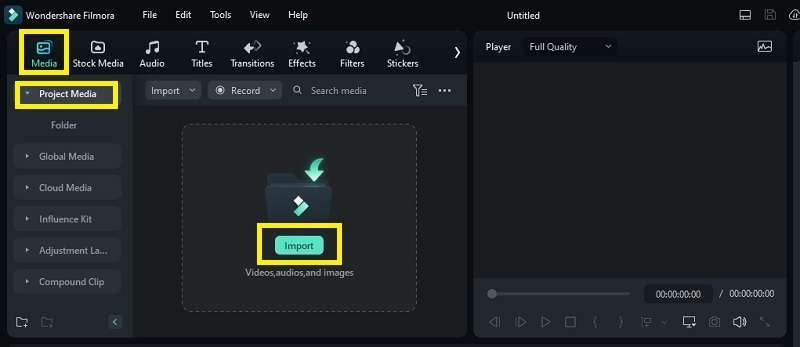
Step 1. Import Video File: Navigate to Media > Project Media > Import to upload the files. Then, drag and drop the files to the timeline.
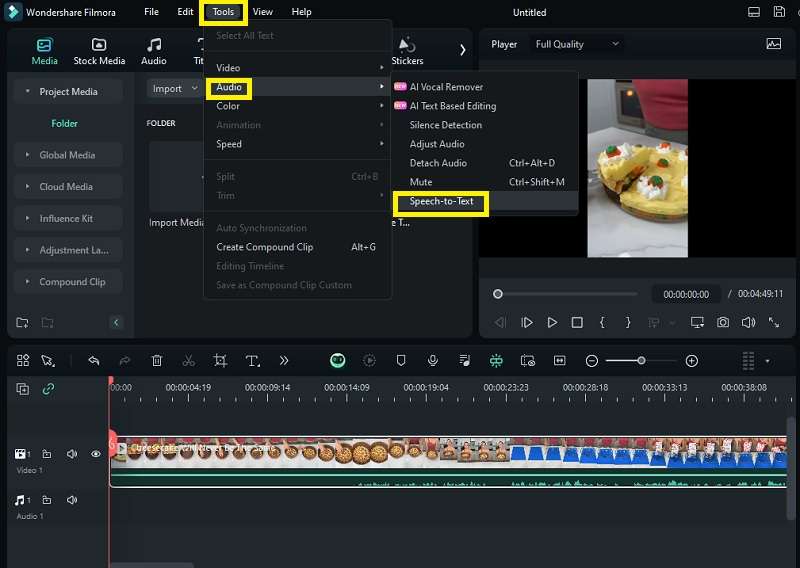
Step 2. Open Speech to Text Feature: Navigate to Tools > Audio > Speech to Text.
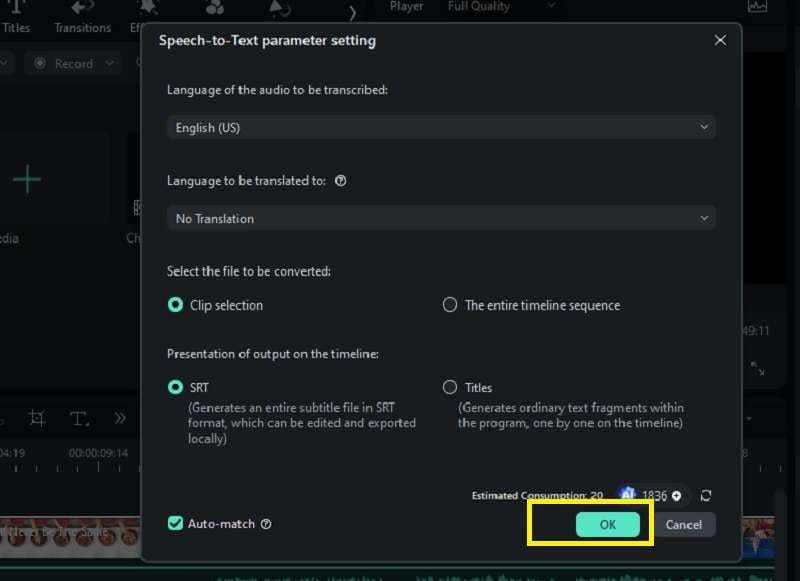
Step 3. Adjust Speech-to-Text settings: select the audio language to be transcribed. Filmora can also transcribe bilingual subtitles for multilingual projects. After adjusting the settings, click OK to start transcribing.
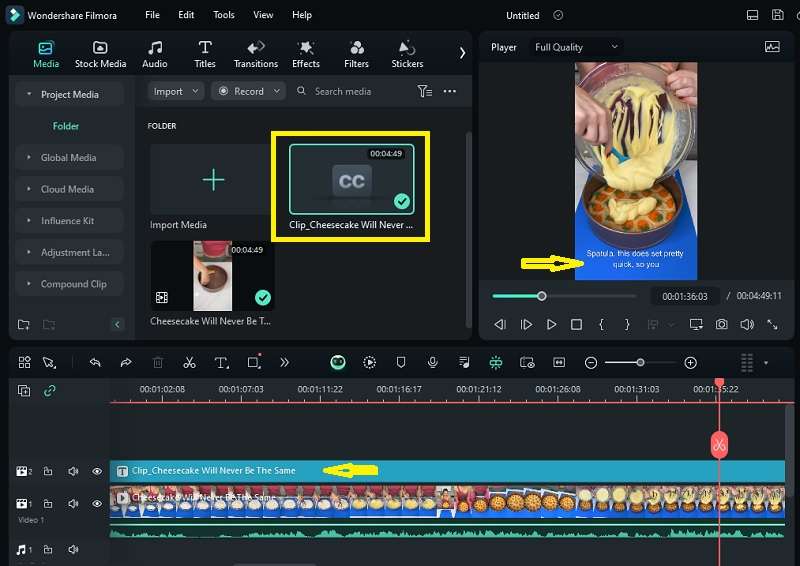
Step 4. Audio Transcription Process: Once the transcription process is complete, the transcription text file will appear under Media > Project Media. Then, drag it to the timeline to make further edits.
Step 5. Once you are satisfied with the transcription results on your video, click Export to save the video to your device.
Conclusion
Isn't it true that the advancement of advanced AI technology makes the process of transcribing audio to text easy and fast? Now that you have learned how to transcribe audio to text with Google Docs, it's time to practice the step-by-step transcription using Google Docs, as explained above.
However, if you want to transcribe video files, we recommend a powerful tool: Wondershare Filmora. In addition to transcribing video files directly while editing videos without having to convert video to audio first, Filmora can also easily add text or subtitles to your videos. What are you waiting for? Try it and enjoy the convenience now!


 100% Security Verified | No Subscription Required | No Malware

