
Do you want to clean up your audio and remove unwelcome sounds from your content? Welcome to our comprehensive guide to Adobe Audition noise reduction. Prepare yourself for clean, professional sound, regardless of your technical skill level.
Whether looking for an effective way to remove background noise or simply perform noise reduction in Audition by Adobe, all you need to know is here. We will show you different methods, from elemental to more complex, so keep reading.
| Methods | Best For |
| Use DeNoise | Beginners |
| Use Noise Gate | Removing Subtle Background Noise |
| Use An Equalizer | Removing Specific Noise Frequencies |
| Use the Dynamics Effect | Intermediate Users |
| Use Hiss Reduction | Reducing High-Frequency Noise |
| Use the Adaptive Noise Reduction | Removing Complex Noise |
| Use the Noise Reduction Feature | Precise Noise Removal |
Method 1: Using DeNoise for Adobe Audition Noise Reduction
Let’s start with DeNoise, an Adobe Audition feature for reducing unwanted background noise in recordings. This tool is a perfect starting point for beginners looking for an effective noise-reduction solution. It’s intuitive and requires no extensive technical knowledge.
Follow these steps to remove unwanted sounds from your recording:
Step 1: Launch Adobe Audition. You may need to use Adobe’s Plugin Manager to install Audio DeNoise. Once you do, add your audio file and go to File > Open.
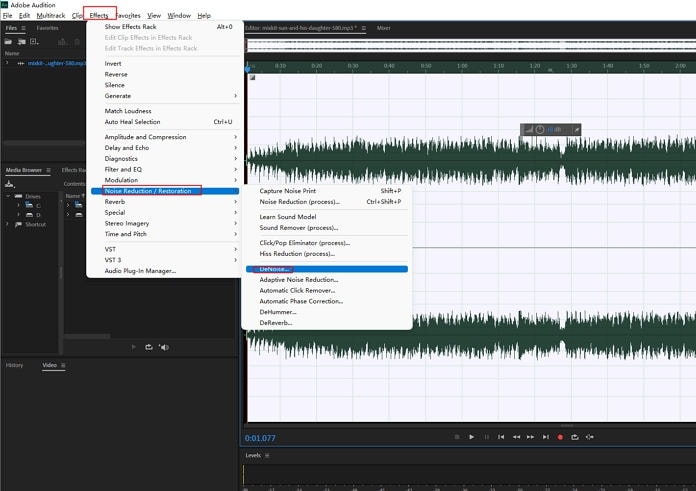
Step 2: Select your clip and highlight the part of your audio where you want to apply noise reduction. You can also use it on the entire track. Go to the top menu and select Effects > Noise Reduction/Restoration > DeNoise.
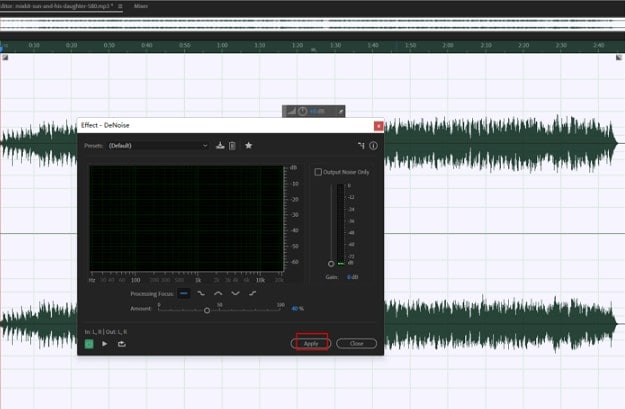
Step 3: Adjust DeNoise settings, move the slider to set how much noise reduction you want to apply, and adjust Output Level for balanced audio. Preview changes and click Apply to add the effect to your track.
Step 4: Go to File > Save As and choose your desired audio format.
- Remove background noise precisely with AI.
- Clean audio based on noise type.
- Edit audio separately after noise removal.
- Remove wind, reverb, hum, and hiss easily.
- Reduce noise for clear sound.


Method 2: Using Noise Gate for Noise Removal in Adobe Audition
The Noise Gate effect is the perfect plugin to remove subtle background noise like hums, hisses, and faint sounds between louder sections.
If you don’t want to risk audio quality in your content, use Noise Gate and set a threshold level. You can reduce or mute sounds below this threshold, allowing the louder sound to pass through. Here is how you can do it:
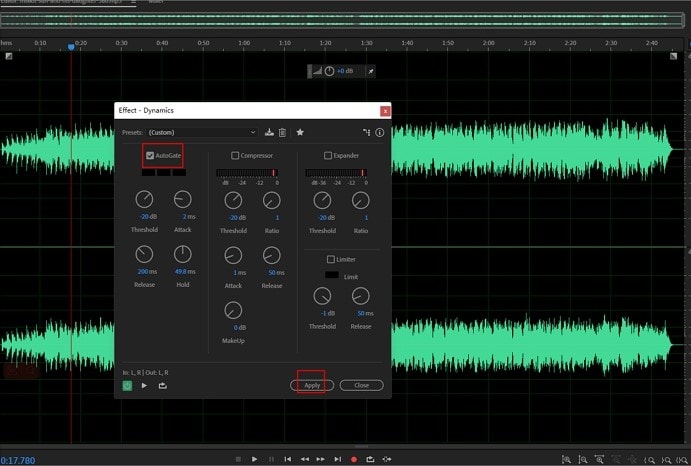
Step 1: Go to Effects > Amplitude and Compression > Dynamics.
Step 2: Select the AutoGate option and uncheck the others. Set the Threshold and Attack levels and click Apply.
Method 3: Reducing Noise in Adobe Audition With an Equalizer
Equalizer in Adobe Audition lets you target specific frequency ranges to reduce undesired sounds in your audio. It can reduce resonances and low-frequency and high-frequency noise. Its primary function is to adjust tonal balance and shape the frequency response of your audio.
This tool is perfect for eliminating low-end background noise. It lets you choose from one, one-half, and one-third of an octave.
Here are the steps to reduce noise with an Equalizer tool in Adobe Audition:
Step 1: Double-click your audio file to activate the Waveform view. Go to Effects > Filter and EQ > Graphic Equalizer.
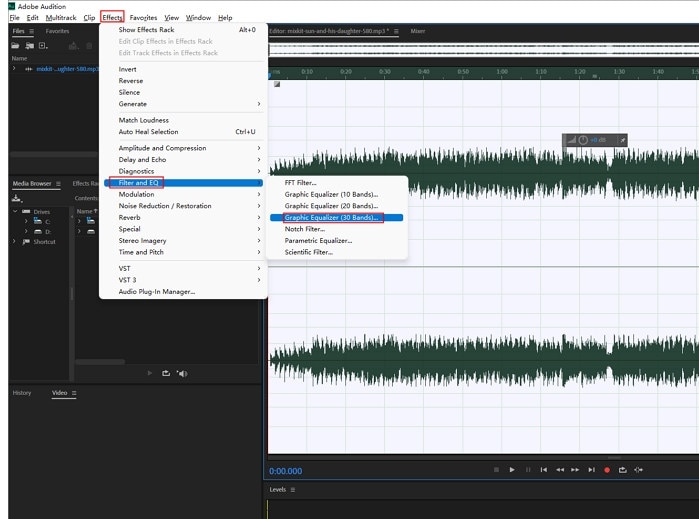
Step 2: Adjust the equalizer bands and click Apply.

Method 4: Adobe Audition Noise Reduction With the Dynamics Effect
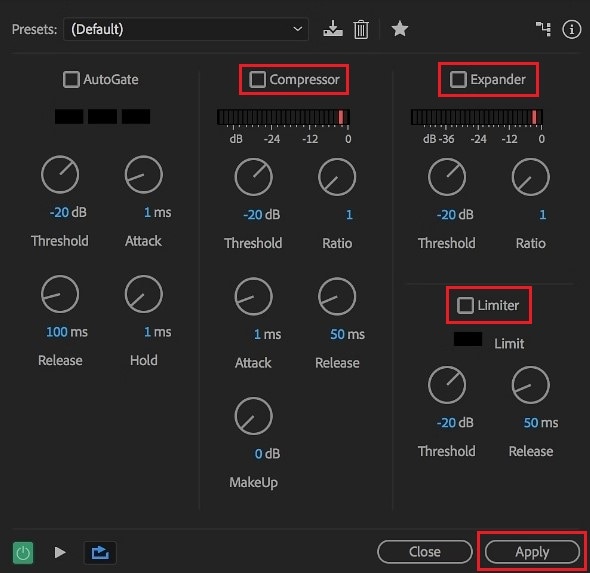
Besides adjusting AutoGate, you can explore the other dynamic parameters: Compressor, Expander, and Limiter.
The Compressor reduces the audio’s dynamic range, the Expander increases it, while the Limiter does the same to the audio that exceeds a specified threshold.
These effects are perfect for users who want to fine-tune their recordings by reducing noise during quieter sections and enhancing the audio quality of their recordings.
Here’s how to reduce noise with the dynamic effects:
Step 1: Go to Effects > Amplitude and Compression > Dynamics.
Step 2: Select the Compressor, Expander, and Limiter and set their Threshold and Ratio levels. You can additionally set the Attack, Release, and MakeUp levels under Compressor. Click Apply.
Method 5: Reducing Noise in Adobe Audition With Hiss Reduction
If you are dealing with high-frequency noise (or a noise floor) in your audio, you can fix it with the Hiss Reduction feature in Adobe Audition.
This feature targets and eliminates high-frequency noise in recordings due to microphone self-noise, electrical interference, or analog tape hiss. Here is how to apply it in your recordings:
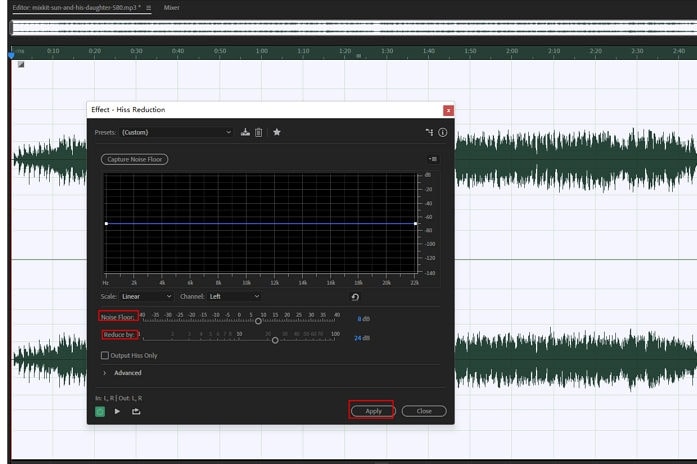
Step 1: Open your audio recording and go to Effects > Noise Reduction/Restoration > Hiss Reduction.
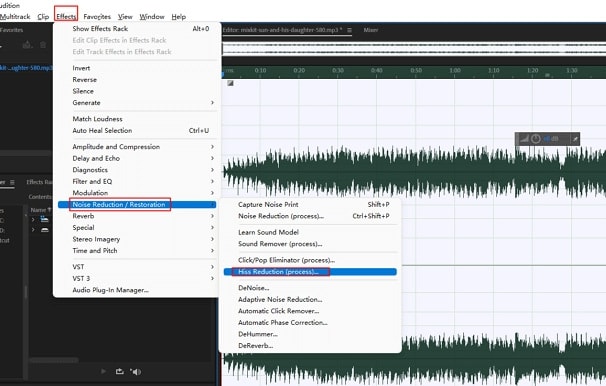
Step 2: Sample your hiss with the Capture Noise Floor function. Control your noise removal effect using the sliders until you like the results, and click Apply.
Method 6: Use the Adaptive Noise Reduction in Adobe Audition
Another option to reduce unwanted sounds from your audio is through the Adaptive Noise Reduction effect. This Adobe Audition feature can tackle complex noise scenarios, such as varying background sounds that change over time, like wind and ambient noise.
The Adaptive Noise Reduction effect can pick up low sounds and isolate excessive bass. Here’s how to apply it:
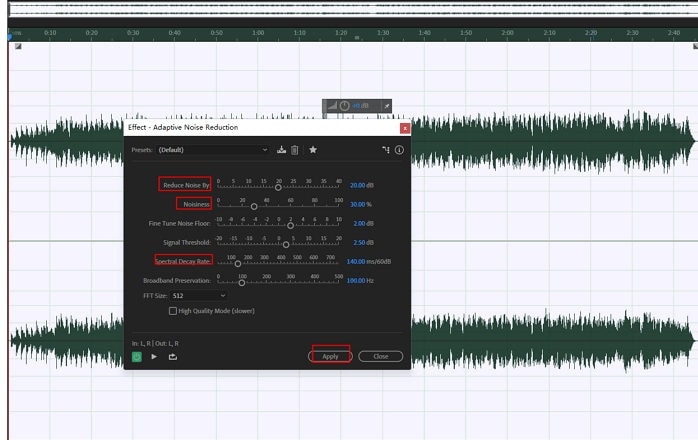
Step 1: Double-click your audio file to activate the Waveform. Then, go to Effects > Noise Reduction/Restoration > Adaptive Noise Reduction.

Step 2: Adjust the Reduce Noise By, Noiseness, and Spectral Decay Rate parameters. Select Apply when you like the results.
Method 7: Reducing Noise in Adobe Audition With the Noise Reduction Feature
The Noise Reduction feature in Adobe Audition is an advanced tool for precisely controlling unwanted noise in your audio recordings. Its primary target is noise like hums, hisses, rumbles, and ambient sounds.
This tool can clean up audio tracks and produce professional results, like high-production tracks. It can be tricky for beginners, but you will remove undesired sounds from your content if you follow our steps:
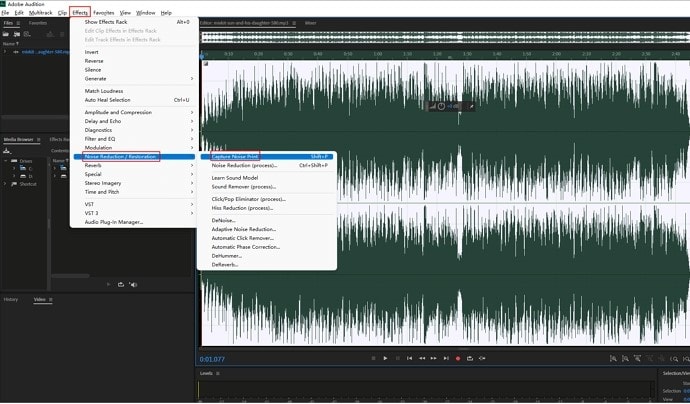
Step 1: Open the audio you want to edit in Adobe Audition and go to Effects > Noise Reduction/Restoration > Capture Noise Print. That way, you can get a background noise sample as a reference for the noise reduction tool. Choose a specific section or hit Ctrl + A (or Command + A on a Mac) to select the entire audio file.
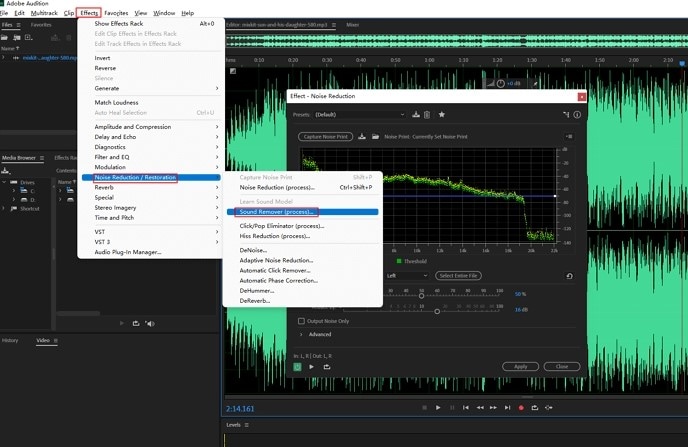
Step 2: Return to the Effect tab and choose Noise Reduction under Noise Reduction/Restoration.
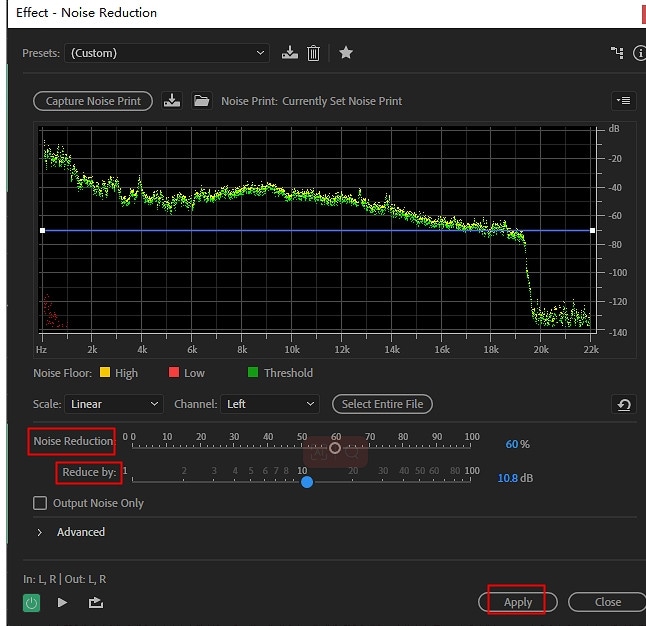
Step 3: Adjust the Noise Reduction and Reduced By parameters. Preview the changes and click Apply.
Looking for a More Intuitive Option to Reduce Noise?
Adobe Audition noise reduction may be overwhelming for beginners. Still, more straightforward solutions can also make a difference for those with technical skills. That’s why we offer a much more convenient option for reducing noise in your audio: Wondershare Filmora.
This diverse software, with video editing as its primary function, has top-notch tools for audio editing. Some include Audio Ducking, Silence Detection, Auto Synchronization, Audio Visualizer, AI Audio Denoise, and Speech-to-Text.
Besides a user-friendly design, Filmora has robust features with AI technology under the hood. It can help you create stunning, professional video content. Try Smart Short Clips for your social media content, delete unwanted objects from your videos with AI Video Object Remover, or capture your screen to create tutorials or gameplay recordings.
Let’s return to the topic and explore the steps to delete or reduce unwanted noise with Filmora:
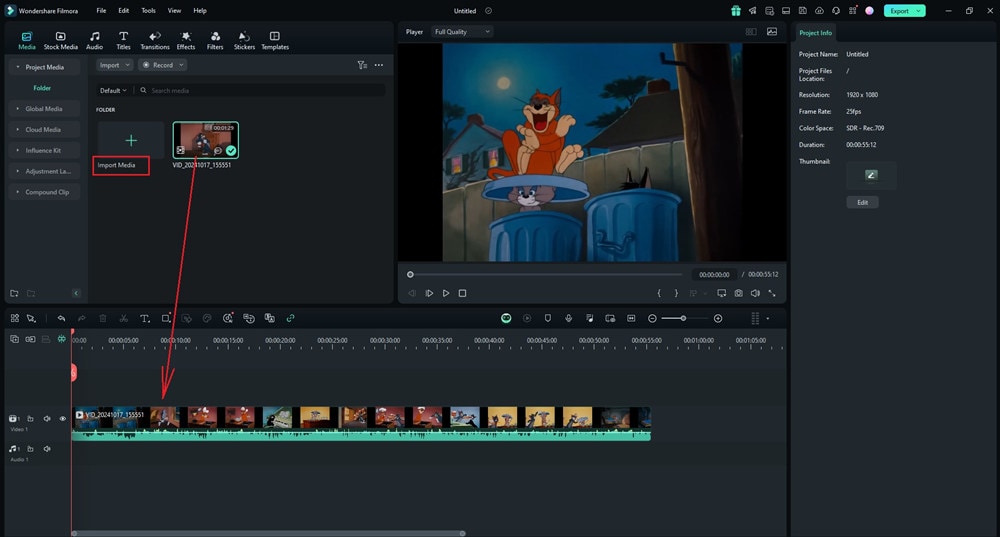
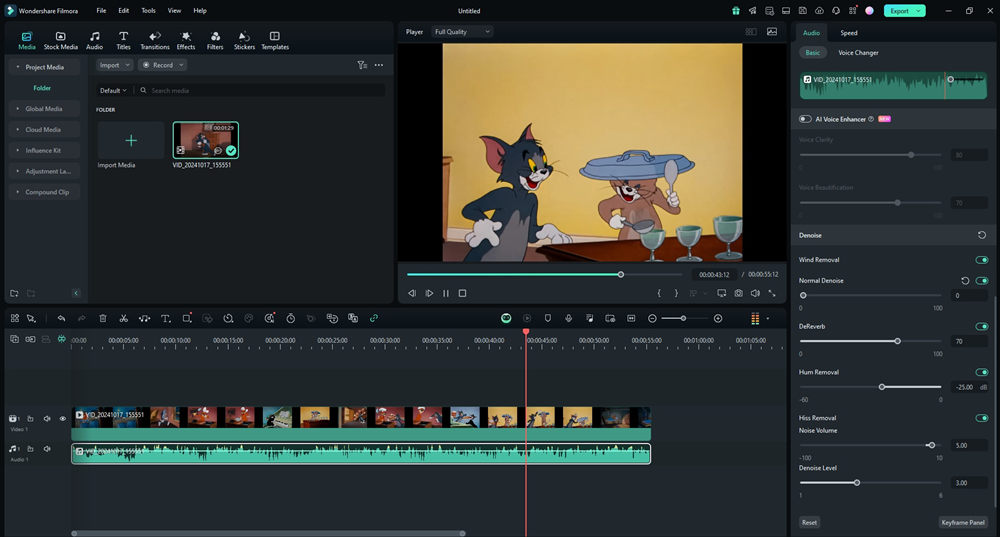
Step 1: Download, install, and launch Filmora. Create a New Project and Import the video to improve the audio. Drag and drop it onto the timeline.
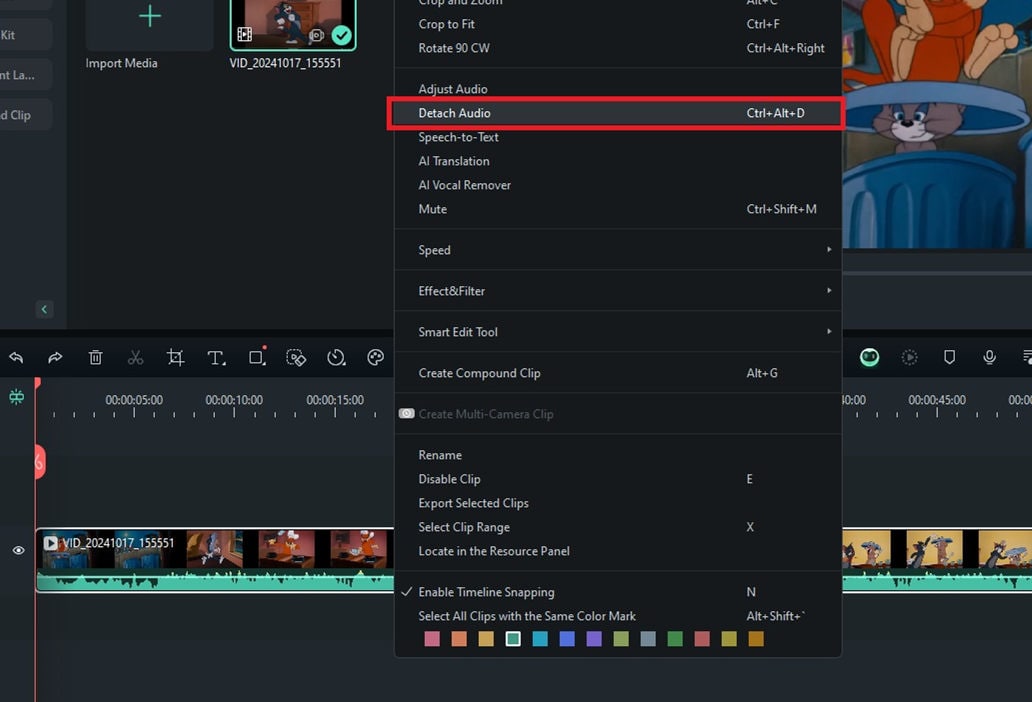
Step 2: Right-click the video on the timeline and choose Audio Detach to separate the audio track from the video.
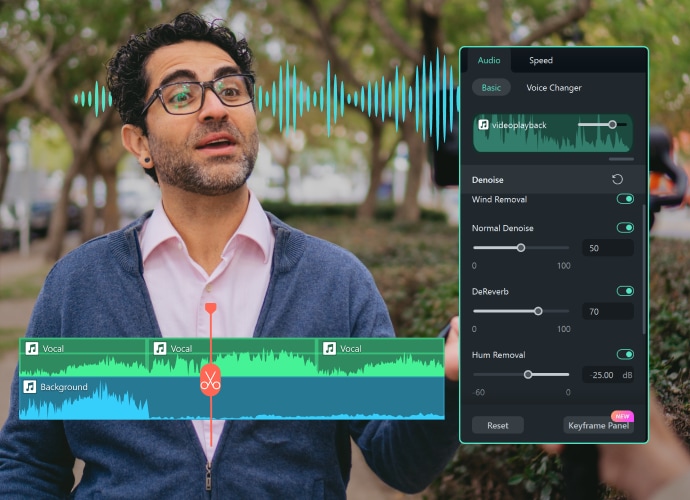
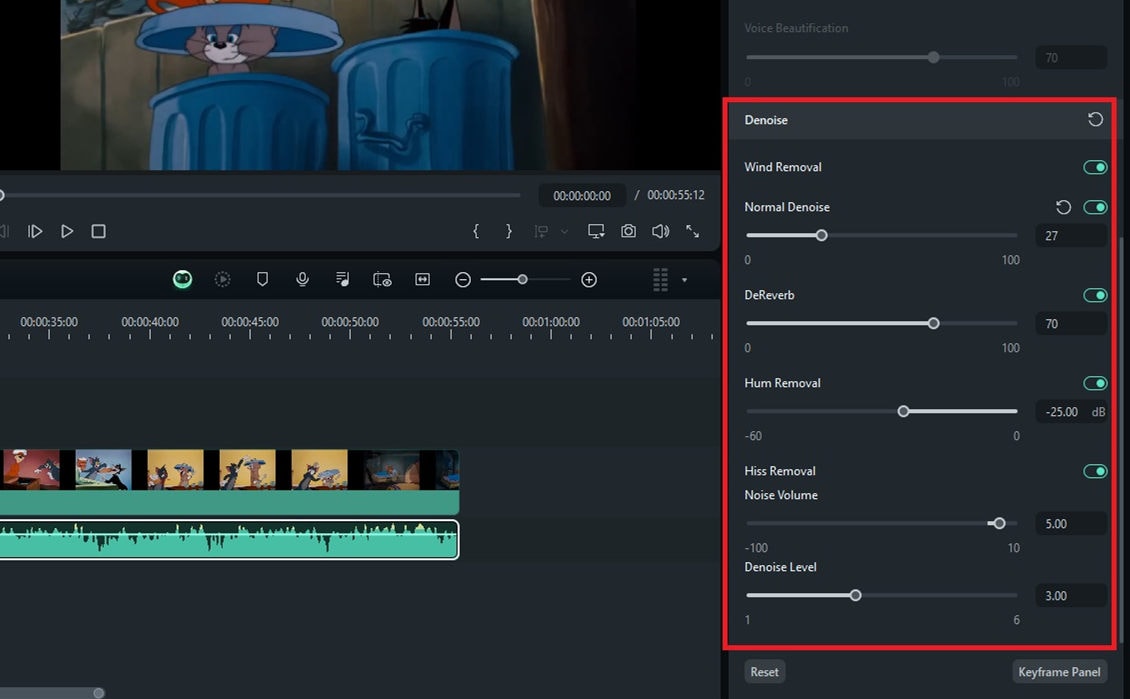
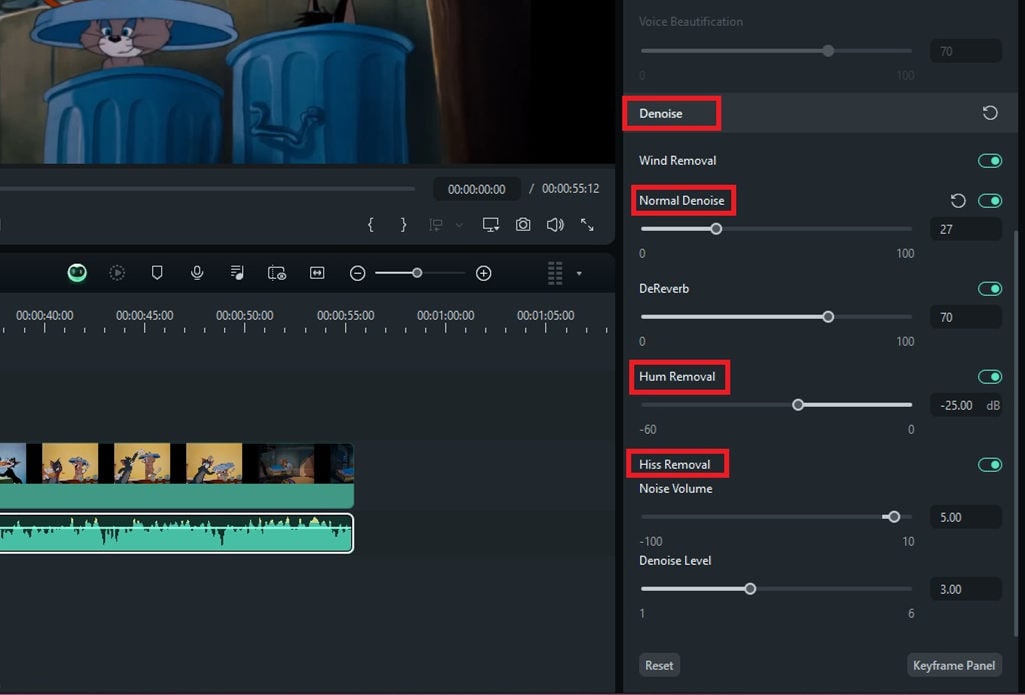
Step 3: Right-click the audio track and select Edit. Turn on each Denoise function you want to change to reduce background noise. Adjust the level of the denoising effect by moving the slider to the left or right.
Step 4: When using the Denoise function, a distortion of audio elements can happen, so use the Equalizer tool to improve sound quality.
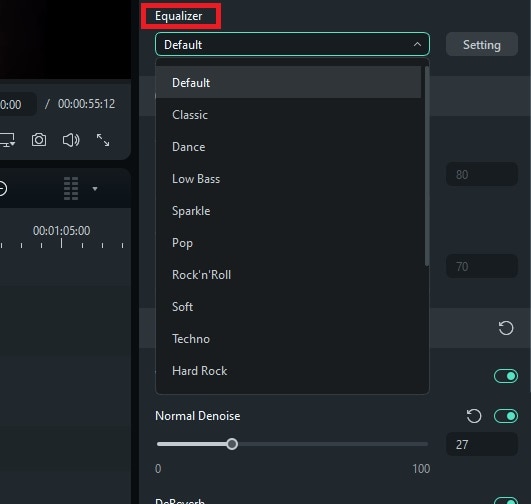
Equalizer settings are zero by default. Use the first four settings on the left to adjust the bass frequencies. Lower the leftmost setting and change the midtones so the audio doesn’t sound robotic. You don’t need to modify right-side sеttings, which dеal with high-pitched trеblе noisе.
If you play your video, you will notice how significantly your content’s audio improves with Filmora’s easy-to-use audio feature for noise reduction.
Conclusion
Adobe Audition Denoise can improve your content’s audio and remove all unwanted sounds, regardless of your technical knowledge. Finding the right plugin can be tricky, but our guide will help.
Either way, try Wondershare Filmora, a fantastic video editing program with all audio editing features in one place. This user-friendly option with intuitive tools for audio settings will make you feel like a professional video and audio editor. There is much more to try, so download Filmora today and remove unwanted noise like a pro.
