
 100% Security Verified | No Subscription Required | No Malware


 ChatGPT
 Perplexity
 Gemini
 Claude
 Grok
Grok
In the last few years, people have taken more interest in podcasts. The podcasts are famous because of the interactive conversation. If you like to create the same type of content, you must take care of audio quality. However, there are many options for creators, but for Mac users, GarageBand for podcasting is a go-to choice—free, user-friendly, and packed with built-in features for recording and editing.
But is GarageBand good enough for professionals, or is it just a beginner’s tool? Can it handle serious podcast editing?
In this guide, we’ll dive into GarageBand podcast recording, its perks and pitfalls, and whether it fits your needs. Plus, we’ll introduce Wondershare Filmora, a powerful alternative for those who want next-level podcast editing tools. Let’s get started!
In this article
What Makes GarageBand a Great Choice for Podcasting?
If you're new to the podcasting world, you want software that's simple, efficient, and not going to cost an arm and a leg. That's where GarageBand for podcasting comes in! Let's discuss why it's a great option:

- Easy-to-Use Interface
No technical expertise? No worries! GarageBand's user-friendly interface means even novices can dive right in. Pre-set templates and a drag-and-drop interface make editing a breeze.
- Totally Free & Already on Your Mac
No downloads, no cost—GarageBand is installed on every Mac. That means no setup fuss and no additional expense—ideal for budget podcasters.
- Built-in Recording & Editing Features
GarageBand offers multi-track recording for interviews, sound effects and loops for pro-level enhancements, and noise reduction to eliminate background noise—making podcast editing easy and professional, all for free.
- Streamlined Apple Integration
Already a Final Cut Pro or Logic Pro X user? GarageBand seamlessly integrates with Apple's ecosystem for a smooth and streamlined workflow.
Although GarageBand podcast editing is wonderful for novices, it is not without some restrictions. Next, let's explore the pros and cons!
How to Do Podcasting with GarageBand: Benefits and Limitations
Want to record a podcast on GarageBand? It’s easier than you think! Follow these simple steps to create a high-quality podcast.
Quick & Easy Steps to Edit a Podcast in GarageBand
Step 1: Install GarageBand on Mac
Ensure your Mac runs macOS 12.3 or later before installing the latest GarageBand version.
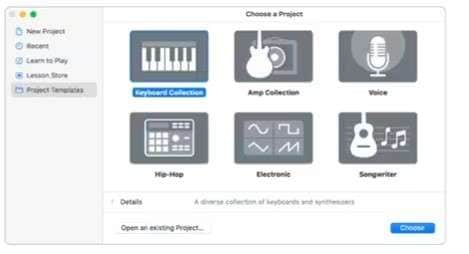
Step 2: Launch GarageBand
Open GarageBand, go to Project Templates, select Voice, and click Choose.
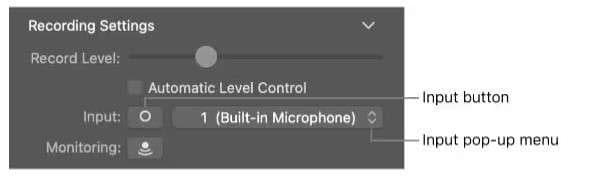
Step 3: Select Audio Input
Under Recording Settings, pick your input source from the Input pop-up menu. Toggle between stereo and mono channels as needed.
Step 4: Set Up Your Workspace
Adjust the display settings to show time only instead of beats for better podcast editing.
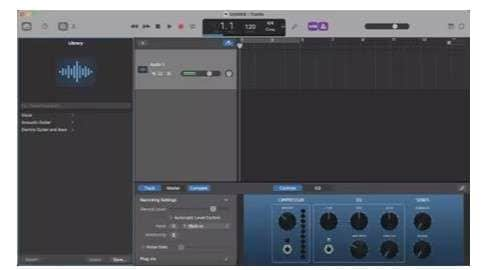
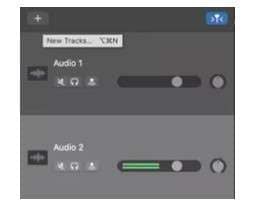
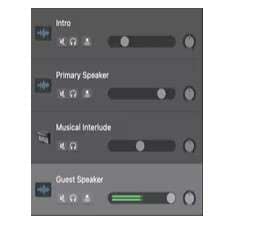
Step 5: Create Multiple Audio Tracks
Click the Plus (+) icon to add tracks for different parts—e.g., intro, voiceover, music, interview.
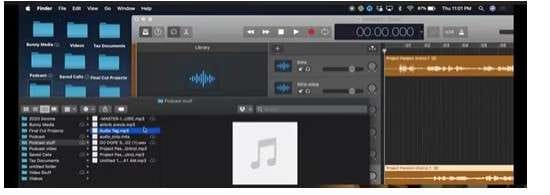
Step 6: Import Recorded Files
Drag and drop pre-recorded audio into the GarageBand timeline, placing them on the relevant tracks.
Step 7: Adjust Audio Levels
Balance the sound by adjusting each track’s volume. Boost quieter tracks if needed.
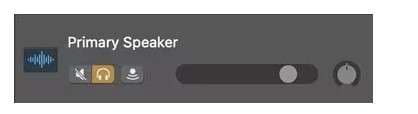
Step 8: Use the Solo & Mute Tools
Click the Headphones icon to isolate a track or use the Mute button to silence unwanted audio.
Step 9: Organize Your Files
Create clearly named folders for easy access to all podcast-related files.
Step 10: Export Your Podcast
Go to File > Save As, name your project, and click Save.
That’s all. Now your podcast is ready to publish. However, while GragageBand is an excellent tool for Mac users, it does have some drawbacks that lead people to seek alternatives.
Limitations of GarageBand
- Lacks Advanced Features—No high-end audio effects.
- Mac-Only – Not available for Windows users.
- Limited Plugins: Fewer options for pro-level audio enhancements.
Wondershare Filmora: The Perfect Alternative to GarageBand
While GarageBand is perfect for newbies, if you're looking for pro-grade podcast editing, Wondershare Filmora is the right option for you! With pro-level features, cross-platform compatibility, and a user-friendly interface, it's designed for creators who need top-notch audio without the fuss.
Why Use Filmora for Podcast Editing?
Have a look at the wonderful features Filmora offers to podcasters.
- Extremely Easy to Use
Filmora's drag-and-drop interface makes editing a breeze—even for newbies. Pre-set templates allow you to start quickly.
- Pro-Level AI Audio Editing Features
- AI Voice Enhancer: Improve audio clarity.
- AI Audio Denoise: Remove background noise for super-clear sound.
- Audio Equalizer (EQ): Customize voice clarity and balance to perfection.
- Multi-Track Editing: Edit several voices and layers of sound to perfection.
- High-end Effects & AI Improvements
- Integrated music library to complement the perfect background sound.
- Sound filters & transitions for smooth, professional-sounding audio.
- AI-powered quality upgrades to automatically enhance sound.
 secure download

Are you looking to take your podcast to the next level? Try Wondershare Filmora and see the difference!
Start editing a podcast with Filmora
Follow the Steps
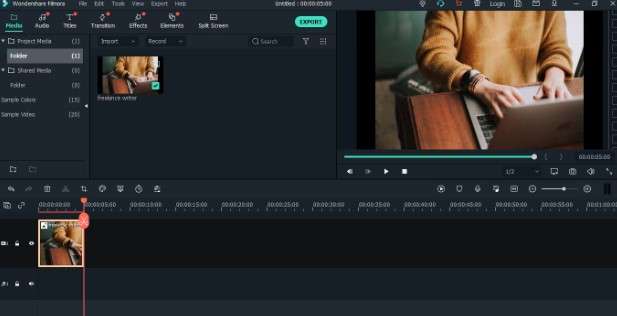
Step 1: Create a New Project
After launching Wondershare Filmora, select Create New Project and import an image or free stock video file relevant to your podcast topic.
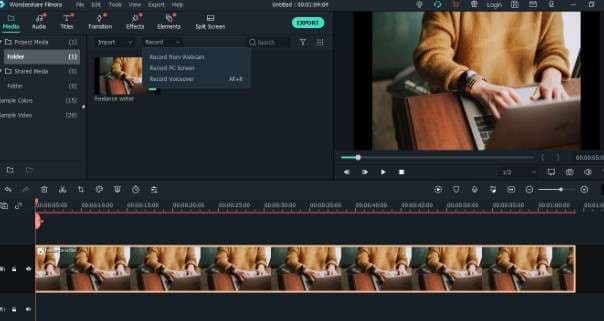
Step 2: Start Recording
Upload the videos and images to the timeline. Then, press the Record button to begin recording. Select Record voiceover from the options.
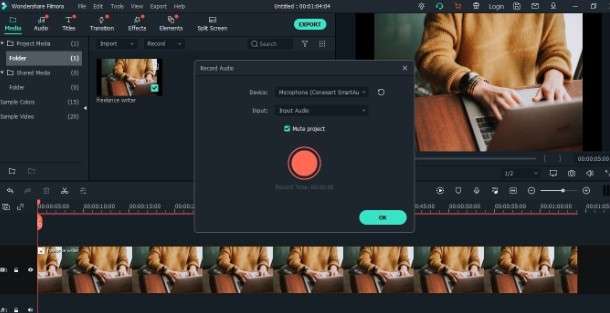
Step 3: Set Microphone
Set the microphone and confirm the voiceover recording by pressing the large red circle.
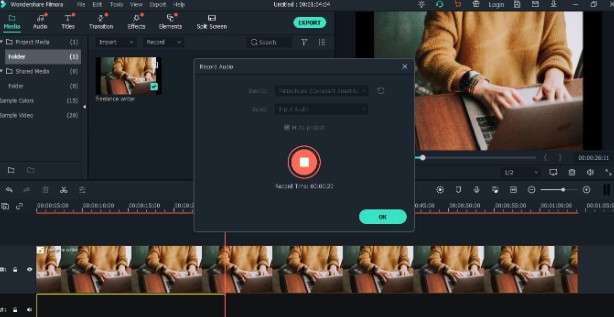
Step 4: Continue Recording
Continue recording until you are ready to make the podcast. To continue, press the OK button.
Step 5: Edit Podcast with AI
After you have recorded your podcast with Filmora, you can edit the audio using AI features. The AI noise reduction and voice enhancement tools improve the clarity of your podcasts.

That is all! See how easy it is to record and edit podcasts using Filmora. So give it a shot with Wondershare Filmora and see how successful your podcasting journey is.
Conclusion
GarageBand is a good beginning for creating a podcast using GarageBand, particularly for first-timers looking for a straightforward, free podcasting tool. Nevertheless, its use is less suitable for deeper podcast editing with GarageBand. For professional-level editing, however, Wondershare Filmora provides a stronger and more flexible alternative. Its superior audio editing capabilities, cross-platform compatibility, and AI-fueled features make Filmora the ideal choice for serious podcasters. To take your podcasting to the next level, give Wondershare Filmora a try today!
