
 100% Security Verified | No Subscription Required | No Malware


 ChatGPT
 Perplexity
 Gemini
 Claude
 Grok
Grok
Is there a Voice Recorder in Windows 11? Yes. If you don't know how to use the Windows 11 voice recorder, you've come to the right place. In this article, we will discuss how to use the voice recorder in Windows 11 and several other ways that you can capture audio on your Windows 11 system.
In this article
Recording Audio on Windows 11 Using the Sound Recorder
For people who are Windows 11 users, they can use the built-in Windows 11 sound recorder to capture internal and external sound. Here is the step-by-step guide.
- Navigate to the Start menu on your taskbar and search for the app, or type Sound Recorder in the search bar. Click to open the Sound Recorder window.
- Look for the Mic icon in the bottom-left corner and select your recording device. Click the red REC button to start recording.

- If you wish to skip to a specific point in your audio recording, click the Mark button or hit Ctrl + M on your keyboard.

- Click Stop to complete the recording and save the file on your device.

- Click My Audio to playback the audio recording without exiting the Sound Recorder app. Select the file and press the Play button.

- If you wish to share your audio, right-click the file in the My Audio folder and select Share. Choose your sharing method, including the Nearby Sharing feature, app, or email.

- Go to Settings > Recording formats > select your preferred audio formats.

- Click Audio Quality and choose from the following options: Auto, Best, High, or Medium.

Alternative Methods for Recording Audio Other Than Windows 11 Sound Recorder
Aside from recording audio on Windows 11 using the sound recorder, here are many alternative methods you can consider.
Method 1: Recording Audio on Windows 11 With Filmora (Third-Party Software)
Though you can cover most audio recording requirements using the built-in Windows 11 sound recorder, it's not the best option for polishing and perfecting your audio content.
Although the tool has pretty basic editing options, which may not meet your audio editing preferences. In that case, we recommend turning to a professional-grade AI-powered audio editor like Wondershare Filmora.
 secure download

It encompasses both audio and video recording capabilities, empowered with an extensive range of AI-enabled audio/video editing features. The software tool works with Windows and Mac devices and offers access to various audio and video customizations, including audio effects, filters, stickers, transitions, etc.
Here's just a taste of all the audio recording and editing capabilities you can accomplish with Filmora:
- Capture your voice and system sound for unlimited time;
- Extract audio from videos easily with the one-click audio detach feature.
- Remove background noise from your recordings;
- Enhance your speech clarity using an AI voice enhancer;
- Apply fade-in/fade-out effects;
- Create royalty-free background music with an AI music generator;
- Clone your voice and auto-generate voiceovers;
Download and install Filmora on your Windows or Mac computer, then follow the steps below to capture audio.
secure download
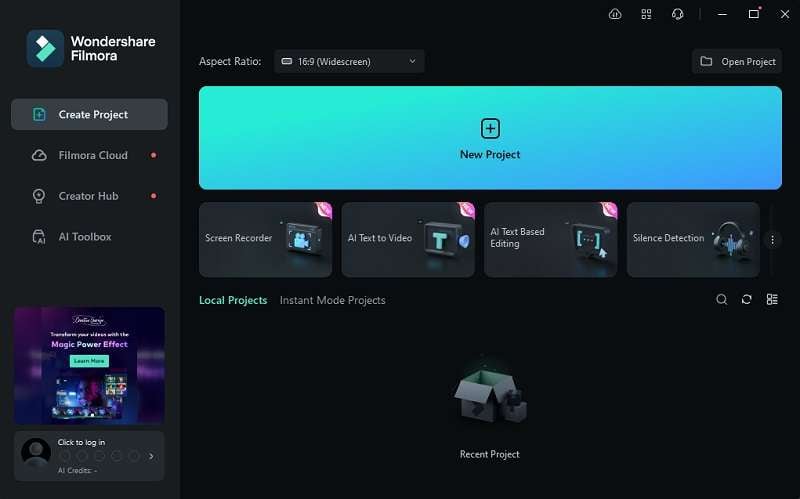
- Launch the app and navigate to Create Project > New Project.
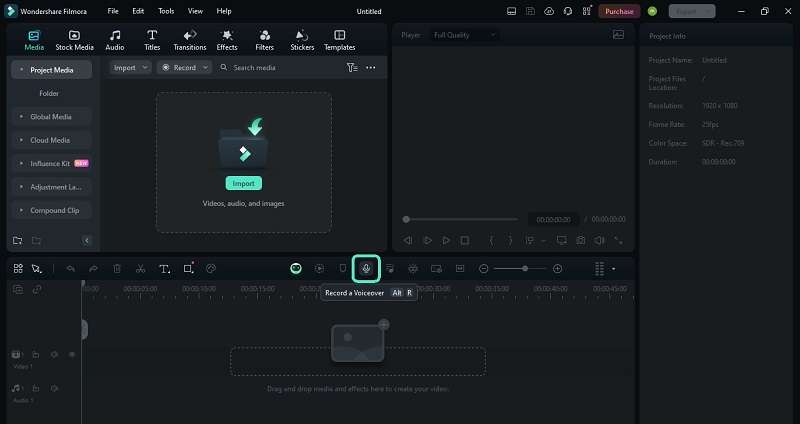
- Click the Microphone icon to access the Record Audio menu and start capturing audio.
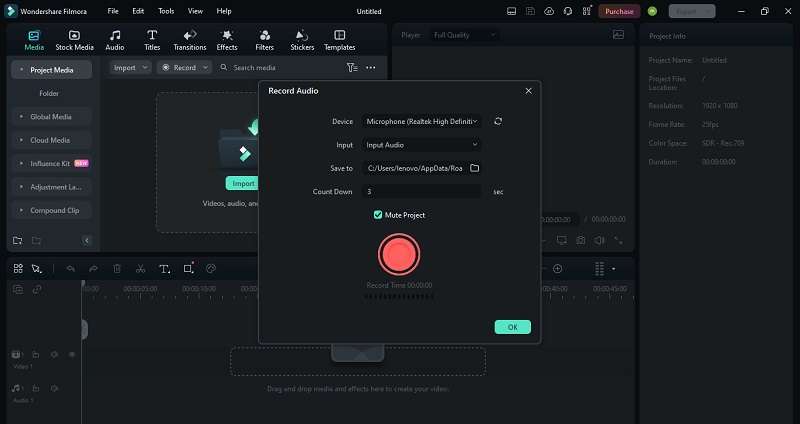
- Make basic settings in the Record Audio window, choose the Device, Input microphone, file location, and count downtime.
- Click the red REC button to start recording. Uncheck Mute Project if you want to capture system audio as well.
- After you complete your recording, you can find your track in the Filmora editing timeline. Click the track and navigate to Audio > Basic. You can make basic audio editing here.
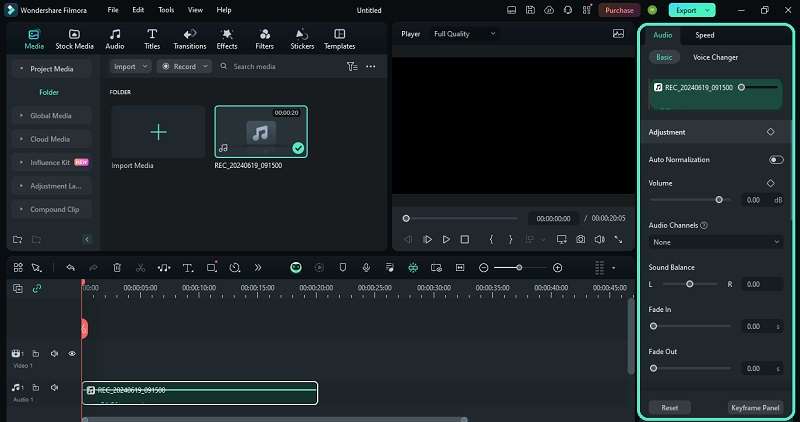
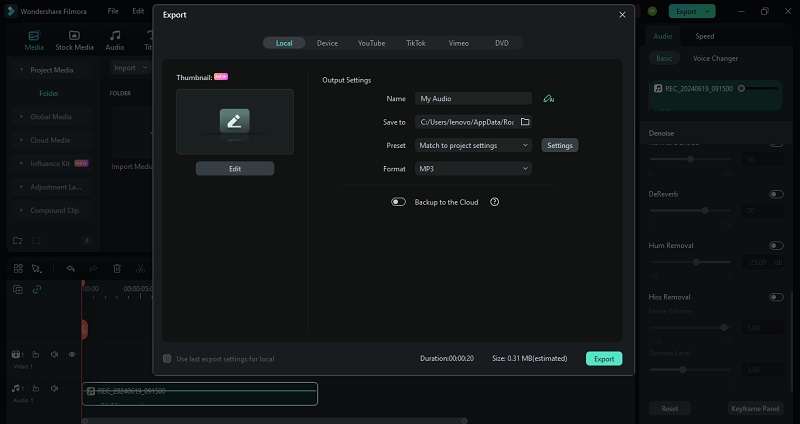
- Click Export to name your recording, choose an audio file format, and save the track to your computer.
Steps To Add Voiceovers on Your Videos With Filmora Mobile
Sometimes, having a recording app that adds the audio straight to your intended video is a great plus. This is why you should also look for video editing tools instead of simple recorders. This way, you will have more flexibility in using your recordings. Filmora, as a video editing app, also offers this feature. You can even make your voiceover in real time to save time when adjusting the audio to fit the video.
To do this, follow the steps below:
Step 1: Download and install Filmora on your Android or iOS device.
Step 2: Start a New Project first. Then, Import the video you want to add a voice over to.

Step 3: From the editing interface’s bottom toolbar, press Audio > Record.

Step 4: Press the red Record button to begin and end the recording. The video shall also play so you can sync your voiceover perfectly.

This simple procedure is what makes Filmora stand out on this list. As a video editing tool with audio recording features, creating content has never been easier.
Related article:
Learn how to Make Audio Recordings on iPhone and iPad.
Perfect Your Narration Filmora for Mobile Filmora for Mobile Filmora for Mobile Filmora for Mobile
Create Engaging Voiceovers with Filmora Mobile
- • Record high-quality voiceovers directly within Filmora.
- • Sync your narration perfectly with video content.
- • Utilize editing tools to adjust tone and clarity.


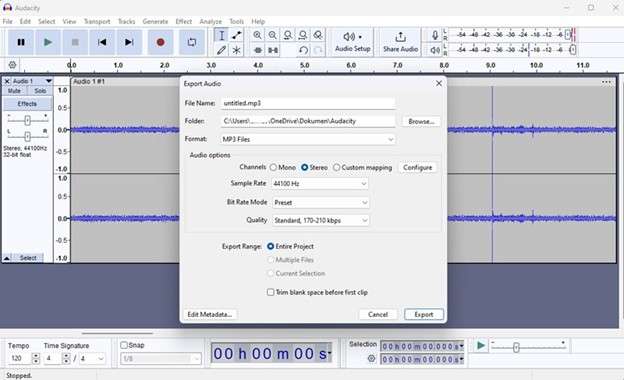
Method 2: Recording Audio on Windows 11 With Audacity (Open-Source Software)
Audacity is a highly recommended open-source free audio recording software for Windows 11 users. The tool is one of the most popular solutions for capturing system audio on Windows, Linux, and Mac devices.
You can export audio in popular formats, including AIFF, WAV, MP3, and more. Below, we'll provide a step-by-step guide on how to use Audacity to capture audio on your Windows 11 device.
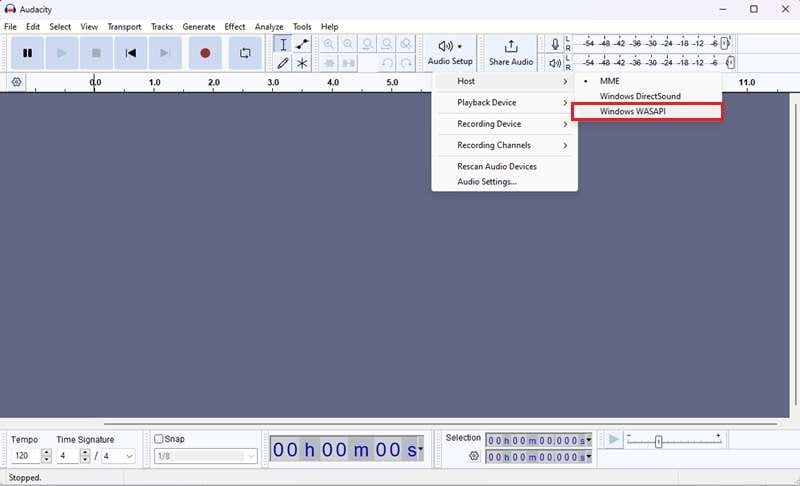
- Download and install Audacity on your Windows 11 device. Launch the app and navigate to the top toolbar. Select Audio Setup > Host > Windows WASAPI.
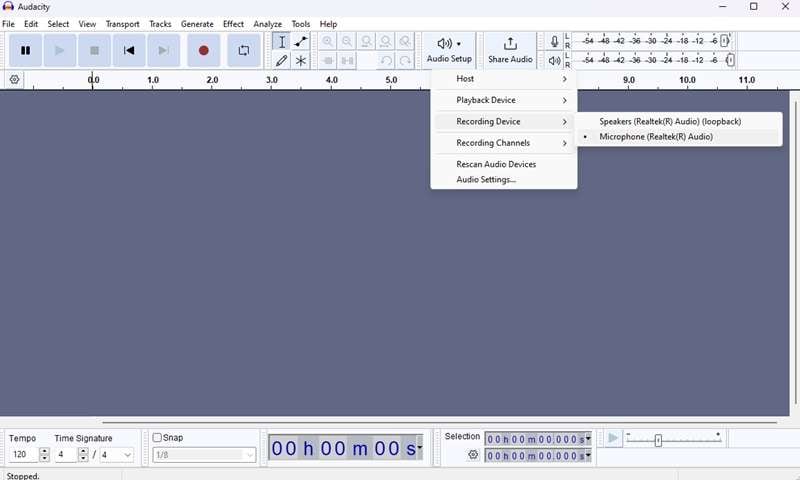
- Select Audio Setup again and choose your Windows 11 recording device. The Speakers option captures your system audio, and the Microphone records your voice.
- After that, click the red REC button to start recording your Windows 11 audio.
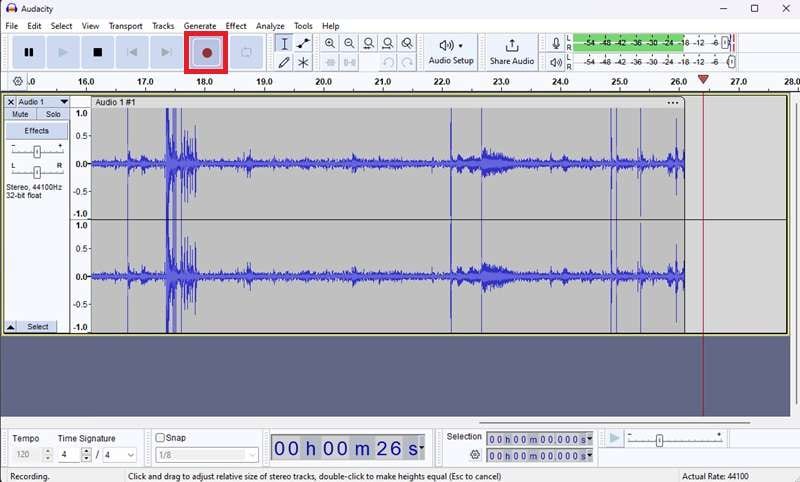
- Click the red button to stop recording and navigate to File > Export to save your file in a preferred audio format. By default, Audacity will save audio recordings in MP3 format.
Method 3: Recording Audio on Windows 11 With DemoAir (Online Tool)

There are online audio recorders that can also be used to capture audio on Windows 11. One of our recommendations is Wondershare DemoAir. It empowers you to capture your voice and system audio using your browser and internet connection. Here are the steps:
- Visit the Wondershare DemoAir website and select Online Audio Recorder. Make sure your microphone is connected to your computer.
- Click the Settings button (gear-like icon) to select your microphone if you wish to add a voiceover to your audio recording. Allow the web app to use your computer's microphone.
- When ready, click the Record button to start recording audio online.

- Use the Pause and Stop buttons to temporarily stop and end the recording.

- Click the red box to stop recording > click Download to save the audio file to MP3 format.

Creative Tips: Enhance Recorded Audio on Windows 11
Once you have your audio file, you can use different methods to enhance your recording. Here are a few ideas:
1. Time Efficient: Convert Recorded Audio into Text
Filmora's speech-to-text option lets you convert your audio to shareable text content with a few clicks with 27+ languages. Instead of manually typing the subtitles to the video, using STT will help save a lot of time.
2. Voice Changer: Change your Recorded Audio Using Voice Filters and Characters
If you wish to enhance your voice and speech in a video, use an AI-powered voice changer to transform your voice using filters and characters in Filmora. This solution is ideal for customizing your content for different social media channels.
3. Voice CloningVoice Clone: Clone Your Voice After Recording a 10 seconds Demo
Filmora's AI-enabled voice cloning is the perfect solution for using your voice to custom-tailor text-to-speech content. Create multiple, customizable, multilingual clones of your voice to enrich your audio content and make it more vibrant.
Conclusion
We have discussed a step-by-step guide to using a Windows 11 sound recorder to capture audio and 3 alternative ways to record audio on Windows 11 in this article and also offered some creative tips to enhance recorded audio with Filmora. Let's download Filmora and see how it works to enhance your audio to the next level.
secure download
