Screen Recorder and PowerDirector are two applauded products from CyberLink that are supposed to transform your screen capture game and help you create better content. Did you know that you can use them together—parts of them, at least?
Intrigued by the offer, we've jumped at the opportunity to test CyberLink Screen Recorder PowerDirector and tell you what we think.
In this article, you will learn the key features of the CyberLink screen recorder, its recording capabilities, streaming, and basic editing features. In addition to that, you will learn how to use the CyberLink recorder, and the pros and cons. Let's dive right in.
In this article
CyberLink Screen Recorder Overview

CyberLink Screen Recorder is a powerful screen recording software for Windows 10 and a streaming tool made for gamers and online content creators. As was to be expected, it allows you to record different areas of your desktop along with webcam and sound, making it suitable for online commentary and tutorials.
One of the greatest advantages of this tool is its multistreaming capability, which broadcasts your screen live on up to five streaming platforms, including Twitch, YouTube, and Facebook. It makes it ideal for game casters, vloggers, and remote workers.
The Screen Recorder also includes a simplified version of CyberLink PowerDirector for video editing that lets you perform basic functions like cutting and trimming. The post-production workspace also offers a rudimentary title and transition maker.
We've also included the system requirements of the Cyberlink screen recorder for your reference.
| Operating System | Microsoft Windows 10, 8.1.SP1 (Windows 10 64-bit recommended) |
| Processor (CPU) | Intel Core™ i-series or AMD Phenom® II and above |
| Graphic Processor (GPU) | Desktop recording: 1GB VGA VRAM or higher Game recording: 3GB VGA VRAM or higher |
| Memory | 2 GB |
| Hard Disk Space | 600MB for installation |
| Screen Resolution | 102.768, 16-bit color or above |
| Language Support | English, French, German, Italian, Dutch, Spanish, Chinese Simplified, Chinese Traditional, Japanese, Korean |
CyberLink Screen Recording Features

Recording and Streaming
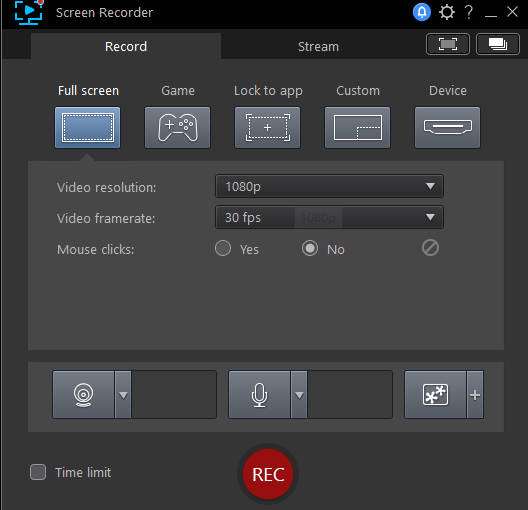
There are five recording modes to choose from: Full screen, Game, Lock to app, Custom, and Device. It also supports streaming in 1080p, 120 fps, and at a custom bitrate without any lag and is enabled for up to five platforms simultaneously—Twitch, YouTube, Facebook, and two other streaming services.
Webcam and Sound Capture
You can set the webcam resolution by clicking the arrow or stretching and dragging the overlay for custom size and position. When the webcam and sound capture are on, you get previews on the dashboard. You can see the system sound volume bar and set the mic accordingly.
Chroma Key and Background
You can replace the background of your webcam with a custom image with a chroma key to make your recordings more vivid and creative.
Picture-in-Picture and Overlay

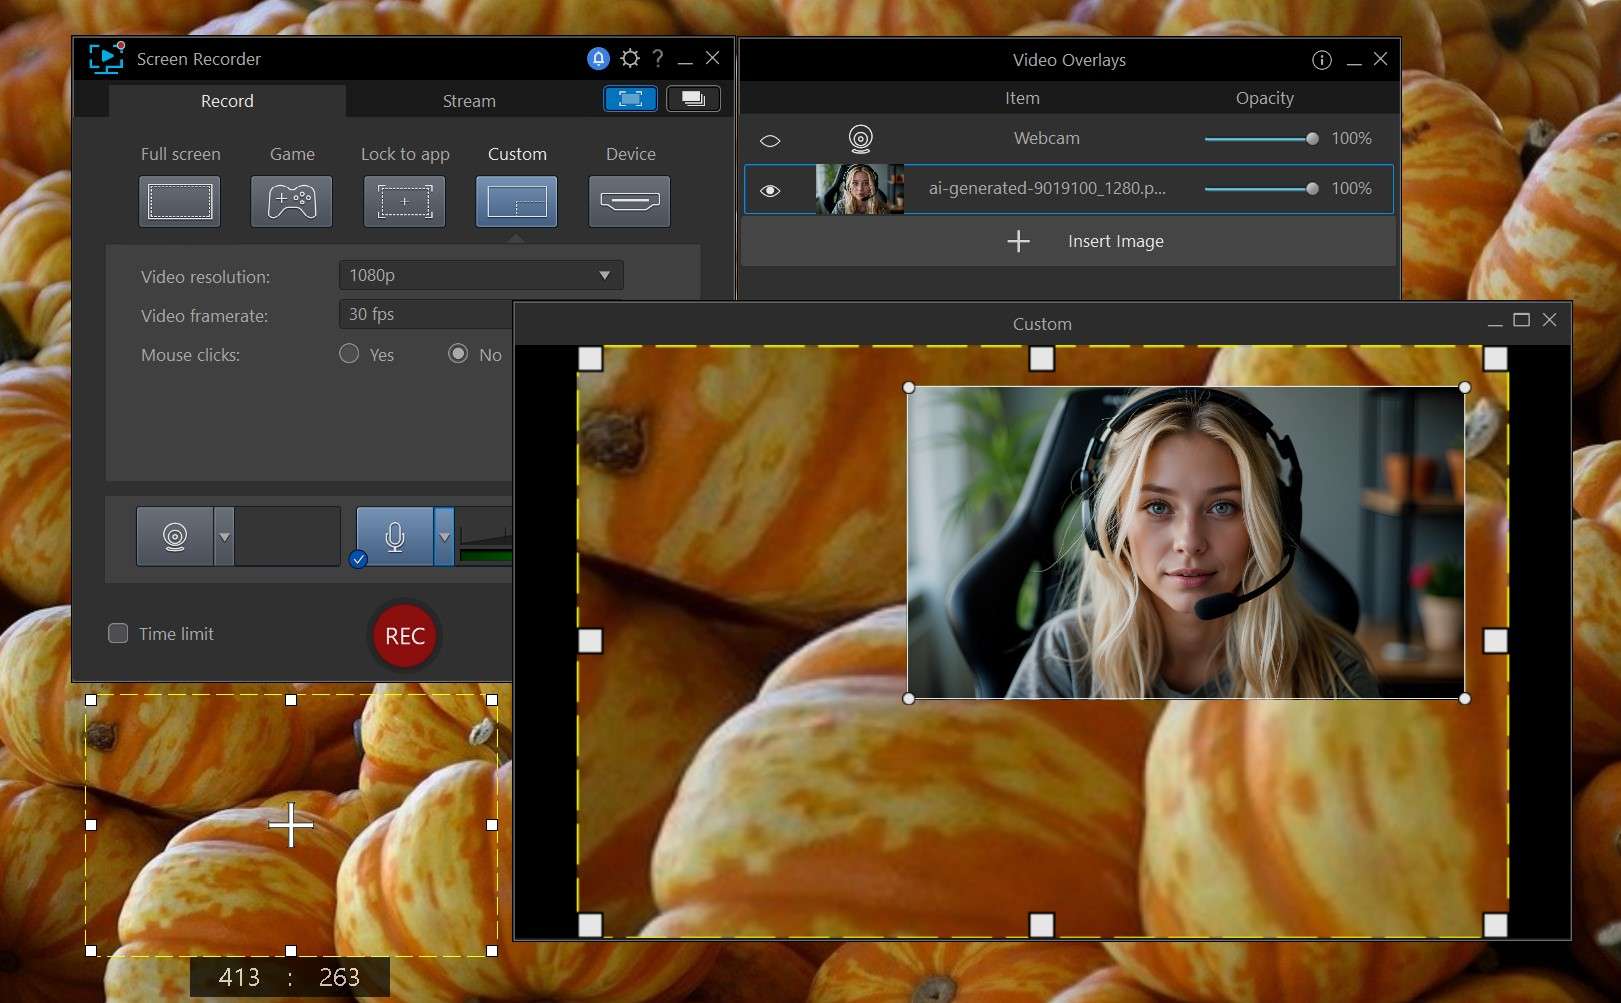
The Overlay tab allows you to add and manage "images" (BMP, GIF, JPG, and PNG) on top of your screen. For example, you can insert a photo and create a PiP effect or add a logo, ad, or CTA. You can change the object's opacity, resize and reposition it, and make it invisible with a click during capture if you don't want to show it throughout the clip.
Mouse Clicks and Hotkeys
CyberLink also lets you enable highlighted mouse clicks and choose a color, which is always helpful when you're showing how something is done on the desktop. If you don't want your audience to see you making adjustments while recording, there's a hotkey for whatever you need to do. Customizable hotkeys are useful in every recording scenario.
CyberLink Screen Recorder Editing Features

After recording, you will have access to the basic video trimmer.
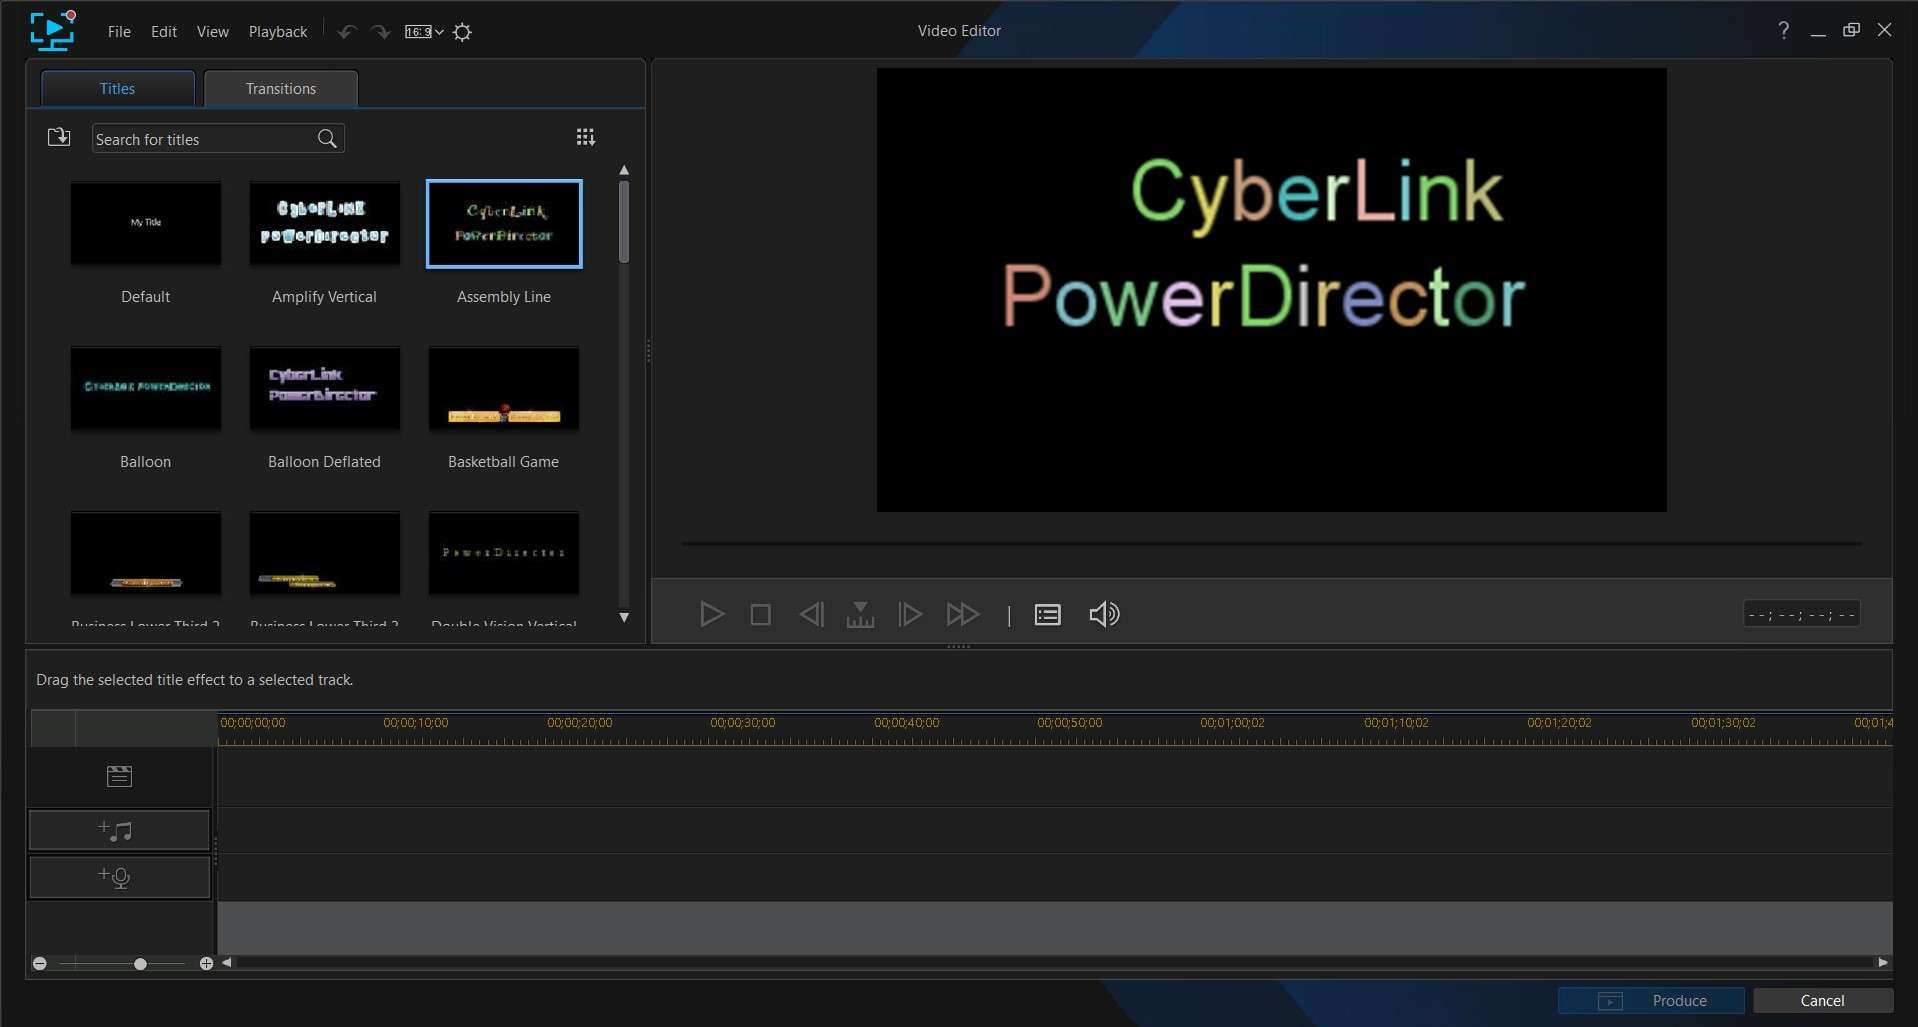
The timetrack-based interface feels eerily empty despite the Title and Transition maker. Both offer 30+ presets that are not very eye-grabbing but can be customized. There are several creative animations on top of classic ones, like fade-in and fade-out. If that's not enough, you can always download, import, and customize your own animations.
However, the biggest letdown of Cyberlink's Screen Recording video editor is the absence of multitrack editing. You can't make complex recordings in post-production.
CyberLink Screen Recorder Pricing + Download
Cyberlink Screen Recorder is not very versatile when it comes to pricing, either. While similar tools unusually work on the per-subscription model and have multiple tiers for various needs and budgets, Screen Recorder Deluxe is available as a one-time purchase only. Users can test premium features for 30 days for free, after which they must pay $49.99.
How to Use CyberLink Screen Recorder?
Here's how to capture your screen using CyberLink Screen Recorder:
- Download, install, and run CyberLink Screen Recorder on your PC.
- Choose a screen recording mode and configure the Resolution and Framerate if you don't like the initial settings.

- Click on the Webcam button to enable webcam capture and select the recording input. Clicking on the Arrow will allow you to choose the resolution and access Webcam Settings, where you can set the framerate and remove the background using the Chroma Key.

- To change the size or position of the webcam overlay, simply drag and drop it anywhere within the capture area.
- Click on the Microphone button to turn on mic capture and select the recording input. To turn the system sound off and adjust the volume, click the Arrow button and go to Audio Preferences.

- To enable Video Overlays, hit the button next to the Microphone. Click the + icon to add and manage image overlays before or during the recording.

- If you want to livestream while recording, switch to the Stream tab. Choose where you want to stream and configure the Resolution and Framerate before typing in the Server/URL and Stream key. When you're ready to start streaming, hit the Live button.

- If you want to see your recording as your audience will see it, click on the Preview window at the top right.

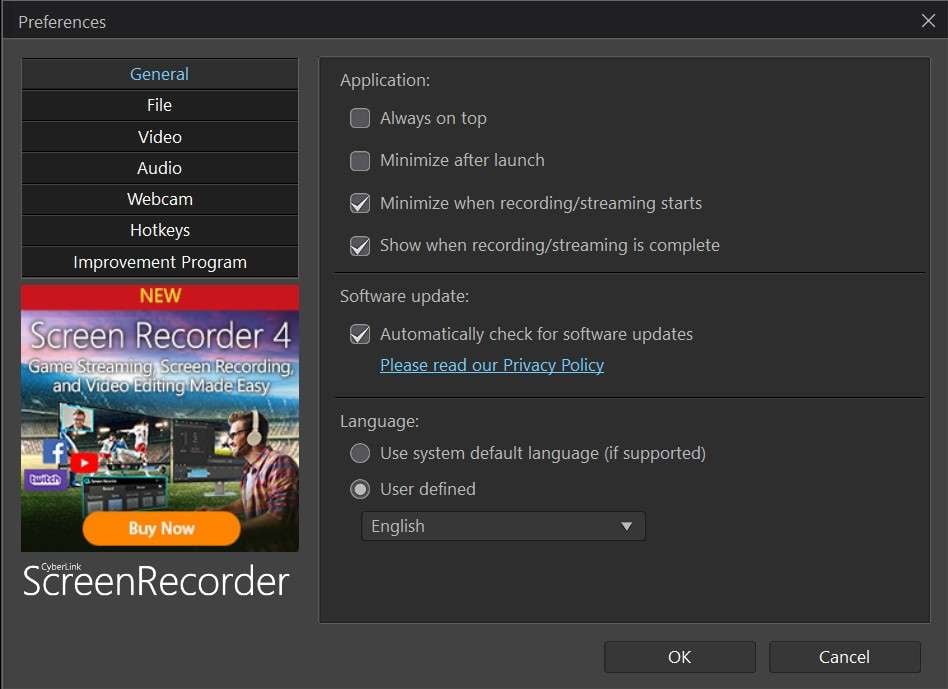
- When you're ready to start recording, click REC. The app will minimize after the recording starts. If you want to change the settings or add an object while recording, you will have to open the app from the Taskbar. There are also hotkeys you can use to stop, pause, take a screenshot, and more without the audience noticing.

- CyberLink automatically saves the recording to your computer when the screen capture stops. To edit the video, click on the Library button in the upper right corner. Select the video you want to edit and click the Pen button.

- Use the Scissor ol to trim the video and apply Titles and Transition by dragging them to the timeline. You can add a music track and voiceover by clicking on their + buttons at the beginning of the timeline.

- To save or share the edited recording, click the Produce button at the bottom.

Pros and Cons of Cyberlink Screen Recorder
Overall, Cyberlink Screen Recorder is an excellent screen capture tool for game casters and streamers. This is its greatest strength and weakest link at the same time.
Best Alternative to Cyberlink Screen Recorder—Filmora
Compared to CyberLink's Screen Recorder, Filmora is a somewhat simpler screen-capturing tool with a weaker accent on gameplay recording (although it can be used for that, as well).
Filmora's strongest suit is post-production. Featuring a top-rated video editor that includes multi-track editing and creativity-unleashing tools like motion tracking, green-screen effects, and AI enhancement, this software can help you produce content that stands out. Filmora also has a massive library of images, music, and other creative assets.
Compare Cyberlink Screen Recorder and Filmora
| Features | CyberLink Screen Recorder | Filmora Screen Recorder |
| Supported Operating Systems | Windows | Windows, MacOS, Android, and iOS (only voiceover for mobile) |
| Recording Modes | Full Screen, Game, Lock to App, Custom, Device | Full Screen, Window, Custom |
| Webcam Capture | ✅ | ✅ |
| Video Editing | Basic (trimming, titles, transitions) | Advanced with AI tools and extensive creative assets |
| Video Composting | ❌ | ✅ |
| Free Video Compression | ❌ | ✅ |
| Chroma Key | ✅ (requires green screen) | ✅(with green screen and AI removal) |
| Picture-in-Picture (PiP) | ✅ | ✅ |
| Mouse Click Effects | ✅ (customizable colors) | ✅ (custom colors and sound effects) |
| Max Recording Resolution | 1080p at 120 fps | 4K at 60 fps |
| GPU Acceleration | ✅ | ✅ |
| File Format Export | MP4, AVI, WMV, MOV | MP4, MOV, MKV, AVI, FLV, and more |
| Price | One-time purchase ($49.99) | Free version with watermark, Paid plan starts at $49.99/year |
| Best For | Gamers and YouTubers | Vloggers, gamers, educators, and other video content creators |
How to Use Filmora Screen Recorder?
Follow these steps to make a screen recording with Wondershare Filmora:
- Download and install Filmora on your PC or MacOS.
- Run Filmora and select the Screen Recorder feature.

- Choose a screen recording mode and enable the Microphone, System Audio, and Webcam you plan to use.

- Click on Settings to access more options, and you can choose your preferred option here. You can also set the Framerate, turn on the Record Timer, set Mouse Click Gestures, customize Hotkeys, enable GPU Acceleration, and more.

- When you're ready to start recording your screen, click the red REC button and press F9 to stop screen capture.

- Filmora will automatically launch your recording in the video editor. Drag and drop it to the timeline to start trimming, cutting, spitting, and more.

- When you're done editing, click on the Export button at the top right corner.

Conclusion
CyberLink's Screen Recorder is a capable, feature-packed software for screen capturing and sharing with multistreaming, HD 1080p resolution, and integration with basic PowerDirector editing features. Aimed primarily at game casters, it lacks the functionality of a versatile tool that can be used to its full potential by different types of online creators.
However, if you require advanced post-production in addition to simplicity and efficiency—as most video creators do—you should consider a more powerful screen recorder and comprehensive video editor like Wondershare Filmora.


