

 ChatGPT
 Perplexity
 Gemini
 Claude
 Grok
Grok
"How do you take a full-screen capture on Windows 10?" You've come to the right place if you have the same question. We'll show you how to record the full screen on Windows 10 and 11 and any MacOS device with the six best options.
In this article
A Quick View of Recording the Full Screen on Windows and Mac
Here's a quick overview of their ease of use and effectiveness to help you know what to expect.
| Full-Screen Recorder | Effectiveness | Ease of Use |
| Wondershare Filmora | High – up to 4K recordings at a maximum of 60 fps without a recording limit | Very Easy – quick setup, clean UI, and seamless use |
| Snipping Tool | Low – 1080p recordings of up to 30 minutes at a maximum of 30 fps on Windows 11 only | Easy – a built-in Windows tool |
| Xbox Game Bar | Medium – 1080p recordings of up to four hours at a maximum of 60 fps | Medium – extensive setup |
| Screenshot toolbar | High – up to 4K recordings at 60 fps without a recording limit | Easy – a built-in macOS tool |
| QuickTime Player | High – up to 4K recordings at 60 fps without length restrictions | Complex – requiring a virtual audio loopback driver to capture system audio |
| Wondershare DemoAir | Medium – recordings of up to 1080p at a maximum of 30 fps without a recording limit | Easy – a Chrome extension |
Record the Full Screen on PCs With Wondershare Filmora
Wondershare Filmora is an AI-powered video editor with standard screen recording capabilities. It's available for Windows 7 through 11 and Mac Catalina through macOS Sequoia.


Besides high-quality recordings, Filmora offers abundant features for fine-tuning audio and video files. Therefore, download and install it on your PC and explore its capabilities. You can record screens on Windows or Mac to any length you want.
Here's how to use the full-screen recorder for PCs in Filmora:
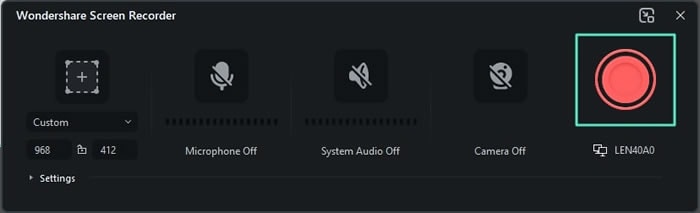
- Launch Filmora and open the Screen Recorder from the startup screen.
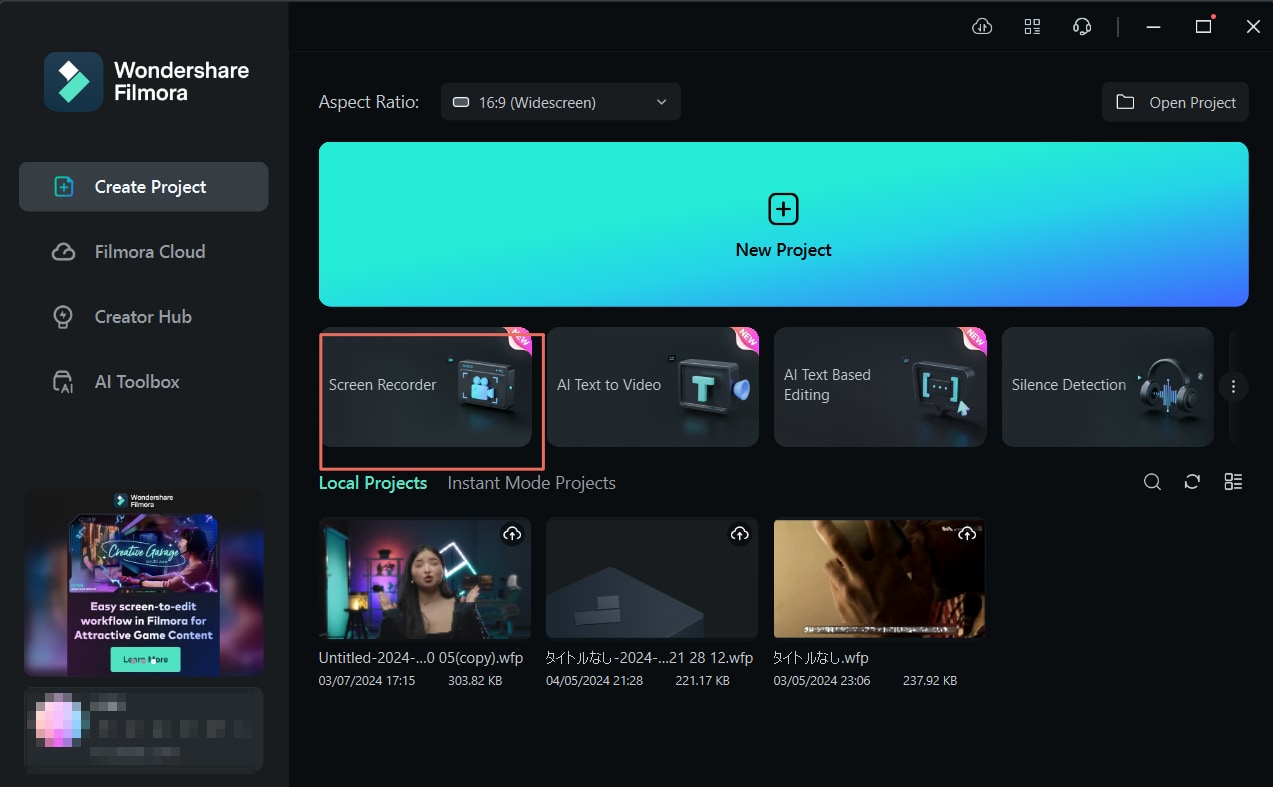
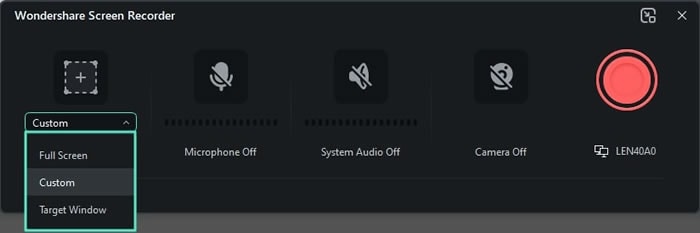
- Choose your Full Screen as the recording area.
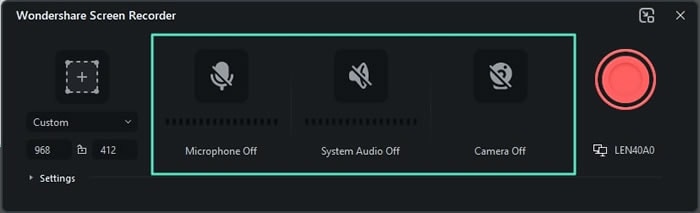
- Enable your microphone, system audio, and camera (if you want a webcam overlay).
- Expand Settings to specify the recording's name, location, frame rate, and quality. You can also change the countdown, set a recording timer, make mouse clicks visible, enable GPU acceleration, and see the recording hotkeys.
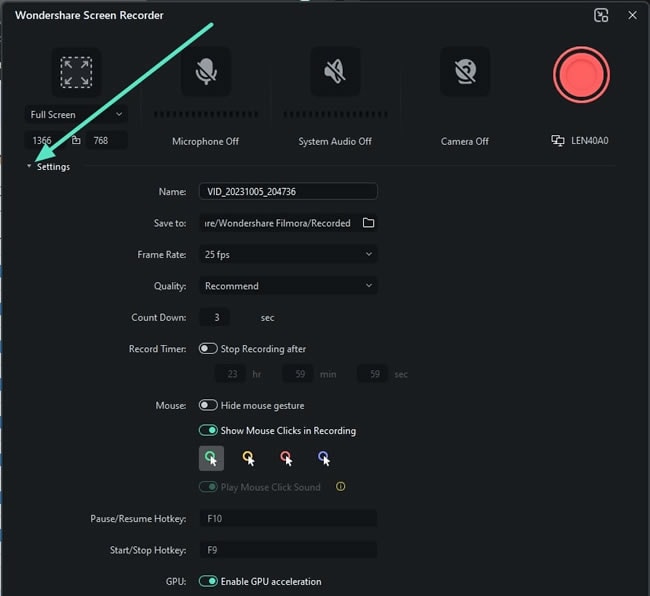
- Hit F9 on your keyboard or click the red Record button. Pause and resume anytime with F10 and finish recording with F9 or the Stop button.
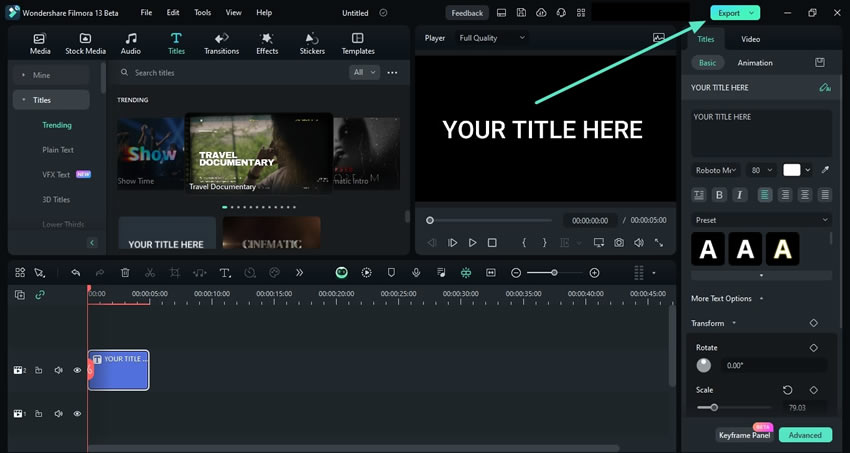
- Edit your screen recording and click Export.
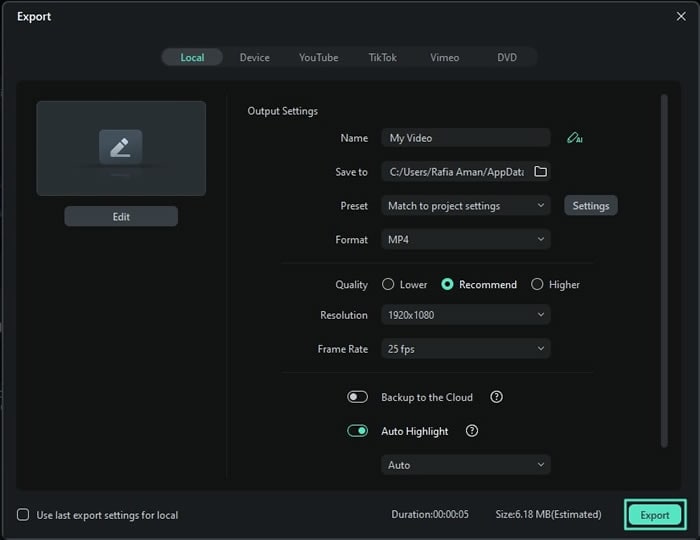
- Customize the output settings and hit Export again.
Record the Full Screen on Windows With Built-in Tools
Windows systems have two built-in options for full-screen recording, including the Snipping Tool and Xbox Game Bar. Here's how to use them.
1. Using the Snipping Tool
The Snipping Tool lets you take screenshots and create screen recordings, capturing your system audio by default. It can also record your microphone, making it excellent for quick recordings without extra software.
Unfortunately, you can't use this screen recorder on Windows 10. It's available only on Windows 11 systems with the build number 22000.0 or higher. Also, it caps recordings at 30 minutes.
Here's how to make a full-screen recording with the Snipping Tool:
- Go to Settings > Privacy & Security > Microphone and flip the On switch next to the Snipping Tool.

- Hit the Print Screen (PrtSc) button to open the Snipping Tool and click More (the three horizontal dots) > Settings.

- Enable system audio and microphone inputs under Screen Recording and return to the startup screen.

- Click the Recording (camera) button and choose New (or press Ctrl + N).

- Click and drag from one corner of the screen to the opposite one to select the recording area. Then, choose your microphone and click Start.

- Click the Stop button to finish recording.

- Hit the Floppy Disk button or Ctrl + S to save your recording.

2. Using the Xbox Game Bar
Xbox Game Bar is a free full-screen recorder for Windows 10 and 11. It's built-in software for capturing gameplay sessions but can also record programs and browser windows. However, it can't record your desktop, File Explorer, or some Microsoft apps.
Here's how to record your entire screen with Xbox Game Bar:
- Go to Settings > Gaming > Xbox Game Bar and flip the On switch. You can also tick the checkbox for a controller.

Windows 11 has a slightly different UI, but you can access the settings identically.

- Go to Settings > Gaming > Captures to set the location and your Recording Preferences, including the maximum recording length and frame rate.

- Close the Settings and press the Windows key + G to launch the Xbox Game Bar.

- Hit the Widgets button and add Capture and Audio widgets by clicking the corresponding stars.

- Go to Settings > Capturing and choose which audio to record.

- Close the Settings and adjust the sound volume in the Audio Mixer.

- (Optional) Click the Microphone button in the Capture widget (or hit the Windows key + Alt + M) to record your voice.

- If the Record button is grayed out, close File Explorer and Microsoft apps like Maps and open a program or browser window because you can't record your desktop.

- Click the Record button or the Windows key + Alt + R keyboard shortcut.

- Finish recording using the same shortcut or click the Stop button.

- Click See My Captures.

- Play, delete, or share your recording from the Gallery or open it in File Explorer.

Record the Full Screen on a Mac With Built-in Screen Recorders
Mac computers have two built-in screen recorders, including the Screenshot toolbar and QuickTime Player. Here's how to use them to capture entire screens on Mac.
1. Using the Screenshot Toolbar
The Screenshot toolbar, which lets you record the screen and take screenshots, is available on macOS Mojave and newer. If your Mac runs on macOS High Sierra or older, skip to the QuickTime Player section below.
Here's how to record your whole screen using the Screenshot toolbar:
- Launch the toolbar using the Shift + Command + 5 shortcut and click the Record Entire Screen button (the fourth in the row).

- Click Options to set the location, timer (optional), and microphone. You can also enable visible mouse clicks and a floating thumbnail for quick access after recording.

- Click Record.

- Click the Stop button in the menu bar to finish recording.

- If you've enabled a floating thumbnail, click it to access editing and sharing options.

- Trim or delete your video in the Preview app and click the Share button to add it to Photos or Notes or send it via AirDrop, Mail, or Messages.

2. Using QuickTime Player
QuickTime Player is your only built-in option for screen recording if you have macOS High Sierra or older. Either way, it can't record system audio, only your microphone. Therefore, we'll show you how to capture both using a virtual audio loopback driver. That middleman will record all sounds and route them to QuickTime Player.
Here's how to record your entire screen with audio using QuickTime Player:
- Download and install BlackHole 2ch on your Mac.

- Launch Audio MIDI Setup, hit the Plus button in the bottom left corner, and click Create Multi-Output Device.

- Tick the Use checkboxes for your Built-in Output (or another name for your default speakers) and BlackHole 2ch (in that order) and enable Drift Correction for the latter.

- Hit the Plus button and click Create Aggregate Device to record your voice with system audio.

- Tick the Use checkboxes for your Built-in Microphone (or external), Built-in Output (or connected speakers), and BlackHole 2ch (in that order). Then, enable Drift Correction for all except your microphone and close the Audio MIDI Setup.

- Click the Apple menu, go to System Settings (macOS Ventura or newer) or System Preferences (macOS Monterey or older) > Sound > Output, and select the Multi-Output Device.

- Choose the Aggregate Device in the Input tab.

- Return to System Settings or Preferences and open Privacy & Security. Switch to the Privacy tab, click Microphone in the left sidebar, and tick the QuickTime Player checkbox to allow access.

- Launch QuickTime Player and click File > New Screen Recording.

- This action will launch the Screenshot toolbar on macOS Mojave or newer, so click the Record Entire Screen button. Skip to Step 12 for older macOS versions.

- Click Options, select your Aggregate Device under Microphone, click Record, and proceed to Step 13.

- If you have macOS High Sierra or older, click the Arrow to select the Aggregate Device under Microphone and click anywhere on the screen to record the whole screen. Finally, click the Record button.

- Hit the Stop button in the menu bar to finish recording.

Record the Full Screen on a PC With an Online Tool: Wondershare DemoAir
Wondershare DemoAir is an online free screen recorder. It offers free online tools for taking webpage screenshots and recording videos, presentations, and audio. It also has a Chrome extension for capturing your screen, including the entire desktop and browser windows.
Here's how to create a full-screen recording with DemoAir:
- Visit the platform via Google Chrome and click the Online Video Recorder.

- Choose Recording mode > Click Start Recording.

- Switch to Entire Screen and then tap on Share.

- Click stop sharing to finish recording the full screen.

- DemoAir will instantly open the Save dialog box, and download the screen recording automatically in the WebM format.
Conclusion
Here we have discussed six different ways to record the full screen on the computer, whether for Windows or Mac, and give you step-by-step guidance. If you don't want to look far, we suggest you use Wondershare filmora because it has no screen time limits and works on both Windows and Mac.
