Saving game records on Windows 10 is essential for many gamers, streamers, and content creators. It’s a great way for those who want to share or study their skills to improve gameplay. Windows 10 provides built-in tools like the Xbox Game Bar for basic recording. However, there are more advanced options, such as Wondershare Filmora, for enhanced features and flexibility.
In this article
Here's a quick look at various Windows 10 game recording tools, with options suited for beginners and experienced creators.
| Tool | Ease of Use | Features | OS Compatibility |
| Wondershare Filmora | Easy | Advanced Editing, AI Tools | Windows, Mac, Mobile |
| Xbox Game Bar | Very Easy | Basic Recording | Windows |
Part 1. Getting To Know and Setting Up the Xbox Game Bar
The Xbox Game Bar is a native Windows 10 feature for recording gameplay. It can also take screenshots and track system performance—all without needing extra software. This versatile tool is ideal for those looking to record gameplay in seconds.
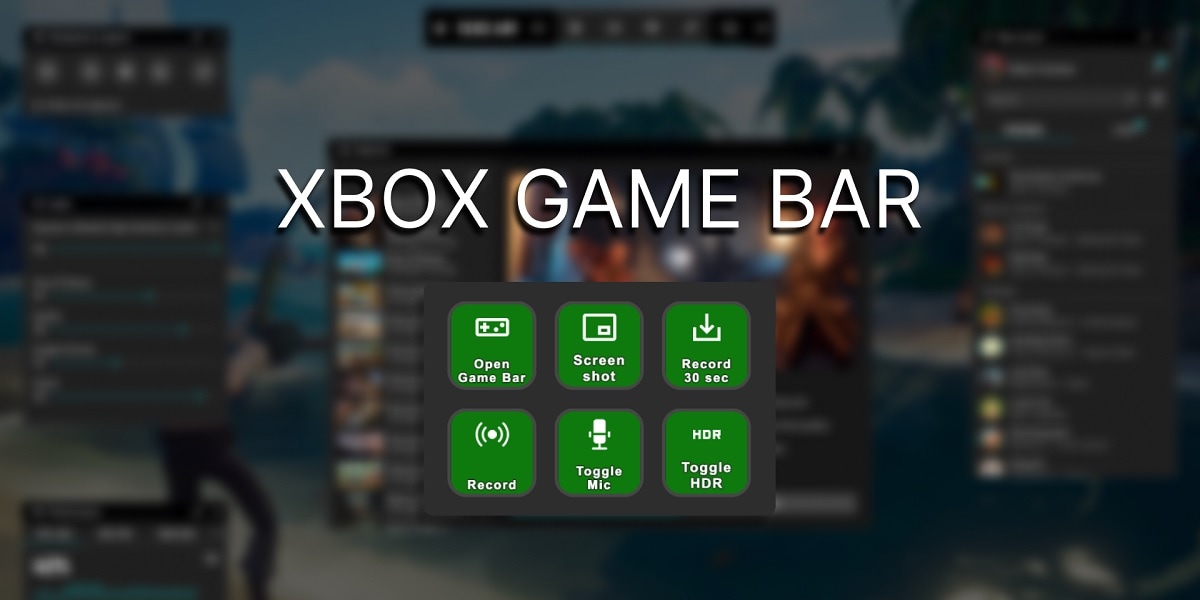
How To Enable and Set Up Xbox Game Bar
Here’s how to enable the Xbox Game Bar to prepare your gameplay recording on Windows 10:
Step 1: Go to Settings > Gaming > Xbox Game Bar. Toggle to enable the Xbox Game Bar.
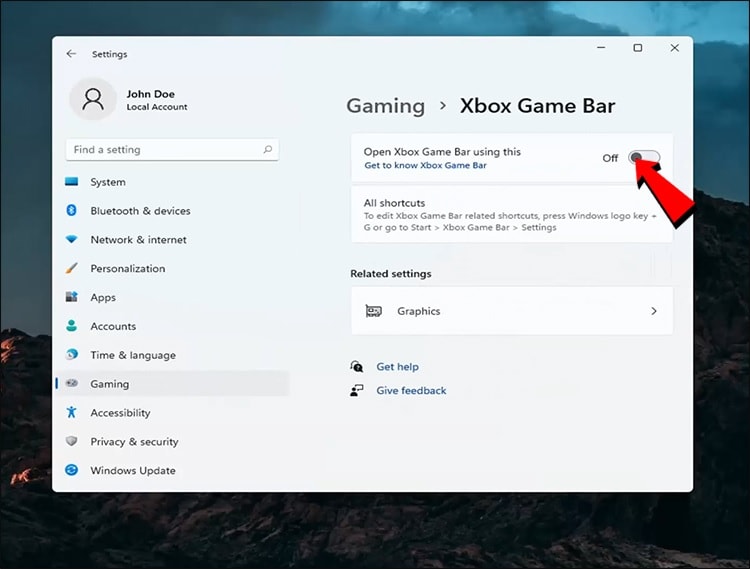
Step 2: Next, adjust shortcuts for quick access, allowing you to open the Game Bar with ease during gameplay.
Customizing the Game Bar gives you the flexibility to arrange widgets, set audio preferences, and manage shortcuts. By tailoring the layout, you can streamline your recording setup for an improved recording experience.
Part 2. How To Record Gameplay on Windows 10 With Xbox Game Bar
Xbox Game Bar offers Windows 10 users a convenient way to record gameplay directly from the system. It’s an excellent tool for gamers looking to record footage without installing extra software. Game Bar has two main recording methods—screen-only and audio-inclusive. Both are easy to set up and use, as detailed below:
Recording Screen Only
To record your screen without audio, follow these steps:
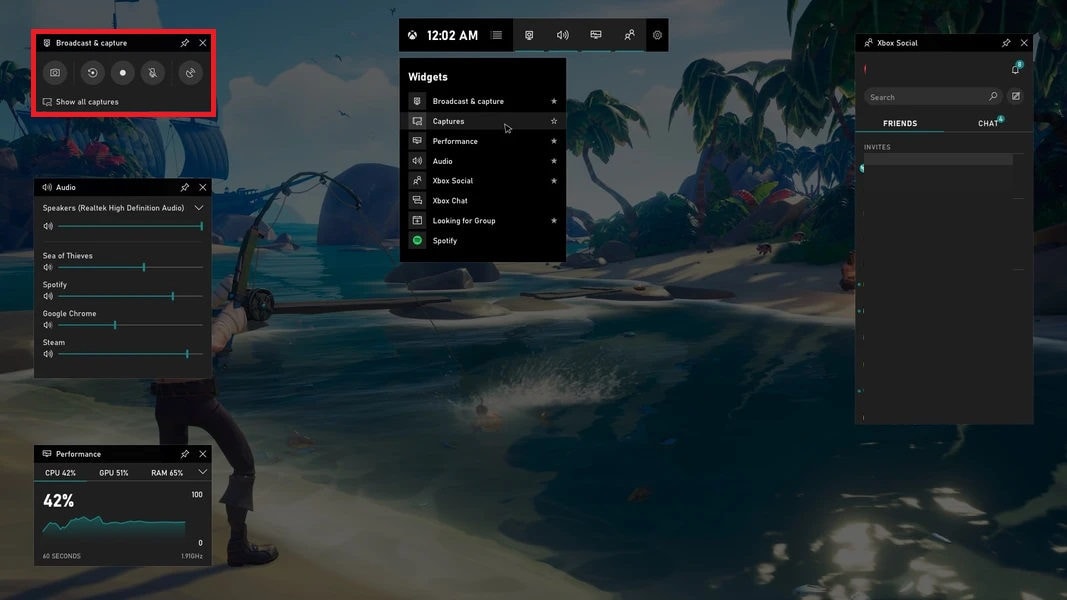
Step 1: Open the Xbox Game Bar by pressing Windows + G to launch the Game Bar overlay. Within the Game Bar, find the Broadcast & capture widget, where you’ll find recording options.
Step 2: Click the Record button (circle icon) to begin capturing your screen. The widget will display a timer, indicating the recording is active.
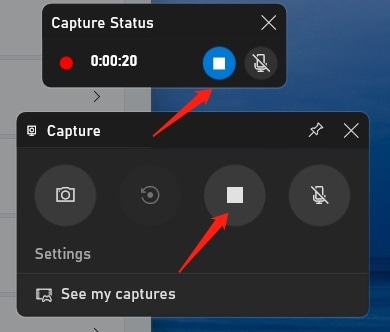
Step 3: Once you’re finished, click the Stop button in the Capture or Capture Status widget or use the keyboard shortcut (Windows + Alt + R) to stop recording.
Step 4: Your video will be saved automatically in the Captures folder, located in the Videos directory, ready for review or editing.
Recording With Audio
For gameplay recording with audio (game sounds and/or voiceover), the Xbox Game Bar provides simple but effective controls. Follow these steps:
Step 1: Launch the Xbox Game Bar and go to Settings > Widgets. Toggle the All option to record the game and system audio.
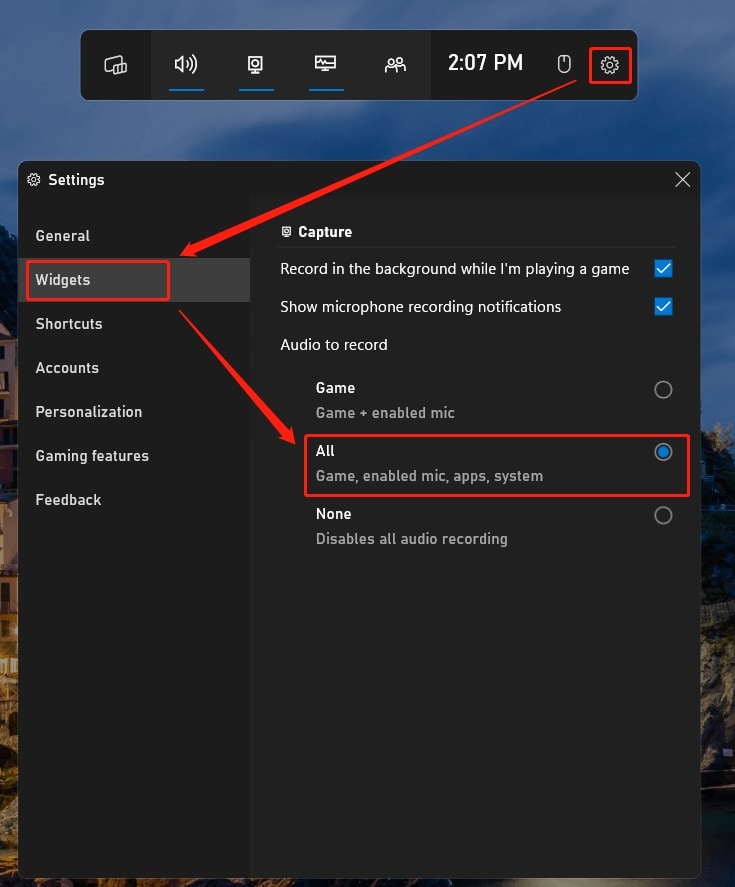
Step 2: To record commentary, connect a mic. The Xbox Game Bar automatically detects connected mics, allowing you to include voiceover alongside gameplay.
Step 3: Use the Audio widget within the Game Bar. Set the volume levels for system audio and microphone input.
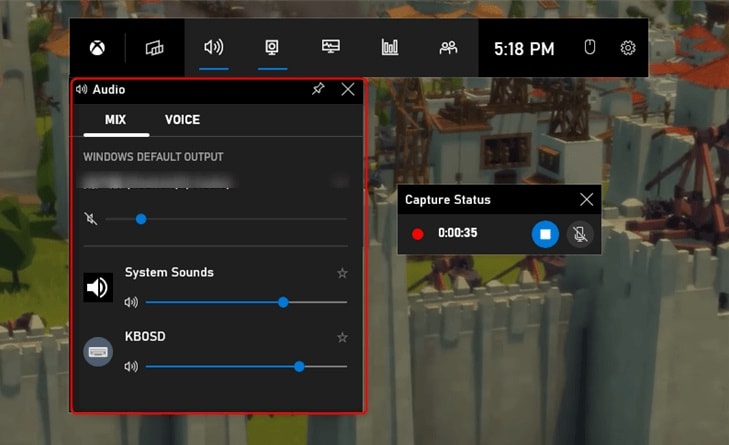
Step 4: When you’re done recording, click the Stop button on the Capture Status widget. The recording will be saved in the same Captures folder, allowing easy access and organization.
Xbox Game Bar is ideal for quick captures and simple editing. For gamers who want advanced control and features, a dedicated software tool like Wondershare Filmora is the way to go. It offers robust recording and editing options, making it easy to create polished, professional-grade gameplay videos. You’ll explore this in the next part!
Part 3. Using Filmora as a Dedicated Tool for Game Recording
While Xbox Game Bar works well for basic recording, many creators still prefer a dedicated tool. They offer more advanced features, better video quality, and smoother editing capabilities. Filmora is one such tool. It’s a comprehensive game recording and editing software designed for creators who want polished, professional content.
Why Use Filmora for Game Recording?
Filmora offers a suite of advanced features that make it a favorite among gamers and streamers looking for more than basic capture. Here’s what sets it apart:
- Powerful AI features
Filmora’s AI tools simplify the editing process. You can add effects, transitions, and smart edits with a click. Features like motion tracking and green screen integration give your videos a high-quality look with low effort.
Access over 10,000 preset templates and 10 million creative assets for customization. From overlays to animations, Filmora’s library has everything you need to enhance your gameplay videos.
- Advanced editing options
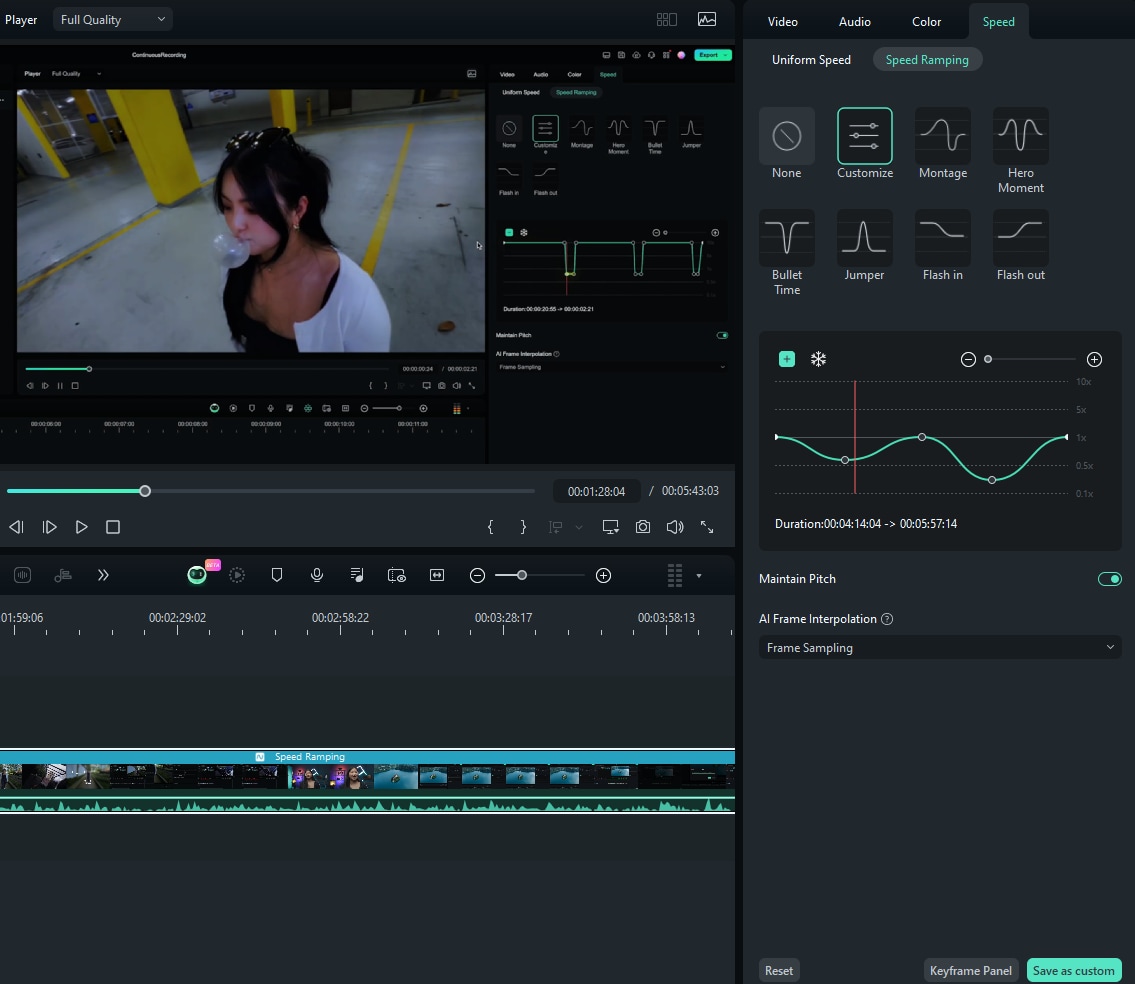
Filmora includes tools like keyframe animations, split screens, speed ramping, and motion tracking. These features let you go beyond basic trimming. They offer full control over how your gameplay footage looks and flows.
- Professional audio tools
Audio is key to a great viewing experience, and Filmora doesn’t disappoint. It includes options for auto enhancements, audio visualization, and synchronization. You can even remix audio for your videos, creating custom soundtracks or commentary tracks with ease.
How To Record Gameplay With Filmora
Getting started with Filmora is easy, even if you’re new to video editing. Follow these steps to record and edit gameplay like a pro:
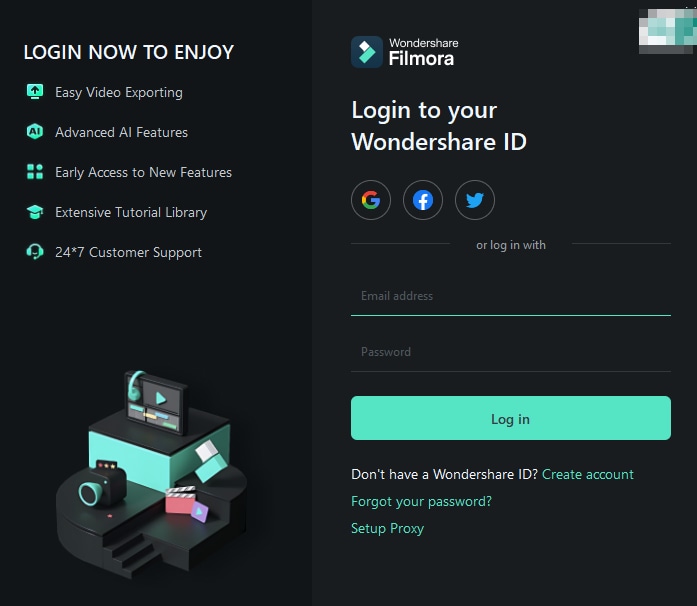
Step 1: Download and install Filmora to your computer. Open the software and log in or register a Wondershare account to get access to the full suite of tools.
Step 2: In the main menu, go to File > Record Media > Record PC Screen. This brings up the recording options where you can set preferences like resolution and audio input.
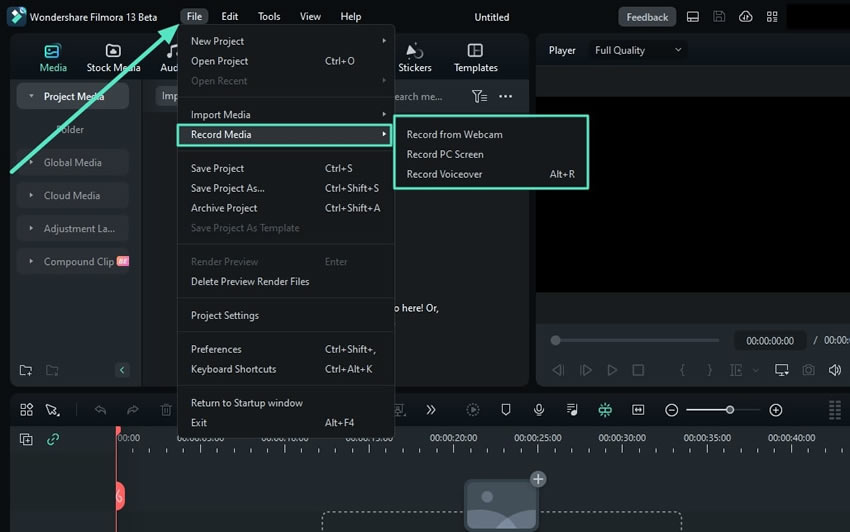
Step 3: Customize the screen area to record either full-screen or specific portions of your display. Choose your audio sources for in-game sounds, system audio, and microphone input to capture commentary.
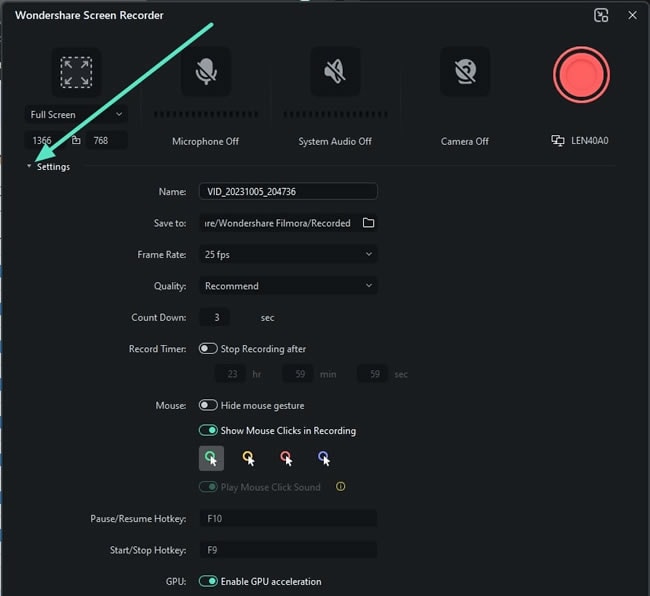
Step 4: Once everything is set up, click the red Record button to start your gameplay recording. You can pause and stop your recording at any time by clicking the same button.

Step 5: After recording, your footage will open in Filmora’s editor. For example, features like speed ramping can be used to emphasize key moments or split screens for a unique viewing experience.
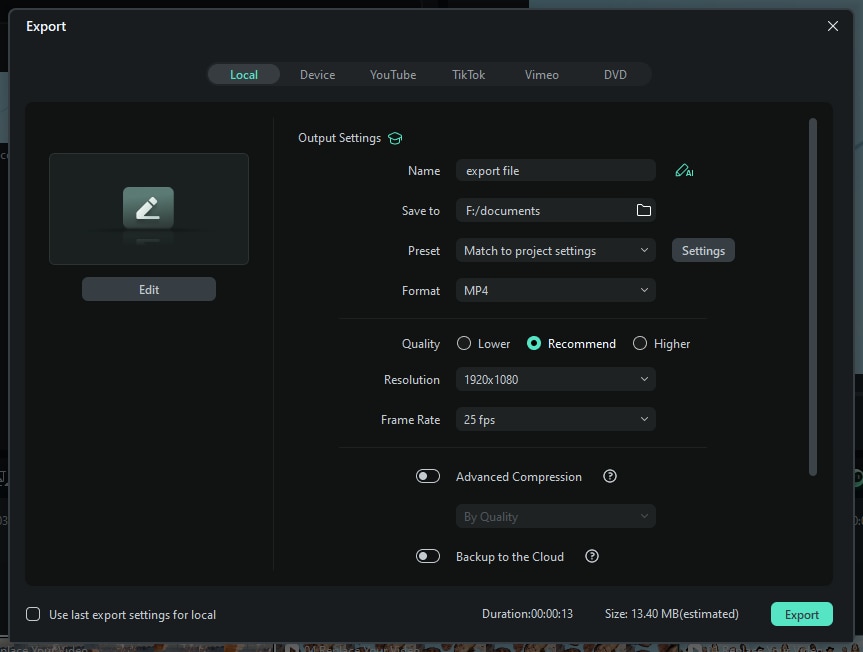
Step 6: Once you’re happy with the final product, export your video in the format of your choice. Filmora supports direct sharing to social platforms, or you can save the video locally for future use.
Why Filmora Is Ideal for Gamers
Filmora’s robust feature set makes it a perfect choice for gamers who want a simple yet powerful tool for game recording and editing. With its intuitive interface and extensive asset library, you can create standout content quickly. For those looking to expand beyond basic recordings, Filmora offers flexibility and creative options that help you craft professional-quality gameplay videos with ease.
Part 4. Tips for Recording Gameplay Without Lag on Windows 10
Ensuring a smooth, lag-free game recording experience on Windows 10 involves optimizing several system settings. Here’s a breakdown of top tips to help keep your recordings clear and uninterrupted:
- Optimize game settings
Adjust in-game graphics to medium or low quality if needed. You can also lower the settings of shadows, textures, and anti-aliasing. It can improve your performance without affecting gameplay enjoyment.
- Close background applications
End unneeded background programs (e.g., web browsers, chat apps, or resource-heavy apps) to free up CPU and RAM. This will maximize system resources for smoother recording.
- Check storage availability
Gameplay videos can be large, so ensure your primary drive has enough space before recording. Low storage can cause lag and might even stop recording mid-game.
- Test recording settings
Use lower resolutions or frame rates if lag is noticeable. For example, try switching from 60 FPS to 30 FPS. This will lower system demand while still providing high-quality visuals.
- Monitor system performance
Keep an eye on CPU, GPU, and memory usage. Windows 10’s Task Manager or Xbox Game Bar’s performance widget can help track this. If usage peaks, adjust settings to avoid lag spikes.
Following these steps helps ensure smooth gameplay capture, letting you record high-quality videos effortlessly.
Conclusion
Saving game records on Windows 10 is easier than ever with tools like Xbox Game Bar for basic recording needs. You can also record on Windows 11 and earlier with Filmora for those seeking professional-grade results. Filmora’s editing features and recording flexibility offer you the chance to polish your footage for a truly immersive experience.
Ready to record like a pro? Try Filmora’s Windows gaming recorder options to boost your content quality. Experiment and add creative touches that bring your gameplay to life.


