

 ChatGPT
 Perplexity
 Gemini
 Claude
 Grok
Grok
Zoom meetings have become common due to the adoption of remote working and learning. Whether you are a student, manager, or trainer, you may want to record a Zoom meeting for future reference, revisit it later when you have time, or create a compilation for your channel or personal use. If you are curious about if you can record a Zoom meeting and how to record it, you've come to the right place! Let's dive in.
In this article
Can You Record a Zoom Meeting?
Yes, it is possible to record a Zoom meeting whether you are a participant or a host. Whether you want to record it on a PC, or on mobile, you can record a Zoom meeting. Here are some of the practical ways.
| Methods | Effectiveness |
| Record a Zoom meeting as a host | Effective |
| Record a Zoom meeting as a participant | Effective |
| Record a Zoom meeting without permission | Very effective |
| Record a Zoom meeting on Android | Not very effective |
| Record a Zoom meeting on iPhone | Not very effective |
How to Record a Zoom Meeting Using Its Built-in Features?
Zoom provides built-in features to allow hosts and participants with permission to record Zoom meetings. Here are the steps on how to record a Zoom meeting using built-in features under these different scenarios:
Scenario 1: Record a Zoom Meeting As a Host
Step 1. First, Open the Zoom desktop app and log in to your account. On the main window, navigate to the "Home" tab and click the "Settings" icon on the top-right just below your profile avatar.

Step 2. Navigate to the "Recording" tab to access Zoom recording settings. Here, choose your desired recording destination folder and other relevant options that you prefer.

Step 3. Now, proceed and set up your Zoom meeting. When the meeting starts and you are ready to record, go to More > click the "Record" tab on the control bar at the bottom of your PC screen.

Step 4. Click the stop button to finish recording Zoom meetings.

Step 5. It will save the results automatically to your destination folder.
Scenario 2: Record a Zoom Meeting As a Participant
To record a Zoom meeting as a participant using built-in features, you must be granted recording permission from the host. To obtain the recording permission, here are the simple steps:
- Ask the host for recording permission.
- The host can click on Participants > Scroll to your name > More > Allow record. Alternatively, he can also simply allow all participants to record with a simple click.

- After being granted, you can now follow the steps like the previous method to record a Zoom meeting.
Hot Topics

How to Record a Zoom Meeting Without Permission?
If you are a participant and don't have recording permission from the host, you can still record the Zoom meeting using a suitable third-party app like Wondershare Filmora.
It lets you record any area or screen size of your Zoom meeting in high quality, and adjust the frame rate and quality of your Zoom recording directly from this program to meet your needs. If you will be busy as the Zoom meeting is running, you can schedule the start and stop time so that the recording starts and stops automatically.
Additionally, you can save time in taking meeting notes and use Filmora's powerful speech-to-text feature to generate them with a simple click. With more than 30+ AI-powered features, it also supports removing background noise and enhancing voice clarification to make your speaking clearer and crisp.
How to Record Zoom Using Wondershare Filmora?
- First, download and install Wondershare Filmora on your PC.


- Once installed, launch it to access the startup window. Now click the "Screen Recorder" tab.
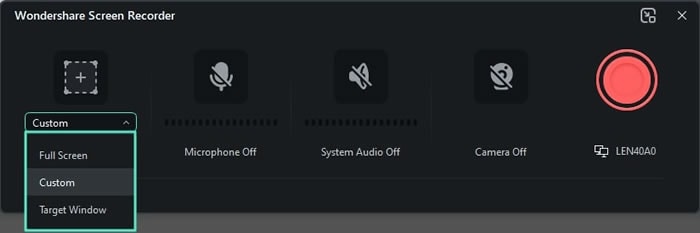
- In the next screen, select your desired recording options. Here, choose the size of screen you want to record including full screen, custom area, or target window. If you want to record Zoom audio, enable the "System Audio" option. We suggest you choose the target window here.
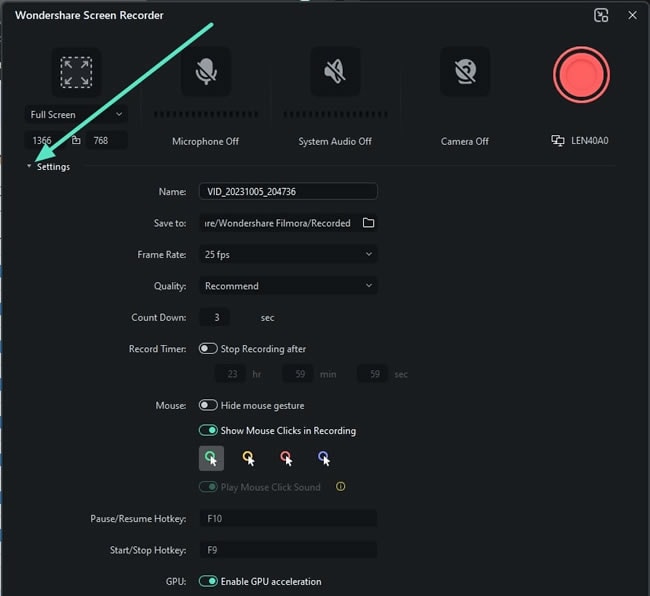
- Now, expand the "Settings" and choose the desired output settings. Here, you can set your preferred frame rate, quality, and output folder. Additionally, you can alter the countdown time and enable mouse clicks in your recording.
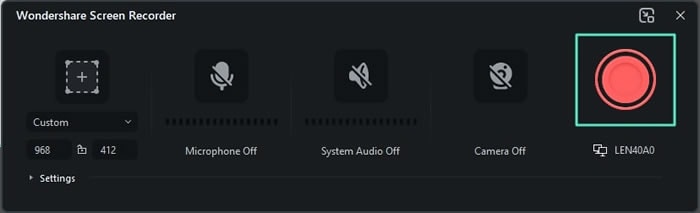
- Once satisfied with your selections, proceed to open the Zoom app and join the meeting you want to record. When you are ready to record, click the "Record" button.
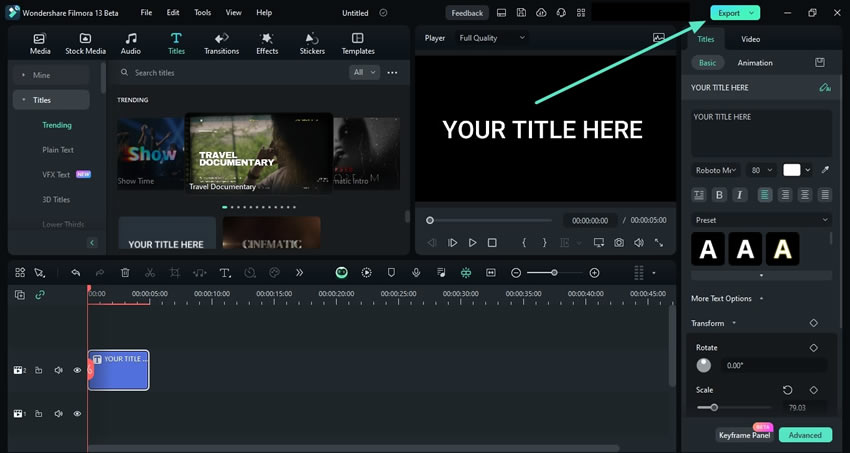
- Once you are done recording your Zoom meeting, click the "Stop" button or press F9 to save your file in the timeline. You can now edit the recording to meet your needs. Finally, click the "Export" button and choose suitable output options.
How to Record Zoom on Mobile?
If you are participating in or hosting a Zoom meeting using your mobile device, you still can record the meeting with ease. The following steps show how to record a Zoom meeting on mobile as a host or a participant with permission.
Record a Zoom Meeting on an Android
Step 1. To begin with, open Zoom on your Android and log in to your account. If you are the host, start the session and if you are a participant, join the meeting.
Step 2. When the meeting starts and you want to begin recording, just tap the "More" tab followed by the "Record" button.

Step 3. You should now see a "Recording" message on the screen. To pause or stop the recording, hit the "More" tab and choose the "Pause" or "Stop" icon depending on your need.

Record a Zoom Meeting on an iPhone
Step 1. On your iPhone, open Zoom and start the session. Now, tap the "More" tab to proceed.

Step 2. Next, choose the "Record to the Cloud" option. You should see a "Recording" message on your screen, indicating that the recording has started.

Step 3. When the meeting ends, go to your Zoom Web Portal and then the "Recordings" section to find your Zoom meeting recording.

Conclusion
We've discussed how to record a Zoom meeting on different devices, you can record it as a host or a participant. However, if you don't want to spend time writing meeting minutes, you can look for a powerful screen recorder and video editor like Wondershare Filmora to help you convert speeches into texts.
FAQs
-
How long can I record on Zoom?
If you are using Zoom cloud recording, there is no limit to the duration of your Zoom recording because the recordings are uploaded to the huge cloud space. On the other hand, if you are using the free Zoom account, you will be limited to a maximum of 40-minute recording. -
Why is there no record button on Zoom as a host?
There is a Zoom record button for host, co-host, and participants with record permission from the host. You can find it under More > Record. -
Can you record a Zoom meeting if you are not the host?
Yes. You can record a Zoom meeting if you are not a host only if you have recording permission from the host. If you want to secretly record a Zoom meeting, you can use a suitable third-party tool like Wondershare Filmora to effortlessly record your Zoom meeting without limitations. -
Can Zoom detect screen recording?
Yes. Whenever you record a Zoom meeting, Zoom detects and notifies members that the meeting is being recorded. It can even show which participant is recording the meeting.
