The number of online meetings, seminars, and networking events for translators and interpreters has increased dramatically in the last year. The OBS Studio is one of them. A streaming program called OBS Studio aids users in planning and arranging their material. To create enlightening and captivating visual sceneries, you may combine several sources. You've undoubtedly acquired a reliable webcam by this point and learned how to adjust your lighting and frame to appear decent on video. You could have even splashed out on a green screen to make your online meetings' backgrounds seem more branded and professional. Without OBS, you may utilize your webcam directly with Zoom, but the picture quality will be poor. This is due to Zoom's lack of access to your webcam's exposure and white balance settings. Additionally, you cannot apply any filters, such as LUTs. This tutorial will show you how to use the OBS Virtual Camera to install OBS as a camera in Zoom.
A video source option called "OBS Virtual Camera" may be found in the settings of video conferencing applications like Zoom, Teams, and Google Meet. You may also be curious about it and how to use the virtual camera. With Zoom, OBS is now easy to set up. Every single scene, overlay, and widget you have access to may be used as a video source for the well-liked conference meetings program. Your ability to utilize OBS Studio with Zoom will help you make your meetings more professional. You may utilize an external media resource, such as a video file, screenshot, app, game, etc., as the camera output for Zoom, Teams, Meet, or other video calls by using the OBS virtual camera. Instead of your face from the camera, your conference partner will see the video source you just selected. We'll walk you through setting up OBS Studio as a virtual camera in this post so that you may utilize any of your OBS collections in Zoom rather than your webcam. Find out more here:
In this article
- Part 1: Add OBS as Webcam in Zoom with OBS-Virtual Cam Plugin
- Part 2: Add OBS as Webcam in Zoom without Plugin
- Part 3. Extra Tips: How to Use OBS Virtual Camera on Windows/Mac
Part 1: Add OBS as Webcam in Zoom with OBS-Virtual Cam Plugin
Fortunately, software has improved steadily while camera hardware has remained stagnant. OBS Studio is a tool you may have forgotten about. OBS Studio, which is more often used as a tool for streamers, comes with a "Virtual Camera" feature built in on Windows and Mac. By using the OBS virtual camera, your computer may offer the video output from OBS as a webcam in other applications like Zoom, Skype, Discord, or Google Hangouts. This exports everything you've configured in OBS Studio to your system and treats it as a camera. Therefore, you have plenty of room for creativity. Let's go through the steps now:
Steps to Add OBS as Webcam in Zoom:
Step1Installing and configuring OBS Studio is the first step. It may be downloaded from the official website, installed, and the Auto-Configuration Wizard can configure your device's ideal settings.
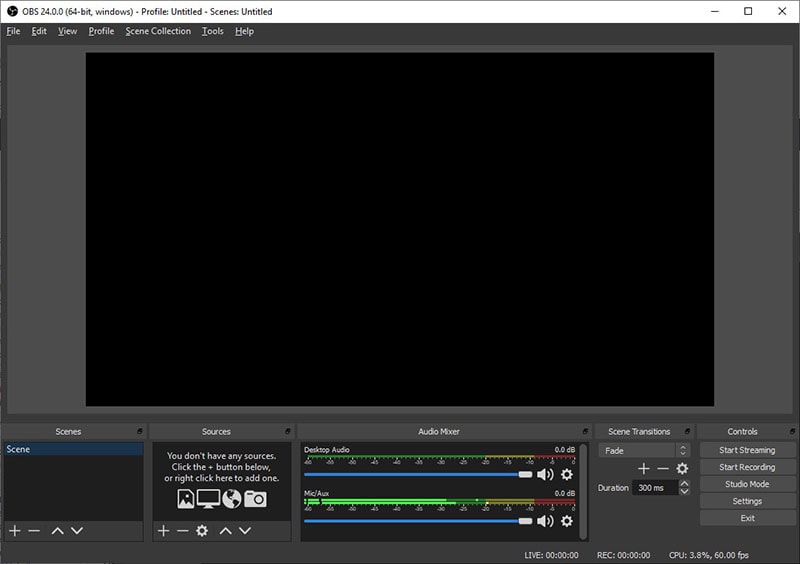
Step2Set up the scenes and sources that you wish to appear in the output preview after that.
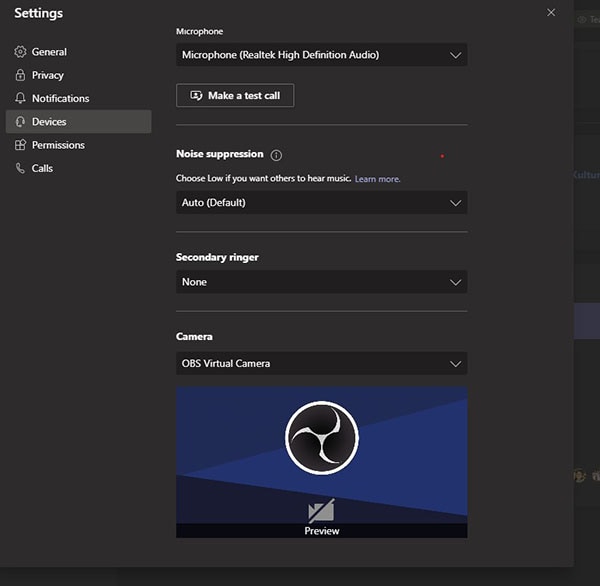
Step3You may now begin by clicking the Start Virtual Camera button in the bottom right corner. This will enable another software on your computer to utilize OBS as a video source. Finally, under the video settings of your other program, just choose OBS as a webcam.
Part 2: Add OBS as Webcam in Zoom without Plugin
You may utilize OBS's virtual camera capability to power Zoom by connecting OBS to Zoom using video. As a result, OBS can handle a wide variety of fantastic video streams from your camera source in Zoom. This may be used for lower thirds, overlays, blending different sources, showing countdown clocks, and much more. Therefore, starting with video is the simplest method to begin going. Using the "Virtual Camera" option in OBS, you may input your webcam and output to Zoom. By default, this button is located in the right-hand corner, just below start streaming and recording. The next step is to choose "OBS Camera" in Zoom as your webcam. Now, Zoom will display everything that is shown on the output screen on OBS.
Steps to Connect OBS to Zoom:
Step1Set up OBS Studio:
Launch OBS Studio in Step 1 and, depending on your operating system, choose and download the appropriate plugin.
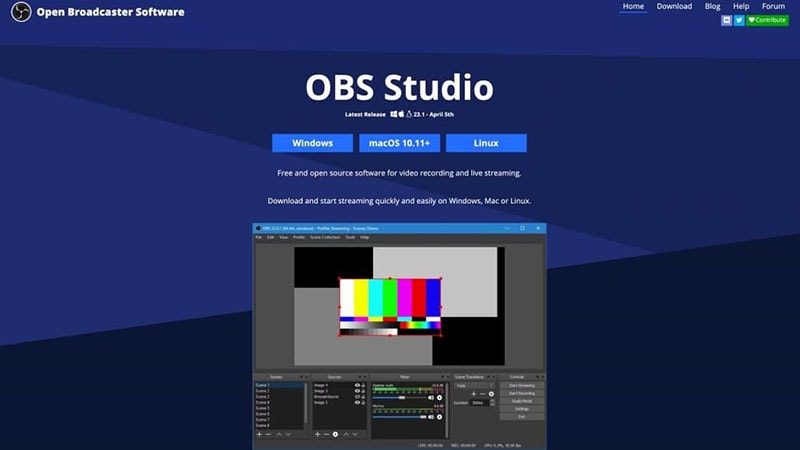
Select the Tools menu. To reproduce OBS output as a virtual camera, locate the plugin you downloaded, click on it, and then follow the on-screen instructions.
Step2Set the Zoom:
- 1. Start a meeting in Zoom, then choose a video source. Your OBS plugin's newly added option will appear. After selecting it, choose Start Video from the menu.
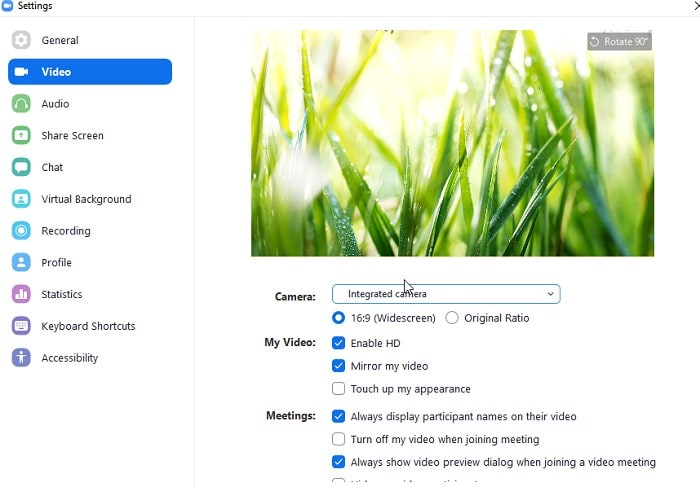
- 2. The virtual camera output from OBS Studio will now be accepted as input by the Zoom's video.
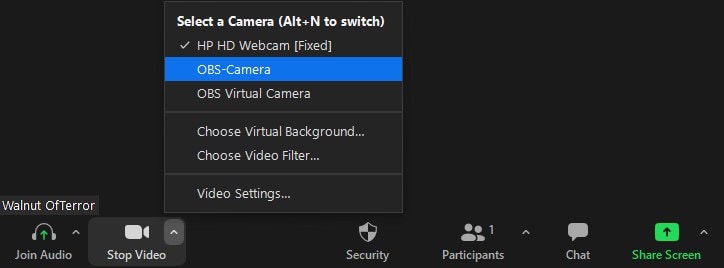
- 3.The majority of you will be using a mobile device, and the screens on mobile devices have a different aspect ratio than those on PCs. On OBS, choose the Profile menu at the top, then select New Profile. Give the profile whatever name you want.
🤩 Post You Might Be Interested In:
How to Add an OBS Webcam Source to Zoom:
To add OBS as a camera source in Zoom, follow these steps:
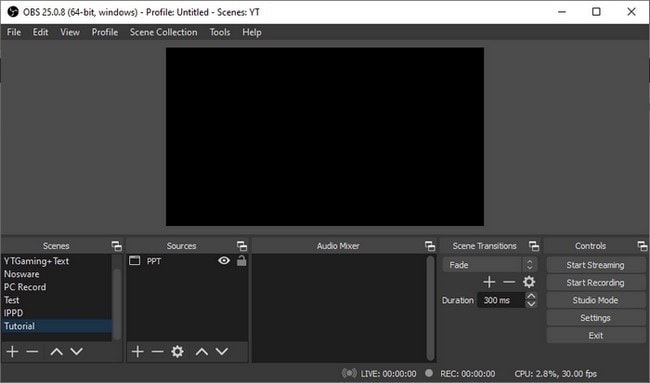
Step1Update OBS Studio to the most recent version and launch the app. Now, in the bottom right, choose Start Virtual Camera.
Step2Select OBS Virtual Camera under Zoom's Settings > Video > Camera menu.

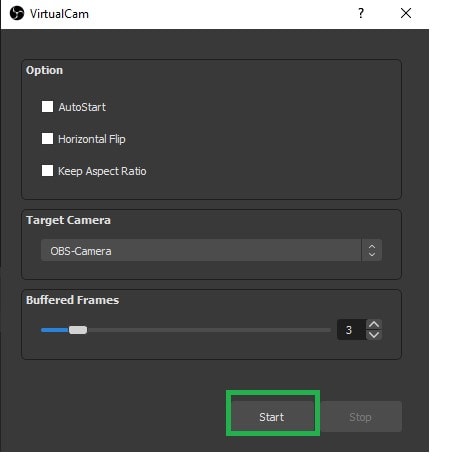
Step3In OBS, manually adjust the camera settings if desired and press Start as shown here:
Part 3. Extra Tips: How to Use OBS Virtual Camera on Windows/Mac
OBS offers you a wide range of production possibilities, such as picture in picture, chroma key (green screen), etc., therefore you may choose to utilize it as a webcam source. This is excellent if you need to do business presentations or if you simply want to amuse your coworkers with a bizarre green screen backdrop. Depending on your operating system, there will be a range in the installation's difficulty. Congratulations, the installation is quite easy if you're using Windows. If you're using MacOS, you'll need to run many apps at once.
On PC:
On a PC, you may wish to use an OBS camera with video conferencing software to create a picture-in-picture effect. It is effective to use OBS as a virtual webcam since it enables the addition of video effects and filters. Additionally, OBS enables webcam optimization, including exposure, zoom, and focus. Overall, it may improve your films' overall quality.
The instructions for attaching the OBS webcam are listed below:
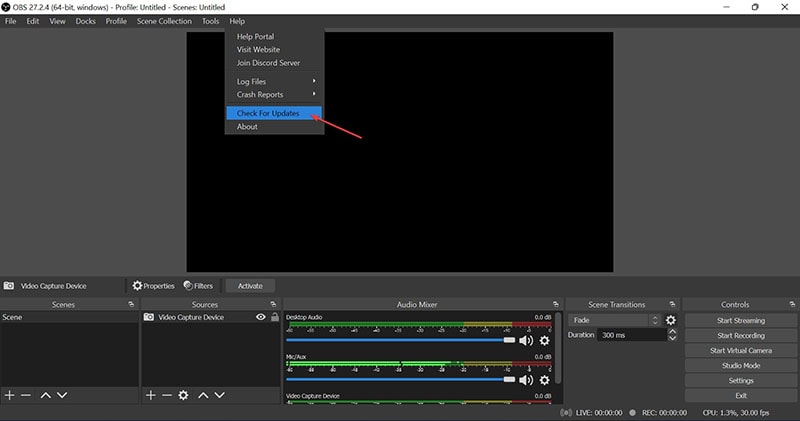
Step1First and foremost, you must upgrade OBS to the most recent version. Click "Help" and then "Check for Updates."
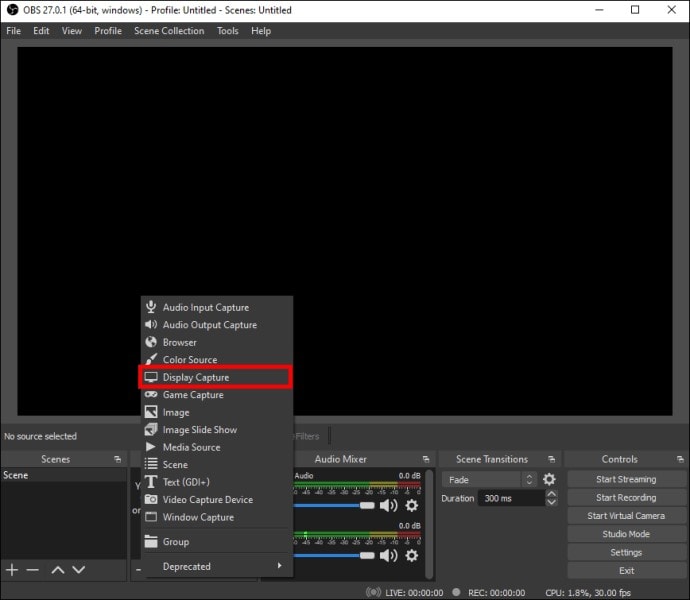
Step2Click the "+" icon in the Sources dock after launching OBS. Select "Display Capture," "Create New," and then "OK." In other video conference software, you may utilize this screen to create a picture-in-picture effect.
Step3Locate the buttons on the bottom side to launch the virtual camera. Click "Start Virtual Camera" after that.
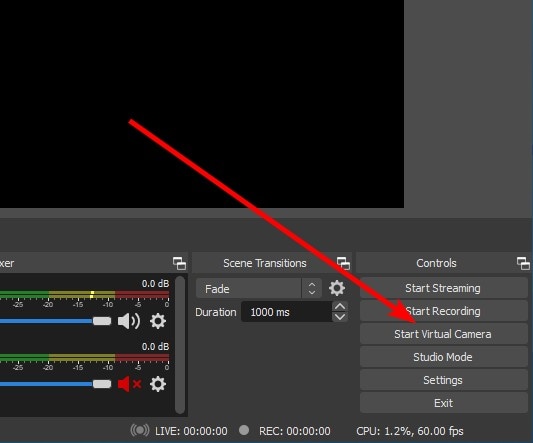
Previously, you had to download a plugin to access this feature; now, you can activate it right from the home screen.
On Mac:
Step1Launch OBS and the tools will now have a Start Virtual Camera button. We're prepared to go.
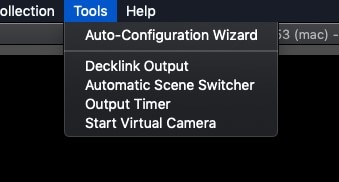
Step2Start the virtual camera by doing so beforehand.

Step3Before you may open the desired application, Virtual Camera must be launched. If not, the virtual camera can fail to identify you as a camera device. Lastly, press Stop Virtual Camera at the same location to leave.
Conclusion
In the present era, where more and more people work from home, we are seeing more and more inquiries about how to utilize OBS as a virtual camera for video conferencing tools like Zoom, Microsoft Teams, Skype, and Google Meet. This is the simplest method to link Zoom with OBS. Additionally, you now fully understand how to combine audio and video using Zoom and Open Broadcaster Software. You may use Zoom for more video and audio functions by virtually connecting a microphone and speaker from OBS and Zoom. Once you've got everything set up, changing your settings shouldn't take much work.

