Are you looking for the best way to record your screen on a Windows device? Well, the best way is to find a good screen recorder for Windows 10 or 11! Yes, whether it's for professional, educational, or personal purposes, a good screen recorder can make it easier to record. Here is a comprehensive guide on some of the best ways to capture video on screen Windows 10 and 11.
In this article
Method 1: Screen Record on Windows 10 and 11 Using Wondershare Filmora
Wondershare Filmora is one of the best screen recorders for Windows 10 and 11, and you can use to capture video on your screen. It can record any area of your PC screen and webcam with ease and maintain high-quality output.
In addition to capturing video screens on Windows, you can also use it to capture both microphone sound and system audio. For those who want to schedule a screen recording time and its ending time, you can also use wondershare filmora to record your screen automatically at your convenience time. These parameters are customizable, hence streamlining your recording process.
What's more, as a powerful video editing software, it also gives you a plethora of editing features that may surpass other screen recorders for Windows 10. You can thus edit and export your recorded video in high quality directly to your device or share it on social media platforms like YouTube.
How to Record Screen on Windows 10 and 11 Using Wondershare Filmora?
By using Wondershare Filmora, screen recording on Windows has never been so much easier. It can also be used to record screens on a Mac. Here is how to record using Wondershare Filmora.
- First, you need to download and install the Wondershare Filmora Windows pc screen recorder on your computer.
- Next, launch the app and select the "Screen Recorder" tab on the startup window.

- In the next screen, hit the "Custom" arrow and choose either the full screen, custom, or target window option. You can also select whether you want to record while your microphone, system audio, and camera are on or off.

- If you want to adjust recording settings to meet your needs, just click the "Settings" tab and make the necessary selections. Once satisfied, hit the recorder button to trigger the process.

- When the recording is complete, select the recorded video and edit (optional) using plenty of editing features and effects in the media library. Finally, click "Export" and choose suitable output options, including format, destination, and resolution among others.

Pros and Cons
Method 2: Screen Record on Windows 10/11 Using Xbox Game Bar
Xbox Game Bar is a built-in screen video recorder for Windows 10 and 11 that allows users to take screenshots and videos when playing games or chatting in the background with friends.
You can record a section of the screen or full screen and edit the clip. If you want to use most of the Xbox features in Xbox Game Bar, you need to download and sign in to the Xbox app for Windows. However, you can only record one window at a time.
Before setting a screen recording on Windows 10 or 11, you should make sure the target window is active in the background before opening the Xbox Game Bar. You can also enable an external microphone to include voiceovers or add commentary to your recording.
How to Record Screen on Windows 10/11 using Xbox Game Bar?
Here is how to screen record using the Xbox Game Bar screen video recorder Windows 10/11.
Step 1. Open the application window you want to record. Consider pausing all the audio currently playing on other application windows. Once satisfied, press the combination of Windows key + G to launch the Xbox Game Bar on your Windows 10 or 11.
Step 2. Now, select your preferred recording modes. You can enable the external microphone and adjust the system audio volume and other parameters to meet your needs.
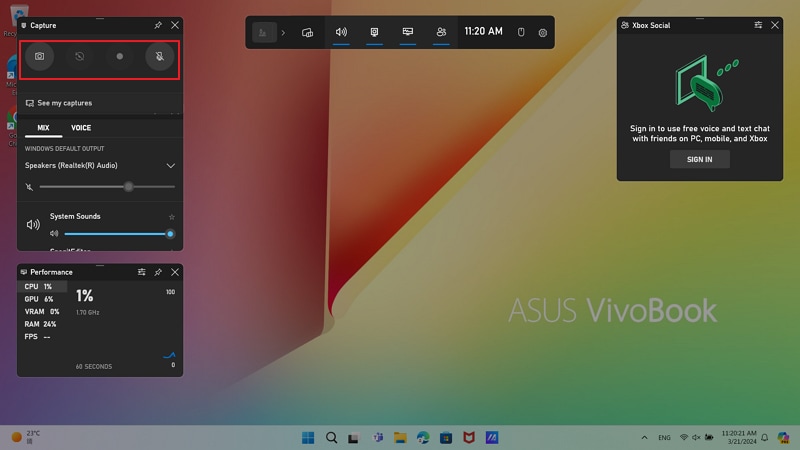
Step 3. Next, click the "Record" button to trigger the screen recording process. You should see a small pop-up bar with some recording controls at the top-right corner. You can either mute or enable the external microphone, depending on your needs.
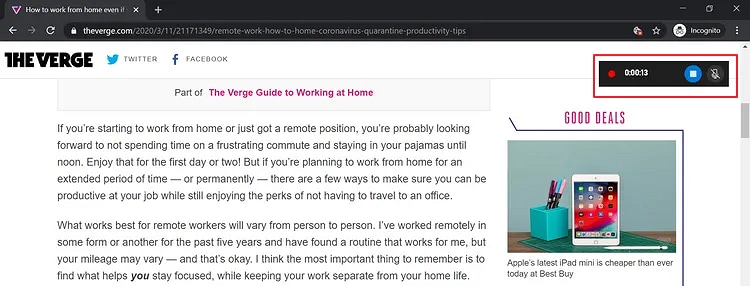
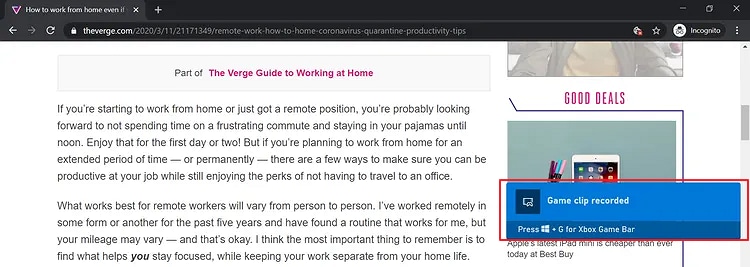
Step 4. Finally, click the "Stop Recording" button to finish the recording. You should see a pop-up notification displaying "Game clip recorded." Click on this option to access the "Captures" folder in the file explorer window.
Pros and Cons
Method 3: Screen Record on Windows 11/10 Using Apowersoft Online screen recorder
Apowersoft Online screen recorder is an easy-to-use free online screen recorder that is worth using on Windows 10 and 11. You record the screen's desktop activity, browser window, and webcam at the same time.
This online free screen recorder for Windows offers several recording modes for various user needs, including picture-in-picture mode and screen and sound modes. Once you have recorded your video, you can save it on your local disk, cloud, or social media or share it directly with others. You can also download the desktop version for your Windows 10 and 11 computer and get started.
How to screen record on Windows 10 and 11 using Apowersoft Online screen recorder
Step 1. On your Windows 10/11, open a suitable browser and visit Apowersoft Online screen recorder.
Step 2. Hit the "Start Recording" button and then "Screen" in the subsequent options.
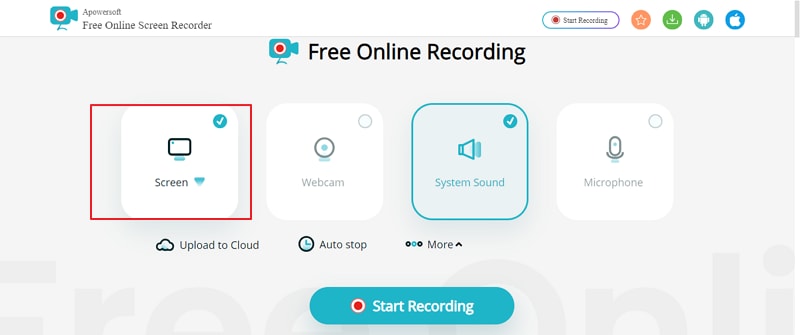
Step 3. Again, click the "Start Recording" button. On the next screen, choose to record either the current window, the entire screen, or the tab.
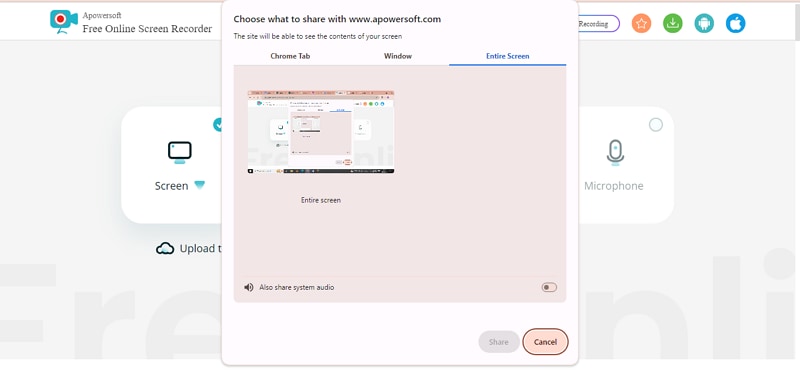
Step 4. Click "Share" to start recording. Once you are done, stop the recording and save the recorded video on your local disk or upload it to the cloud, depending on your preferences.
Pros and Cons
Learn our detailed review of the Apowersoft screen recorder.
Method 4: Screen Record on Windows 10 and 11 Using a Browser Extension
DiReec All-in-One Screen Recorder for Chrome is an awesome screenshot and screen recorder extension for Chrome that is worth trying. This screen recorder for Windows 10 lets you capture screen activities, system audio, microphone sounds, and facial expressions. It is a perfect tool for content creation, webcam recording, gamers, professionals, and voice recording needs, among others.
How to Record Screen on Windows 10 and 11 Using Direec?
The following steps illustrate how to screen record on your Windows 10 and 11 using DiReec All-in-One Screen Recorder for Chrome extension.
Step 1. Download and add DiReec All-in-One Screen Recorder for Chrome extension to your Chrome browser. Now, open the extension on your Chrome browser.
Step 2. Next, select "Screen" mode and click the "Start Recording" button.
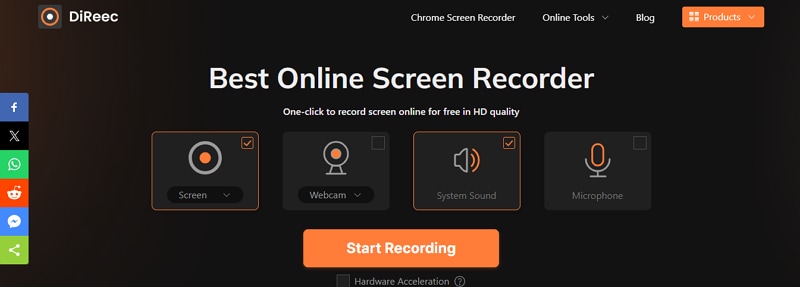
Step 3. Now, select whether you want to record the Chrome tab, window, or entire screen then click "Share".
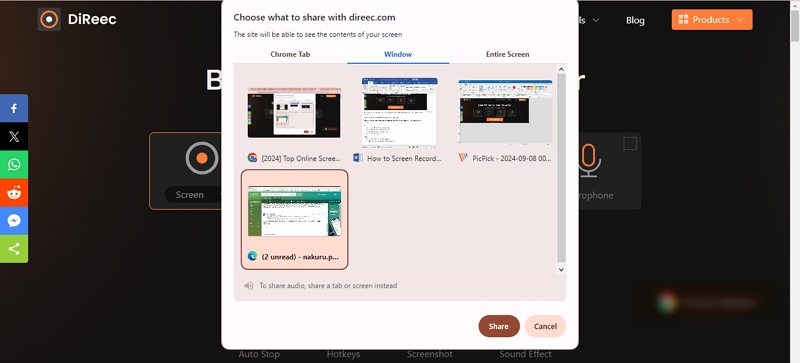
Step 4. When you are done recording, hit the "Stop Sharing" icon.
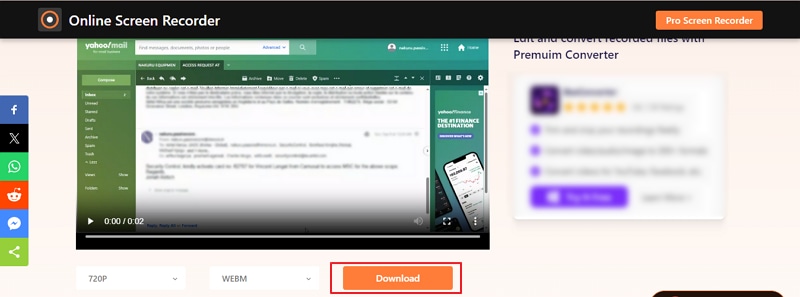
Step 5. Finally, click the "Download" button to fetch your newly recorded screen video on your computer.
Pros and Cons
Conclusion
In conclusion, we've discussed 4 different ways to capture video of screen Windows 10 and 11. Well, Wondershare Filmora is one of the windows pc screen recorders you can go for if you're looking for a tool with features like high-quality video capture, audio recording, easy editing options, the ability to save in various formats, and more!
FAQs
-
1. Does Windows 10 have a built-in screen recorder?
Yes, Windows 10 comes with a built-in screen recorder called Xbox Game Bar. To access this built-in screen recorder, just press the Windows key + G on your keyboard. However, its features are limited compared to dedicated screen recorders that have advanced video editing features. But, you can use it for those quick and basic Windows 10 screen recording needs. -
2. How do you record full screen on Windows 10?
To record the full screen on Windows 10, you can download Wondershare Filmora. Then follow these steps:- Launch Wondershare Filmora and click New Project.
- Click record and make basic settings. You can choose to record the full screen, target window, or customize the screen window.
- Click the red button to start recording the full screen on Windows 10.
- Press F9 to finish it.


