


 100% Security Verified | No Subscription Required | No Malware

In today’s digital world, a reliable screen recording tool is essential to work and daily life. Whether you need to create a tutorial, capture an error message for troubleshooting, or save a memorable moment, the ability to record your screen can be invaluable. Screen recordings serve many purposes, from enhancing communication and collaboration to archiving important information and creating content.
If you’re a Mac user, you’ll be delighted that macOS has a built-in screen-capturing utility that allows you to record your entire screen or specific portions of it effortlessly. In this article, you’ll be guided through performing the whole screen captures on your Mac, making it easy to harness this handy tool’s power.
In this article
Part I. Advanced Screen Capturing Method: Wondershare Filmora
While the built-in screen recording tools on macOS can be convenient for primary screen captures, they may fall short regarding advanced features and high-quality recording. If you’re looking for a more robust and versatile solution for full-screen recording on your Mac, Wondershare Filmora is an excellent third-party tool to consider.
Wondershare Filmora is a staple video editing application with many use cases and applications. Yes, you can perform whole screen captures on Mac or create recordings. With its built-in editing features, everything you need is accessible in one app, too. You can create GIFs, short videos, or long movies with your screen recordings all through Filmora.
Before diving into the specifics of full-screen captures on Mac, it’s worth exploring what makes Filmora an outstanding choice. Here are some of its key features:
- Specific zone capturing. Filmora lets you specifically capture any area of the PC screen or webcam.
- Flexible audio input devices. The tool seamlessly integrates with available microphones on your device. Be it your built-in microphone, webcam, or external mic, Filmora has you covered.
- Built-in editor. Since Filmora is primarily a video editing tool, you can take advantage of this after screen recording your Mac. Go straight into creator mode and edit your videos with amazing tools and effects.
- Instant sharing options. Easily share your screen recordings with colleagues, clients, or a wider audience through free cloud storage and integration with popular social media apps like TikTok and Vimeo.
- Cross-platform compatibility. Use Filmora seamlessly across macOS and Windows. It’s a versatile choice for your screen recording needs.
By starting your screen recording journey with a tool like Wondershare Filmora, you’ll have access to an array of advanced features from the outset, ensuring you can easily create professional-grade, high-quality screen recordings.
How To Perform Whole Screen Captures With Mac Through Filmora
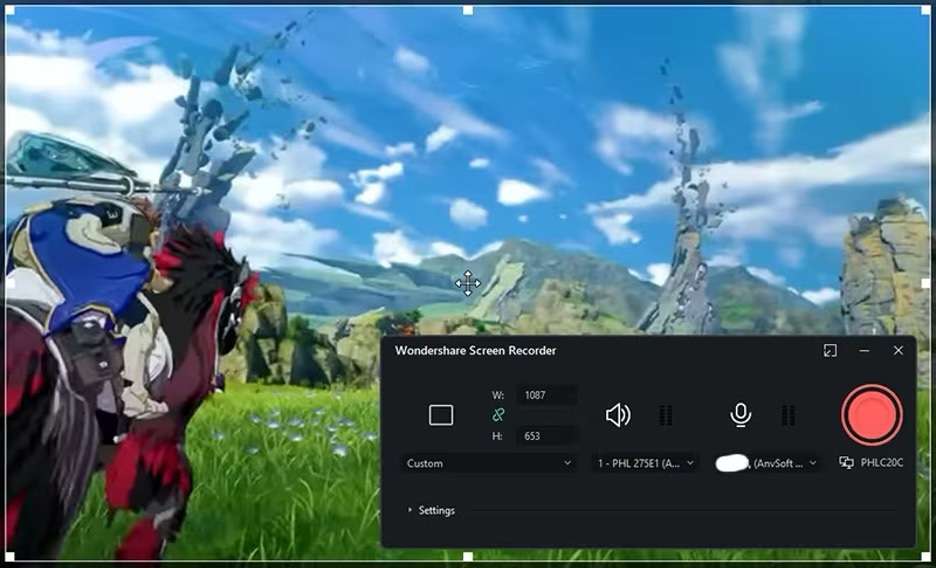
Now, it’s time to get into the nitty-gritty of full-screen captures on a Mac. The first method is, you guessed it, through Filmora. Here’s a step-by-step guide on how to use this tool:
Step 1:
Install, download, and launch Filmora on your Macbook.
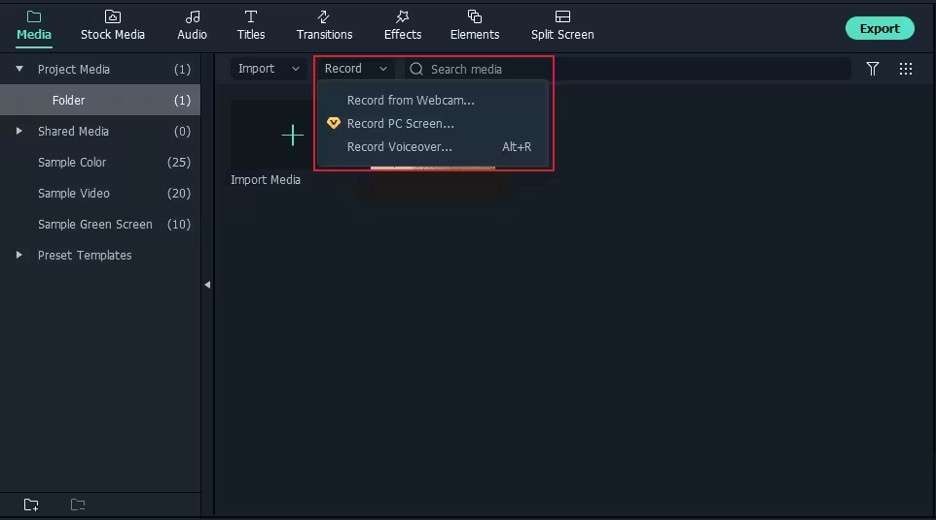
Step 2:
Go to Record > Record PC screen.
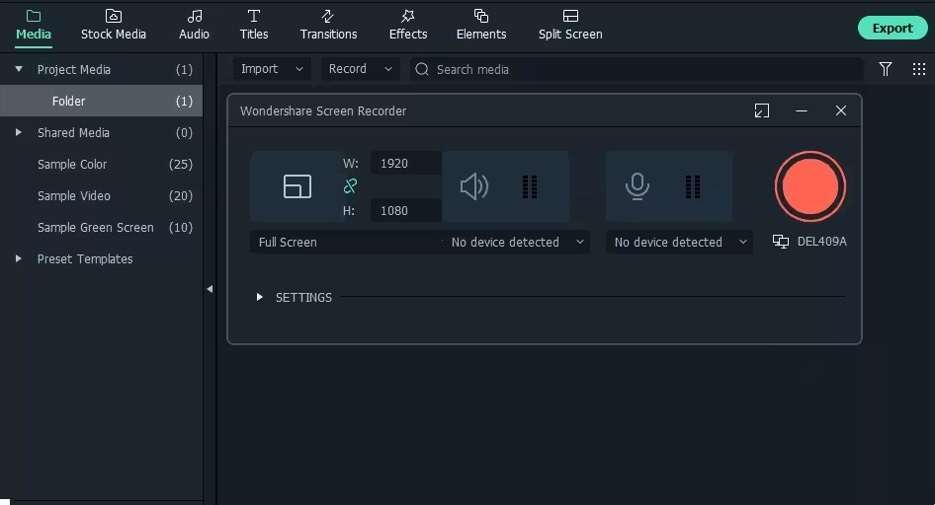
Step 3:
Hit the red record button to start recording, and press F9 to finish recording.
Part 2. How To Full-Screen Capture With macOS’ Built-In Screen Recorder
While numerous third-party screen recording tools are available, Mac users enjoy the convenience of a built-in screen capture utility that comes pre-installed with macOS. This versatile tool allows you to capture screenshots and supports full-screen captures on Macbooks, making it an efficient solution for your screen recording needs.
One of the standout features of the macOS screen capture utility is its ability to record your whole screen with only a few clicks. Whether you need to create a comprehensive tutorial, capture a webinar, or document a process, the full-screen recording option ensures you get all the details.
To initiate a full-screen capture on your Mac, follow these simple steps:
Step 1:
Press the keyboard shortcut Command + Shift + 5 to open the screen capture interface.

Step 2:
In the toolbar that appears, click the Record Entire Screen button (or use the keyboard shortcut "Command + Control + N").
Step 3:
You’ll see a countdown timer before the recording begins, which gives you a few seconds to prepare.
Step 4:
Once the recording starts, you can perform your desired actions on the screen.
Step 5:
Click the Stop Recording button in the menu bar or use the keyboard shortcut Command + Control + Esc to stop the recording.
Step 6:
Your screen recording will be saved as a .mov file on your Photos app.
With just a few keystrokes, you can effortlessly capture your entire screen, ensuring that you never miss a crucial moment or step in your workflow.
Part 3. Alternative Methods To Full-Screen Capturing on macOS
While macOS’s built-in screen capture utility is a powerful tool, some users may prefer to explore alternative methods for full-screen recording, particularly regarding video conferencing and presentations. In such scenarios, leveraging the screen recording capabilities of popular video conferencing apps can be a convenient solution.
This approach is especially beneficial for lecturers, presenters, or anyone who needs to perform full-screen captures on Mac during online meetings, webinars, or virtual classroom sessions. Using the screen recording feature within these apps, you can seamlessly capture your entire screen, including any shared content, presentations, or demonstrations, without additional software.
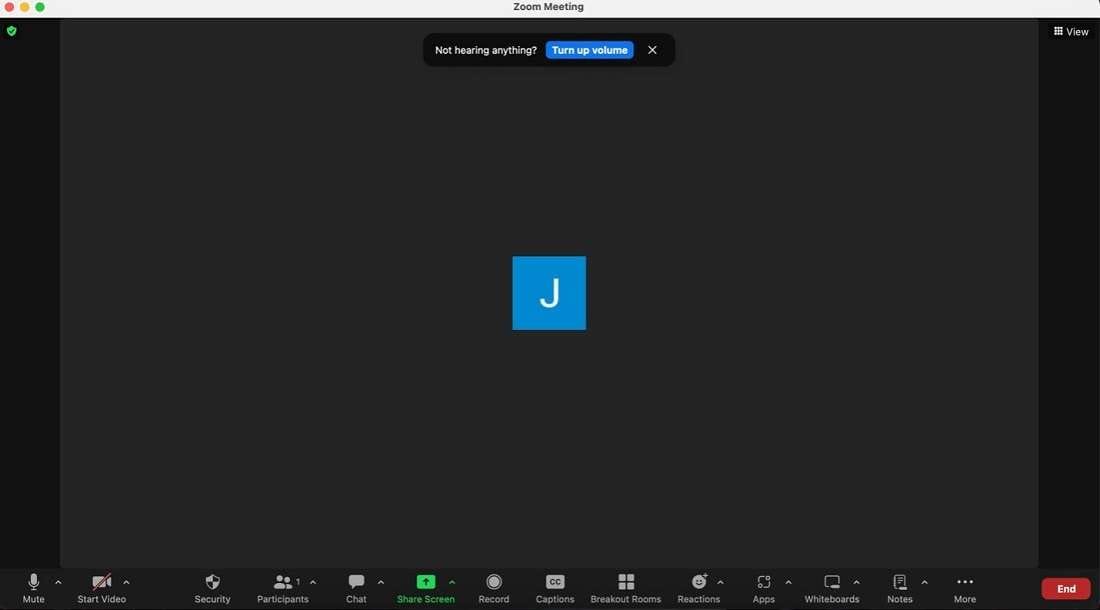
Recording Full Screen on Zoom
Zoom, a widely used video conferencing platform, offers a built-in screen recording feature that makes capturing your entire screen during a meeting or presentation easy. Here’s how you can do it:
Step 1:
Start or join a Zoom meeting.
Step 2:
Click the Share Screen button at the bottom of the Zoom window. Then, hit the Record button.
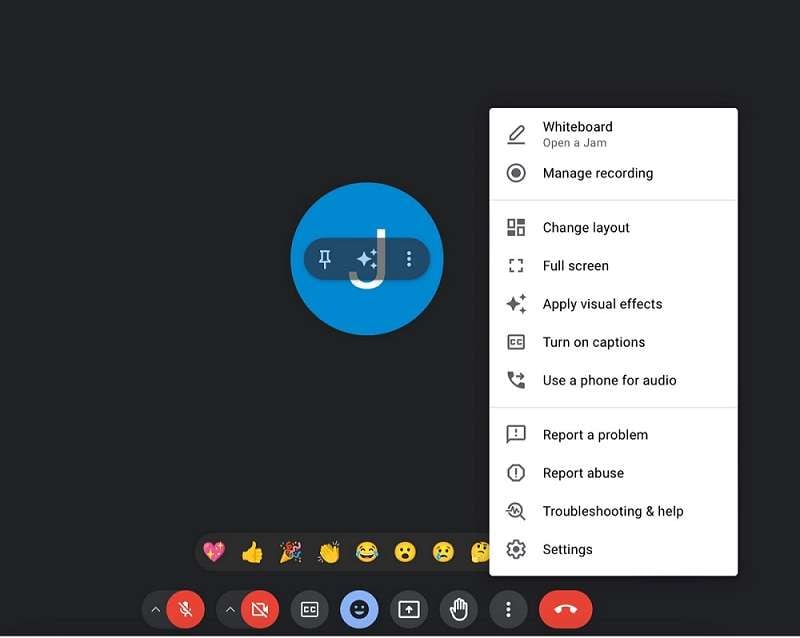
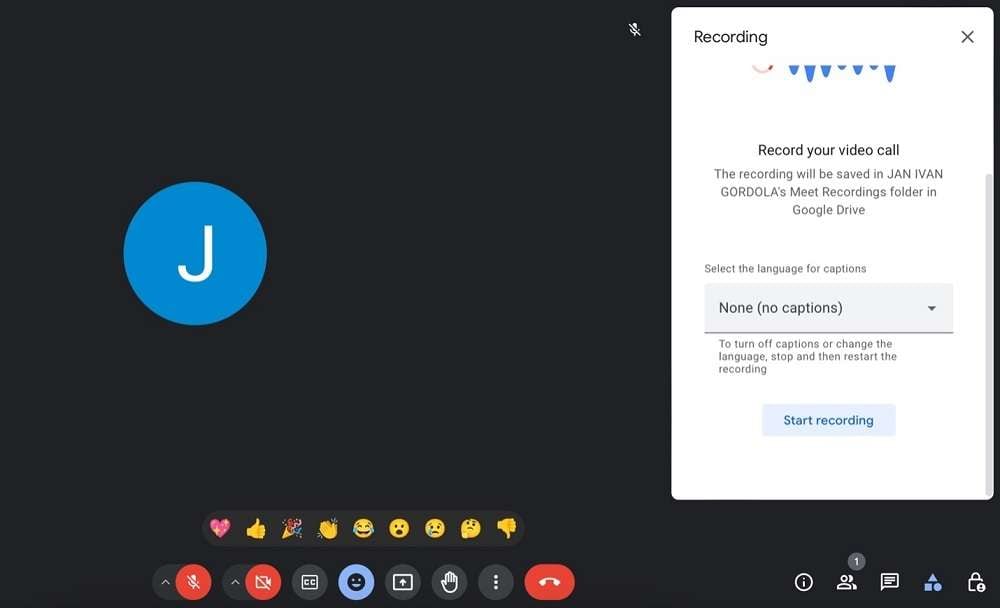
Recording Full Screen on Google Meet
Google Meet, Google’s video conferencing solution, provides a straightforward way to record your entire screen during a meeting or presentation. Follow these steps:
Step 1:
Start or join a Google Meet session.
Step 2:
Start screen sharing.
Step 3:
Select Manage recording from the pop-up menu.
Step 4:
Click Start recording while your screen sharing is active.
Using the screen recording capabilities of these popular video conferencing apps, you can easily capture your entire screen, along with any audio or video content, without additional software installation or configuration.
Conclusion
Capturing your entire screen can be valuable in today’s digital world, whether you need to create tutorials, record presentations, or document processes. While macOS offers a built-in screen capture utility, exploring third-party tools like Wondershare Filmora can unlock new functionality and quality.
With its intuitive interface, high-quality recording capabilities, and powerful editing tools, Filmora provides a comprehensive solution to perform full-screen captures on Mac. From capturing stunning 4K/8K videos to seamlessly sharing your creations across multiple platforms, this versatile software empowers you to elevate your screen recording game.
