Are you wondering how to record a meeting on Google Meet? It's one of the top software solutions for online meetings. The need for online meetings has skyrocketed in recent years as the work-from-home employment model is becoming increasingly popular. Therefore, to stay afloat, companies rely on online meetings a lot.
This guide will discuss the top options for Google Meet recording. Let's dive in.
In this article
Method 1: Record Google Meet with Its Built-in Feature
The easiest option by far is to use the built-in recording function provided by Google. With this option, there is a chance that all meeting participants will be aware of the fact that you are recording. So, even though it is the most straightforward option, it does come with this drawback and a few others.
Another drawback is that you have to be a Google Workspace subscriber if you want this option. Additionally, you can only record a meeting if any of the following criteria are met:
- You have to be the host of the meeting.
- If you are outside the host's organization, you need to be promoted to a co-host to record;
- If you are within the host's organization, the Host Management option should be off;
- If you are a teacher using Google Classroom, you can record;
In any case, here are the steps to record Google Meet using the built-in tool.
- When you begin your call, you will see the Activities menu in the bottom-right corner of the screen. Click on that.

- You will see the activities bar show up on the right-hand side of the screen. Click on Recording.

- Another prompt will appear. This time, you can tweak the video recording process before you begin by adding simple features. When you are done, click Start Recording.


The recording will stop automatically when the meeting is over. Alternatively, you can manually pause or stop the recording at any time. The recording will automatically be saved in a specific folder when you do so.
But you might be wondering: where do Google Meet recordings go?
They go into a specified folder called Meet Recordings, which you can locate on your Google Drive. It will take some time to render and upload, but you can locate it there after a short while. But there is a catch.
It's only true if you were the host of the meeting. If not, ask the host to share the video file with you.
Method 2: Record Google Meet with Third-party Software
The second option, and probably the best overall, is to use a third-party free screen recording software. There are neat tools for capturing your screen, which will also provide you with many customization features. One of the best tools on the market at the moment that provides a well-rounded set of features for screen recording is Wondershare Filmora.
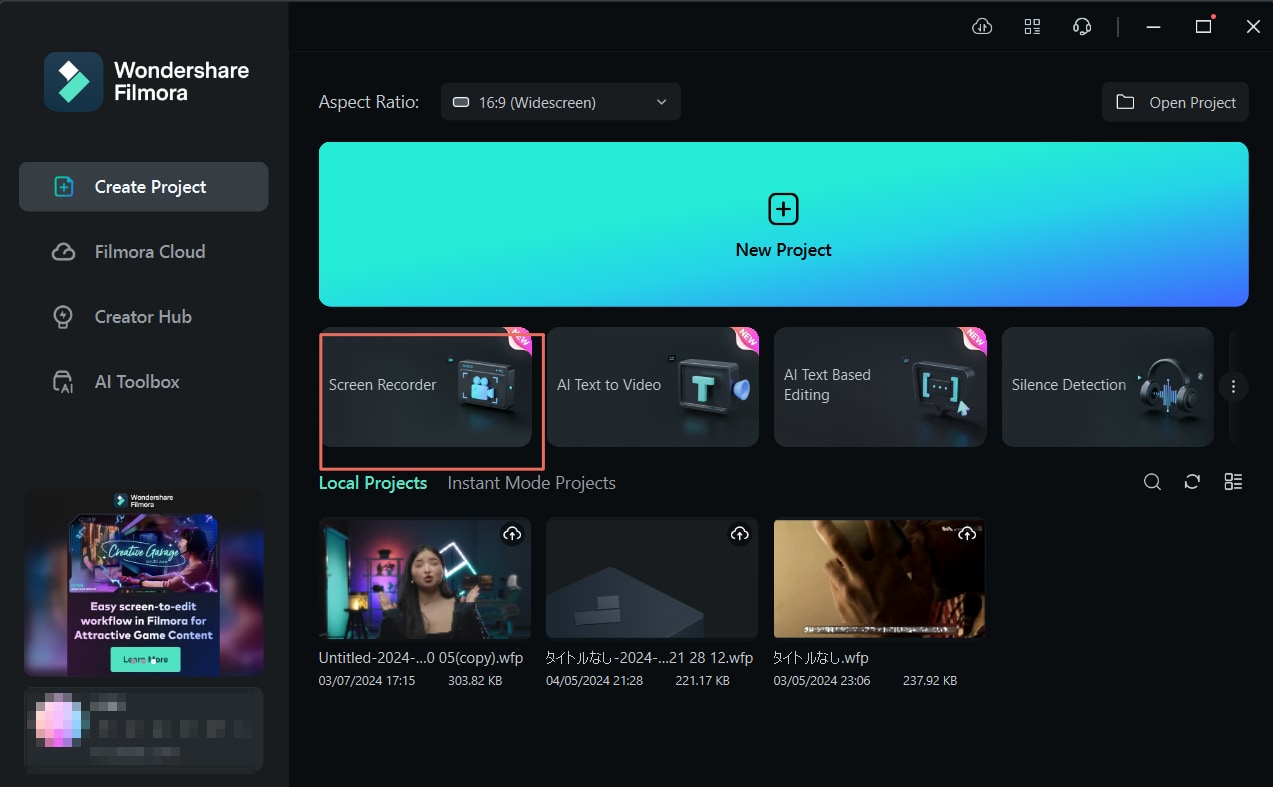
Filmora offers many useful features, but we will only focus on the screen recording feature today. To activate the screen recording feature, follow these steps after you begin your meeting.
- When you open the tool, you will see the Screen Recorder feature. Click on it.
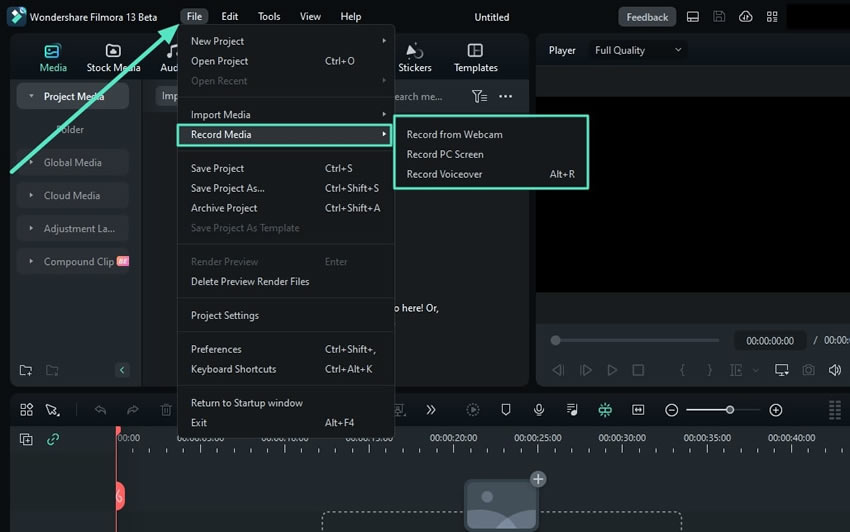
Alternatively, you can click on File > Record Media and select Record PC Screen.
- You can select the area you want to record by clicking on the square icon, as shown below. You can choose whether to record the full screen, a specific window, or a custom portion of the screen.

- Explore audio and camera options before recording. You can toggle the Microphone, System Audio, and Camera.

- Explore and ensure that all advanced settings are in order. Filmora's intuitive interface will guide you through the various settings. Make sure not to forget to specify the output folder.
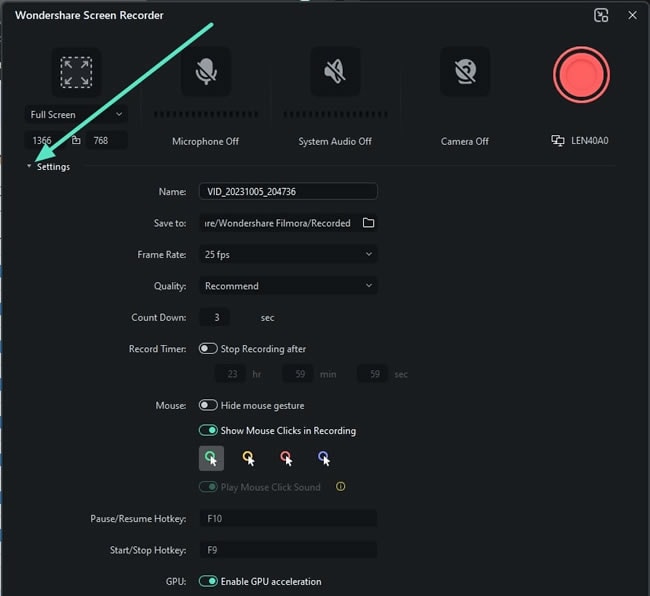
- After everything is set up, there is nothing left to do but click Record. You will see a countdown, which can be skipped. Just follow the prompts. Also, like any other recorder, Filmora offers the option to pause, stop, and restart the recording.

After you are done, the video file will be waiting for you in the specified output folder.
Before we move on, we should mention that Filmora has several video editing features that you can employ to edit the recording and make it more practical. You can trim the video and delete all the unnecessary parts of the meeting, divide it into several segments, add notes, etc.
Know how to edit videos with Filmora by checking the following video guide.
Method 3: Record Google Meet on PC with Free Built-in Tools
You can also use the built-in screen recorder provided by your Operating System.
Record Google Meet on Windows with the Snipping Tool
For Windows, you can use the Snipping Tool. If it has not already been installed, you can download it from the Microsoft Store.
After your meeting has begun, you can follow these simple steps to start recording.
- Find the Snipping Tool in the Search bar on Windows and open it. You will see this interface.

- Make sure that the video camera icon is selected to capture videos. To begin the recording process, click the + New button or use the keyboard shortcut, as shown in the screenshot above.
- Whichever option you choose, you will be given a prompt to select the part of the screen you want to record. You will see this interface in the top-middle part of your screen.

- Just click and drag your mouse to select the area you want to record and click the Start button.

Record Google Meet on Mac with the Screenshot Toolbar
For Mac users, the process is more or less the same. You can use the Screenshot toolbar to capture and record your screen.
- Use this command line to open the tool.

- You will be greeted with this interface. Click the record button to start recording.

Like with Windows, you can record the entire screen or select a portion to record. In any case, just follow the prompts.
Method 4: Record Google Meet on Mobile
So, if you are wondering how to record Google Meet on phone devices, there are two options.
As always, the first step is to begin your Google Meeting.
The first option is to record using Google's built-in function. It works the same as shown in Method 1. Click on the Activities icon and press Start Recording. However, since the same drawbacks apply, using your phone's screen recording feature is a better option.
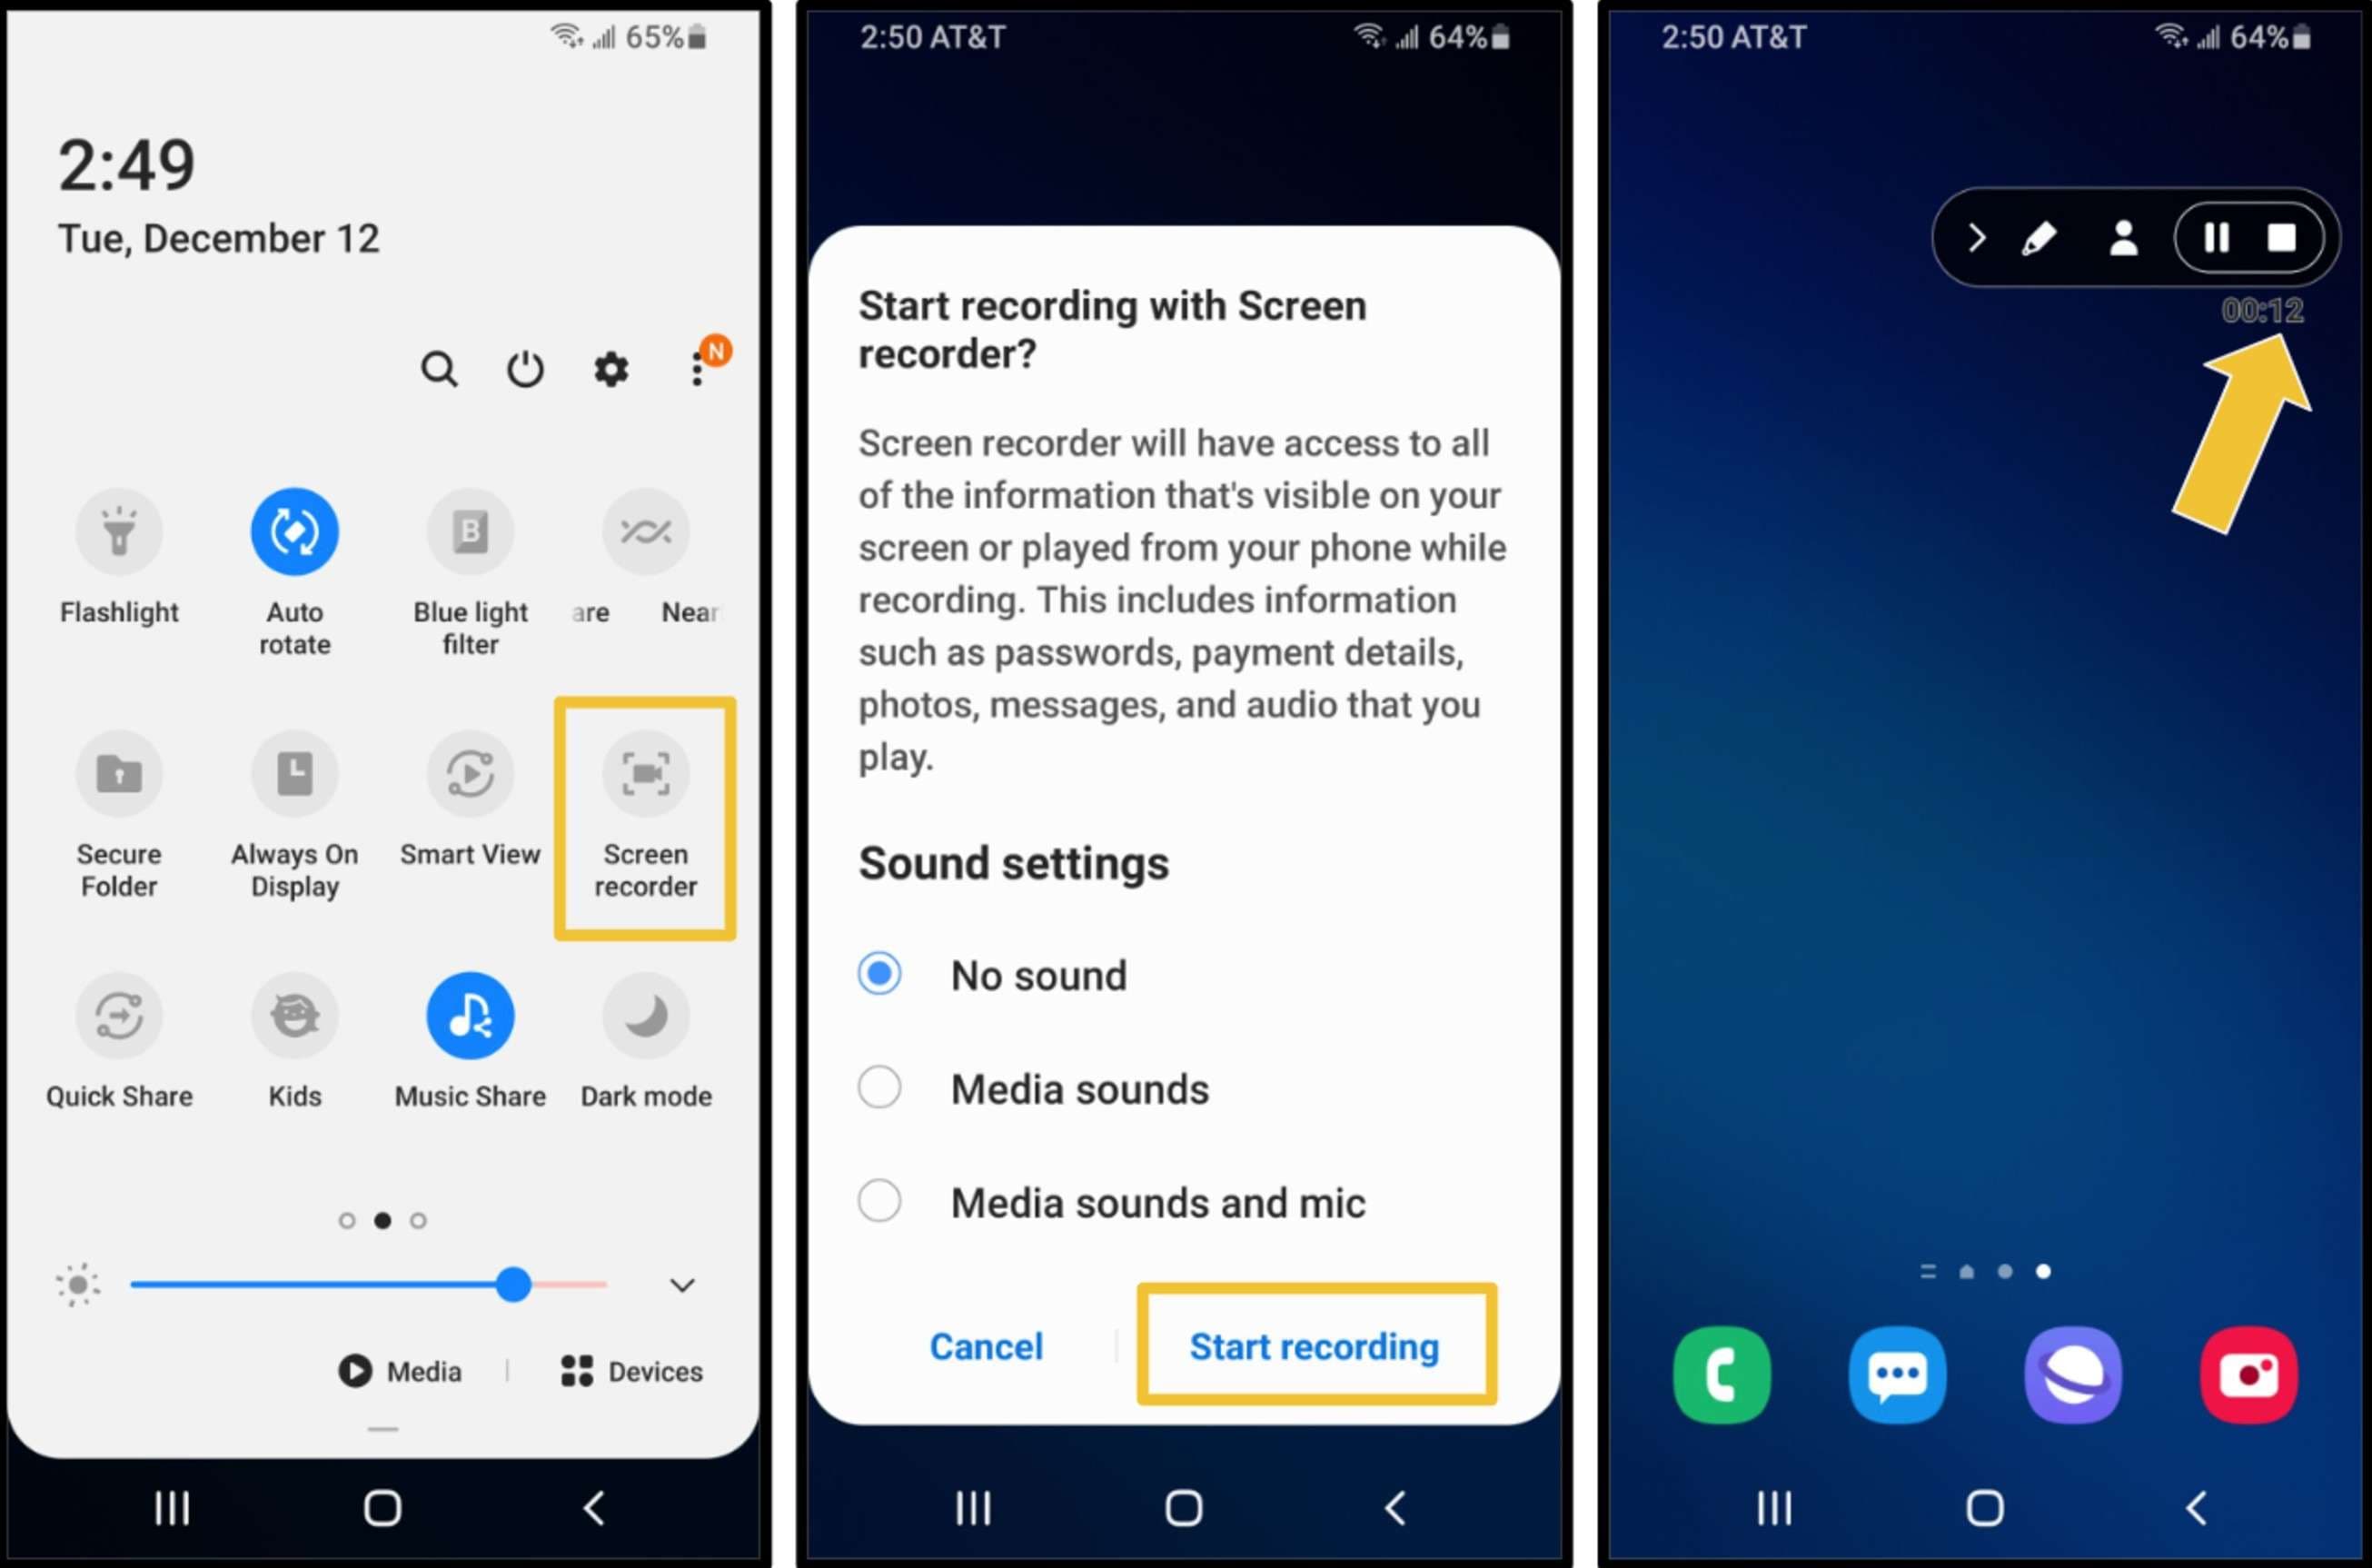
For Android users, after you swipe down and access your Quick Settings, you should tap on Screen Recorder, select one of the three sound setting options, and click the Start Recording button. You can pause or stop the recording at any time.
For iPhone users, the process is similar. After you swipe from the top to access the menu, click the Record button. The recording will automatically start, and you can stop it at any time by clicking on the red timer and then tapping Stop to confirm the action.
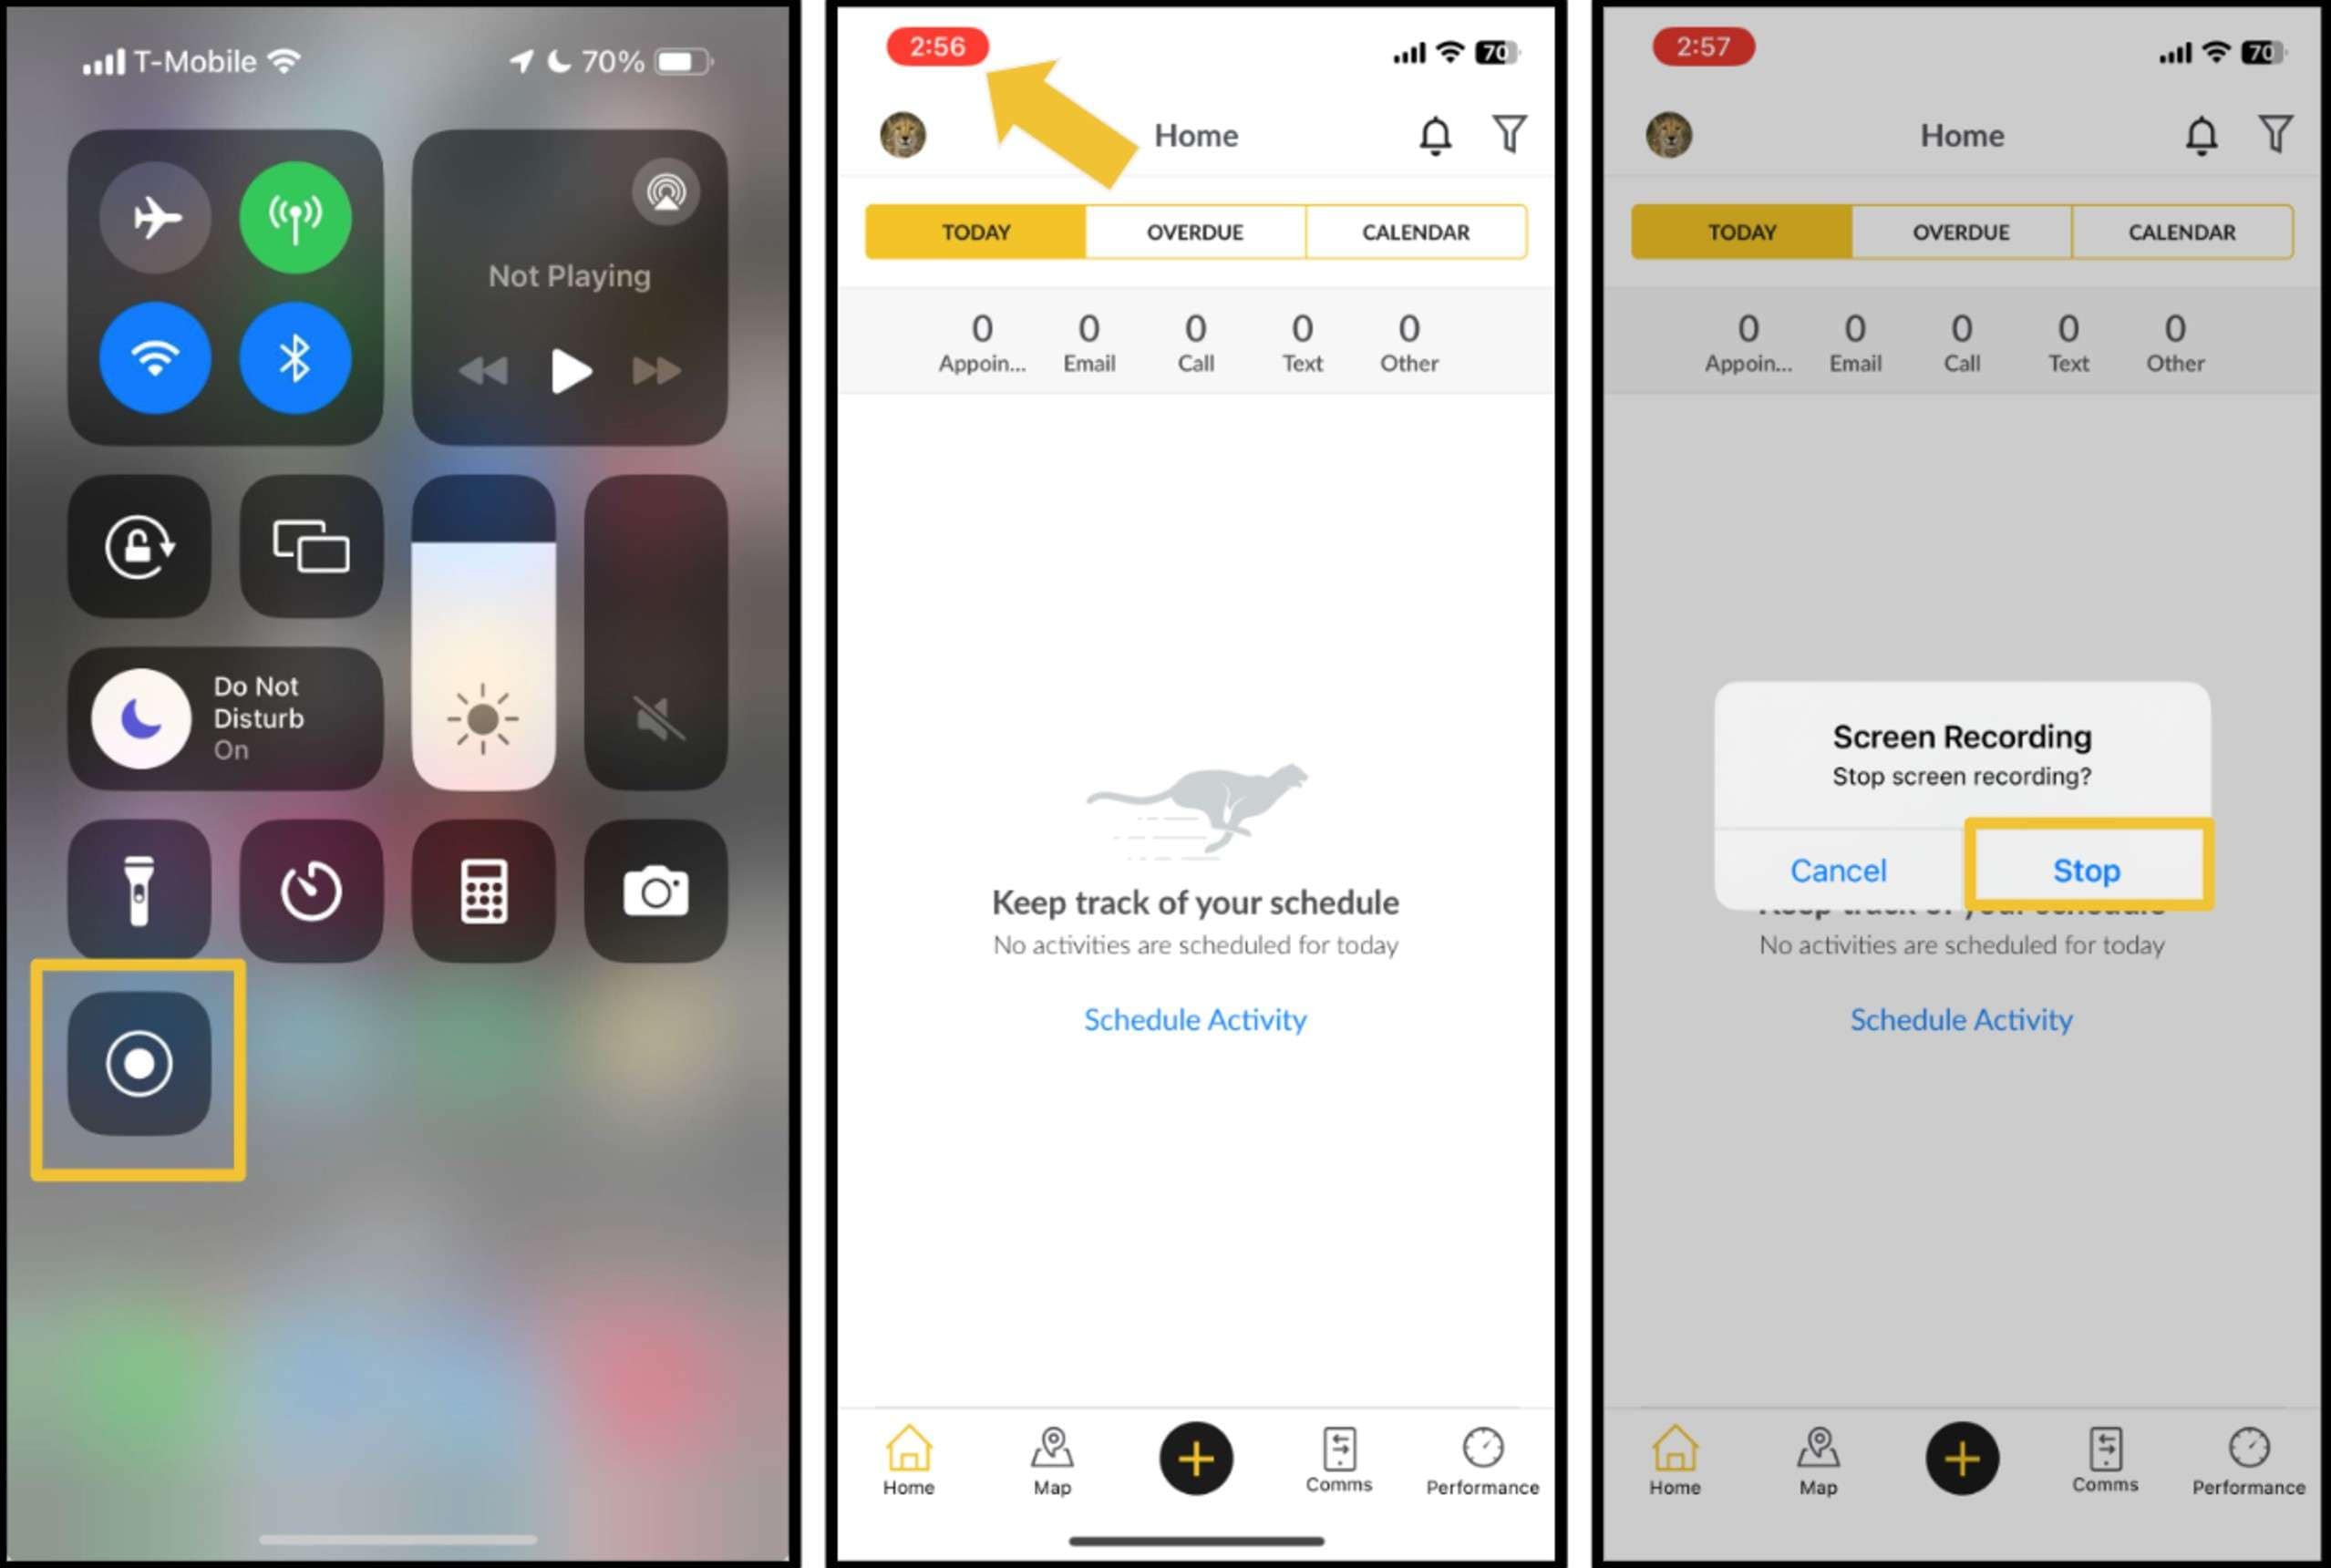
In both instances, the recording will be stored on your mobile device, and you can access it at your leisure.
Conclusion
These were the top answers to the "how to record a Google Meet video" question. In all cases, the process is not that challenging. It's worth mentioning again that the second option with Wondershare Filmora offers the most flexibility.
No one will know you are recording, and as soon as you finish the recording process, you can instantly edit the video and streamline retention.
FAQs
-
Can I record Google Meet and save my meeting?
Yes! You can use the Recording function from the Activities menu in the app itself, third-party software like Filmora to record the video or your OS's built-in screen capture tool. -
What is the top tool for recording Google Meet?
Wondershare Filmora is the top tool for screen recording. Follow these simple steps to record your Google Meeting.- Start your Google Meeting;
- Open Wondershare Filmora;
- Select Record PC screen;
- Adjust the settings;
- Start the recording.
-
How do I download a third-party Google Meet video recording tool?
You can download any third-party software by visiting their official download page. In Filmora's case, you can visit their official page and follow the prompts to install the software.


 100% Security Verified | No Subscription Required | No Malware

