Every video creator knows the importance of a green screen in enhancing the graphical aspect of a video significantly. It is not always possible to have a great setup to showcase to the viewers when you are creating a video where you are talking straight to the camera. The gamers who stream their gameplays can relate to the scenario the most. That is where a green screen gaming setup can do wonders and make a gamer stand out easily.
If you are serious about making videos of your gameplay and publishing it on popular video streaming platforms, you need to have the proper gaming setup and gaming video editor. You should use green screens in the background as well as a green screen gaming chair. Most importantly, you should have the right video editing tool to make the most out of the green screen. In this article, we will illustrate how to add green screen effects on your recorded gameplay video.
#1. Capture A Game Video
To capture your gameplay, you need a professional screen recorder. At the same time, if you are using a gaming green screen, you will need a professional video editor. Therefore, we recommend Wondershare Filmora which is a professional video editor with a built-in screen recorder. Here are the steps to follow in recording your gameplay.
Step 1: Download and install Filmora on your computer. Launch the application.
For Win 7 or later (64-bit)
For macOS 10.12 or later
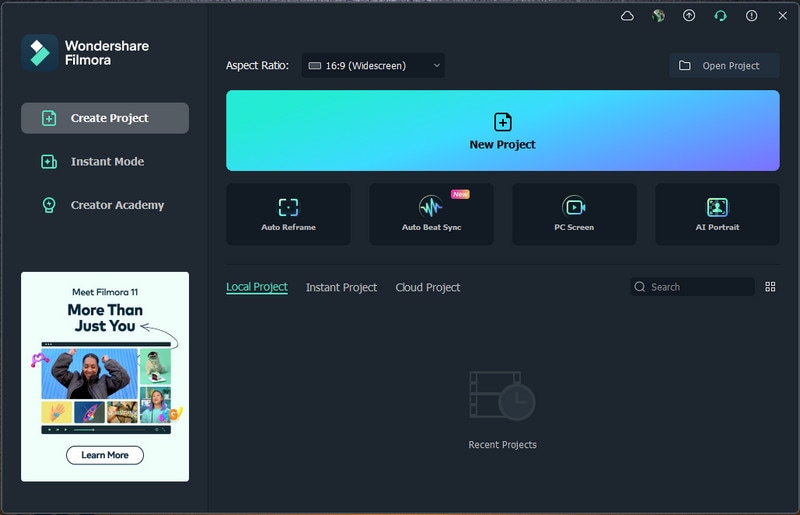
Step 2: Click on New Project. Set the configurations as required.
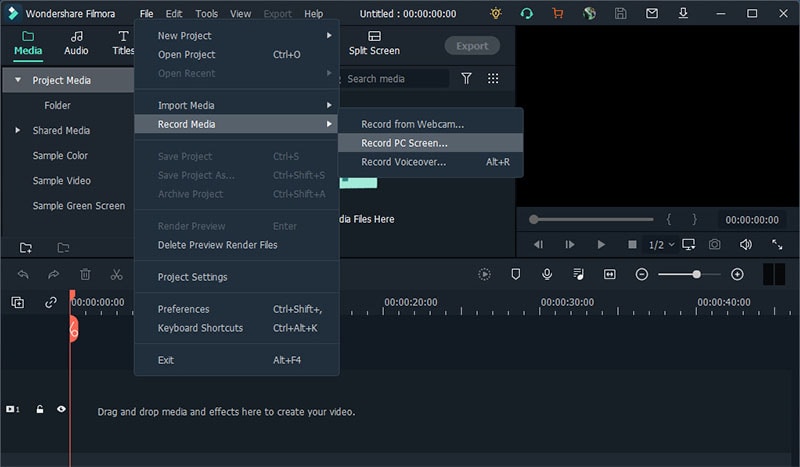
Step 3: Click on Record and click on “Record PC Screen…” option.
Step 4: From the pop-up menu, select the screen size that you want to record. For recording gameplay, full screen is recommended.
Step 5: Turn on the speaker to record the internal sound of the game. Turn on the microphone as well if you want to record your commentary.
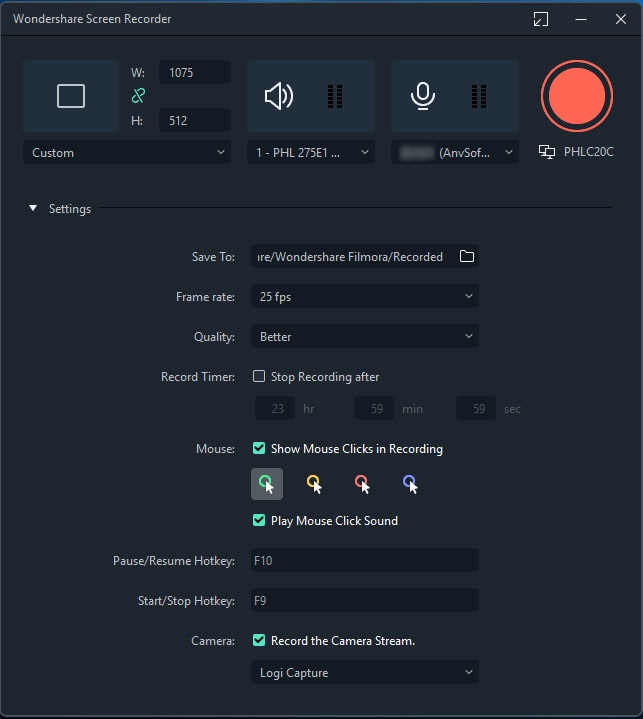
Step 6: If you want picture-in-picture mode where you will record your gameplay as well as your webcam for your live reactions, click on the Gear icon at the bottom right corner.
Step 7: Turn on Record the Camera Stream to record both your gameplay on the screen as well as your webcam simultaneously.
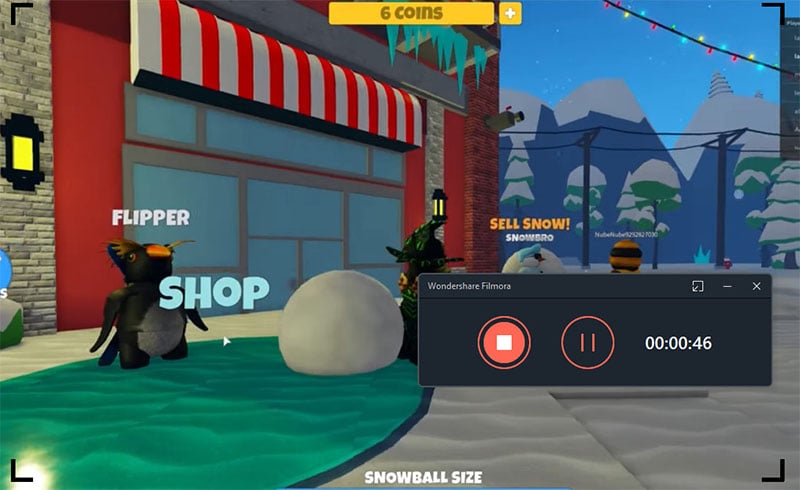
Step 8: Finally, click on the Record button. You will get a few seconds to set up your screen to start recording.
#2. Add Green Screen Effects
When you record your webcam, your gaming setup will be visible to the viewers. That is where the game green screen comes into the scene. If you have used green screens in your setup, you have to add green screen effects while editing your video. Filmora makes it easy to replace your green screens in your background as well as your gaming chair green screen with any image or video. Here are the steps to follow to add green screen effects to your recorded gameplay.
Step 1: Launch Filmora on your computer. Select Create New Project to get started.
Step 2: Import the recorded video with the green screen and drag and drop it onto the Timeline.
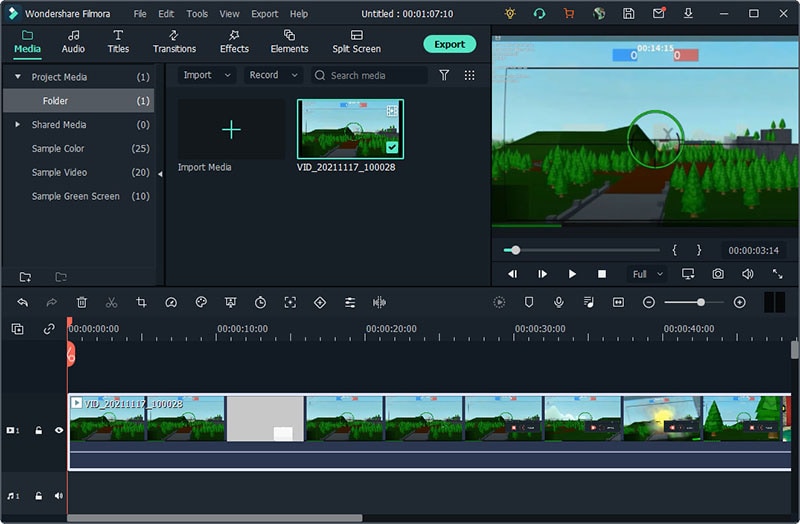
Step 3: Import the image or video with which you want to replace the green screens in the recorded video. Drag and drop the same on the Timeline.
Make sure that the green screen video is above the replacement video/image on the Timeline.
Step 4: Double-click on the recorded video and on the left side, turn on Chrome Key option. This will superimpose the replacement video/image onto the recorded green screen video and you will see the green screen effect.

Step 5: You can adjust certain parameters such as Offset, Tolerance, Edge Thickness and Feather and Alpha Channel as required. When you are done, click on Ok button.
#3. Enhance Green Screen Game Video
Filmora is a professional video editor and hence, there are loads of features available to enhance the recorded game video so that it looks more attractive and get the attention of viewers instantly. You can add animations and motions to cut out the monotony of the video. Here are the steps to add animations and motions in between the recorded game video.
Step 1: If you already have the game video opened on Filmora, double click on the recorded gameplay.
Step 2: On the left side, go to Animation tab.
Step 3: Under Preset tab, you will find a number of animations to apply on your recorded video under Preset Animation. Double-click on your preferred animation to add to the recorded video.

Step 4: You can go to Preset Motions to expand it and add Motion to the recorded video by double-clicking on any one of them. Once done, click on Ok button at the bottom-right corner.
Step 5: If you want to show your webcam video in any shape other than the default, you can add a mask frame. Go to Effects> Utility> then to Shape Mask.

Step 6: Drag and drop your preferred mask frame onto the webcam video on the Timeline.
Step 7: Once done, Export the video and share on any platform to get instant traction.
Conclusion
If you want to publish videos of your gameplay with webcam, you must have a green screen gaming setup. After recording the gameplay and webcam, you have to edit the video to replace the green screens with attractive videos or stunning images. Filmora is the best video editor that comes with a screen recorder and therefore, there is no need for downloading two separate applications. You can also enhance the video with video effects and adjust video parameters for a better response from the viewers.


 100% Security Verified | No Subscription Required | No Malware

