In 2024, out of a global population of 8.088 billion, an impressive 3.9 billion people, or 48.22%, are Android smartphone users. This massive user base highlights the growing demand for mobile functionalities that enhance user experience, with screen recording being one of the most popular features.
In this guide, we'll dive into the different methods of recording screens on an Android, from using built-in screen recording tools to third-party apps and even how to record an Android screen through a PC.
In this article
How to Screen Record on Android with Built-in Screen Recorder?
The overwhelming majority of the current Android devices already have an in-built screen-capturing service. However, you won't be able to edit any recorded video. Here's how you can use it:
- Access the Quick Settings panel by swiping down from the topmost part of your device's screen.

- Navigate to the screen recorder icon.
- Click the screen recorder icon to start recording.

- After you are done recording, once more, swipe down the top of your screen and click on the "Screen Recorder" icon to stop. In this case, you get an icon floating on your screen, which when clicked stops the recording.

- The recorded video will be stored in the Gallery on the device or in a directory of your preference. Normally in photos or galleries.
How to Edit Screen Recordings on Android?
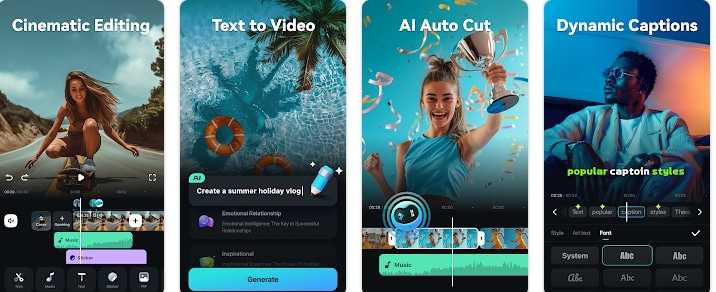
After recording your screen, you might want to edit your video to enhance it or remove unnecessary parts. Filmora Mobile is a very simple video editing application that can help you edit all your screen recordings within a few minutes. It provides an intuitive interface with a range of editing tools to refine your screen recordings easily.
Key Features:
- Video Trimming and Cutting: You can quickly remove any part of your video that you don't want to include.
- Audio Detaching: Place each video in a new category by splitting clips into audio and video categories.
- Text and Titles: Add captions, titles, or subtitles for your video.
- Audio-to-Text Conversion: Make closed captions by transcribing your audio stream suitable for tutorials and presentations.
- Filters and Effects: Use built-in thousands of filters, transitions, and effects to make the video more exciting and attractive to the client.
- AI Music: Generate background music with the power of AI.
Filmora for Mobile Filmora for Mobile Filmora for Mobile Filmora for Mobile Filmora for Mobile
Edit Videos on Your Mobile Phone with 1-Click!
- • Powerful Brand New AI Features.
- • User-friendly video editing for beginners.
- • Full-featured video editing for professionals.
How to Screen Record on Android with Third-Party Apps?
If you don't want to come across the issue that it may not record the audio on your Android successfully, or if you need additional features, there are several third-party apps available that offer enhanced features for recording and editing videos. Below are descriptions and practical steps for using some of the top apps.
Screen Recorder - XRecorder
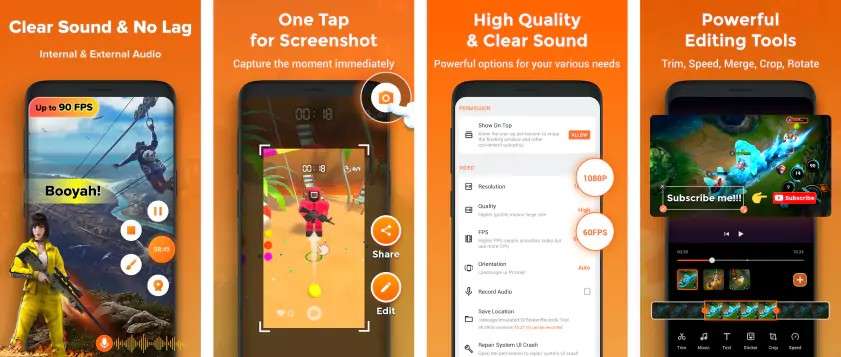
Screen Recorder - XRecorder is a highly-rated, free app available on Google Play that lets you record Android screens in high quality without watermarks. It also includes various editing features such as trimming and adding audio.
Key Features:
- High-quality recording: Record in 1080p, 60fps with no time limits.
- Floating Widget: Control your recording with a widget without leaving your current screen.
- Editing Tools: Trim and edit your recordings within the app.
- No Watermarks: Create professional recordings without watermarks.
How to Screen Record on Android with XRecorder?
Step 1: Download and install: Go to the Google Play Store and search for XRecorder. Install the app on your device.
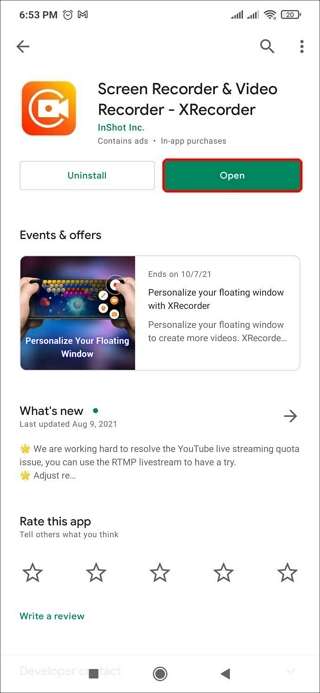
Step 2: Start Recording: Open XRecorder and give the necessary permissions (access to screen, audio, etc.). A floating widget will appear, allowing you to control the recording process. Tap the "Record" button to begin capturing your screen.
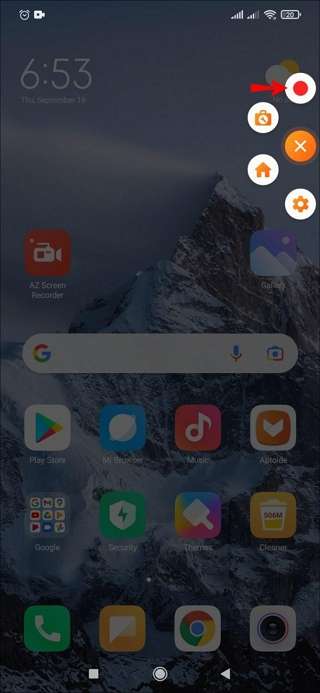
Step 3: Pause or Stop Recording: You can pause the recording by tapping the floating widget and resume when ready. To stop the recording, tap the widget again and select "Stop."
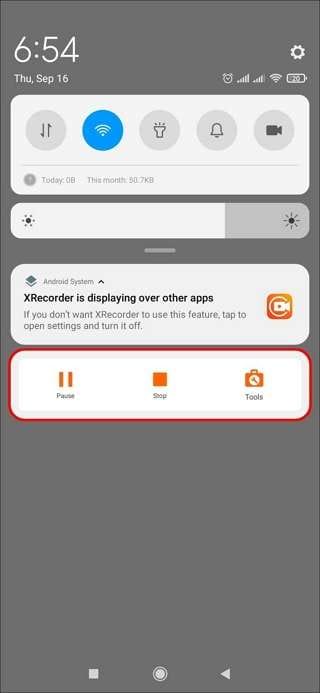
Step 4: Edit Your Recording: Use XRecorder's built-in editing tools to trim, merge, or adjust the audio of your recording.
Step 5: Save and Share: Once edited, save the video and share it directly from the app to platforms like YouTube, and Instagram, or save it to your gallery.
Screen Recorder Video Recorder
Screen Recorder Video Recorder is another useful app that offers additional features like facecam integration, customizable recording resolution, and editing capabilities.
Key Features:
- Facecam Integration: Record your screen along with a facecam, perfect for reaction videos or tutorials.
- Flexible Recording Settings: Adjust the resolution, frame rate, and bitrate for customized recording quality.
- Video Editor: Trim, cut, and add background music to your videos.
How to Screen Record on Android Screen Recorder Video Recorder App?
- Download and Install: Search for Screen Recorder Video Recorder on Google Play and install it on your Android device.
- Start Recording: Launch the app and tap the "Record" button to start capturing your screen. The app will give you options to adjust video resolution and recording quality before starting.

- Add Facecam: If you want to record your face along with the screen, toggle the Facecam option before starting the recording.

- Stop and Edit Your Recording: After recording, stop the session and go to the editing section within the app. Here, you can trim your video, add background music, or apply effects.

- Save and Share: Once the editing is complete, save your video to the gallery or share it via social media platforms directly from the app.
Google Play Games App
Google Play Games is a native Android app designed for gamers but can also be used to record gameplay or even other activities on your screen.
Key Features:
- Game Recording: Record gameplay directly from the Play Games app.
- Built-in Recording: No need for additional downloads, as the app comes pre-installed on most Android devices.
- Resolution Options: Choose from 720p or 480p depending on your needs.
How to Screen Record on Android Using Google Play Games?
- Open the Google Play Games App: Launch the app from your Android device or install it from the Google Play Store if you do not already have it.
- Select a Game to Record: Tap on the "My Games" tab to see a list of games you've installed. Select the game you want to record.

- Start Recording: Once the game is launched, tap the Record button located at the top-right of the screen. You can choose between 720p or 480p video quality before starting the recording.

- Play and Record: Remember to djust the settings. Begin playing the game, and the app will record everything on the screen. You can also toggle the front-facing camera to capture your reactions.

- Stop and Save: Once you're finished recording, tap the floating "Stop" button. The video will automatically be saved to your gallery.
Bonus: How to Record Android Screens on PC?
Screen recording on Android will take up space in your device storage, especially for long videos, which may cause not enough space issues and fail to record. If you prefer to record your Android screen from your PC, you can use an Android emulator and desktop software like Wondershare Filmora. Here's a step-by-step guide:
- Install an Android Emulator: Download and install an Android emulator such as Bluestacks or NoxPlayer. These emulators allow you to run Android apps on your PC.

- Launch the Emulator: Click open to launch the emulator on your computer.

- Open the emulator and sign in with your Google account. This will give you access to the Google Play Store and other Android services.

- Download and Install Filmora: Download, install, and launch Wondershare Filmora on your computer, then click screen recorder.
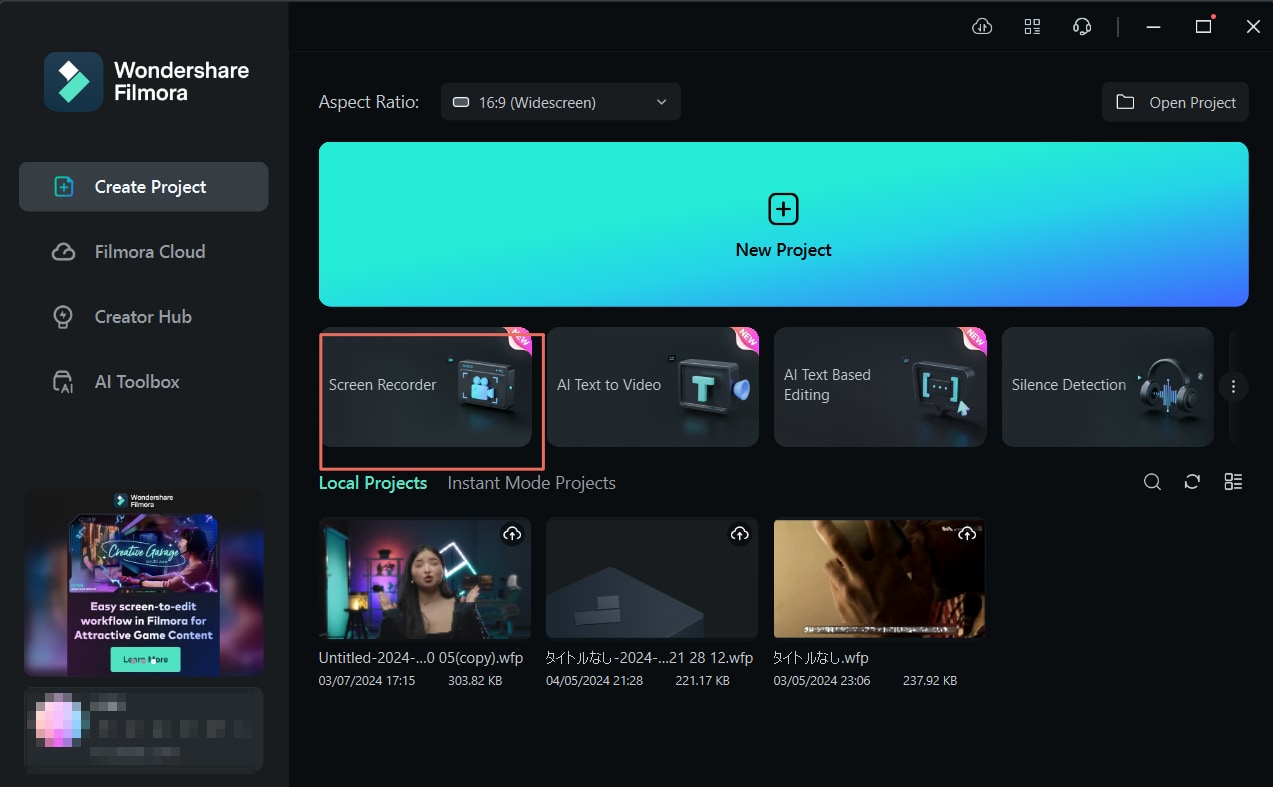
- Record Your Android Screen: You can customize the screen recording area, and choose to record the full screen, target window, or only a part of the interface. Then click the Red button to start recording.

- Stop Recording and Export: Press F9 to finish recording Android screens. You can also use the powerful video editing features in Filmora before exporting.
Conclusion
There are various methods to screen record on Android, whether you want to use the built-in tool, look for a third-party app, or want to record Android screens on the computer. For those who want to work via a PC, you can produce an emulator in combination with Filmora, which provides You with a complete set of tools for recording and editing Android screens.
Looking through all the steps find the one that suits you best!


